Set up An Efficient Sign Up and Account Verification
There are scenarios where scenario users sign up for your service but don't verify the account information, for example their phone number, right away. Using the Infobip platform, the goal is for your users to quicky sign up and verify their information so they can start using your service.
Solutions to combine:
- Moments
- Conversations
- People
- Communication channels (in this tutorial, we've used WhatsApp)
This tutotial explains how to build a communication flow in a scenario where users leave their contact phone number using a web app but don't immediately follow through with the registration.
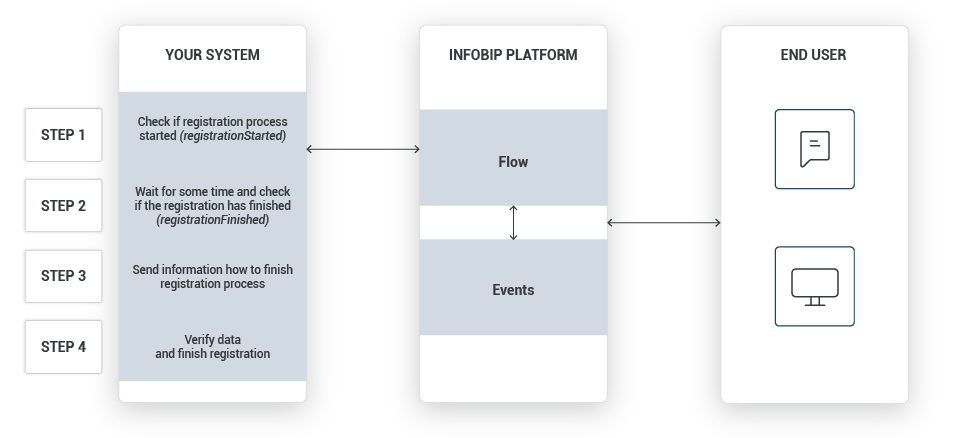
Process Workflow
IMPLEMENTATION STEPS
Prerequisites
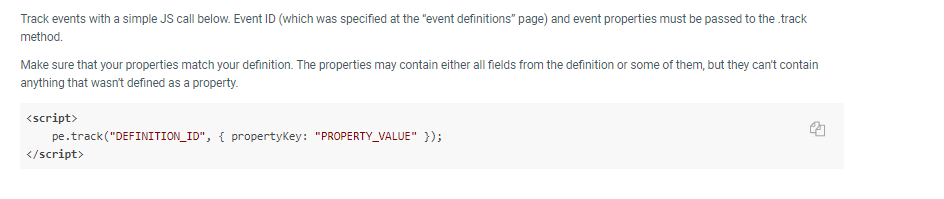
There are three possible ways to track customer actions/events:
- JavaScript SDK
- mobile SDK
- API
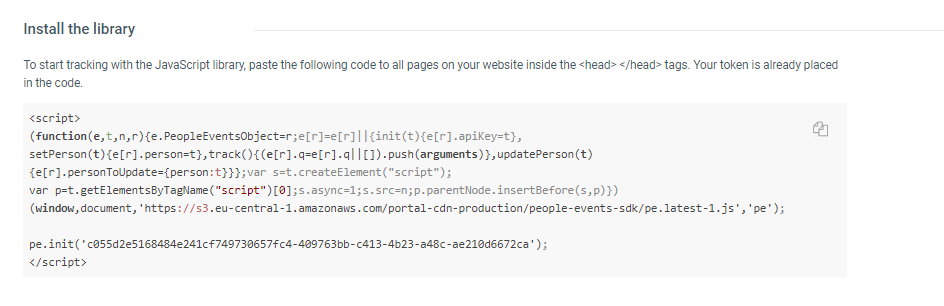
In this tutorial, tracking events with JavaScript SDK is required. The instructions and code are available inside the WebSDK library on our web interface (People > Events > Web SDK).
NOTE
Event tracking is possible when customers are logged in to your website.
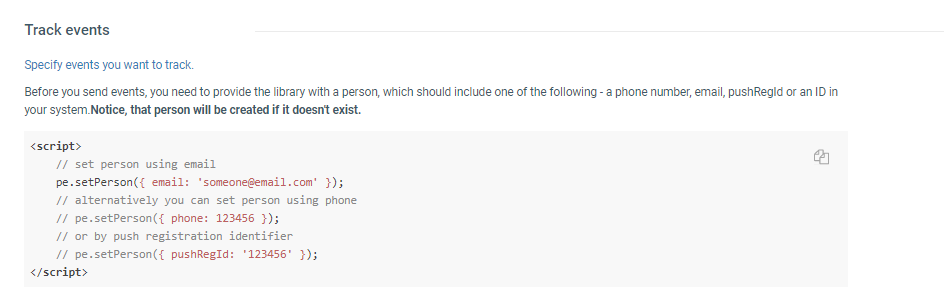
Before you start building the automated flow, go to the People module on our web interface, and create the New Event Definition. In this case, you could use registrationStarted as an event that will trigger other actions in the communication flow. (You will need to do the same for every event you plan to add to your communication.)
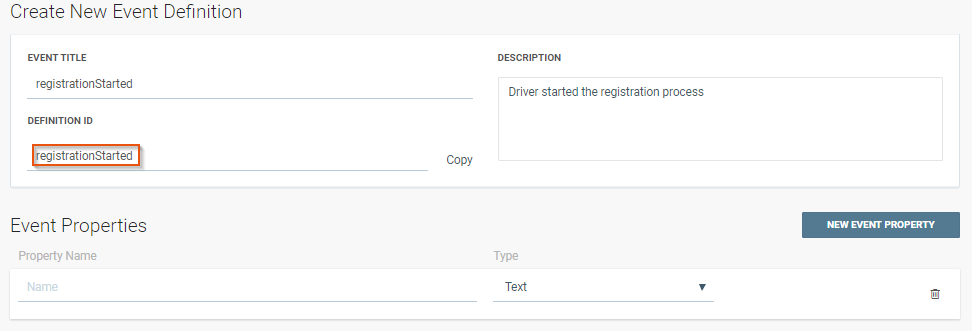
Once the New Event Definition has been created and you get your definition ID, go back to the Web SDK library and copy the tracking method code to the body of your website.
TIP
Mobile SDK is another way you can track events in this scenario.
Steps Over Web Interface
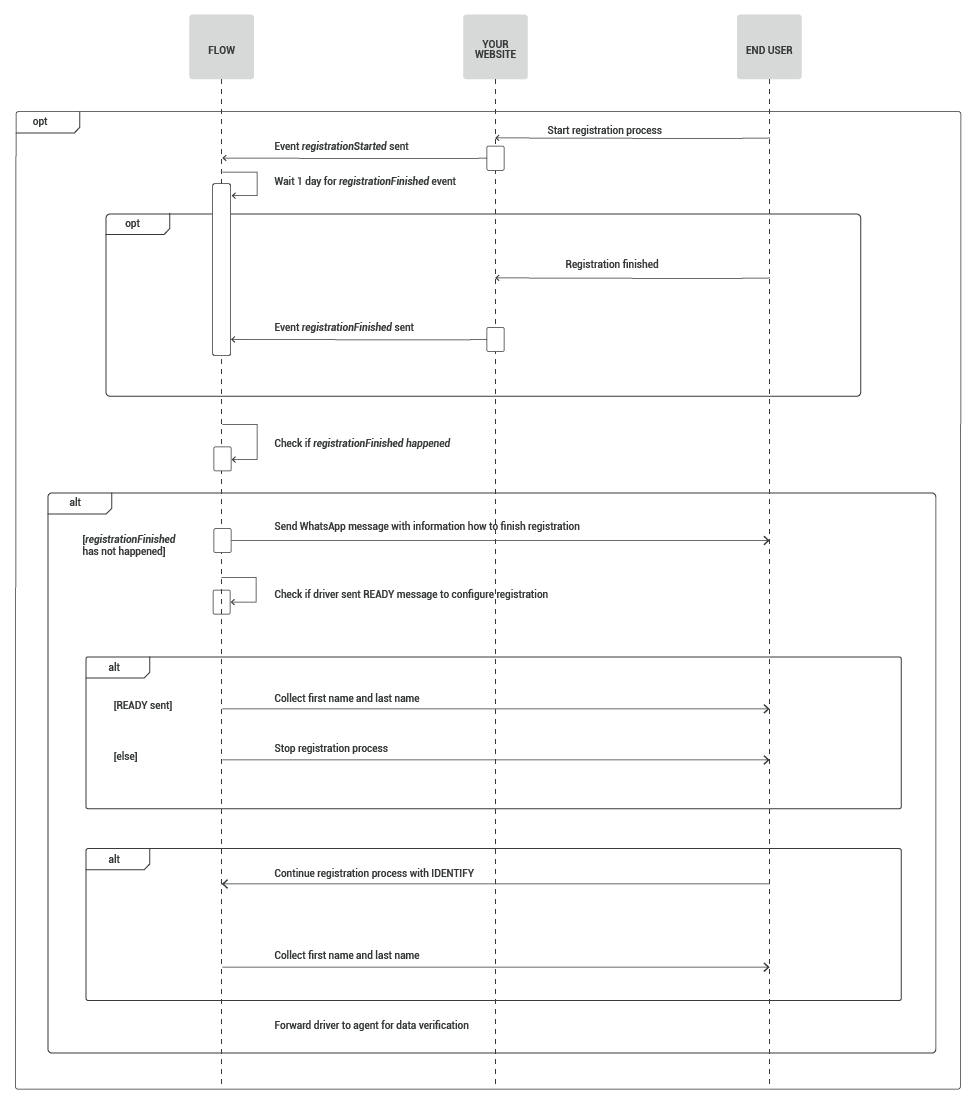
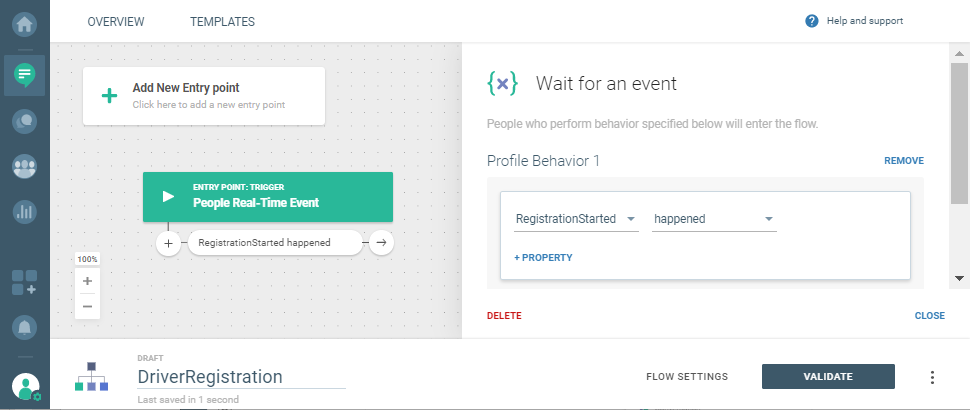
1. After logging in to the Infobip web interface, navigate to Moments > CREATE FLOW > Start from Scratch. Next, click Trigger > People Real-Time Event.
You have now created a foundation for a scenario where a future driver successfully finishes the entire registration process. But first, specify the event that starts it all: click on the green trigger and select RegistrationStarted (creating events inside the People module is a prerequisite described earlier in this use case).
2. You will need another event – RegistrationFinished – that will inform you when the registration has been completed.
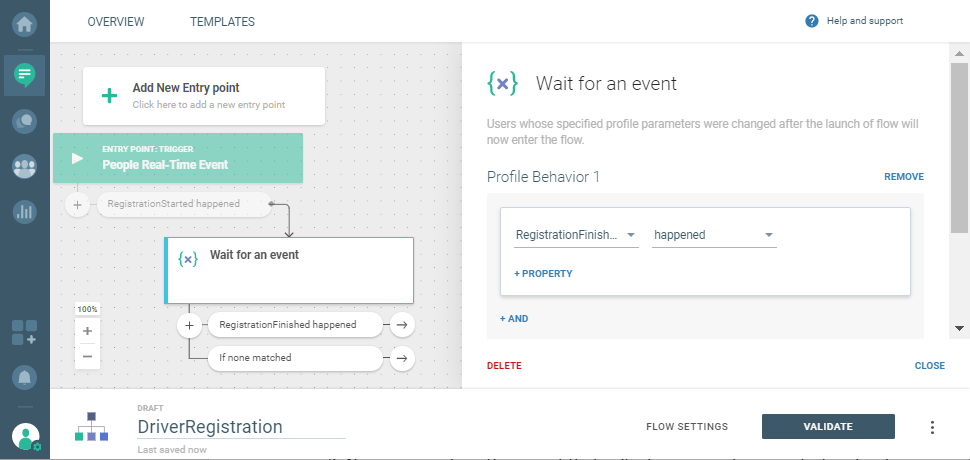
3. But, what happens if the driver does not finish the registration? You could wait one day (this option is available on the side panel when you click If none matched branch), and then send a WhatsApp message.
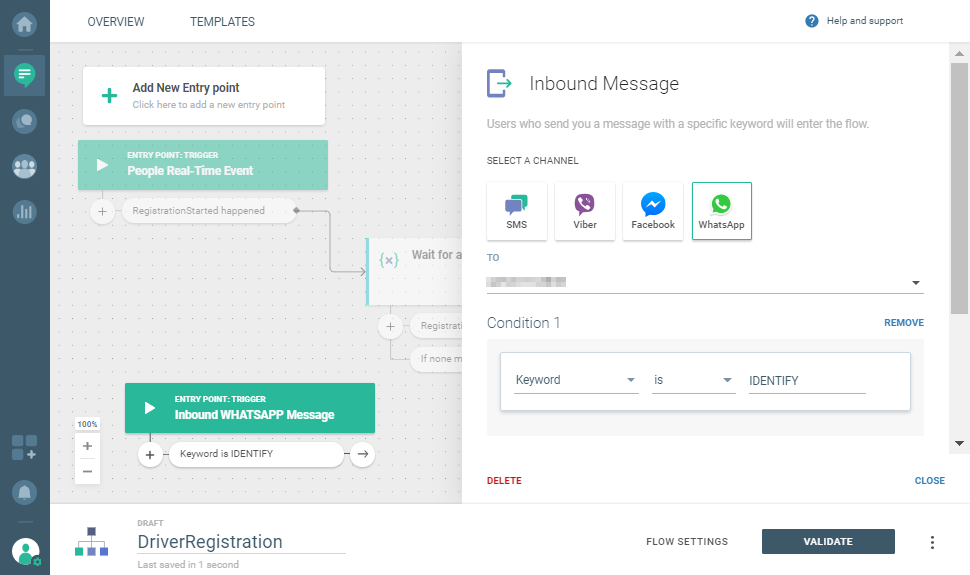
Use a WhatsApp entry point: Add New Entry point > Inbound Message. On the side panel, select WhatsApp and enter the keyword: IDENTIFY.
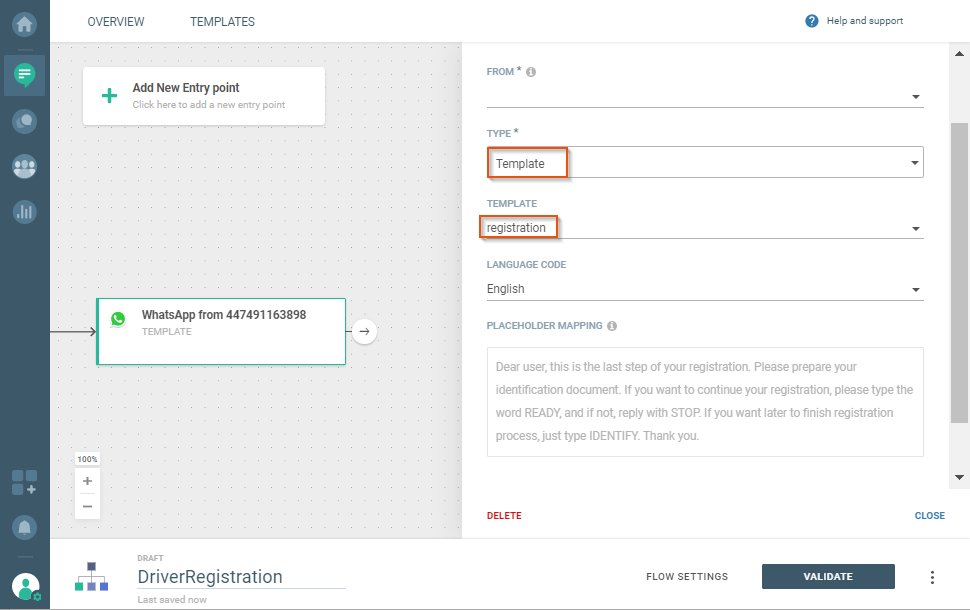
4. Send a WhatsApp message and choose the registration template.
IMPORTANT NOTE
For template registration, you need to provide template name, notification content, and language info, after which Infobip sends the template to WhatsApp for approval. Once registered on the WhatsApp platform, templates for your account get a unique template namespace.
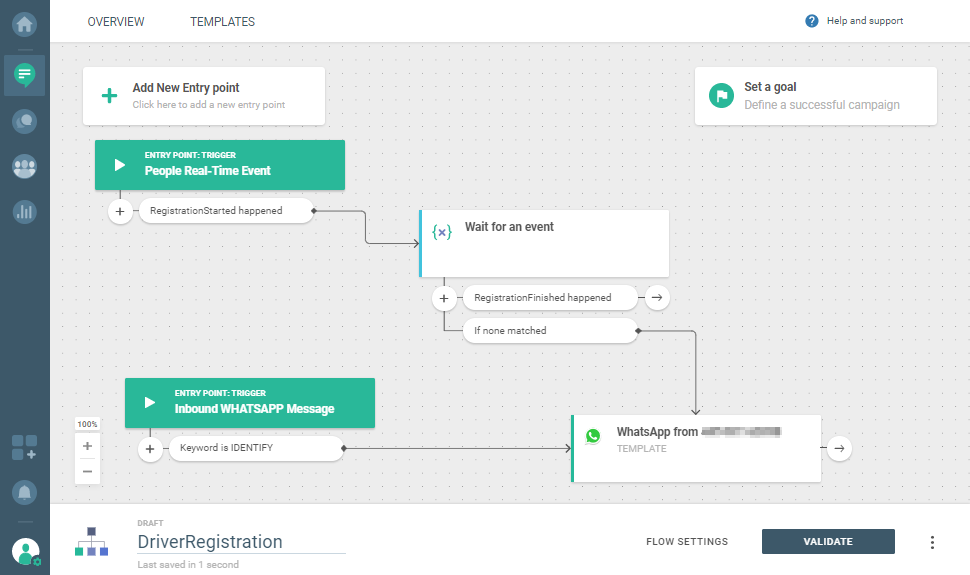
This is what the canvas will look like after you add the message:
4. To continue the communication based on customer responses, go for Evaluate inbound WhatsApp message and create keywords READY and STOP for situations where the candidate is ready to continue or stop the registration.

- If the driver replies with STOP, send another WhatsApp message letting them know that they can continue registration at any time: Ok, anytime you're ready you can just type the word IDENTIFY.
- If the driver replies with READY, follow up with instructions in another WhatsApp message. Select the Text template to acknowledge the driver`s response with something simple: Okay, great! First, type in the message your first name. The last name will be collected in a separate message.
5. For drivers from the group b, who are ready to go ahead with the registration, include Evaluate inbound WhatsApp for both messages (one for first name response and the second one for the last name). This is what you need to do in the side panels:
- Select Any keyword and then variable: Name, String. Select Message content.
- Select Any keyword and then last_name, String, and Message content.
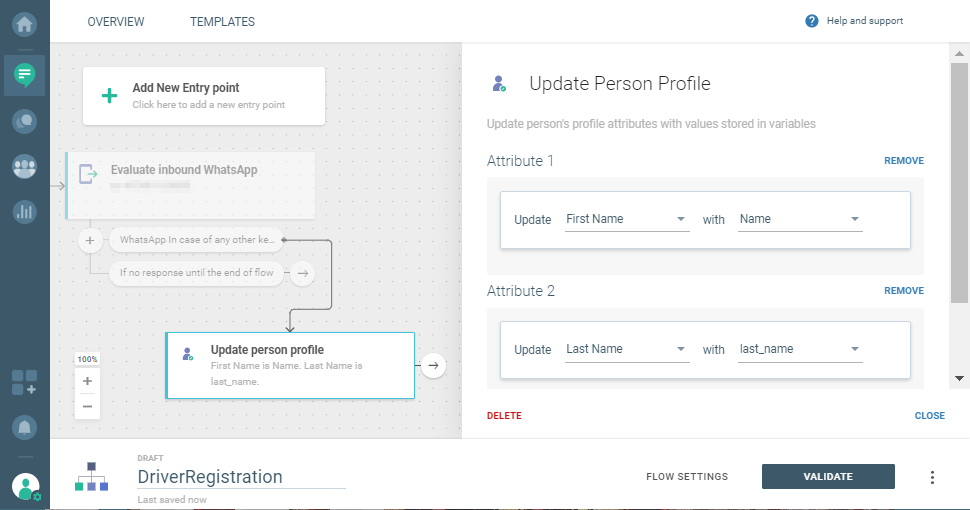
With the Update person profile element, you will be able to actually record their first and last name. Person attributes either exist in Target already or you have to create the new ones and then automatically update them using this element.
6. You are almost there! Send the final WhatsApp message (the type of the message is Text):
For the last step, you will be redirected to one of our agents for data verification. Thank you!
Now redirect the driver to a live agent using Conversations. Select Start a Conversation element.
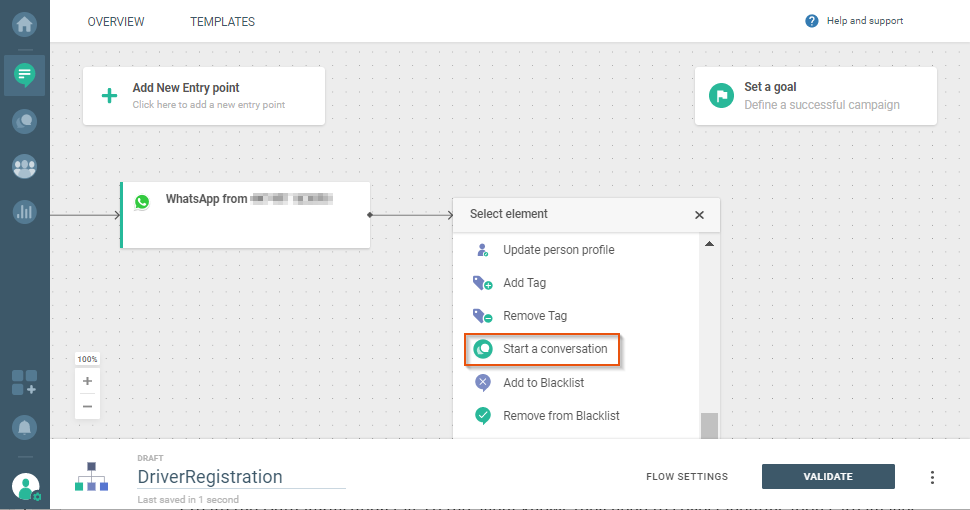
Create the Data Verification tag, so the agent knows they need to collect identification card images.

7. VALIDATE AND LAUNCH! The customer is redirected to an agent, and the agent helps with the completion of the onboarding process.
