Manage users
Browse through this section for quick instructions and tips on how to manage users. This is where you will find most, if not all, answers to questions related to creating and enabling or disabling users, viewing detailed user information, and more.
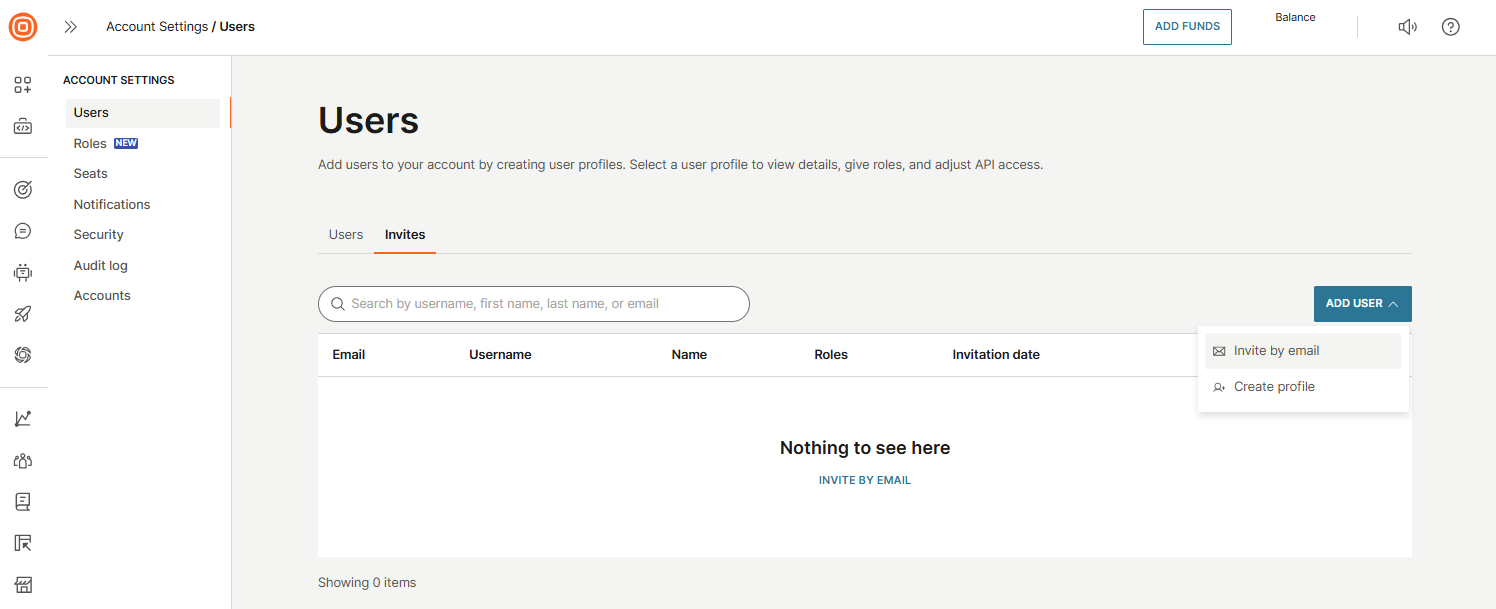
Add users to your account
To add new users to your Infobip account:
- Log in to your Infobip account.
- In the navigation menu, select the Profile icon.
- Go to Account settings → Users.
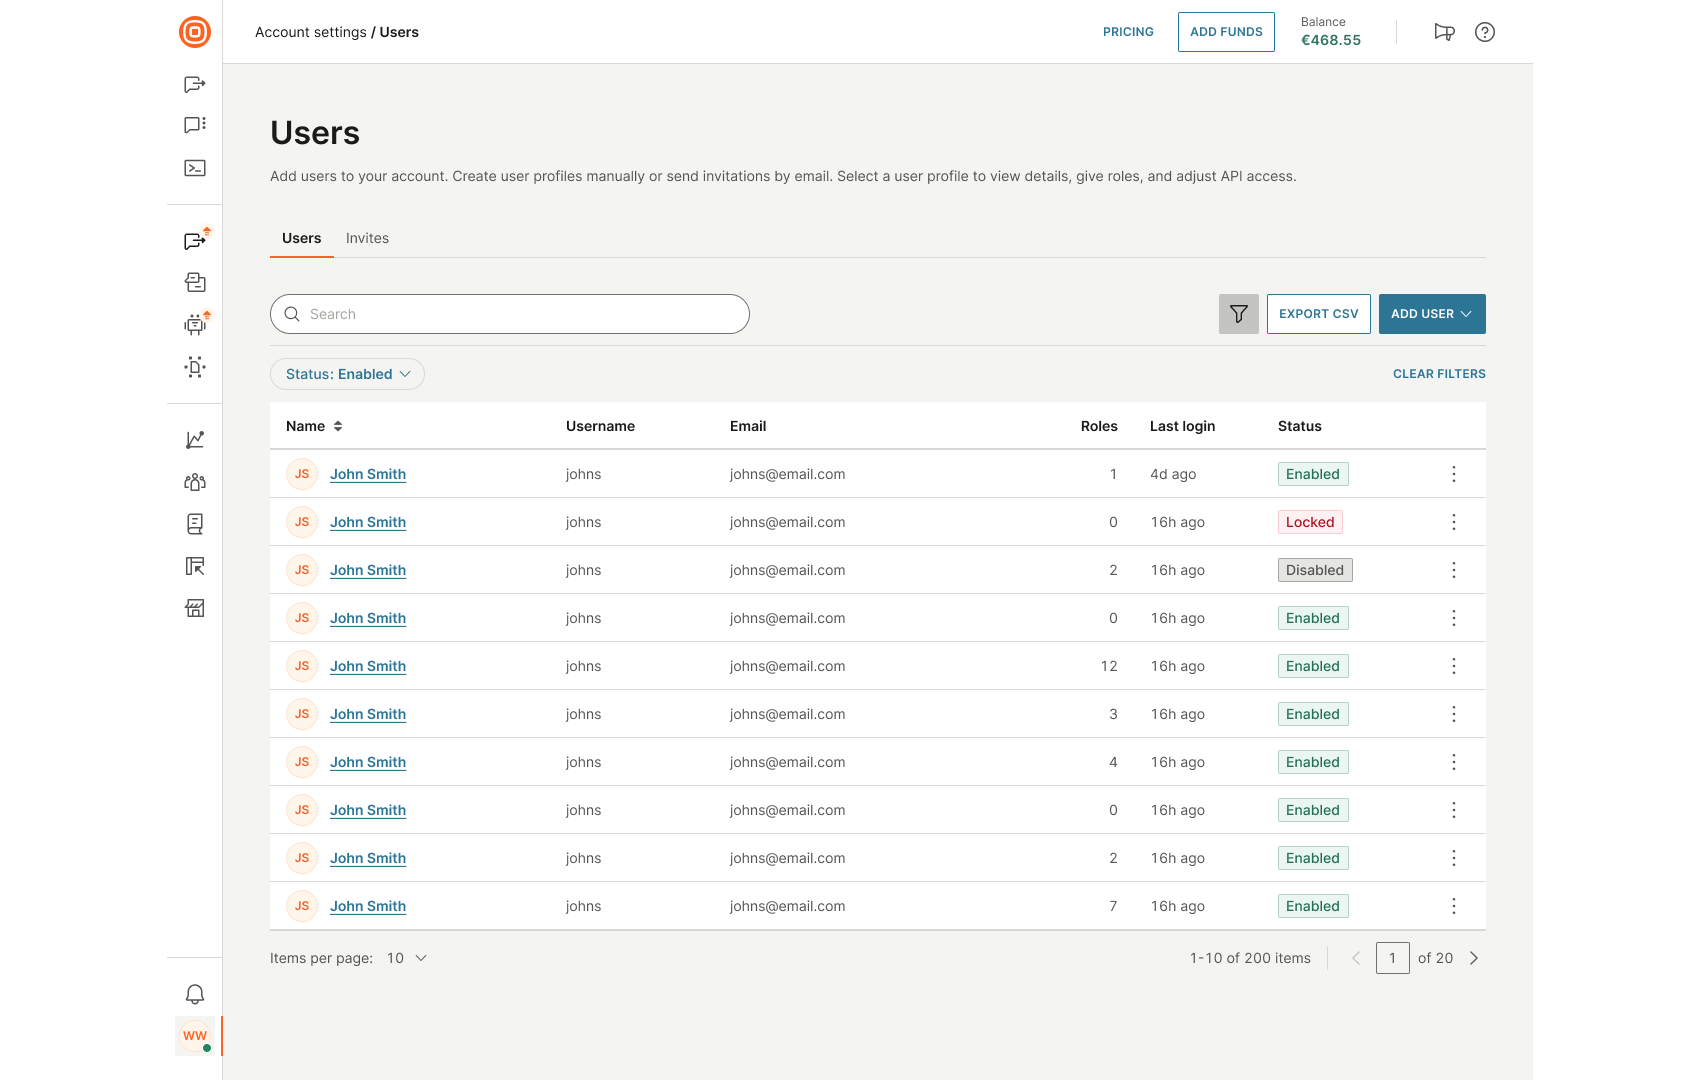
Within the Users section, you will find two tabs:
- Users: View and manage existing user profiles.
- Invites: Track and manage pending user invitations.
You can either manually create a user profile or send an invitation through email.
Users [#users-add-users-to-your-account]
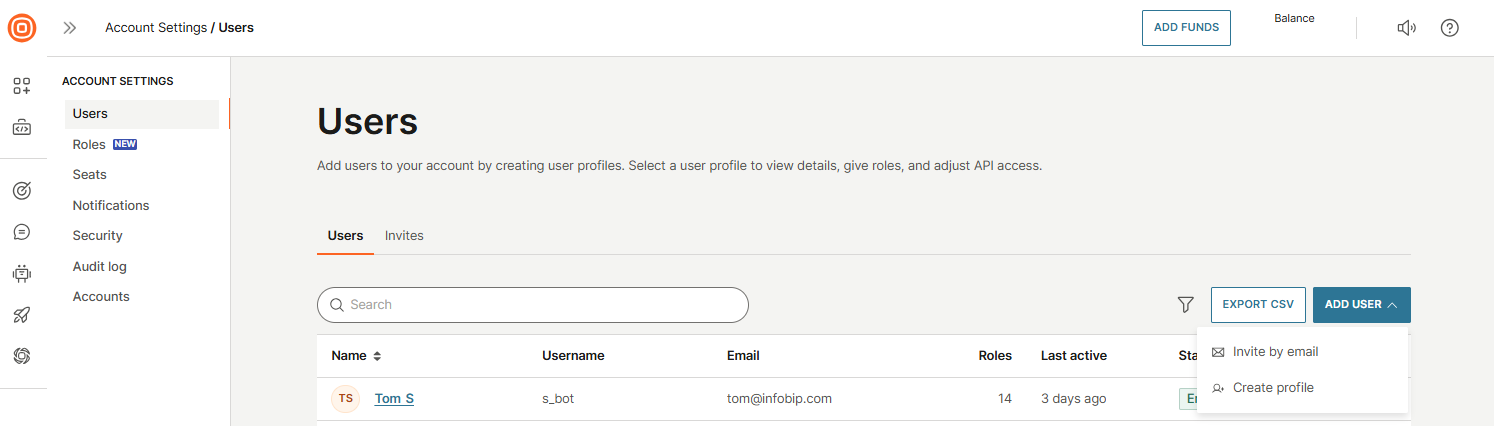
In the Users tab, you can:
- Create a new user
- Search for specific users using the search bar
- Apply filters to narrow results
- Export the user list in CSV format
- View key information, including:
- Name
- Username
- Roles
- Last login
- Status
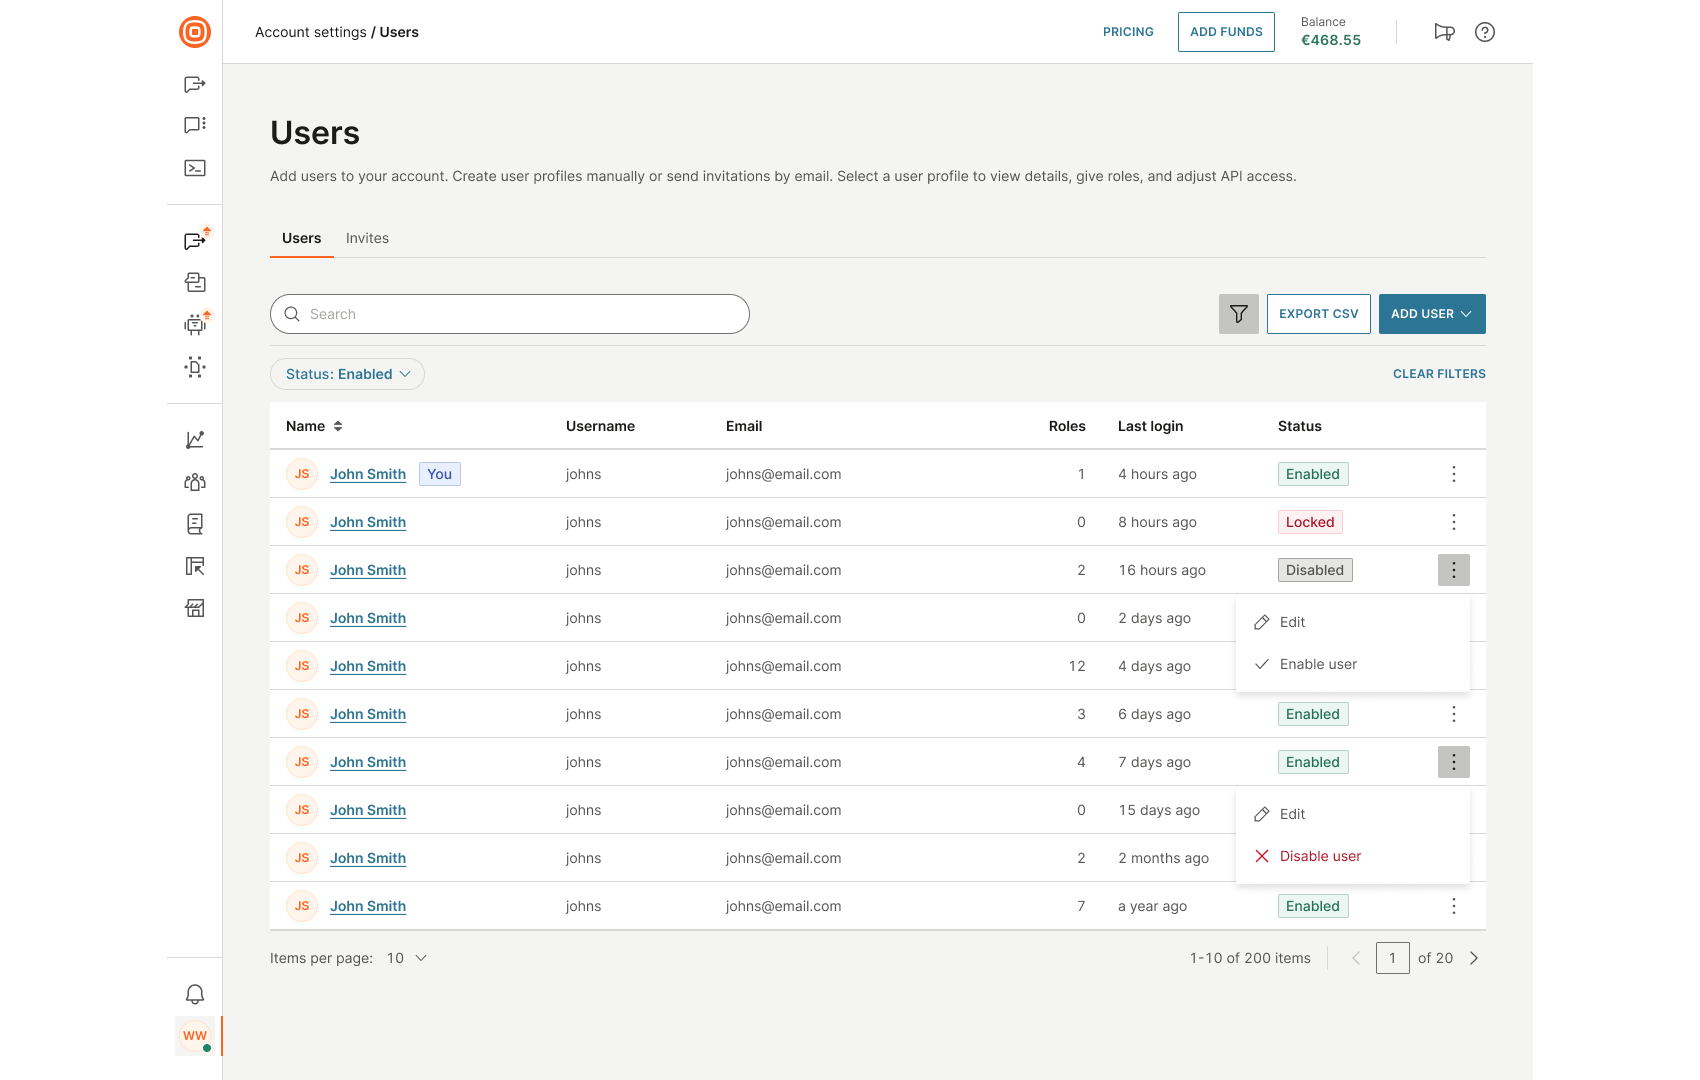
Use the three-dot menu next to each user to edit their profile or to enable or disable their account, depending on their current status. When a user is disabled, they will no longer be able to log in or receive notifications. However, their profile will remain in the user list and will be marked as disabled. You cannot disable your own account while logged in.
Read more about adding and editing a user below.
Add a new user [#add-a-new-user-add-users-to-your-account]
To add a new user:
- Select the Add user button → Create profile.
- On the Create user profile page, enter the user's basic details, such as name and email.
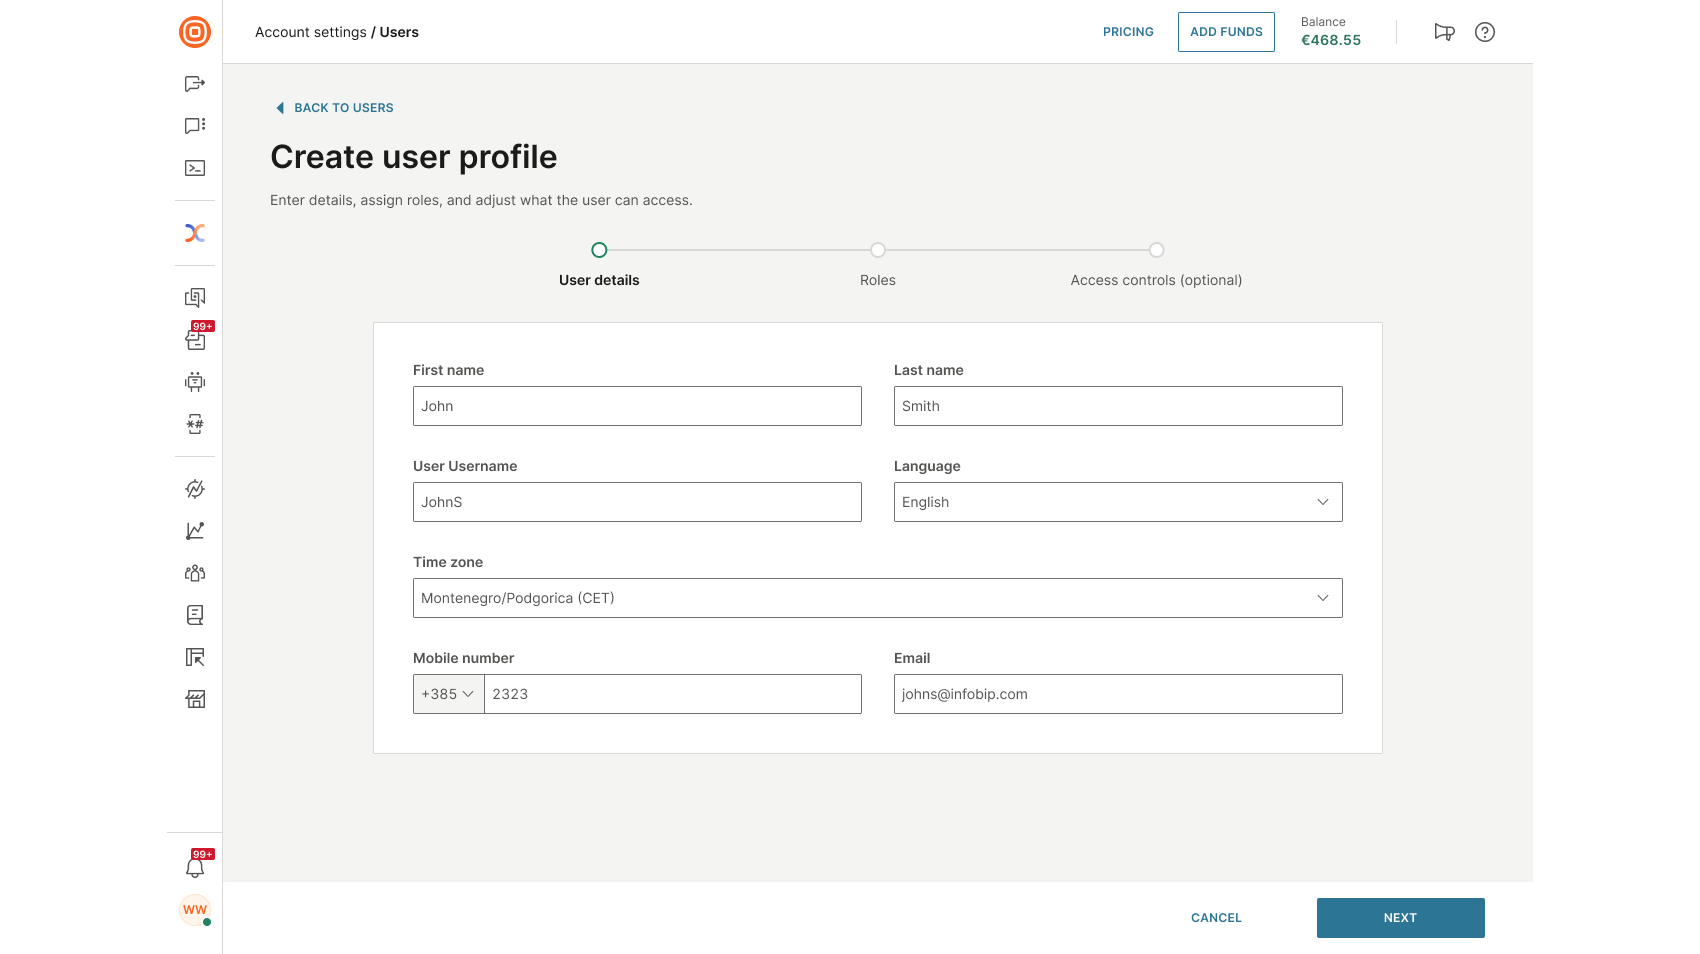
- Assign one or more roles to define their permissions and access level.
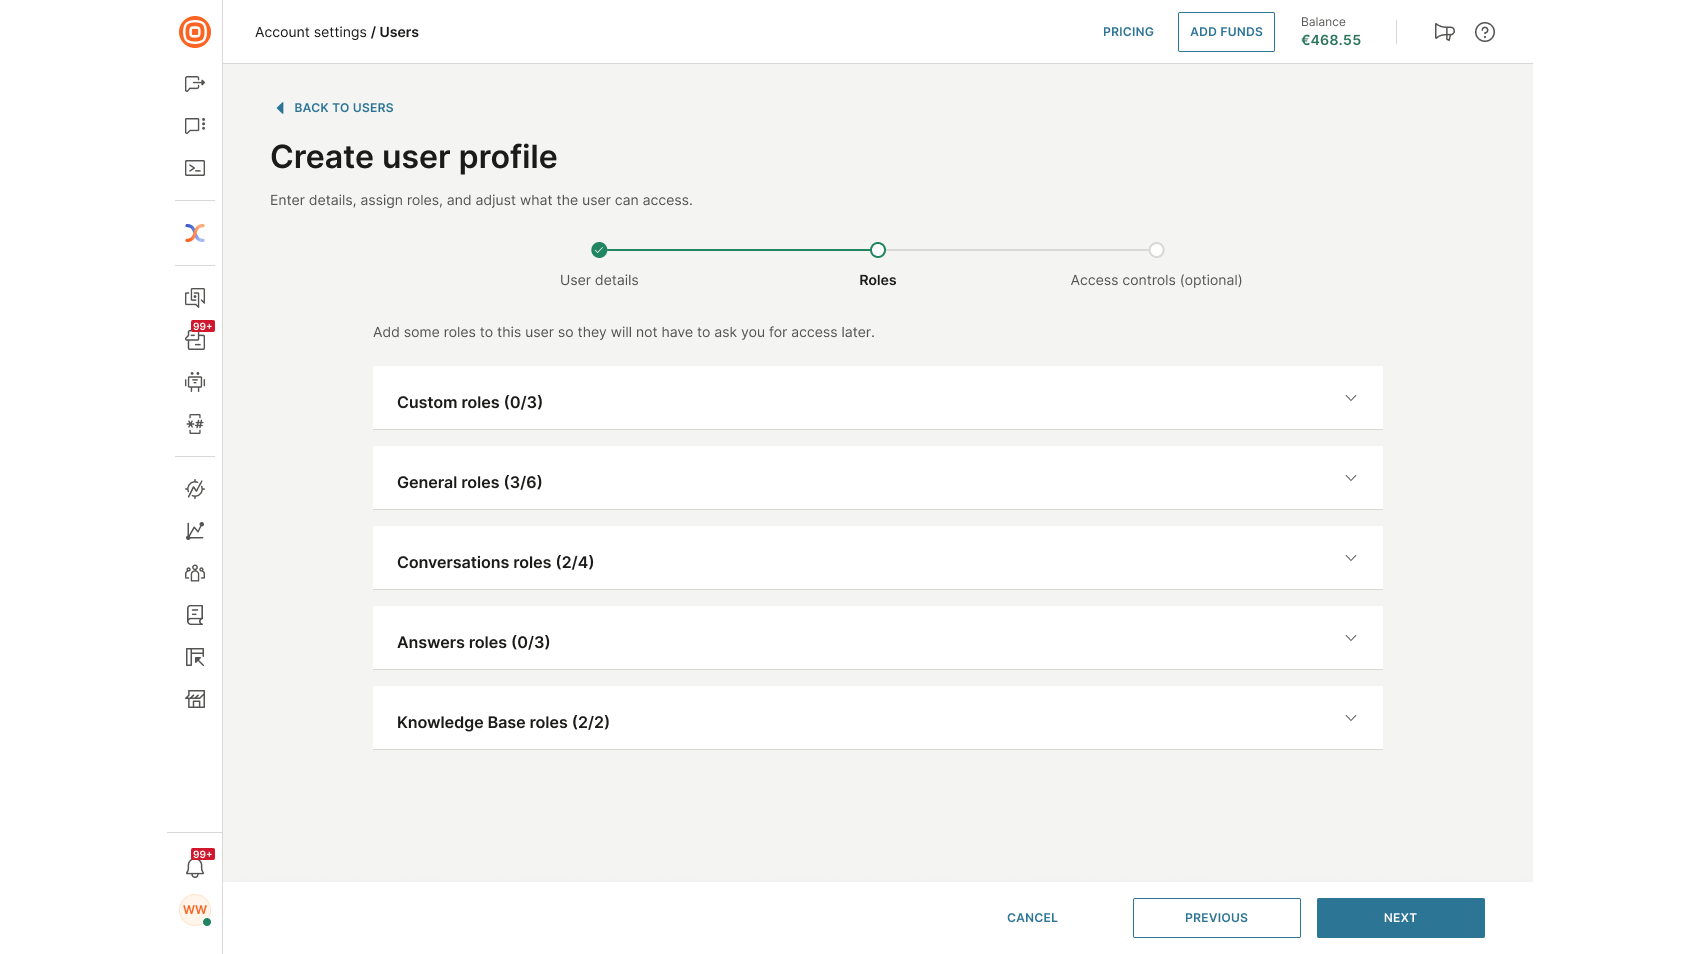
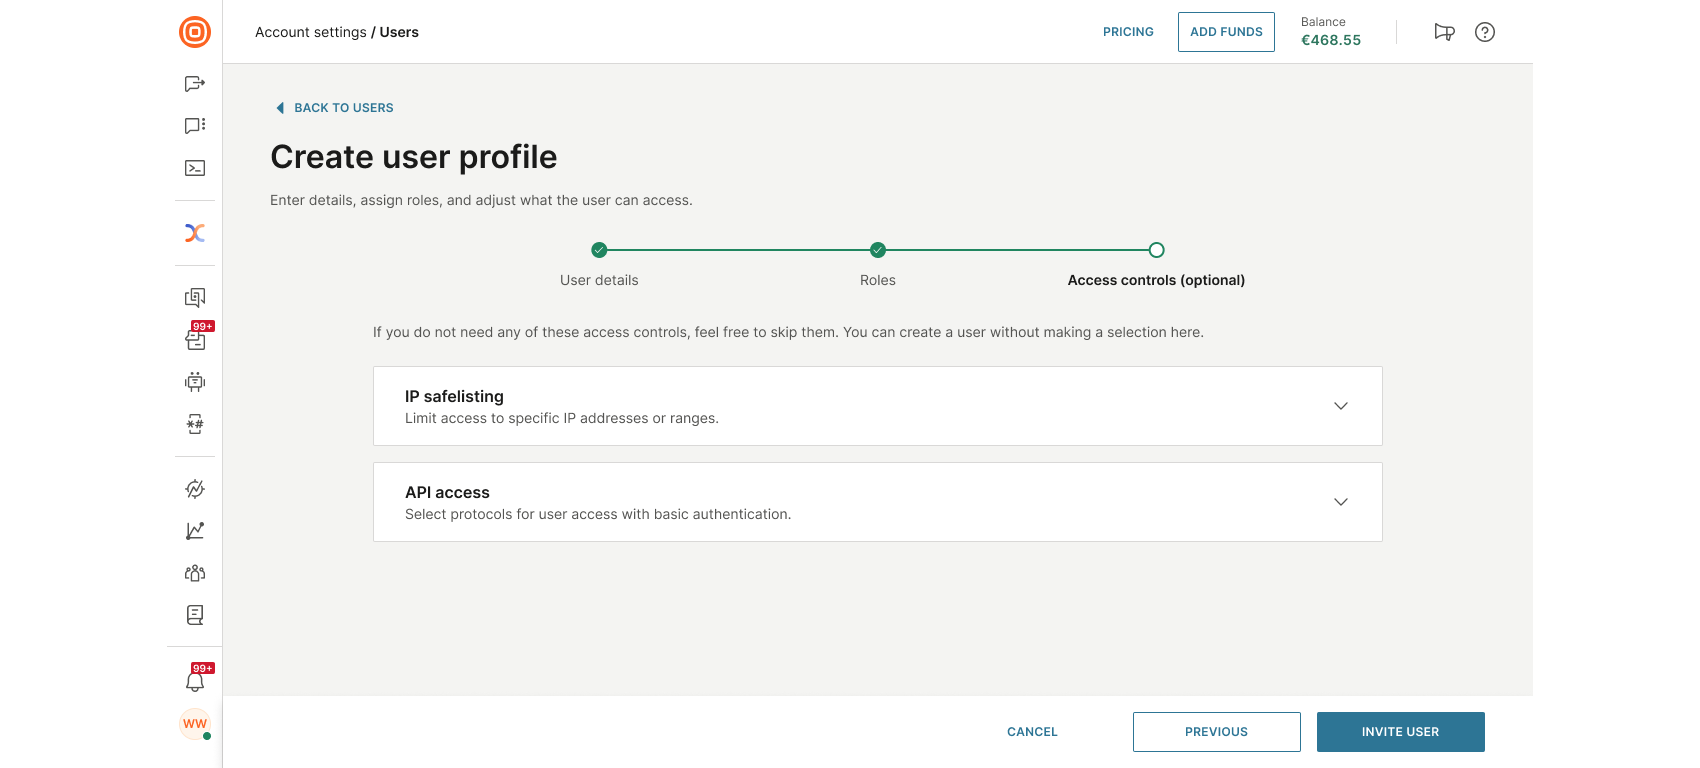
- Configure access controls (optional):
- Restrict access by IP address or range.
- Choose authentication protocols (for example, Basic Auth).
- Skip this step if access control is not needed.
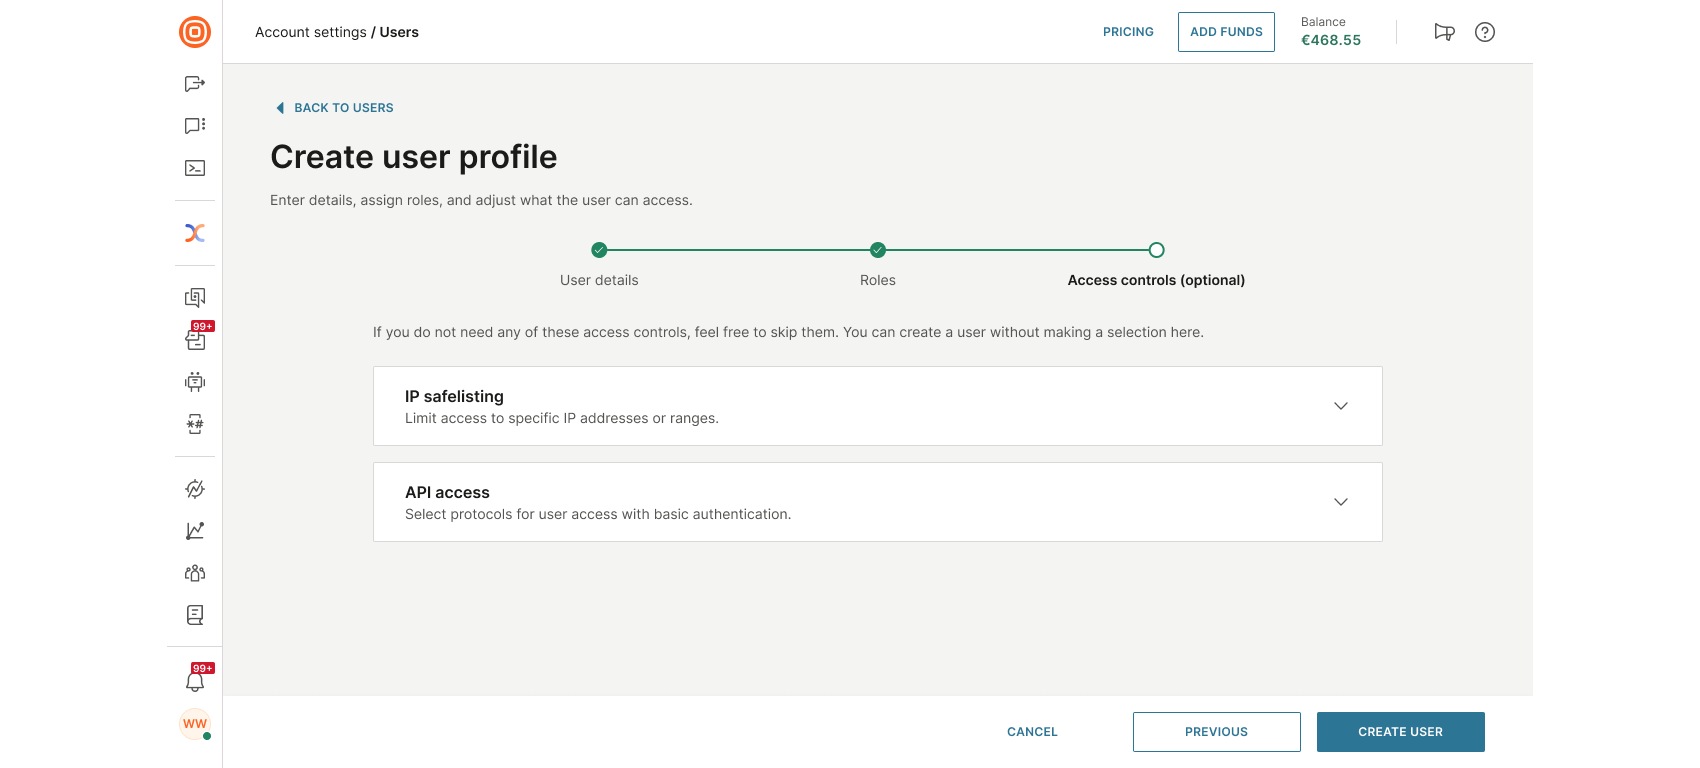
- After filling in all required information, select Create user to complete the process.
Edit a user [#edit-a-user-add-users-to-your-account]
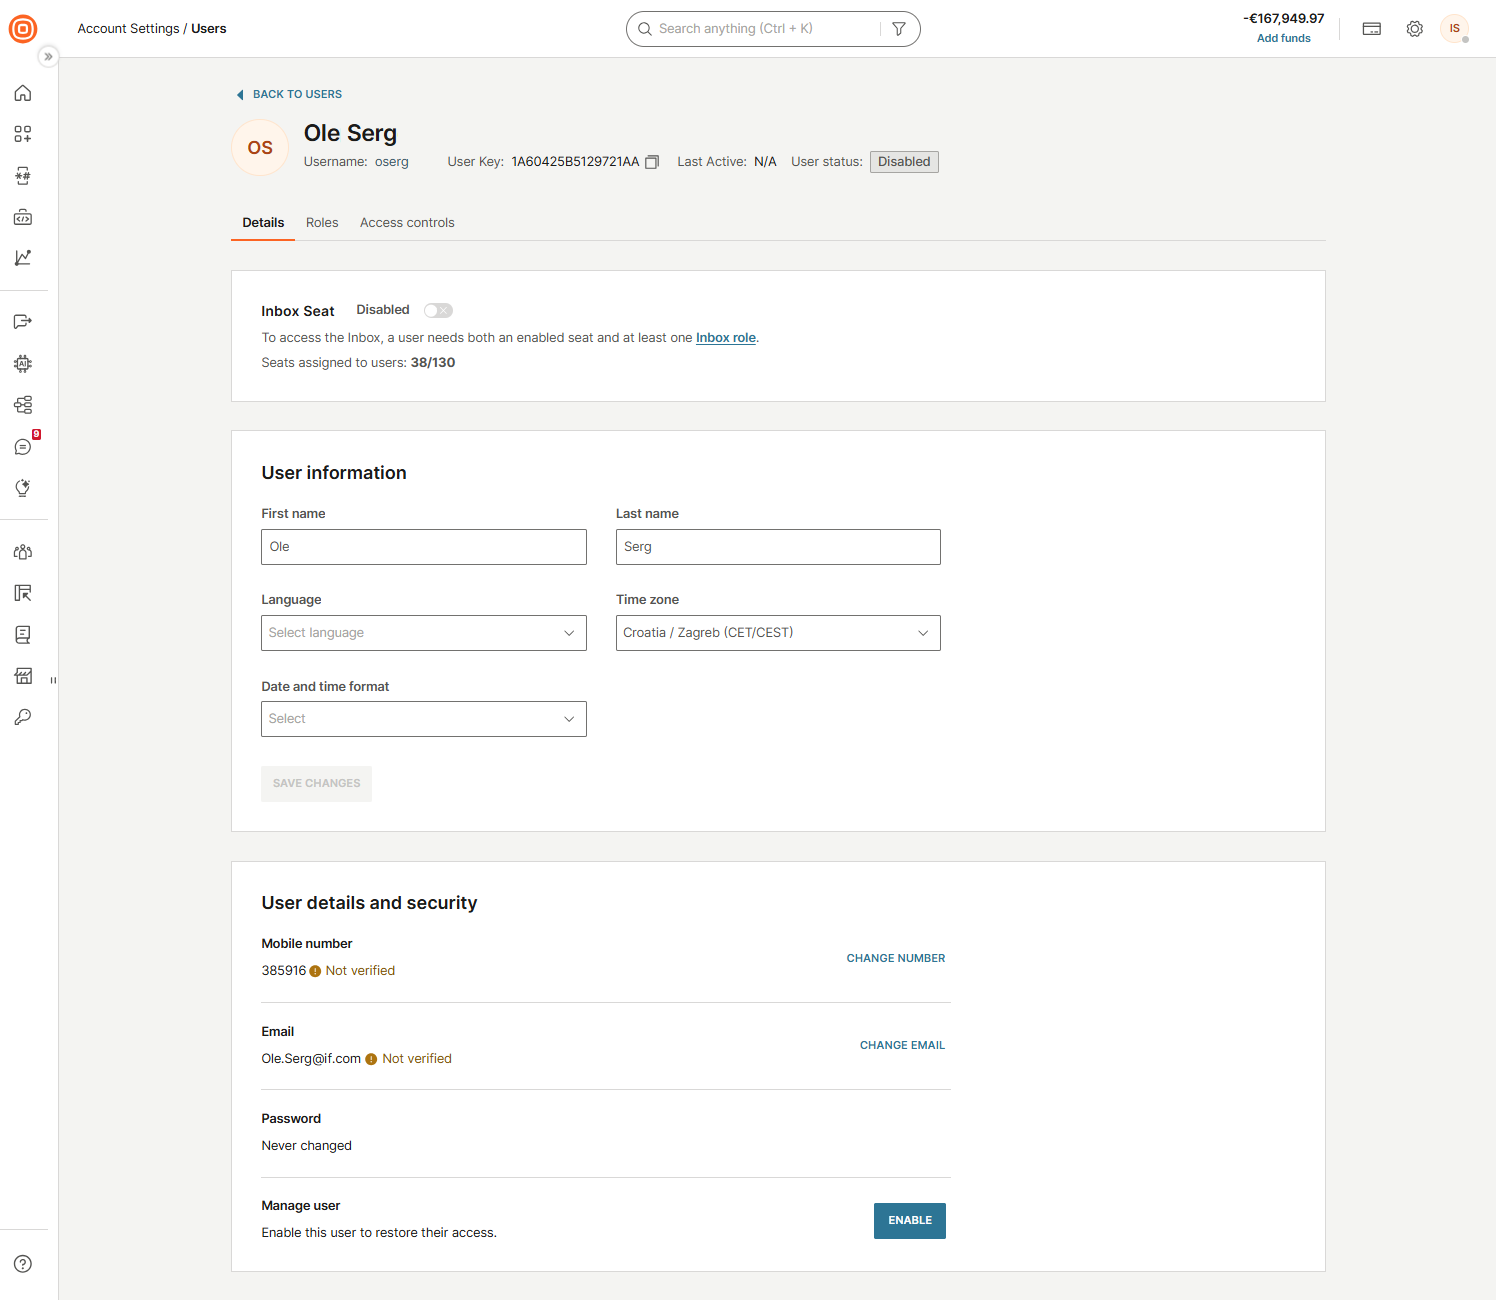
To edit a user's profile, select Edit from the three-dot menu next to their name. This opens the user’s profile page, which includes the following tabs:
- Details
- Roles
- Access controls
Details
In the Details tab, you can view and update the user’s basic information:
- First name
- Last name
- Language
- Time zone
- Date and time format
After making changes, select Save changes to apply them.
In the User details and security section, you can:
- Update contact information:
- Mobile number
- Email address
- Change the password
- Manage user access:
- Enable or disable the user and their permissions
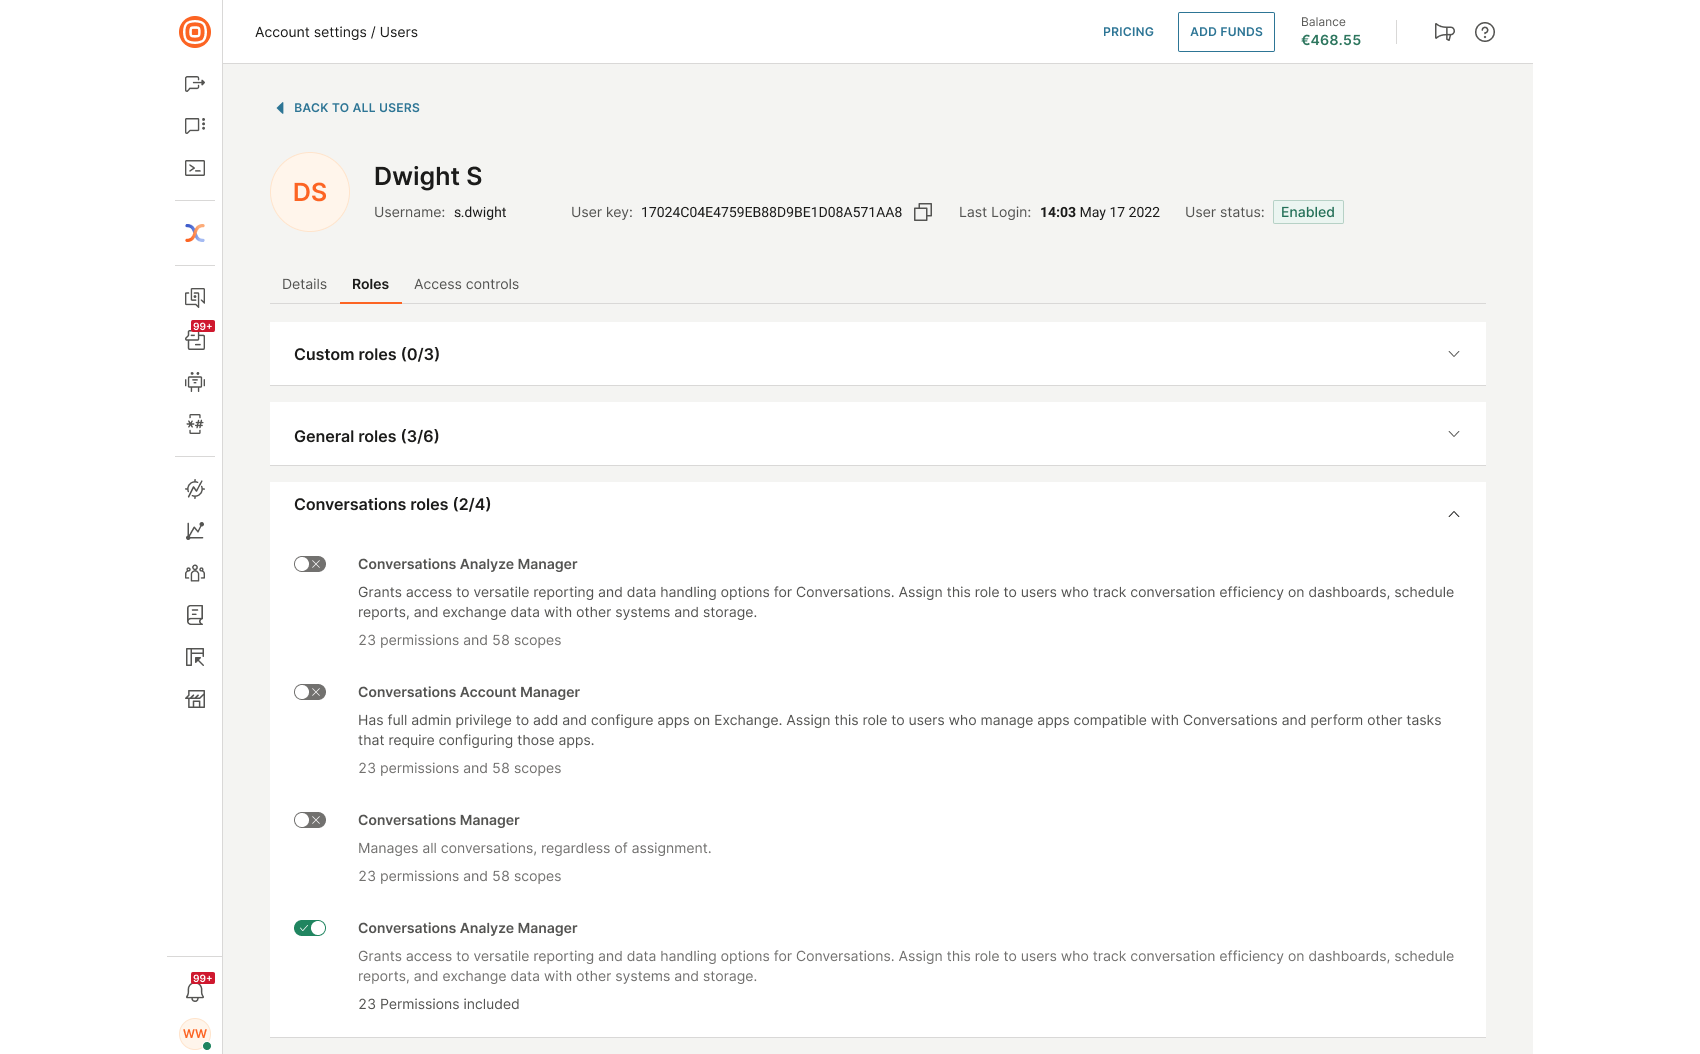
Roles
In the Roles tab, you can manage which roles are assigned to the user. The list displays all available roles, each with a toggle switch.
- Enable a role by turning the toggle on
- Remove a role by turning the toggle off
Changes are applied immediately and define what features and permissions the user has access to.
Access controls
In the Access controls tab, you can configure additional security settings, including IP safelisting, mobile authentication, two-factor authentication (2FA), and API access permissions.
For detailed guidance on each option, refer to the relevant sections below.
Select a language [#select-a-language-add-users-to-your-account]
Adapt the web interface to a specific language by selecting it from the Language dropdown under the User information section.
Currently, we offer full support for the following languages:
- Albanian
- Arabic
- Bosnian
- Chinese (Simplified - China)
- Chinese (Traditional - Taiwan)
- English
- French
- German
- Greek
- Italian
- Japanese
- Korean
- Portuguese (Latin America)
- Russian
- Spanish (Latin America)
- Slovenian
- Swedish
- Turkish
- Ukrainian
Once you select a new language for your own user, the entire web interface will immediately adapt to your language choice.
You can specify a separate language for all other users that you manage. Once they log in, they will see the UI in the language you have specified for them. If you have assigned a role of an Account admin to your users, they can select other language options. Otherwise, your language selection will appear on their web interface as a read only field.
Invites [#invites-add-users-to-your-account]
You can manage and track pending invitations directly within the Invites tab.
To invite new users via email:
- Select the Invites tab.
- Select the Add user button → Invite by email.
- On the invitation page, enter the user's email address, and any additional details.
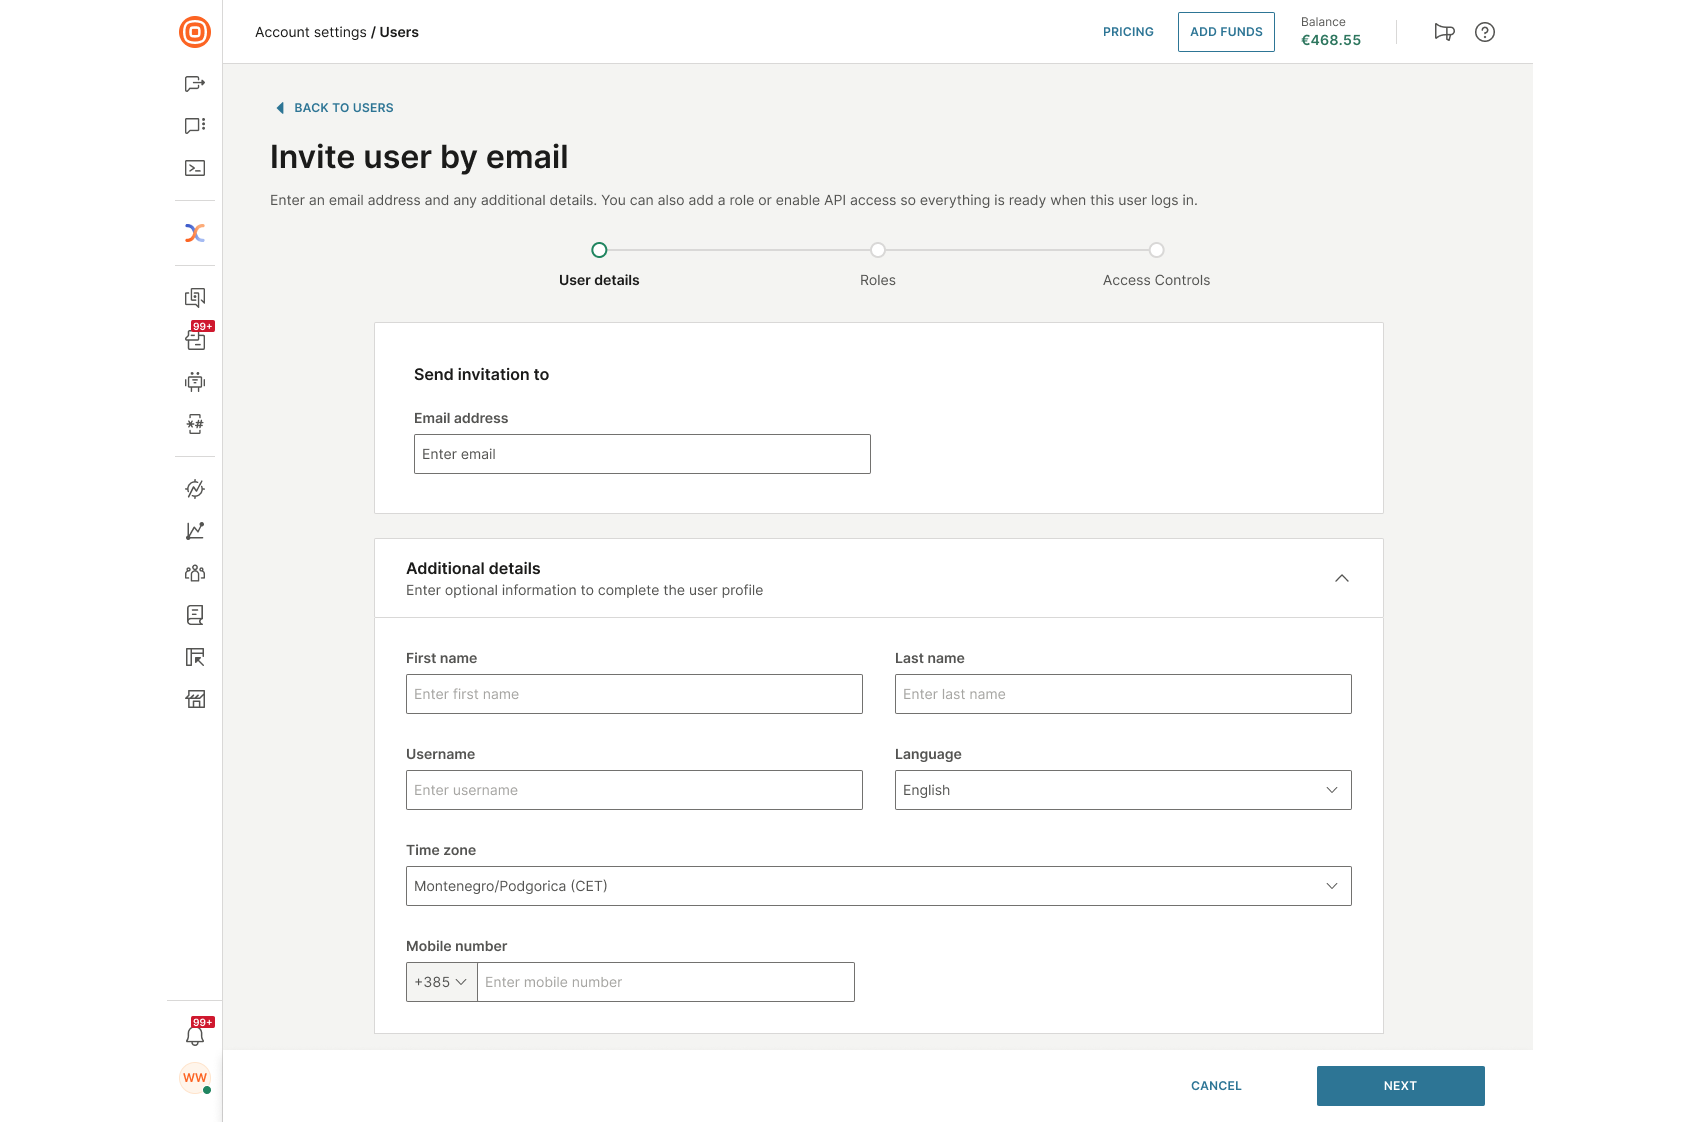
- Assign one or more roles to define their permissions and access level.
- Configure access controls (optional):
- Restrict access by IP address or range.
- Choose authentication protocols.
- Skip this step if access control is not needed.
- After filling in all required information, select Invite User to complete the process.
Once submitted, the user will receive an email with instructions to join and complete their profile.
Unlock a user
When the user gets locked after several unsuccessful attempts to log in to their account, the Account admin (user role) can go to the Infobip web interface and help them out. Account admin will check the last login and account information in Users, and, if they decide to do so, unlock the user.
After the account admin does their part, the user will receive an email with instructions on how to reset the password.
IP safelisting
IP safelisting allows the creation of trusted lists containing specific IP addresses or ranges. These authorized IPs enable human users or APIs to access the Infobip platform securely.
Depending on the assigned role, you will have the following options:
- If you have the Account admin role, you can:
- View and edit your IP safelisting, and add your IP address before you save the changes.
- View and edit the IP safelisting from other users without the need to add your IP address before saving the changes.
- If you do not have the Account admin role, you can:
- Only view the IP addresses that are safelisted for your user.
To add, edit, or remove IP addresses or ranges that are allowed to access our services:
- Log into your account, and go to User profile → Access controls → IP safelisting.
- When you click the arrow to expand the menu, you will have the option to view and add your current IP address to the list of allowed IP addresses to prevent any potential lockouts by clicking the Add Current IP Address button. If your current IP address is already on the safelist, the button will be disabled.
- Below this, you can add the wanted IP addresses that will be allowed to access our services. If the IP addresses list is empty, it means that all IP addresses are allowed to access our services.
- After you add all wanted IP addresses, select the Save button.
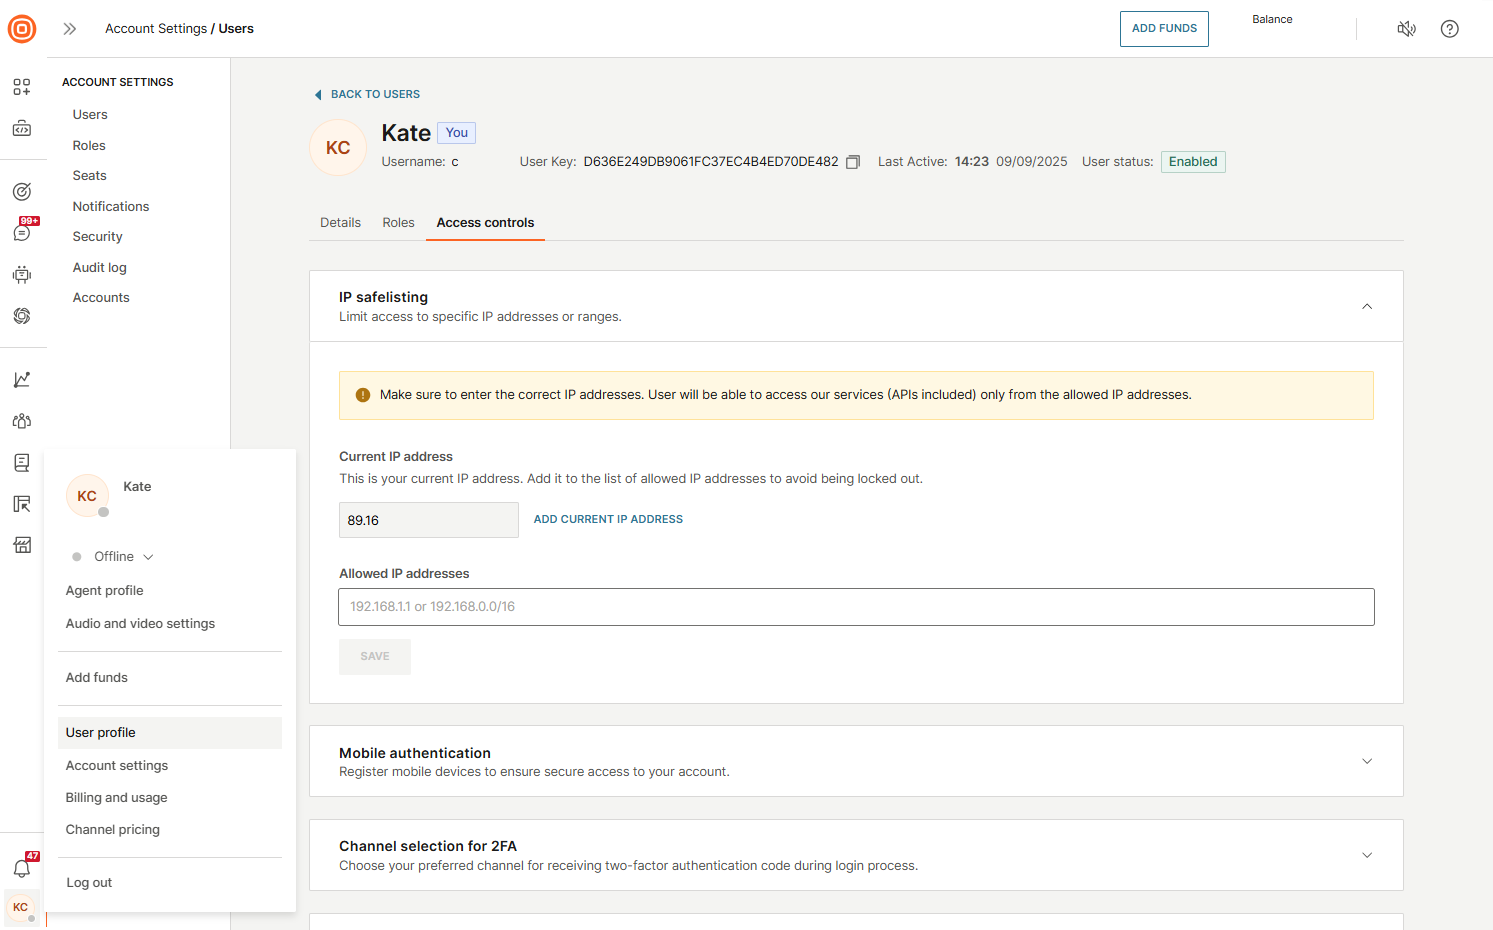
Once enabled, the IP safelisting is applied to all services - HTTP API, SMPP API, and web interface access.
Mobile authentication
The Mobile authentication option lets you register mobile devices for secure access to your account.
Currently, this option is supported only in the Conversations mobile app.
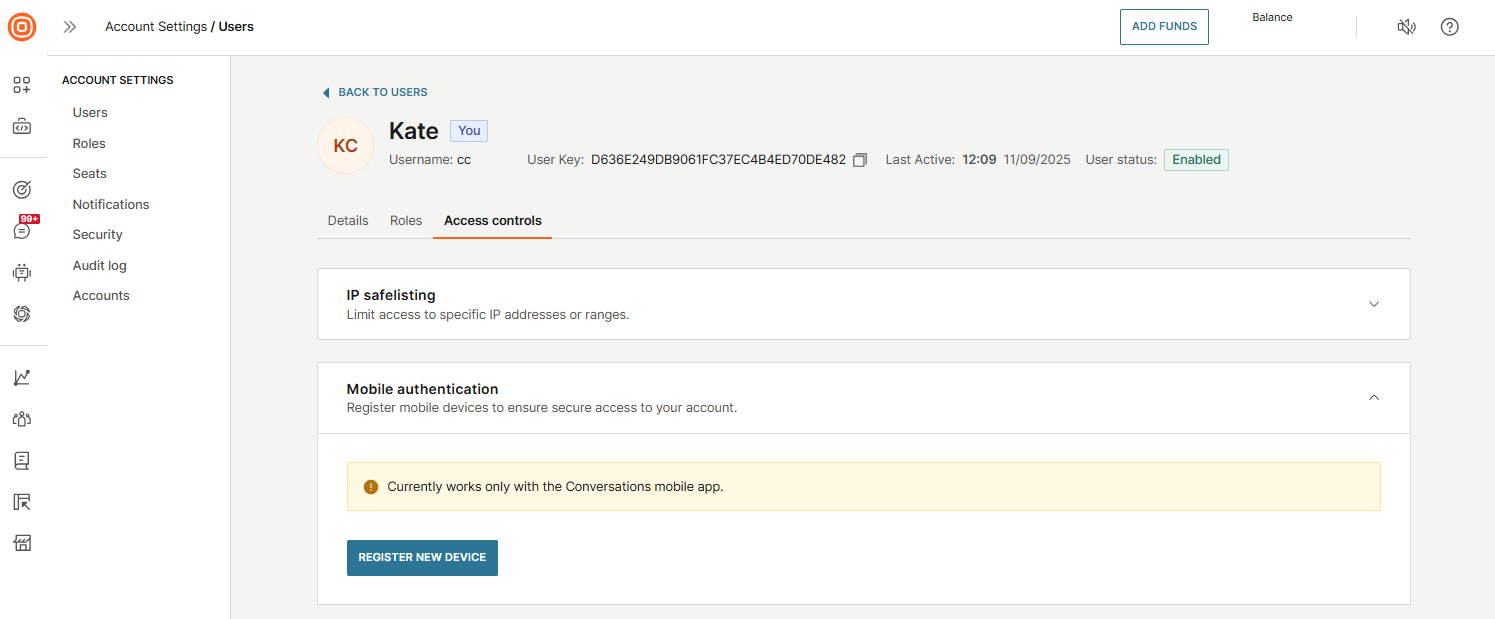
For details, see Mobile authentication.
Channel selection for 2FA
To select your preferred two-factor authentication (2FA) channel, follow these steps:
- Go to User profile → Access controls → Channel selection for 2FA.
- You can choose between three different channels:
- SMS
- Voice
- Once you choose the preferred channel, click Save.
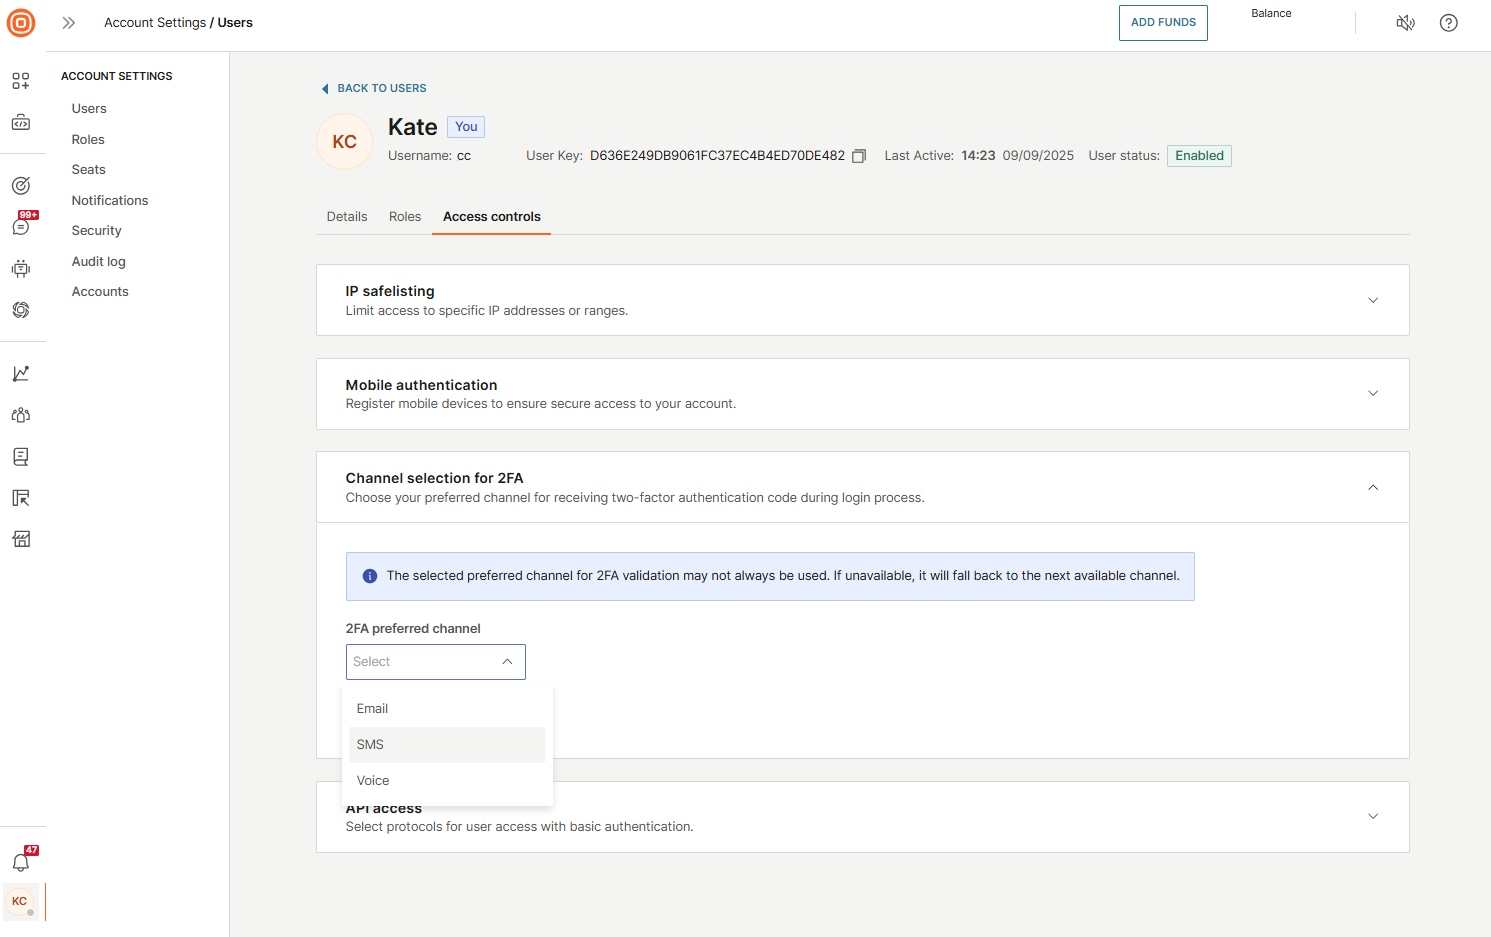
The preferred channel selection will be used to deliver a 2FA PIN when you are logging to your Infobip account from a new device. Additionally, you can switch to failover channels if your preferred method fails.
API access
The API access control prohibits the use of basic authentication as a security measure. Instead, you can select between two protocols for accessing the platform securely:
- SMPP access
- HTTP access
To access it:
- Go to User profile → Access controls → API access.
- From there, enable one or both protocols. These protocols determine how authentication is handled when a user attempts to log in using basic credentials.
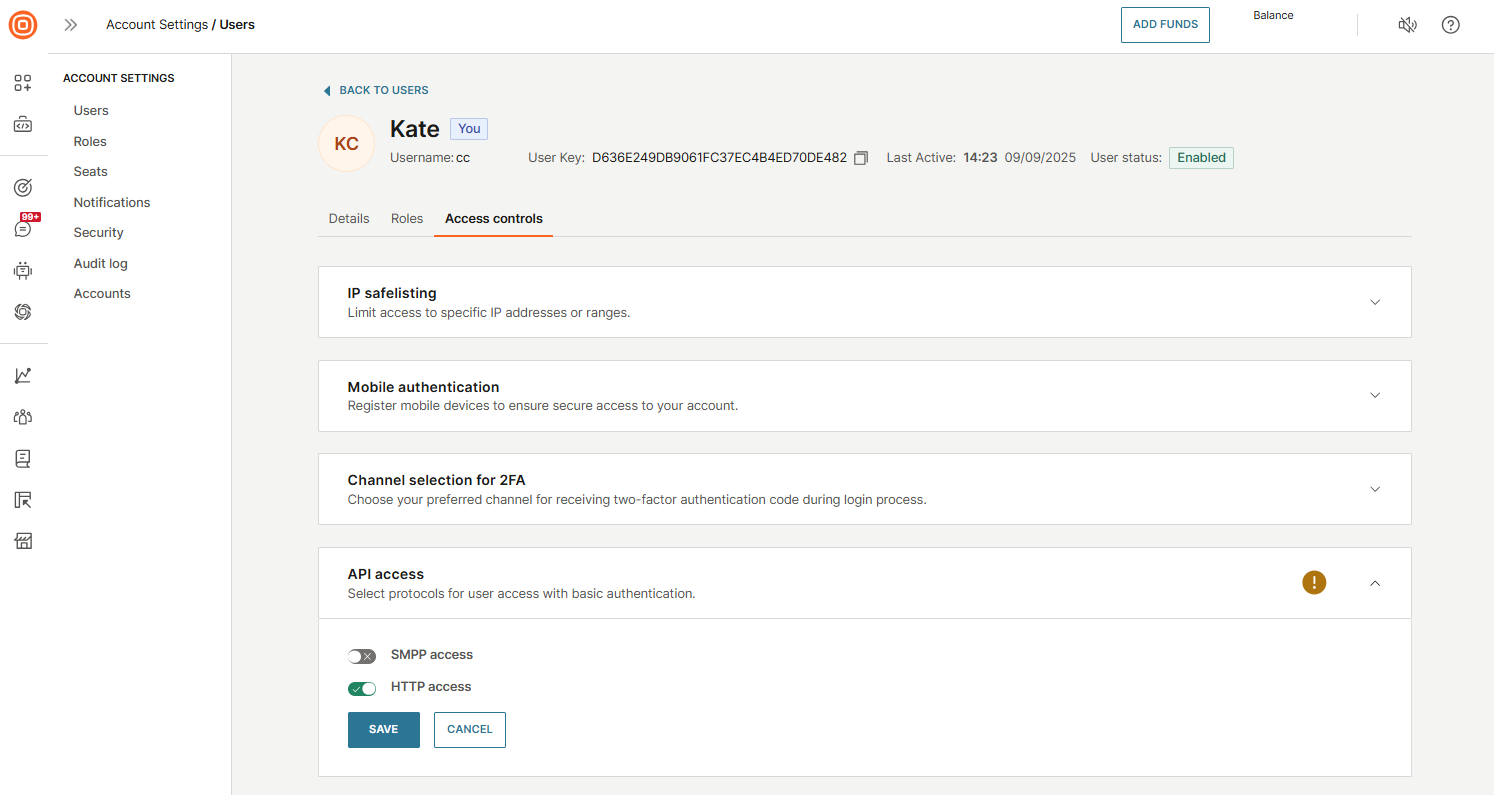
You still have the option to utilize alternative authentication methods, such as generating an API key or an IBSSO token, based on your preference. For further details regarding authentication methods, refer to the API authentication page.
To learn more about SMPP and HTTP, check the links below: