Get Started
Start using Numbers in Infobip either via the web interface or the API.
To get started, you need an Infobip account. Log in or create an Infobip account.
Numbers over web interface
The following instructions describe how to buy or order numbers, and import, manage, and cancel numbers over the web interface.
Buy or order numbers over web interface [#buy-or-order-numbers-over-web-interface-numbers-over-web-interface]
To buy numbers over the web interface, log in to your Infobip account, and then:
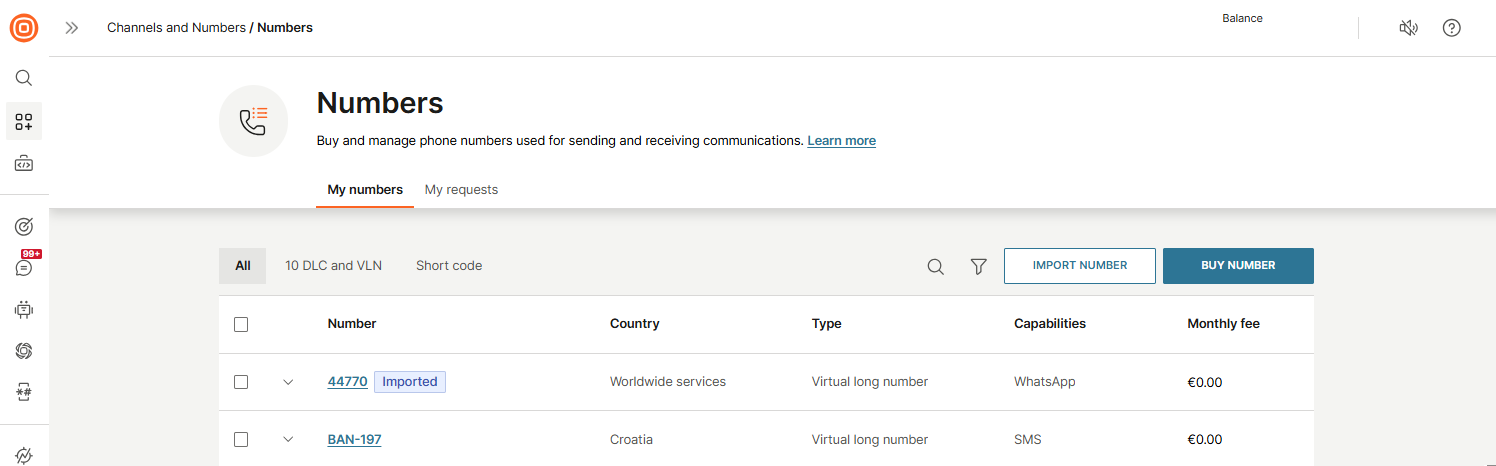
- Go to Channels and Numbers > Numbers > My Numbers.
- Click Buy number.
- Select the traffic destination country by choosing a country from the Country drop-down list. This is the country where the traffic would be terminated (where end users are).
- Select the number capability from the options available. You can choose more than one channel but you may find that this affects the numbers being offered. The capability selection depends on the country selection made in the previous step:
- SMS
- Voice
- MMS
- Click Next.
- Select the Number type. The number types displayed depend on the destination country and number capability chosen. Select the number type most appropriate to your business needs:
- Virtual Long Number
- Short Code
- Toll-Free
- 10DLC
- Click Next.
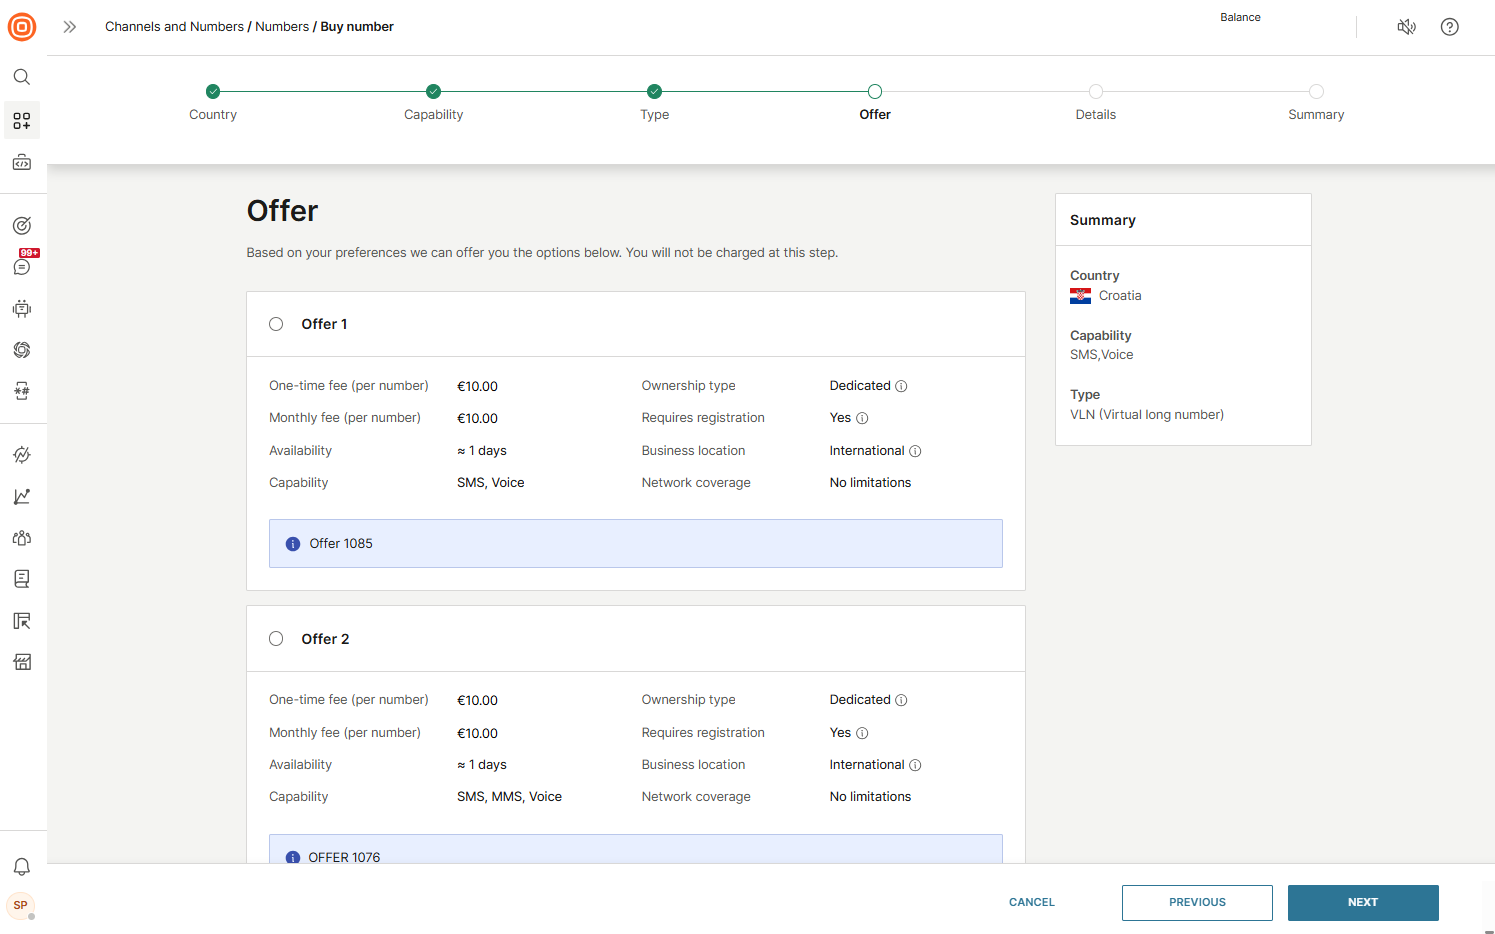
- Infobip then generates an offer for you. The number offer contains the following information:
- One-time fee - charged upon the number of procurements
- Monthly fee - charged every month
- Availability - depending on whether Infobip has such numbers in stock, or has to procure them from a number of suppliers. Numbers that are in stock might also require additional configuration by the Infobip team before being assigned to you
- Capability - assigned to a number
- Ownership type - dedicated or shared
- Registration required
- Allowed client type - indicates whether there are any limitations for local or international clients
- Network coverage - in case the number can not terminate or receive traffic in certain networks in the county
- When the offer is generated, the offer is dependent on the country you have selected. There are extensive requirements per offer. The offer asks for more specific information required per country.
- Click the selection button next to the offer you want to choose.
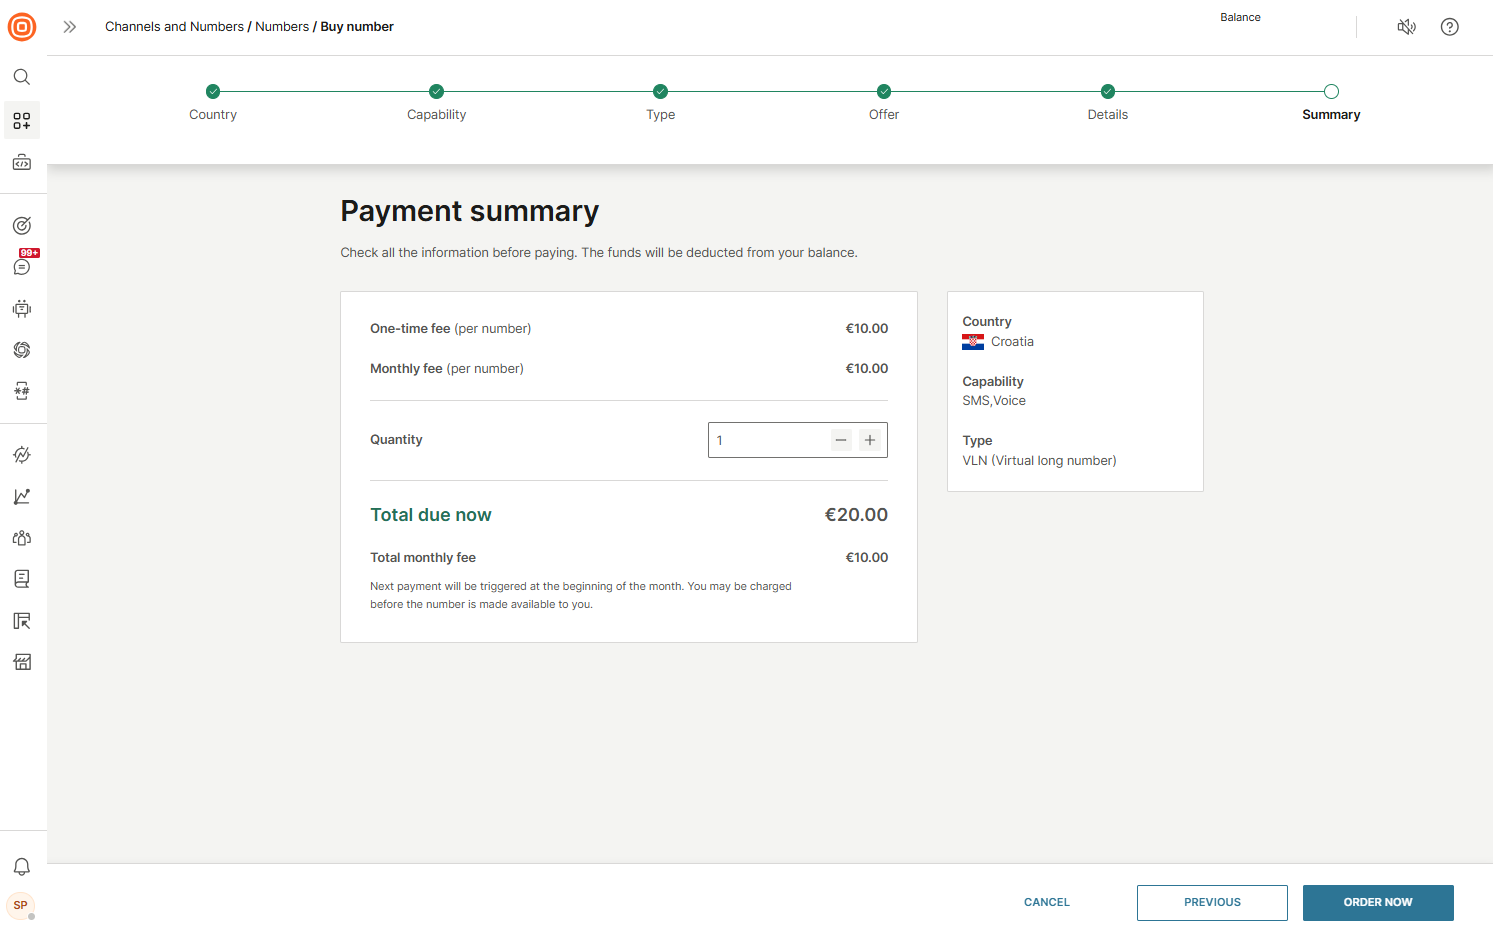
- When you have provided the necessary details, you then see a summary of your order. You can set the number quantity, if you want to buy multiple numbers.
- Select Order now.
- The number request is then processed by the Infobip system, and additional details might be required following Infobip’s review.
- When you have submitted your request, you can view your requests from the My requests tab and track the status of your numbers.
- (Optional) When you select an offer that fits your needs, you may be required to provide additional details. This step varies per country.
If your account balance is low, top up your account using payments.
Manage number requests [#manage-number-requests-numbers-over-web-interface]
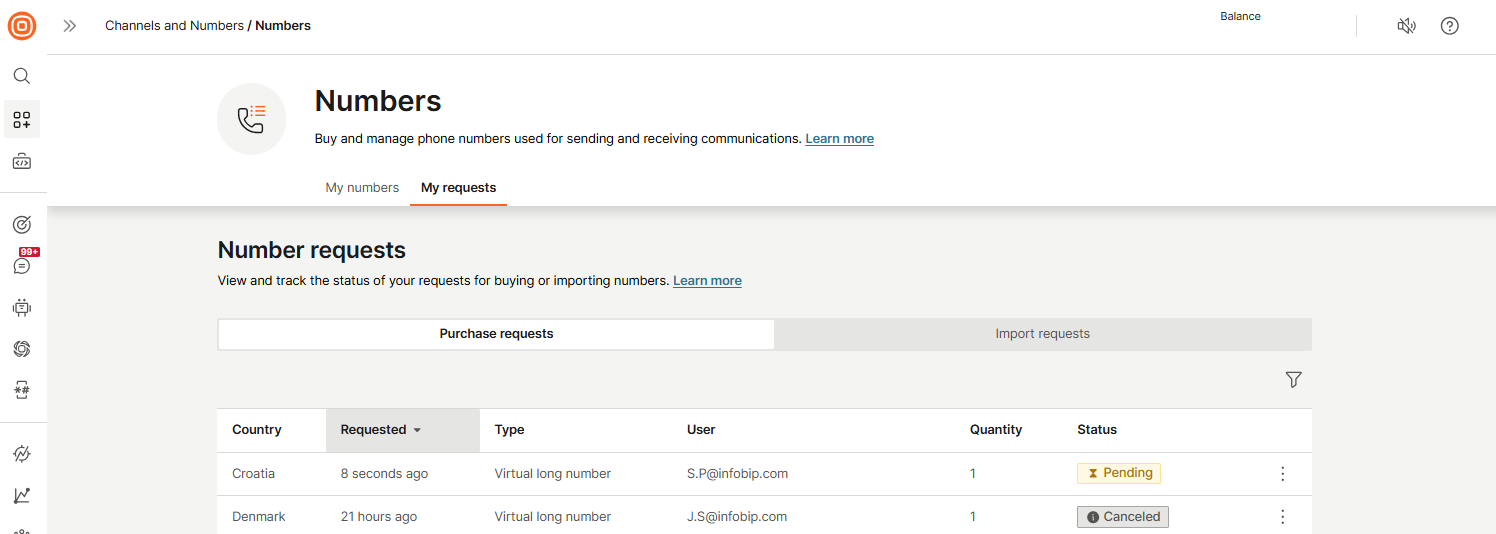
In the My requests > Number requests section, you can view and track the status of your number purchase and import requests.
This section contains two tabs:
- Purchase requests
- Import requests
Purchase requests
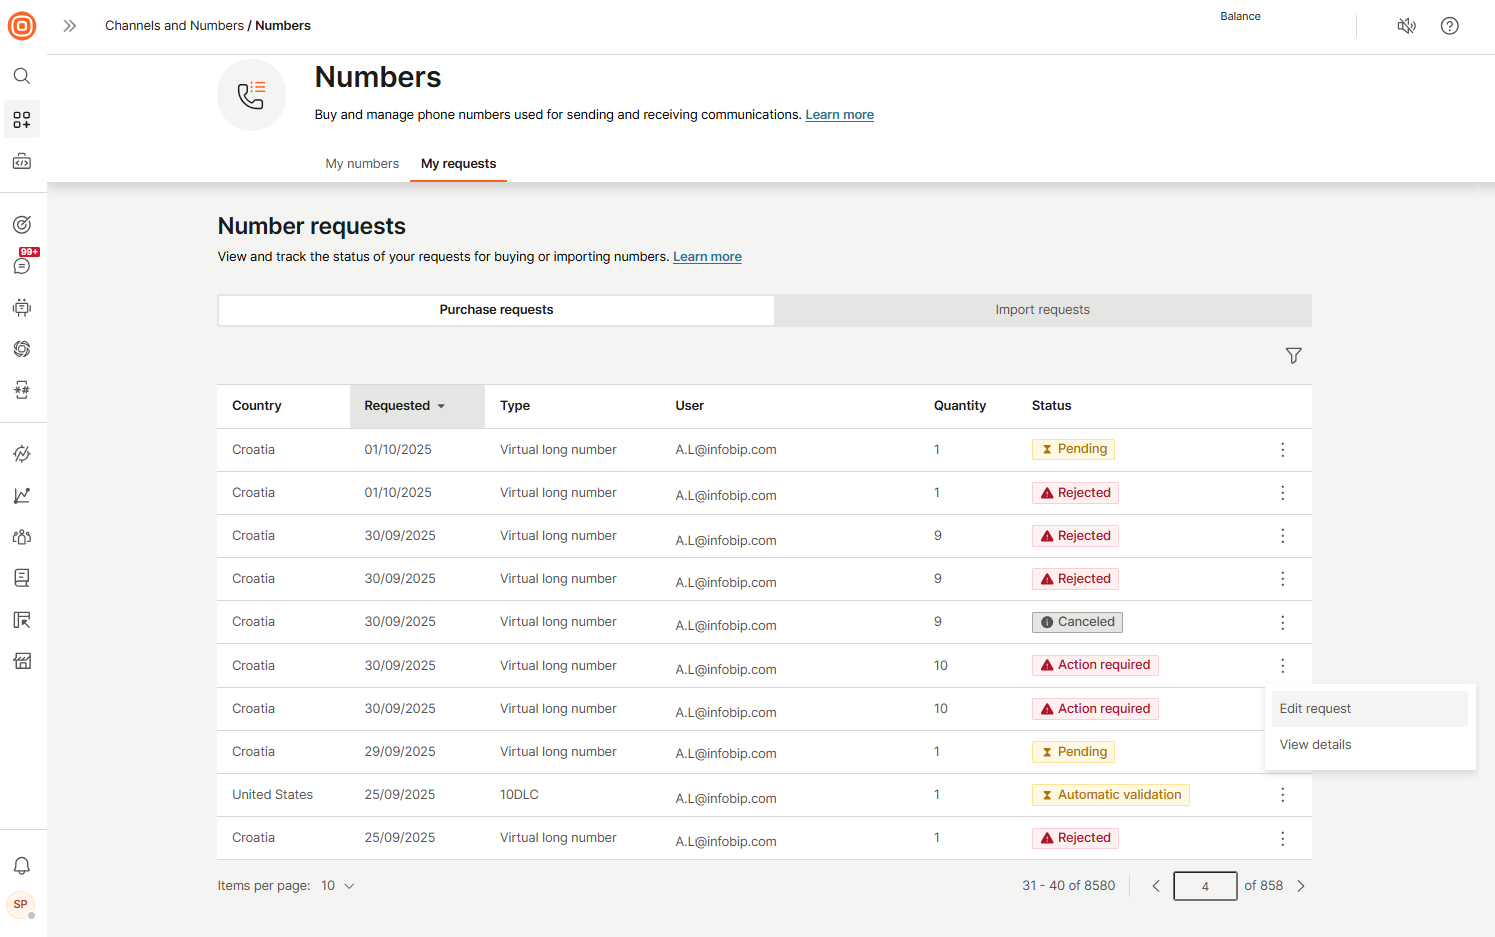
In the Purchase requests tab, you can view all your number purchase requests, track their progress, and edit requests depending on their current status. You can filter the requests by Request status.
The list includes details such as country, request date, type, user, quantity, and status for each number purchase request.

Edit a purchase request
When a purchase request is in Action required status, the Edit request option is available only for Alphanumeric sender requests from the My requests page. Use this option to provide the additional information requested by Infobip.
To edit a purchase request in Action required status:
- On the My requests page, find the purchase request you want to edit.
- Select the three-dot menu next to the request.
- Click Edit request.
- On the Edit number purchase request page, review the form. Missing or incorrect fields are highlighted in red. Enter the required information (for example, website, message example, contact number, email address, and more). Note: Core fields such as Country code and Capabilities cannot be edited.
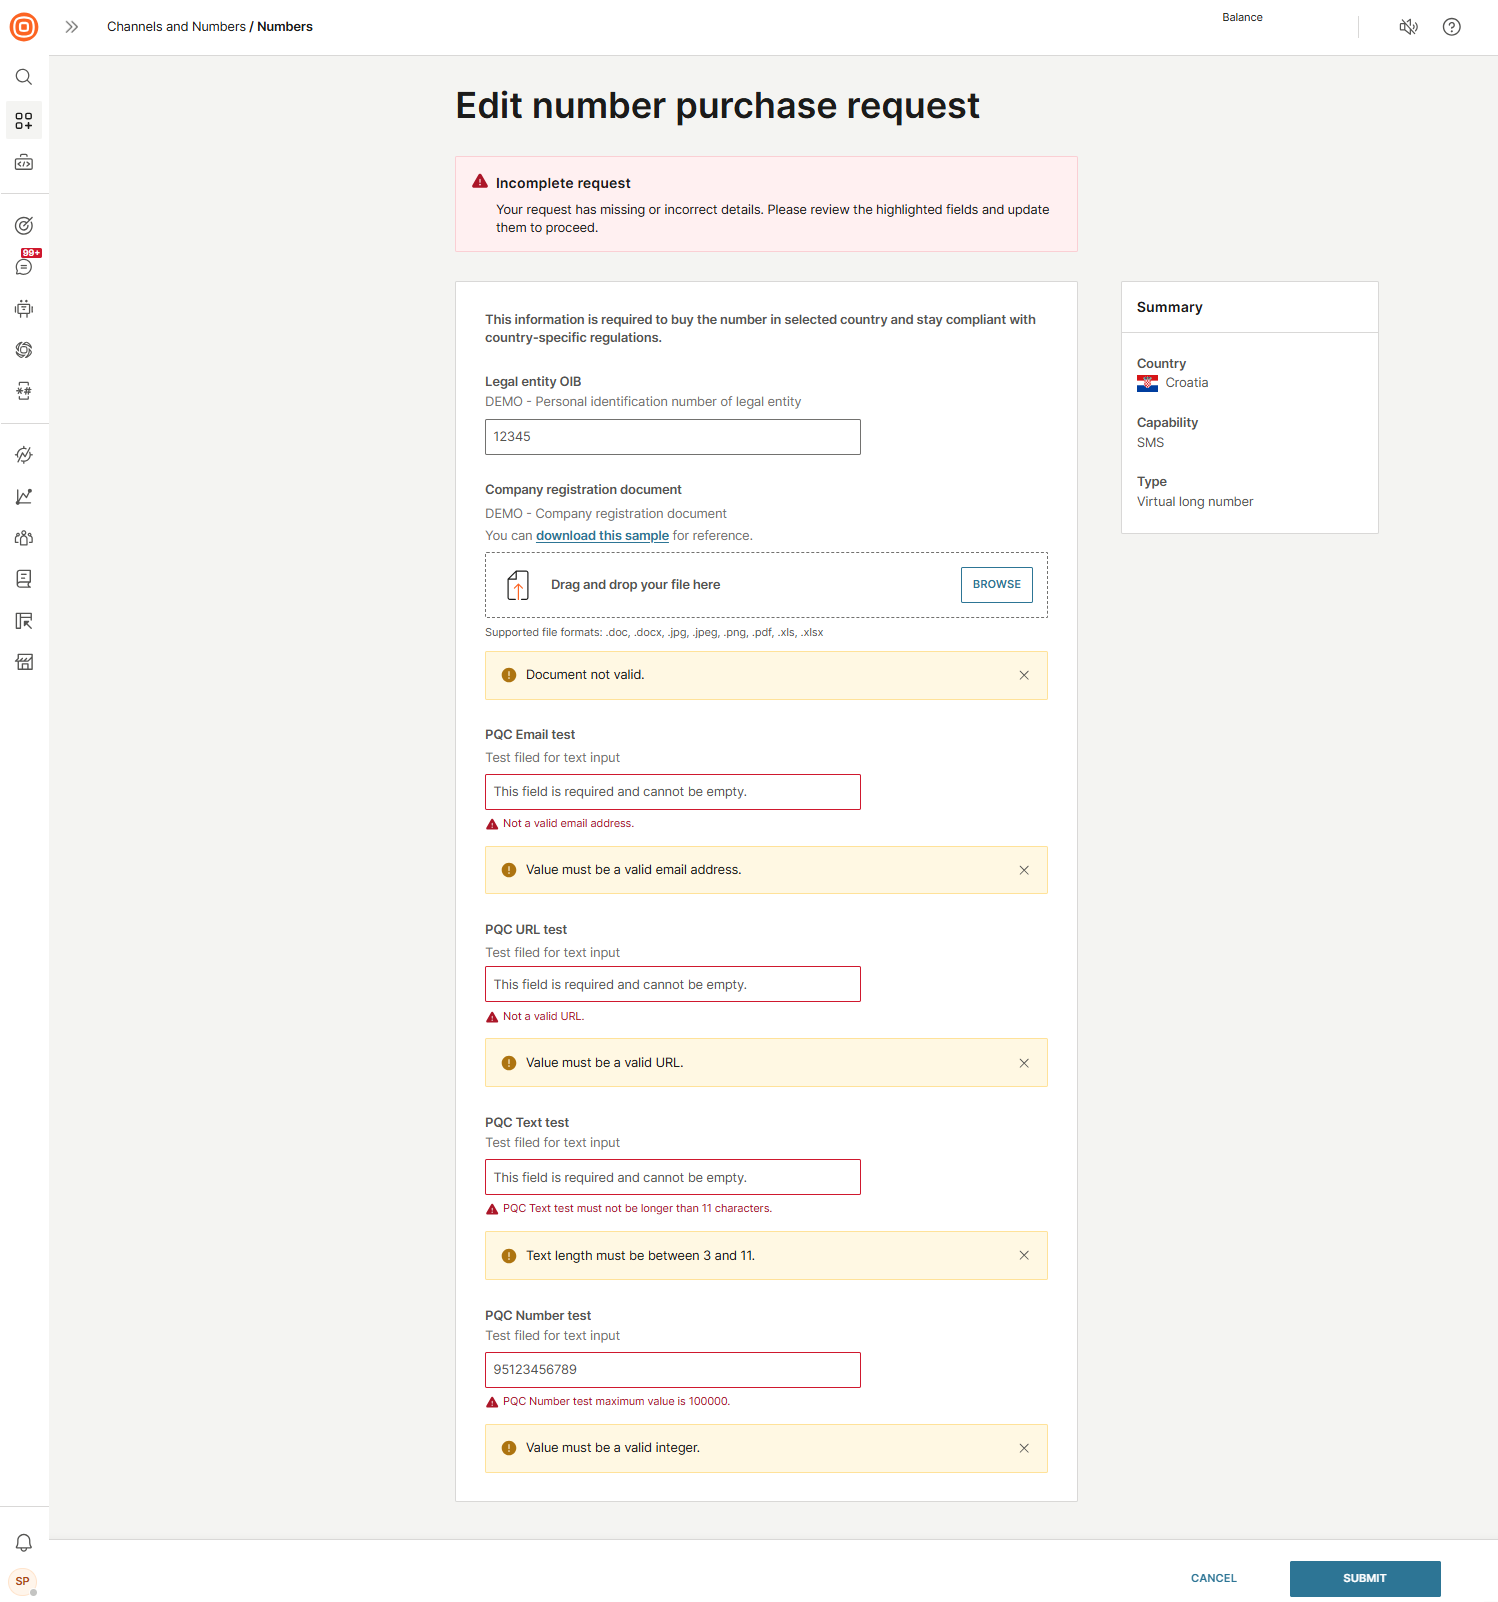
- Once all mandatory fields are completed, select Submit to send your updates.
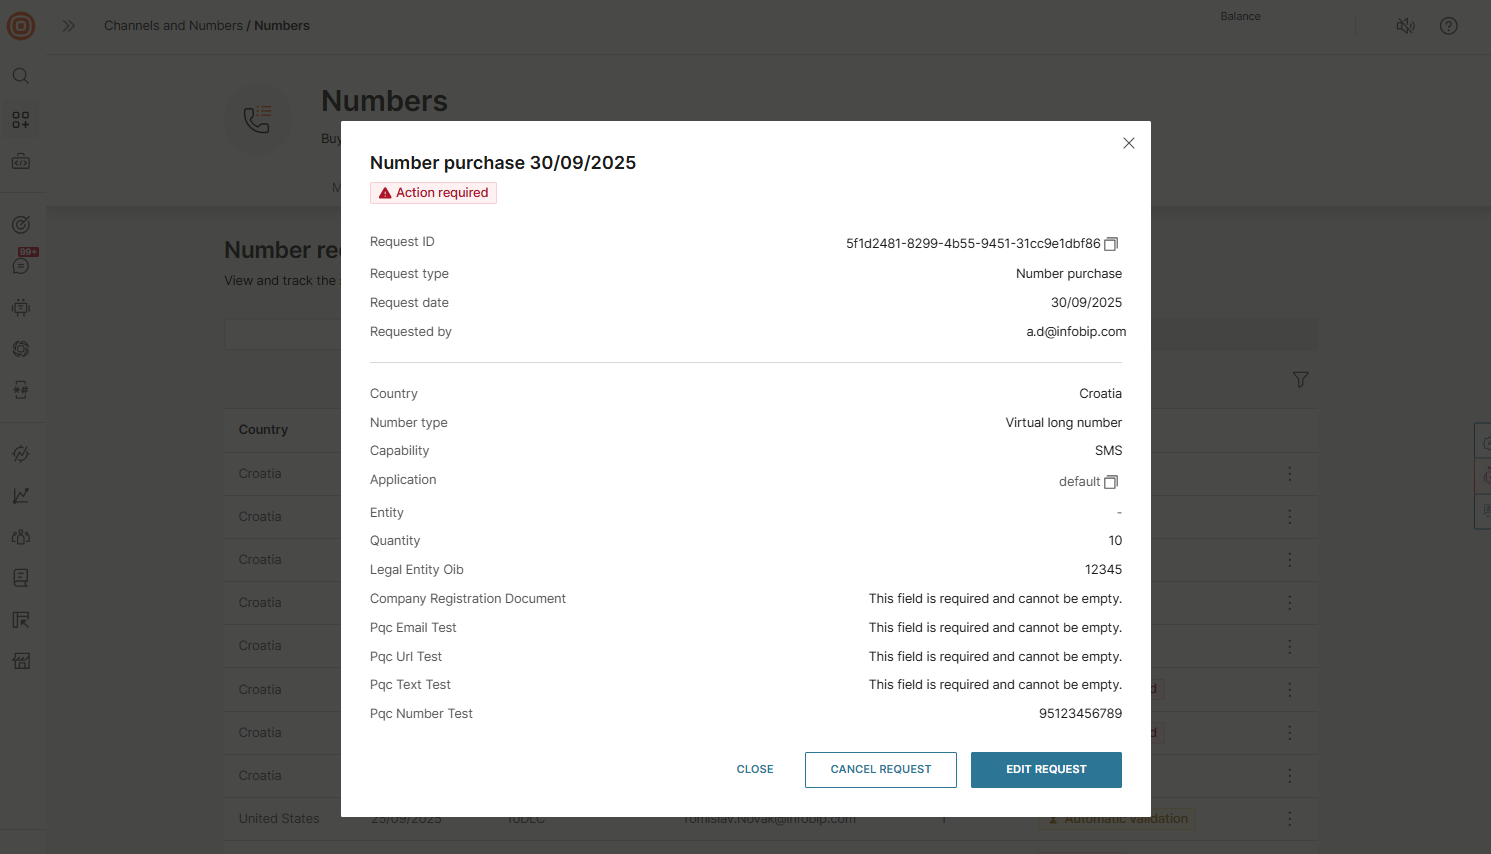
Cancel purchase request
You can cancel a purchase request only when it is in the Action required status.
To cancel a purchase request:
- On the My requests page, find the request you want to cancel and select the three-dot menu.
- Select View details.
- Select Cancel request and confirm your action.
Learn more about Managing requests.
Import numbers over web interface [#import-numbers-over-web-interface-numbers-over-web-interface]
To request a number import:
- Go to Channels and Numbers > Numbers
- Click Import number.
- Select the number details.
- Country
- Number Capability
- Number type
- Information on whether the number is actively used and requires traffic migration
- Select the numbers.
- a number or list of numbers you want to import. they should match the criteria provided in the previous step
- Select the Evidence of ownership
- LOA or receipt, as evidence that you are allowed to use the numbers you've listed
- up to 3 files are supported
When you have submitted your request, you can view your requests from the My requests tab and track the status of your numbers.
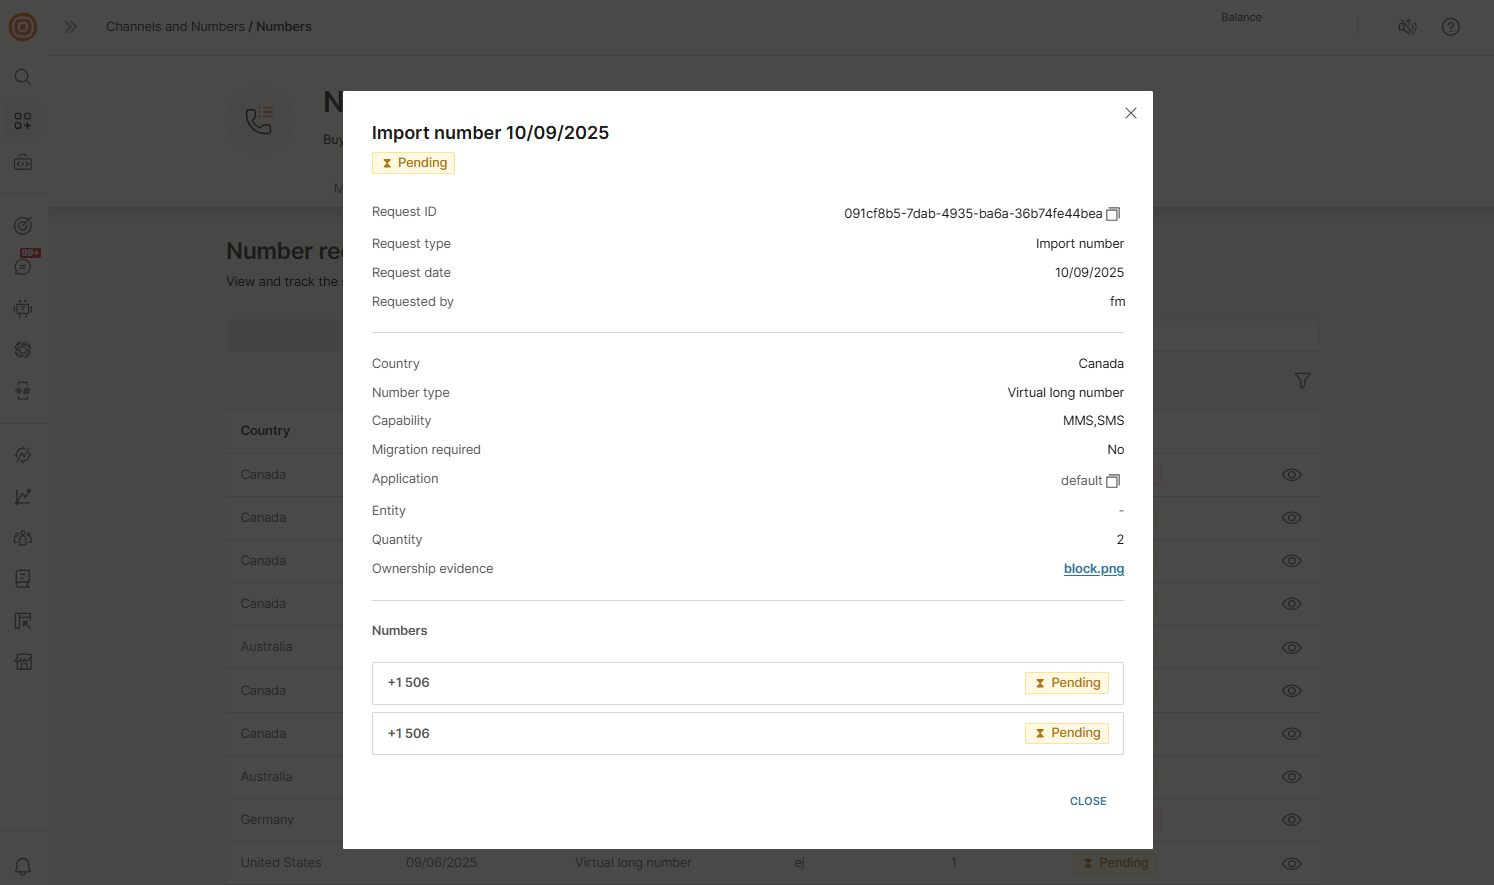
Import requests
In the Import requests tab, you can view all your number import requests, check their details, and track their progress.
The list includes details such as country, request date, type, user, quantity, and status for each number import request.
The requests can be filtered by both Request status and User.
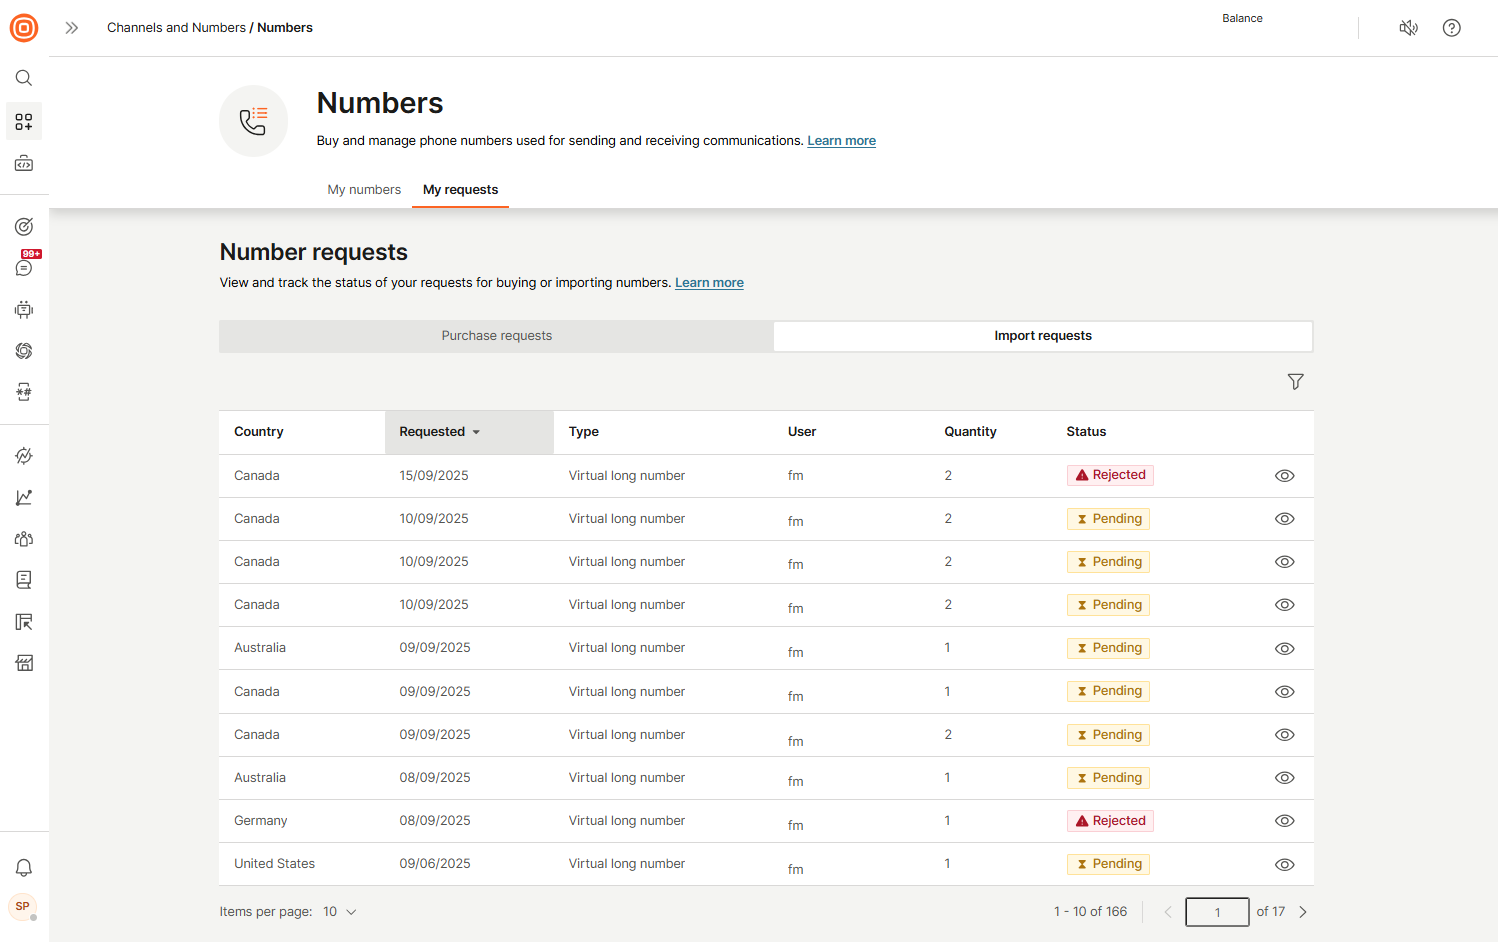
Additionally, selecting the eye icon next to a request opens a pop-up window with all import request details.
Learn more about Managing requests.
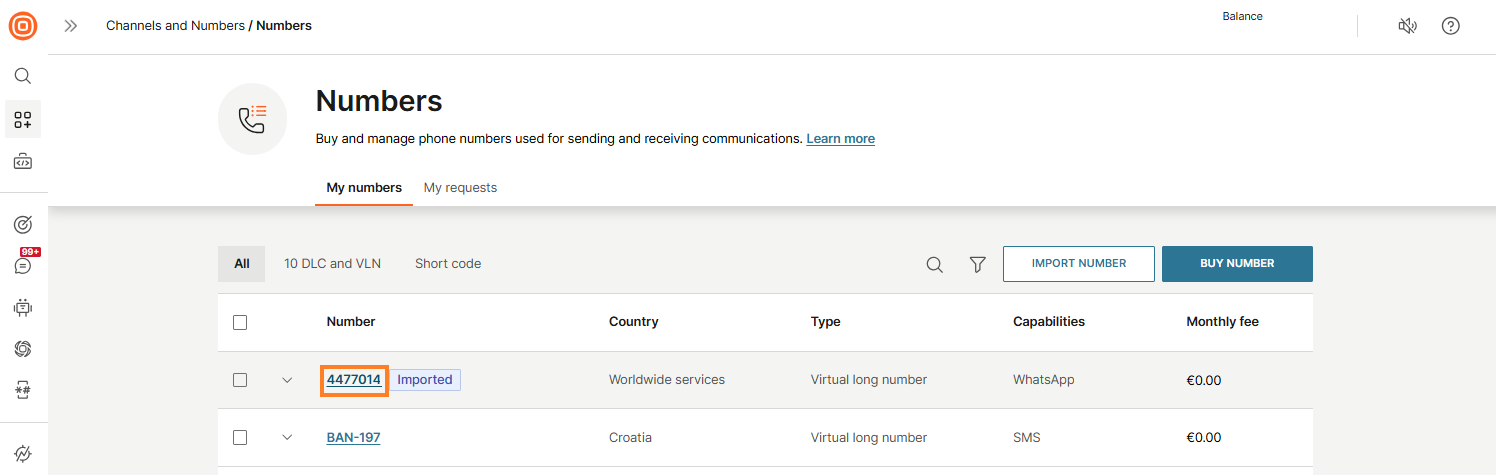
Manage your numbers over web interface [#managing-your-numbers-over-web-interface-numbers-over-web-interface]
To configure a number:
- Go to Channels and Numbers> Numbers.
- Find the number that you want to edit. To configure the numbers in bulk, you can choose several or all numbers. Select the checkbox to select all or select specific numbers.
- When you click the number, you enter number details view. You see a General tab, as well as tabs for your number's capabilities.
To see all the possible actions you can set, see Actions and Keywords.
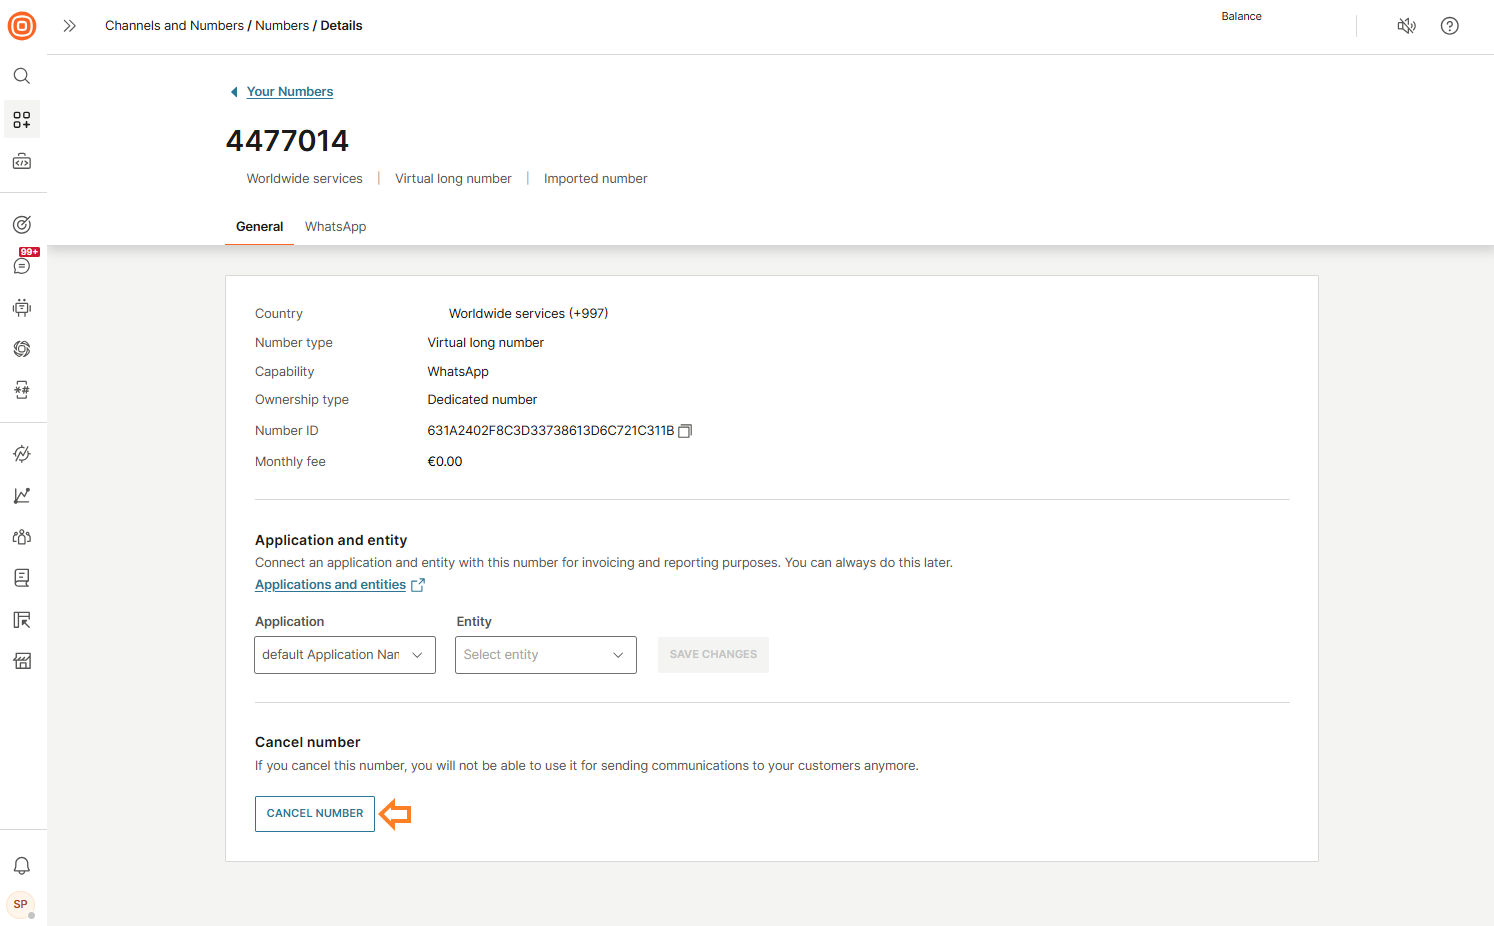
Cancel numbers over web interface [#cancelling-numbers-over-web-interface-numbers-over-web-interface]
When you no longer need a number and you want to stop receiving inbound traffic, you can cancel it.
When a number has been cancelled, you can no longer use it in communications, all future messages are not associated with your account, and future fees for that number in your account are discontinued.
To cancel a number:
- Go to Channels and Numbers > Numbers.
- Find the number you want to cancel and click it.
- Enter the number details view, and click Cancel.
Numbers over API
The following instructions describe how to buy or order numbers, and import, manage, and cancel numbers over API.
Buy numbers over API [#buy-or-order-numbers-over-api-numbers-over-api]
You can buy or request your numbers over the API without ever using the web interface. This allows you to automate the process when needed.
To buy a number over the API, use the Submit resource request endpoint in the Resource Request API.
Additionally, you can use the Update resource request endpoint to modify an existing resource request that is in the UPDATE_REQUIRED or UPDATE_REQUIRED_BY_INTERNAL_REVIEWER status. This applies only to alphanumeric registration and number purchase requests. Note that all required data must be included in the update, not only the changed fields.
You can also use the existing Purchase numbers in the Numbers API.
Cancel numbers over API [#cancelling-numbers-over-api-numbers-over-api]
To cancel a number over the API, use Numbers API documentation.
Configure your inbound messages over API
To configure your inbound messages over API, use the Resource Management in the Resources API.
To see all the possible actions you can set, see Actions and Keywords.
List resources and Lookup coverage over API
To request more information on your resource configurations, use the Resource Management API.
For example, to lookup the coverage for a resource, use Lookup coverage for a resource and to list all the resources, including senders and usable numbers, use List resources.
Manage Voice numbers over API [#managing-your-numbers-over-api-numbers-over-api]
To set up Voice numbers over API, use Numbers Management in the Numbers API.
Billing
There are two expenses that you can expect when buying a number—set-up fee and monthly fee. In some cases, for example in the US, there could also be regulatory fees.
- Set-up fee is a one-time fee billed when you buy a number
- Monthly fee is a recurring fee, charged every 5th day of the month