Send RCS messages to end users
Rich communication services (RCS) offers advanced features such as sharing files and media, interactive buttons, and carousels. Use RCS to promote your products and services, send appointment reminders, send important service messages, and more.
This tutorial describes how to send the following message types to end users:
- Over Broadcast: Text message
- Over API: Text, PDF, Audio, Video, Card, and Carousel messages
Customize the examples in the tutorial for other message types.
Products and channels [#products-channels]
Prerequisites
-
Infobip account with RCS enabled. Contact your Infobip account manager regarding the number of assigned free credits/RCS messages.
Broadcast is enabled by default with your Infobip account.
If you do not have an account, create a free trial account and select the RCS channel on the welcome screen.
-
Infobip API key with the
rcs:message:sendscope.For information about creating an API key with the required scope, refer to API authorization.
-
HTTP client. This tutorial uses curl. Alternatively, you can choose the official Infobip SDK for the required programming language.
-
RCS agent or sender must be configured and launched on the mobile network/carrier in which you want to check the RCS capability of destination phone numbers.
If the agent or sender is not launched on the network, the capability check request always returns a negative status for the destination phone numbers.
To launch the sender or to configure a custom RCS sender, contact your Infobip account manager.
-
A destination phone number to which you can send the RCS message.
If the RCS agent is not launched, you can only send messages to safelisted phone numbers.
Implementation over the Infobip web interface [#implementation-over-web-interface]
Safelist a phone number [#safelist-web-interface]
This feature is in Early access phase. For more information, contact your Infobip account manager.
-
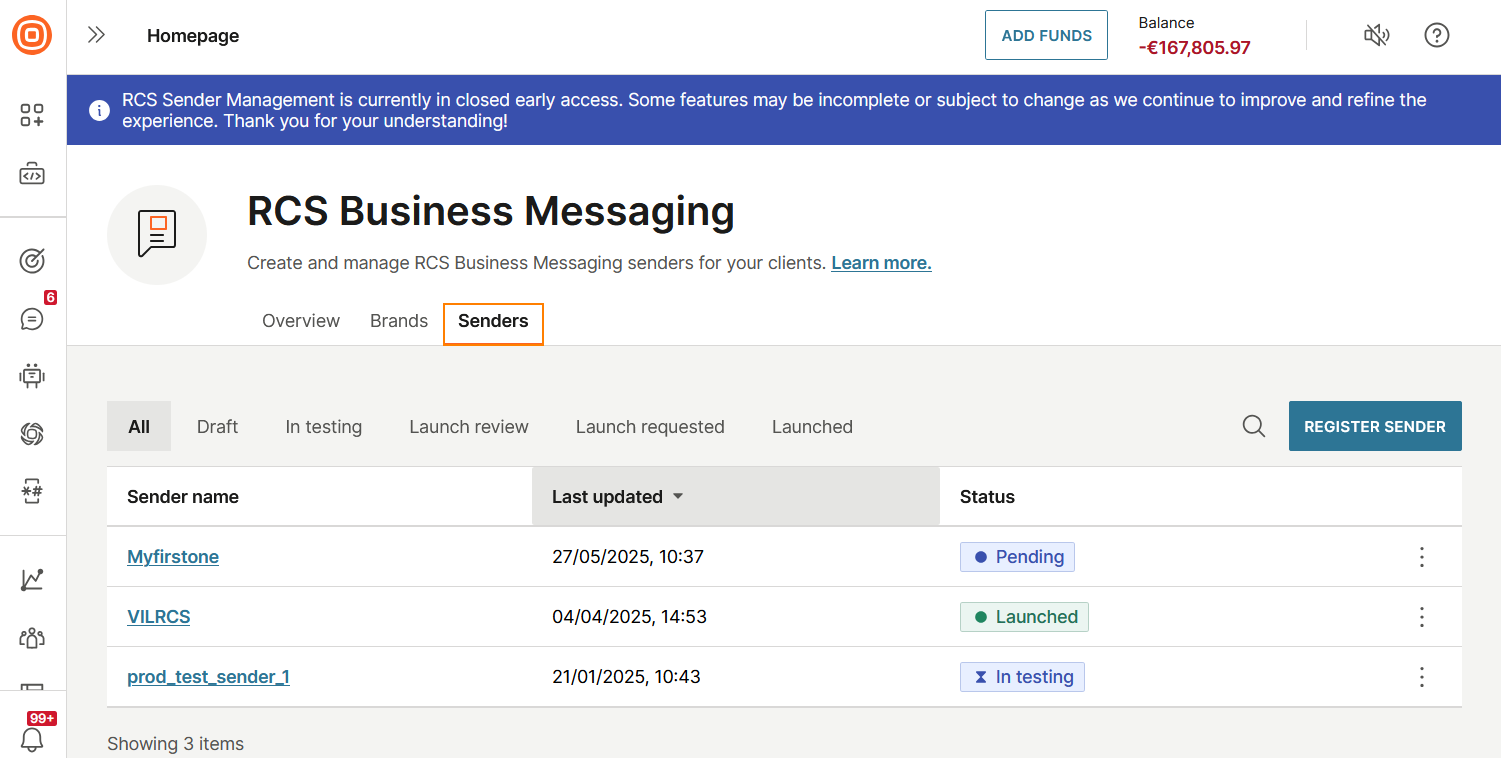
On the Infobip web interface, go to Channels and numbers > Channels > RCS Business Messaging > Senders tab.
A list of all RCS senders for your account and their statuses is displayed.
-
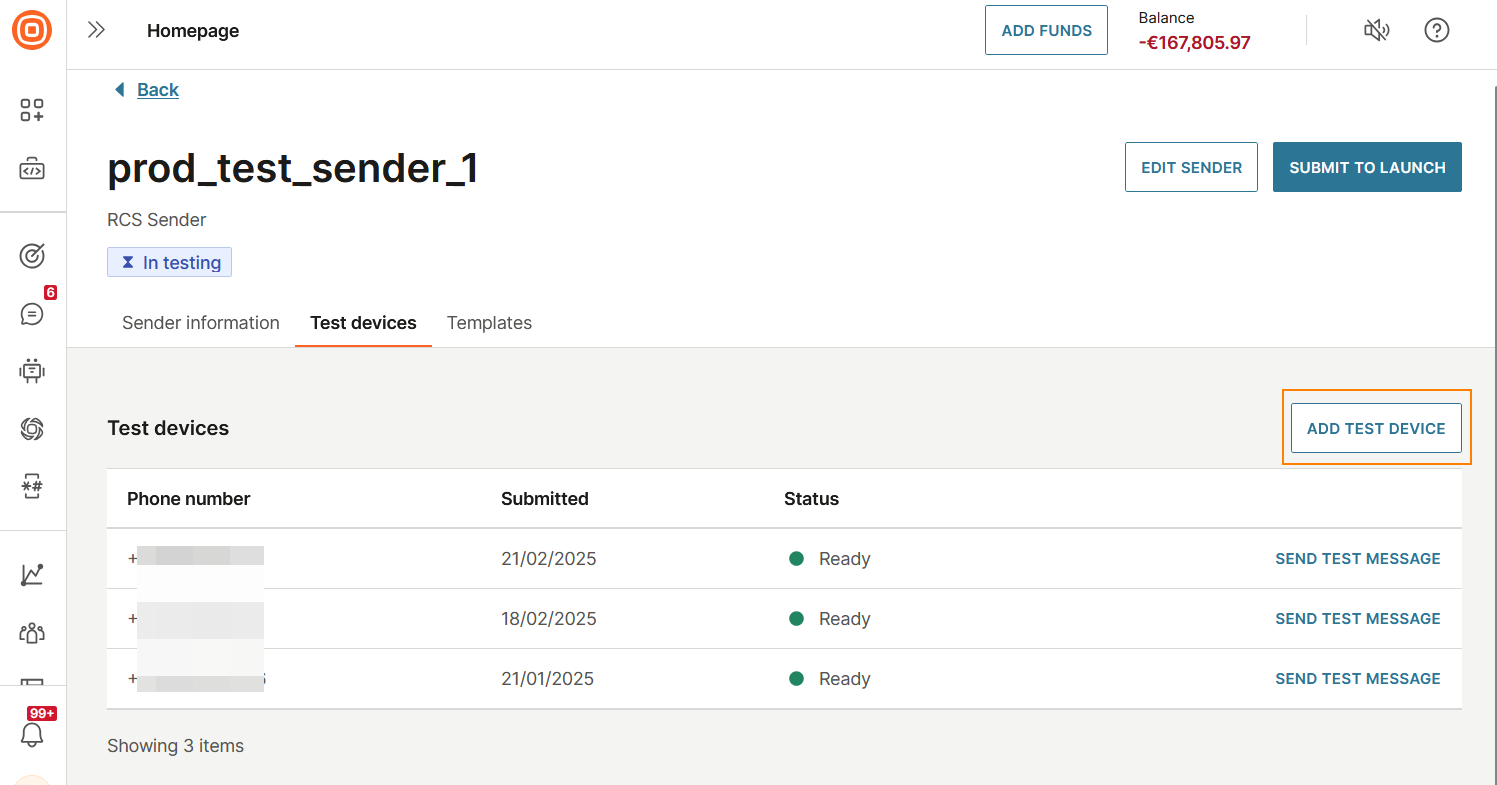
Select the sender that you want to use to send messages.

-
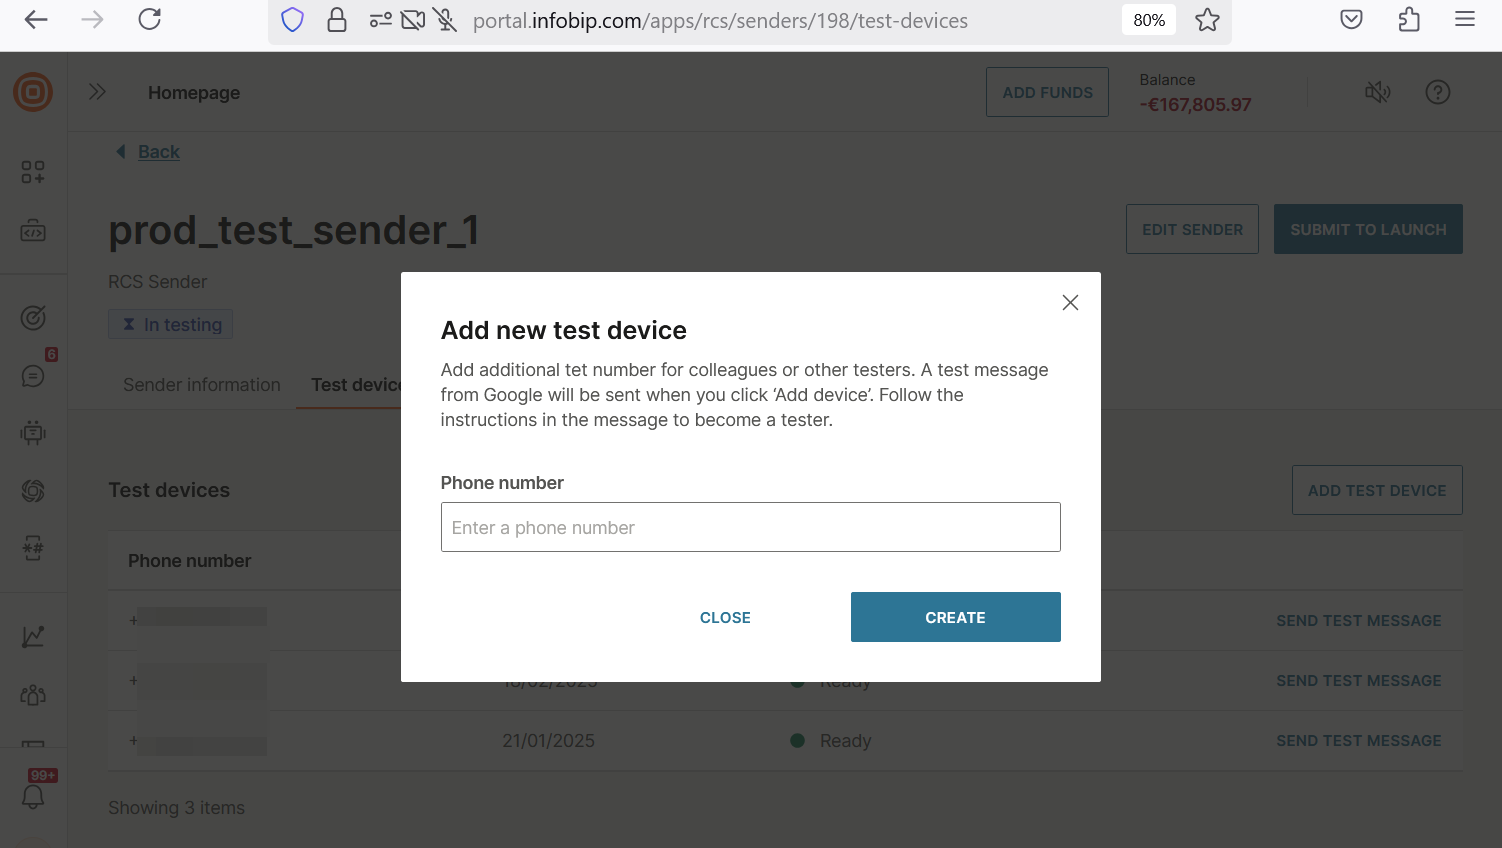
In the Test devices tab, select Add test device.
-
Enter the phone number in international format with country prefix.
-
Select Create.
The new number is in Pending status until the tester's invitation is accepted.
When the number is accepted, the status is displayed as Ready. You are now ready to send your first test RCS message.
Send an RCS message over Broadcast
-
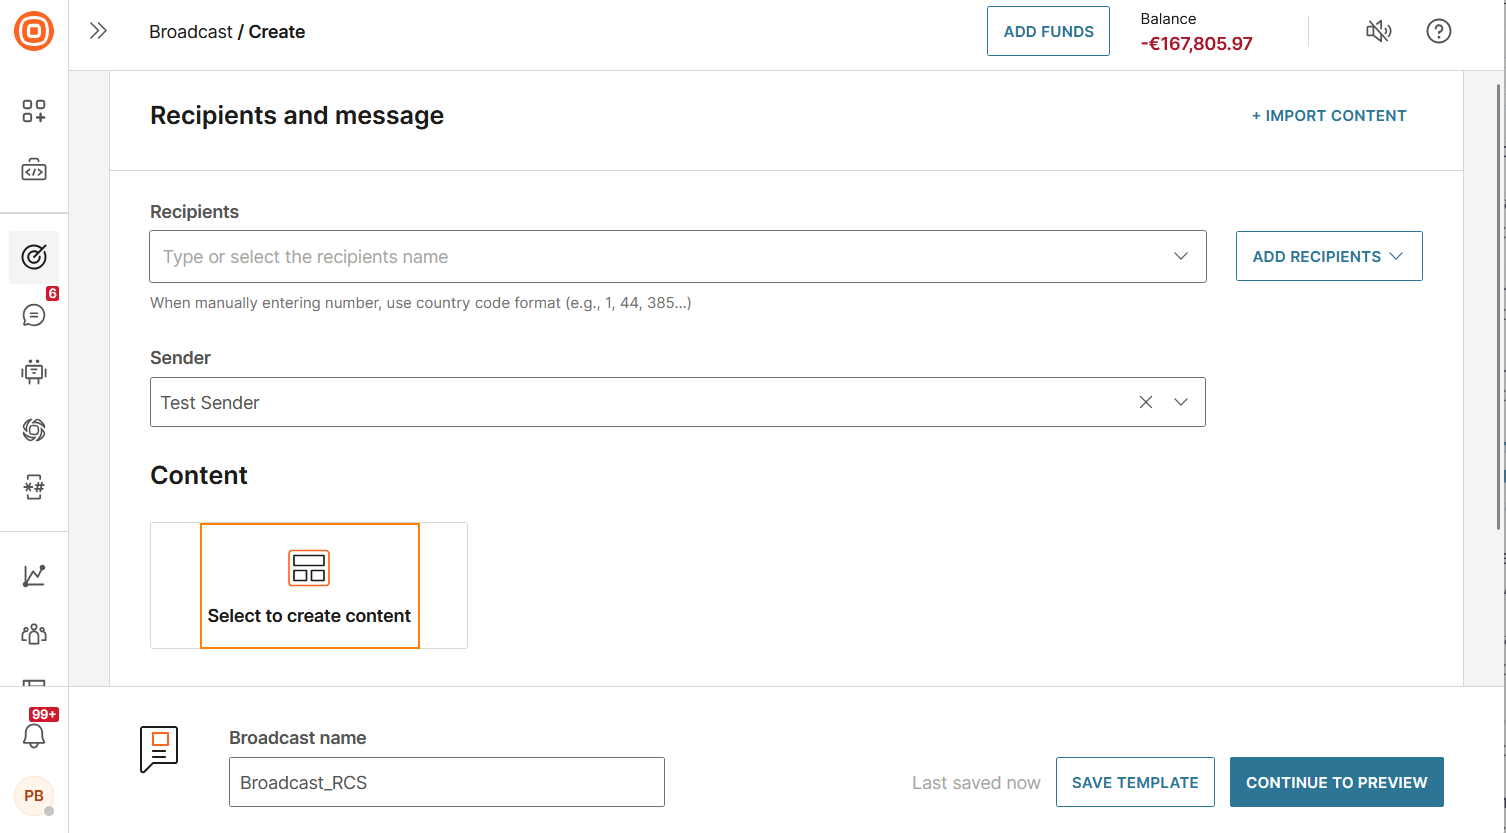
On the Infobip web interface, go to Moments > Broadcasts.
-
Select Create broadcast.
-
Select RCS as the channel.
-
Configure the Recipients and Sender fields.
-
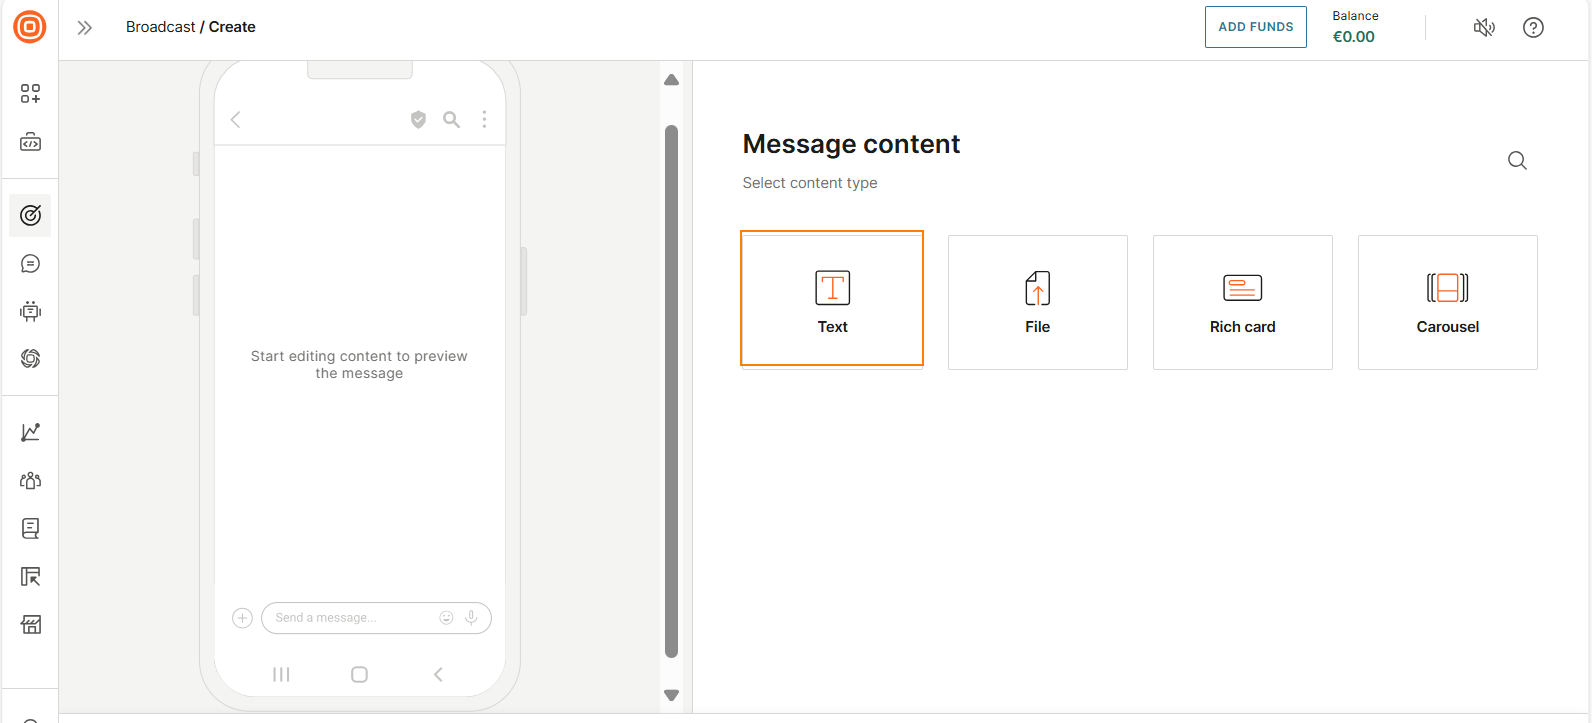
Select to create content.
-
Select the type of message to send. This tutorial uses Text message type.
-
Enter the message content.
-
Select Done designing.
-
Configure the other fields in the broadcast as required.
-
Check all the fields and rename the broadcast if required.
-
Select Continue to preview.
-
Check the preview and make sure that all the information is correct.
-
Select Launch.
To see the broadcast, go to Moments > Broadcasts.
Implementation over API [#implementation-over-api]
When sending an RCS message over API, the URL of the resource must start with either http:// or https://.
The maximum supported file size is 100 MB.
Safelist a phone number [#safelist-api]
This feature is in Early access phase. For more information, contact your Infobip account manager.
How to safelist the phone number
-
In the RCS Service management APIs, use the following code:
json1curl -X POST https://api.infobip.com/rcs/1/senders/{senderName}/test-numbers \2-H 'Authorization: App {YOUR_API_KEY}'\3-H 'Content-Type: application/json' \4{5 "testNumber": "YOUR_DESTINATION"6}If the API request is successful, you will receive a response with a
200 OKstatus that contains asenderName,testNumber, andrequestStatus.json1curl -X POST https://api.infobip.com/rcs/1/senders/{senderName}/test-numbers \2-H 'Authorization: App {YOUR_API_KEY}'\3-H 'Content-Type: application/json' \4{5 "senderName": "YOUR_SENDER",6 "testNumber": "YOUR_DESTINATION",7 "requestStatus": "PENDING"8} -
To check the request status for the RCS test number, either use a GET request or receive the status on the webhook.
GET request:
json1curl -X POST https://api.infobip.com/rcs/1/senders/{senderName}/test-numbers/{testNumber}/request-status \2-H 'Authorization: App {YOUR_API_KEY}'\3-H 'Content-Type: application/json'If the API request is successful, you will receive a response with a
200 OKstatus.json1{2 "senderName": "YOUR_SENDER",3 "testNumber": "YOUR_DESTINATION",4 "requestStatus": "COMPLETED",5 "completedAt": "2025-05-09T08:17:01.514+0000",6 "errors": []7}
You can now send your first test RCS message.
Request and Test number status
The following requestStatus are available:
- PENDING: Request is accepted and is in progress.
- REJECTED: Request is rejected. An error occurred when processing the request.
- COMPLETED: Request is successfully completed.
The following testNumberStatus are available:
- WAITING_FOR_TESTER_ACCEPTANCE: Waiting for the user to accept the request to become a tester.
- APPROVED: User has accepted to become a tester. Test messages can be sent to that number.
- EXPIRED: If the user does not accept the invitation within 24 hours, the status of the test number is changed to EXPIRED.
- UNSUPPORTED: Test number is not supported for RCS traffic.
- FAILED: Failed because an internal service error occurred when processing the request. Contact the Infobip Support team.
Supported content types [#supported-content-types-api]
The RCS APIs support the following content types:
- image/jpeg
- image/jpg
- image/gif
- image/png
- audio/aac
- audio/mp3
- audio/mpeg
- audio/mpg
- audio/mp4
- audio/mp4-latm
- audio/3gpp
- application/ogg
- audio/ogg
- video/h263
- video/m4v
- video/mp4
- video/mpeg
- video/mpeg4
- video/webm
- application/pdf
Send a Text message [#send-text-api]
Use the following request:
If the API request is successful, you will receive a response with a 200 OK status that contains a bulk ID, message ID, status, and destination.
Send a File message (PDF) [#send-file-api]
Use the following request:
If the API request is successful, you will receive a response with a 200 OK status that contains a bulk ID, message ID, status, and destination.
Send a File message (Audio) [#send-audio-api]
Use the following request:
If the API request is successful, you will receive a response with a 200 OK status that contains a bulk ID, message ID, status, and destination.
Send a File message (Video) [#send-video-api]
Use the following request:
If the API request is successful, you will receive a response with a 200 OK status that contains a bulk ID, message ID, status, and destination.
Send a Card message [#send-card-api]
Use the following request:
If the API request is successful, you will receive a response with a 200 OK status that contains a bulk ID, message ID, status, and destination.
Send a Carousel message [#send-carousel-api]
Use the following request:
If the API request is successful, you will receive a response with a 200 OK status that contains a bulk ID, message ID, status, and destination.
Additional resources [#additional-resources]
- RCS API reference documentation
- Subscriptions management API documentation
- RCS documentation
- Broadcast documentation
- Response status and error codes documentation
- Broadcast on the Infobip web interface
- Infobip SDK documentation