Activate an Account or Service Using Chatbots
Allow customers to use trained chatbots to activate or sign up for different services.
In this tutorial, we've set up a credit card activation customer journey that can easily be extended and applied across multiple scenarios.
Solutions used in this tutorial are Answers, Conversations, and Messenger, however, any communication channels available over these solutions can be used.
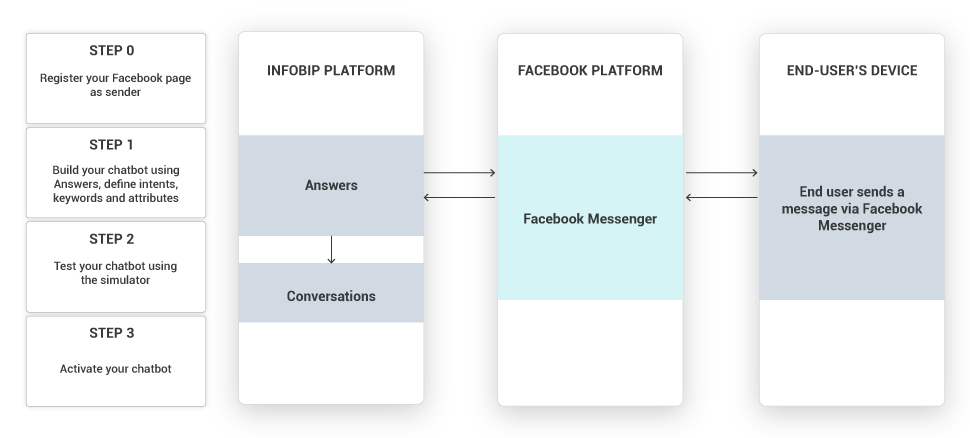
Process Workflow
Before Getting Started
To get started with this tutorial, you must have an Infobip account. Log in or sign up for an account.
Prerequisites
To recreate this use case, you’ll need the following enabled and set up:
- Have an official Facebook page set up
- Enable and set up Messenger
- Enable Answers as module
- An Answers chatbot
Implementation Steps
This tutorial can be implemented using the Infobip web interface.
- Create a new chatbot and select Messenger as your communication channel. Set your sender in this case as your official Facebook page.
- In this tutorial, we are going to focus on the chatbot dialogs to enable verification. This means you'll already need to have your keywords, attributes, and intents already set up.
- Use the default dialog to receive all incoming messages. Add the Text element to introduce the chatbot and then add the Button element to let end users select a pre-configured option.
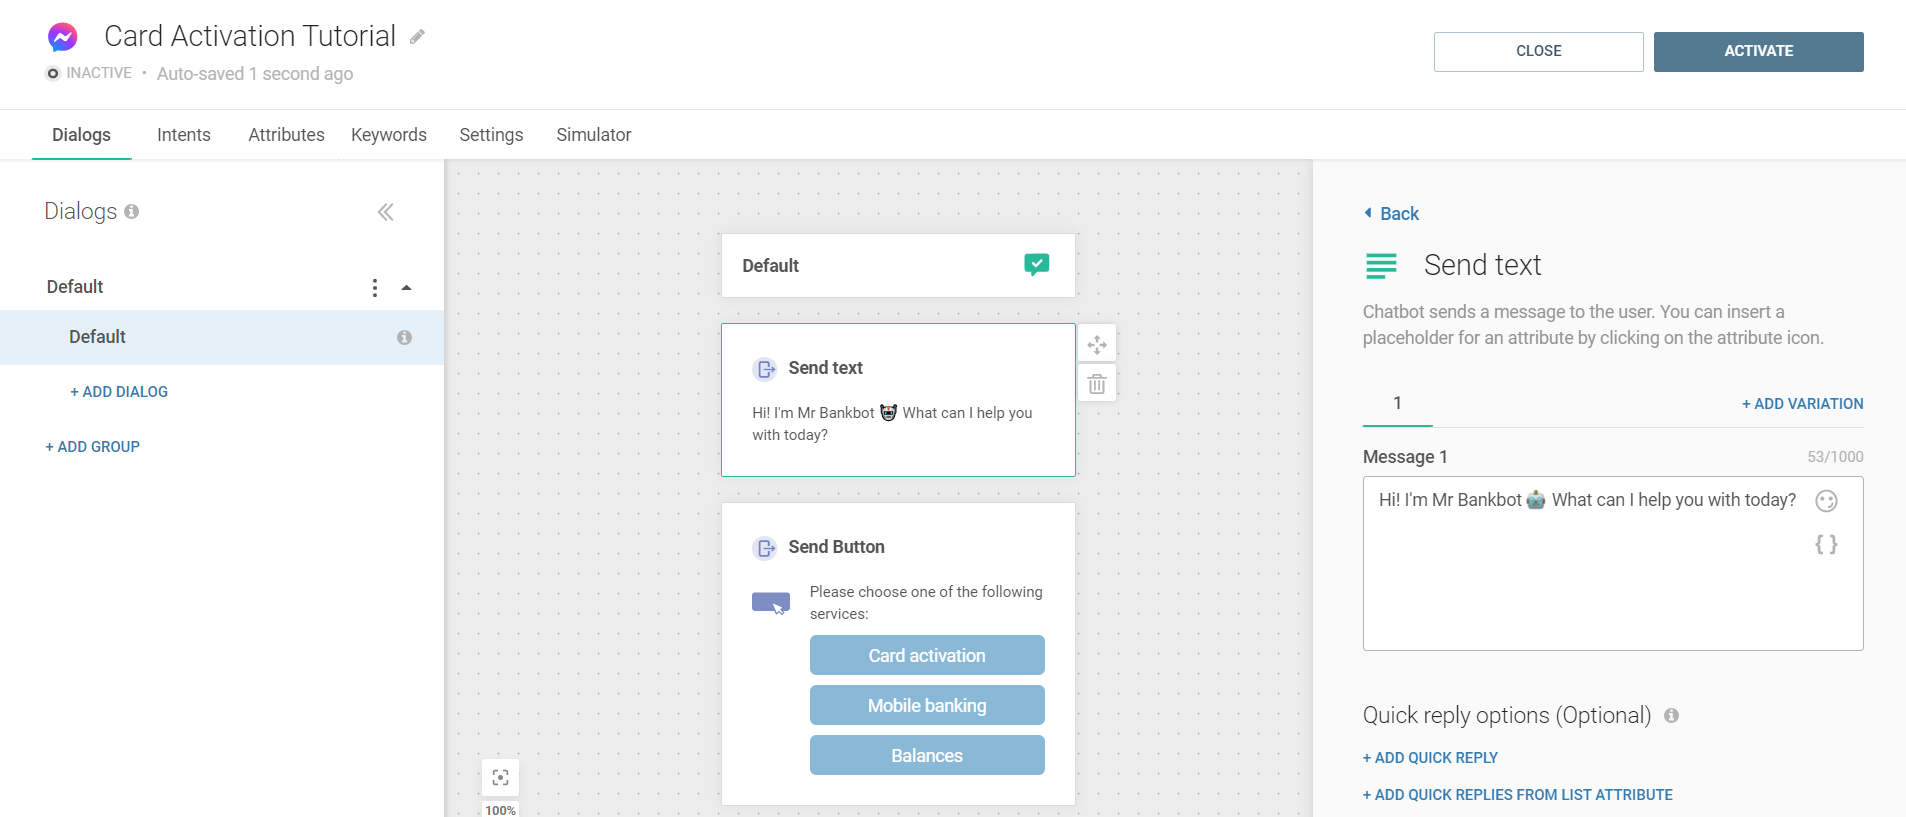
- Configure the Button element with postback actions so that the chatbot can interpret them as keywords to route users to the next dialog.
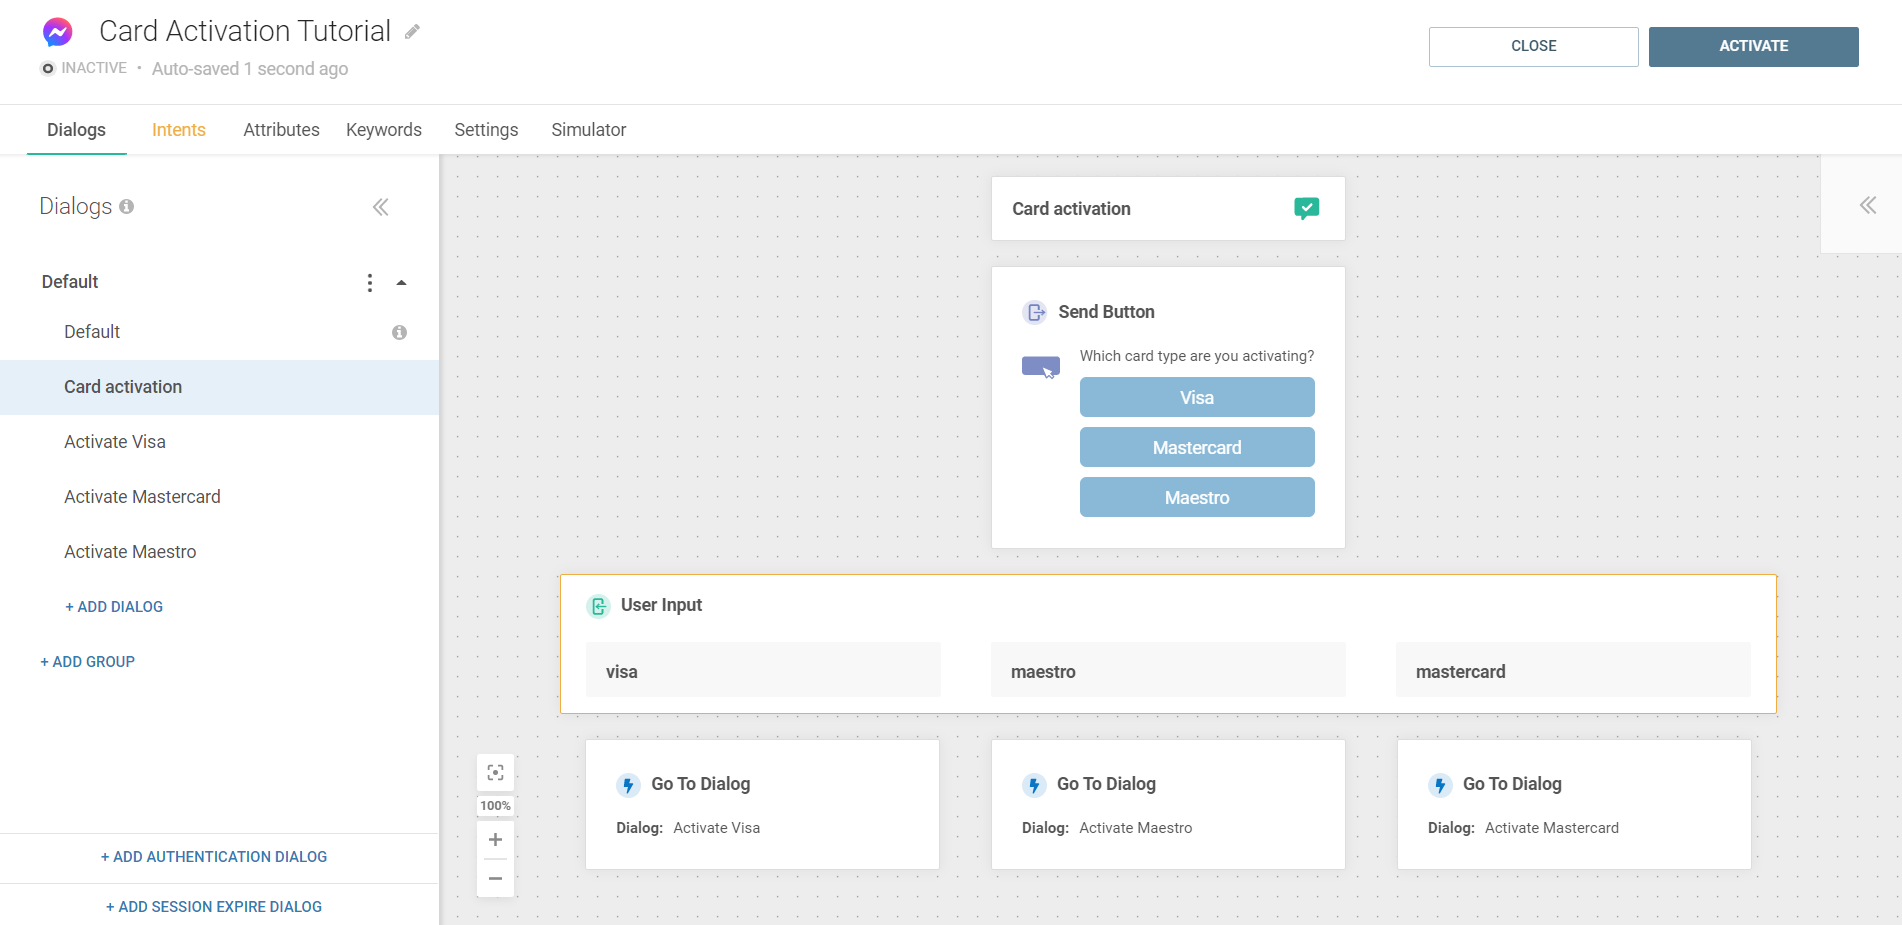
- Then configure your next dialog so that end users can select which card type they are activating, after selecting they will be redirected to an activation page.
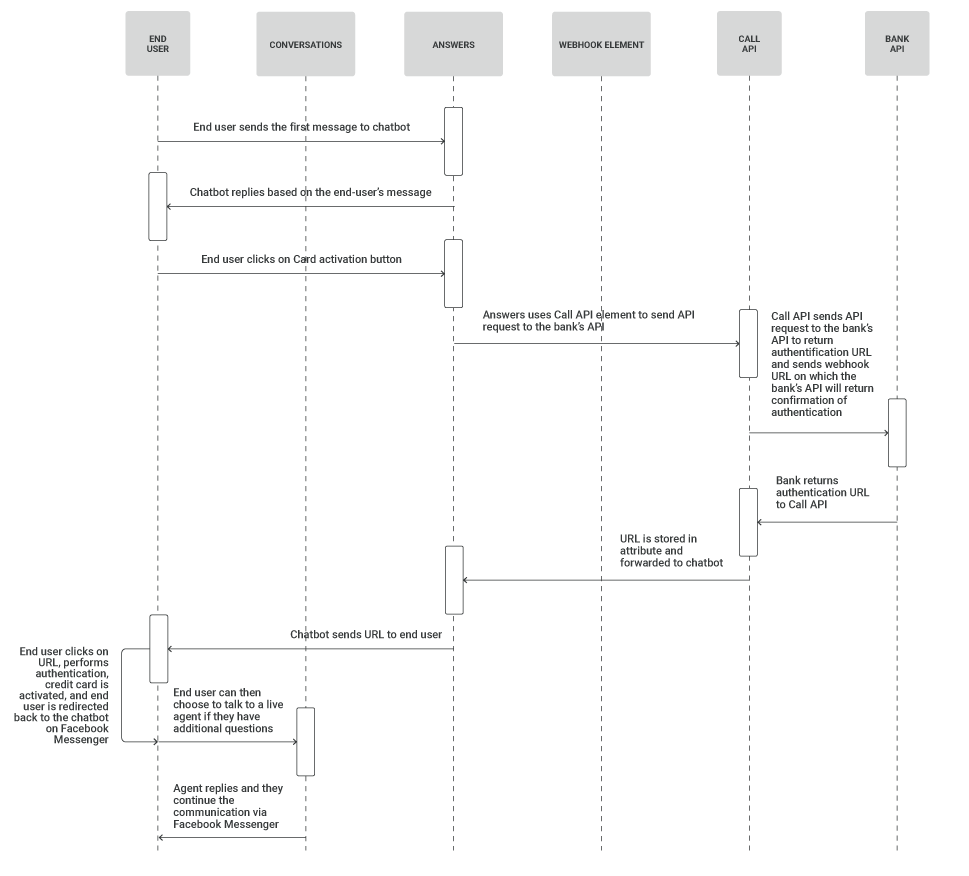
- Now it's time to add the authorization step. Add the API element to send the webhook URL. The bank will notify you once the authorization is initiated.

- Add the Text element to send the URL to the end user. This is the link through which they will authorize themselves with the bank.
- Add the Webhook element to receive the information on whether the authorization was successful.
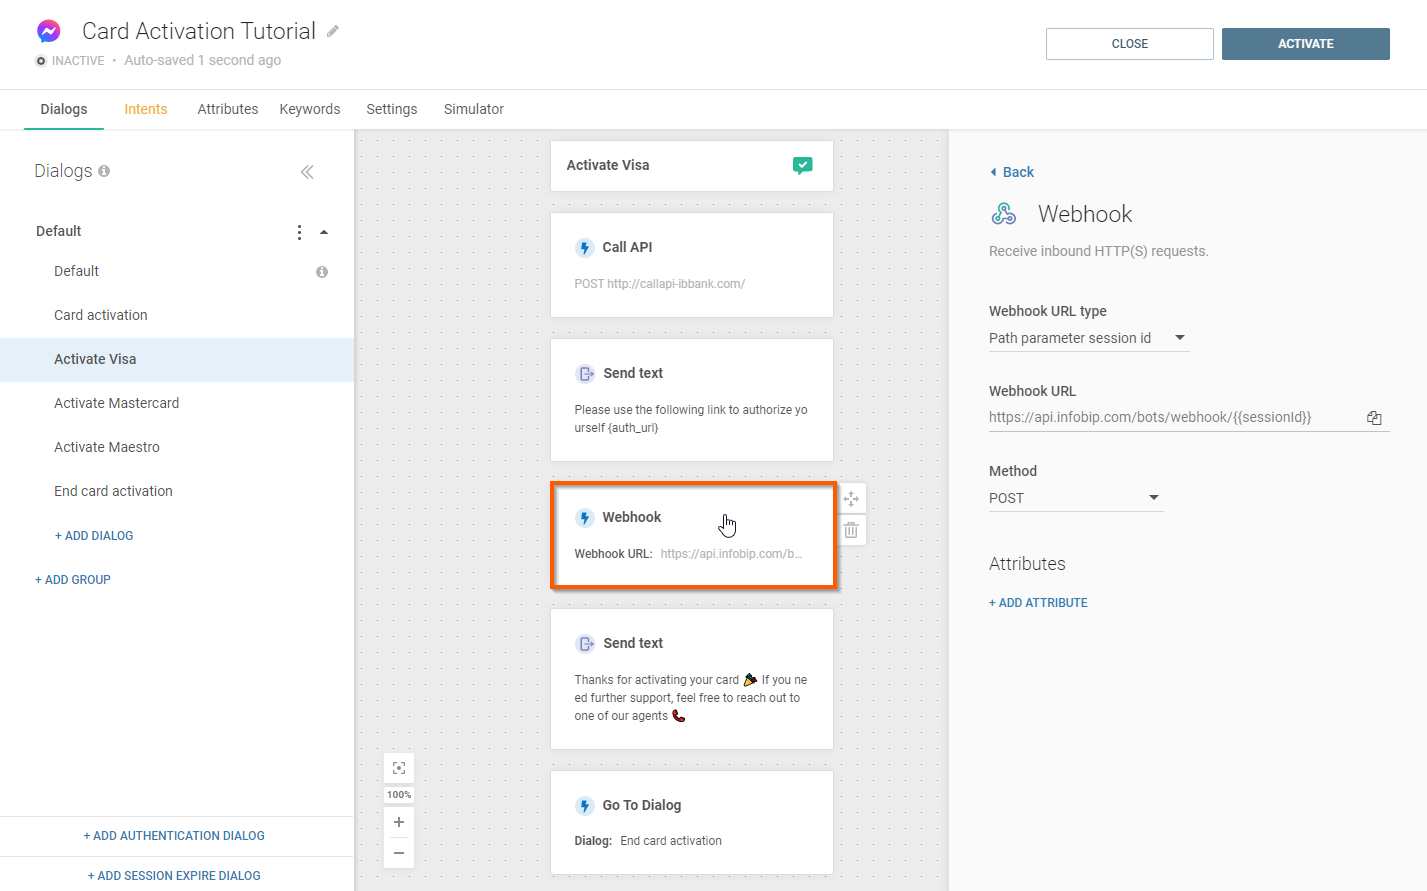
- Once authorized, add the Text element to notify the end user and route the dialog. For example, a thank you note, or offer them additional agent support using Conversations.
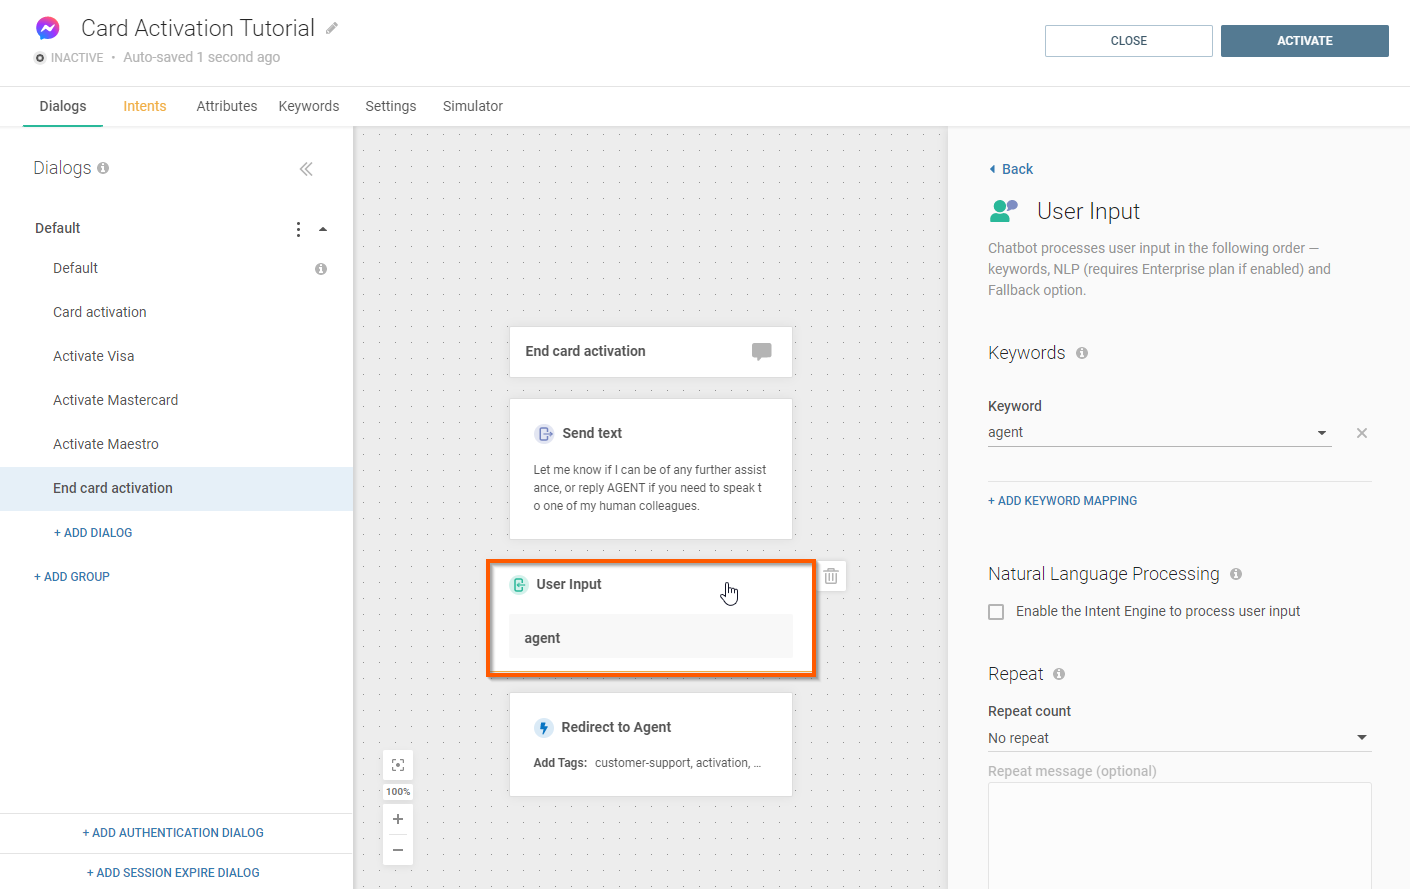
- To help you route the conversation to a specific quote (for example, a group of agents best equipped to help your end user), select the appropriate tags. For detailed information on how to manage queues, see Queues.