Send a notification to multiple channels
Some situations call for notifications on multiple channels, whether due to the urgency or importance of the information, like emergency alerts, appointments canceled on short notice, or failed billing. This tutorial will take you through building a minimal .NET Core project which sends a message to multiple channels and reads the delivery reports.
Prerequisites
- Infobip account. If you do not have one, you can easily register.
- .NET SDK installed.
- Node.js installed.
Implementation
Step 1: Use your API key and base URL [#step-1-use-your-api-key-and-base-url-implementation]
Head to Infobip and copy the auto-generated API key and your base URL. If there is no option to copy the API key, the new API key can be created with the message:send scope. For more information, read about API scopes here.
Step 2: Register Email single sender [#step-2-register-email-single-sender-implementation]
You can use your email address to register a sender. Complete the first step of Email onboarding on the Infobip account. Click the verification link sent to the provided email address.
Step 3: Initiate a conversation via WhatsApp and Viber [#step-3-initiate-a-conversation-via-whatsapp-and-viber-implementation]
Send the first message to your phone number from the first step in WhatsApp on the Infobip account and respond to the message in the WhatsApp app. Note that there is a 24-hour window for sending any message content. For more information, read about initiating a conversation on WhatsApp.
Do the same for Viber - send the first message from the Infobip account and respond using the Viber app.
Step 4: Create an ASP.NET Core project [#step-4-create-an-asp-net-core-project-implementation]
Either use your project or start from scratch with the minimal API tutorial.
Step 5: Create a client for Infobip API [#step-5-create-a-client-for-infobip-api-implementation]
First, create a client that can request the messages-api endpoint. For that purpose, define HttpClient. The copied API key will be added to the headers via DefaultRequestHeaders.Authorization, and the base URL will be set as BaseAddress in the following format: https://your.api.infobip.com:
Next, define a new method that can invoke the messages endpoint via the previously defined infobipClient:
Step 6: Build a request [#step-6-build-a-request-implementation]
Valid request data is required to make a request. Define it for the Viber channel to start:
On the Infobip account, there is a page dedicated to all assigned Viber senders. During the free trial, you will have access to the assigned shared sender "DemoCompany" for testing Viber messages.
Edit the line with infobipClient to use the method defined earlier to build the request.
Step 7: Add endpoint for sending alerts and trigger it [#step-7-add-endpoints-for-sending-alerts-and-trigger-it-implementation]
Add an endpoint for invoking the method with the following logic:
After running the project, Swagger UI will open in your default browser, where you will be able to execute the /alerts endpoint:
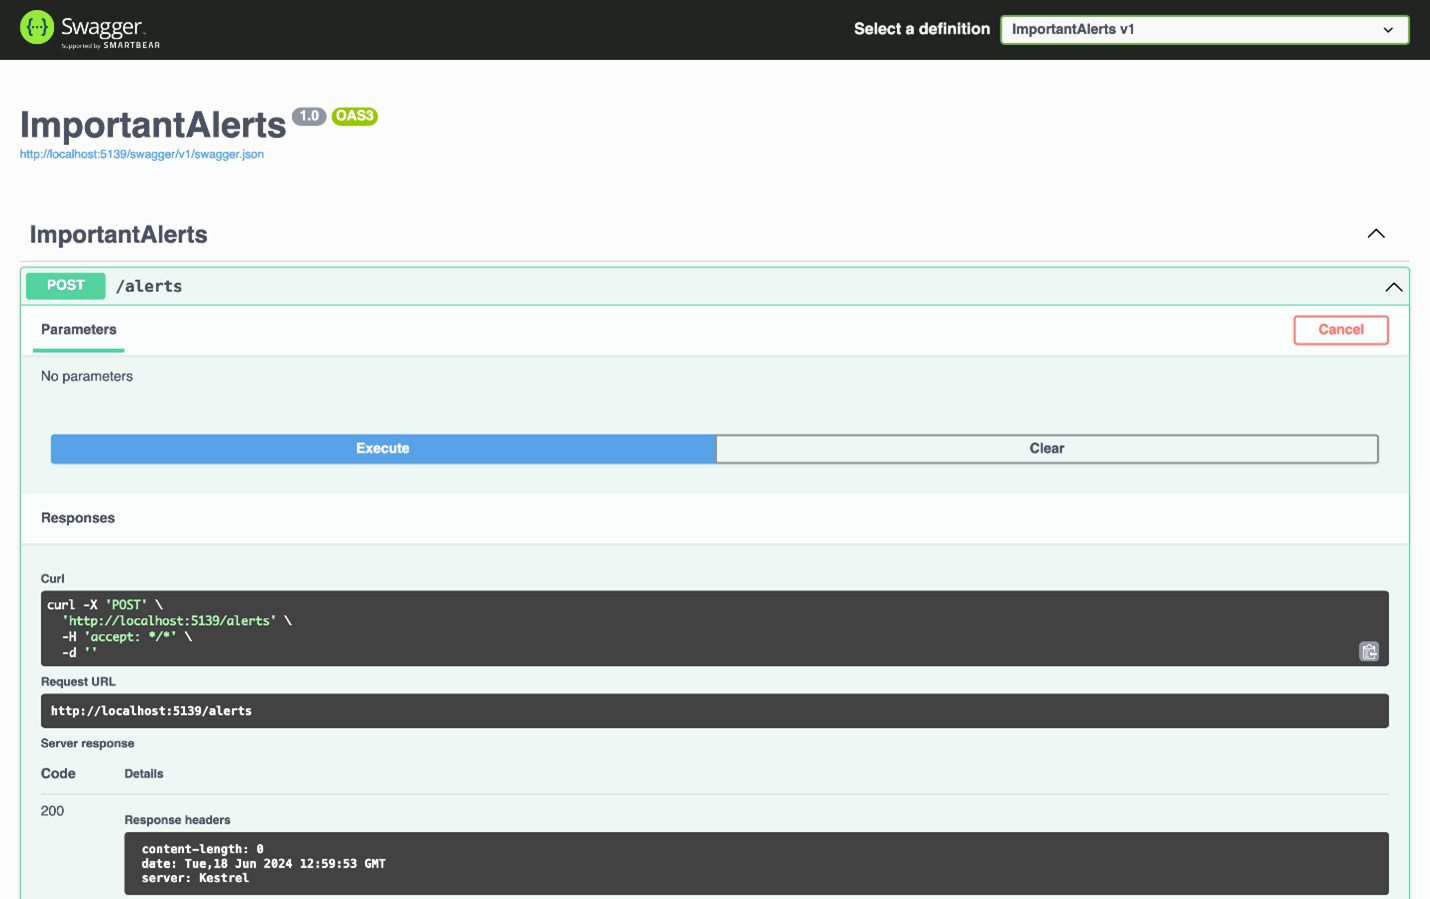
After execution, the message should be delivered to Viber shortly. If something did not go as planned, a response in the console will provide more detail.
Step 8: Read delivery reports [#step-8-read-delivery-reports-implementation]
You now have a working example of sending Viber messages, but you cannot be sure the messages were delivered. To receive delivery reports, set up a webhook endpoint that can trigger our app whenever delivery data is available. Find more details here.
To expose your local app via the public domain, use the localtunnel CLI tool, which is built on Node.js.
The CLI will respond with a message skin: "Your URL is: https://hip-emus-car.loca.lt". Copy the URL and use it in the code below.
Expand your request and include the "Webhooks" part with the new URL with the endpoint that you have built. For example, https://hip-emus-car.loca.lt/messages/webhook:
Now create a new endpoint that will accept the POST request. Log the request in the console:
When you execute the /alerts endpoint, you will see the delivery information provided via webhook in the console.
Step 9: Defining other channels [#step-9-defining-other-channels-implementation]
To specify additional channels, use a dictionary that associates each channel identifier with its corresponding sender.
All assigned senders can be viewed on the Infobip account.
Next, iterate over the dictionary and make a message request object for every item:
Test the new implementation and execute the /alerts endpoint. You will now receive important messages across multiple channels simultaneously.