Send Automated Reminders To Your Customers
Create and send different types of reminders to your customers and end users about various topics. From seasonal sale, marketing campaigns, appointments to travel engagements, app launches, subscriptions, payment reminders and more. You can automate just about any reminder using Moments and Events in People.
Additionally, you can use any communication channel your customers perfer.
This tutorial explains how to create an automated payment reminder using the Infobip web interface and API.

Process Workflow
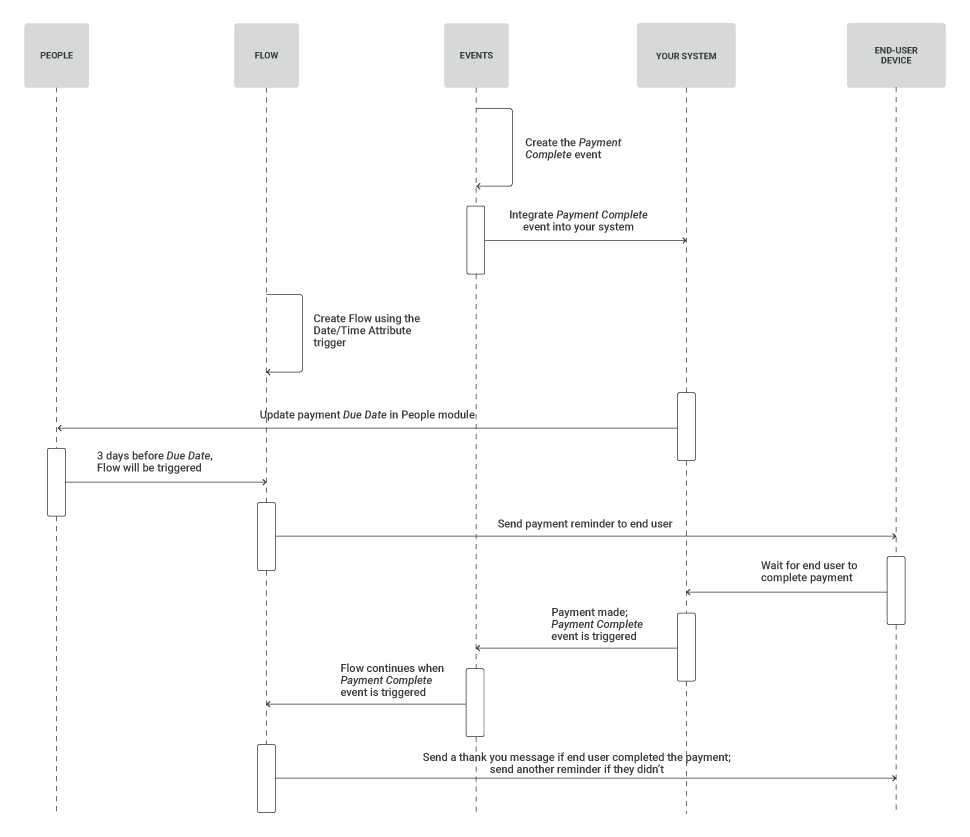
IMPLEMENTATION STEPS
Essential for this setup are the Infobip API instructions (below) so that the information between your system and the Infobip platform can be exchanged and you are able to build the communication around it.
Steps Over API
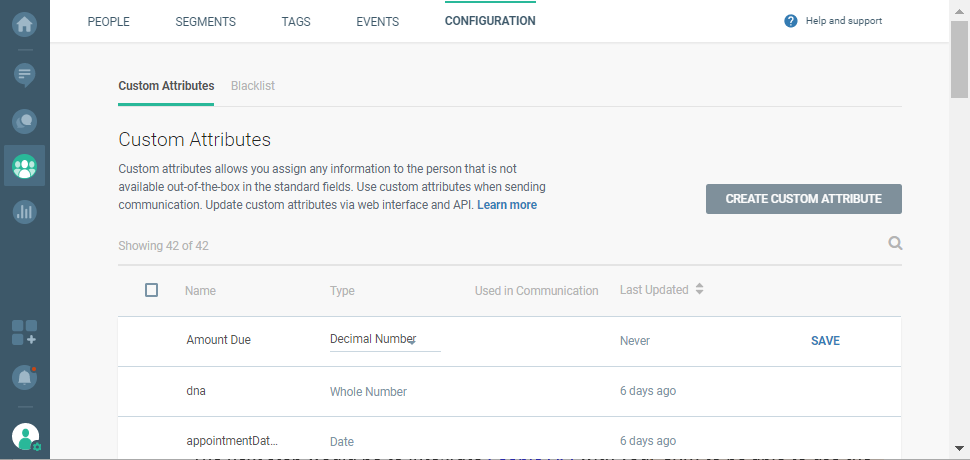
- Configure custom attributes on our web interface: People module > CONFIGURE > CREATE CUSTOM ATTRIBUTE.
One custom attribute in this scenario is Due Datewhere value is Date, and the other one Amount Duewhere value is Decimal Number. You will need them for communication between your CRM and the Infobip platform.
The next step is to integrate People API with your CRM to be able to use the payment due dates stored inside your CRM and send them via our platform.
- To get informed when and if the customer made a payment after they received a message about the upcoming due date, follow our API specification and use these:
{{personId}} - unique person identifier (email, pushRegId, phone) inside the People module.
{{definitionId}} - definition ID from the Event Definition page. You need to create a Payment Complete event on our web interface: People > Events > New Event Definitionto track if users have made the payment.
{{AppKey}} - API Key from the Settings page on our web interface.
{{Your personal Base URL}} - base URL you can get after logging in.
Steps Over Web Interface
After you are done with the integration steps from the previous section, you will be ready to start building your Flow!
-
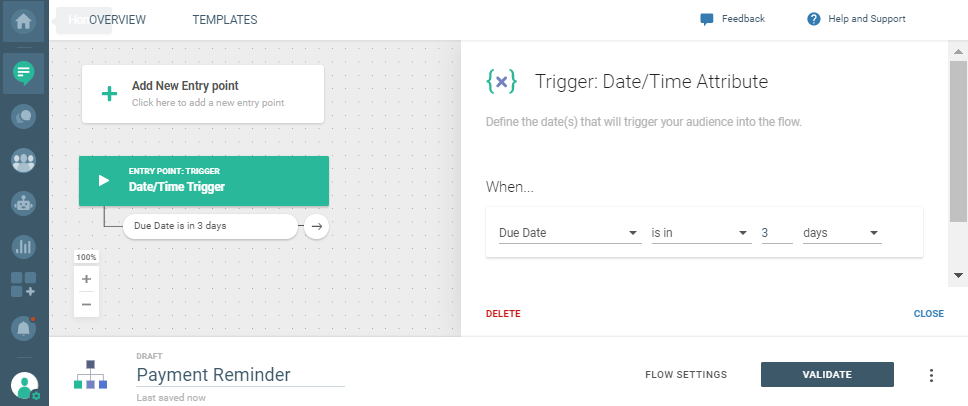
On the Infobip web interface, go to the Moments module, select CREATE FLOW > Start from Scratch > Date/Time trigger.
-
Click the trigger and on the side panel select the Due Date attribute that you have set up previously and then select Is In 3 days because that's when the payment should be made.
-
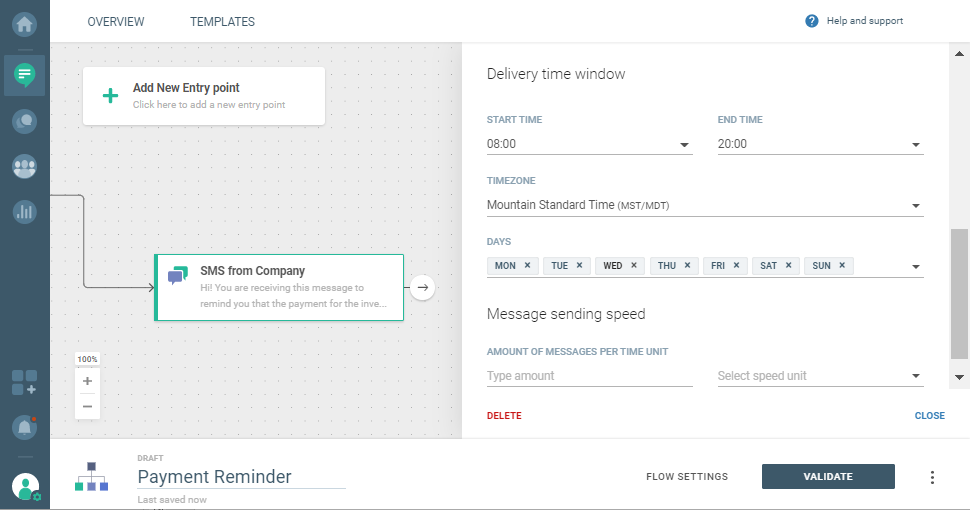
Send an SMS to inform the customer the due date is coming soon.
IMPORTANT NOTEOn the SMS side-panel, you can set the time and date inside the Delivery Time Window.
-
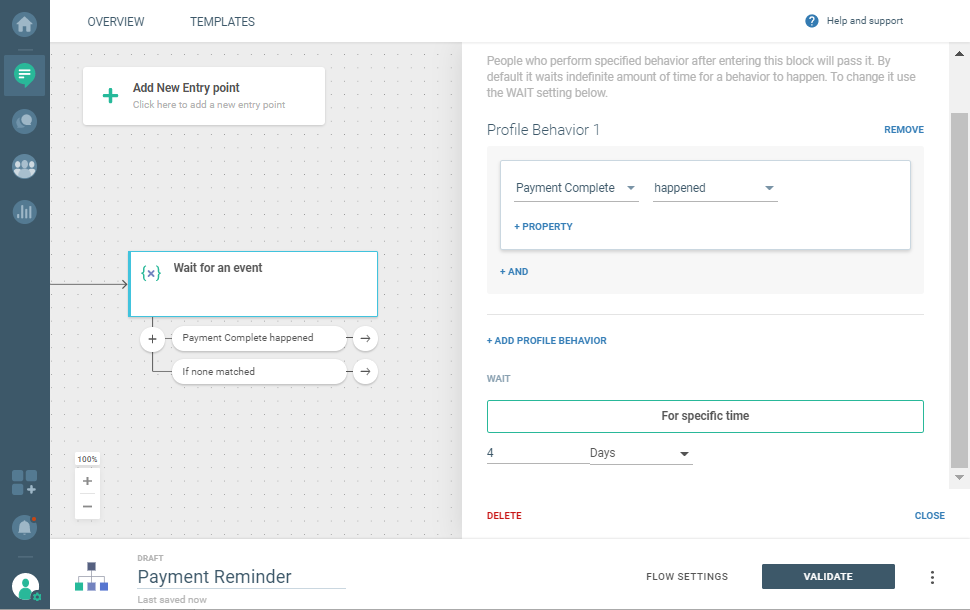
Add Wait for an event element and Payment Complete (this is an event you created earlier in this use case), so you can continue this communication based on customer actions. Set specific wait time to 4 days because your first message was 3 days before the due date and you plan to send another reminder one day after the due date.
-
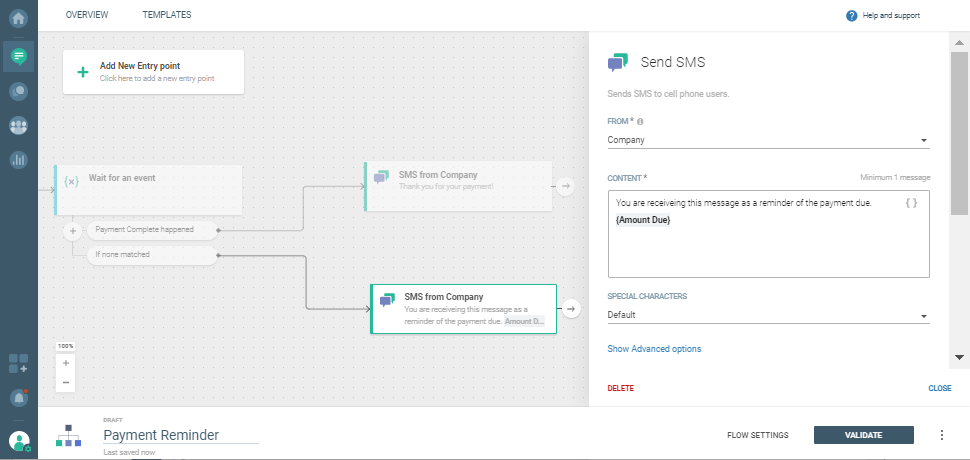
If the customer makes the payment, they will receive athank youSMS which will be triggered immediately. If they miss the due date (If none matched branch), another reminder will be sent a day later. Select a placeholder (curly brackets icon) to automatically include in the SMS the information about the amount due. You are able to include this information because you have set up the Amount Due custom attribute at the beginning of this use case.
-
Click VALIDATE and LAUNCH!