Arrange Meetings With Your Customers
Using the Infobip platform, especially the SaaS layer, you can set up meetings with your customers. There are different ways to achieve this.
To arrange and schedule appointments with your customers you can either use Moments, our customer engagement platform, or Answers, our chatbot building platform. Additionally, you can use one of our many communication channels and Conversations, the Infobip cloud contact center solution, to increase customer interactions and achieve a significant growth in meeting requests.
This tutorial shows how to Moments, Conversations, and Viber as a communication channel to arrange a meeting.
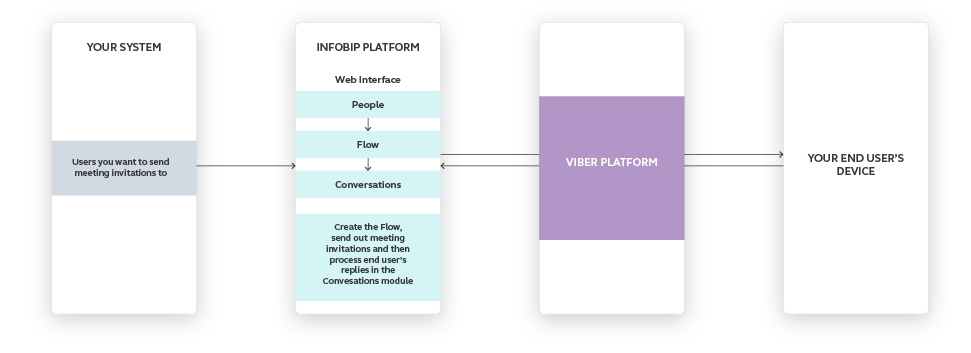
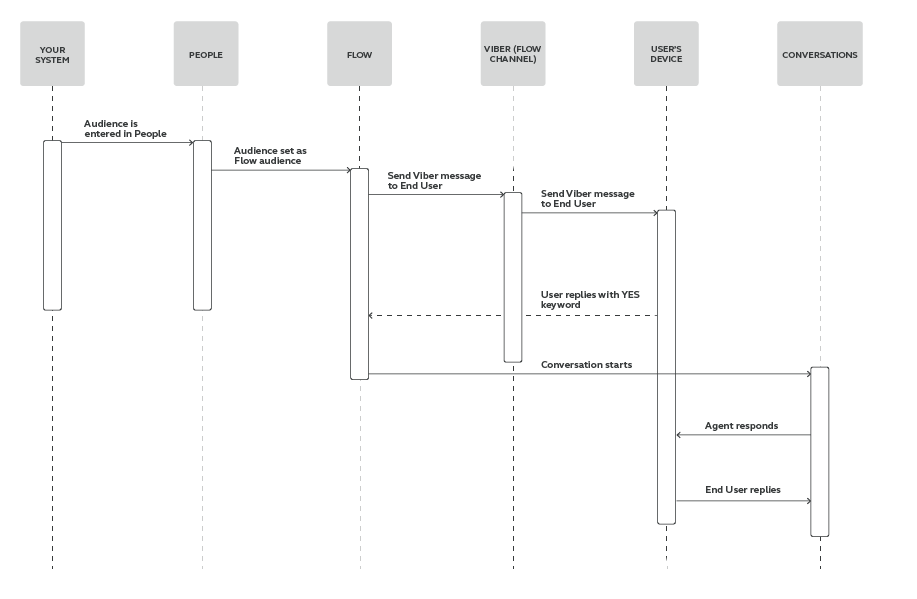
Process Workflow
IMPLEMENTATION STEPS
Steps over Web Interface [#steps-over-web-interface-implementation-steps]
-
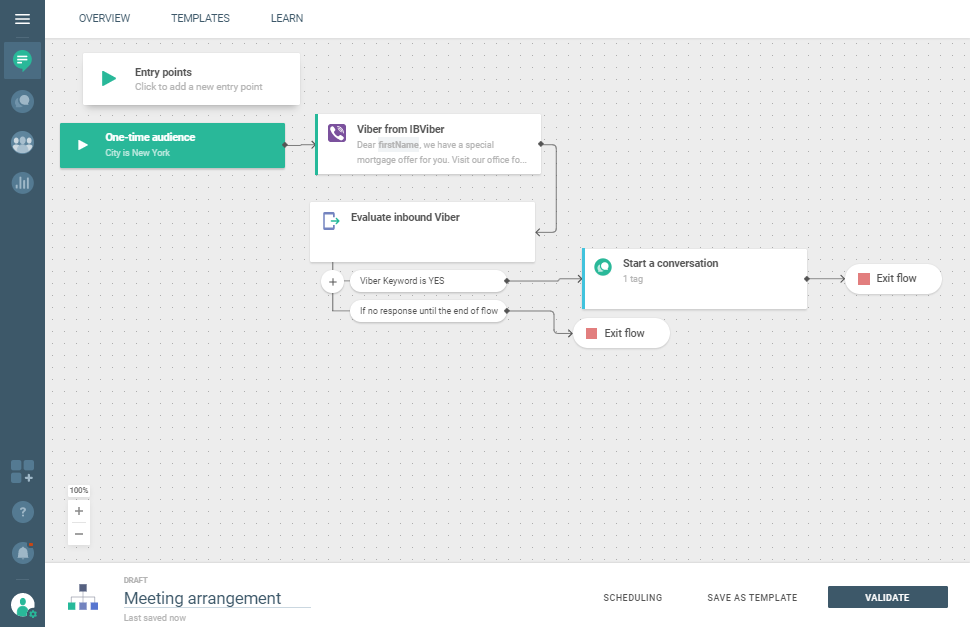
Log in to the Infobip web interface, navigate to the Moments module > click CREATE FLOW> and then Start from Scratch.
-
Select Predefined audience and start building your flow.
-
Name your campaign.
NOTETo start communicating with your customers over Viber, you must obtain and store their opt-ins.
-
Select your audience by selecting recipients (who should receive an invitation to schedule a meeting with you).
-
Click the arrow and select the Send Viber element.
-
Set sender and message text.
For example: “Dear FirstName, we have a special mortgage offer for you. Visit our office for details. Respond YES to arrange a meeting at time convenient to you."
In advanced options set on the promotional label and validity period for 2 hours.
For a more personal approach use variables such as subscriber's first name.Click Close when finished.
-
Click the arrow and add the Evaluate inbound message element. Select the channel you used to send the first message, in this case Viber.
-
Fill in the following information:
To- choose the same sender as you used in previous element
Conditions - where you expect a specific answer, it should be set like this: IF… keyword is YES
-
Click the arrow from Keyword is YES and select the Transfer chat to agent element. The conversation will be automatically transferred to the Conversations when starts.
-
Select the Conversation tag or create a new one.
To create new tag, click Create Tag and name your tag (e.g., meeting appointment). Once you enter a name, the tag will be added at the top to the Selected Tags.
You can use multiple tags.
Click V ALIDATE.
-
If you did everything correctly, you would see a summary screen. Click LAUNCH NOW execute the campaign.
Here’s how the entire Flow looks like:
-
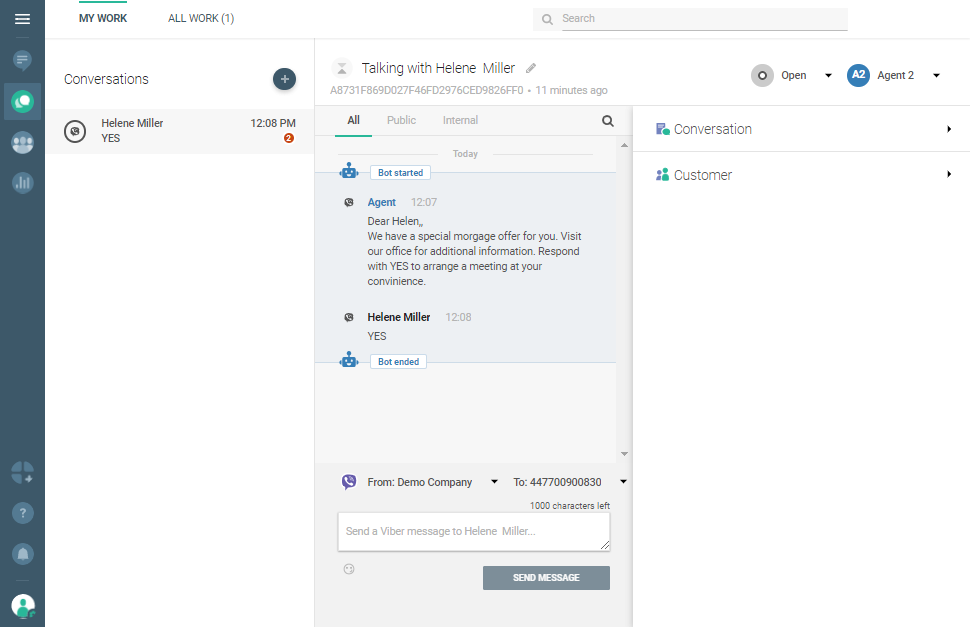
Once in the Conversations module, the agent will take over and continue the conversation with the customer.