Manage RCS blocklist with keywords
Configure RCS inbound keywords to automatically add or remove end users from your sender blocklist. This tutorial describes how to set up keyword-based blocklist management for opt-out and opt-in control.
Prerequisites
- Infobip account. If you do not have one, you can create a free trial account.
- RCS sender registered in testing phase or launched on carriers.
- RCS channel active on your account (full plan or free trial).
Implementation steps [#implementation-steps]
Add to blocklist [#add-to-blocklist]
-
On the Infobip web interface, go to Channels and numbers > Channels > RCS Business Messaging > Senders.
-
Select the sender for which you want to add the keyword setup.
-
Select Edit inbound configuration.
-
Under Keywords, select Add keyword.
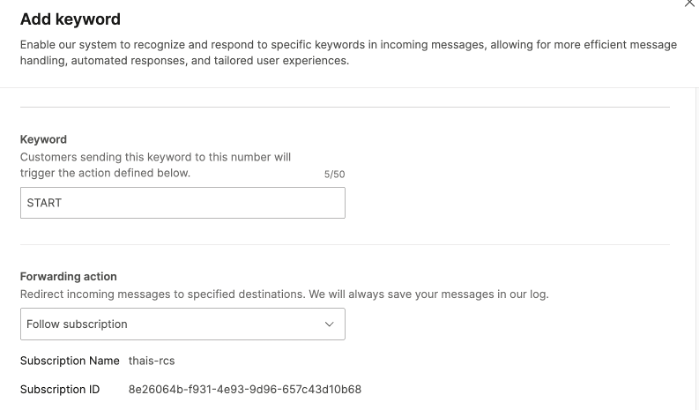
In the keyword configuration menu, fill out all the required fields:
-
Keyword:
START -
Forwarding action: Select one of the following:
- Follow subscription
- Forward to HTTP
We recommend using subscriptions instead of Forward to HTTP.
Simpler management - One subscription can cover inbound messages for multiple numbers, making it easier to create and update.
Better security - You can make an authentication configuration in Subscription management as a security measure for your event notifications.
-
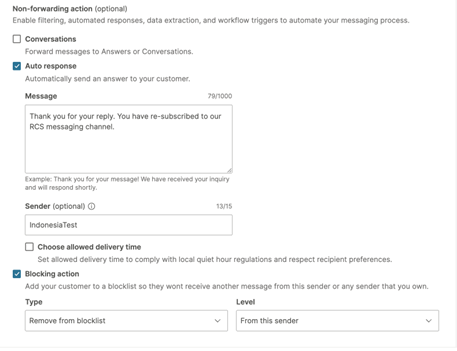
Non-forwarding action: Select Auto response
- Message: Enter the message that will be automatically sent to your customers
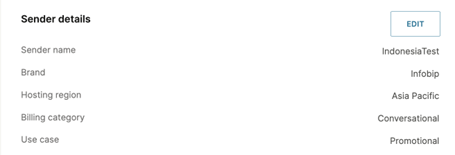
- Sender (optional): Enter the sender name (from Sender Details) for which you are creating the keyword setup
-
Blocking action:
- Type: Select Add to blocklist
- Level: Select From this sender

-
Application and entities (optional): Connect an application and entity with this inbound action for invoicing and reporting purposes if you are using a CPaaS X structure.

-
Once fill in all fields, confirm the setup by clicking Add keyword.
The keyword is now visible in the inbound configuration.
Remove from blocklist [#remove-from-blocklist]
-
On the Infobip web interface, go to Channels and numbers > Channels > RCS Business Messaging > Senders.
-
Select the same sender.
-
Select Edit inbound configuration.
-
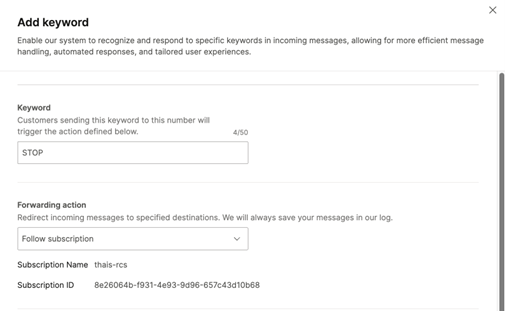
Under Keywords, select Add keyword.
In the keyword configuration menu, fill out all the required fields:
-
Keyword:
STOP -
Forwarding action: Select one of the following:
- Follow subscription (our selection)
- Forward to HTTP
-
Non-forwarding action: Select Auto response
- Message: Enter the message that will be automatically sent to your customers
- Sender (optional): Enter the Sender name (from Sender Details) for which you are creating the keyword setup
-
Blocking action:
- Type: Select Remove from blocklist
- Level: Select From this sender
-
Application and entities (optional): Connect an application and entity with this inbound action for invoicing and reporting purposes if you are using a CPaaS X structure.
-
After all the fields are selected and filled, confirm the setup by selecting Add keyword.
Both keywords that we've just set up are now visible in the inbound configuration.
