Reduce Call Costs With Answering Machine Detection
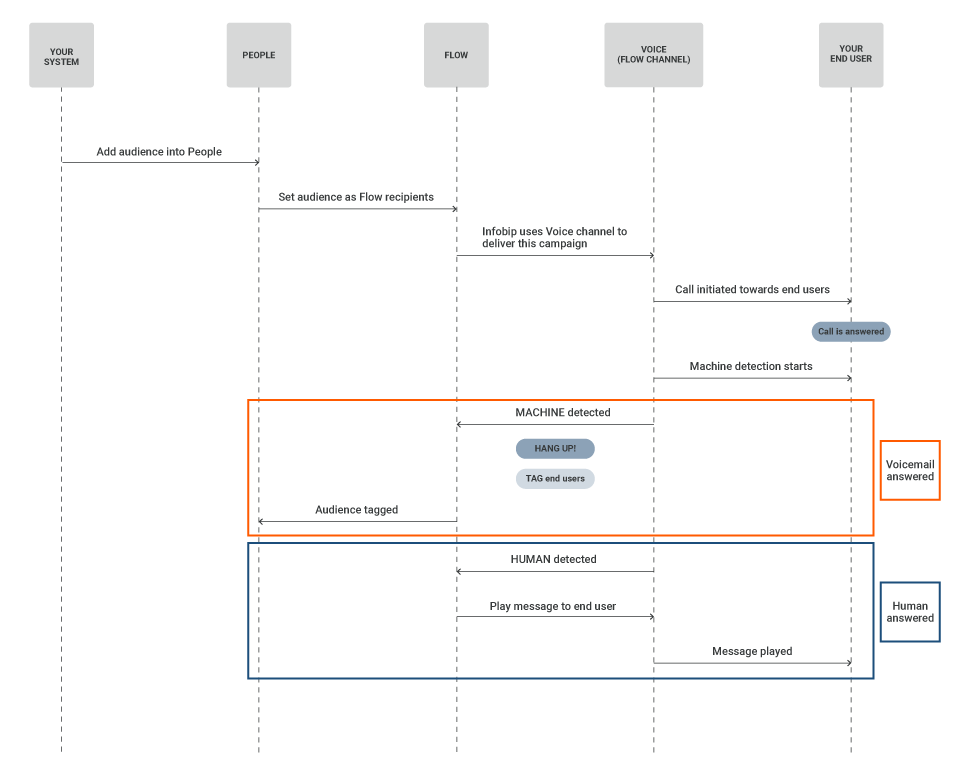
When using Voice over the Infobip platform, you can detect whether a voicemail/machine or a real person actually answered the call. You can configure it according to your needs and choose what to do when our system detects that a voicemail has picked up the call. To cut costs you can choose to hang up the call altogether.
However, not to lose sight of those users who were unavailable for a call, you can save the information about who was not reached, and later launch another campaign only towards those users.
This tutorial shows you how to build a simple IVR Flow with a cost-effective machine detection feature. It also encompasses steps on how to check out reports and run additional campaigns.
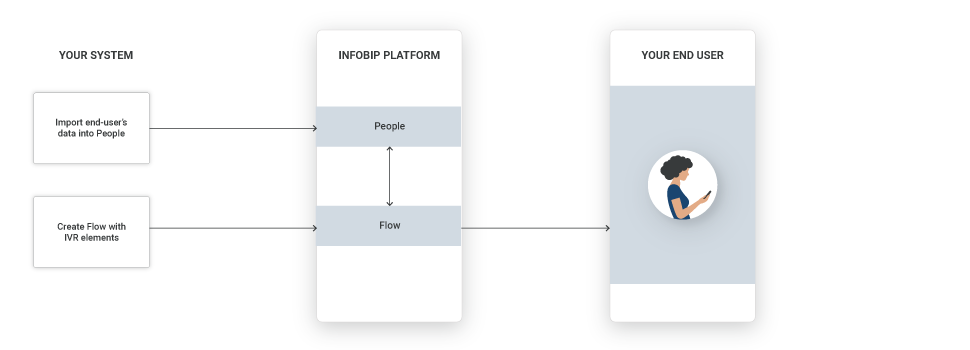
Process Workflow
Create a simple outbound IVR Flow. To start an outbound IVR, use the Start outgoing call action, where you can choose Answering Machine Detection conditions and then build a Flow according to your specific use case scenarios. You can mark the audience whose vocemail picked up so you can contact them later if necessary.
After the campaign has finished, you can check out the Voice report to see what calls were answered by voicemail.
Furthermore, you can choose to contact only those users whom you previously marked.
IMPLEMENTATION STEPS
Steps over Web Interface [#steps-over-web-interface-implementation-steps]
-
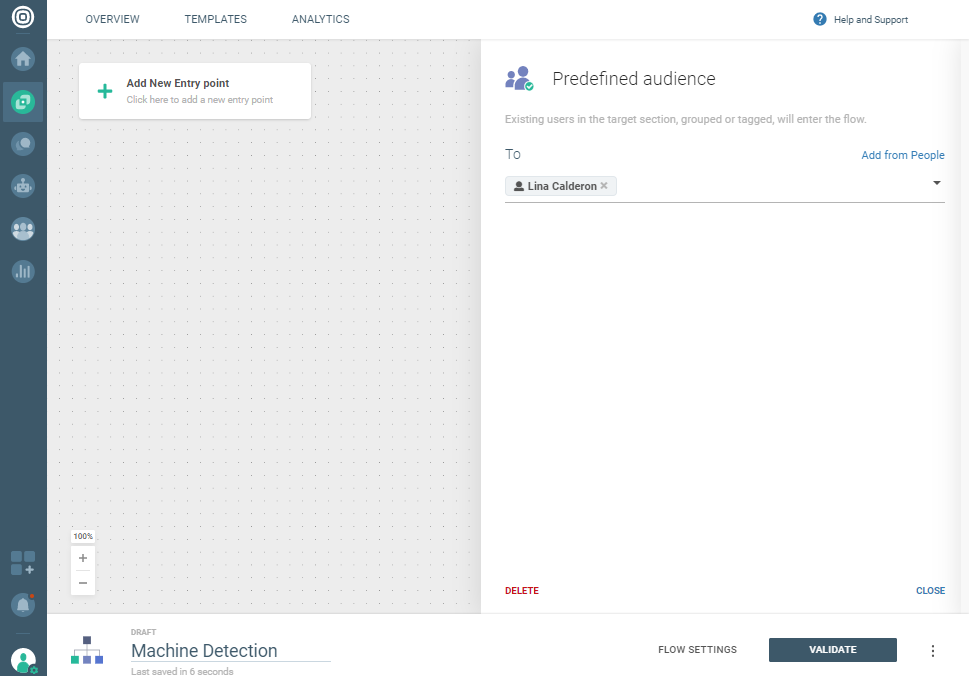
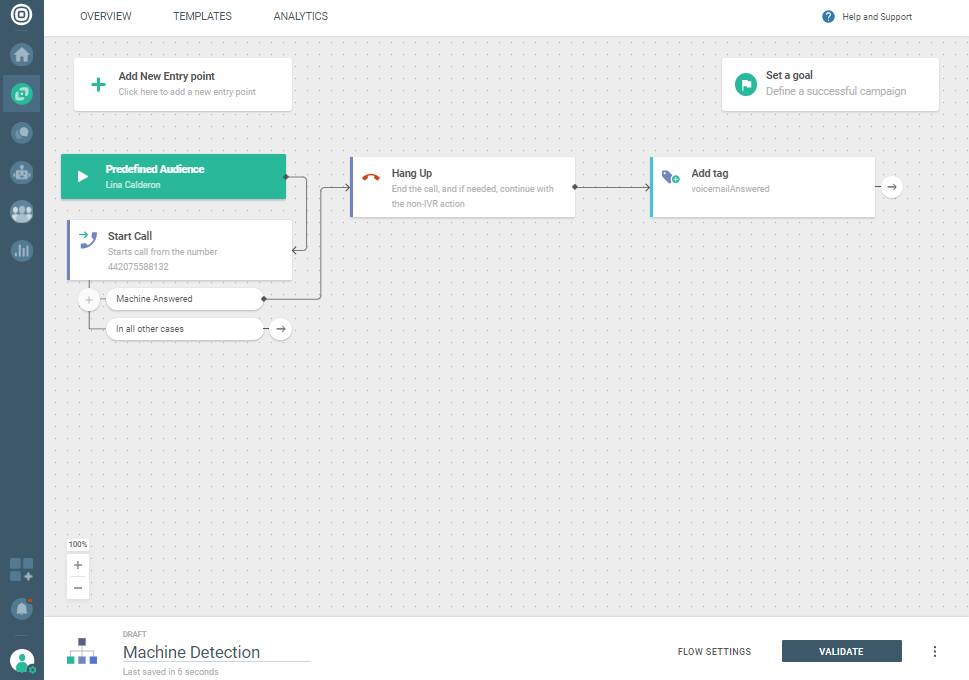
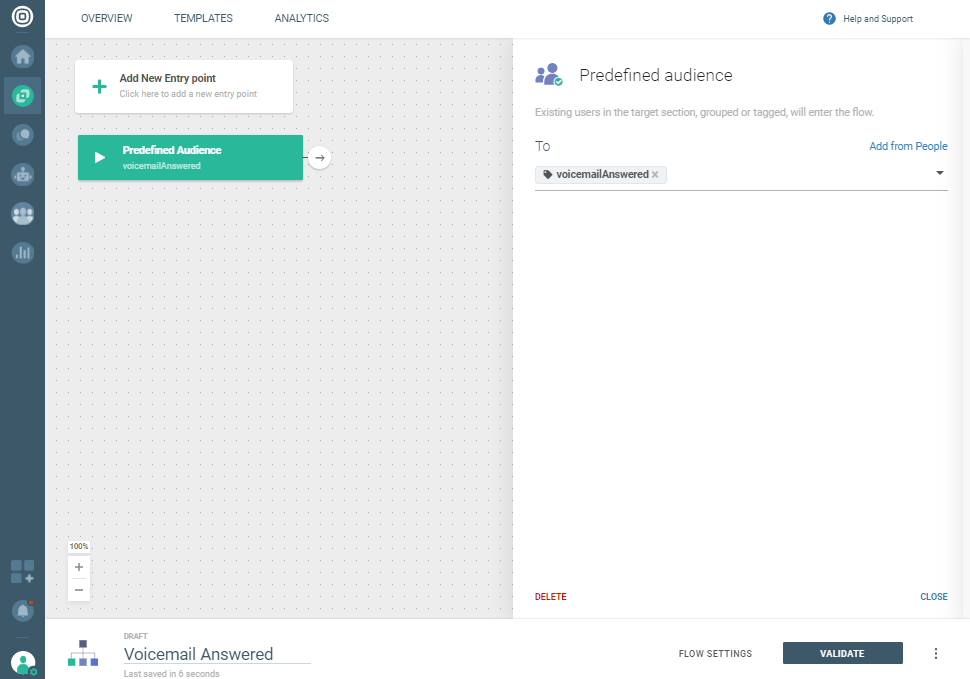
Create an outbound IVR Flow. Start by adding Predefined Audience as an entry point and choose your target audience from the drop-down menu.
-
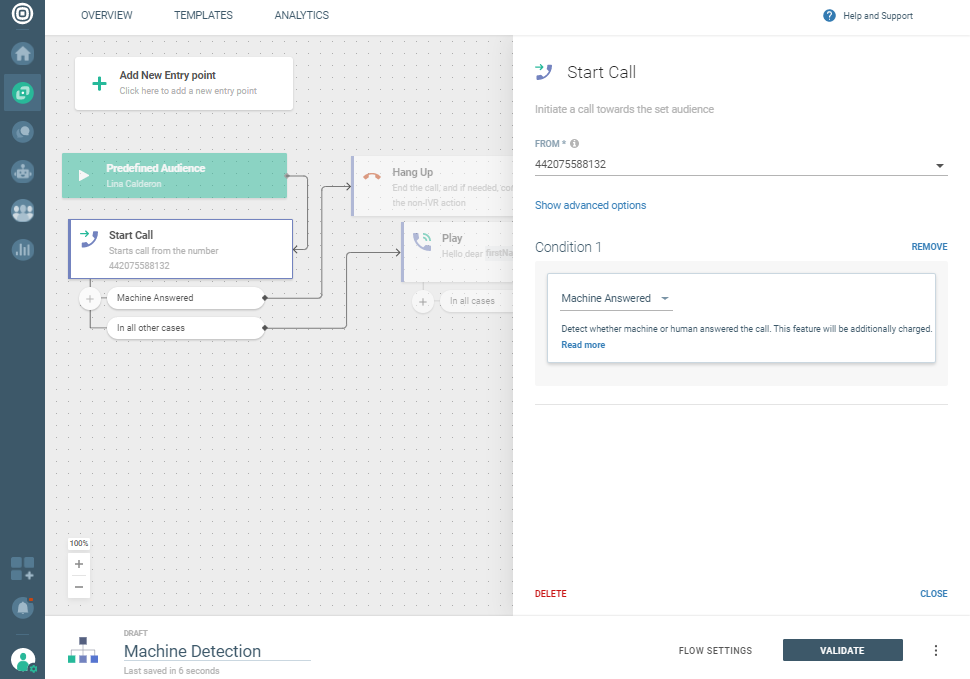
Use the Start outgoing call action to initiate an outbound IVR and enable AMD for your calls.
-
Branch your Flow further based on your preference and needs. You can hang up the call if the voicemail but not a person answered the call - simply by adding the Hang Up action. If you want to mark the audience you didn't manage to reach right away, use Add tag (e.g., you can create voicemailAnsweredtag). Choose the created tag as your recipient in the Predefined audience entry point to trigger a call to them later.
-
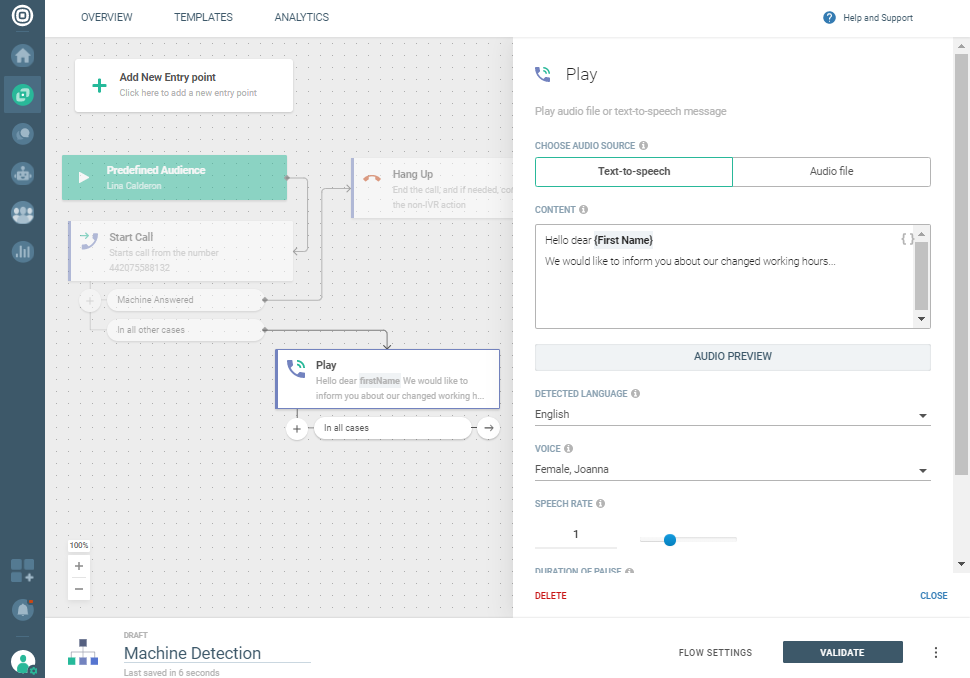
Use the In all other cases condition ( on Start call) to determine your Flow execution in case a person answered the call. You can choose to deliver a voice message to them by using the Play action.
-
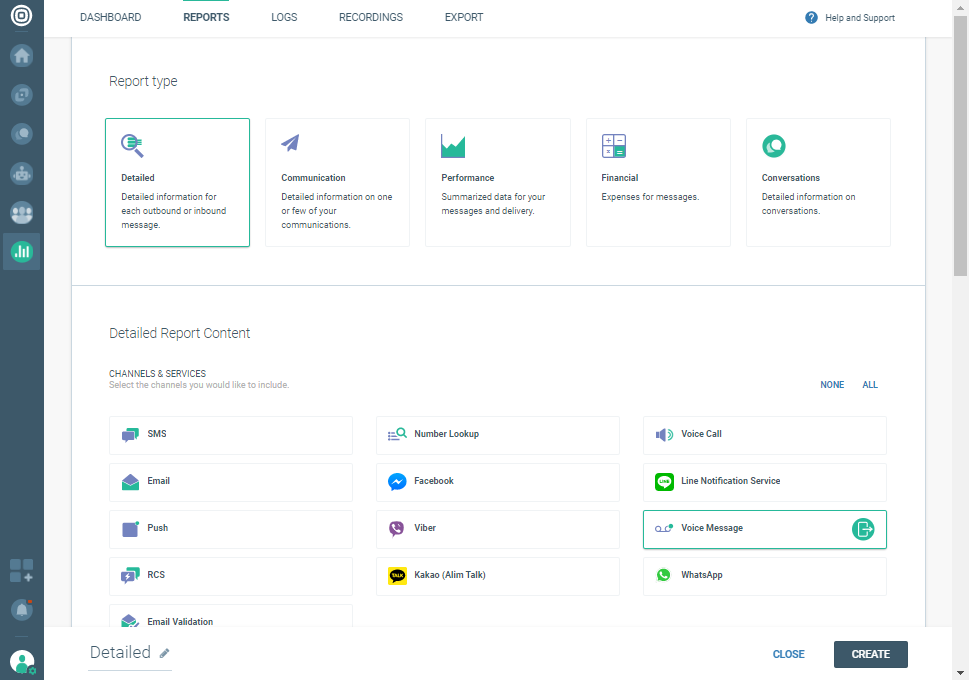
To check out which calls were answered by voicemail go to te Analyze section on the left side of the menu. Choose REPORTS from the upper list and click CREATE REPORT. In the Detailed report content section leave the Voice Message button selected.
In the Recurrence and Date Range section choose your preferred time and date for voice report traffic. You can choose the report format, either .XLSX or . CSV, as well as change the name of the report in the label below. Click CREATE.
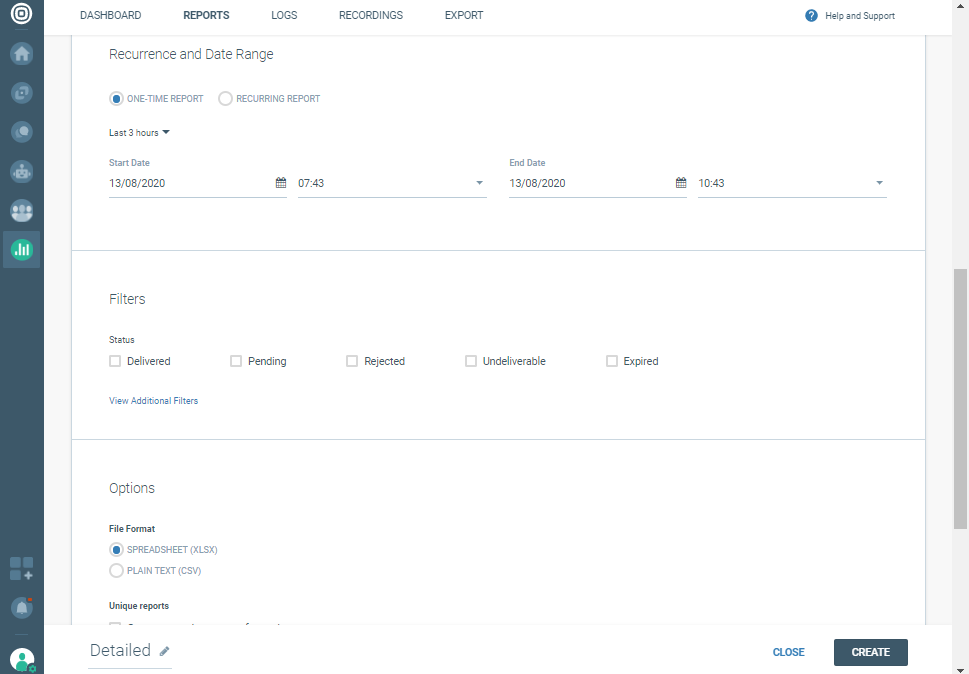
Your Voice report will take some time to create, depending on the selected time range. After it's done you can download it and check out the content.
The Error Name column contains information on whether a person (code 5000) or voicemail (code 5001) answered the call.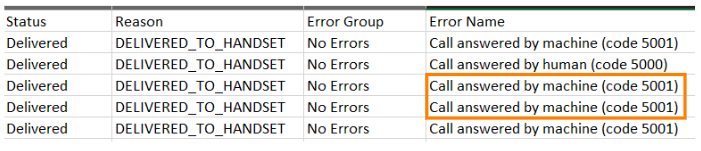
-
As you previously marked those end users whose voicemail answered the call using tags (STEP 3), you can now contact only them. To do that you need to create another Flow with Predefined Audience entry point. This time choose your predefined tag (e.g., voicemailAnswered) from the drop-down.
Visit our Answering Machine Detection page to learn more about this feature.
Instead of hanging up the call you can actually deliver a message to your end-user's voicemail. Simply choose Play instead of Hang up. This way your message will be delivered after the voicemail announcement. To make sure your end user is aware of it, let them know by sending a notification via Infobip SMS, Emailor another preferred channel.