Gather After-Purchase Feedback
Once your customers make a purchase, you can set up an event trigger. Customers will receive a product or service survey to fill out. Then, you are able to see their reviews and improve your services or processes if and where you need to.
This tutorial shows how to send email messages to customers with a review link for each item they bought and ask about their experience with your products. We will create two-way communication by using our visual builder, data platform, and email messages.
Solutions to combine:
Process Workflow

IMPLEMENTATION STEPS
You need to set up a few things before going to the Infobip visual builder and start putting the communication blocks together.
Prerequisites [#prerequisites-implementation-steps]
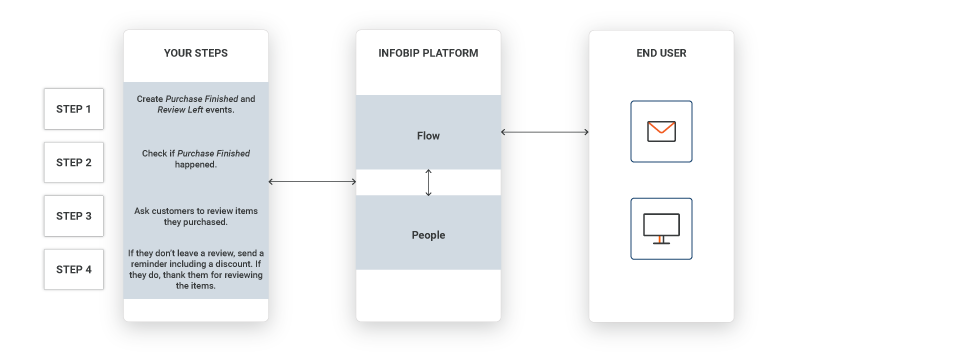
Navigate to People module > Events > New Event Definition and create a PurchaseFinished Event Definition ID. This event will help you get the information that the customer has made the purchase.

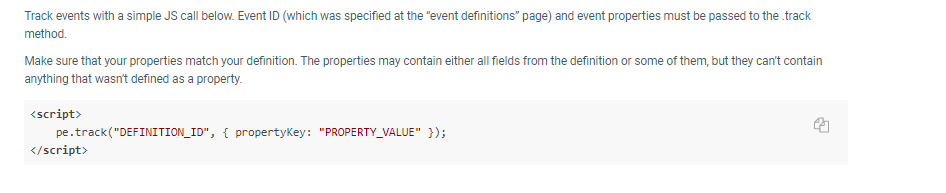
The instructions for developers about the event tracking are available on the Events page, under the Web SDK Library tab.
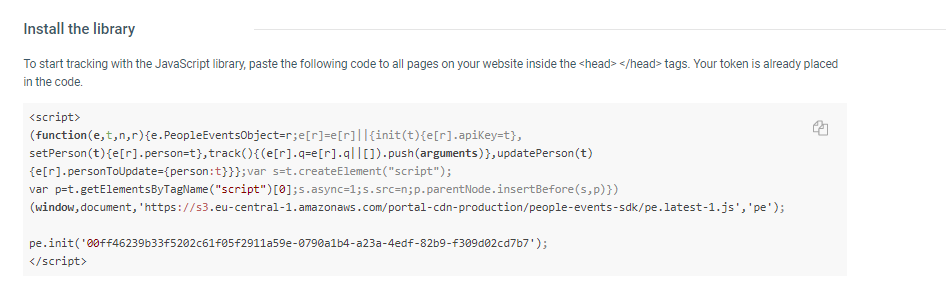
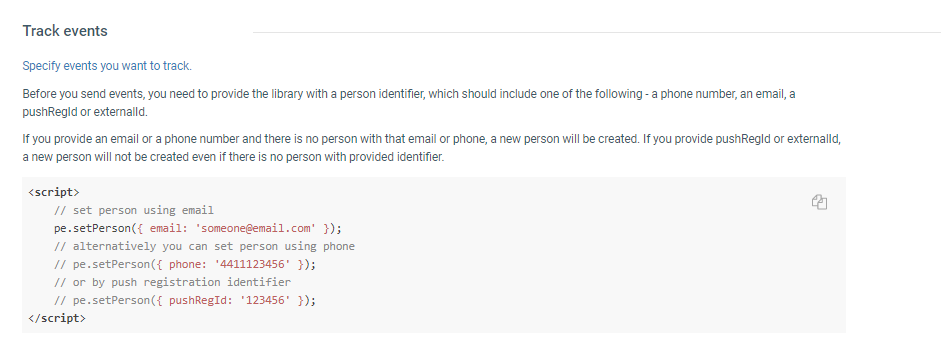
Set up tracking for the PurchaseFinished event you created for this communication. Copy the tracking method code to the body of your website.
Repeat the steps for the other event - Review Left- that you will need to use in this communication.
Event tracking is possible when customers are logged in to your website.
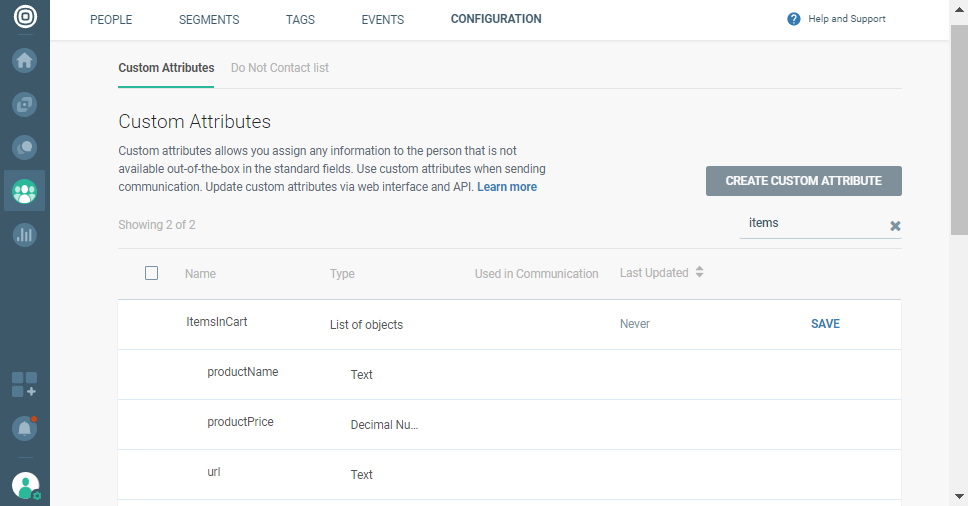
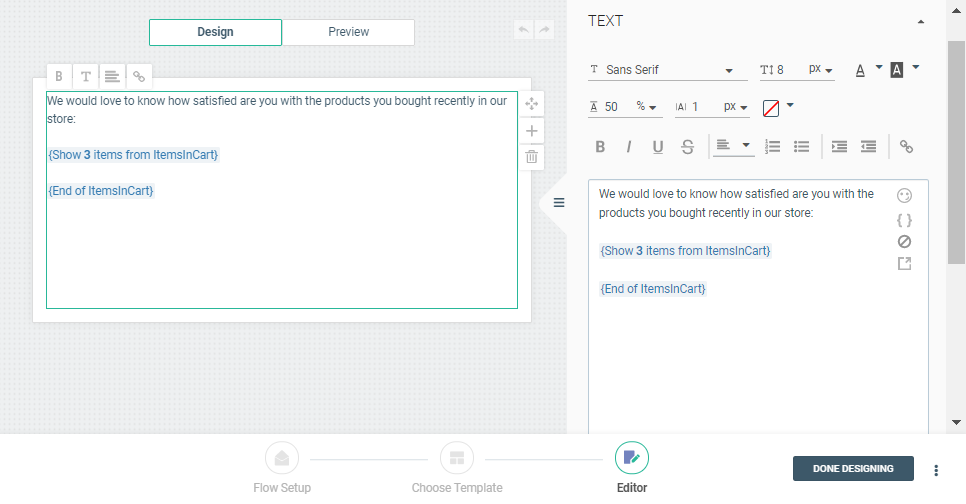
Next, set up the list of items to be included in the message, including their properties: name, price, and URL. Once the customer opens your email, they will see each product followed by the review link.
Steps Over Web Interface [#steps-over-web-interface-implementation-steps]
-
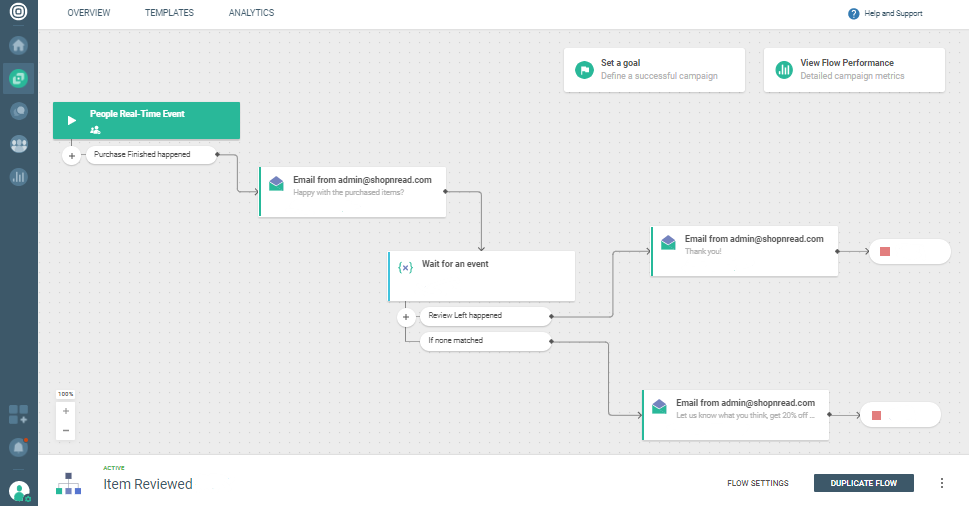
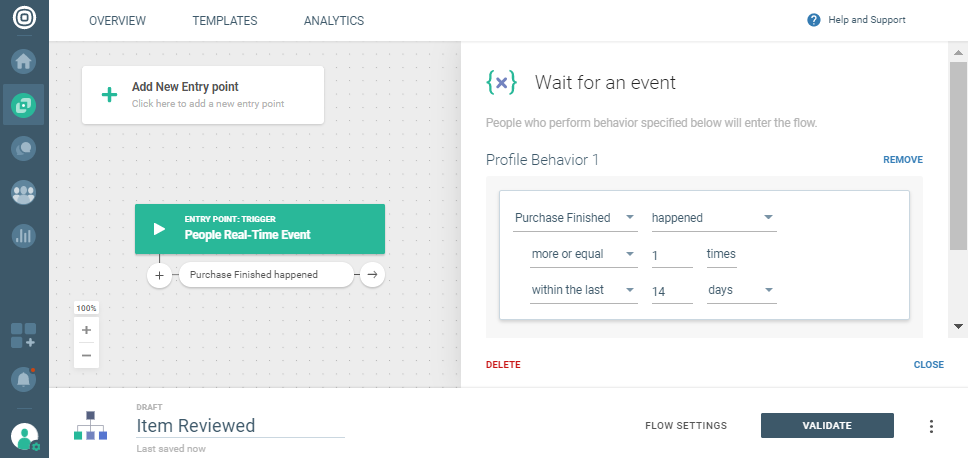
On the Infobip web interface, go to Moments > Create Flow and select People Real-Time Eventas the communication starter using the PurchaseFinished event that you created.
-
Add the email channel (you will have to set it up to be able to use it). Use the side panel to design your email. Include the list of items you created earlier.
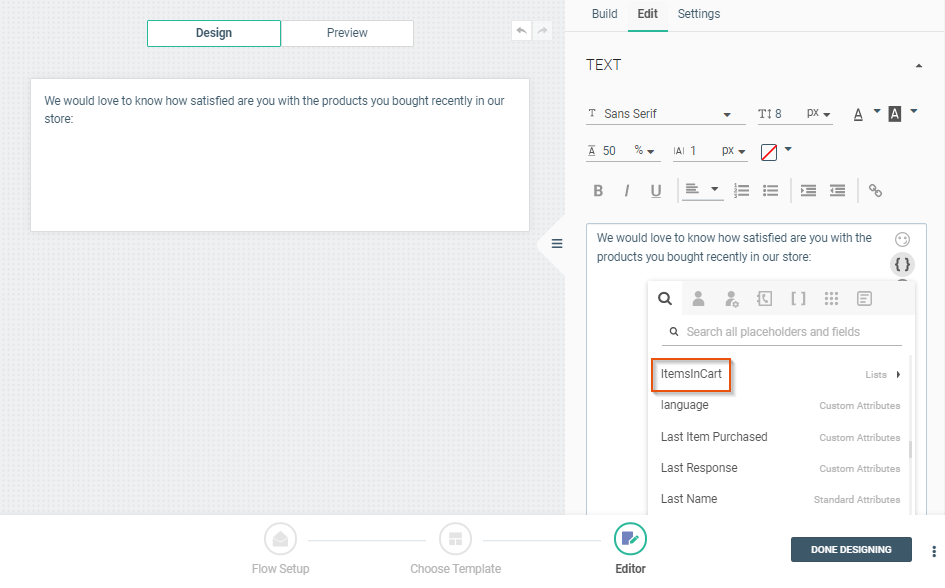
Type in the number of items you want to be shown in the email.
-
The next building block is the Wait for an event one: select the Review Left event (create this event as shown in the Prerequisites section) so that the Flow can get information about this user action.
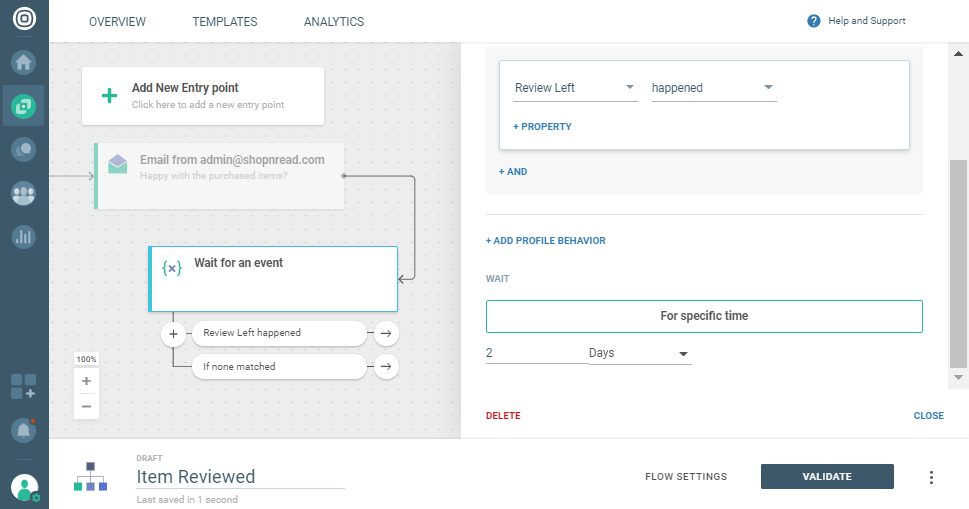
At the bottom of the side panel, select the Wait Time – how long you want to wait before you send another message to those who did not click the link.
-
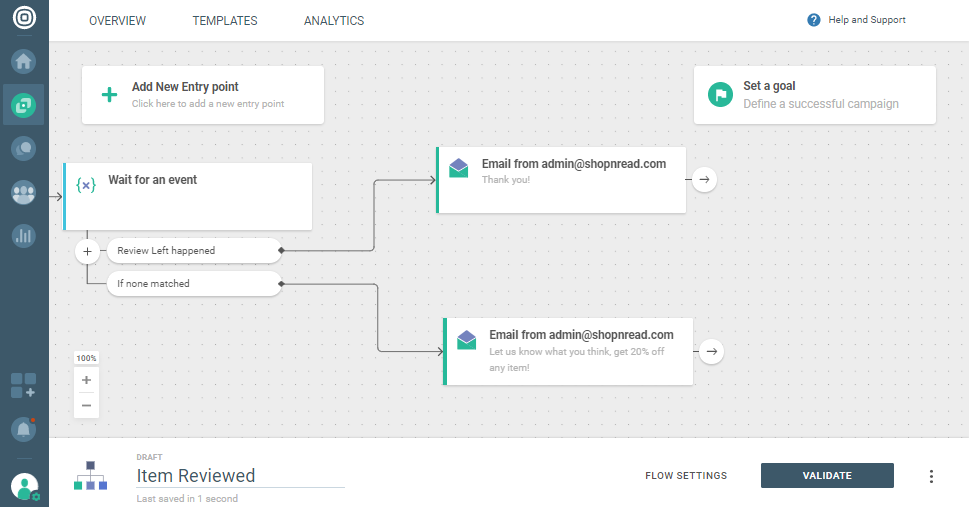
Send a thank you message to the customers who reacted to your first email, and send another review email to those who didn't. Remember to include the list of items as shown in step 2.
-
You have put together all the building blocks, now Validate and Launch this communication!