Collect Customer Feedback
This tutorial explains how you can use our customer engagement platform, Moments, to send surveys to your users and gather feedback to improve your services and customer experience. You can use Moments with People, along with different communication channels.
This tutorial focuses on collecting customer feedback via SMS.
Be sure to consider all possible communications channels when collecting customer feedback because some customers might be more eager to rate your services or talk to your call center agent simply due to a personal touch when using Voice rather than using the speed and convenience of SMS.
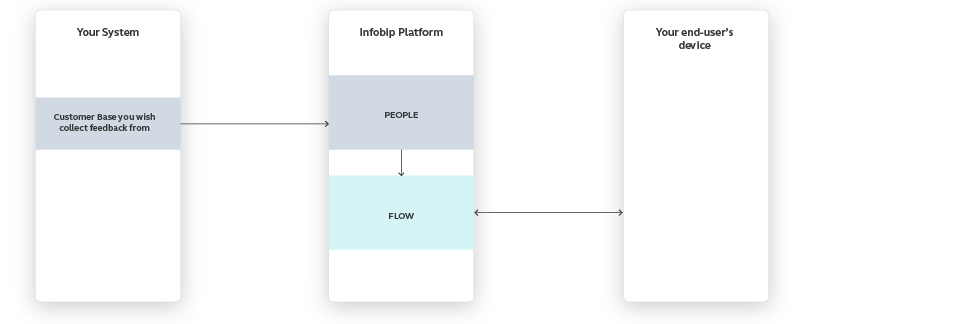
You’ve provided your service, now you can ask for feedback by sending an SMS, Viber, WhatsApp message, or creating an outbound IVR call so the user can rate you via their phone keypad. They can even choose to talk to a live agent.
Before Getting Started
To get started with this tutorial, you must have an Infobip account. Log in or sign up for an account.
Prerequisites
Upload the list of contacts to the People module.
Process Workflow
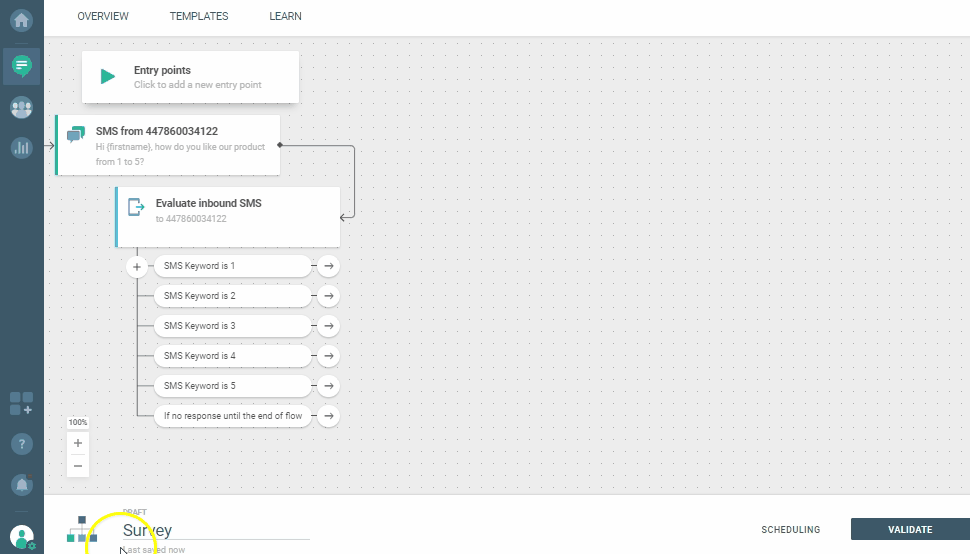
The structure of a collect customer feedback flow is the same for almost all communications channels. The only difference is the flow elements that you choose. Every collect customer feedback flow has:
- An initial contact message to the customer
- An element for collecting the customer response
- Conditions and tags to enable us to branch flow responses into appropriate groupings like Satisfied, Neutral, and Unsatisfied
- An (optional) closing response or message like "Thank you for your input. Goodbye."
Workflow over Message Platforms [#workflow-over-message-platforms-process-workflow]
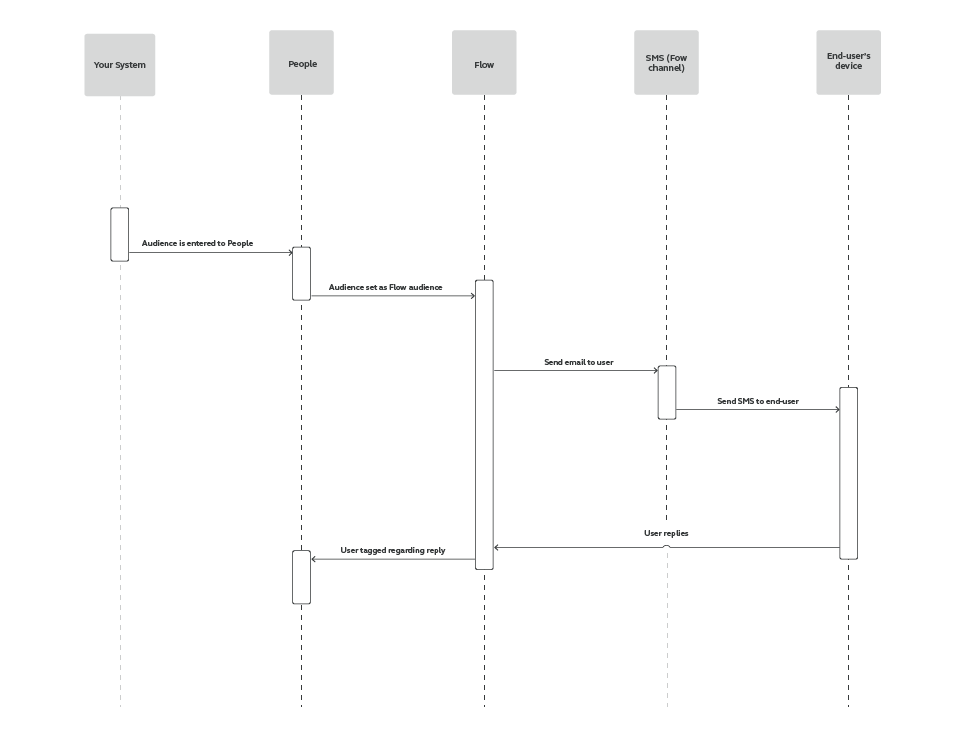
This is what the functioning workflow looks like in action for collecting Customer feedback over message platforms.
Workflow over IVR Call [#workflow-over-ivr-call-process-workflow]
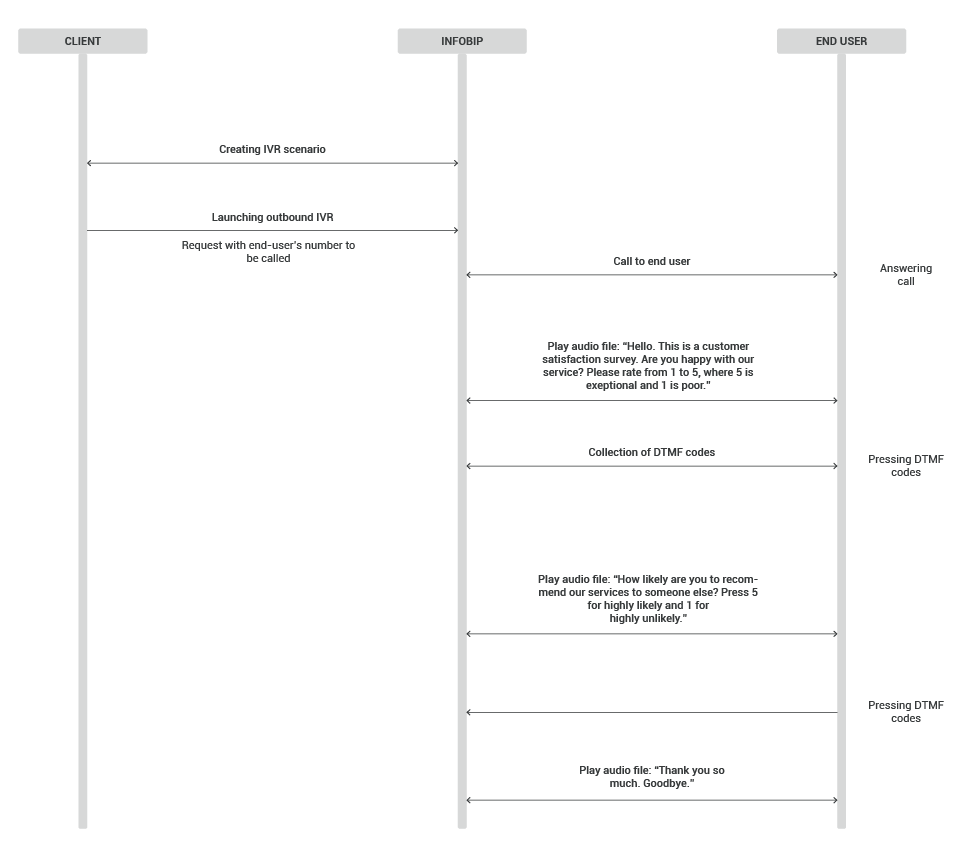
This is what the functioning workflow looks like in action for collecting Customer feedback over IVR Call.
Implementation Steps
This tutorial can be implemented using the Infobip web interface.
-
Log in to the Infobip web interface, navigate to the Moments module, click CREATE FLOW, and then click Start from Scratch.
-
Select Predefined audience, and Start building.
-
Set your audience by entering the name of a segment or a tag, such as "My audience"
-
Select the right-facing arrow on the Predefined audience element and choose a communication channel (e.g., SMS / WhatsApp / Viber / Start outgoing call)
-
Fill in the Data Required for the channel you choose.
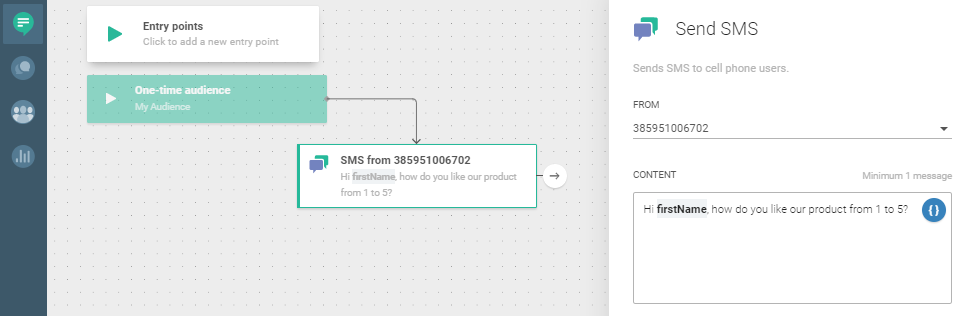
For example, SMS:
- Choose From (the sender you wish to use).
- Enter Content, maybe something like “Hi {firstname}
, how do you like our product from 1 to 5?“
 NOTE
NOTEIf you are using the IVR: Start Call communication channel then remember to click the arrow immediately after Start outgoing calland add the Play element where you configure the voice message that will be played to the customer.
Choose an audio source: Text-to-speech where you enter the message you want to be played to your users, or Audio file to use pre-recorded audio files from your computer (File Upload).
Read more about IVR and IVR in Flow.
-
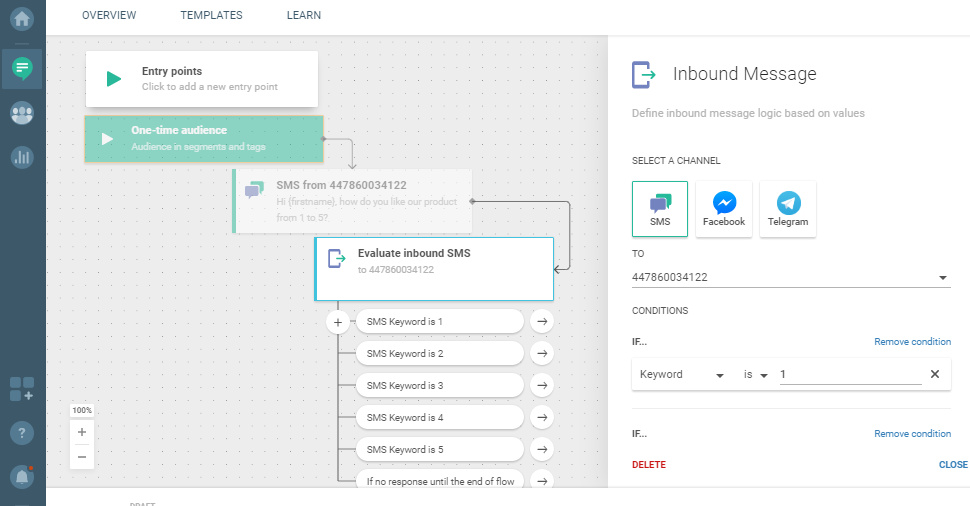
Click the arrow to add the Evaluate inbound message element (or the Collect element if you are collecting customer feedback via IVR call).
-
Fill in the details required. You may see different elements depending on the element accessed. For SMS you will see:
- Select a Channel you used to send the first message.
- Choose To (we recommend you use the same number you used to send the first message).
- Set Conditions. In this example, where you expect grades from 1 to 5, the conditions should be set like this:
- IF… keyword is 1
- IF… keyword is 2
- IF… keyword is 3
- IF… keyword is 4
- IF… keyword is 5
- IF… any keyword
NOTEIf you are collecting customer feedback by IVR call then the same principle is followed. Set conditions for each response. For example, Answer is 1, Answer is 2 and so on.
-
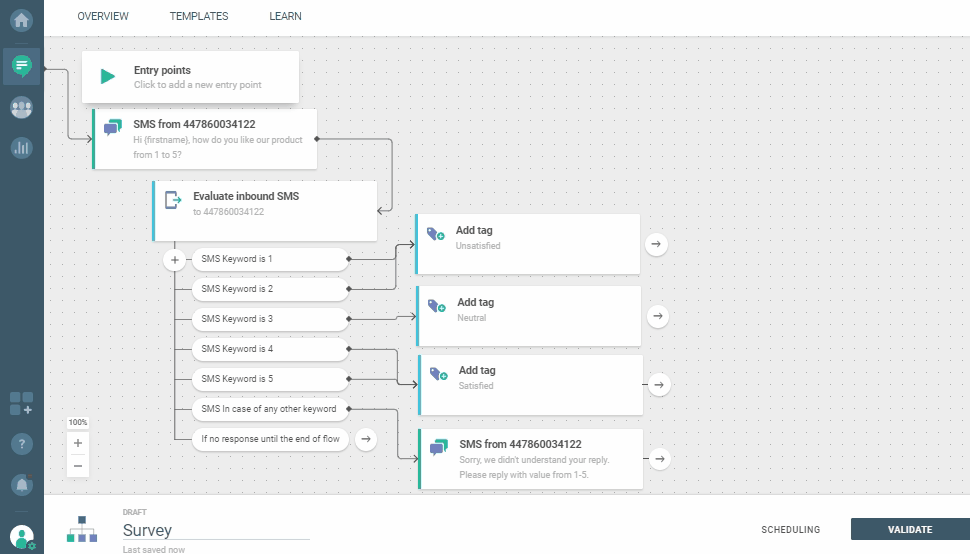
Click the arrow from the Keyword is 1and click theAdd Tagelement.
-
Set an Add Tag element.
- Click Create Tag and enter a name that will be used to tag unsatisfied customers.
- Once you enter a name, the tag will be added at the top to the Selected Tags (multiple tags can be used).
-
Connect the arrow from Keyword is 2, click theAdd Tagelement and add the Unsatisfied tag.
-
Click the arrow from Keyword is 3, click theAdd Tagelement and add the Neutral tag.
-
Click the arrow from Keyword is 4, click Add Tagelement and add the Satisfied tag.
-
Connect the arrow from Keyword is 5 element to Satisfied tag element.
-
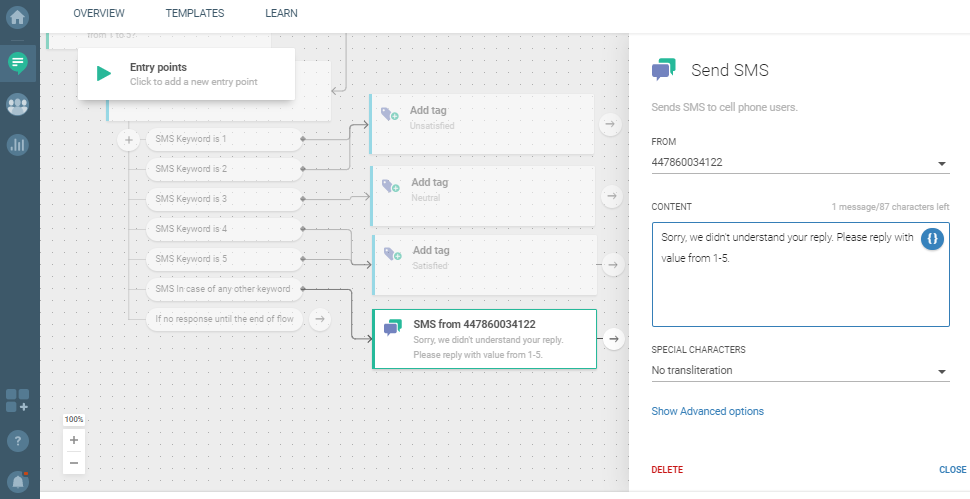
For the In case of any other keywordelement, click the arrow and select a communication channel (e.g., SMS).
Repeat step 6 and fill the From field and the message content. For example, you can enter: "Sorry, we didn't understand your reply. Please reply with a value from 1-5."
-
When done, connect this element to the Evaluate inbound message element to wait for a valid reply from the user. You do not need to do this step if collecting feedback via IVR Call.
Exit the flow by linking all Keyword responses to the Exit Flow element
ADVANCEDYou can continue to branch your Flow, by adding a "Thank you for your feedback" message on each tag. For example, select the arrow on Satisfied tag element, choose SMS, and define From and Content. This means when your end user rates you with 4 or 5 they will receive a thank you note. You can do the same with unsatisfied and neutral end users.
-
Select Validate(the flow won't launch when you click this) or schedule the Flow to be launched in the future by clicking Schedule.
-
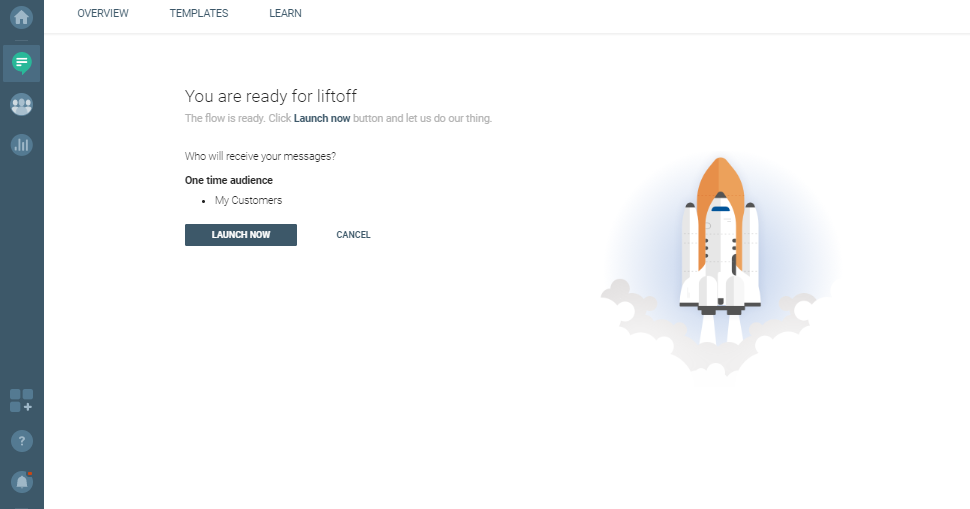
If you did everything correctly, you will see a summary screen with the LAUNCH NOWbutton (if scheduling is not set) or LAUNCH LATER (if scheduling is set).
Set an additional entry point for customers that are not in your segment or tag. By doing this you will send a survey to your one-time audience that you created in the Target module, but will also enable other customers that send a message to your number to participate in the survey. You can do much more, for example, target the customers who were tagged as Satisfied and ask them to leave a recommendation or like your social media page.