Embeddable Moments
EARLY ACCESS
Embeddable Moments provides predefined use case templates that enable you to deploy fully-configured flows while simplifying the experience for your platform users. You can integrate the solution into your web application through an iFrame, enabling your users to:
- Activate use cases by using a step-by-step configuration wizard.
- Manage activated use cases, including performance analytics.
The corresponding Moments flows run seamlessly in the background within their dedicated Infobip accounts or an isolated X tenant.
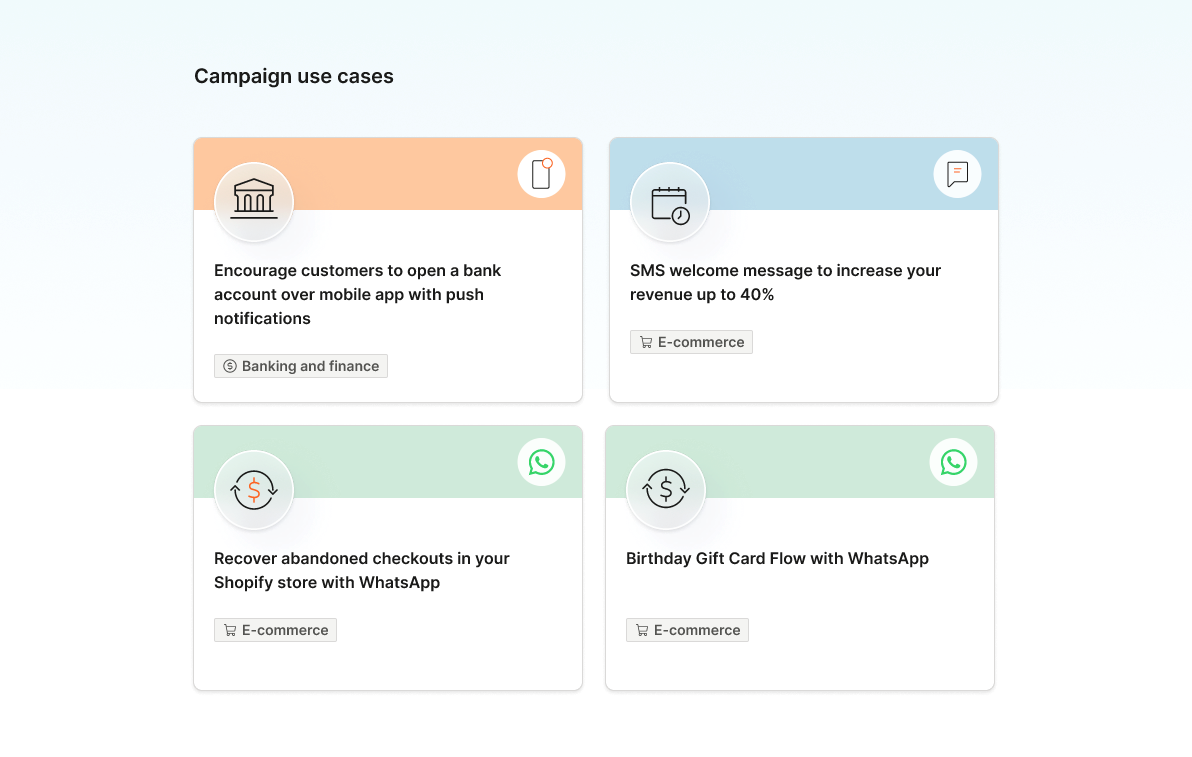
The following image shows an example of the embedded interface.
Prerequisites
-
Infobip account with Account management role.
-
Generate API key with the following API scopes.
- account-management:manage - to be able to initiate OAuth PAR flow.
- flow:manage
- flow:read
- flow:use
Compatibility with X [#compatibility-with-x-moments]
You can use Embeddable Moments with or without X.
Process overview
-
Use the Campaign wizard iFrame component that has predefined templates (use cases).
To work with the Campaign wizard iFrame component, you need to provide a request URI. This URI is used to access the Campaign wizard API.
This URI is generated and injected by the backend as part of a more secure authentication flow called OAuth Pushed Authorization Requests (PAR).
ImportantTo create the use cases and to manage existing use cases, contact your Infobip account manager.
-
Add the Campaign wizard iFrame component to your webpage.
Your customers can then activate the flow to use it.
Your customers cannot edit the flow journey.
Generate request URI [#generate-request-uri]
Follow these actions on your backend before rendering the frontend with Moments.
-
To initiate OAuth PAR flow, send a POST request to the following URL.
copyPOST https://api.infobip.com/embeddable/1/auth/parUse the following headers.
javascript1'Content-Type': 'application/json',2'Authorization': 'App <api-key>'Use the following payload.
json1{23 "embedding_id": <embedding_id>,4 "scopes": ['flow:manage', 'flow:read', 'flow:use'],5 "application_id": "<application_id>", // if needed6 "entity_id": "<entity_id>̣" // if needed78 "embedding\_id": , "scopes": \['flow:manage', 'flow:read', 'flow:use'\], "application\_id": "", // if needed "entity\_id": "̣" // if needed}The cURL request would be as follows.
json12curl --location 'https://api.infobip.com/embeddable/1/auth/par' \ --header 'Authorization: App <api-key>' \ --header 'Content-Type: application/json' \ --data '{3"embedding_id": <embedding_id>, "scopes": [ "flow:manage", "flow:read",4"flow:use" ],5"application_id": "<application_id>",6"entity_id": "<entity_id>" }' -
The response contains the object with
request_uriparameter. Use this parameter in the iFrame component.
Add the iFrame component to your web page [#add-iframe-to-web-page]
Include the following iFrame component on your web page.