Create a Simple Self-Service Chatbot
By using Answers, Infobip chatbot building platform, you can easily build a simple chatbot that will assist your customers and provide them the information they need in aself-service mode. For example, working hours of your offices, or share with them information related to your service (like Terms & Conditions, maps, guides, etc.).
Solutions to combine:
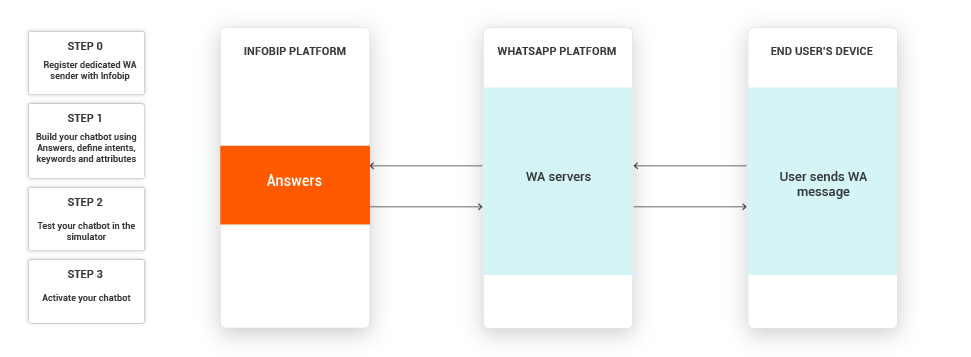
Process Flow
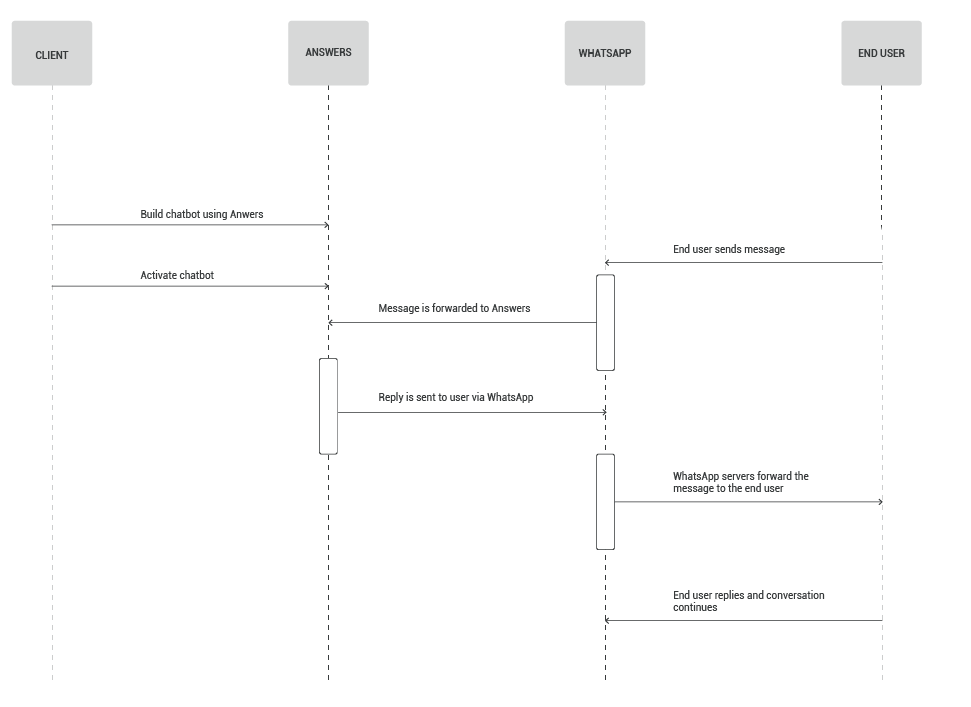
End users enter into the chatbot conversation by initiating the conversation with the keyword you define—the most used is the simple “Hi”. The logic behind a chatbot is very simple—if end users reply with for example, “YES” or “option 1”, or “first option” then you send one type of information, and if they reply with “NO” or “option 2”, or “second option”, you send another type of information.
Besides using simple keywords, you can enable NLP (Natural Language Processing), train the intent engine in the backend and make your chatbot even more powerful. In the example where the end users want to know the exact location of your office, you canadd training phrases in the Intent element, so the end users can write both „Option 1“, „1“, or any synonym of the number 1, but they can also write “location”, or “where is the office”, making chatbot understand their intent, and provide appropriate answer.
IMPLEMENTATION STEPS
Pre-requisites: [#pre-requisites-implementation-steps]
- Products/solutions used in this case are Answers, the Infobip chatbot building platform, and WhatsApp as a channel. Before you can start using WhatsApp, you have to set up the WhatsApp Business account.
- Depending on a specific use case you are trying to resolve by implementing chatbot, you should outline and define what are the pain points of your end users you are trying to resolve via chatbot.
- After outlining pain points, it is recommended to create an outline of possible answers your chatbot will reply with.
- Now, when you have the idea how your chatbot will resolve your end users’ issues, you are ready to start building your chatbot.
Steps over Web Interface [#steps-over-web-interface-implementation-steps]
-
Log in to the web interface and navigate to the Answers module.
-
Click the CREATE CHATBOT button and create a new chatbot. Enter Bot nameand select WhatsApp as Channel as the mandatory fields and before you activate the bot, make sure you also configure the Sender number, Language, Escape phrases, and Session Timeout.
-
If you have the intent training file prepared, import it. Otherwise, go to Intent tab and manually createnecessary intents required for the dialogs. For example, all the greetings phrases you expect to receive from the end users.
-
Based on the conversation design, create all required attributes.
-
As the service chatbot usually depends on keywords to branch the conversation, create keywordsas well.
-
Once most of the intents, attributes, and keywords exist in the Answers platform, start with dialog design. Based on the conversation schema, use the necessary elements to build the dialogs starting with selecting the intent.
-
To start the conversation from the chatbot side, add a text element to the dialog by drag and dropping the Send text element underneath the intent element.
-
Enter the text the chatbot will send to the user.
-
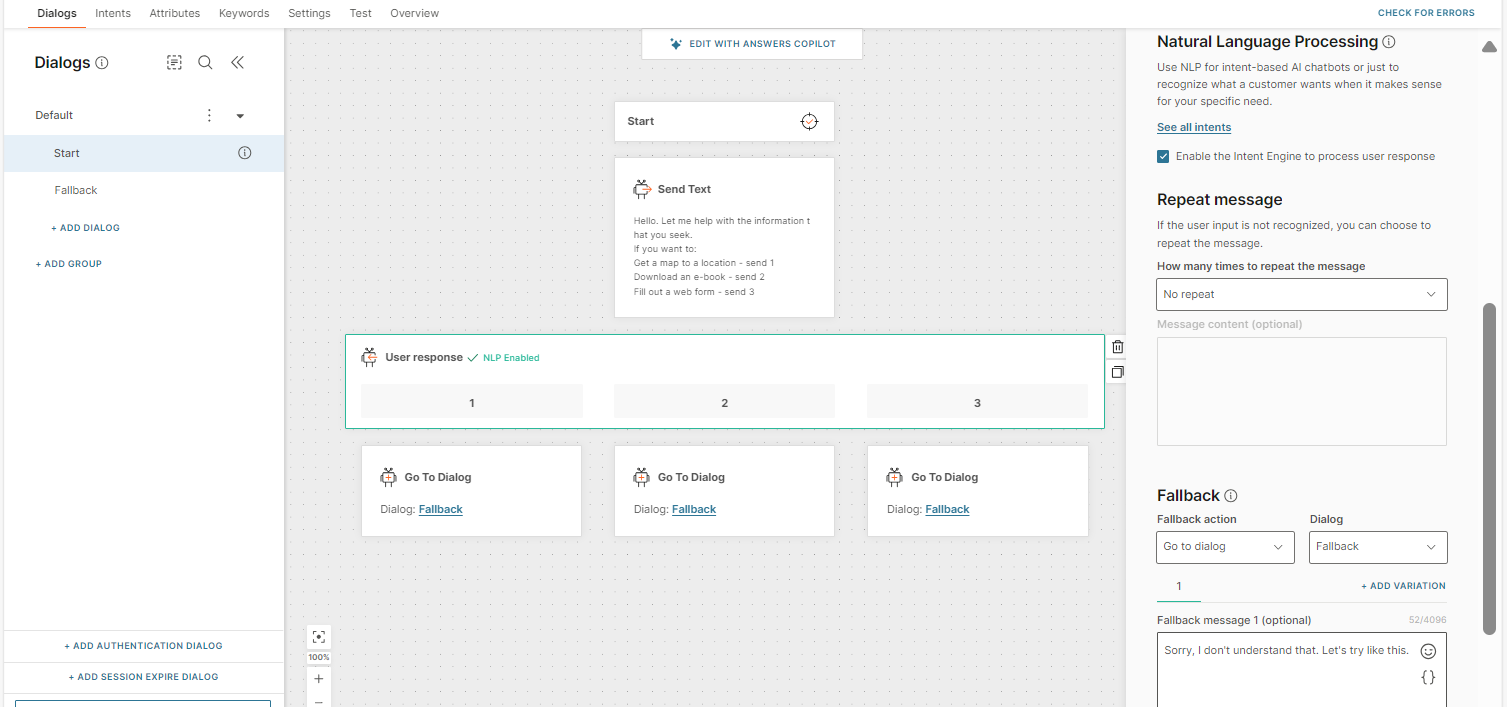
For the expected user response add Process User Input element which will use previously created keywords to navigate the chatbot to what you expect to receive in user responses.
NOTEEnable NLP by checking the Enable the Intent Engine to process user input checkbox for cases where the end user sends a message that doesn’t correspond to expected keywords and the NLP engine will try to find the appropriate dialog and answer the user. You can also select the Fallback option for cases where keywords and NLP do not recognize the message and send the user directly to a dialog defined for such cases.
-
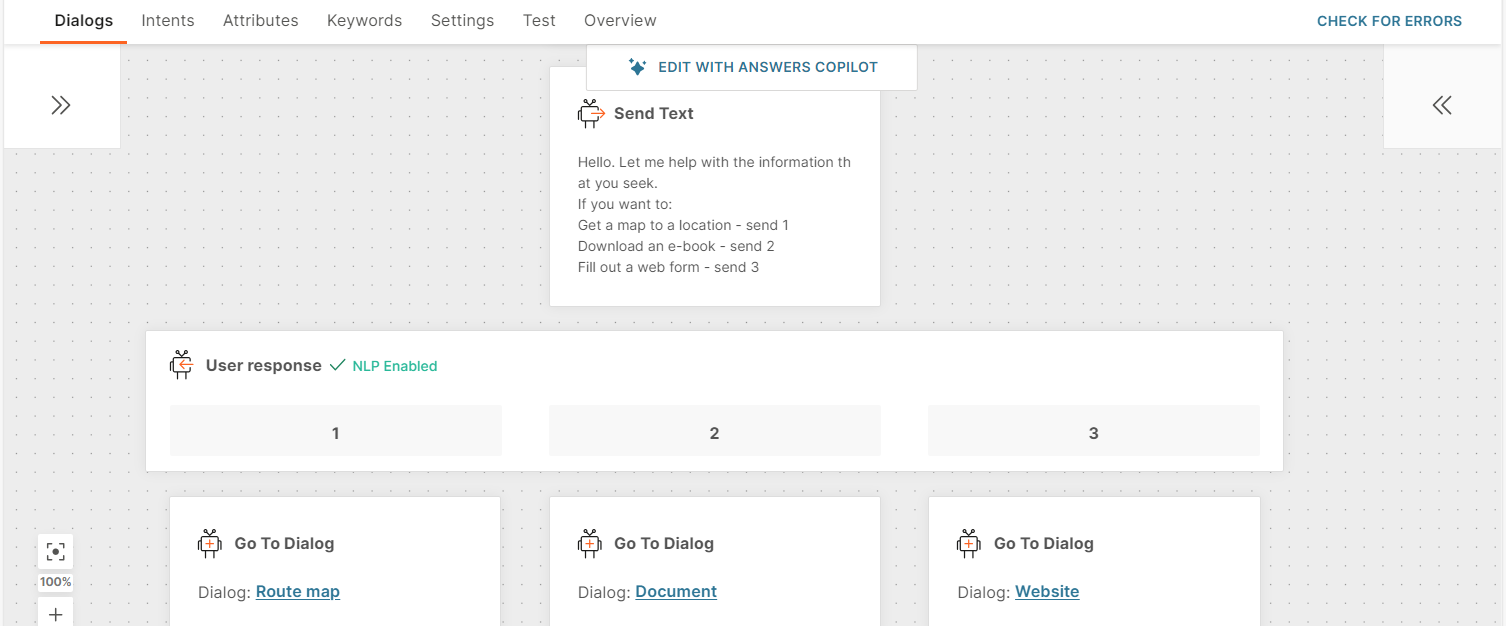
As we want User response element to use NLP if the user doesn’t respond with the expected keyword, add the Go to Dialog elements which will guide the end user to the dialogs which will provide them with the requested information.
 NOTE
NOTEWhen you add the Process User Input element, you can only add two more elements under each Process User Input branch.
-
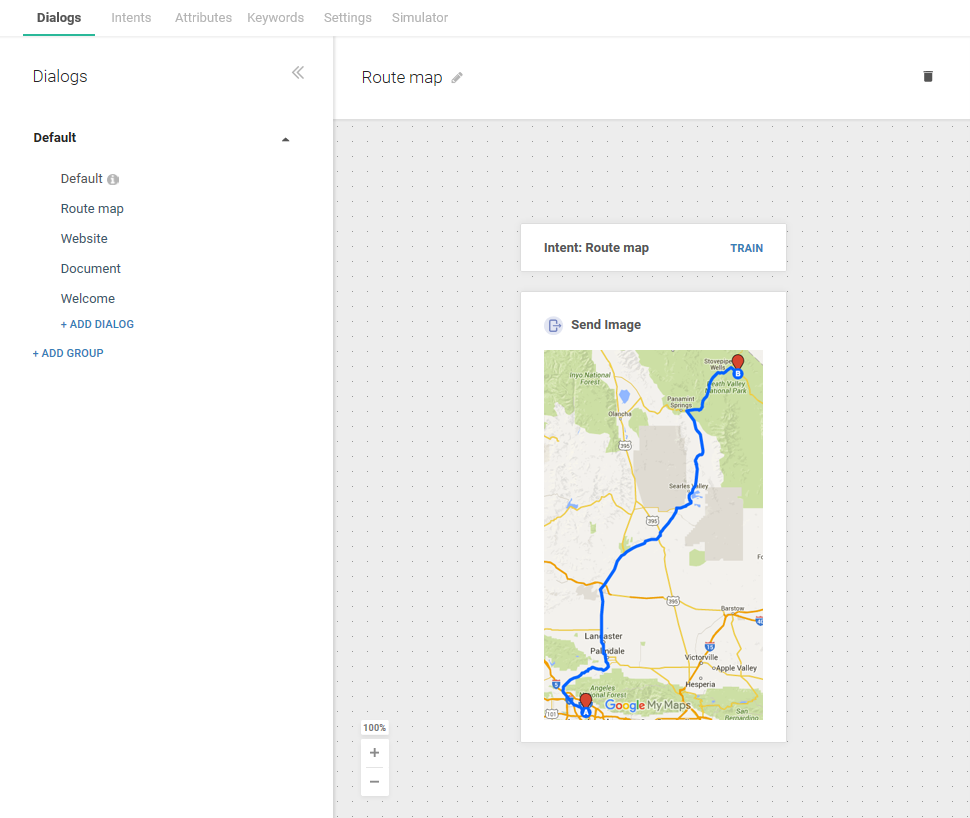
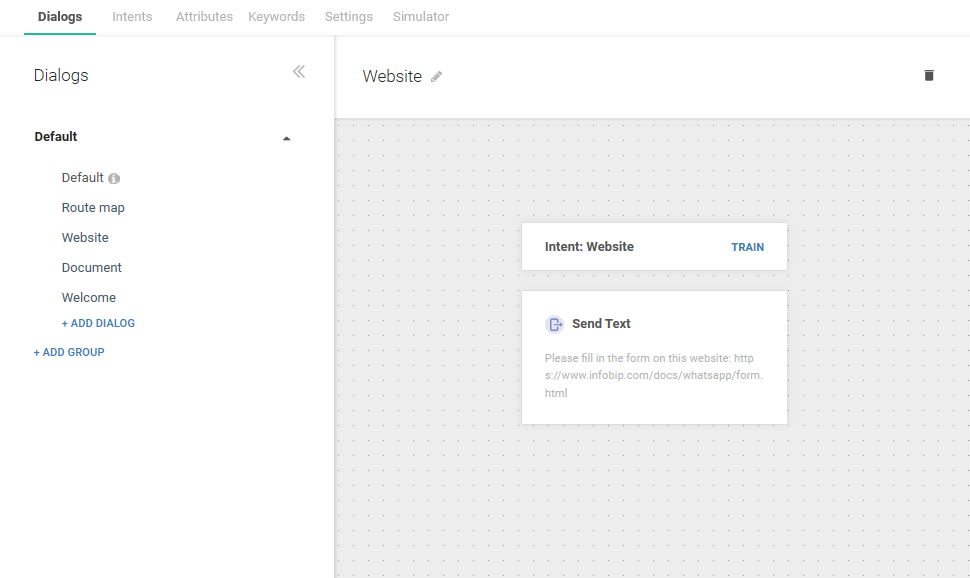
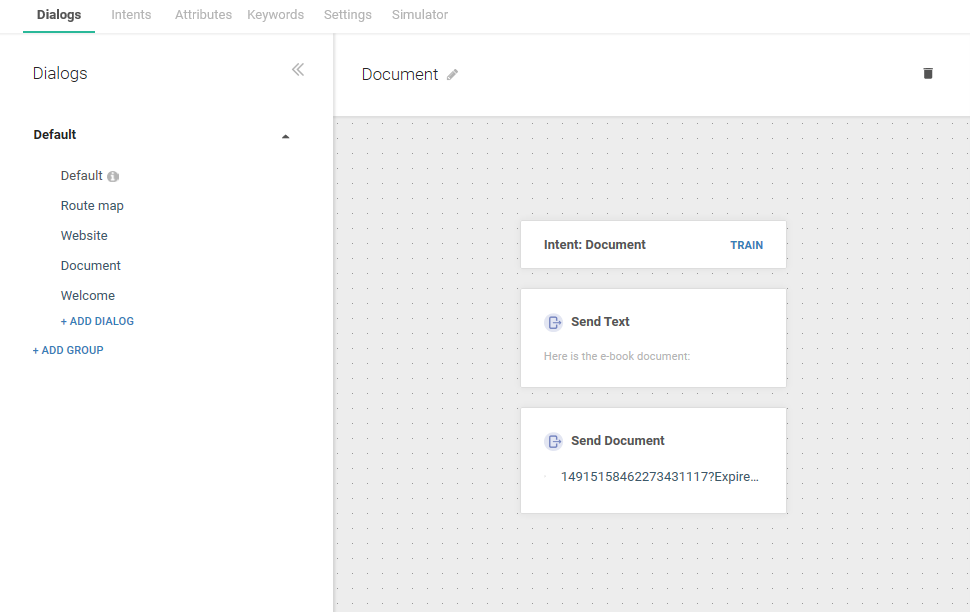
Each Go to Dialog element forwards the conversation to the dialog where the keyword/intent match the information the end user is looking for.
Keyword 1/Intent Route map
Keywords 2/Intent Website
Keyword 3/Intent Document
-
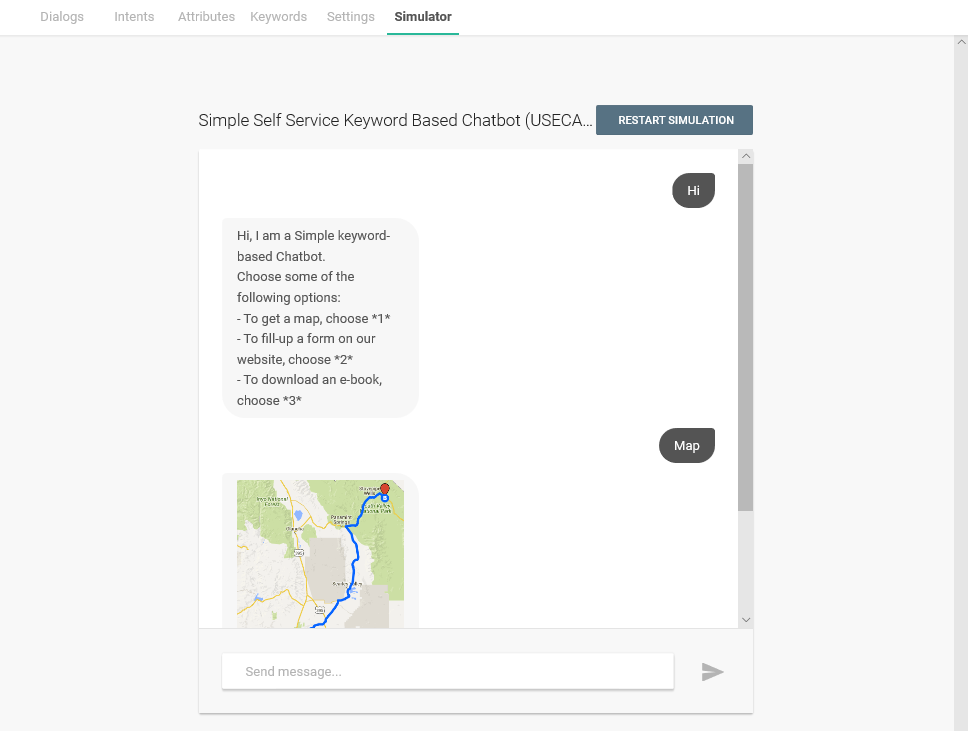
After you finish dialog design, use the Simulator tab to check how well your chatbot performs in simulations of real-life conversations As you can see, after enabling the NLP, even when the user sends the answer “Map”, the bot recognizes the question even though it is not the expected keyword.
-
Once you make sure the conversations run as planned, check that all the settings are configured and activate the chatbot.
In some situations, a chatbot is unable to resolve your end users’ issues. In order to keep them satisfied, use Redirect to Agent element and transfer the conversations to a live-agent, by using Conversations, our cloud contact center solution.