Intents
When end users contact a chatbot, they have a specific goal. Example: They may contact the chatbot to obtain information, perform an action, or resolve an issue. The chatbot needs to identify the goal of the end user's message so that it can take the relevant action.
Chatbots use intents to identify these goals. The process is as follows:
- Identify a list of potential goals that end users might have.
- For each goal, create an intent.
- Assign the intent to the relevant dialog.
- When an end user sends a message, the chatbot identifies the relevant intent of the message, and directs the end user to the dialog that is associated with the intent.
Example: For a chatbot that manages bookings:
| End user's message | Goal of the message | Intent that is matched for the goal | Dialog to which the conversation is routed |
|---|---|---|---|
| I want to create a new reservation | To create a booking | Create_booking | Create |
| Need to reschedule my booking | To manage a booking | Manage_booking | Manage |
| Can I cancel my appointment? | To cancel a booking | Cancel_booking | Cancel |
Intents are mandatory for AI chatbots and optional for rule-based chatbots.
If you enable natural language processing for a dialog, you must assign an intent to that dialog for NLP to work correctly.
Training dataset for intents
Each intent has a training dataset that helps the chatbot identify the correct intent. The training dataset contains training phrases and important words.
Training phrases [#training-phrases-training-dataset-for-intents]
Training phrases are a set of sample messages that end users are likely to send to the chatbot. These phrases help the chatbot understand what the end user wants. The chatbot can then take the relevant action.
Example:
| Manage_booking intent | Baggage intent | |
|---|---|---|
| Training phrases | I want to change my booking. Help me manage my booking. I want to reschedule my appointment. Need help to manage my booking. How do I modify my booking? | I want to know about my baggage allowance. |
Training phrases can be single words, phrases, or complete sentences. The more the number of training phrases, the higher the probability for the chatbot to take the right action.
Important words [#important-words-training-dataset-for-intents]
Similar to training phrases, important words also help identify intents. An important word is a single word that helps the chatbot uniquely identify the intent.
It is not mandatory to add important words. However, if there are similar intents, adding important words helps identify the correct intent.
In the following example, the important words Manage and Cancel help differentiate between the two intents.
| Manage_booking intent | Cancel_booking intent | |
|---|---|---|
| Training phrases | I want to change my booking. Help me manage my booking. I want to reschedule my appointment. Need help to manage my booking. How do I modify my booking? | I want to cancel my booking. Help me scrap my booking. I want to call off my appointment. |
| Important word | Manage | Cancel |
Synonyms: When end users respond to your chatbot, they may use variations of the important words. Example: Instead of using the word 'manage', the end user may say 'reschedule'. You need to add these variations to the training dataset. Instead of adding these variations as separate important words, you can add them as synonyms to an existing important word. Example: For the important word 'manage', you can add the following synonyms: reschedule, move, change, and update.
The chatbot takes the same action whether the end user's response contains the important word or a synonym.
Named entity recognition attributes
Use Named entity recognition (NER) attributes to extract information when end users respond with unstructured text. NER is a part of natural language processing (NLP). The goal of NER is to recognize and categorize information (entities) in the end user's message. These entities can be either a single word or a set of words.
Use NER attributes in combination with intents in AI chatbots.
NER attributes have the following fields.
Name [#name-named-entity-recognition-attributes]
The name of the NER attribute. Example: mobile_attribute.
Type [#type-named-entity-recognition-attributes]
NER attributes can have one of the following data types:
- Standard NER attribute type
- Custom data type
Standard NER attribute types [#standard-ner-attribute-types-named-entity-recognition-attributes]
NER attributes can have one of the following NER-enabled data types. The behavior of these data types is different from the data types for standard attributes.
- City: Data set from GeoNames
- Country: Data set from GeoNames
- Currency: Numeric amounts and currency names, codes, or symbols
- Date: The date is stored in the format YYYY-MM-DD.
- If an end user's message contains the date in Month/Day/Year format, the date is stored incorrectly.
- If an end user's message contains the date in a different format, Answers converts the date to the format YYYY-MM-DD.
- The attribute supports only names of English months.
- If a part of a date is missing, Answers stores the value as 0. Example: If an end user's message contains '1st March' and the year is missing, the date is stored as 0-3-1.
- The attribute accepts the following values:
Day: Either from 1 to 31 or is missing
Month: Either from 1 to 12 or is missing
Year: Either from 1900 to 2100 or is missing - If the day (DD) information is present, the month information (MM) must also be present.
- Example:
End user's message Date attribute 1st of March, 2023 2023-3-1 01/03/2023 2023-3-1 1.3.2023 2023-3-1 1/3/2023 2023-3-1 1-3-2023 2023-3-1 First of March, 2023 2023-3-1 First of March 0-3-1 March 0-3-0
- Day of week: Text for the days of the week, in English
- Number: Numbers written in digits. Example: Use a NER attribute of type, Number, to extract the customer number
- Relative date: Supports the following relative dates.
- TODAY
- YESTERDAY
- TOMORROW
- DAY_BEFORE_YESTERDAY
- DAY_AFTER_TOMORROW
- LAST_MONTH
- LAST_YEAR
- THIS_MONTH
- THIS_YEAR
- NEXT_MONTH
- NEXT_YEAR
Example:End user's message Relative Date attribute That happened today? TODAY Is that the day before yesterday? DAY_BEFORE_YESTERDAY Is that the day after tomorrow DAY_AFTER_TOMORROW Was that the previous month? LAST_MONTH Was that the last month? LAST_MONTH
Validation for standard data types [#validation-for-standard-data-types-named-entity-recognition-attributes]
| Standard data type | Condition | Validation |
|---|---|---|
| City | is equal to | is not equal to | is null | is not null | Data set from GeoNames |
| Country | is equal to | is not equal to | is null | is not null | Data set from GeoNames |
| Currency | is equal to | is not equal to | is null | is not null | Numeric amounts and currency names/codes/symbols |
| Date | is equal to | is not equal to | is before | is before or equal to | is after | is after or equal to | is null | is not null | Checks if a word in the text is a date element (day, year, or month) |
| Day of the week | is equal to | is not equal to | is null | is not null | Textual input for days of the week in English |
| Number | is equal to | is not equal to | is before | is before or equal to | is after | is after or equal to | is null | is not null | Numbers written with digits |
Custom data types [#custom-data-types-named-entity-recognition-attributes]
In addition to the NER-enabled data types, which are defined by Answers, you can create custom data types for NER attributes. Use custom data types to identify predefined entity values in end user messages.
Create a custom data type and add custom values to it. If the end user's message contains one of the custom values, configure the chatbot to direct the flow accordingly. For an example that explains how to use custom data types, refer to the Use entities section.
Custom data types are case sensitive. So, add values in the same format that you expect end users to use.
All AI-supported languages support custom data types.
Supported data type by language [#supported-data-type-by-language-named-entity-recognition-attributes]
The availability of an attribute type depends on the chatbot language.
English, Spanish, and Portuguese support the following NER attribute types:
- City
- Country
- Currency
- Date
- Day of week
- Number
- Relative date
- Custom data types
Other languages support the following NER attribute type:
- Number
- Custom data types
If you change the language of the chatbot and the new languages does not support the NER attribute type, the NER attribute becomes invalid. You must correct the error before you activate the chatbot. Example: Your chatbot language is English and you create the startDate NER attribute with the Date attribute type. If you then change the chatbot language to Arabic, the startDate NER attribute is invalid because Arabic does not support the Date NER attribute type.
Subtype [#subtype-named-entity-recognition-attributes]
A subcategory for the NER attribute type. Subtypes enable you to capture 'to' and 'from' values in responses from end users. Example: If your chatbot is for booking flights, use two City type NER attributes with Source and Target subtypes to capture the 'from' and 'to' cities.
NER attributes can have one of the following subtypes:
- Source
- Target
- None
Subtype is optional. But, if you want to assign two NER attributes of the same type to an intent, you must define the subtype for each attribute. Also, the subtype for each of these attributes must be different.
If you do not add the subtype, you can add only one attribute of a specific type to an intent.
Example: For Intent_1, you can add the following attributes of the type City and define their subtypes:
- Location_from attribute - Source subtype
- Location_to attribute - Target subtype
- Location attribute - None subtype
When the end user sends a message, the attributes are recognized as follows:
| End user message | Location_from attribute | Location_to attribute | Location attribute |
|---|---|---|---|
| I want to travel from London to Zagreb | London | Zagreb | empty |
| I want to travel to Zagreb | empty | Zagreb | empty |
| I want to visit Zagreb | empty | empty | Zagreb |
Source and Target subtypes are available for Country, City, and Currency attribute types.
Scope [#scope-named-entity-recognition-attributes]
The scope can be one of the following:
-
Dialog: The attribute value is specific to a dialog. In other dialogs, the attribute value either has the default value or is blank.
Example: The default value of the opt_in attribute is False. In a specific dialog, the opt_in attribute value changes to True. But in all other dialogs, the attribute still has the default value, False.
-
Chatbot: The attribute value is the same across all dialogs in the chatbot.
Example: The default value of the opt_in attribute is False. In a specific dialog, the opt_in attribute value changes to True. In all other dialogs, the attribute now has the value, True.
List [#list-named-entity-recognition-attributes]
You can select whether the NER attribute is for a single value or a list. If you define the attribute as a single value, the attribute stores the first relevant value from the end user's message. If you define the attribute as a list, the attribute stores all relevant values from the end user's message.
Example: You want to store the name of the city in the city attribute. The end user message is "I want to visit London, Chennai, and Zagreb". If you define the city attribute as a single value, it stores the first city in the end user's response, that is, London. If you define the city attribute as a list, it stores all the cities in the end user's response, that is, London, Chennai, and Zagreb.
To define the attribute as a list, select List. Otherwise, the attribute is set as a single value.
If you define the attribute as a list, you can use other Answers elements to obtain specific information.
Example: You want to obtain the name of the city from the end user. The end user's message is "I want to visit London, Chennai, and Zagreb".
-
Define the city attribute as a list. city stores all the cities in the end user's response. So, city contains London, Chennai, and Zagreb.
-
Use the Conditions element to identify the number of values in the city attribute.
-
If the number of values is 1, use this value for the next steps of the chatbot flow.
-
If the number of values is more than 1, use either the Quick Reply or the Carousel element to ask the end user to provide the specific value from of the list of values. In this example, the number of values is 3. So, use a Quick Reply or Carousel element to ask the end user the specific city from the 3 values. "In which of these cities you would like to start your trip? London, Chennai, Zagreb"
-
The end user chooses Zagreb.
-
Use Save user response element validation to make sure that only 1 value, that is, Zagreb, is now stored in the city attribute.
Available to agents [#available-to-agents-named-entity-recognition-attributes]
If you select this field, the NER attribute value is visible to an agent when the chat is transferred from the chatbot to an agent in Conversations.
In Conversations, the attribute value is displayed in the context card of the conversation and the conversation history.
If you also select Sensitive data, the attribute value is displayed as a hashed value in Answers and Conversations..
To hide the attribute value from agents, deselect this field.
Sensitive data [#sensitive-data-named-entity-recognition-attributes]
If you select this field, the attribute value, including default value, is encrypted when it is stored in the database. So, the attribute value is displayed as hashed data in Answers and Conversations.
Example: The message is displayed as follows.
When this field is disabled: Your account balance is 2123.32.
When this field is enabled: Your account balance is ####.##.
Use this field if the NER attribute contains sensitive data. This setting is especially useful when chats are transferred to live agents.
This feature is applicable only for outbound attributes.
The user interface
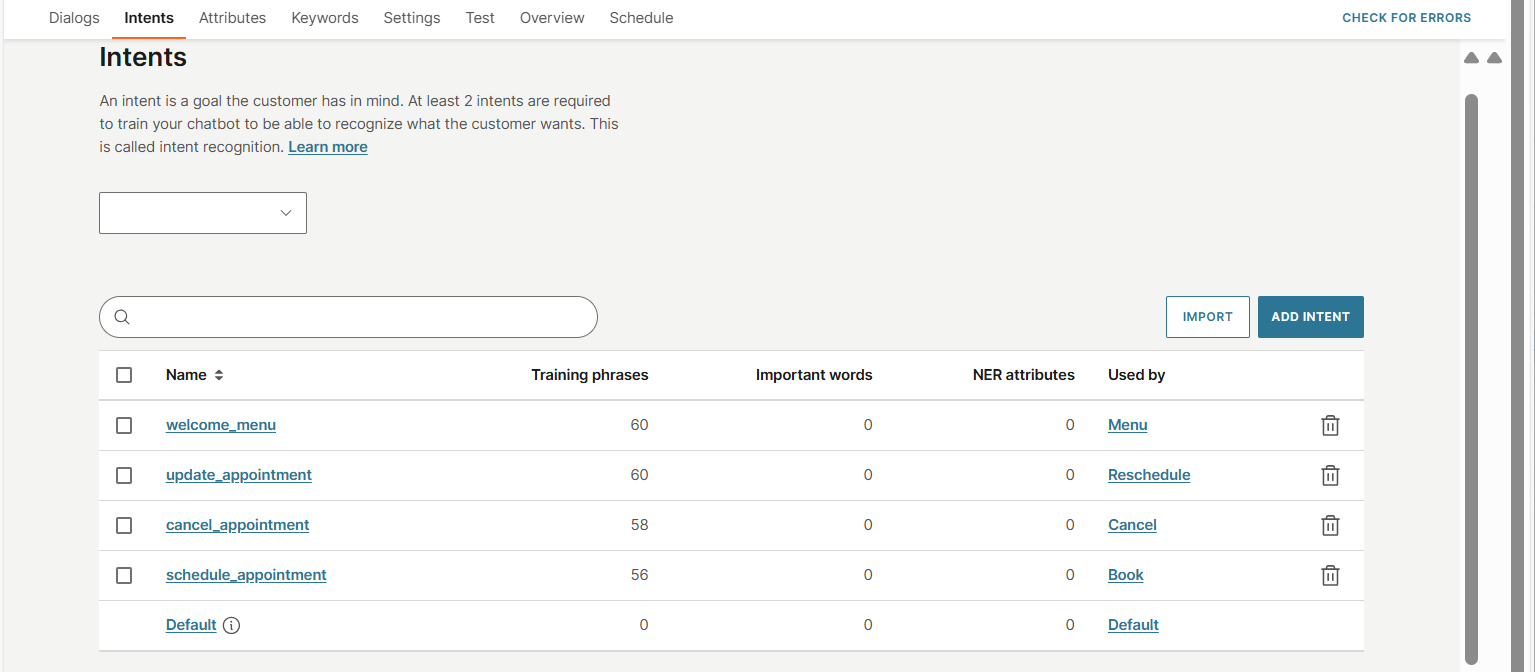
Intents tab [#intents-tab-the-user-interface]
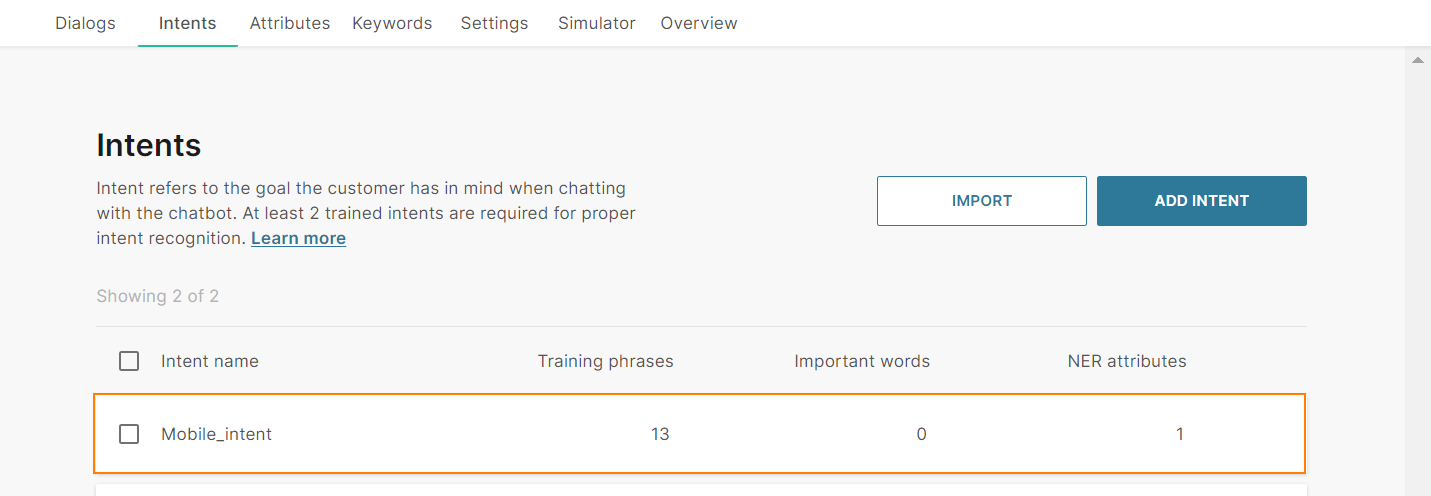
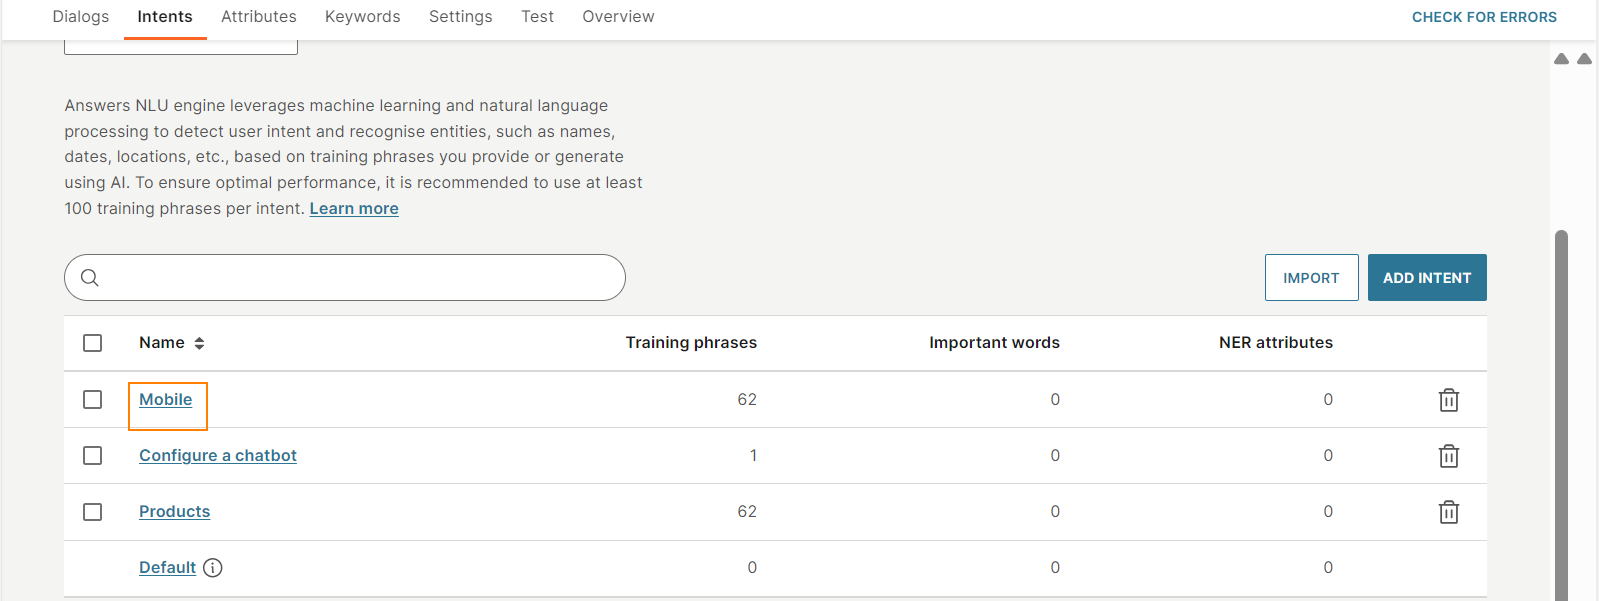
In the Intents tab, you can view and manage the intents in your chatbot.
You can do the following.
-
View a list of intents. Each intent shows the following information.
- Name: Name of the intent
- Training phrases: The number of phrases used to train the intent
- Important words: The number of important words used with the intent
- NER attributes: The number of NER attributes used with the intent
- Used by: The dialogs that use the intent
-
Search for an intent. Use the search box.
-
Sort the intents by name. Select the Name column header.
-
View and manage training phrases, important words, and NER attributes for an intent. Select the intent and go to the relevant tab.
-
Select the intent engine for your chatbot.
-
Create an intent.
-
Import intents into your chatbot.
-
Export intents.
-
Delete one or more intents.
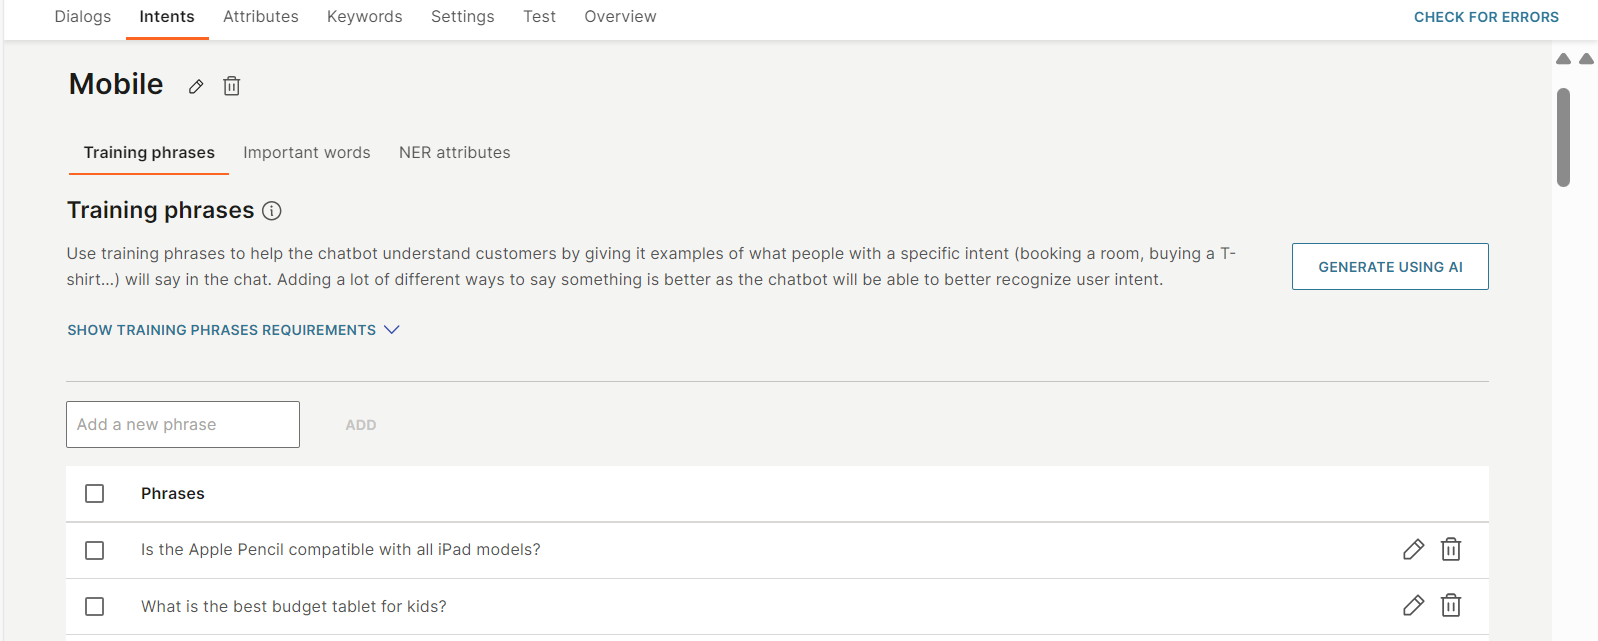
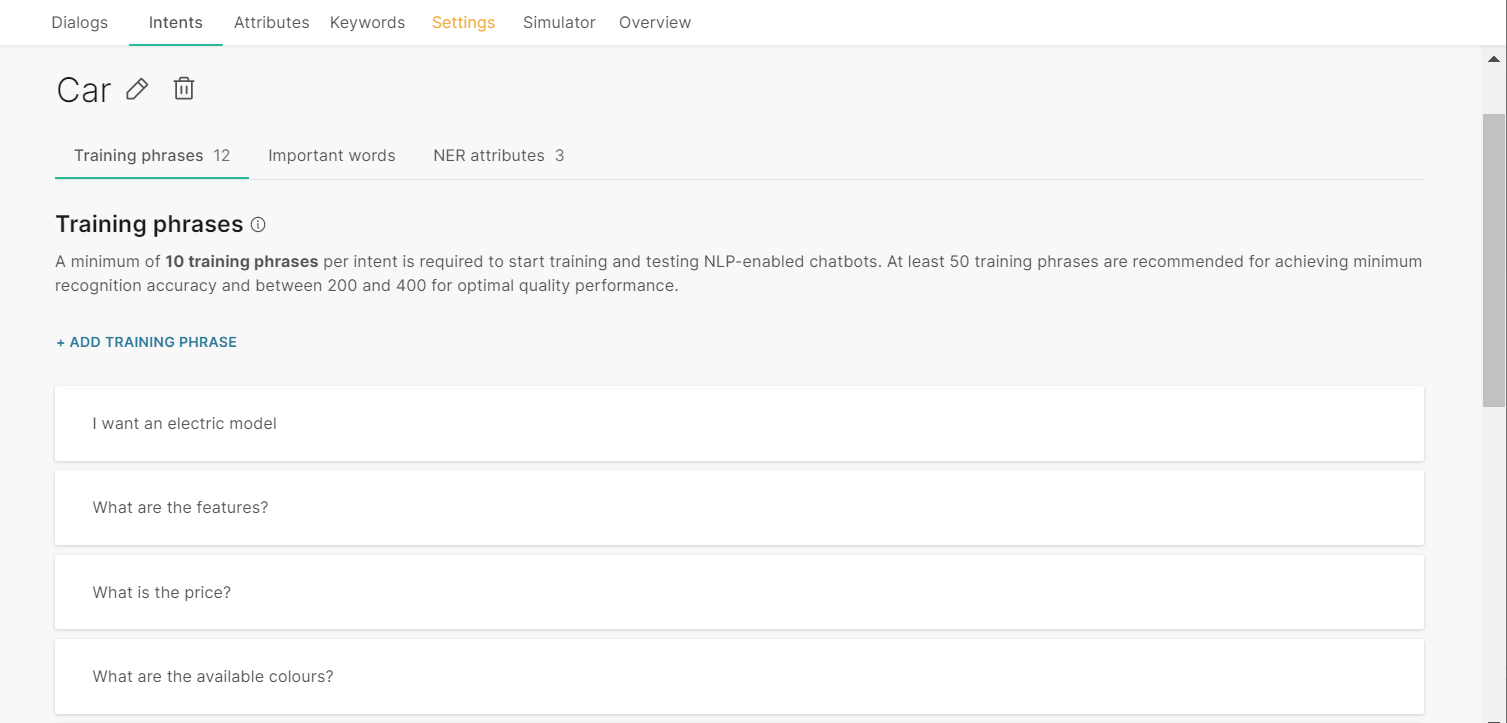
Training phrases tab
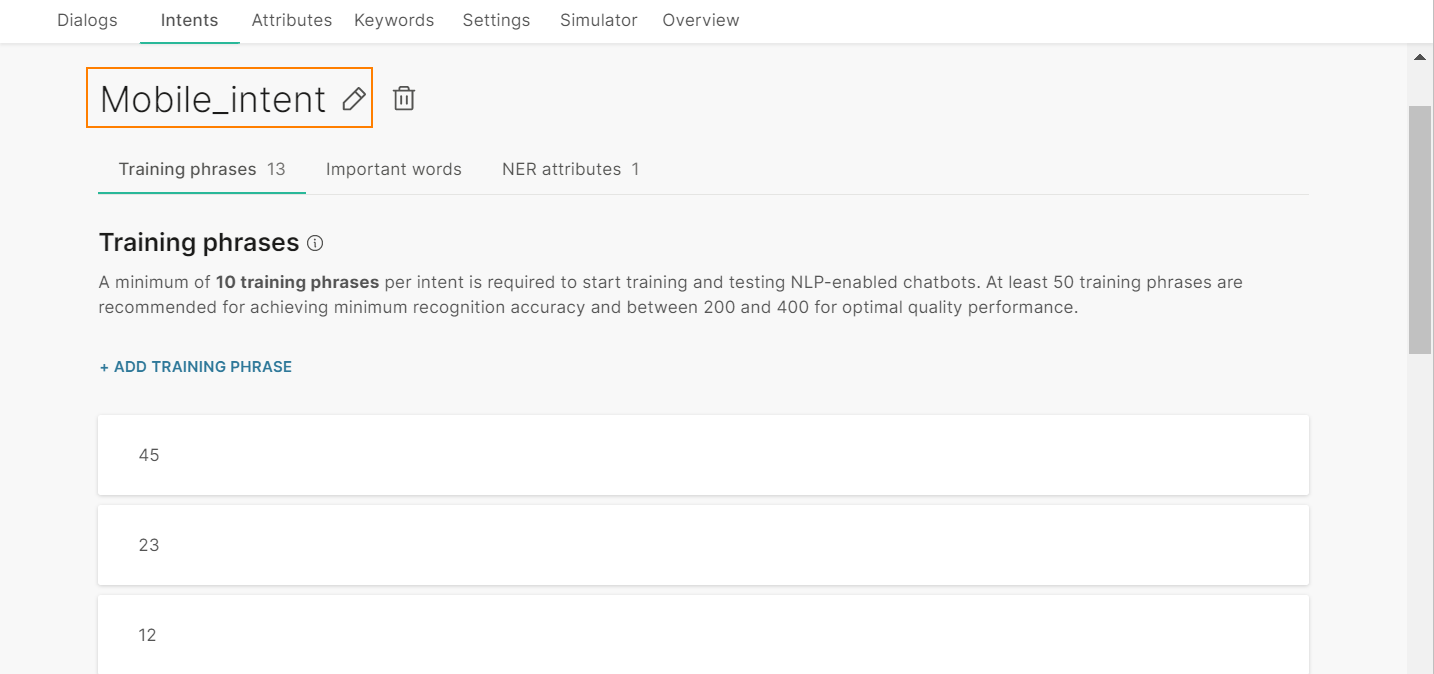
To view and manage the training phrases for an intent, go to the Intents tab, go to your intent > Training phrases tab.
You can do the following.
- View a list of training phrases.
- Search for a training phrase. Use the search box.
- Create training phrases either manually or by using AI.
- Edit a training phrase. Select the pencil icon next to the training phrase.
- Delete one or more training phrases.
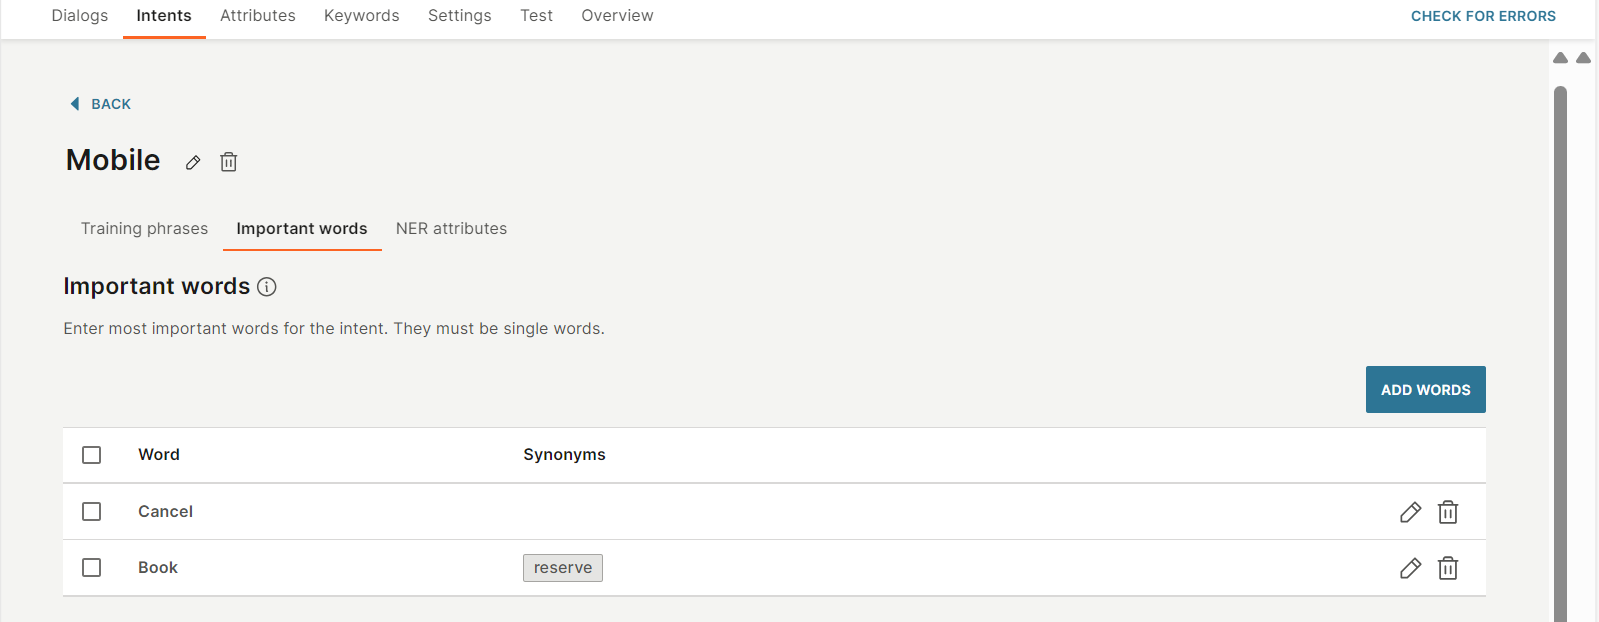
Important words tab
In the Important words tab of an intent, you can view and manage the important words for the intent.
You can do the following.
- View a list of important words.
- Search for an important word. Use the search box.
- Create important words.
- Edit an important word and its synonyms. Select the pencil icon next to the important word and update the required fields.
- Delete one or more important words.
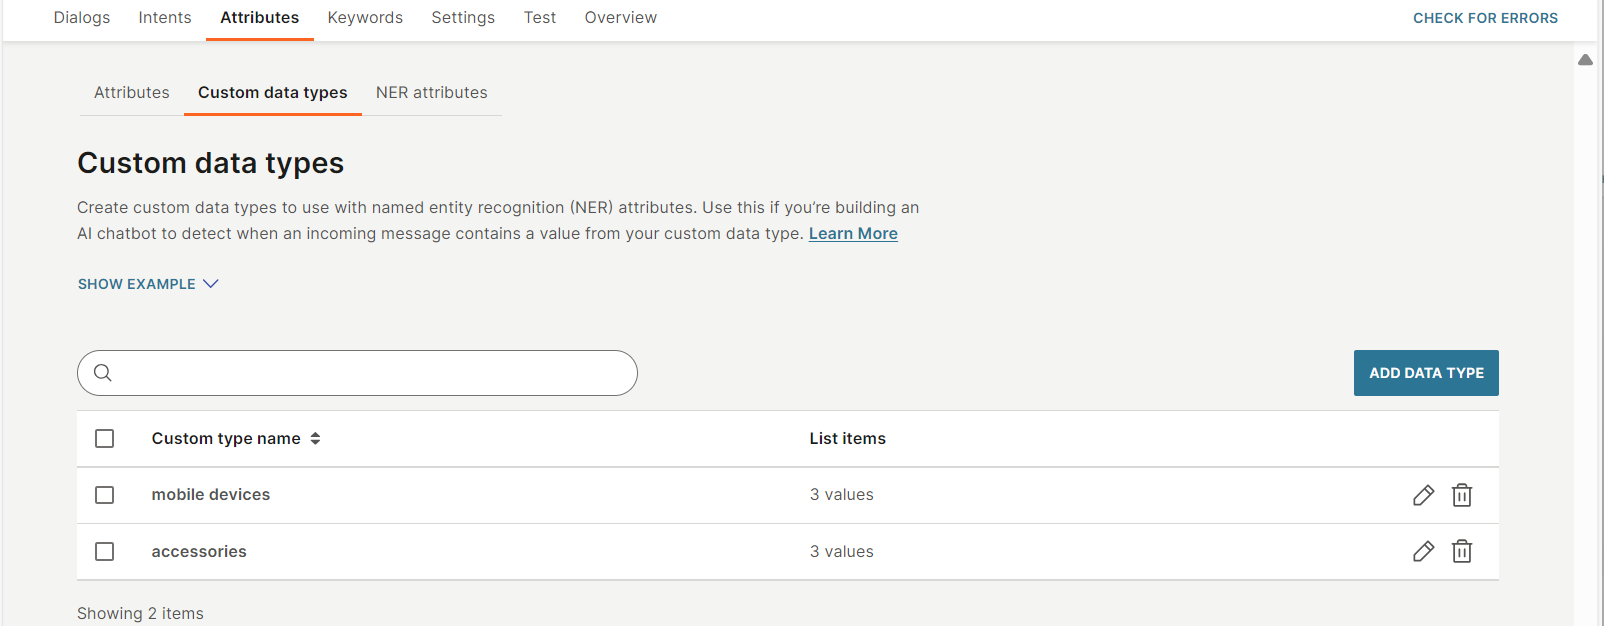
Custom data types tab [#custom-attribute-types-tab-the-user-interface]
In the Attributes tab > Custom data types tab, you can view and manage the custom data types in your chatbot.
You can do the following.
- View a list of custom data types.
- View the number of list items that a custom data type contains. See the List items column.
- Search for a custom data type. Use the search box.
- Sort the custom data types by name. Select the Custom type name column header.
- Create a custom data type.
- Edit a custom data type and its custom values. Select the pencil icon next to the custom data type and update the required fields.
- Delete one or more custom data types.
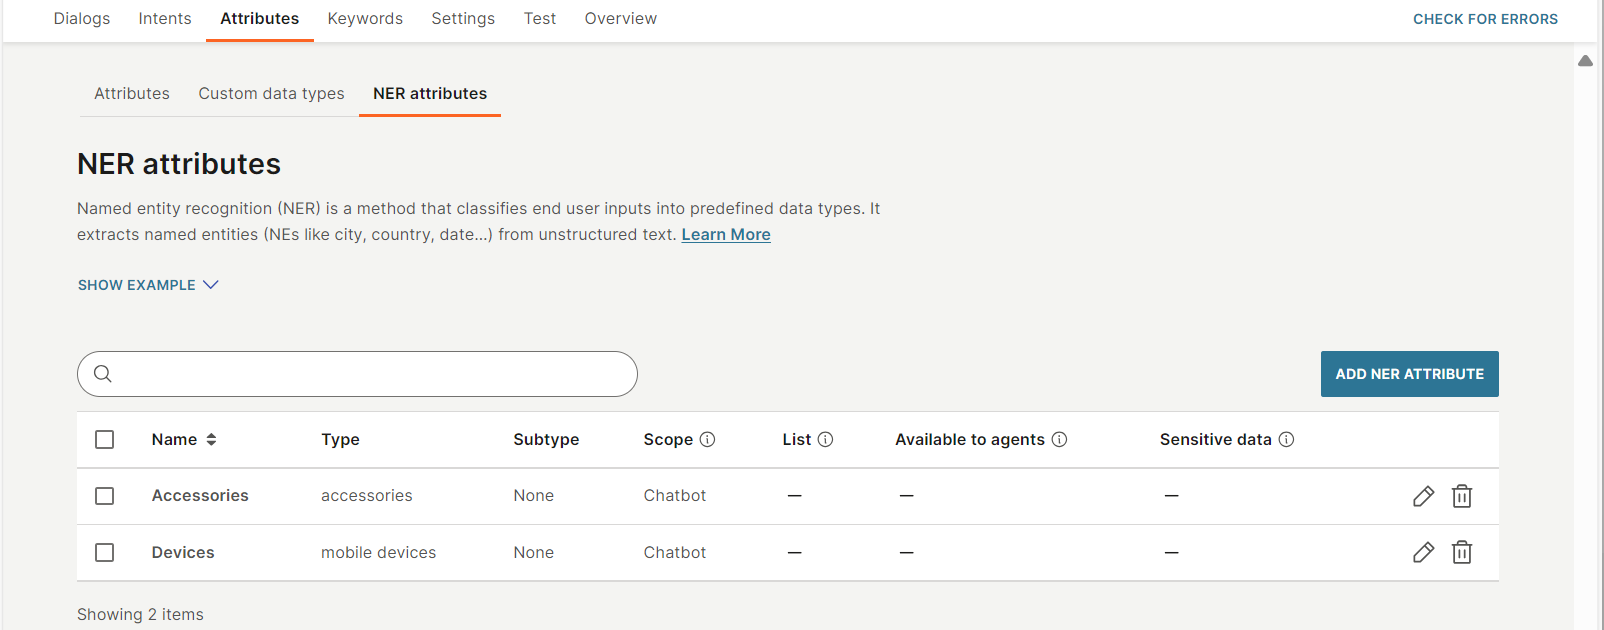
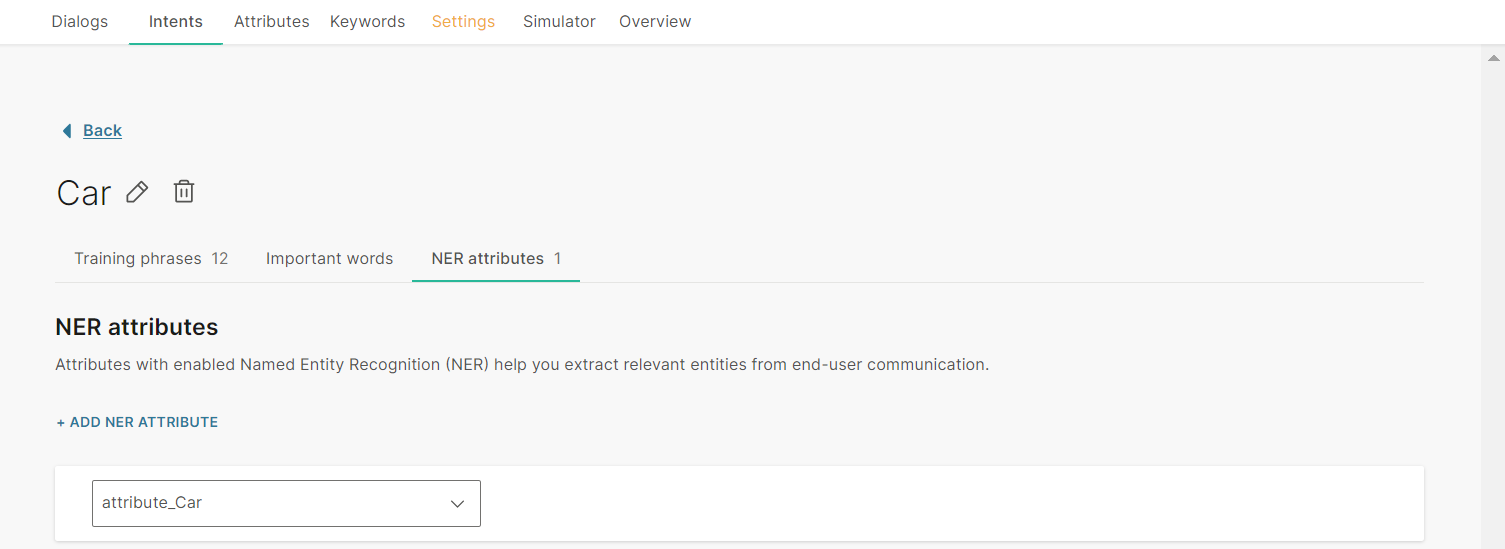
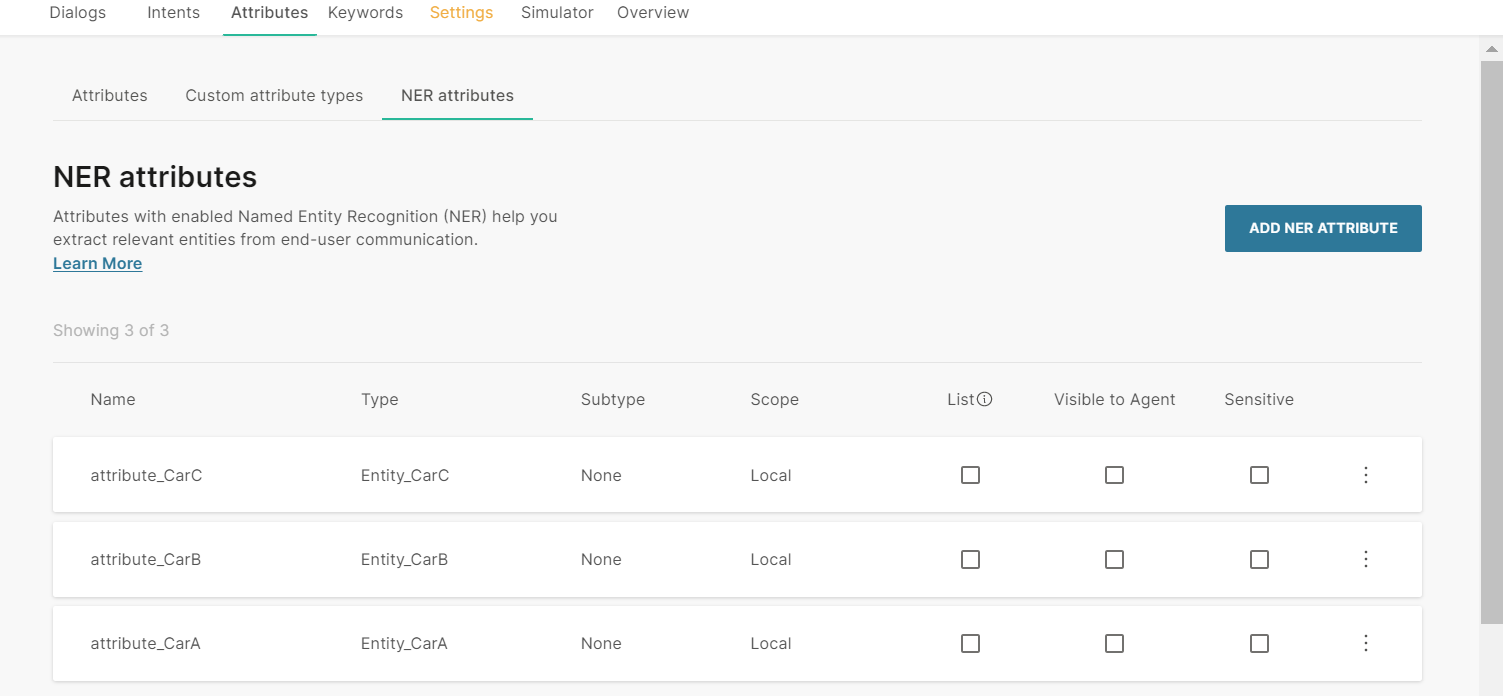
NER attributes tab [#ner-attributes-tab-the-user-interface]
In the Attributes tab > NER attributes tab, you can view and manage the custom data types in your chatbot.
You can do the following.
- View a list of NER attributes.
- View the field values of the NER attributes. For information about the fields, refer to the NER attributes documentation.
- Search for a NER attribute. Use the search box.
- Sort the NER attributes by name. Select the Name column header.
- Create a NER attribute.
- Edit a NER attribute. Select the pencil icon next to the NER attribute and update the required fields.
- Delete one or more NER attributes.
How to
Work with intents [#work-with-intent-how-to]
To use intents in your chatbot, do the following.
- (Optional) By default, the chatbot uses the Answers NLU intent engine. Select a different intent engine if required.
- Identify a list of potential goals that end users might have.
- For each goal, create an intent.
- Create training phrases for each intent.
- (Optional) Add important words to the intents to improve identification of the correct intent.
- (Optional) Use NER attributes in your intents, if you expect end users to respond with unstructured text.
- Assign the intent to the relevant dialog.
When an end user sends a message, the chatbot identifies the relevant intent of the message, and directs the end user to the dialog that is associated with the intent.
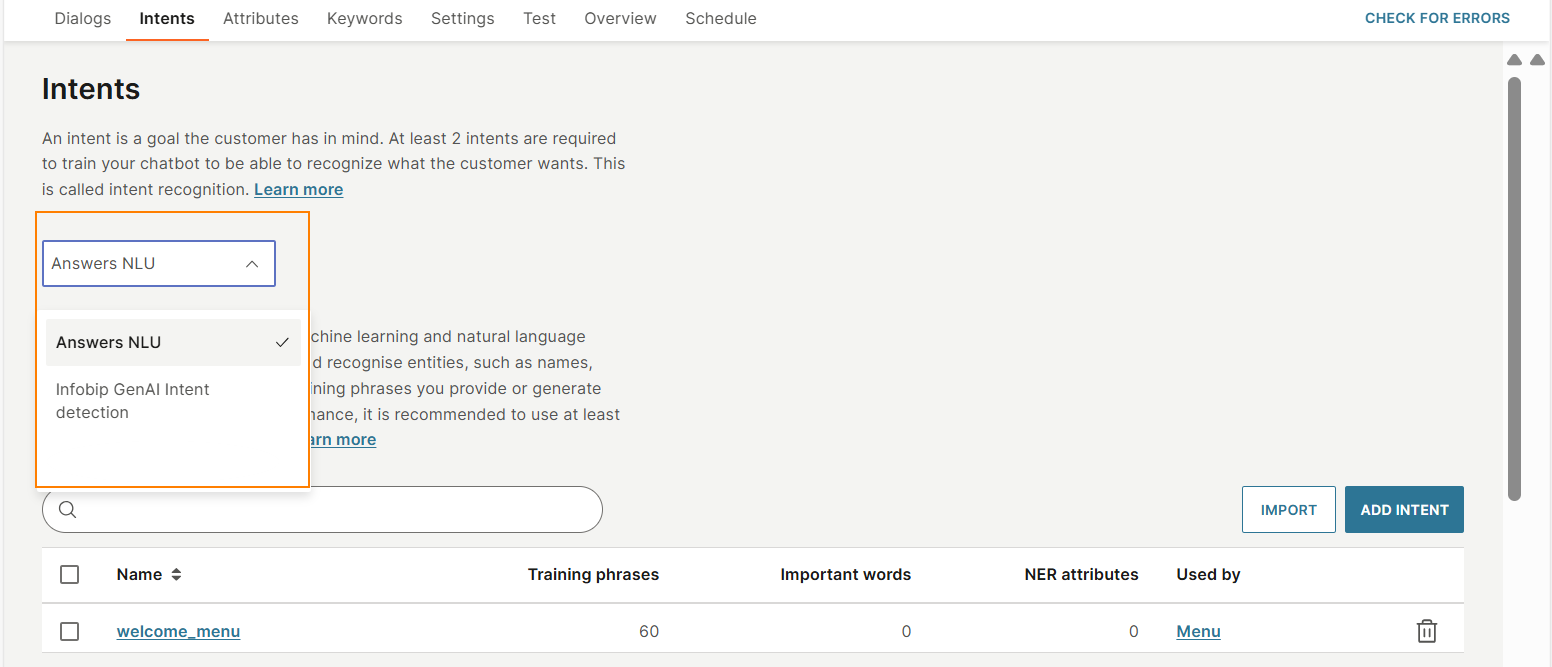
Select an intent engine for your chatbot [#select-intent-engine]
EARLY-ACCESS
Select the intent engine that the chatbot needs to use. You can select one of the following.
- Answers NLU: This is Infobip's Answers intent detection engine.
- Infobip GenAI intent detection: This is the Infobip Generative AI intent engine. It is powered by the language capabilities of GenAI and supports most of the languages.
If you do not select an intent engine, the chatbot uses the Answers NLU engine by default.
This feature is in the Early access stage and has additional costs. For more information, contact your Infobip account manager.
Create an intent [#create-an-intent-how-to]
Refer to the guidelines for creating intents.
You can create an intent either from the Intents tab or from a dialog.
Create intent from the Intents tab [#create-intent-from-the-intents-tab-how-to]
-
On the Infobip web interface, go to Answers > Chatbots and go to your chatbot.
-
Go to the Intents tab.
-
(Optional) By default, the chatbot uses the Answers NLU intent engine. Select a different intent engine if required.
-
Select Add intent.
-
Click either the pencil icon or within the 'New intent' text, and enter the name of the intent.

-
If you selected Infobip GenAI Intent detection as the intent engine, enter a description for the intent. The description helps the intent engine understand the purpose of the intent and to identify the intent of the end user's message.
Example: This intent is used to check the account balance in the chatbot that offers customer support for banking services.
-
Add training phrases to the intent.
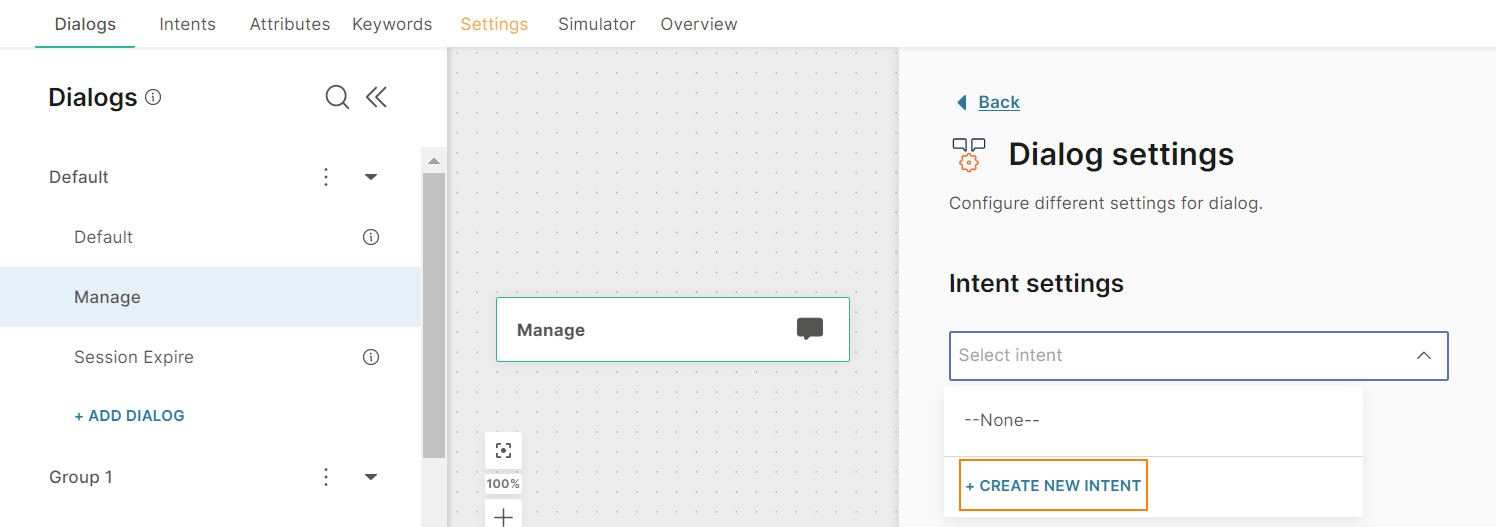
Create intent from within a dialog [#create-intent-from-within-a-dialog-how-to]
You can create intents only from standard dialogs. You cannot create intents from the Default, Authentication, and Session Expire dialogs.
Follow these steps.
-
On the Infobip web interface, go to Answers > Chatbots and go to your chatbot.
-
In the Dialogs tab, select the dialog for which you want to create the intent.
-
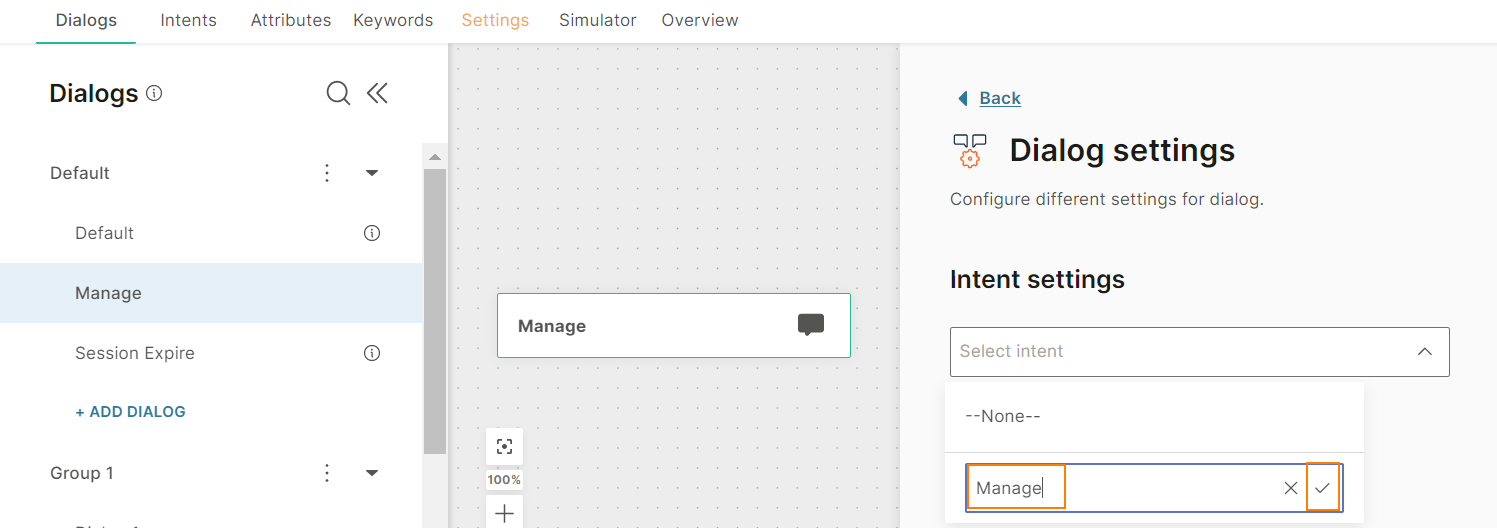
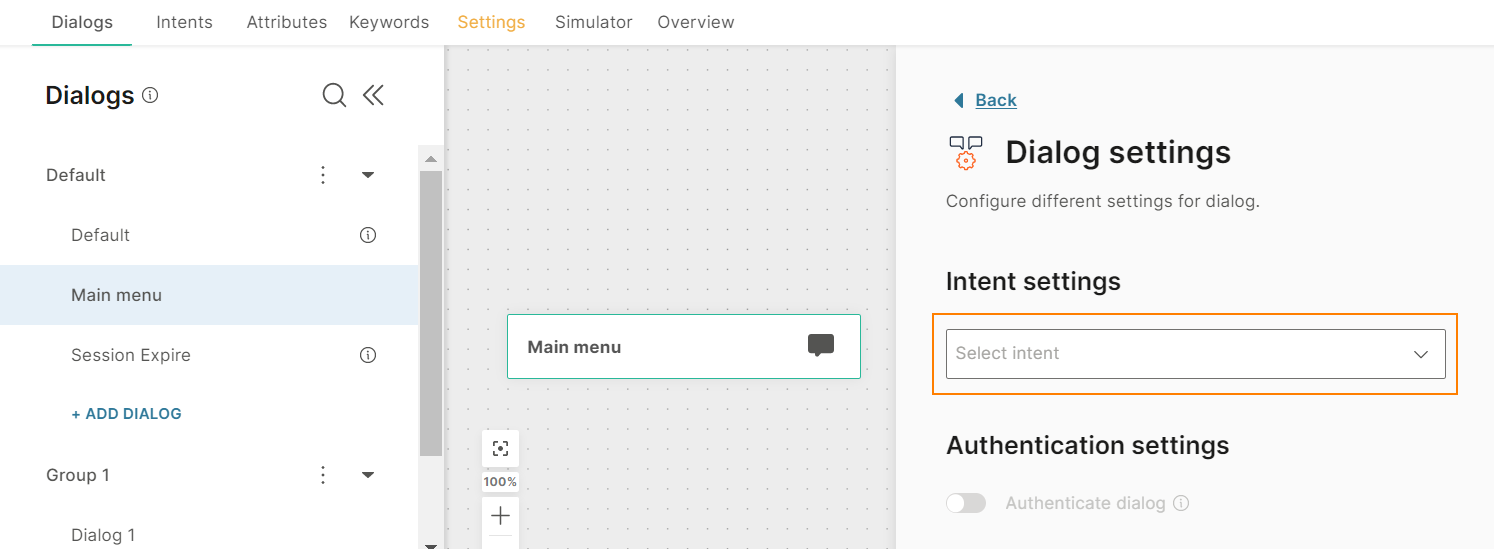
In the Intent Settings section, select the menu and select Create new intent.
-
Enter the name of the intent and select the checkmark.
-
Go to the Intents tab.
-
(Optional) By default, the chatbot uses the Answers NLU intent engine. Select a different intent engine if required.
-
Select the intent that you created.
-
If you selected Infobip GenAI Intent detection as the intent engine, enter a description for the intent. The description helps the intent engine understand the purpose of the intent and to identify the intent of the end user's message.
Example: This intent is used to check the account balance in the chatbot that offers customer support for banking services.
-
Add training phrases to the intent.
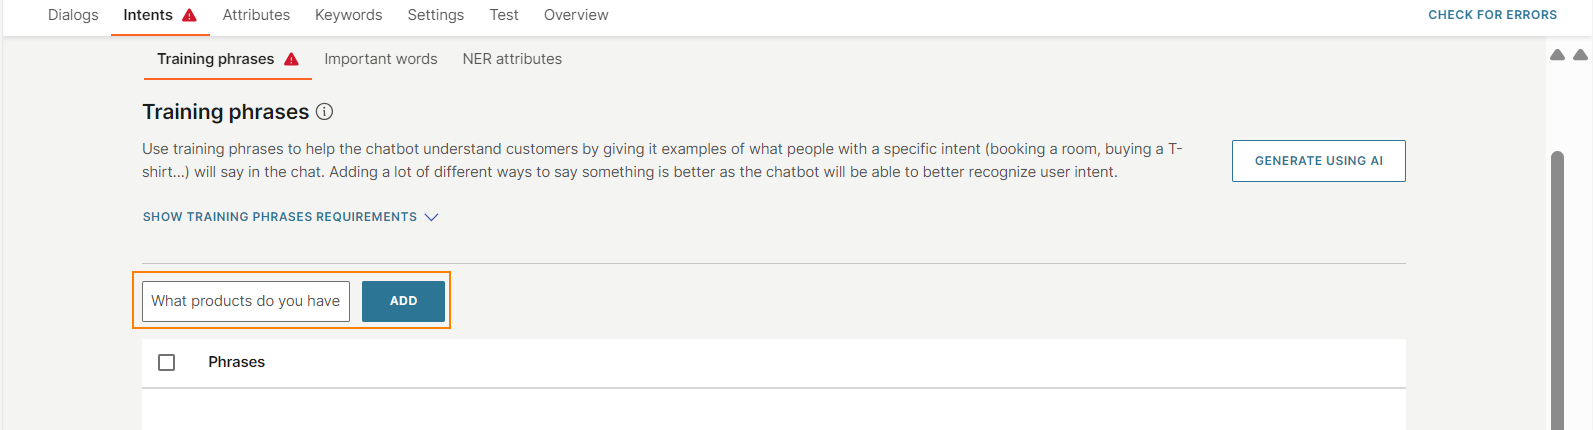
Add training phrases to an intent [#add-training-phrases-to-an-intent-how-to]
You can add training phrases in the following ways.
- Manually
- Generate automatically using AI (Early access)
Add manually [#add-manually-how-to]
Refer to the guidelines for creating training phrases.
-
Go to the Intents tab.
-
Select the intent for which you want to add training phrases.
-
In the Training phrases tab, type the training phrase and select Add.
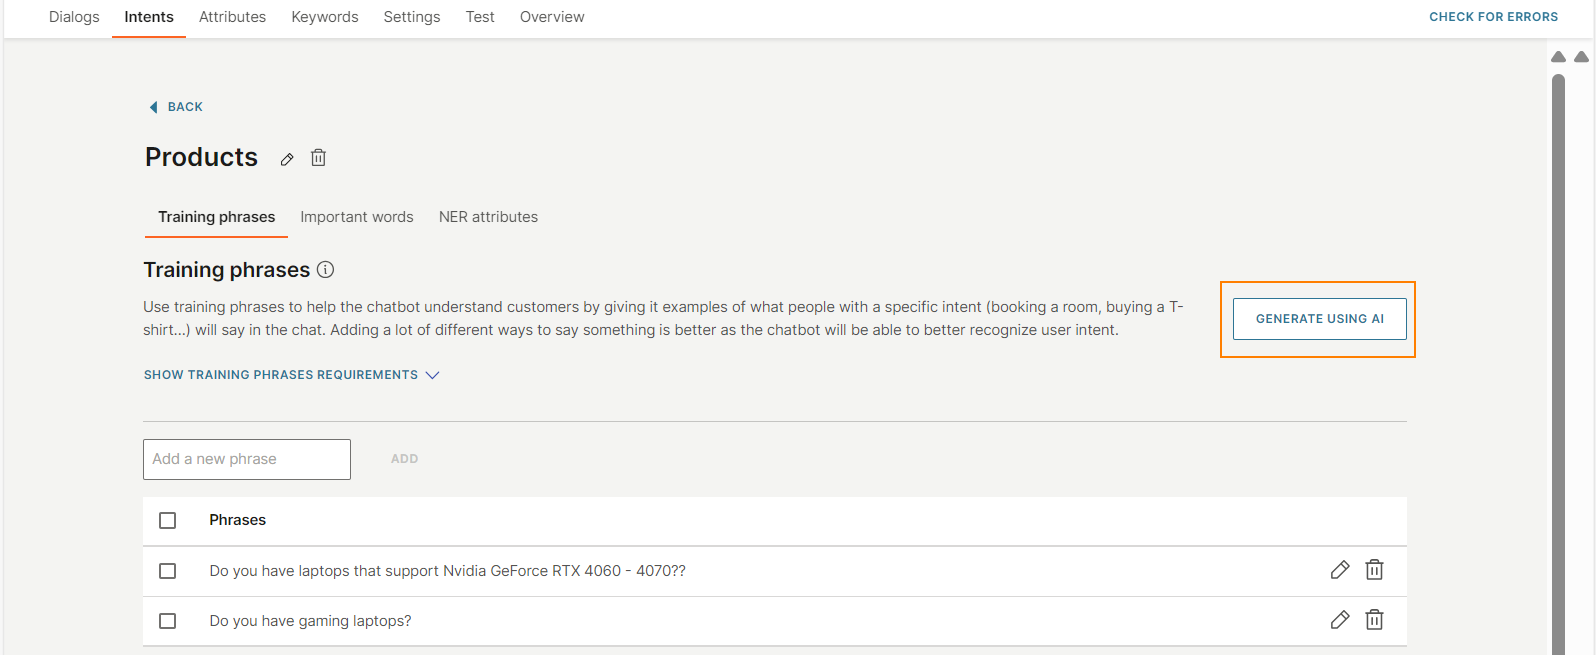
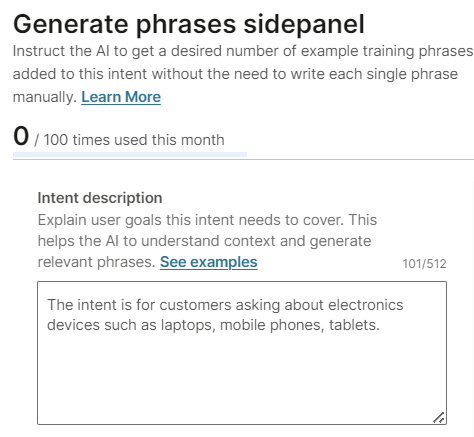
Generate automatically using artificial intelligence [#generate-automatically-using-artificial-intelligence-how-to]
EARLY-ACCESS
You can generate a maximum of 60 training phrases at a time. If you want more than 60 training phrases, generate the phrases multiple times, for a maximum of 100 times a month.
When you generate the training phrases more than once, duplicates might be created. The chatbot discards these duplicates and adds only unique values to the intent.
Follow these steps to generate a set of training phrases.
-
Go to the Intents tab.
-
Select the intent for which you want to add training phrases.
-
In the Training phrases tab, select Generate using AI.
-
In the Generate phrases side panel > Intent description section, add a description for the intent. You can add a maximum of 512 characters, including spaces, new line, and special characters.
-
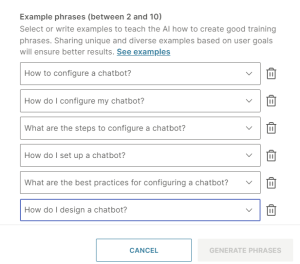
In the Example phrases section, add sample messages that you expect the end user to send the chatbot for this intent. These examples guide the AI engine in creating the type of training phrases that you want. Follow these guidelines:
- You must add a minimum of 2 training phrases and can add a maximum of 10 training phrases.
- Make sure that the sample training phrases are unique and diverse.
-
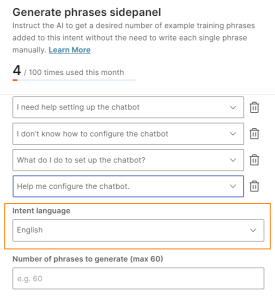
In the Intent language field, select the language in which you want the training phrases to be generated.
-
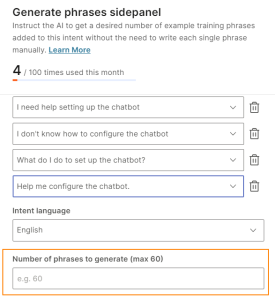
Specify the number of training phrases to generate. You can specify a maximum of 60.
-
Select Generate phrases. The status shows that the training phrases are being created.
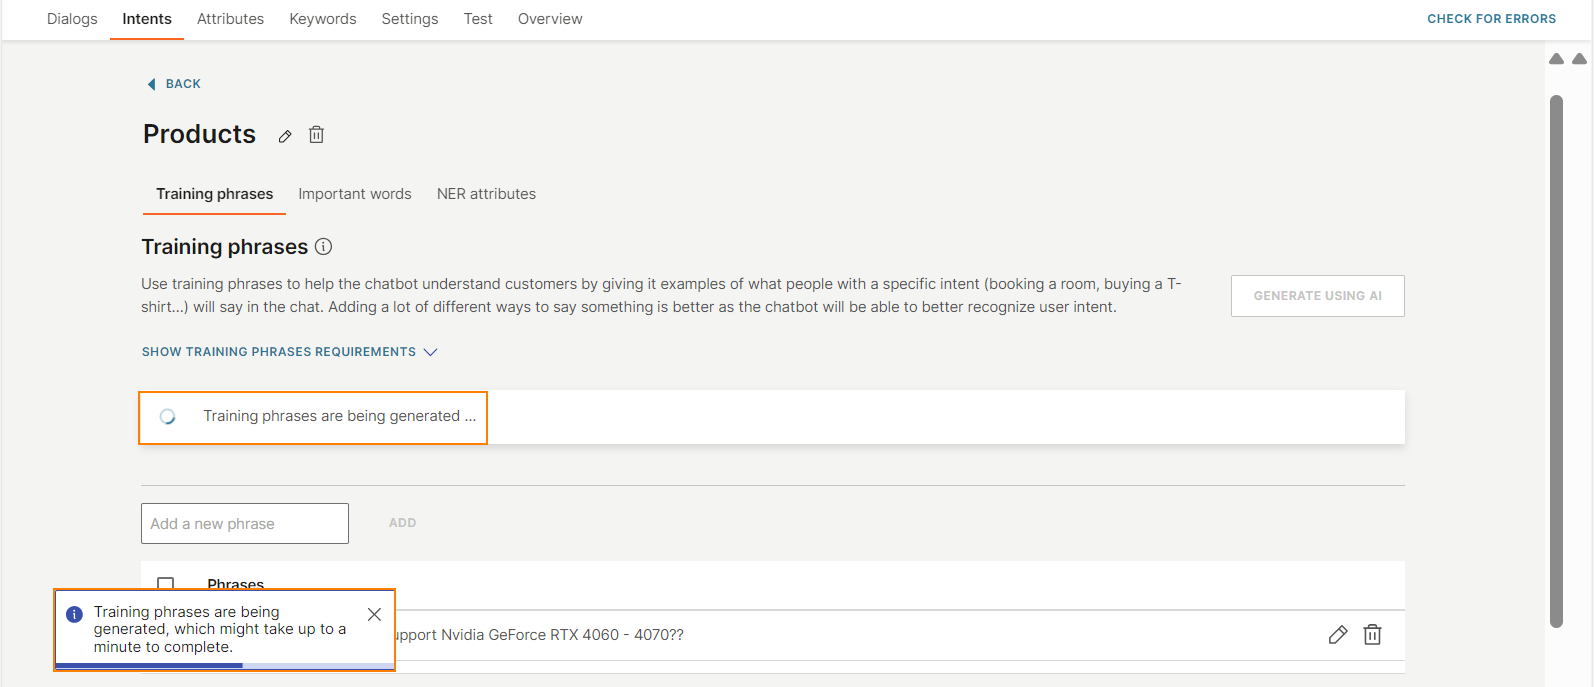
When the training phrases are ready, the chatbot shows a notification.
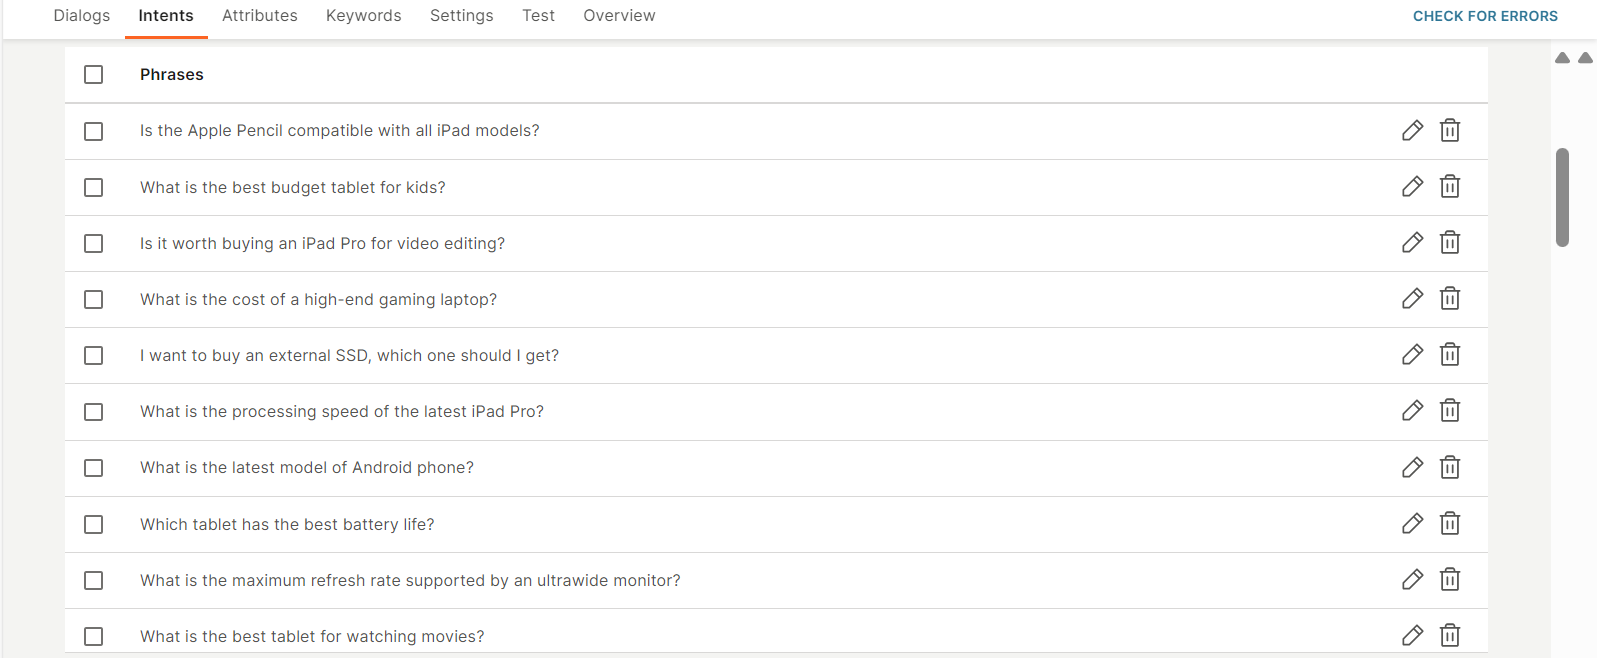
The training phrases are now available for the intent.
Add an important word to an intent [#add-an-important-word-to-an-intent-how-to]
Refer to the guidelines for creating important words.
- Go to the Intents tab.
- Click the intent for which you want to add important words.
- In the Important Words tab, click Add important word.
- Enter the important word.
- (Optional) Add the synonyms.

Create a NER attribute and add to an intent [#create-a-ner-attribute-and-add-to-an-intent-how-to]
Carry out the steps in each of the following sections sequentially.
- Use an existing intent or create a new intent.
- Create a custom data type.
- Create a NER attribute that uses the custom data type.
- Add the NER attribute to the intent.
Create a custom data type [#create-a-custom-data-type-how-to]
-
On the Infobip web interface, go to Answers > Chatbots and go to your chatbot.
-
Go to the Attributes tab > Custom data types tab.
-
Click Add data type.
-
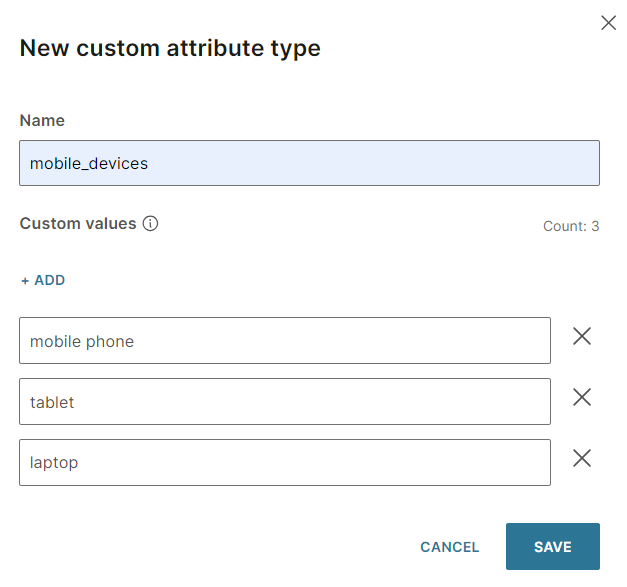
In the New custom data type window > Name field, enter the name of the custom data type. Example: mobile_devices.
-
Add each value that this data type can contain. Example: mobile phone, tablet, and laptop. Enter the values in the exact format, including upper and lower case, in which you expect the end user to respond.
To add a custom value, select Add and enter the value.
-
Select Save.
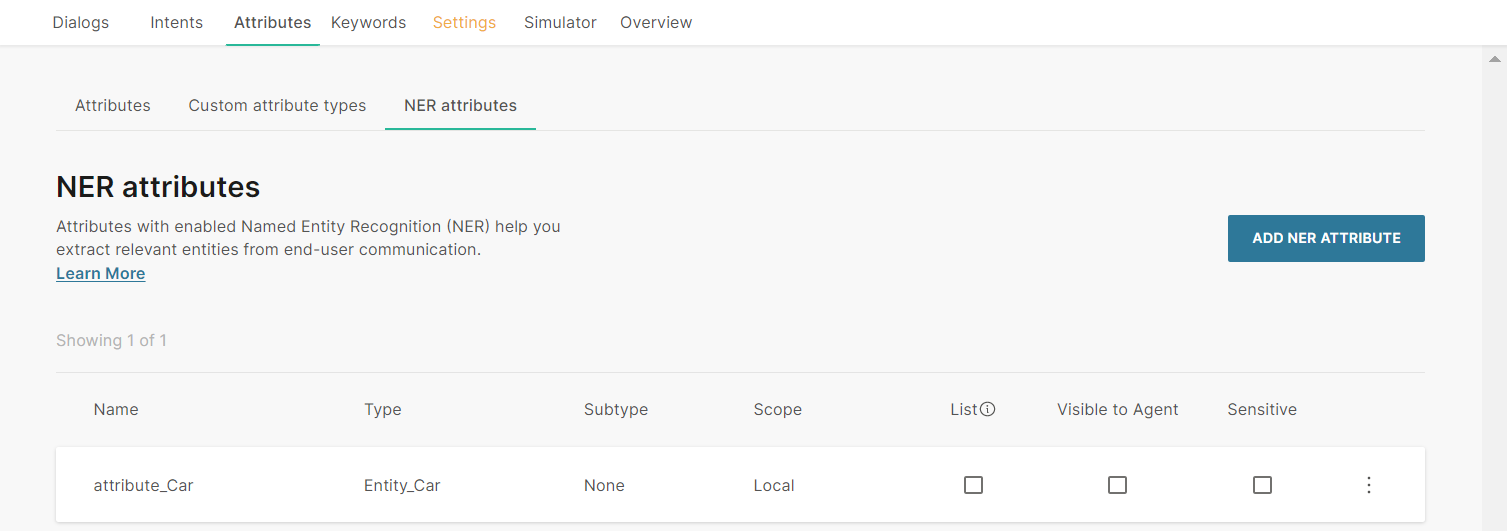
Create a NER attribute [#create-a-ner-attribute-how-to]
-
Go to the Attributes tab > NER attributes tab.
-
Click Add NER attribute.
-
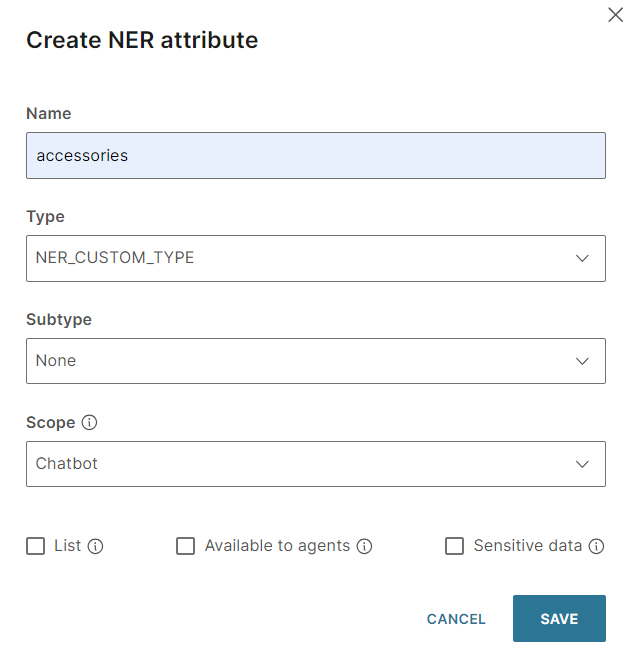
Configure the following fields. For information about these fields, refer to the NER attributes documentation.
- Name: Enter a name for the attribute. Example: mobile_attribute.
- Type: Choose the custom data type that you created. If you want to use the NER attribute in a Conditions element, refer to the Validation for Attributes section to make sure that you choose the correct type.
- Subtype: Select the relevant subtype.
- Scope: Choose whether the attribute is Dialog or Chatbot.
- List: Select whether the NER attribute is for a single value or a list.
- Available to agents: Deselect this field to hide attribute values from agents when the chat is transferred from the chatbot to an agent in Conversations.
- Sensitive data: Select this field if you want to display attribute values as hashed values in Answers and Conversations.
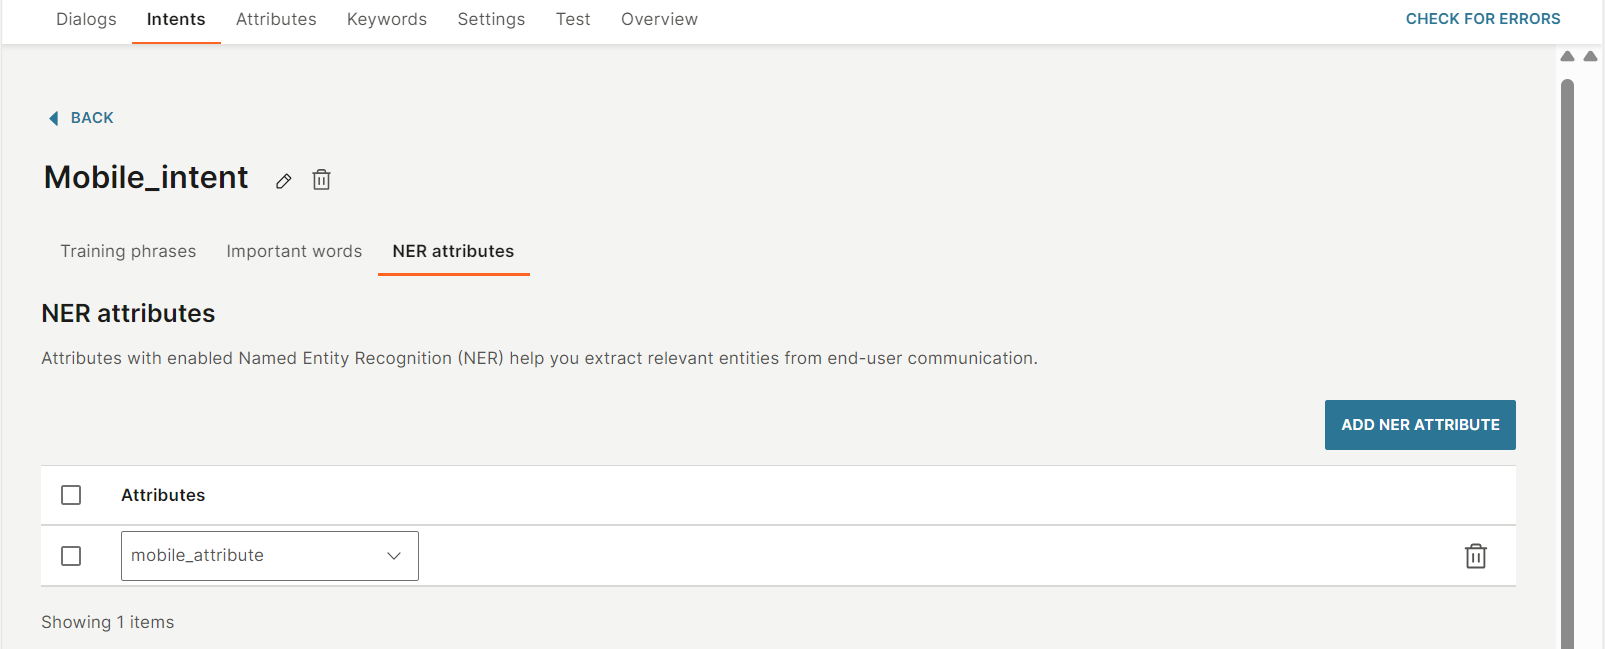
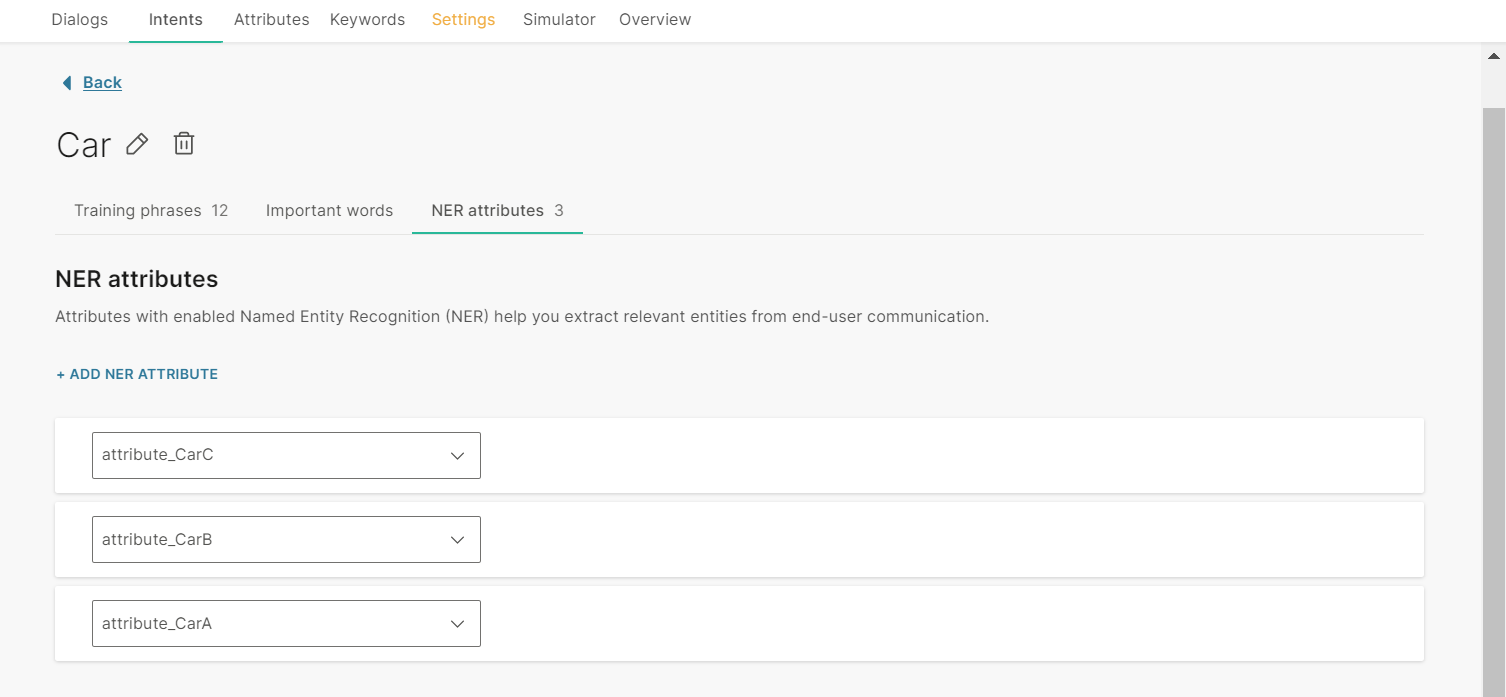
Add the NER attribute to the intent [#add-ner-attribute-to-intent-how-to]
- Go to the Intents tab.
- Select the required intent and go to the NER attributes tab.
- Select Add NER attribute.
- Choose the NER attribute that you created.
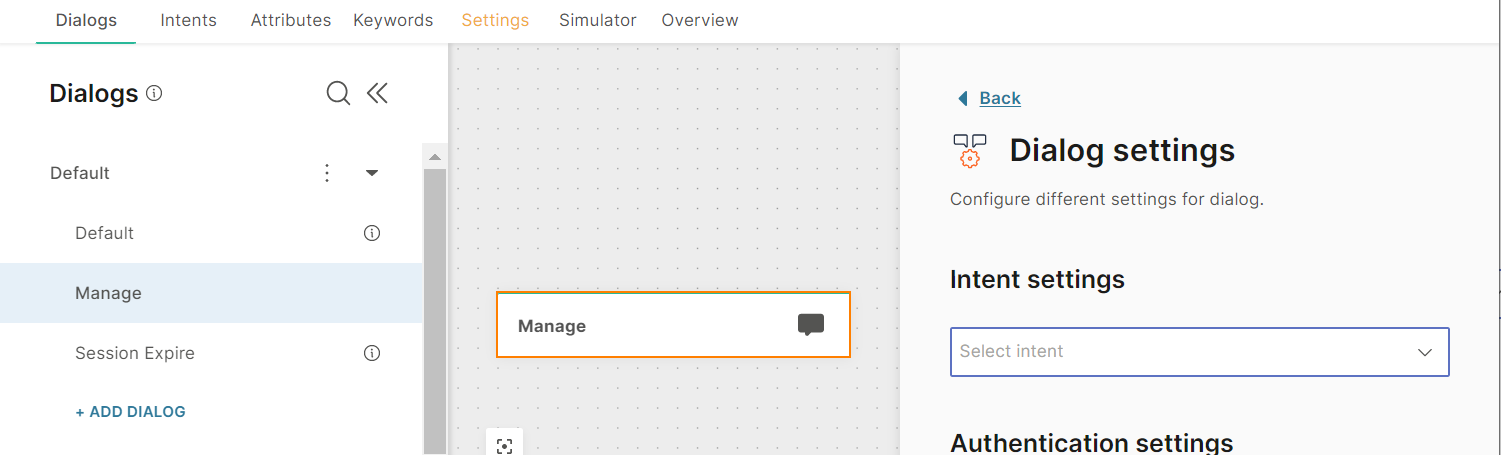
Assign an intent to a dialog [#assign-an-intent-to-a-dialog-how-to]
After you create an intent, assign it to the relevant dialog. Example: Assign the Manage_booking intent to the Manage dialog.
You can assign intents only to standard dialogs. You cannot assign intents to the Default, Authentication, and Session Expire dialogs.
- In the chatbot editor, click the name of the dialog to view the settings.
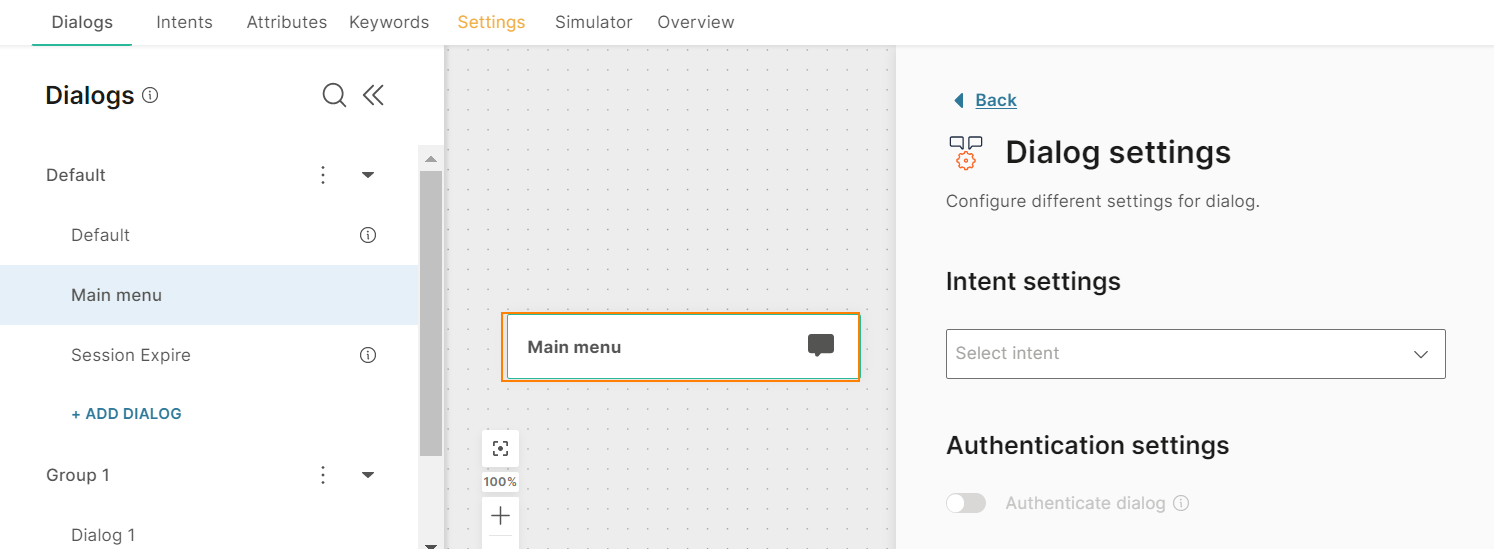
- To use an existing intent, choose the intent from the list.
- To create a new intent for the dialog, refer to the Create an Intent section.
Use entities to branch a dialog [#use-entities-to-branch-a-dialog-how-to]
If end users contact your chatbot for similar products or categories, you would need to create a separate intent and dialog for each product. When directing the flow, you would need to add a branch for each product. You may need to add a similar set of training phrases to each intent.
Also, if there are several products, it could lead to a large number of intents and branches.
To avoid this situation, you can do one of the following:
- If there is a small number of similar products, you can branch based on entity values.
- If there is a large number of similar products, you can branch based on entity types.
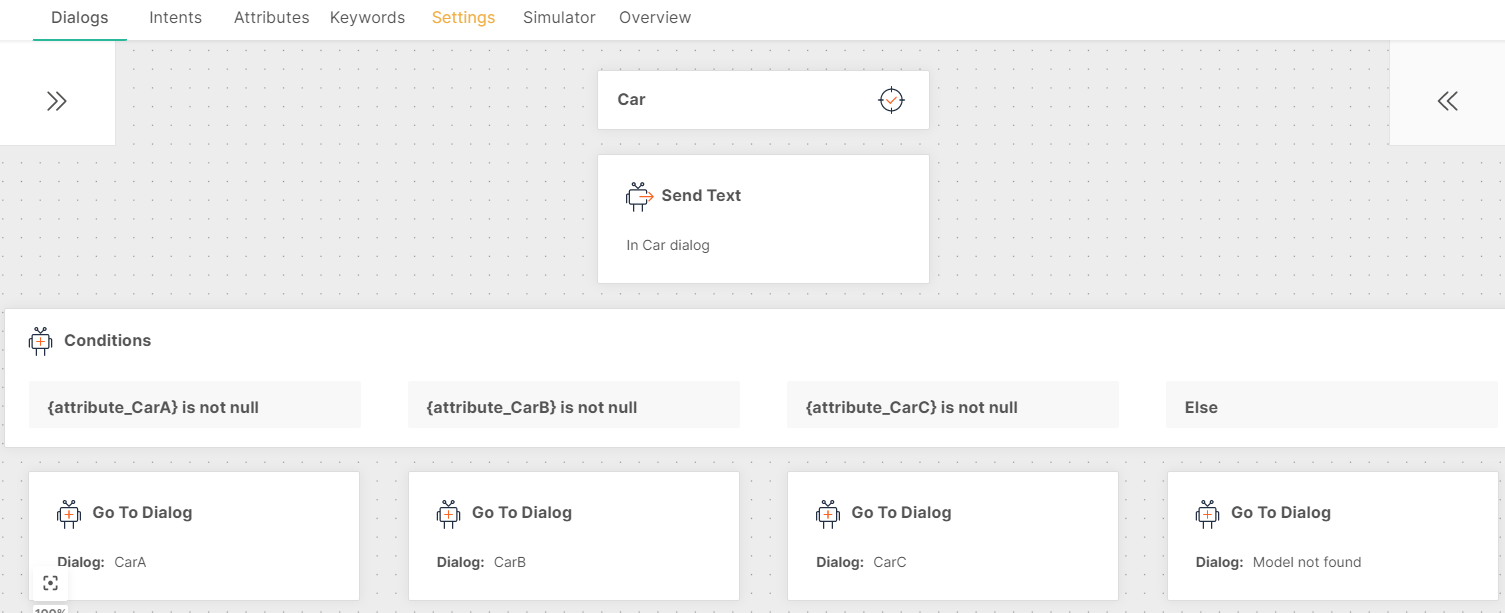
Branch based on entity values [#branch-based-on-entity-values-how-to]
Example: End users contact your chatbot about different car brands - CarA, CarB, and CarC.
To branch based on entity values, do the following:
- Create a custom data type for cars and add the brands as attribute values.

- Create a NER attribute. In the Type field, choose the custom data type.
- Create an intent that contains training phrases for all car brands.
- Add the NER attribute to the intent.
- Branch the chatbot based on the value of the NER attribute.
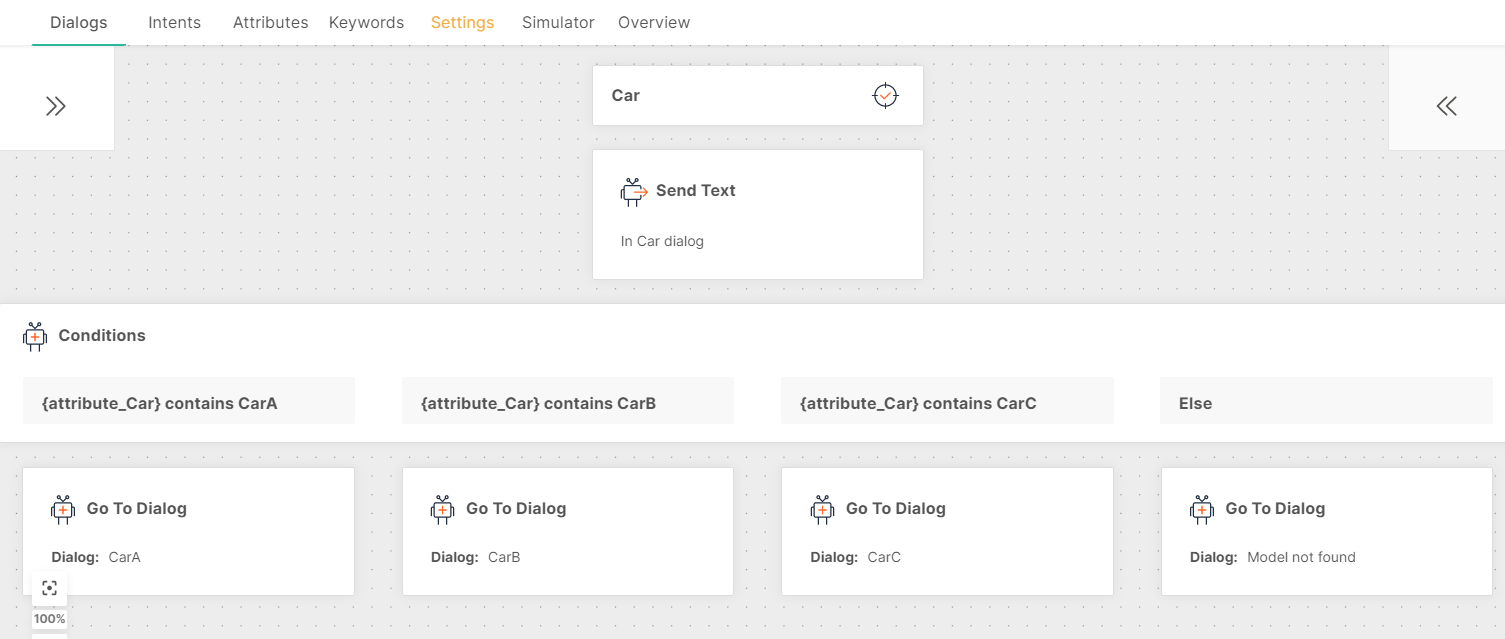
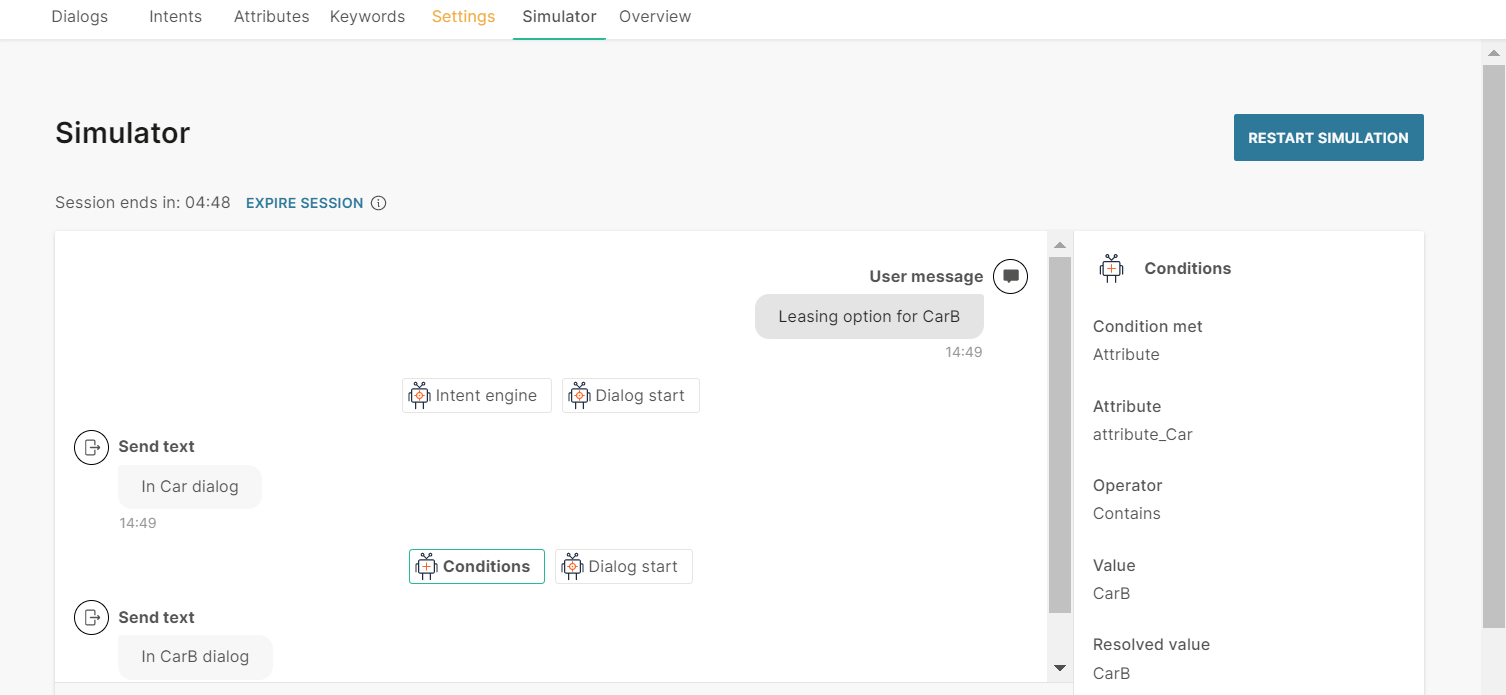
- Test the flow in the simulator. Example: If you enter a question about CarB, the chatbot takes you to the dialog for CarB.
Branch based on entity types [#branch-based-on-entity-types-how-to]
Example: End users contact your chatbot about different car brands and models.
- CarA - Model_A1, Model_A2, Model_A3, Model_A4
- CarB - Model_B1, Model_B2, Model_B3, Model_B4
- CarC - Model_C1, Model_C2, Model_C3
To branch based on entity types, do the following:
- Create a custom data type for each car brand and add the models as attribute values.
- Entity_CarA = {Model_A1, Model_A2, Model_A3, Model_A4}
- Entity_CarB = {Model_B1, Model_B2, Model_B3, Model_B4}
- Entity_CarC = {Model_C1, Model_C2, Model_C3}

- Create NER attributes for each car brand. In the Type field, choose the custom data types.
- Create an intent that contains training phrases for all car brands.

- Add the NER attributes to the intent.
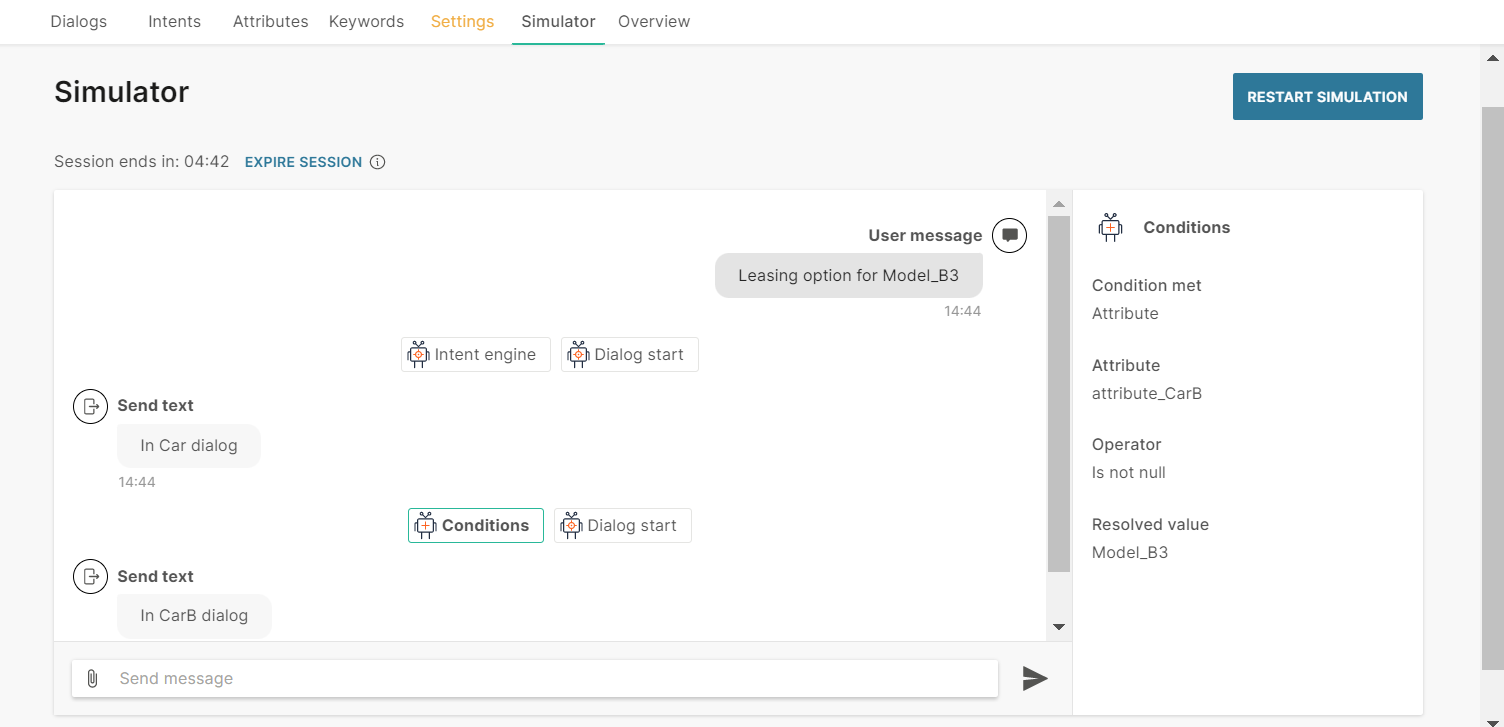
- Branch the chatbot based on the NER attribute.
- Test the flow in the simulator. Example: If you enter a question about Model_B3, the chatbot takes you to the dialog for CarB.
Import intents [#import-intents-how-to]
Automate the process of adding intents and training phrases, instead of manually adding them one by one.
Carry out the steps in the following sections sequentially:
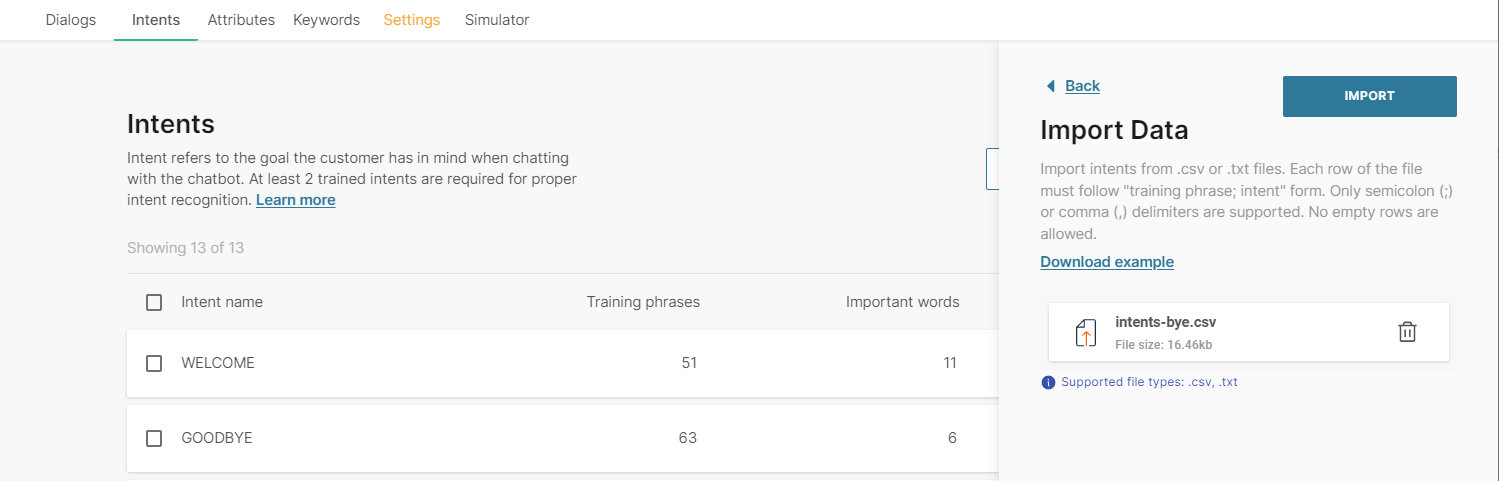
- (Optional) Download a sample file for reference.
- Create a file that contains intents, training phrases, important words, and synonyms.
- Upload the completed file.
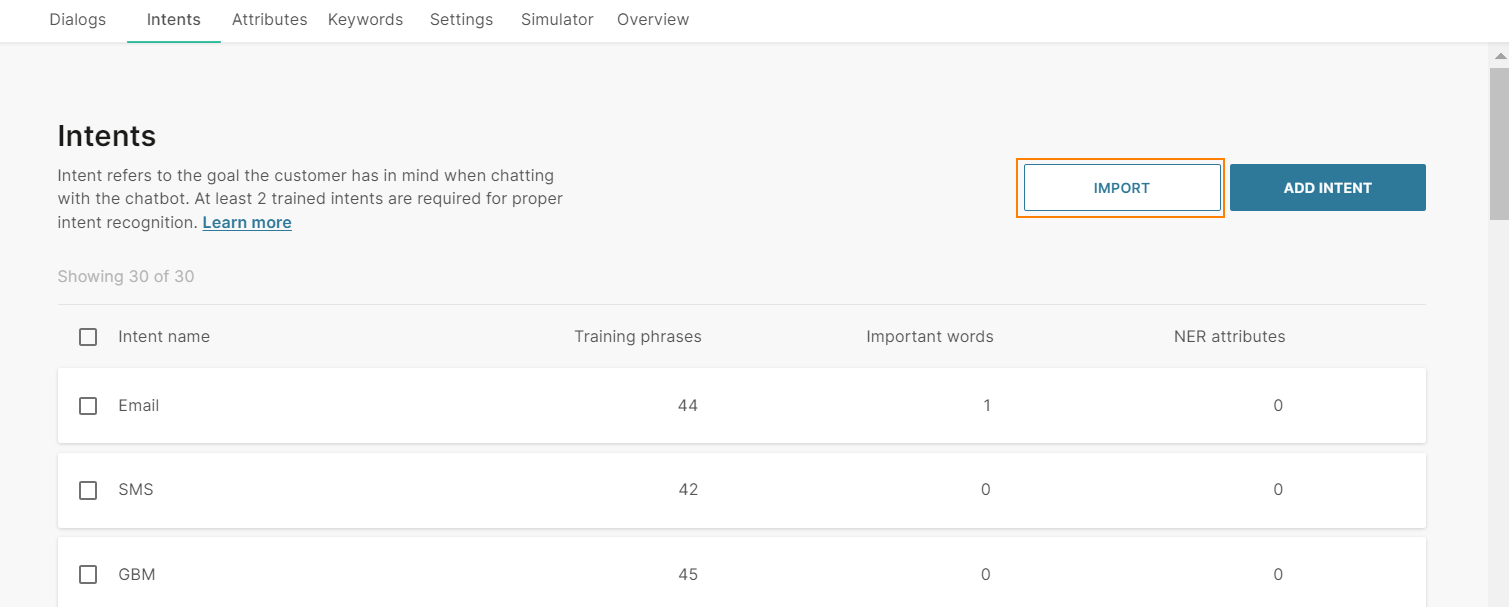
Download a sample file [#download-a-sample-file-how-to]
This is an optional process.
- On the Infobip web interface, go to Answers > Chatbots and go to your chatbot.
- Go to the Intents tab.
- Click Import.
- Click Download example.
Create the file [#create-the-file-how-to]
Prepare a file that contains phrases and sentences that end users are likely to use in conversations with your chatbot. Ideally, use phrases taken from your customer-facing portals. Example: online chats with your customer service.
Make sure that the file follows these criteria:
- The file type must be .csv or .txt.
- There must be no empty rows.
- The file must not have a header.
- Training phrases:
- Add each training phrase to a separate line.
- Use a semicolon to separate training phrases and intents.
- Organize the training phrases by intent.
- Format:
Training_Phrase;Intent
- Important words:
- Add each important word to a separate line.
- Use a semicolon to separate important words, intents, and the synonyms of the important words.
- Use commas to separate multiple synonyms.
- Organize the important words by intent.
- Format:
Important_Word;Intent;Synonym1,Synonym2,Synonym3
Example: For the Welcome and Goodbye intents, the file is as follows:
How are you?;Welcome
How can I help?;Welcome
Thank you.;Goodbye
Glad to have been of help.;Goodbye
Bye.;Goodbye;farewell,ciao
Close;Goodbye;end,finished
Import the file [#import-the-file-how-to]
- On the Infobip web interface, go to Answers > Chatbots and go to your chatbot.
- Go to the Intents tab.
- Click Import.
- Select the file.
- Click Import.
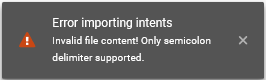
If there are issues with the file, Answers shows an error.
- Incorrect file type

- Incorrect formatting. Example: wrong delimiter
Export intents [#export-intents-how-to]
- On the Infobip web interface, go to Answers > Chatbots and go to your chatbot.
- Go to the Intents tab.
- Select one or more intents on the page. To export all intents, select the checkbox against Intent name.
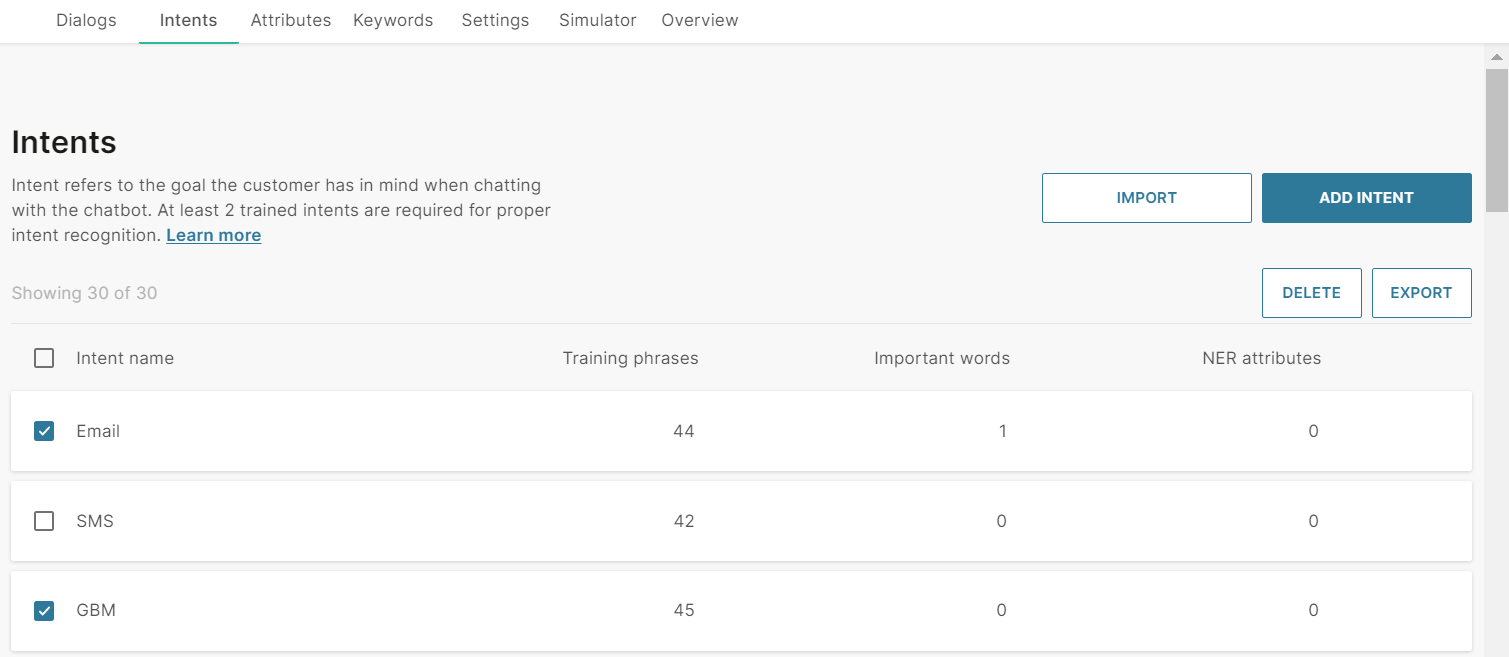
- Click Export.
The intents are downloaded in a predefined format as a .csv file.
Any NER attributes, which are part of the intents, are not exported.
Rename an intent [#rename-an-intent-how-to]
- Click an intent.
- Either click the name of the intent or click the pencil icon.
- Add the new name.
Delete an intent [#delete-an-intent-how-to]
When you delete an intent, you can no longer add it to a dialog. If an intent is already added to a dialog, the intent is removed from the dialog.
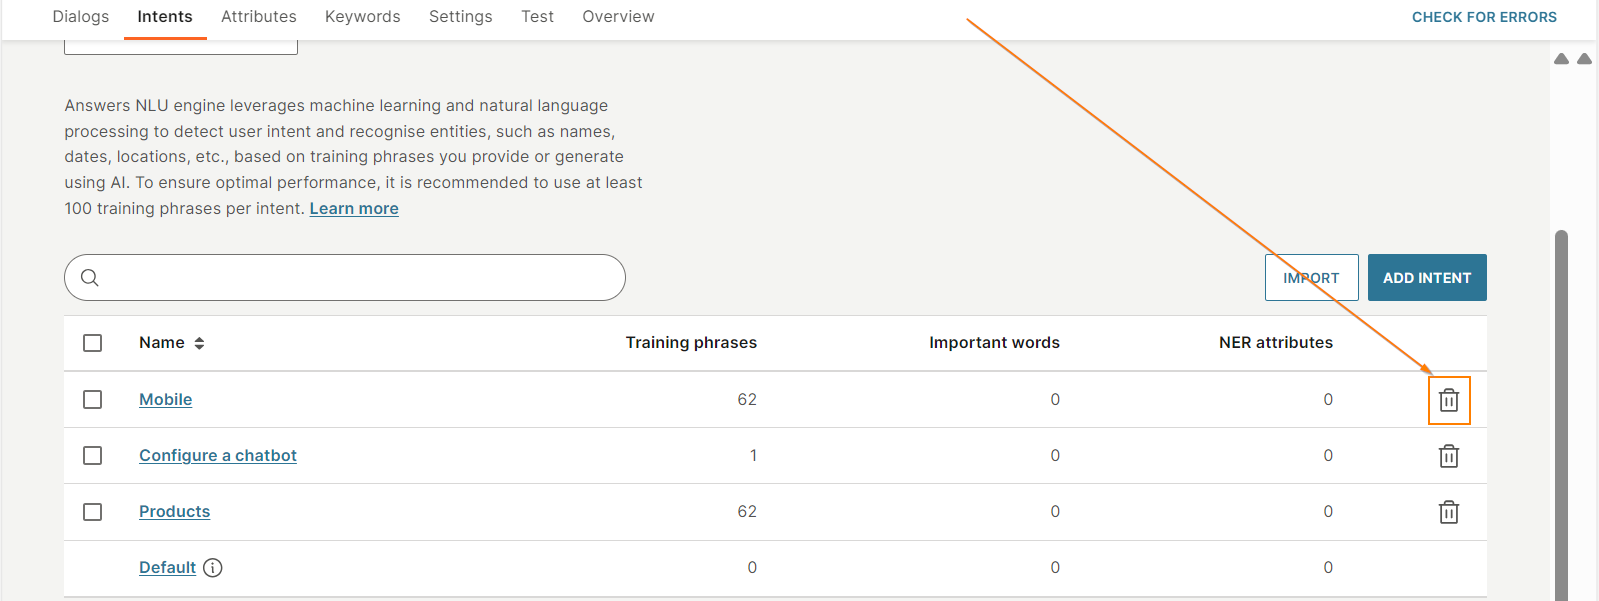
To delete intents, go to the Intents tab and follow one of these options.
Delete a single intent
To delete a single intent, select the Delete icon next to the intent. In the confirmation screen, select Delete.
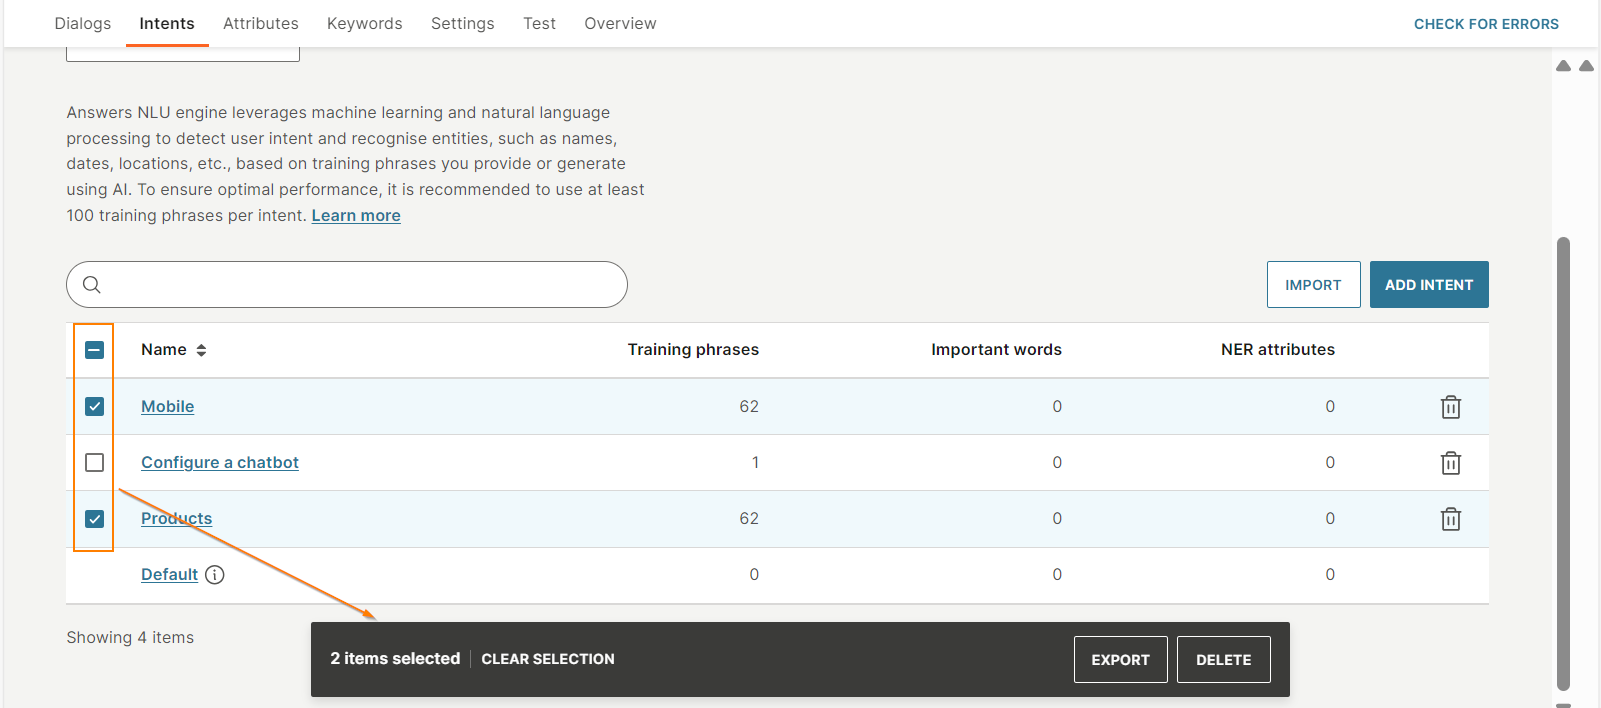
Delete multiple intents [#delete-one-or-more-intents-how-to]
Select one or more intents on the page and select Delete. To delete all intents, select the checkbox next to the Name column header, and select Delete.
In the confirmation screen, select Delete.
Delete from within an intent [#delete-from-within-an-intent-how-to]
- Select an intent to open it.
- Click the Delete icon.
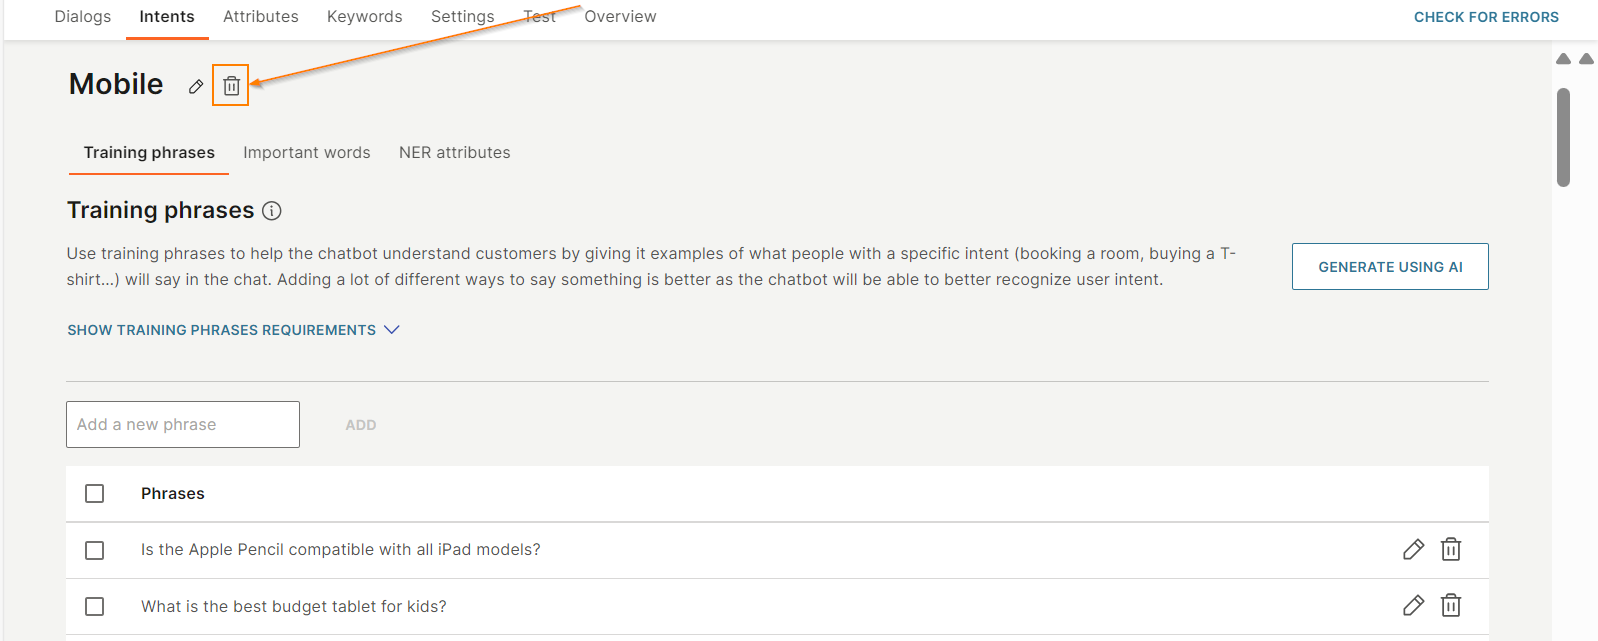
- In the confirmation screen, select Delete.
Delete a training phrase [#delete-a-training-phrase-how-to]
To delete training phrases, go to the Intents tab. In the intent for which you want to delete training phrases, go to the Training phrases tab.
Do one of the following.
- To delete a single training phrase, select the Delete icon next to the training phrase.
- To delete multiple training phrases, select one or more training phrases on the page and select Delete.
- To delete all training phrases, select the checkbox next to the Phrases column header, and select Delete.
In the confirmation screen, select Delete.
Delete an important word [#delete-an-important-word-how-to]
To delete important words, go to the Intents tab. In the intent for which you want to delete training phrases, go to the Important words tab.
Do one of the following.
- To delete a single important word, select the Delete icon next to the important word.
- To delete multiple important words, select one or more important words on the page and select Delete.
- To delete all important words, select the checkbox next to the Word column header, and select Delete.
In the confirmation screen, select Delete.
Delete a NER attribute [#delete-a-ner-attribute-how-to]
To delete NER attributes, go to the Attributes tab > NER attributes tab.
Do one of the following.
- To delete a single NER attribute, select the Delete icon next to the NER attribute.
- To delete multiple NER attributes, select one or more NER attributes on the page and select Delete.
- To delete all NER attributes, select the checkbox next to the Name column header, and select Delete.
In the confirmation screen, select Delete.
Delete a custom data type [#delete-a-custom-data-type-how-to]
To delete custom data types, go to the Attributes tab > Custom data types tab.
Do one of the following.
- To delete a single custom data type, select the Delete icon next to the custom data type.
- To delete multiple custom data types, select one or more custom data types on the page and select Delete.
- To delete all custom data types, select the checkbox next to the Custom type name column header, and select Delete.
In the confirmation screen, select Delete.
Test intents
Check how well Answers recognizes the intents in your chatbot.
In the simulator, do the following:
- Click Start Simulation.
- Enter an end user message.
- Click Intent engine.
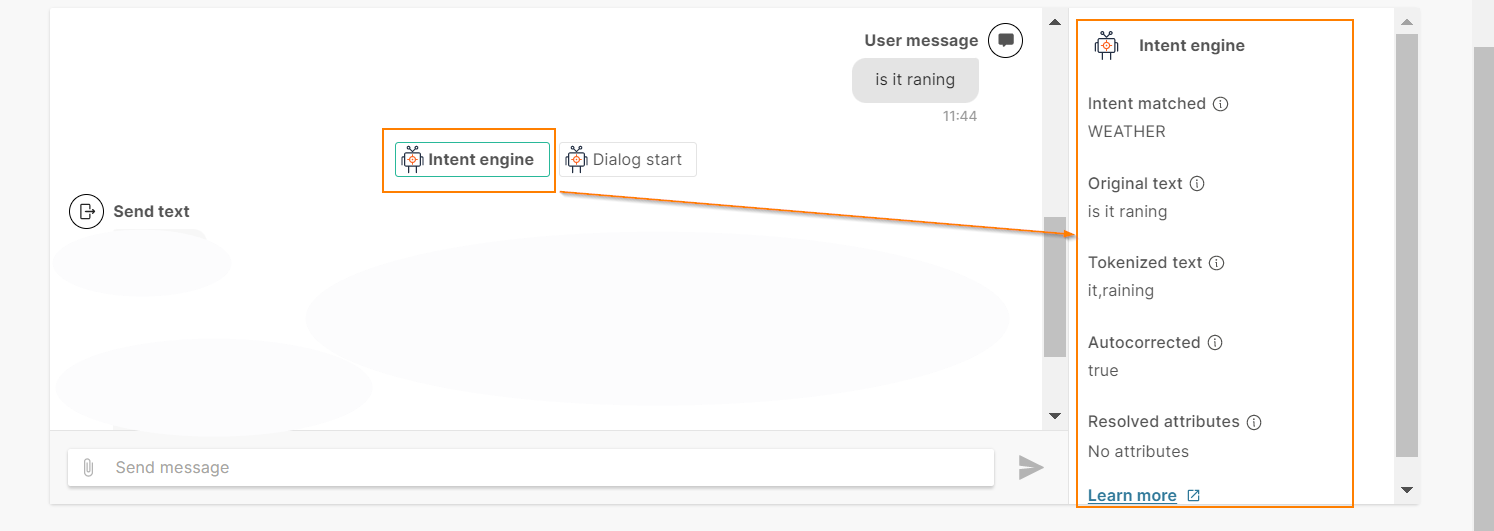
In the right-hand pane, you can view the following:
Intent matched: The intent with the highest score that was recognized by evaluating the tokenized text against training phrases. If an incorrect intent is matched, follow the steps in the Incorrect intent is matched section.
Route to dialog: The dialog that was linked to the recognized intent (in the intent matched section) when the chatbot was built.
Original text: The original end user message without any changes, such as autocorrection or other post processing actions.
Tokenized text: The text that was obtained after word autocorrection and removing stop words.
Autocorrected: Indicates whether autocorrection was applied. If autocorrection was applied, the field value is true.
Resolved attributes: Resolved NER attributes that are configured for the recognized intent.
For any dialog, the intent engine details are available only outside that dialog.
Troubleshooting
Number of training phrases in intent higher or lower than others [#number-of-training-phrases-in-intent-higher-or-lower-than-others-troubleshooting]
The system has detected that the number of training phrases for one of your intents is significantly higher or lower than for others. Use a similar number of training phrases for all intents.
Incorrect intent is matched [#incorrect-intent-is-matched-troubleshooting]
If the intent match is not correct, check the Tokenized text section to understand which words were used to evaluate the intent score.
Example: Your chatbot uses the following intents - 'book appointment', 'cancel appointment', and 'reschedule appointment'. If Answers incorrectly recognizes 'book appointment' as the intent instead of 'cancel appointment, do one or more of the following:
- Add more training phrases to the correct intent (cancel appointment).
- Relocate some of the training phrases between intents (from 'book appointment' to 'cancel appointment')
- If intents are similar, merge them into a single intent, and use a different approach to distinguish between the actions. Example: Use a combination of named entity recognition (NER) and a custom data type. Refer to the Use Entities to Branch a Dialog > Branch based on Entity Types section.
Analytics
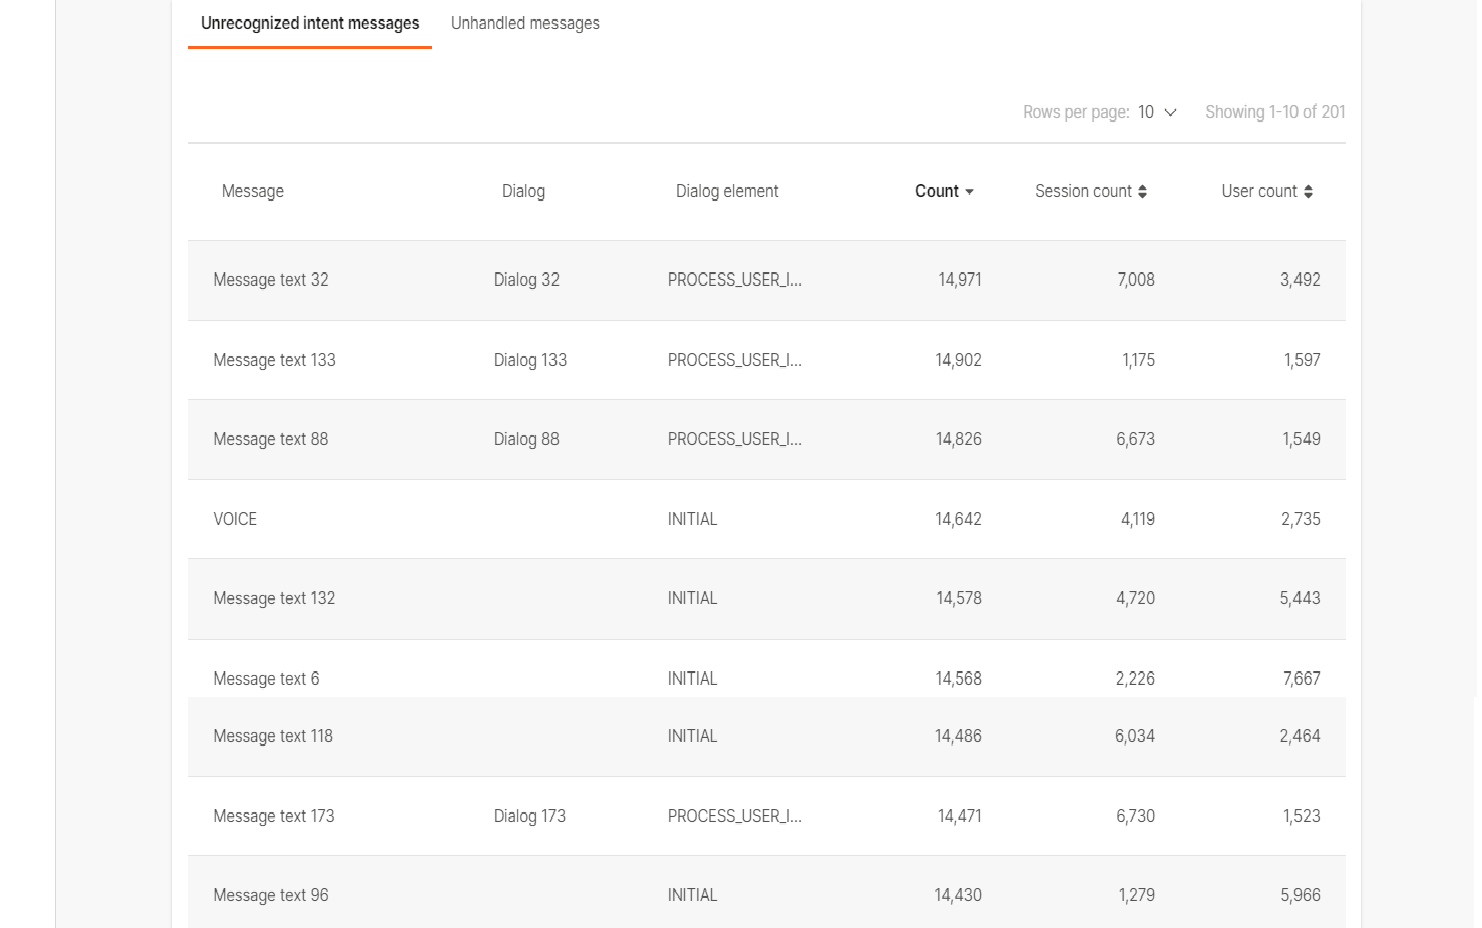
Identify unrecognized intents [#identify-unrecognized-intents-analytics]
Use the unrecognized intents message list in the Conversational analytics to identify the end user messages for which the chatbot cannot identify the intent.
If this list also contains user start messages, it means you need to include these messages as training phrases in your starting intent.
If this list contains messages that you did not expect as possible training phrases or intents, use these messages as training phrases or create new intents, if required.