Dialogs
A dialog is a part of a chatbot that performs a specific task or set of tasks. Dialogs divide a chatbot into manageable parts. The entire communication between the chatbot and the end user happens through dialogs.
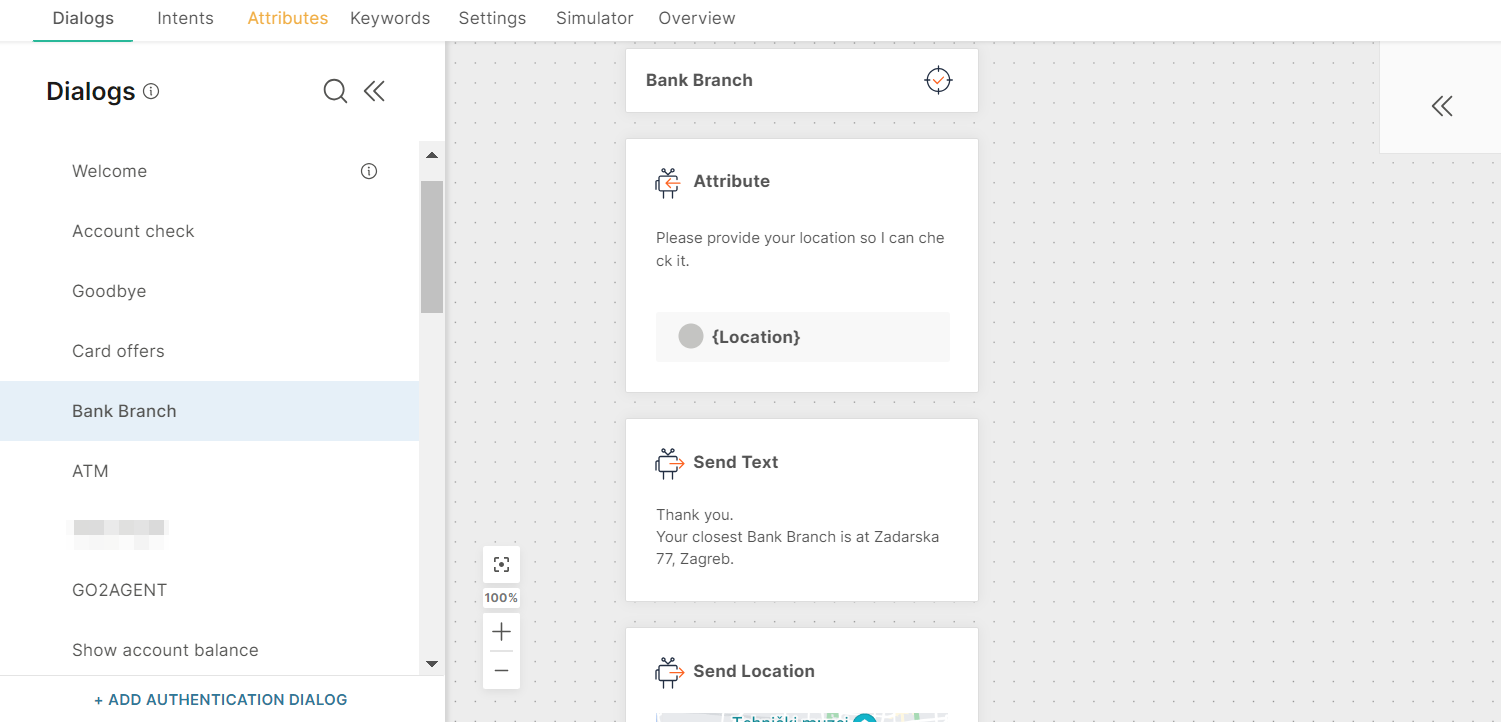
Example: A banking chatbot needs to perform tasks such as welcoming the end user, providing information about the account, showing location of bank branches, and closing the conversation. The chatbot can have a separate dialog to perform each of these tasks. So, the chatbot has the following dialogs - Welcome, Account check, Bank branch, and Goodbye.
In the following example, the Bank branch dialog performs the task of sharing the location of the nearest branch. The dialog asks the end user for their location, and calculates and shares the location of the nearest branch.
How Dialogs Work
In the chatbot, a set of dialogs work together to form the conversation flow. Based on the end user's message or their response to the chatbot, the chatbot directs the flow to the relevant dialog. Then, based on the end user's message or their choice or action in that dialog, the chatbot directs the flow to the next relevant dialog, until the flow ends.
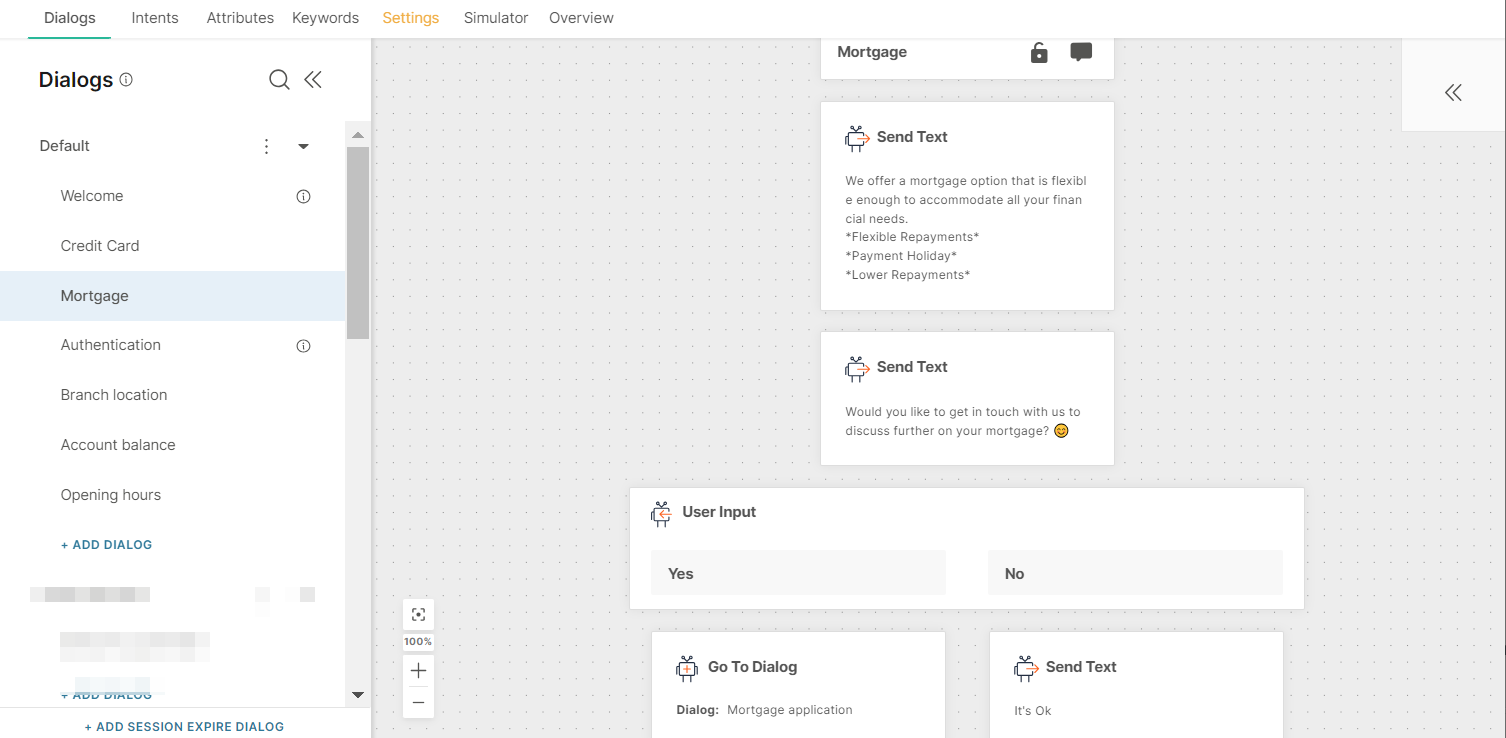
Example: A banking chatbot starts with the Welcome dialog that welcomes the end user and asks them to make a choice. The end user responds with 2. Based on this response, the chatbot directs the flow to the relevant dialog, Mortgage.
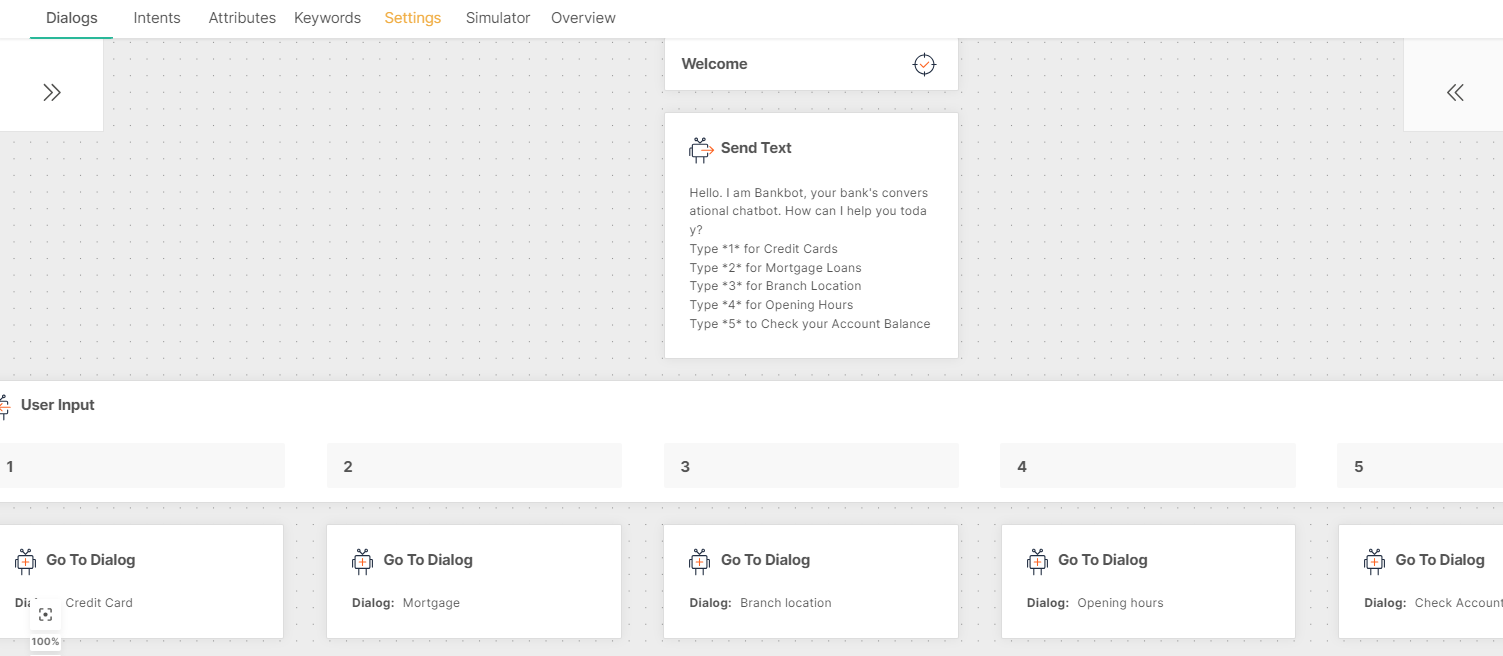
In the Mortgage dialog, the end user has further options. Based on their choice, the flow is directed accordingly.
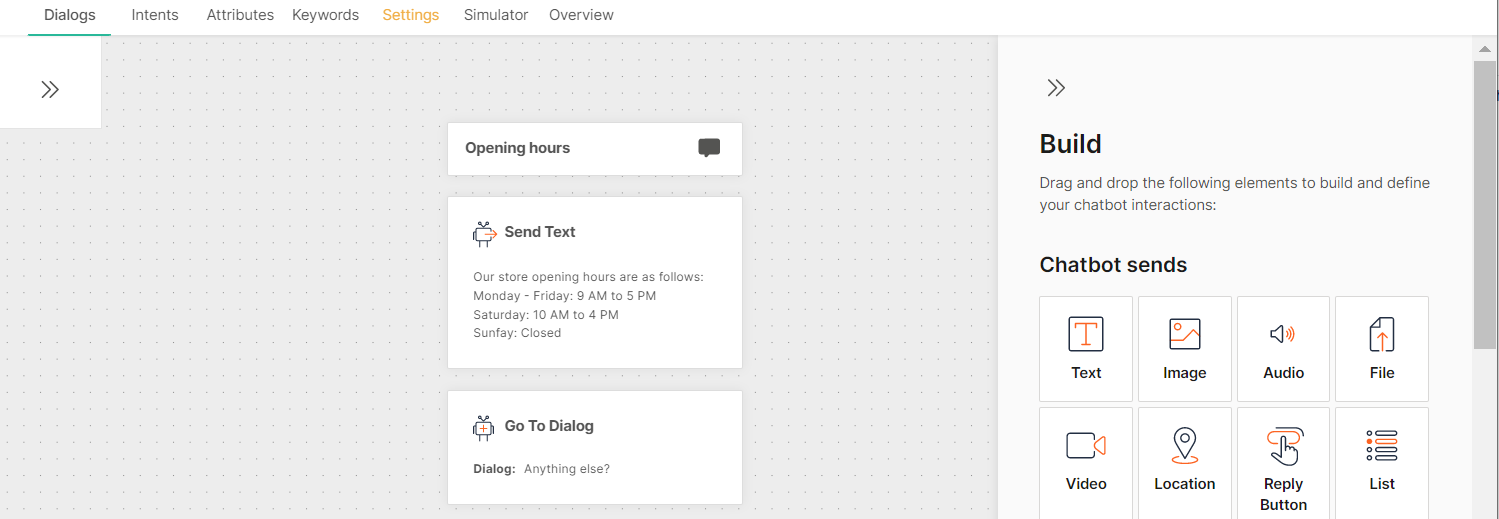
Each dialog contains a set of chatbot elements that work together to perform the task. The following example shows the Opening hours dialog, which informs the end user about the opening hours of the store. The Opening hours dialog contains the Text and To dialog elements.
Dialog Types
Chatbots can contain the following types of dialogs.
Standard Dialog [#standard-dialog-dialog-types]
Standard dialogs are the dialogs that you create for performing various tasks. These dialogs contain most of the actions of a chatbot. To improve the clarity of the chatbot flow, create a separate dialog for each chatbot action. Example: Welcome, create account, manage appointment, and goodbye.
There is no limit on the number of standard dialogs that you can create.
Default Dialog [#default-dialog-dialog-types]
This dialog is added by default when you create a chatbot. This is always the first dialog. Use this dialog to send a welcome message and identify what the end user wants.
There can be only one Default dialog in a chatbot.
This dialog is also used as a fallback for any undefined scenarios.
You cannot move or delete this dialog. You can rename the dialog.
The Default dialog has a Default intent assigned automatically. You cannot unlink this intent from the dialog or add other intents to this dialog.
Authentication Dialog [#authentication-dialog-dialog-types]
Some dialogs in the chatbot may contain sensitive data. Example: Dialogs that obtain or update personal information. Access to such dialogs needs to be available only to authenticated end users.
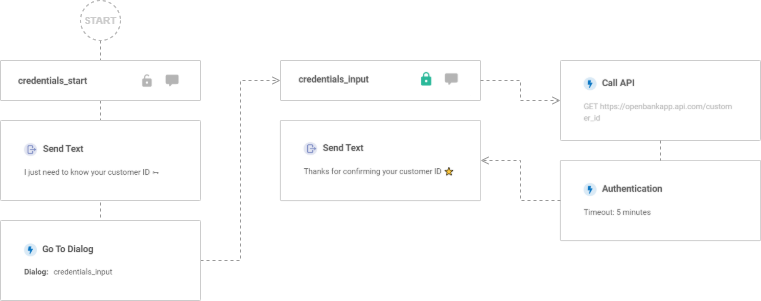
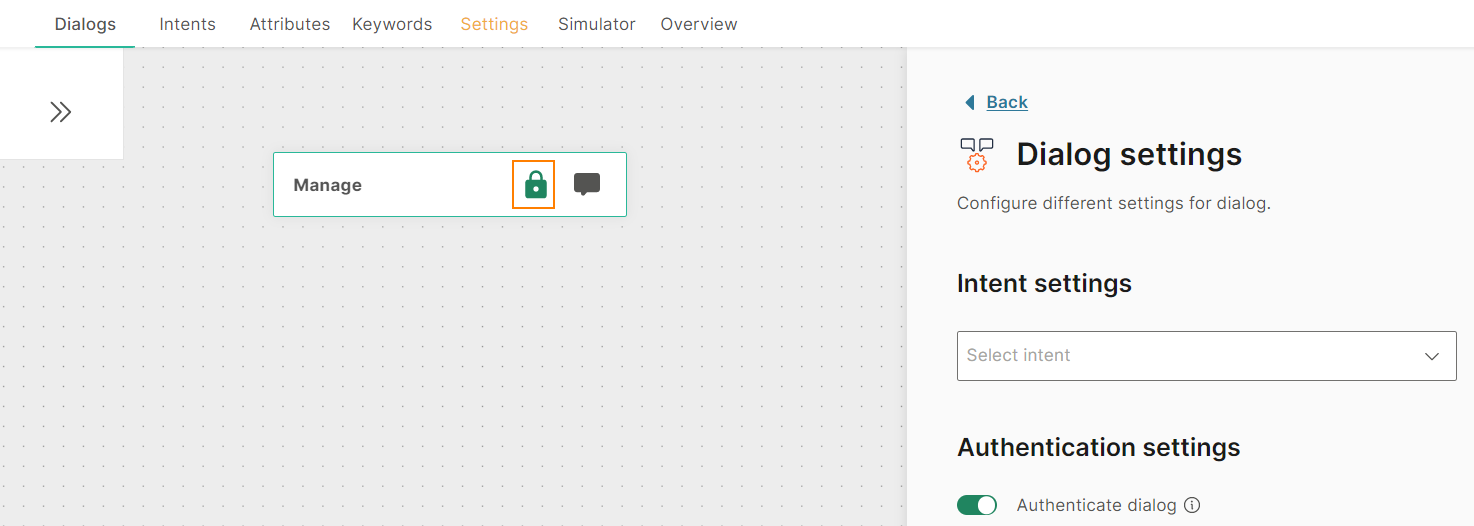
Use the authentication dialog to verify the identity of end users. When an end user enters a protected dialog, redirect them to the authentication dialog. The authentication dialog verifies the end user's data against either the Infobip People solution or a third-party application. If the authentication succeeds, only then the end user can access the protected dialog. The lock icon in a dialog indicates that the dialog is protected. Use the To Dialog element to route end users to the authentication dialog.
For step-by-step instructions to create an authentication dialog, refer to the Create a chatbot section.
When an end user is authenticated, the authenticated predefined attribute is set to True.
You can configure authentication such that it expires after a specific period. After this period, end users need to authenticate themselves again. The expiry period starts from the last message sent by the end user. When the authentication expires, the authenticated predefined attribute is set to False. Example: The authentication timeout is set to 5 minutes. After authenticating themselves, the end user leaves the chat open and rejoins after 5 minutes. Because the authentication has expired, the end user needs to authenticate themselves again.
You cannot restrict the Default and Session Expire dialogs through authentication.
You cannot add an intent to the Authentication dialog.
Session Expire Dialog [#session-expire-dialog-dialog-types]
Use this dialog when you want the chatbot to notify end users that their session is finished. You can also let them know that if they decide to continue the conversation, a new session will start.
To transfer the chat to an agent in Conversations, add the To agent element. Example: When an end user does not respond for a specified time, the chatbot redirects the flow to the Session expire dialog. From this dialog, the chatbot transfers the conversation to an agent in Conversations.
You cannot add an intent to this dialog.
Dialog Groups
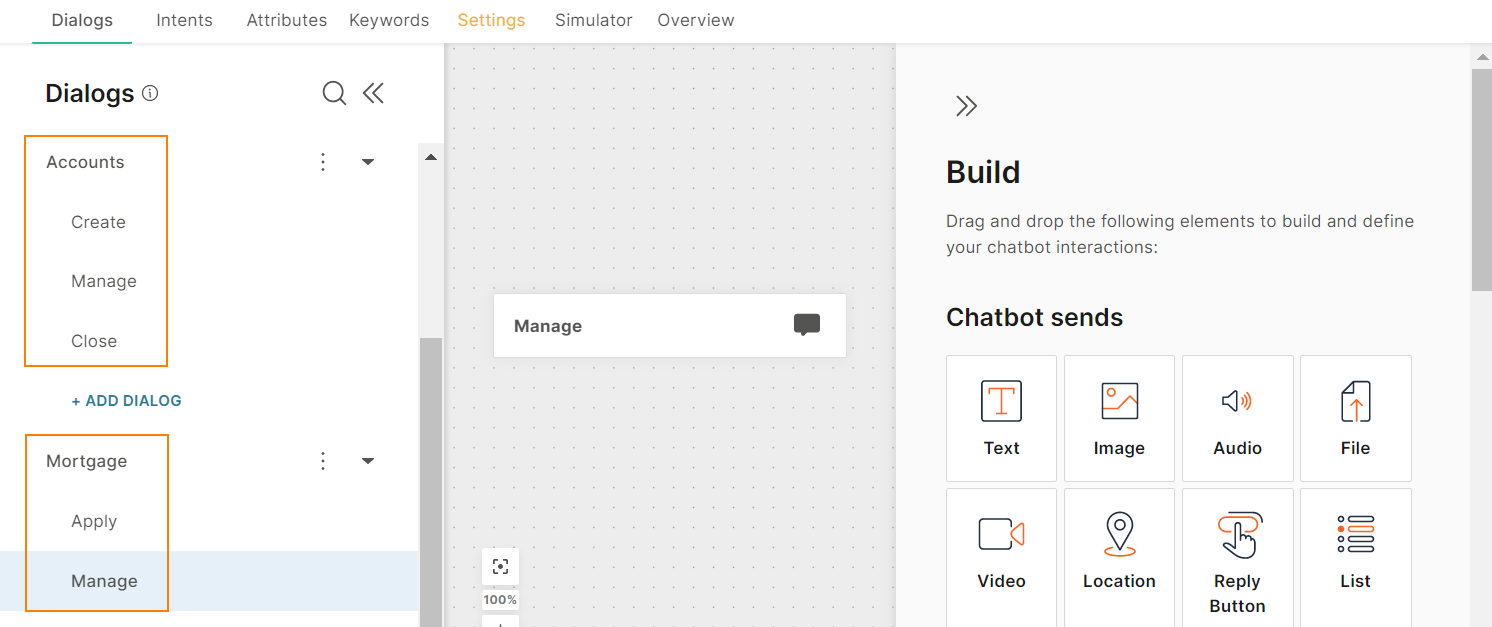
If a chatbot has a large number of dialogs, it may be easier to group them by function.
Example: A banking chatbot may have dialogs for creating an account, updating an account, and closing an account. You can group these dialogs under the dialog group, Accounts. Similarly, you can have a dialog group for Mortgage, and so on.
The Default dialog group is automatically added. You cannot rename, delete, or move this dialog group.
Dialog Routing
Dialogs can be routed in the following ways:
- Based on keywords: When the chatbot recognizes a keyword in the end user's message, the chatbot directs the flow accordingly. For step-by-step instructions to create a rule-based chatbot, refer to the Create a Chatbot section.
- Based on intents (AI chatbots): When the end user sends a message, the chatbot identifies the intent, and directs the end user to the relevant dialog.
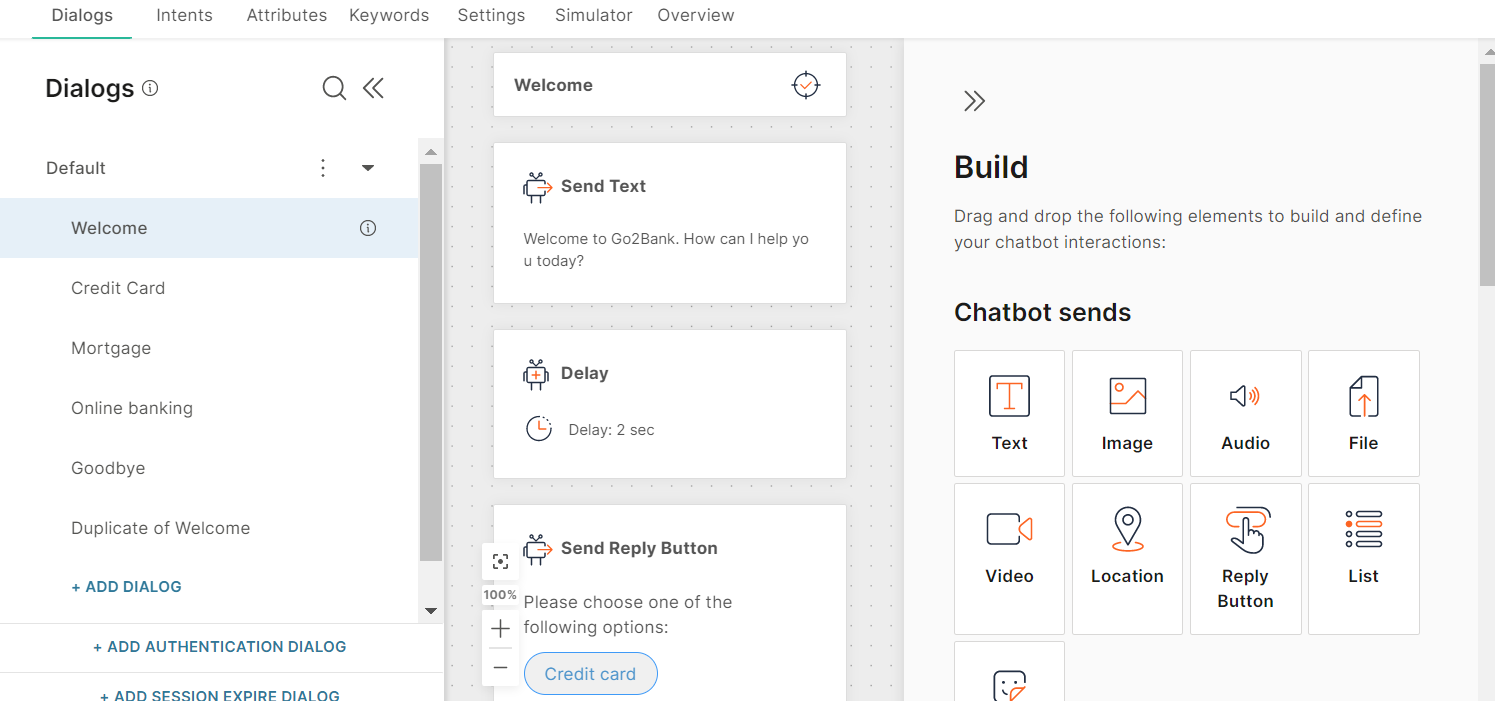
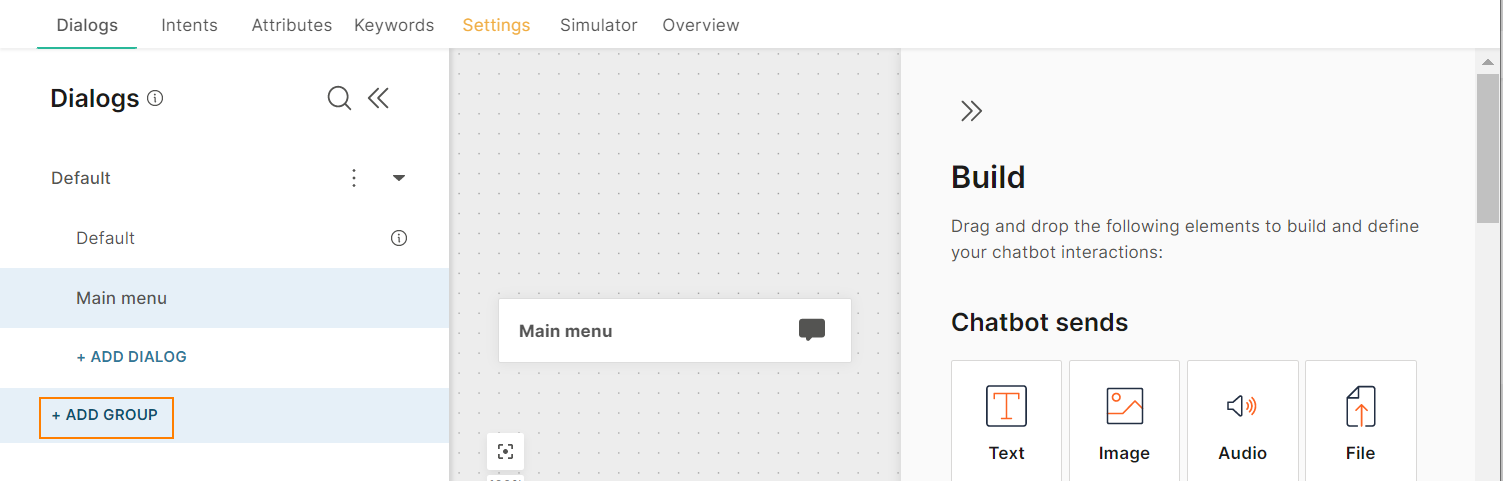
Dialogs Tab
This tab consists of the following sections:
- Left pane - List of dialogs and dialog groups. Use this section to perform tasks such as creating a dialog, renaming a dialog, and grouping dialogs.
- Middle pane - Dialog builder. Use this section to create the flow of the dialog.
- Right pane - List of chatbot elements and integrations. Drag elements or integrations from this section to the middle pane. When you select an element or integration in the middle pane, the right pane shows the configuration for that element or integration.
Guidelines and Best Practices
- Use a separate dialog for each topic of conversation. Example: For a banking chatbot, use separate dialogs for mortgages and savings.
- For AI chatbots, create a separate dialog for each intent.
- If many dialogs contain the same content and/or logic, create a base dialog. Then, duplicate the dialog and modify it instead of creating new dialogs.
- Add a closing dialog. When end users finish their queries, direct them to this dialog.
- You can add intents only to standard dialogs. You cannot add intents to the Default, Authentication, and Session Expire dialogs.
- You cannot unlink the Default intent from the Default dialog.
How to
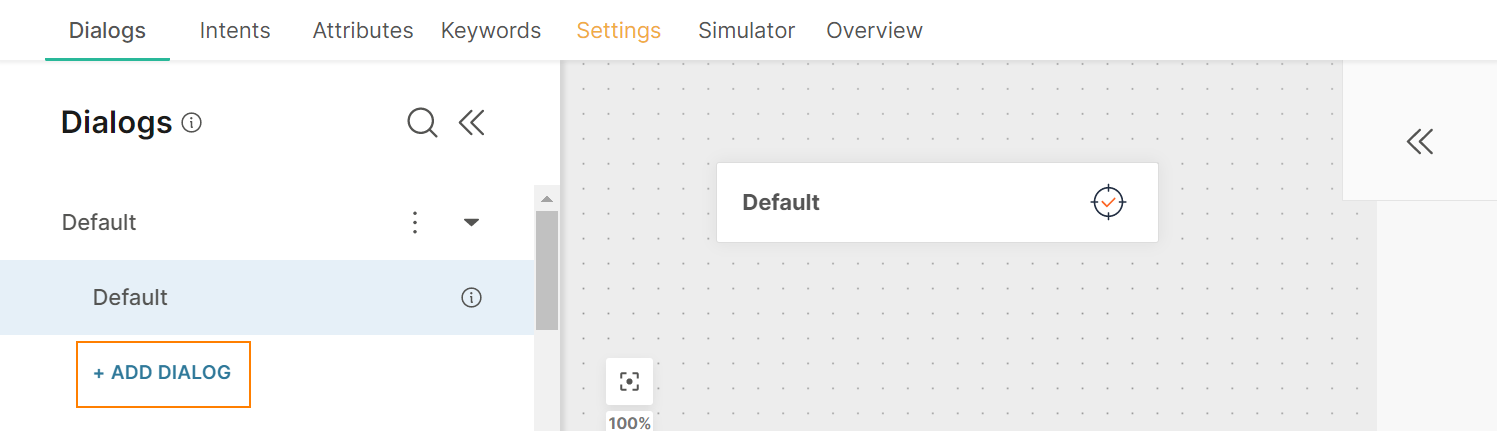
Create a Dialog [#create-a-dialog-how-to]
In the chatbot editor, the Default dialog is added automatically.
You can add the following types of dialogs:
- Standard dialog: Within a dialog group. click Add dialog. The new dialog is added to the dialog group.
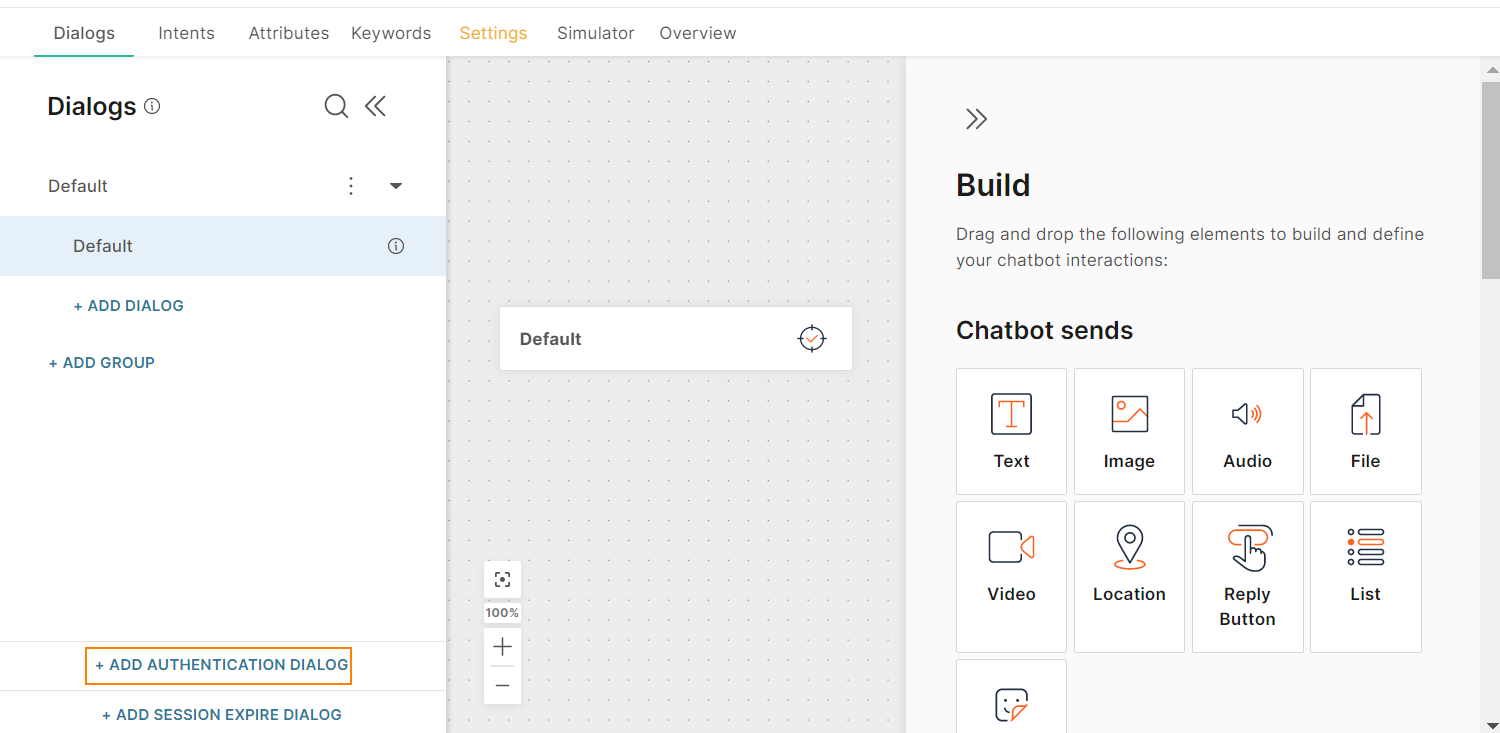
- Authentication dialog: Click Add authentication dialog. By default, this dialog is added to the Default dialog group. You can move this dialog to other dialog groups if required.
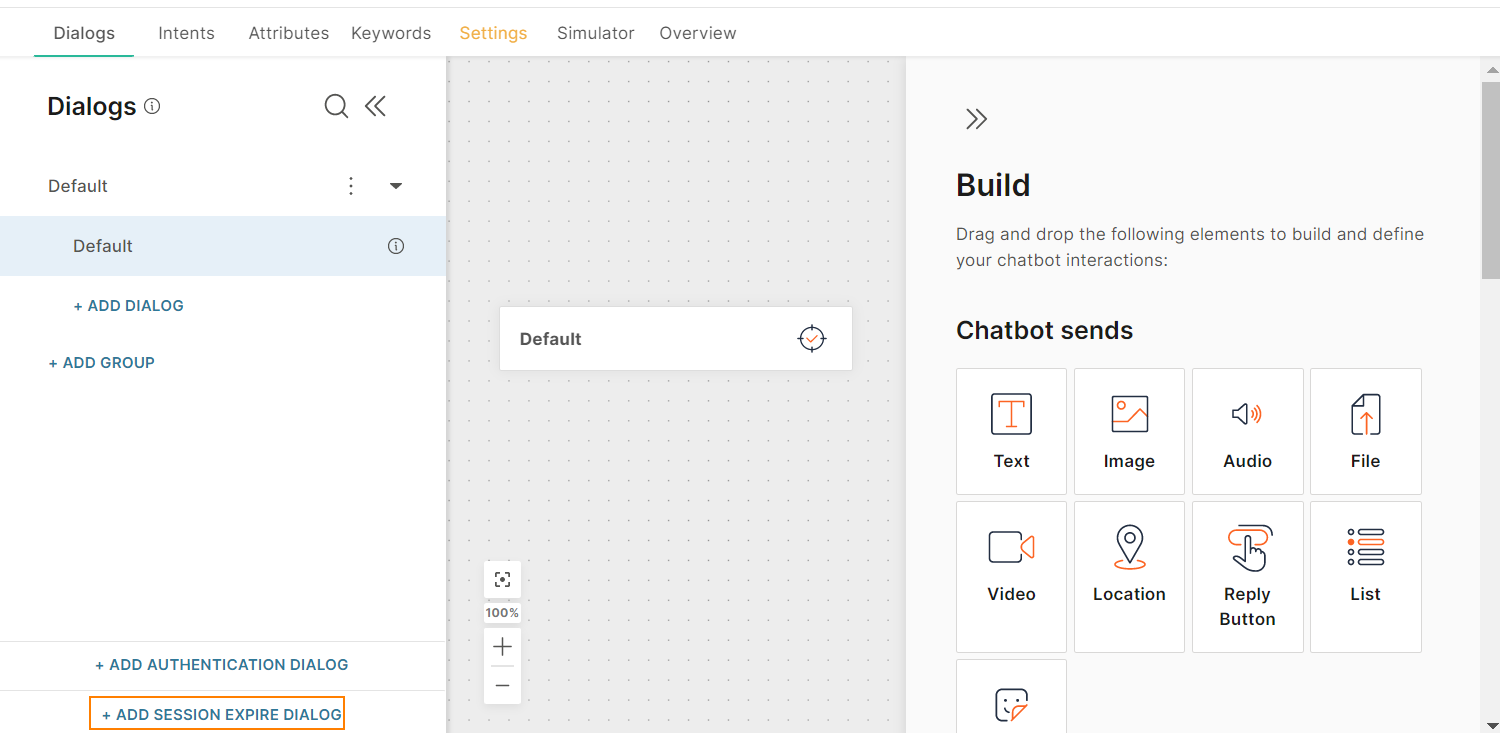
- Session expire dialog: Click Add session expire dialog.
- This dialog supports only some chatbot elements.
- A Text element is added by default. You can delete this element if required.
- By default, this dialog is added to the Default dialog group. You can move this dialog to other dialog groups if required.
You can now add chatbot elements and design the flow for the dialog.
All dialogs, except the Authentication and Session Expire dialogs, contain a block that shows the name of the dialog. You cannot delete or move this block.
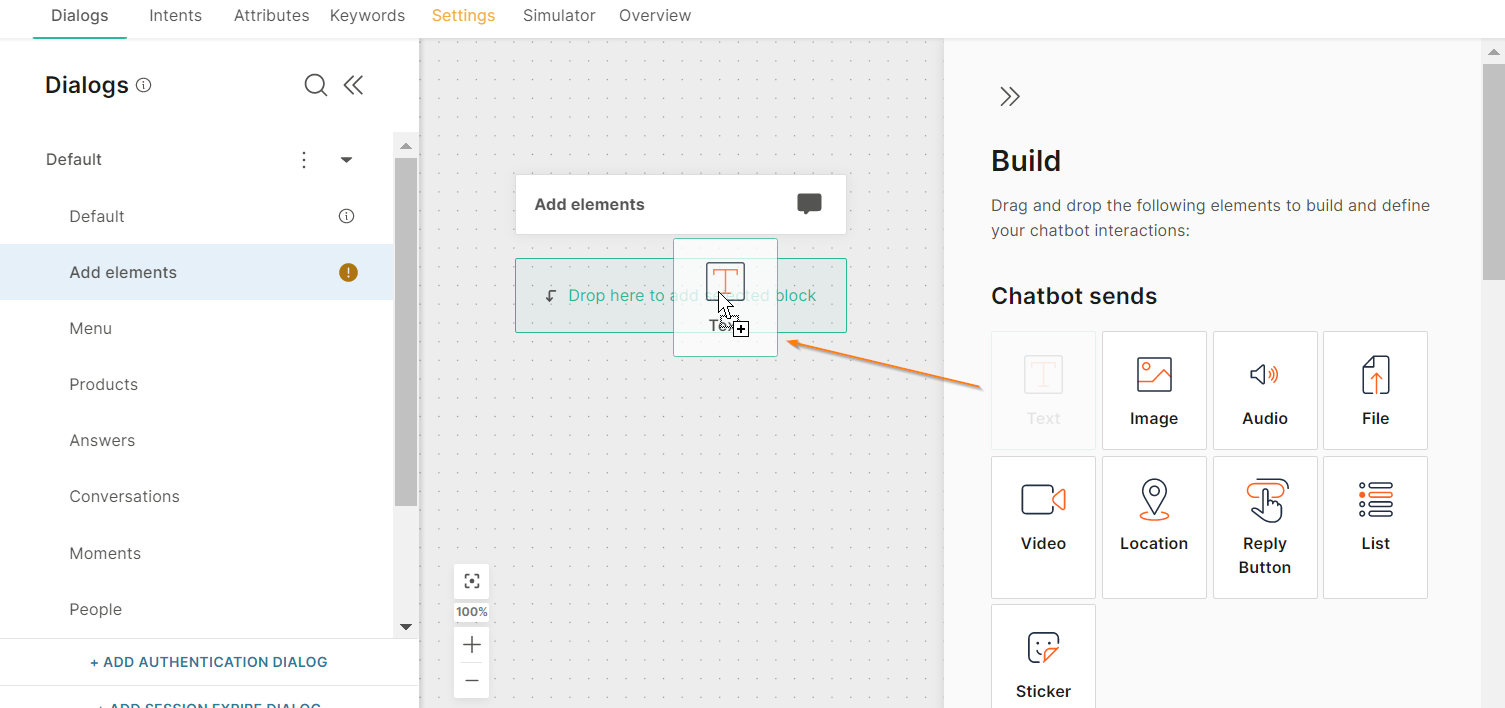
Add an element to a dialog [#add-an-element-to-a-dialog-how-to]
Drag an element from the right-hand pane to the chatbot editor.
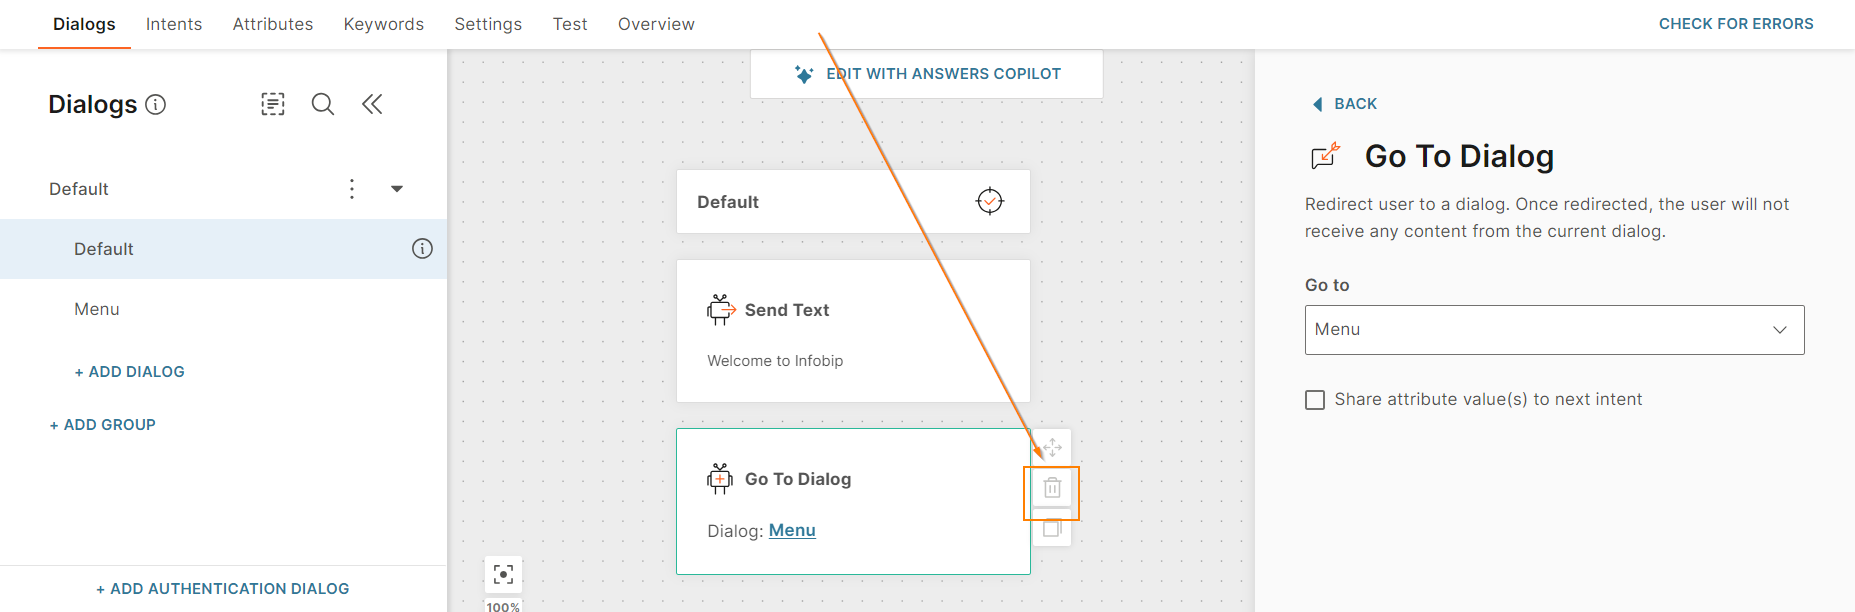
Delete an element in a dialog [#delete-element-in-dialog-how-to]
Do the following.
-
In a dialog, select the element that you want to delete.
-
Select the delete icon.
-
In the confirmation screen, select Delete.
Copy an element in a dialog [#copy-element-in-dialog-how-to]
You can copy an element in a dialog and paste it either in the same dialog or in a different dialog. Use this option to create a duplicate of a configured element.
Do the following.
-
In a dialog, select the element that you want to copy.
-
Do one of the following.
- Right-click the element and select Copy element.
- Press Ctrl + C.
- Select the copy icon.
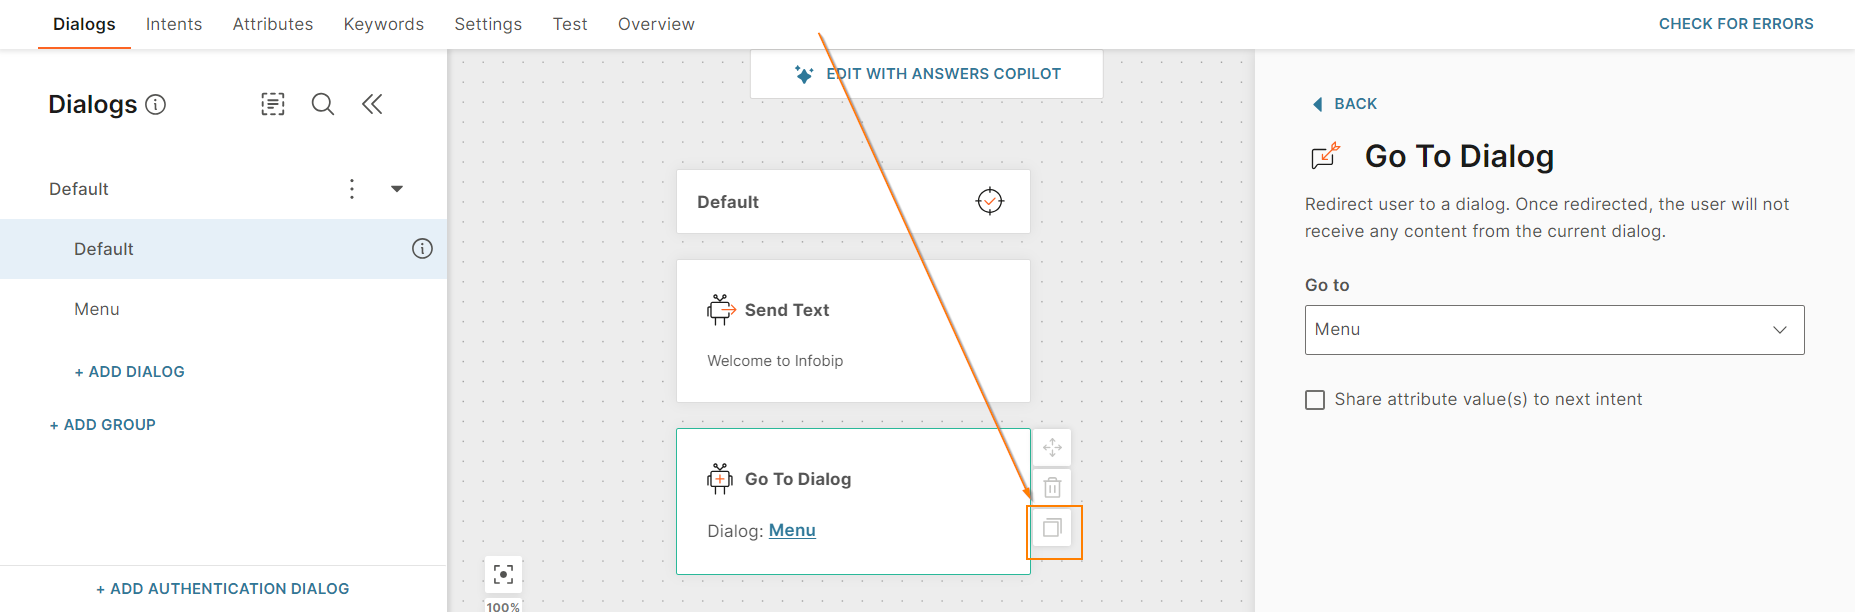
You get a confirmation that the element has been copied to the clipboard.

-
To paste the element, do one of the following.
- Right-click anywhere in the canvas and select Paste element.
- Press Ctrl + V.
If you want to cancel the Paste action, select Cancel.

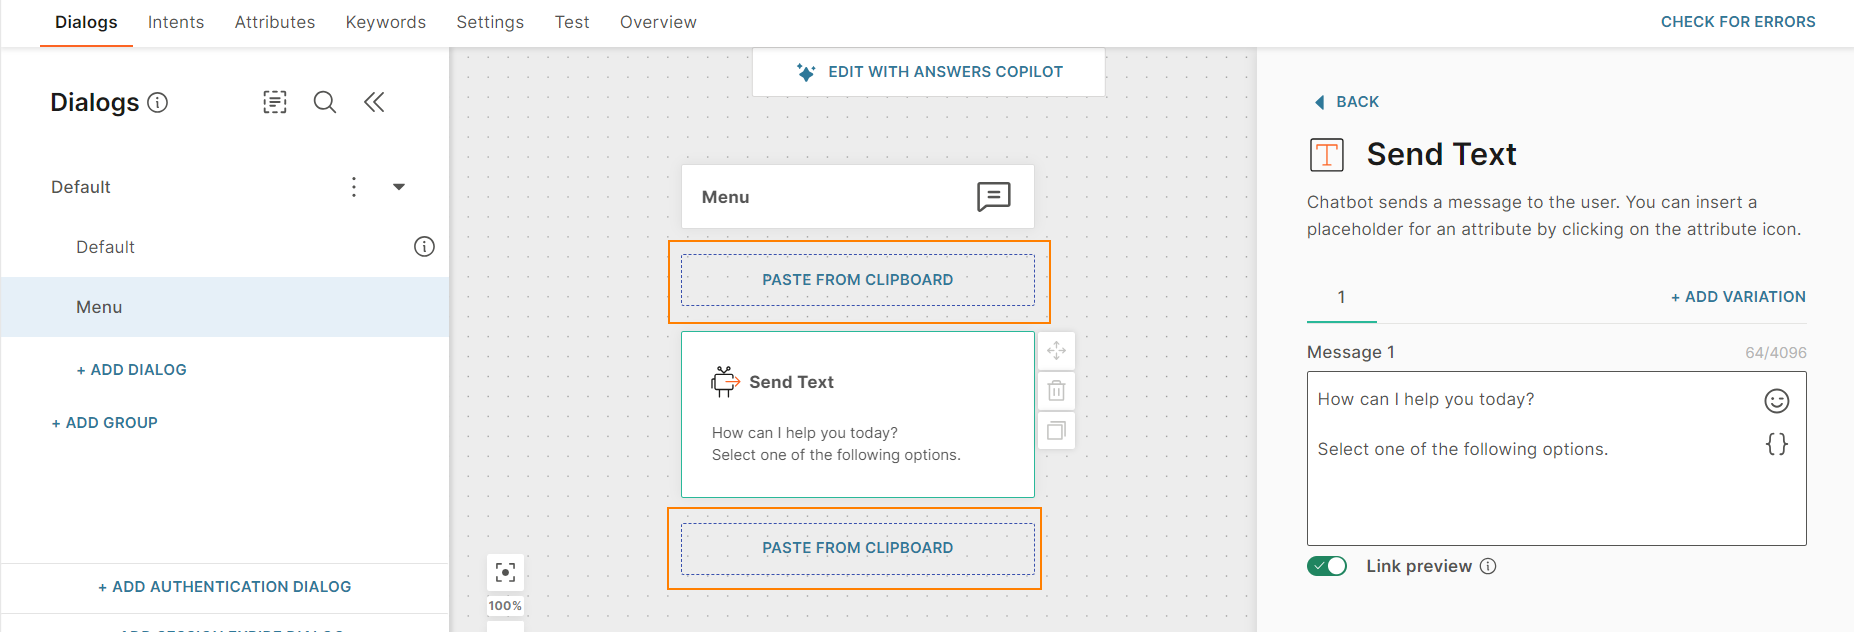
-
In the location where you want to paste the element, select Paste from clipboard.
Move an element within a dialog [#move-element-in-dialog-how-to]
You can move an element within a dialog.
Do the following.
- In a dialog, select the element that you want to move.
- Select the move icon.
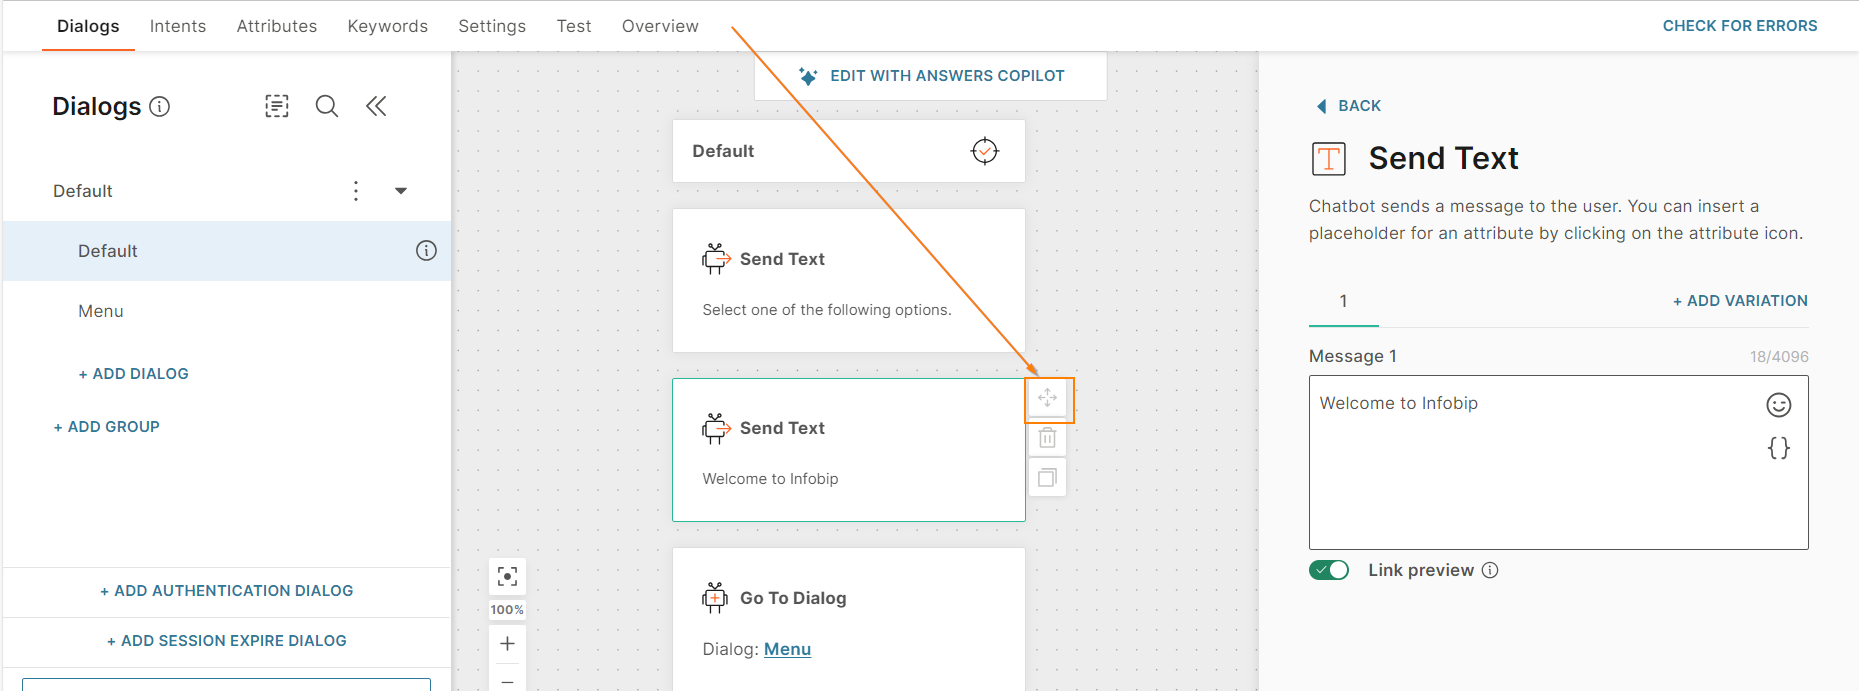
- Drag the element to the required location.
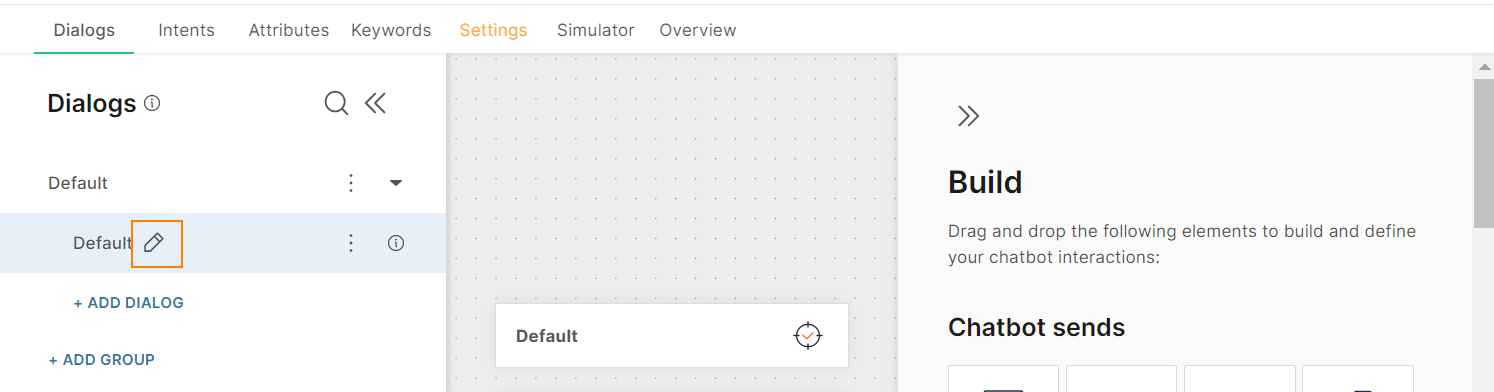
Rename a Dialog [#rename-a-dialog-how-to]
In the Dialogs pane, click the pencil icon against the name of the dialog. Add the new name.
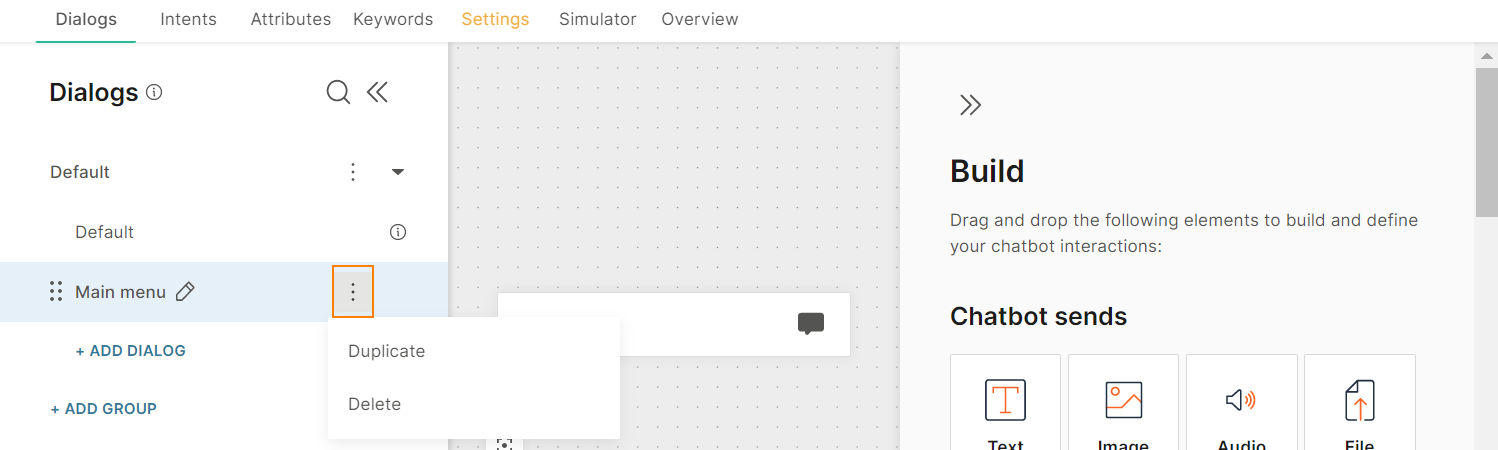
Duplicate a Dialog [#duplicate-a-dialog-how-to]
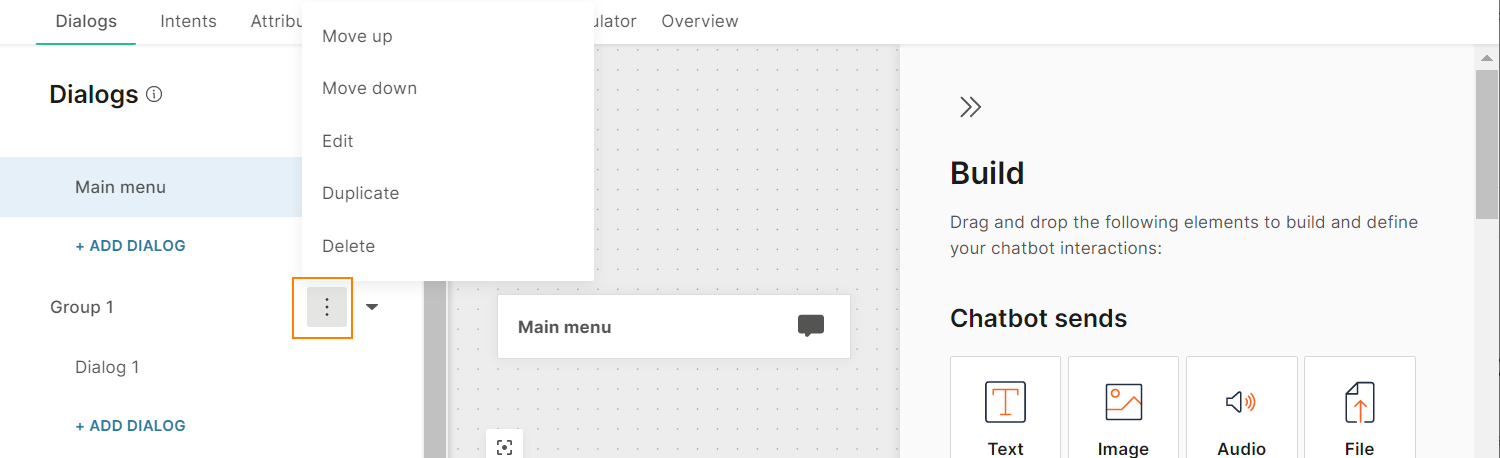
Click the three dots against the name of the dialog to access the menu. Click Duplicate.

If you duplicate the Default, Authentication, or Session Expire dialogs, the duplicate dialogs are created as standard dialogs.
Delete dialogs [#delete-a-dialog-how-to]
You can delete one or more dialogs in a chatbot.
You cannot delete the dialog that has the Default intent.
If you delete the Authentication dialog, authentication is disabled for all dialogs in which you had enabled authentication.
Delete a single dialog [#delete-single-dialog-how-to]
- Select the three dots against the name of the dialog to access the menu.
- Select Delete.
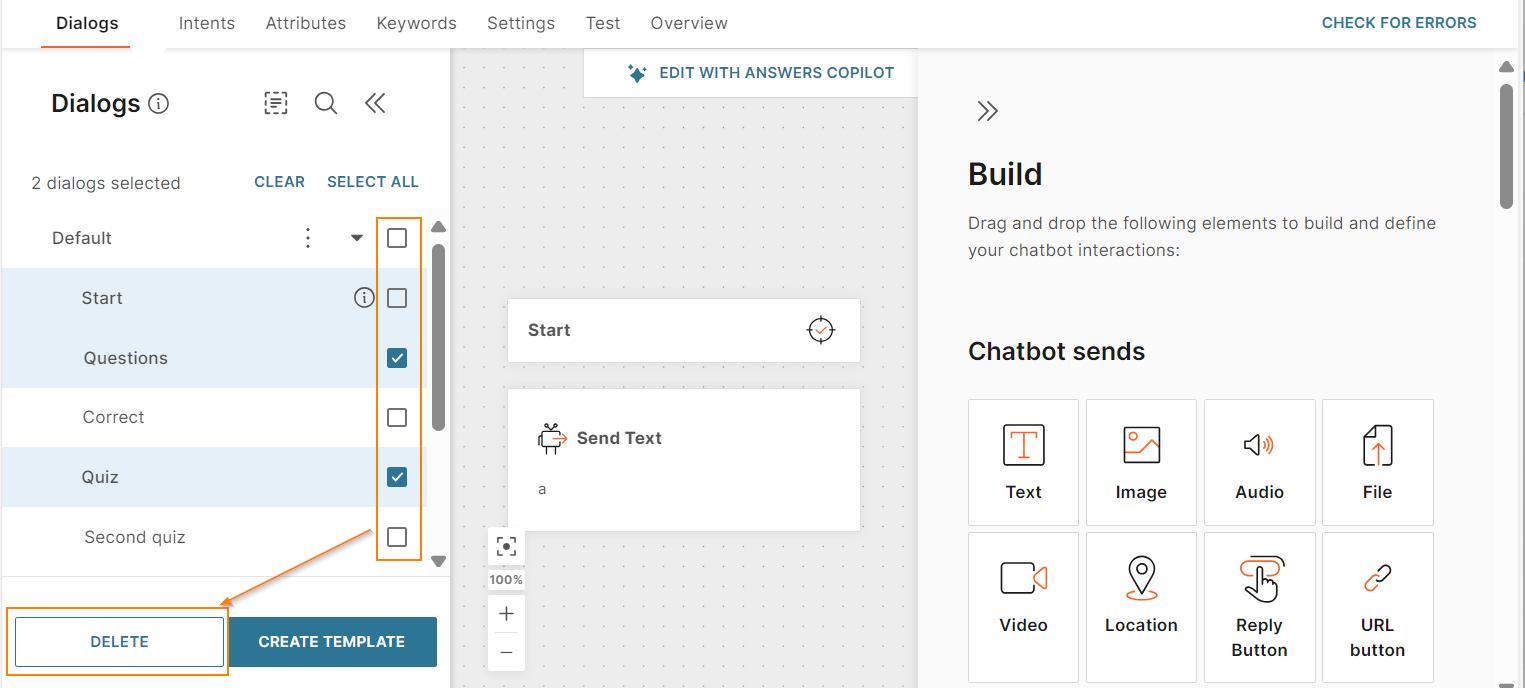
Delete multiple dialogs [#delete-multiple-dialogs-how-to]
- Select the checkbox against the dialogs that you want to delete. To delete all dialogs, select Select all.
- Select Delete.
Assign an intent to a Dialog [#assign-an-intent-to-a-dialog-how-to]
In AI chatbots, each dialog has an intent. For information about how dialogs and intents work in AI chatbots, refer to the AI section. To add an intent to a dialog, refer to the Intents section.
Reorder Dialogs [#reorder-dialogs-how-to]
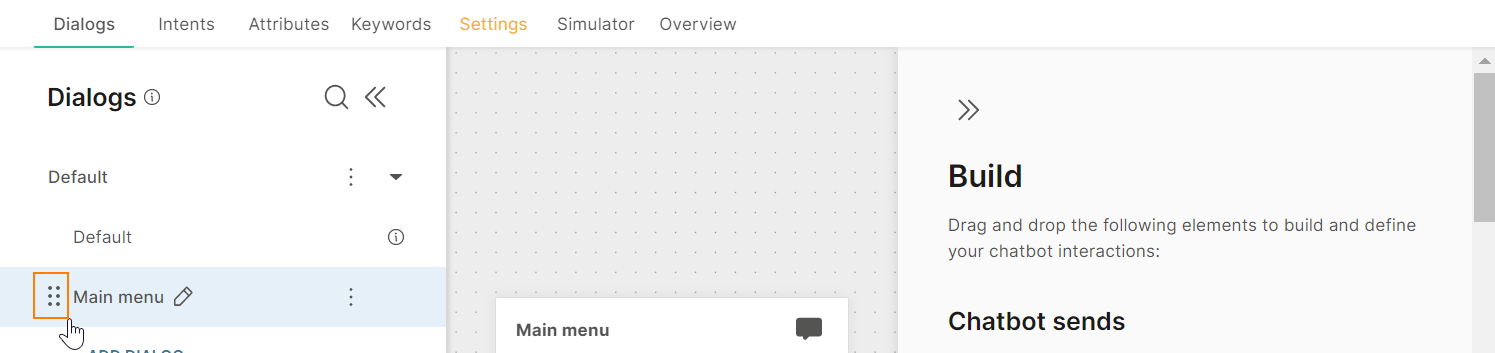
Click the icon in front of the dialog name to get the hand icon. You can drag and drop the dialog within the dialog group or to other dialog groups as required.
You cannot move the Default dialog. This dialog is always at the top.
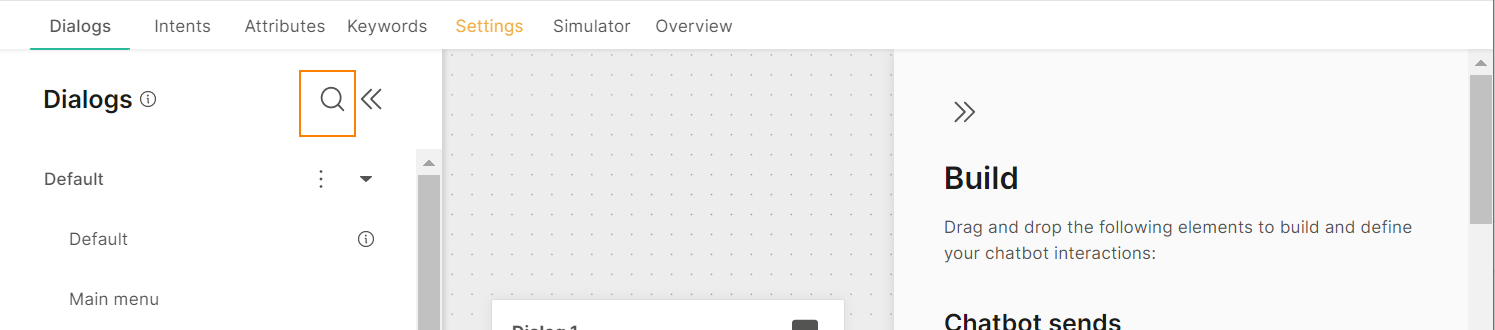
Search for a Dialog [#search-for-a-dialog-how-to]
Click the Search icon and enter the name of the dialog in the Search field.
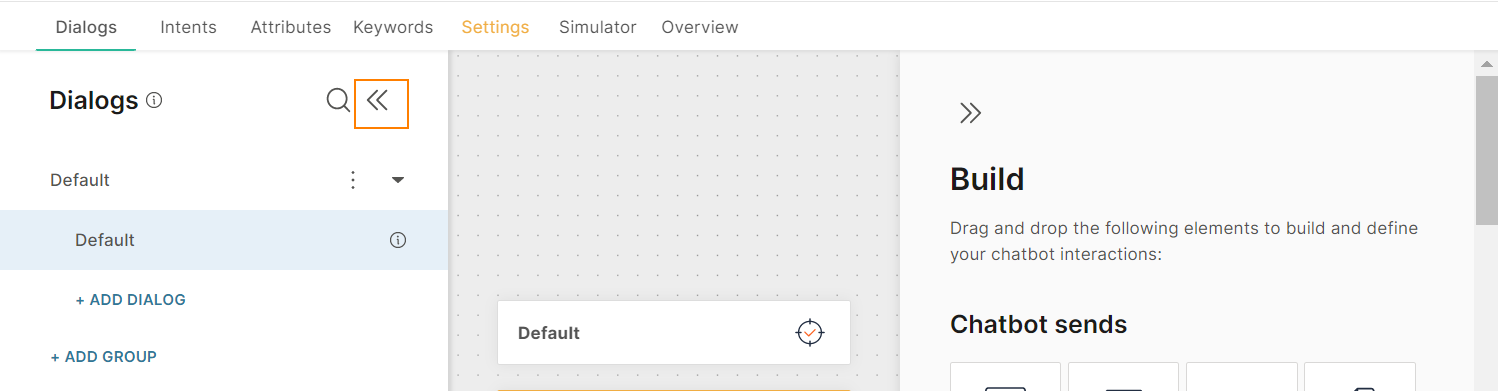
Show or Hide the Dialogs Pane [#show-or-hide-the-dialogs-pane-how-to]
Click the arrows icon to show or hide the Dialogs pane.
Enable Authentication for a Dialog [#enable-authentication-for-a-dialog-how-to]
Prerequisites [#prerequisites-how-to]
Create an Authentication dialog to enable authentication in other dialogs. For step-by-step instructions to create an authentication dialog, refer to the Create a chatbot section.
Enable Authentication [#enable-authentication-how-to]
To enable authentication in the Default dialog, use the To dialog element to redirect the end user to an Authentication dialog.
To enable authentication in other dialogs, do the following:
- In the center pane, click the name of the dialog.
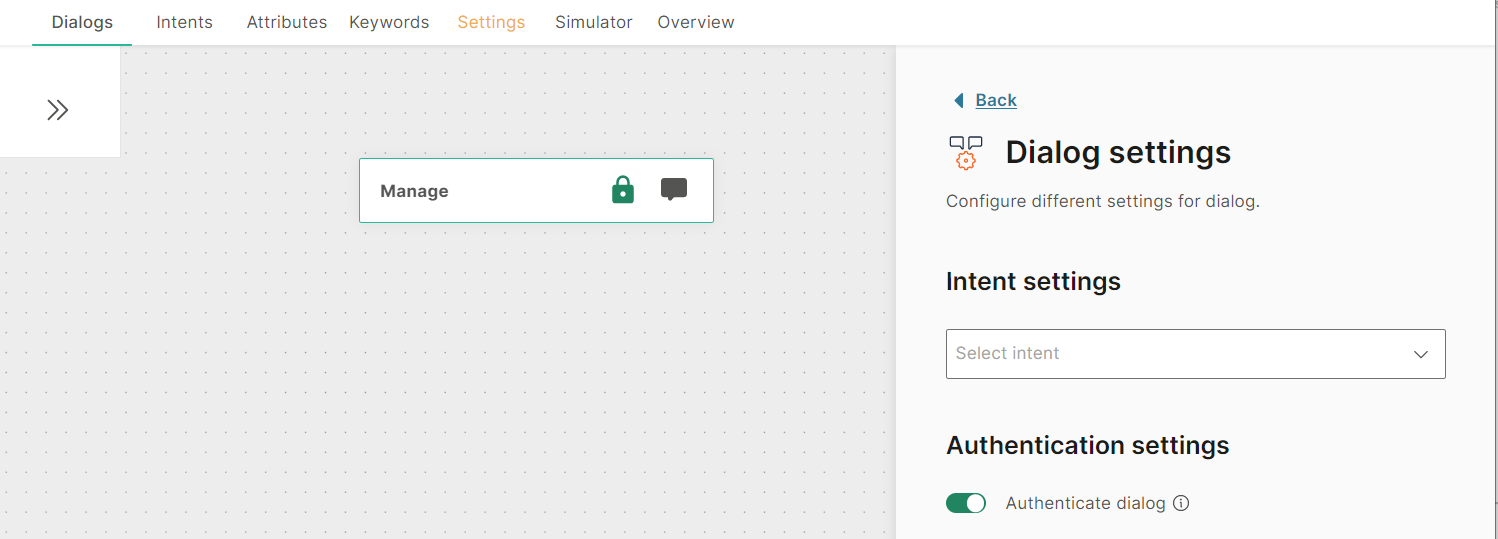
- In the Dialog settings > Authentication settings section, enable authentication.
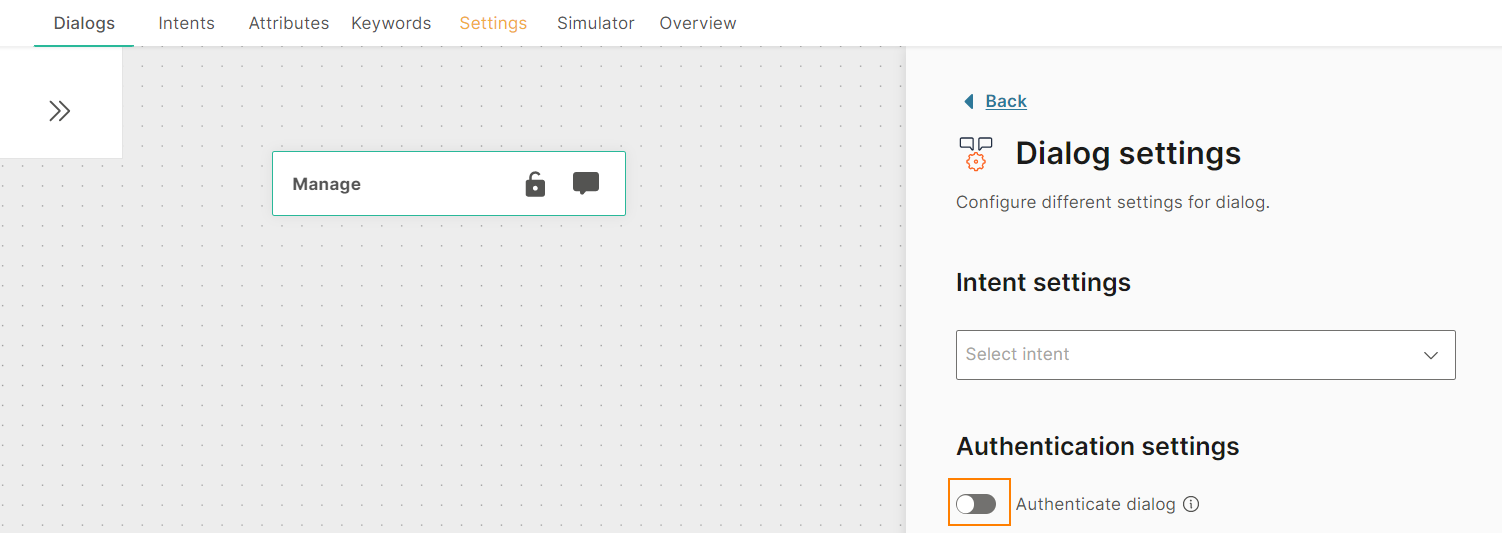
The dialog now has a lock symbol to indicate that authentication is enabled for that dialog.
When the end user enters an authenticated dialog, they are redirected to the Authentication dialog, either to perform authentication or to check the status of the authenticated predefined attribute.
If you delete the Authentication dialog, authentication is disabled for all dialogs in which you had enabled authentication.
If you disable authentication for a dialog, the authentication process is not performed when the end user enters the dialog.
View Dialog Settings [#view-dialog-settings-how-to]
In the center pane, click the name of a dialog to view its settings.
For each dialog, you can do the following:
- Assign an intent to a dialog.
- Specify whether access to the dialog is restricted.
Create a Dialog Group [#create-a-dialog-group-how-to]
Click Add group to create a new dialog group.
Rename a Dialog Group [#rename-a-dialog-group-how-to]
You cannot rename the Default dialog group.
Follow these steps to rename other dialog groups.
- Click the three dots against the name of the dialog group to access the menu.
- Click Edit.
- Enter the name.

Duplicate a Dialog Group [#duplicate-a-dialog-group-how-to]
Click the three dots against the name of the dialog group to access the menu. Click Duplicate.
Delete a Dialog Group [#delete-a-dialog-group-how-to]
Click the three dots against the name of the dialog group to access the menu. Click Delete.
You cannot delete the Default dialog group.

Reorder Dialog Groups [#reorder-dialog-groups-how-to]
Click the three dots against the name of the dialog group to access the menu. Click Move up or Move down to reorder the dialog groups.
You cannot move the Default dialog group. This dialog group is always at the top of the list.

Show or Hide a Dialog Group [#show-or-hide-a-dialog-group-how-to]
Click the arrow against the name of the dialog group to expand or collapse the group.

Example of Dialog Creation
In the following example, the chatbot assists end users who ask about the gate for their flight.
-
In the chatbot editor, click Add dialog to create a new dialog.
-
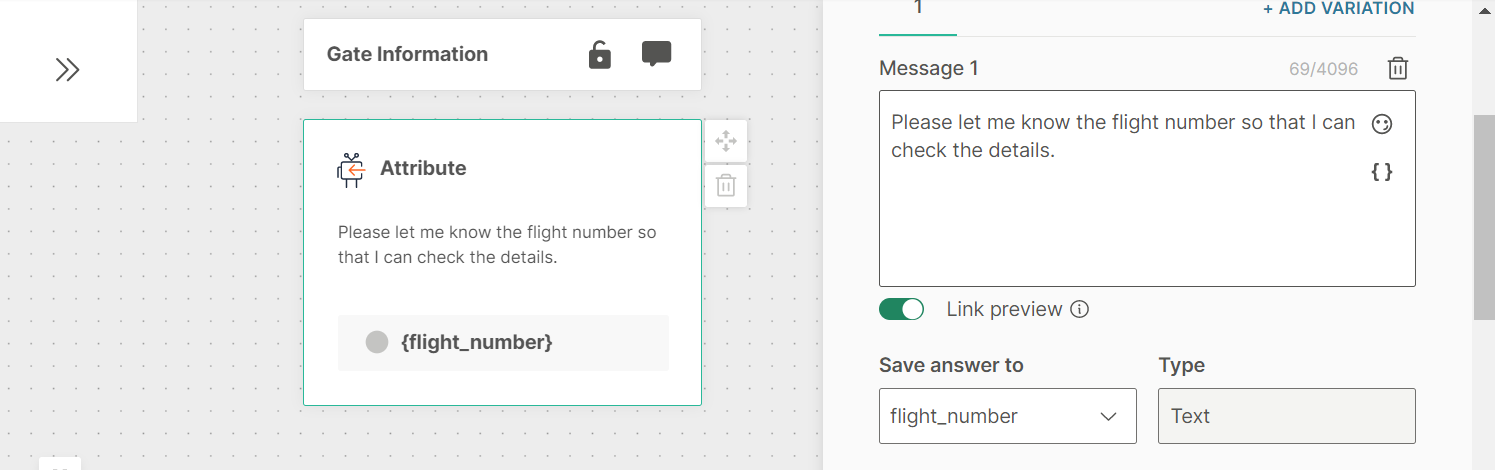
After the initial contact from the end user, the chatbot needs to ask them for information regarding their flight. So, drag and drop the Attribute element under the dialog block.
-
In the text box, enter the text that the chatbot sends to the end user. Ask for the flight number. You can incorporate previously-created attributes, such as first_name, to make the message more personal.
-
Add an attribute to save the end user's response.
-
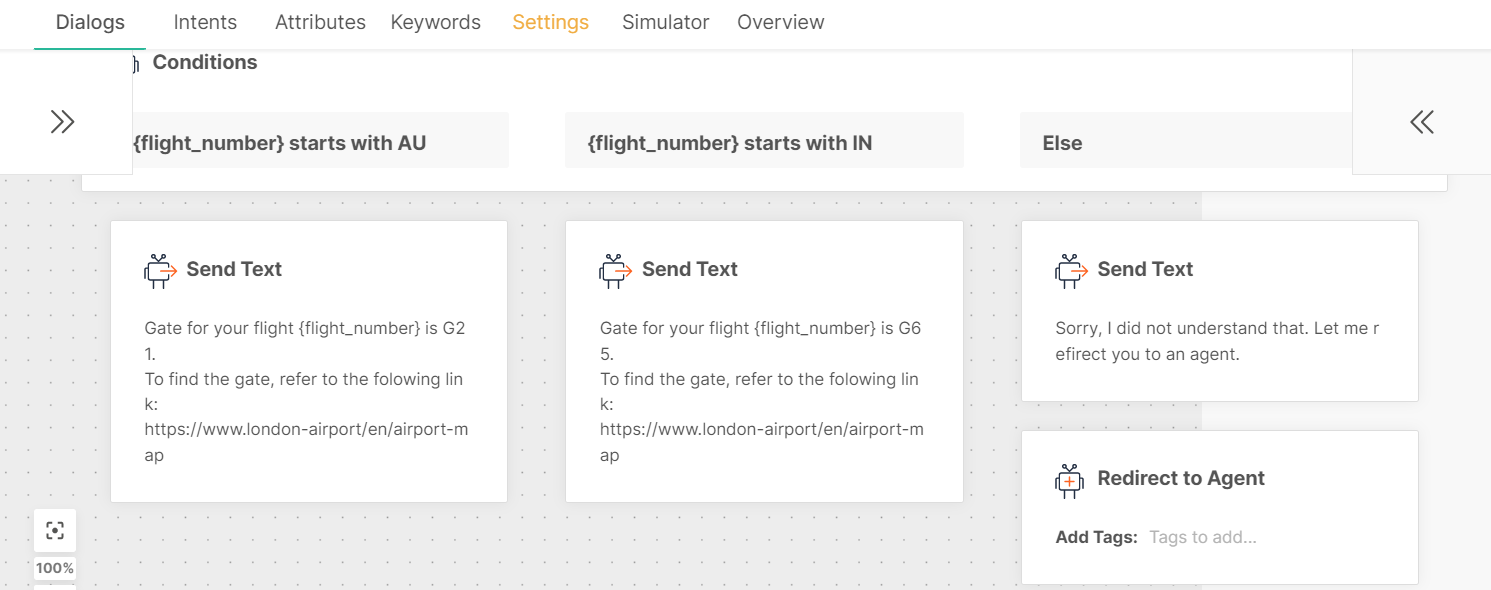
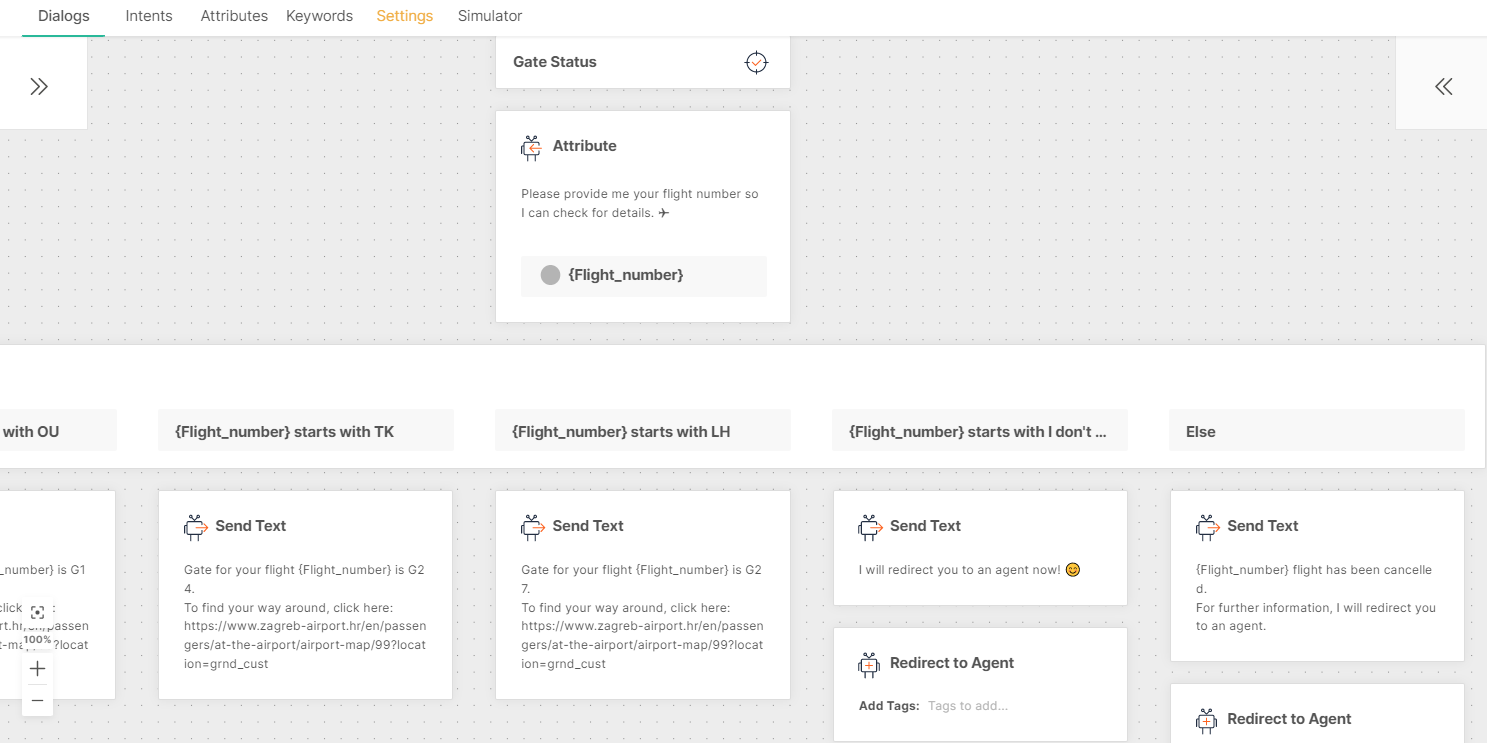
Depending on the end user's response, you need to branch the dialog to provide the relevant answer. So, drag and drop the Conditions element under the Attribute element.
- Add a separate branch for each flight number. In the right frame, add conditions for each flight number.
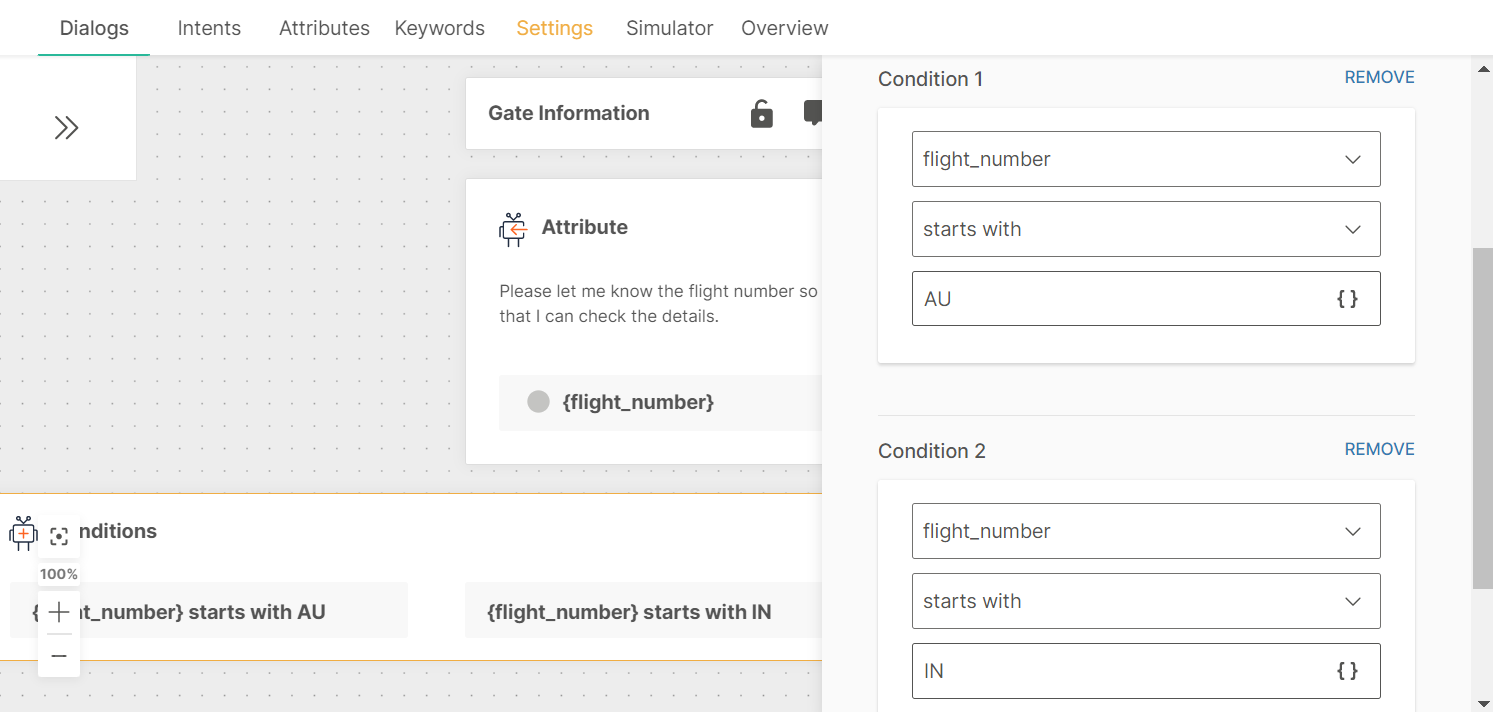
-
-
For each condition, add a follow-up element in which you provide the answer to the end user.
- For each branch for a specific flight number, add a Text element that provides the gate number for that flight.
- For the Else branch, configure what happens when the end user's response does not fulfil any of the conditions. Add a Text element that explains that the chatbot could not obtain the requested information. Send the end user to a different dialog, one that handles unresolved queries. So, add the To agent element.