Create a rule-based chatbot
This tutorial is an example of a simple rule-based chatbot. The tutorial is for a weather app and uses WhatsApp as the channel.
The tutorial is divided into the following sections.
- Creating and configuring the chatbot
- Designing the chatbot flow
For information about designing the chatbot flow, using entry points, and designing conversations, refer to the Guidelines and best practices section.
Create and Configure the Chatbot
- Log on to the Infobip web interface.
- In the menu the left, navigate to Answers > Chatbots.
- Select New chatbot.
-
- In the New chatbot screen, do the following:
- Enter a name for the chatbot. Specify a unique name so that you can identify the chatbot.
- Select the required channel.
- Define the sender account. You can do this any time before you activate the chatbot.
- Choose the chatbot language.
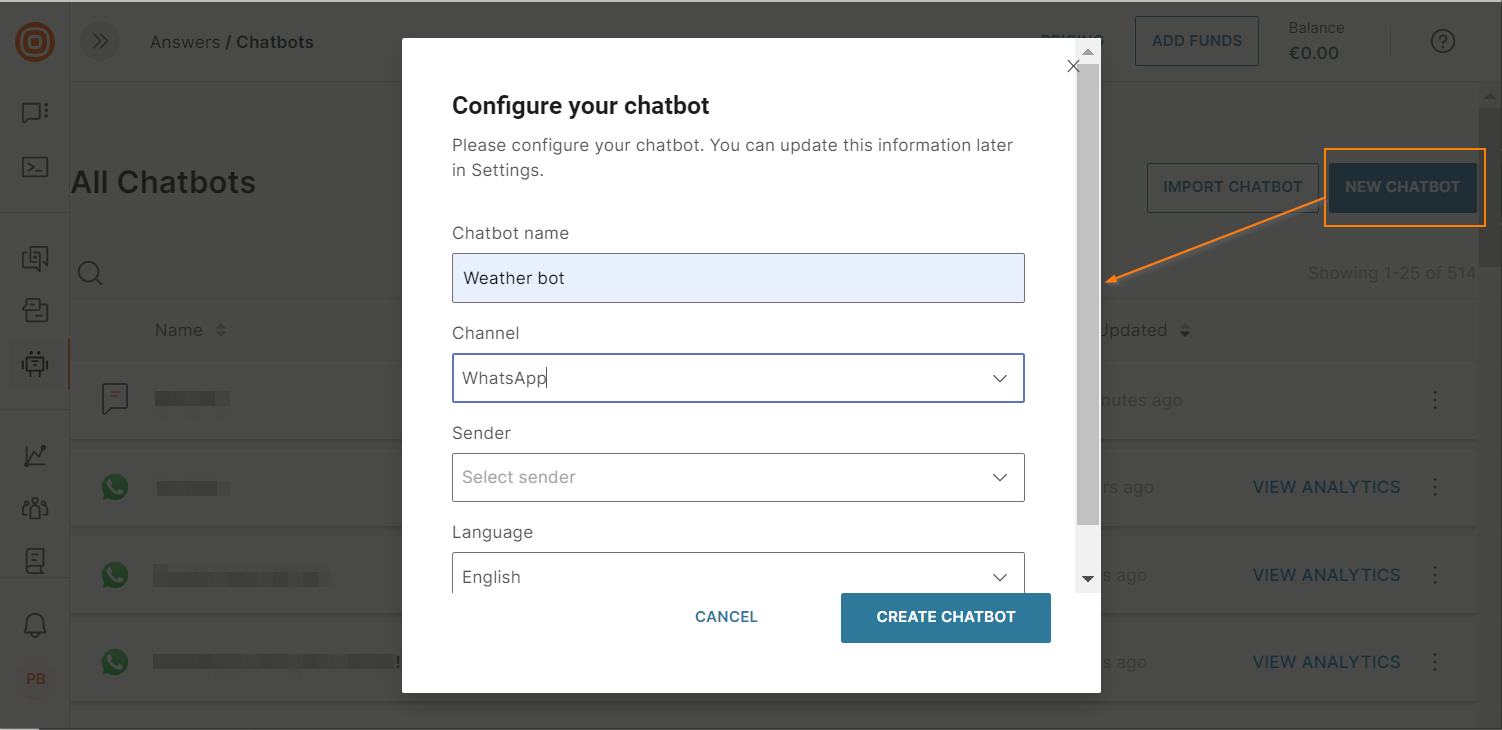
- Select Create chatbot. The chatbot editor opens at the Dialogs tab.
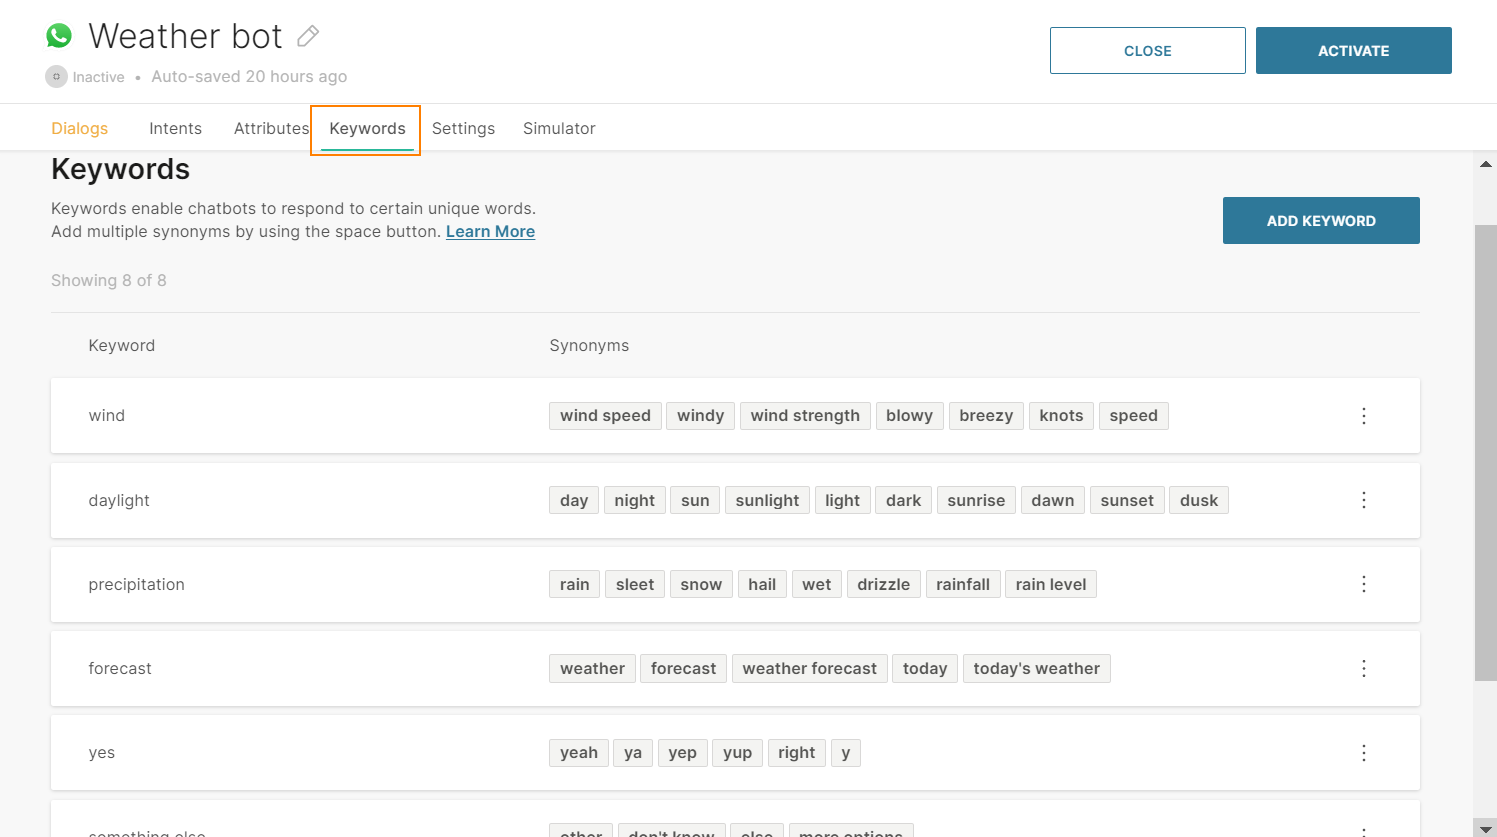
- Go to the Keywords tab. Add words that end users are likely to use in their responses. These words enable your chatbot to understand how to route end users. Example: End users could ask about the forecast, wind speed, or precipitation. So, add these items as keywords.
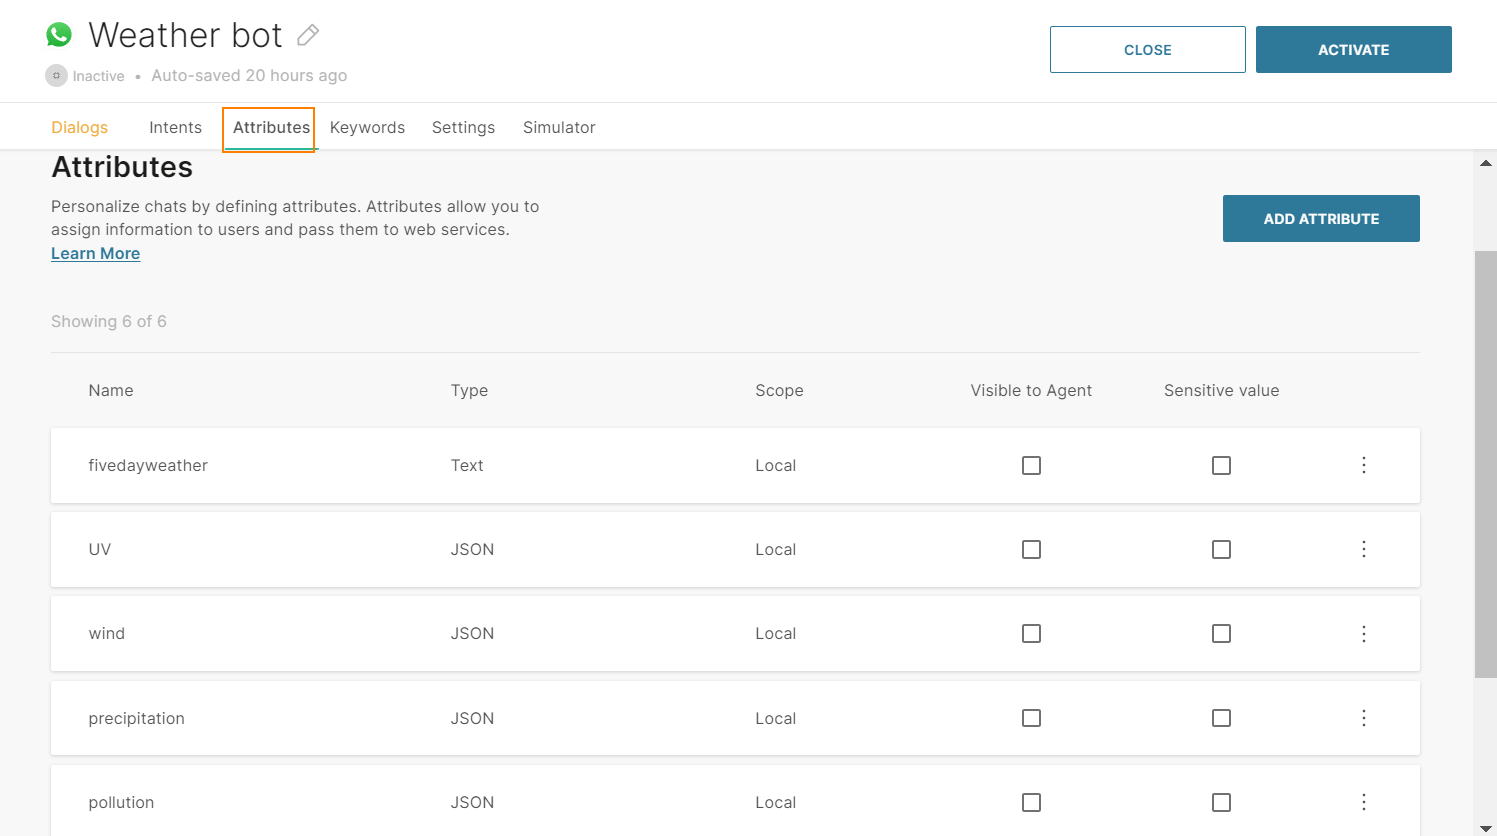
- Go to the Attributes tab. Create the custom objects that capture and store responses from end users. Set the attribute type depending on the format in which you want to receive the responses. Example: Text, JSON, or XML.
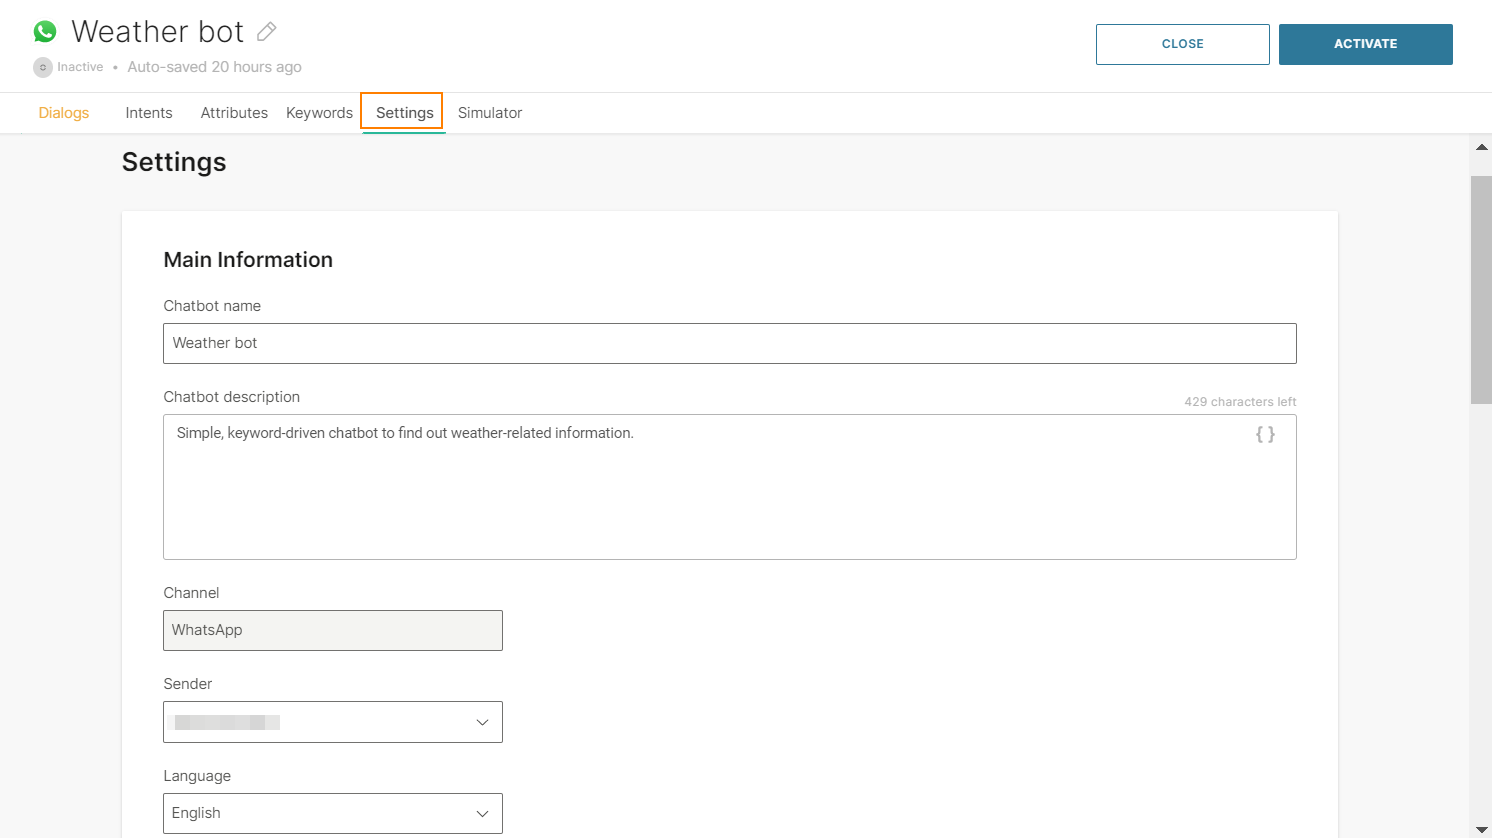
- (Optional) To edit the chatbot configuration, add escape phrases, configure the chatbot timeout logic, and do other actions, go to the Settings tab.
Design the Flow
-
Go to the Dialogs tab.
-
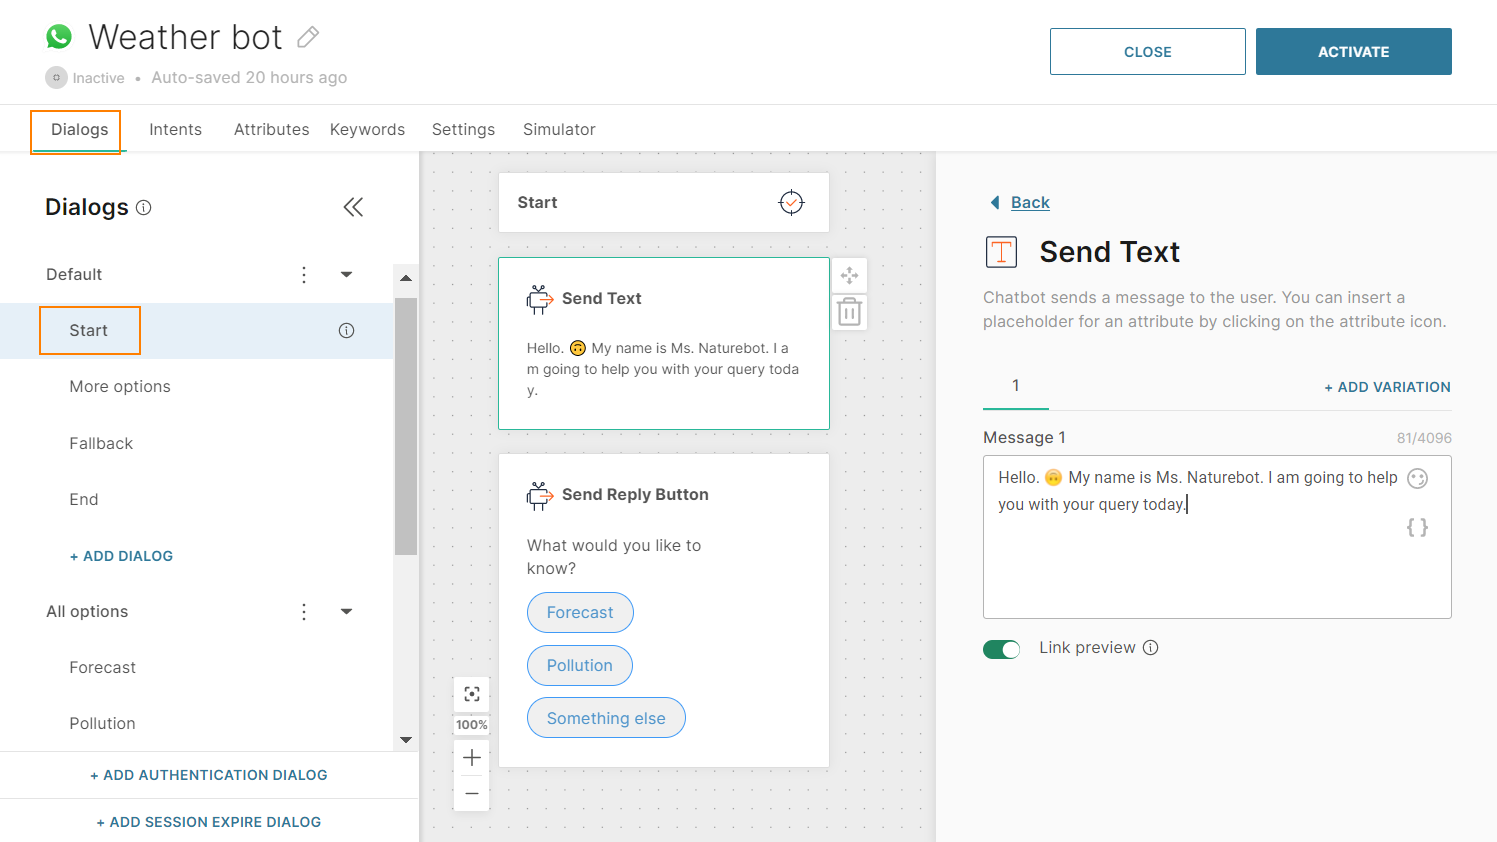
By default, you will be in the Default dialog. Use this dialog for a greeting message, and to find out why the end user contacted the chatbot. Do the following.
- Rename this dialog to 'Start'.
- Drag and drop the Text element onto the editor. Enter a greeting message.
- Drag and drop the Reply button element under the Text element. Add buttons based on the keywords. Example: forecast, pollution, and something else. End users can choose one of these options. Set the Postback value to match the relevant keyword.
-
Use the Add dialog option and add dialogs for each topic of conversation as required. These dialogs must correspond to the keywords that you configured. If the dialogs contain similar content and/or logic, create a base dialog and then use the duplicate option.
-
Go to the Default dialog.
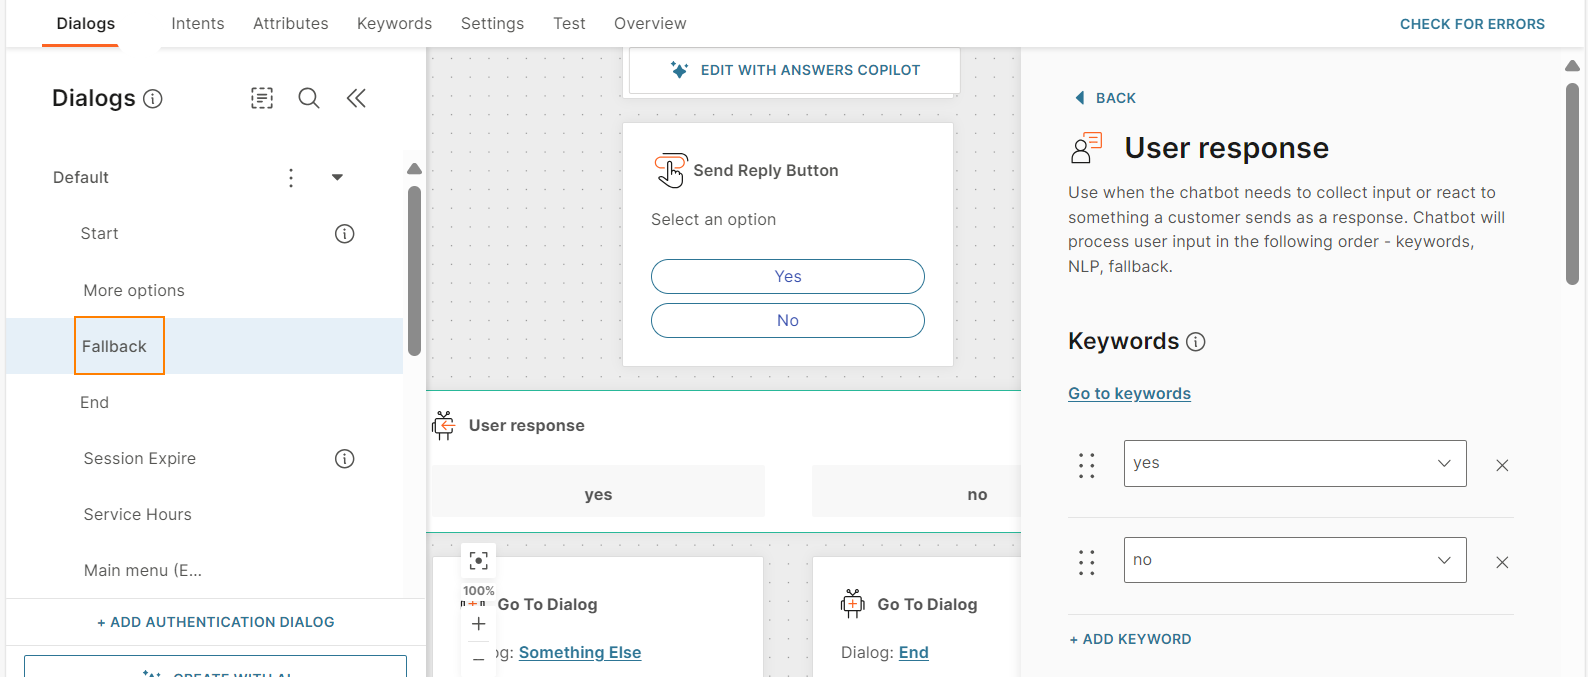
- Add the User response element to process the response that the end user chooses in the Reply Button. Select the keywords that you added earlier.
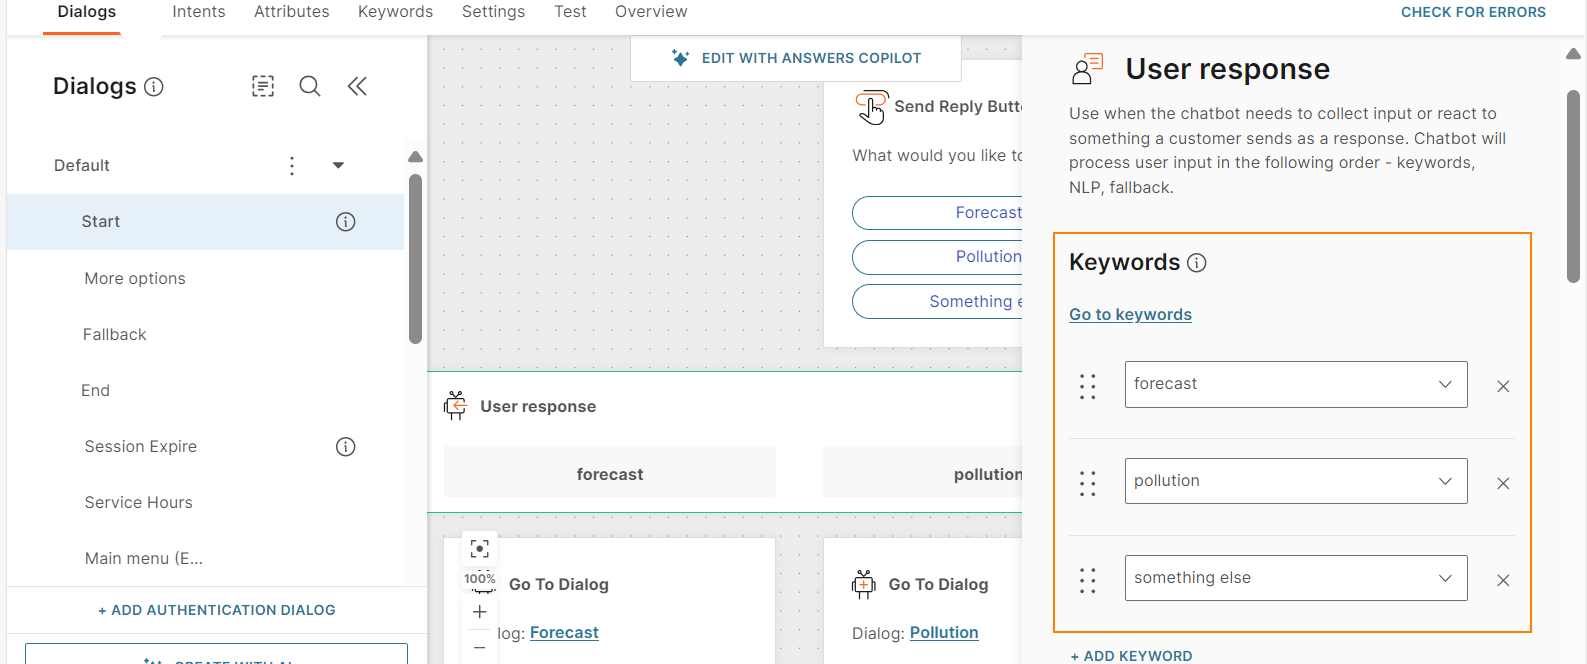
- Drag and drop the To dialog element under each option of the User response element to route the conversation to the relevant dialog. Example: For the keyword/user response 'forecast', direct the end user to the Forecast dialog.
- Add a fallback action for the User response element so that the chatbot knows how to handle unrecognized inputs from the end user. Either select an existing dialog to fall back to or create a dedicated fallback dialog.
- Add the User response element to process the response that the end user chooses in the Reply Button. Select the keywords that you added earlier.
-
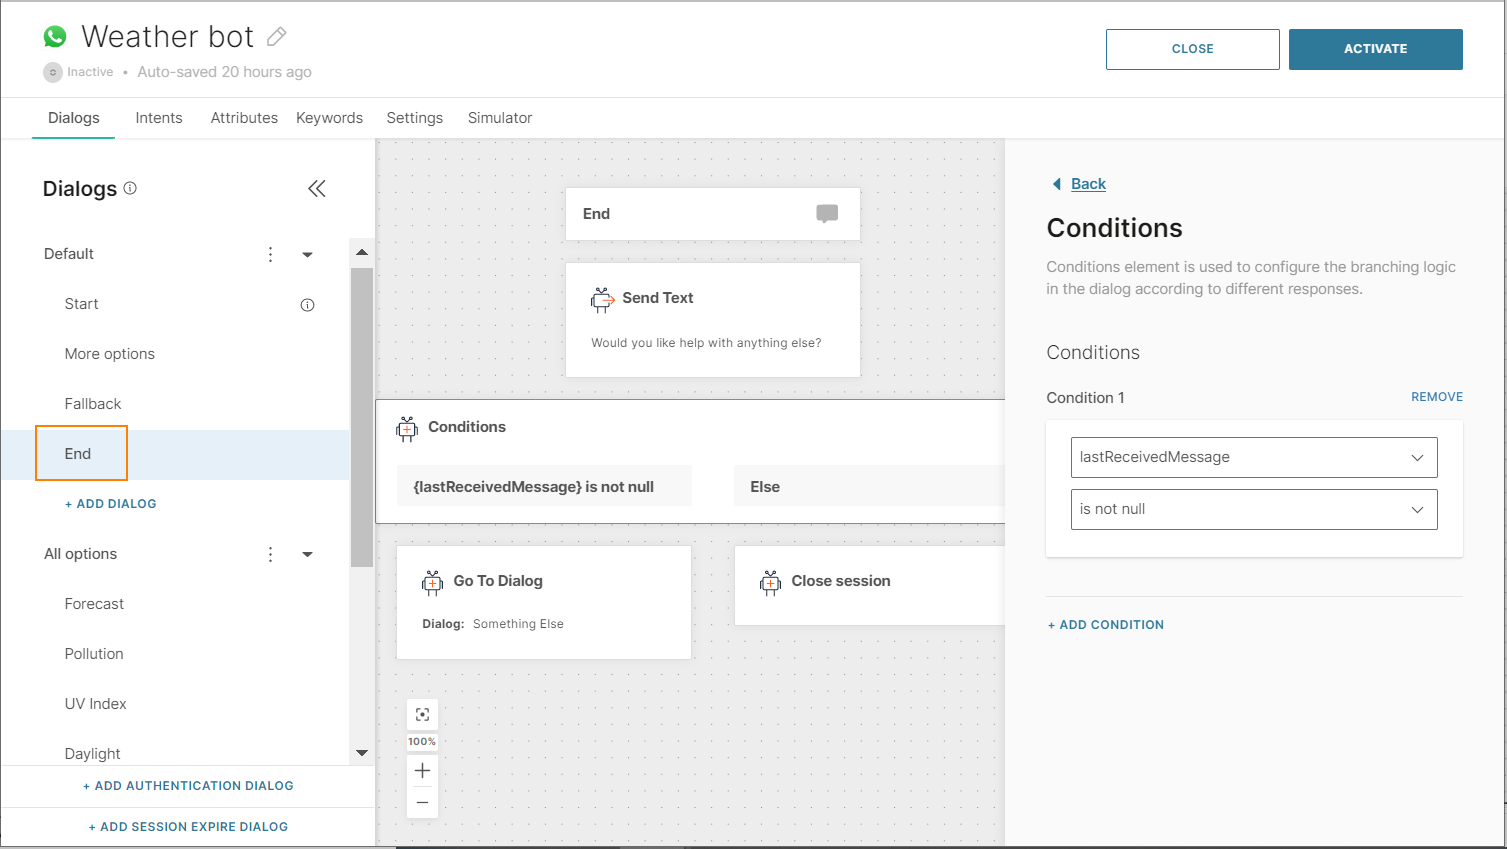
Add a closing dialog to which you can redirect end users when they finish their query.
- Add a new dialog.
- Drag and drop the Text element and add a goodbye message to it.
- Drag and drop the Conditions element below the Text element. In the condition, set the lastReceivedMessage attribute tois not null.
- Drag and drop the To dialog element under the condition. Select a relevant dialog.
- Drag and drop the Close session element under Else.
-
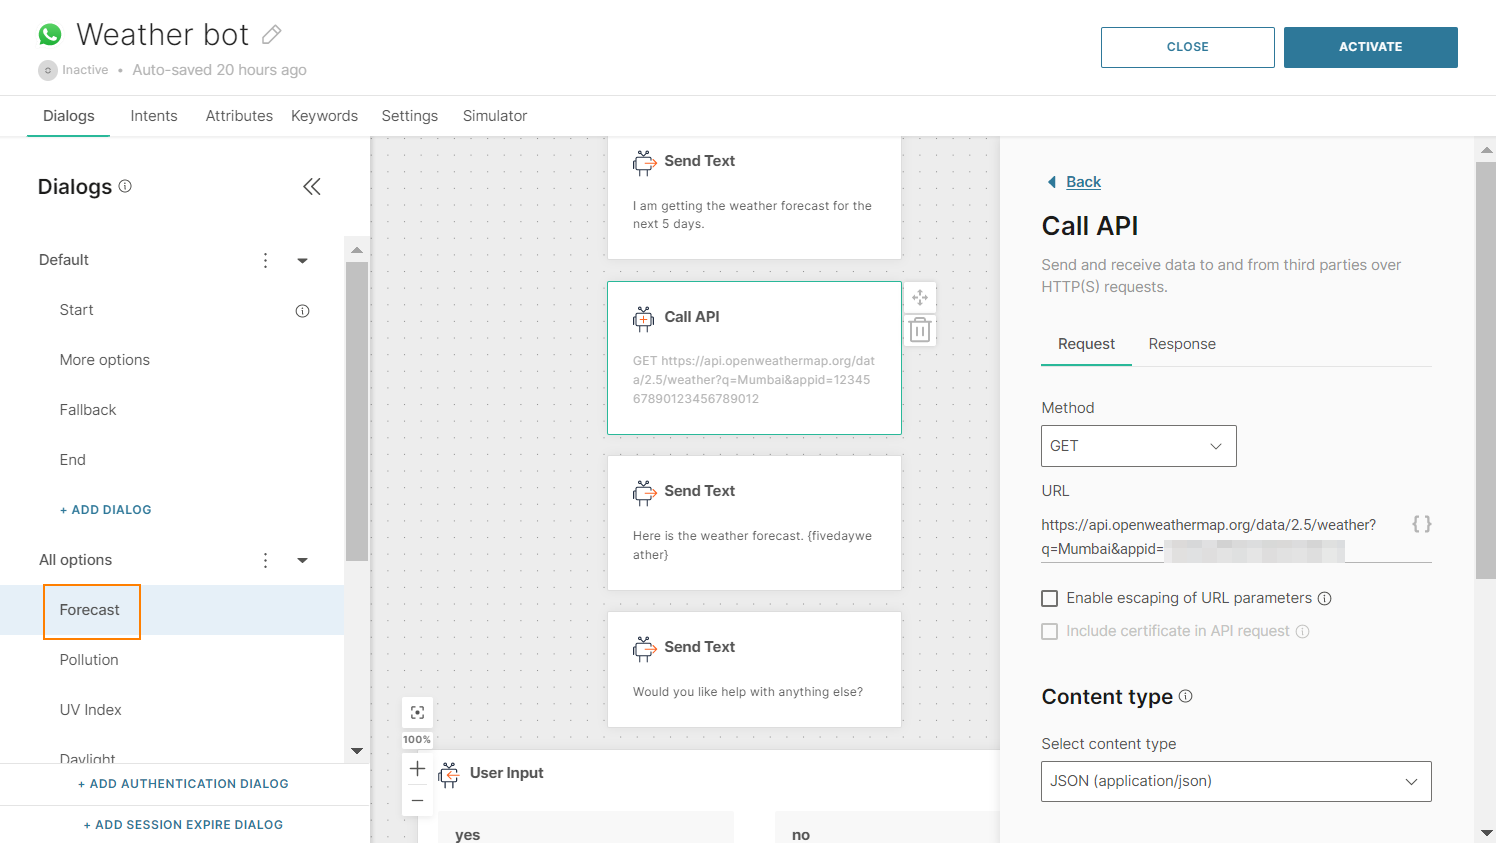
Configure additional dialogs based on their function. Example: The Forecast dialog makes a call to a weather app through API and saves the response to the dedicated attribute. Configure how to store the data from the response, either from headers or from the body. Add the relevant chatbot element to display the response in a readable format to end users.
-
Route end users to the next steps in their conversation. Example: back to the main menu, or to the closing dialog.