Simulate the Conversation
After you design part of a chatbot or the entire chatbot, you can test it in the Test tab.
You can do the following.
- Test the chatbot in the simulator.
- (WhatsApp and Open channel only) Test the chatbot on your device and simultaneously view the conversation flow live in the simulator.
The following are examples of how to test the chatbot.
- Simulate conversations between the chatbot and the end user.
- Simulate information, such as location and destination, which is not hardcoded in the chatbot but is extracted from end user responses.
- Check the behavior of chatbot elements. You can view information such as values of attributes, which conditions were met, and whether the API call was successful.
- View the chatbot flow.
- Identify issues with the flow.
- Use Expire Session to see how expired session dialogs are displayed to end users.
There might be differences between the simulator and the live environment. The behavior of the chatbot elements or the flow may also differ based on the channel.
When you finish testing and making any relevant changes, you can activate the chatbot.
The chatbot cannot process messages while an element is running. Example: The chatbot is waiting for a response from the Webhook element or the Delay element is running. If the end user sends any messages during this time, the chatbot ignores these messages. So, take this into consideration when designing the chatbot.
Test the chatbot in the simulator [#simulator]
Do the following.
- Start the simulation.
- View the chatbot activity.
- Make changes to the chatbot, if required.
- Activate the chatbot to share with end users.
Start the simulation [#start-simulation]
- Log on to the Infobip web interface.
- In the menu on the left, go to Answers > Chatbots and go to your chatbot.
- In the Test tab > Simulator tab, select Start simulation.
- In the message box, send an initial message to the chatbot to start the simulation.
- When the chatbot responds, continue the conversation.
Restart the simulation [#restart-simulation]
If you want to try other options in the chatbot flow, you can restart the simulation.
Select Restart Simulation.
Stop the simulation [#stop-simulation]
The simulation automatically stops 5 minutes after you start it. The session duration of the simulator does not depend on the chatbot session timeout.
You can manually stop the simulation by selecting Expire session.
How to use the simulator
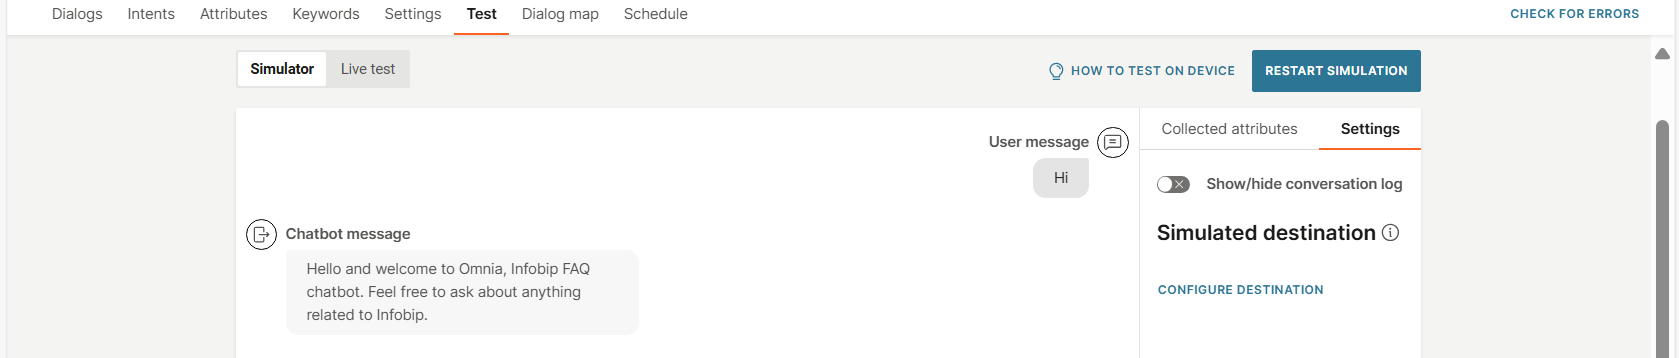
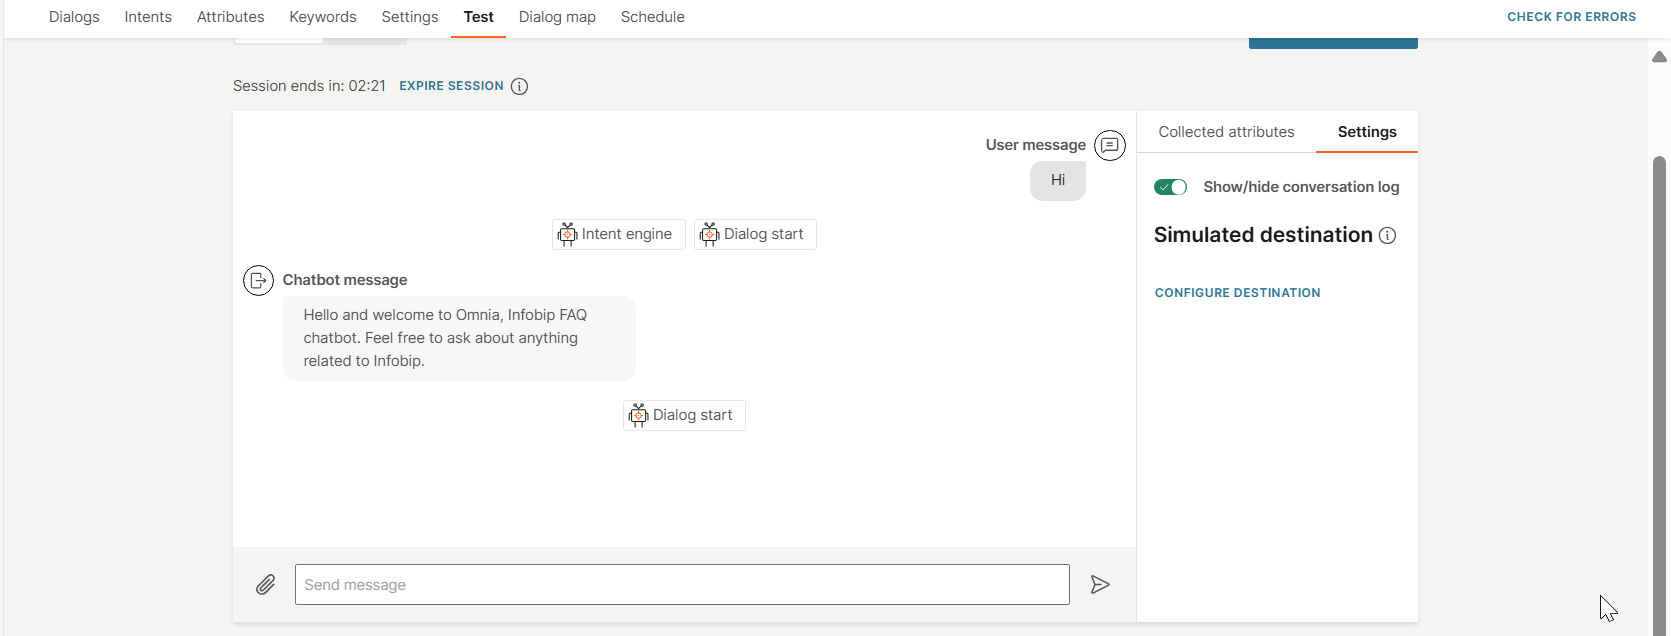
Show or hide conversation log [#simulator-conversation-log]
You can show or hide the conversation log.
In the right-hand panel in the simulator, go to the Settings tab. Enable or disable Conversation log.
-
Show conversation log: Enable the option if you want to see the conversation and the chatbot activity.
-
Hide conversation log: Disable the option if you want to see only the conversation. The chatbot activity is not displayed.
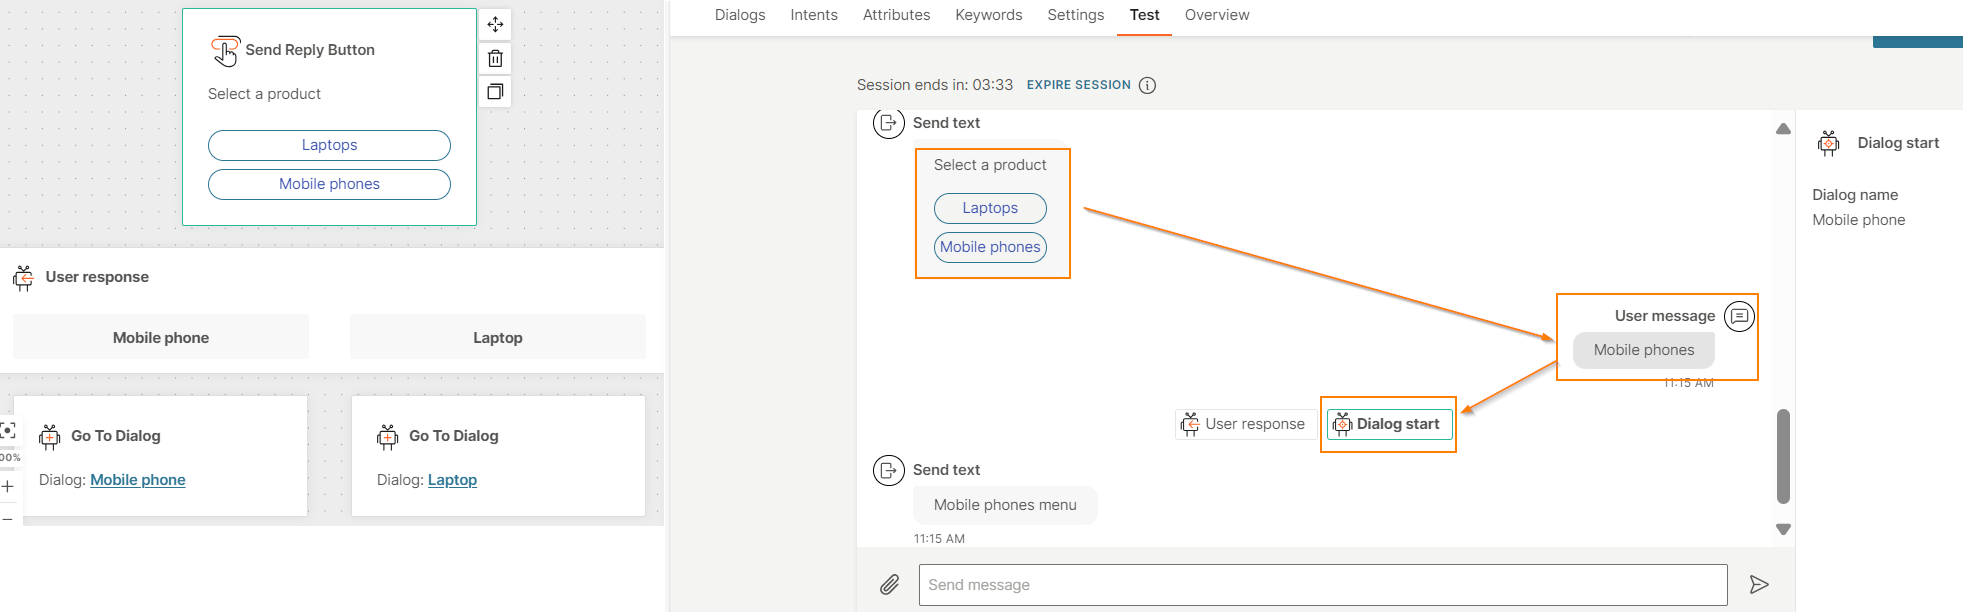
View conversation flow
View the progress of the conversation.
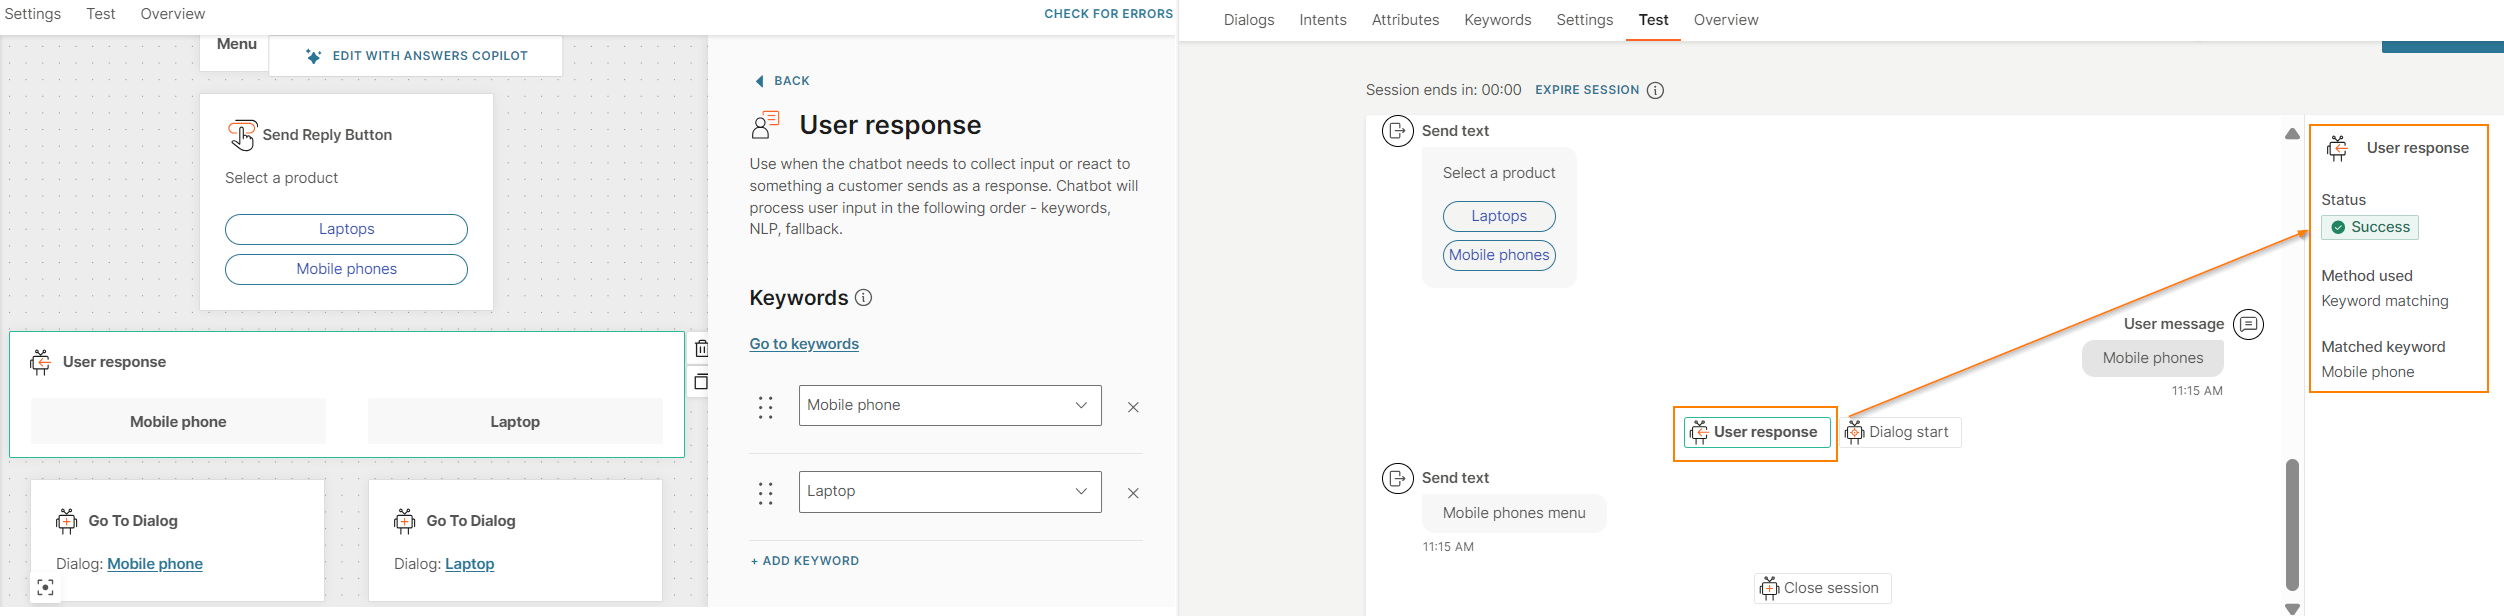
The following image shows the simulation of a menu in the chatbot. When you select Mobile phones from the menu, you can see that the flow is routed to the Mobile phones dialog.
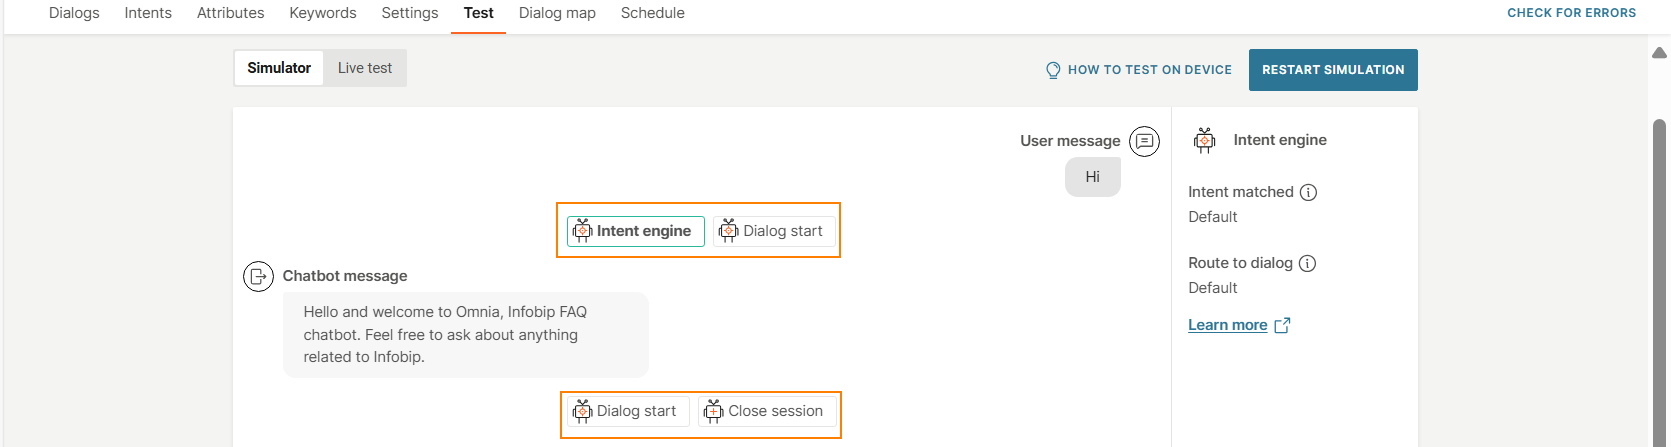
View the chatbot activity [#view-activity-simulation]
When you start the simulation, you can see the details of the element or activity on the right. Select an element to see its details.
You must enable Conversation log to see the chatbot activity.
In the example shown in the following image, the menu selection is Mobile phones. When the User response element is selected, the details of the element are displayed on the right. The details show that keyword matching was used for the menu selection and that the selection was matched to the Mobile phone keyword.
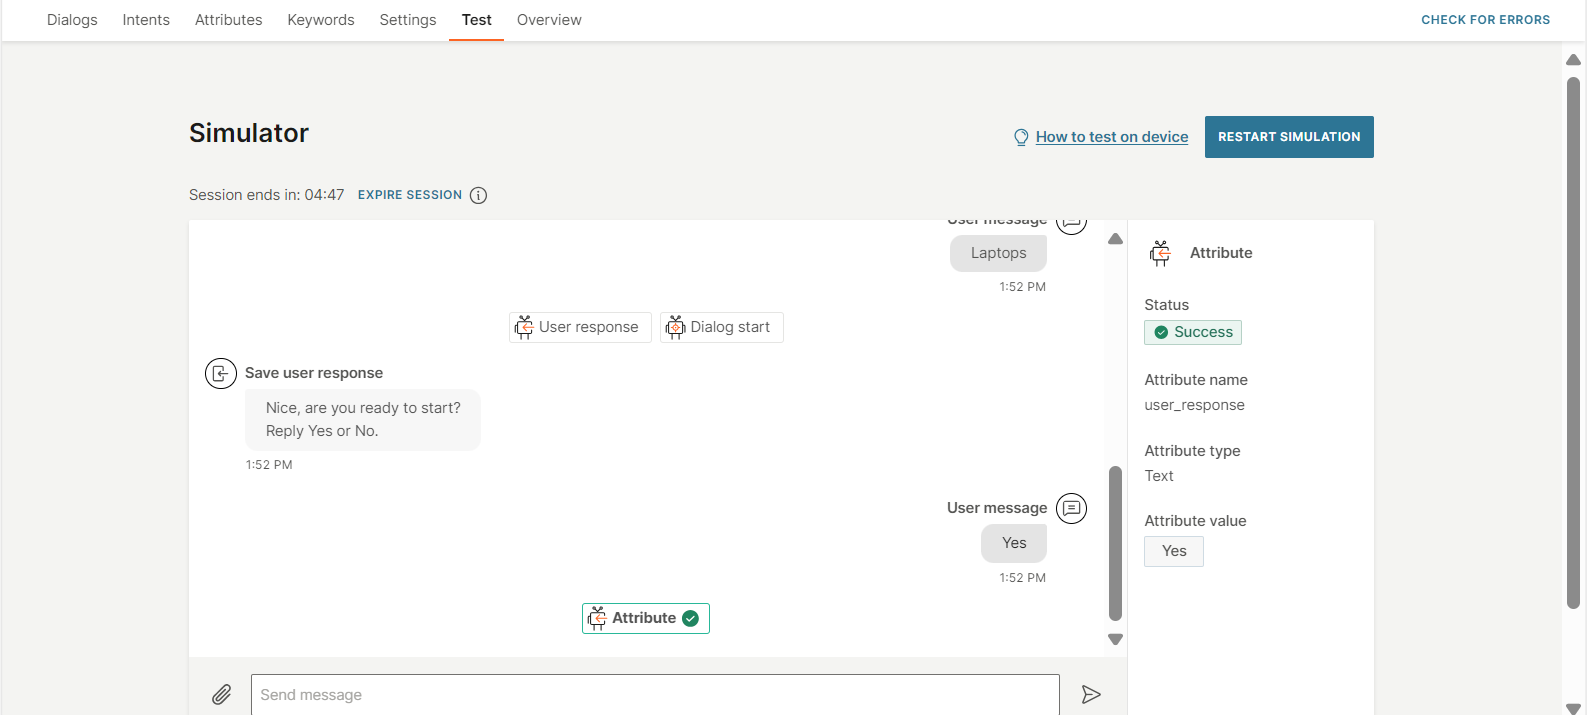
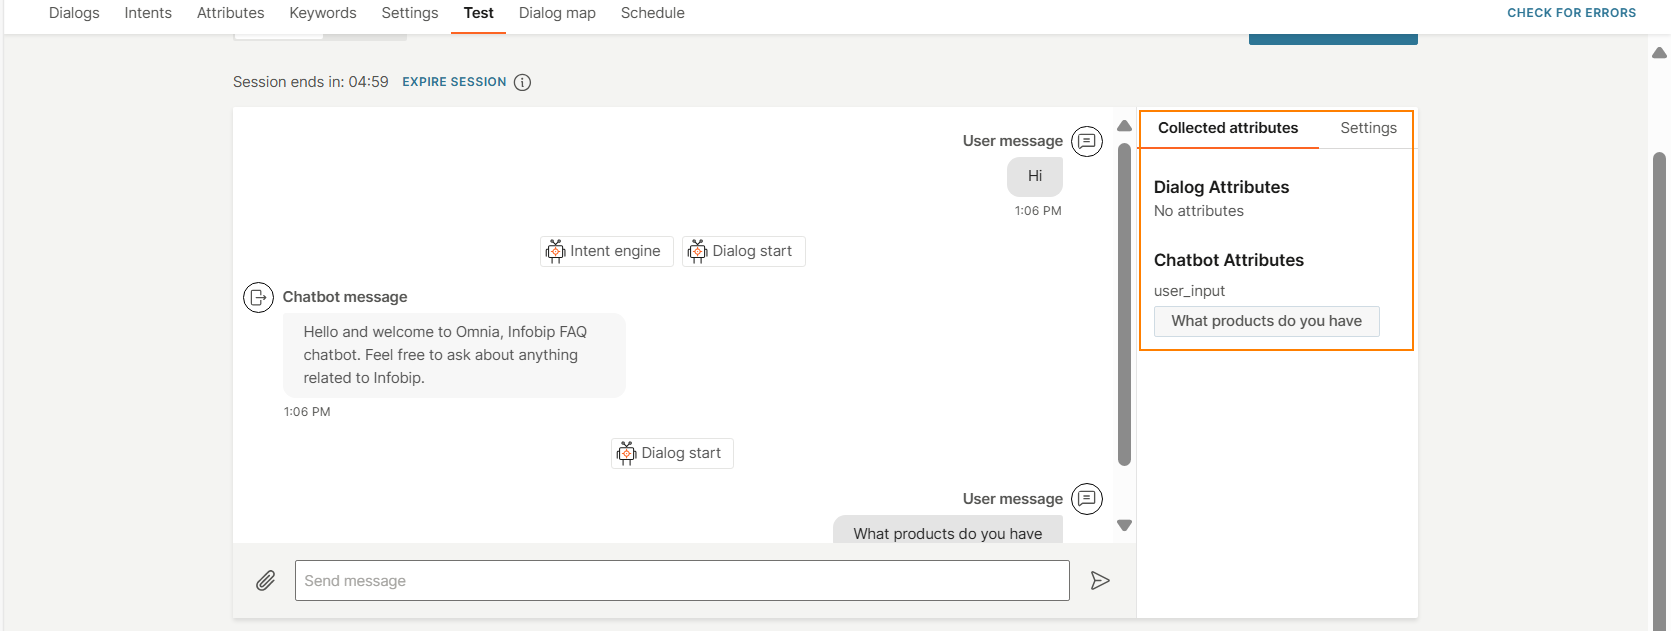
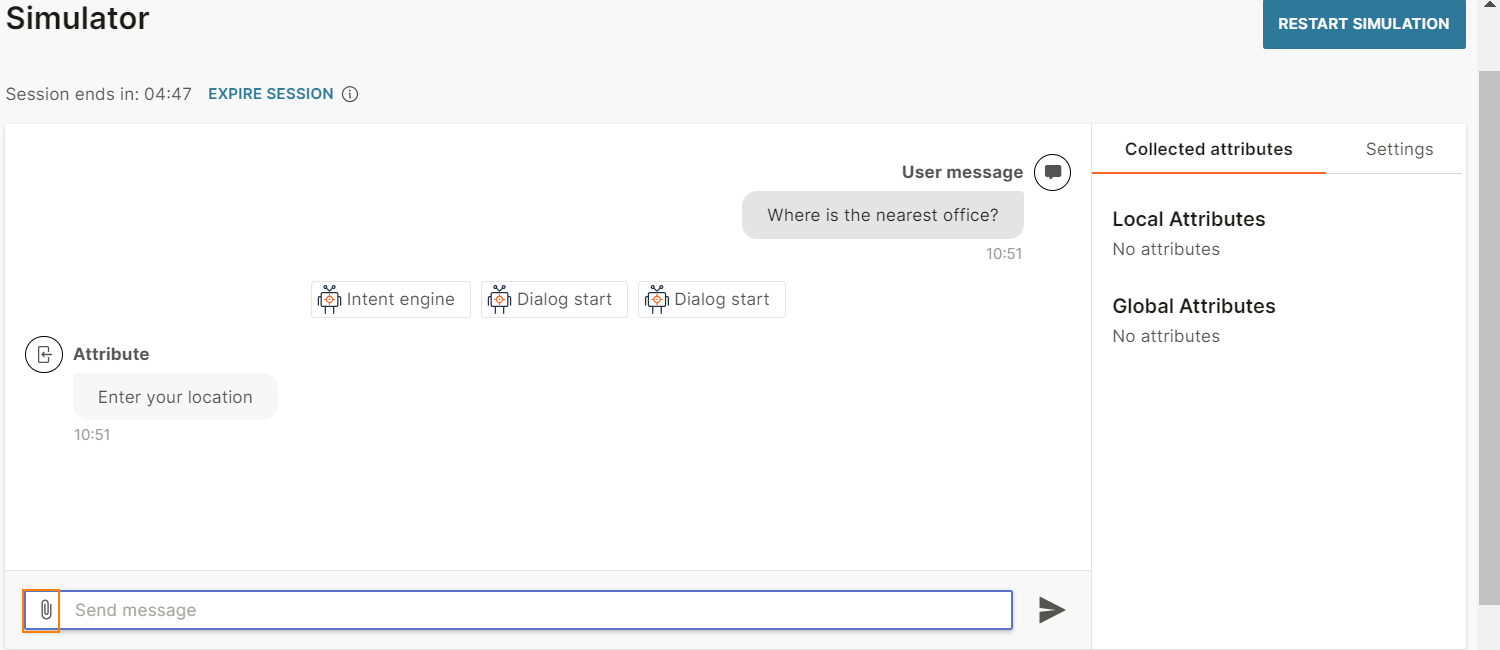
View collected attributes
View the attributes that the chatbot collects from the end user.
The following image shows the value of the user_input attribute.
Simulated destination
This setting enables you to simulate the chatbot as if the end user accessed the chatbot with the specified destination.
The following are examples of how this setting helps you test the behavior of the chatbot better:
- If the chatbot is integrated with People, it can use data from People in the simulation.
- Test specific functionality. Example: The chatbot checks the country prefix and route users to different dialogs accordingly. Adding a simulated destination helps test this functionality.
Test chatbot on your device and view conversation live [#test-on-device]
This feature is currently available only for WhatsApp and Open channel.
You can test the chatbot on your device and simultaneously view the conversation flow live in the Test tab on the Infobip web interface.
Example: Send messages from the WhatsApp app on your device to your WhatsApp chatbot. Simultaneously, you can see the chatbot activity in the Test tab of your chatbot.
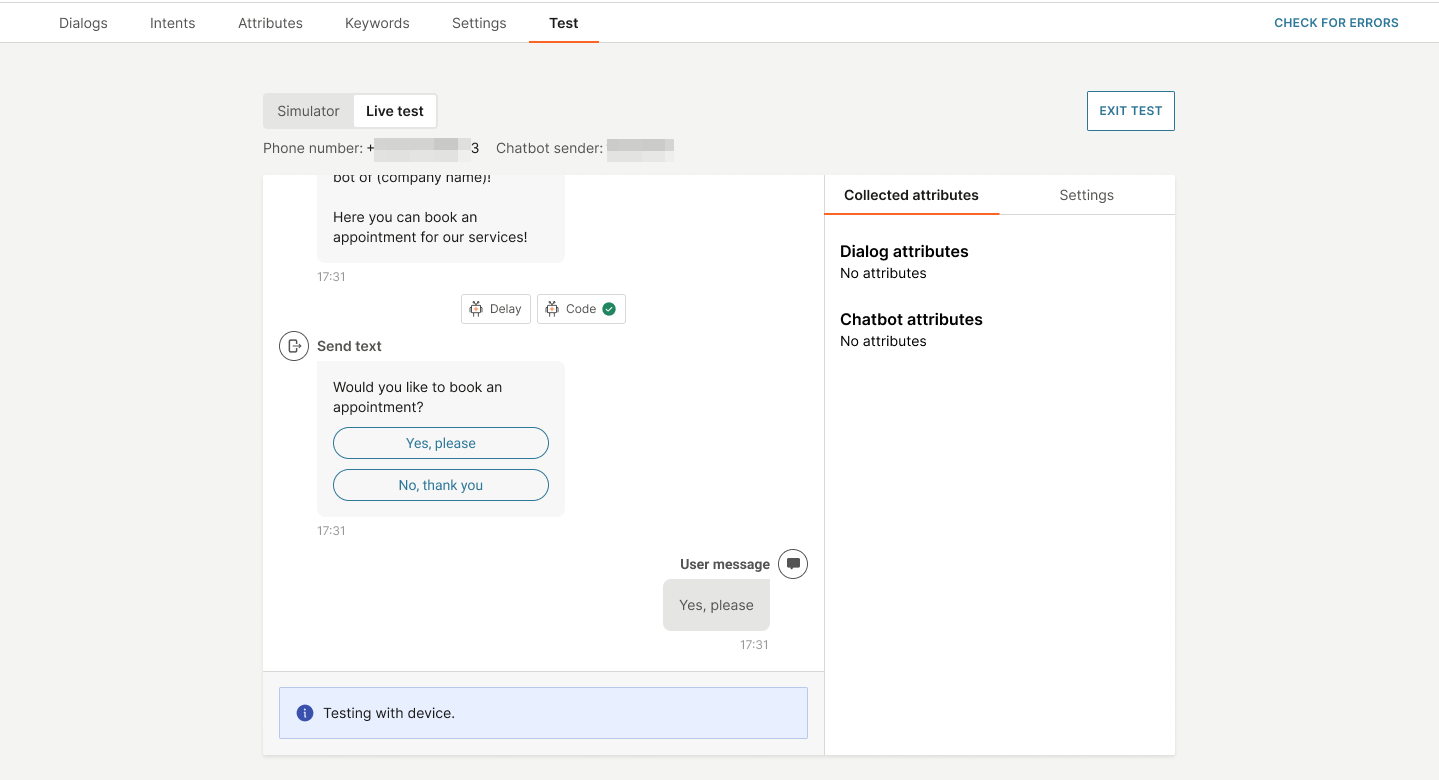
The following are some examples of what you can see live in the Test tab.
- Check whether attributes are being collected correctly.
- See the results of an API call.
- See how the flow is routed.
- See the results of selections that you make on your device. Example: Selecting a menu item.
You can test the chatbot on your device only after you activate the chatbot.
If you test the chatbot on your device, you cannot interact with the chatbot through the simulator. You can only view the conversation flow in the simulator.
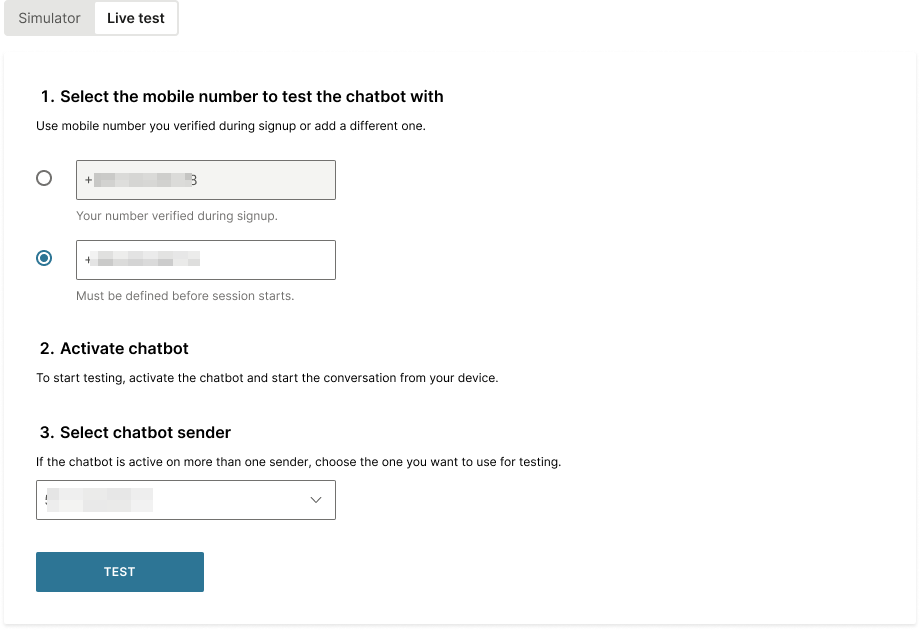
How to test [#how-to-test-on-device]
-
Log on to the Infobip web interface.
-
In the menu on the left, go to Answers > Chatbots and go to your chatbot.
-
In the Test tab > Live test tab, select one or more mobile numbers on which you want to test the chatbot. You can use either the mobile number that you use for your Infobip account or a different number.
-
Activate the chatbot.
-
If your chatbot is active on multiple senders, select the sender that you want to use for testing.
-
Select Test.
-
Do one of the following to connect to the chatbot from your device.
- Use your device to scan the QR code that is displayed.
- Select the Open in WhatsApp link.
- Copy the link that is displayed, to your device.
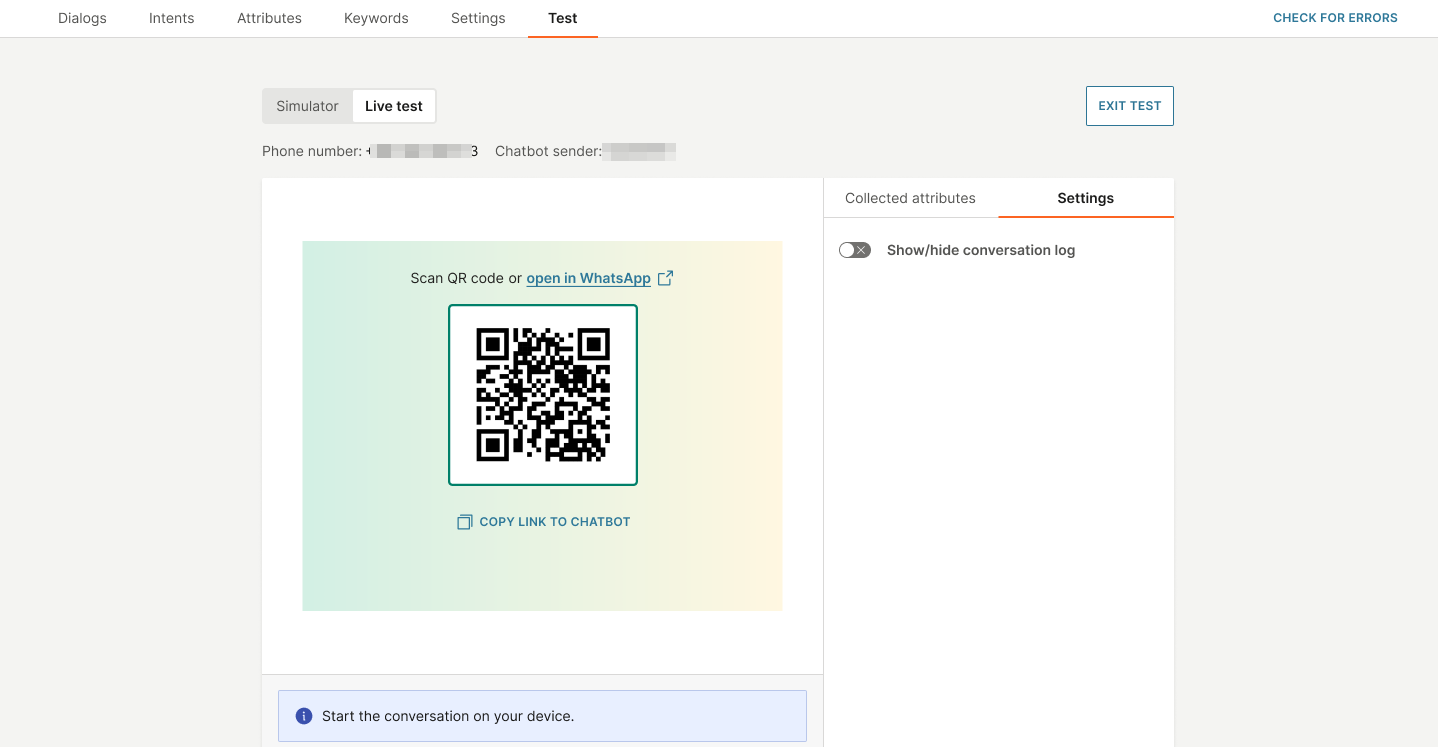
-
In the WhatsApp app on your device, send an initial message to start the chatbot session.
-
Continue the conversation with the chatbot. Simultaneously, view the activity in the simulator.
Test the chatbot over API [#test-over-api]
Use the Answers API to simulate a conversation between the end user and the chatbot.
Simulation Fail
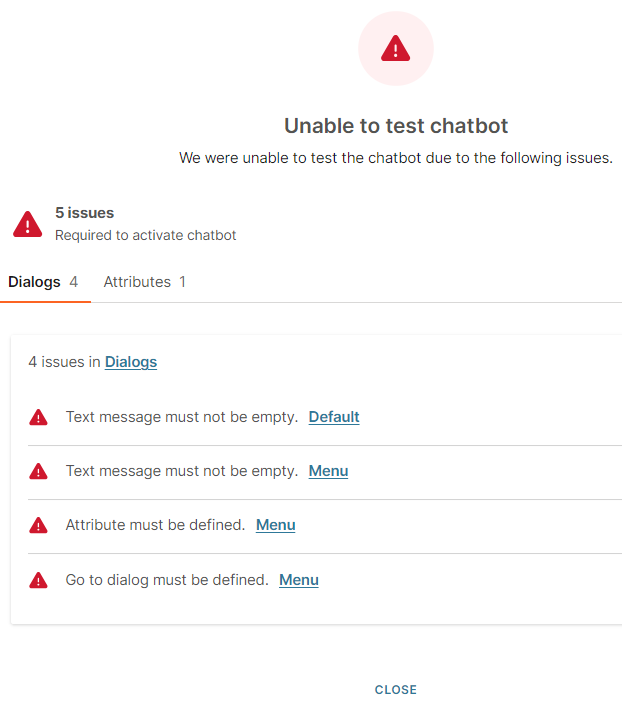
If there are errors in the chatbot, the simulation fails. The error screen in the simulator shows the following information.
- A list of error descriptions, grouped by the tab in which the error is present. Example: List of errors in the Attributes tab and the Dialogs tab.
- Link to the location of the error. Example: Link to the Attributes section or link to the dialog in which the error is present.
Location of error messages [#location-of-error-messages-simulation-fail]
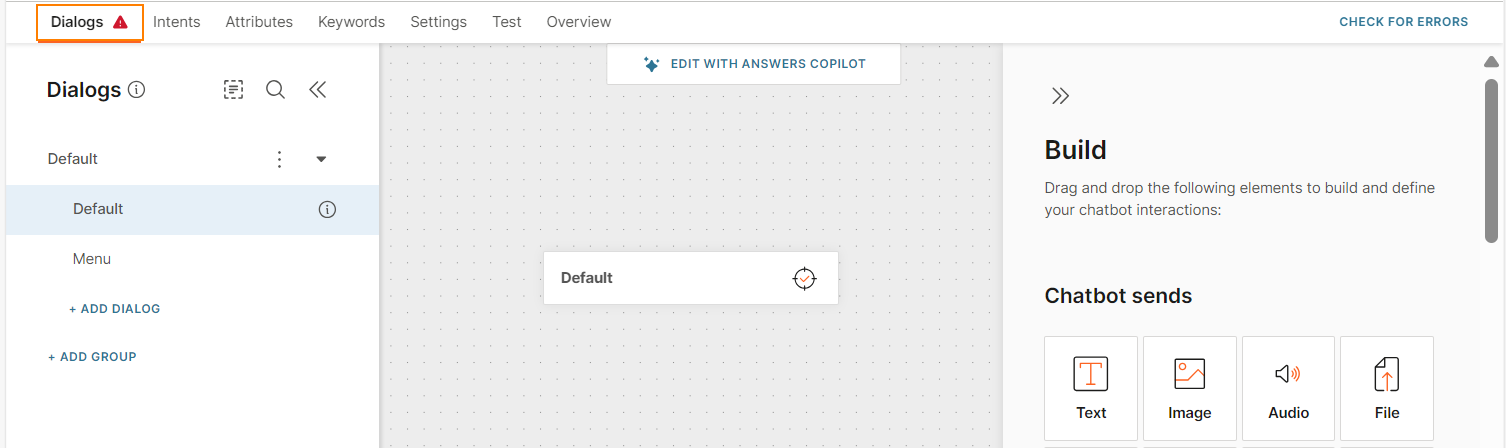
Error messages are also indicated by error icons and error messages in other locations in the chatbot. You can hover over the error icons to get more information about the error. Error icons and messages are displayed in the following locations.
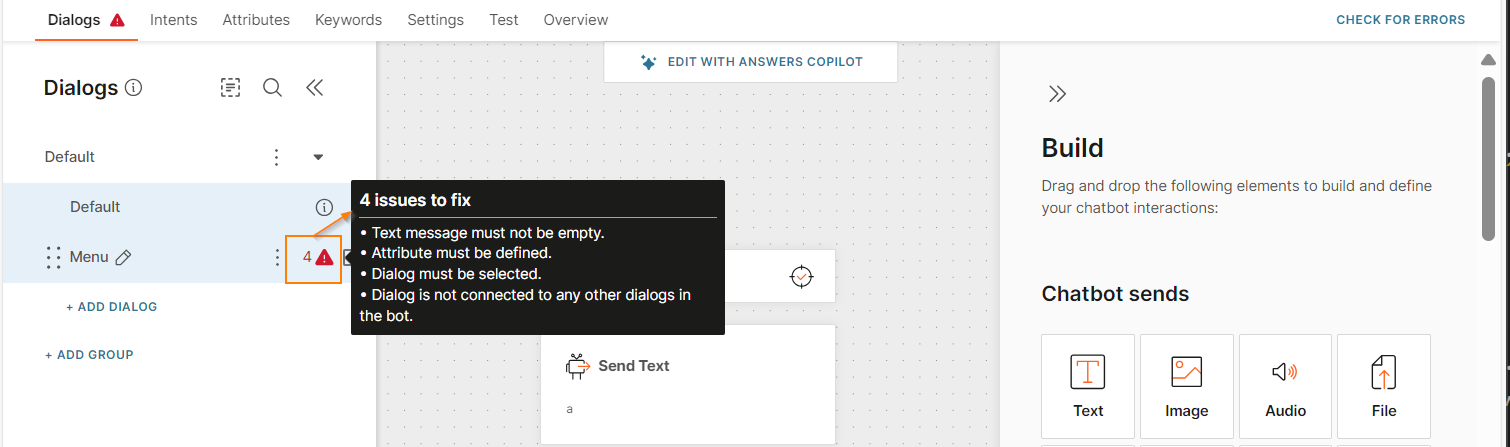
- The tab in which the error is present. The following image shows that there are errors in the Dialogs tab.
- Within a tab, you can view the location and description of the errors. Example: When you hover over the error icon in the Menu dialog, you can view the list of errors for this dialog.
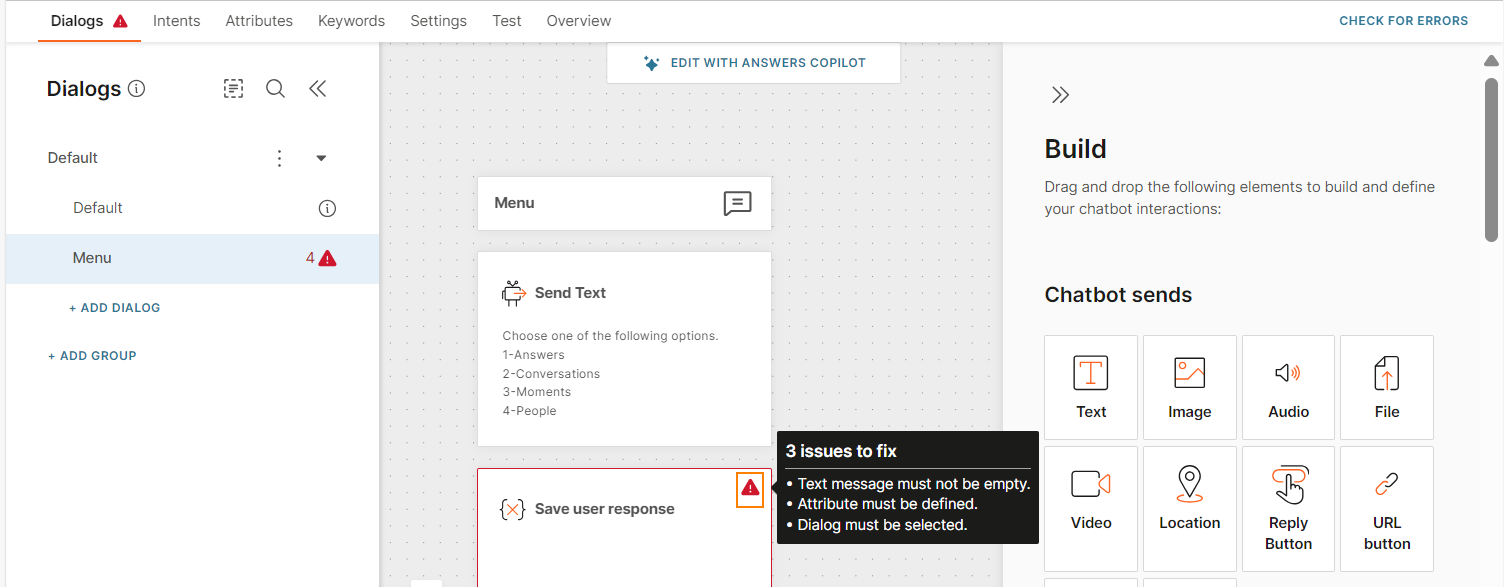
- You can view the error messages in the chatbot element in which the error is present. Example: When you hover over the error icon in the Save user response element in the Menu dialog, you can view the list of errors.
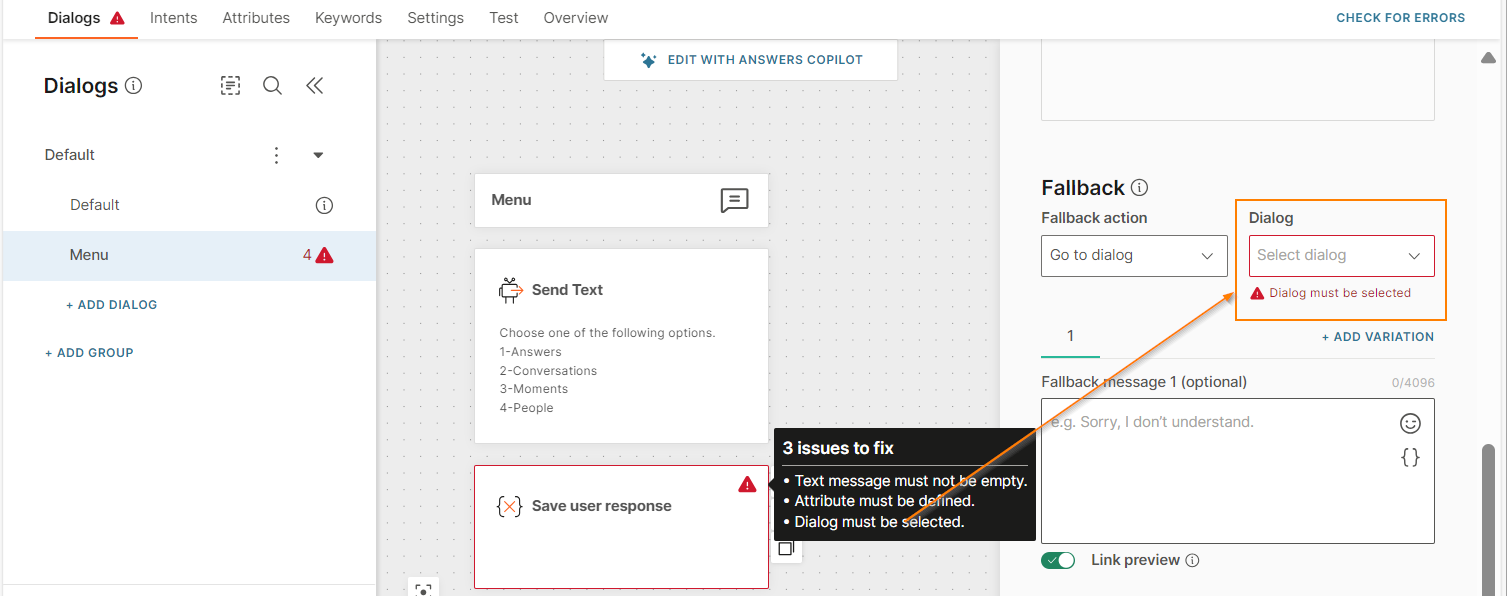
- You can view the error messages in the chatbot element configuration.
Check Natural Language Processing
For AI chatbots, you can check how well NLP (Natural Language Processing) works. For more information, refer to the NLP section.
Check Intents
Check how well Answers recognizes the intents in your chatbot. For more information, refer to the Test intents and Troubleshooting > Incorrect intent is matched sections.
Simulate End User Interaction
Simulate what the conversation would look like when end users respond to your chatbots.
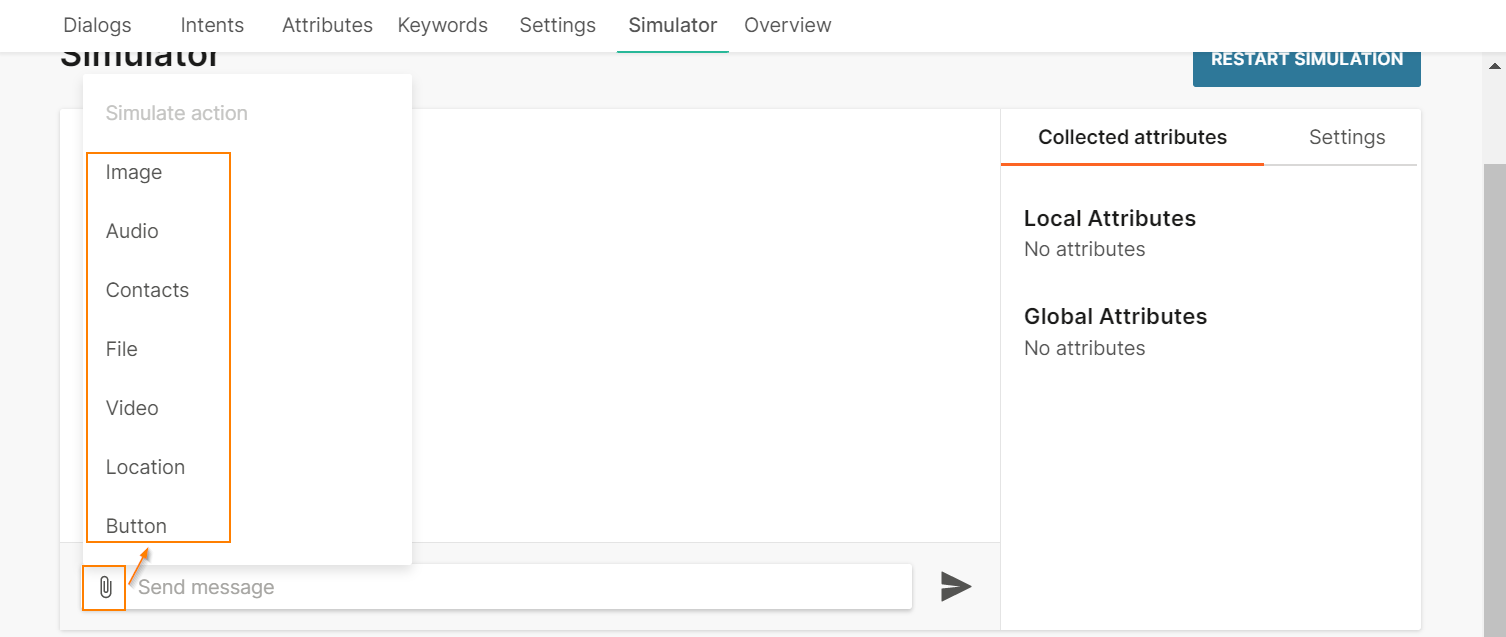
Simulate Incoming Files [#simulate-incoming-files-simulate-end-user-interaction]
Simulate receiving files from end users. In the message box, choose the type of file that you expect the end user to send during the conversation.
Simulate End User Location [#simulate-end-user-location-simulate-end-user-interaction]
Select a location to simulate how your chatbot communicates with end users based on their geography.
In the simulator, do one of the following.
Share the location pin [#share-the-location-pin-simulate-end-user-interaction]
- Click the attachment icon.
- Choose Location.
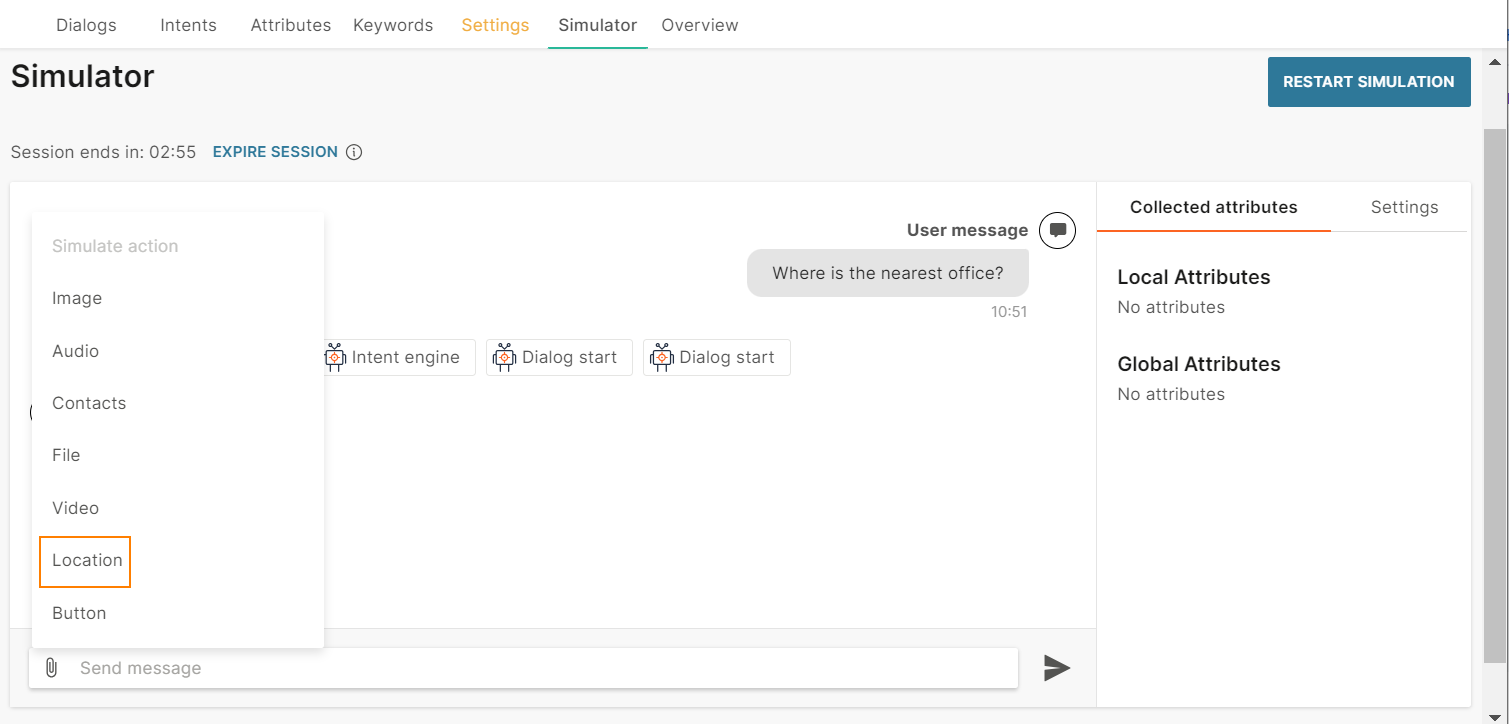
- In the Select how to get location field, choose Search for a location.
- In the Location address or select on a map field, type the name of the location.
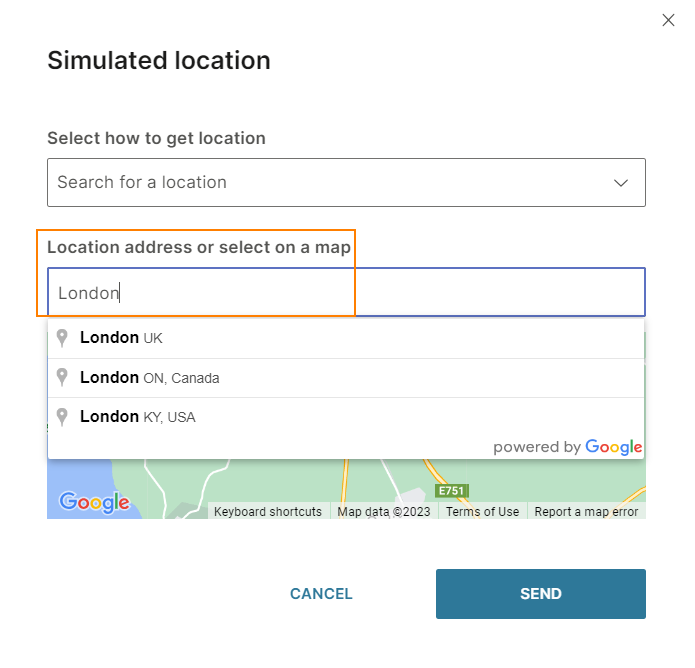
- Choose the required location.
- Click Send.
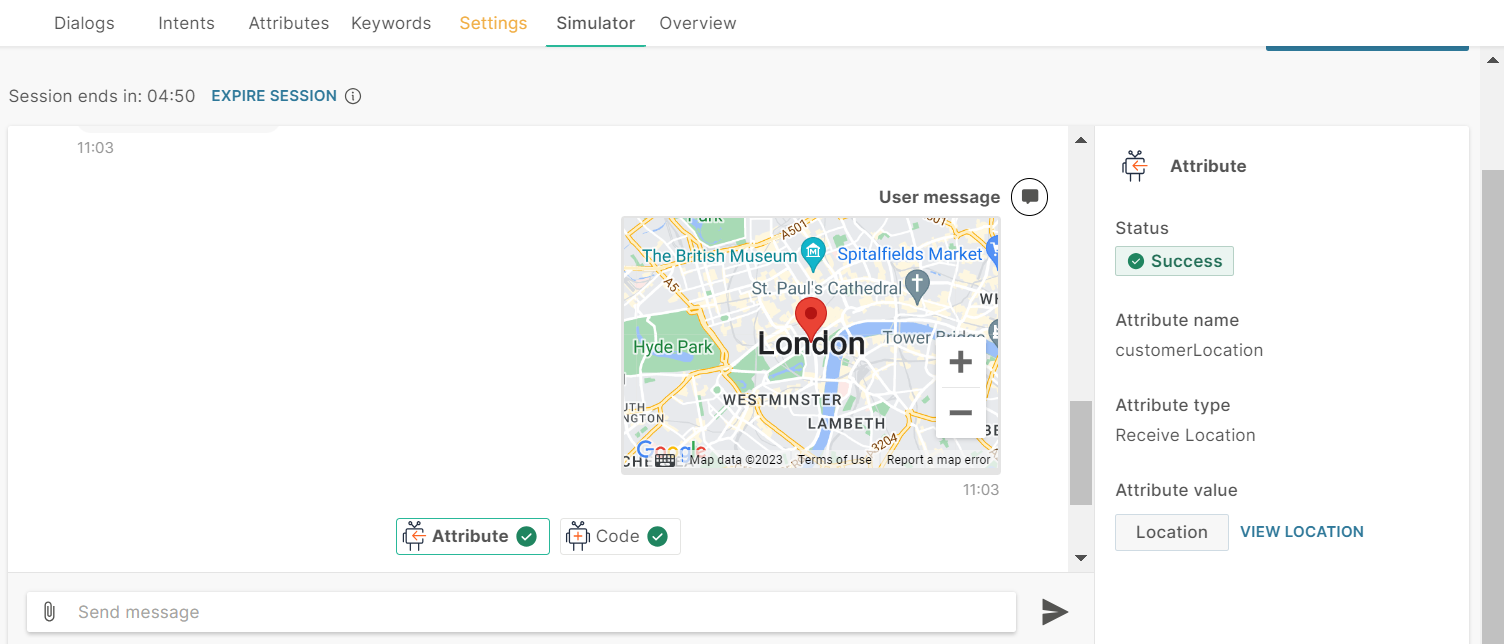
The attribute stores the location.
Share the latitude and longitude [#share-the-latitude-and-longitude-simulate-end-user-interaction]
- Click the attachment icon.
- Choose Location.
- In the Select how to get location field, choose Enter longitude and latitude.
- In the Latitude and Longitude fields, enter the coordinates of the location.
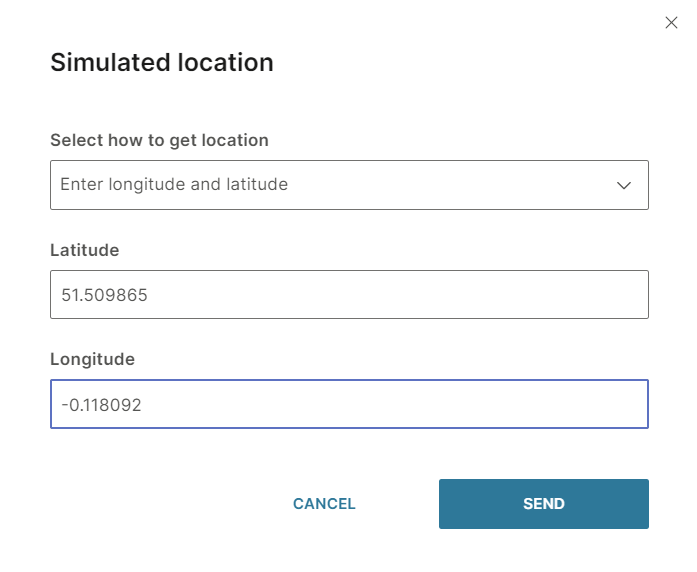
- Click Send.
The attribute stores the location.
Simulate Image Caption Display [#simulate-image-caption-display-simulate-end-user-interaction]
Simulate the caption displayed for images when you send messages to end users. Availability of image captions depends on the channel.
Simulate Chatbot Actions
Identify the actions taken by the chatbot at various stages of the conversation to understand what the customer journey looks like.
You can track the following to understand background actions:
- User response: See which keywords from end user responses are registered as keyword match.
- Delay: Identify when delays occur during the chat.
- Close Session: See what happens when end users are given the option to close the session.
- New Dialog: Identify when the conversation enters a new dialog to understand the chatbot flow.
- Switch Dialog: Identify when the conversation moves from to another dialog to understand the chatbot flow.
- Transfer to Agent: Identify when end users are offered the option to transfer to an agent.
- Webhook: See webhook request and response data.
- CSAT: View details about CSAT
Differences between Simulator and Live Session
There may be differences between the simulator and a live session. These differences could be in any aspect such as the way an element is displayed, the way the chatbot works, the use of a field within an element, and connection to external applications or databases.
These differences may be specific to a channel.
The following table shows examples of the differences.
| Simulator | Live Session | |
|---|---|---|
| Carousels | Cards are displayed one below the other. | Cards are displayed next to one another in the end user's device. |
| Quick reply buttons - images | Images are not displayed on the button. | Images are displayed on the button in the end user's device. |
| WhatsApp - Connection to Meta Catalog | Does not connect to the Meta catalog but uses the values that you specify in the chatbot elements. Example: Uses the product name from the 'Product name' field. | Connects to the Meta catalog and obtains information from the catalog. Example: Uses the product name from the Meta catalog. |
| Shortened URLs | Original URLs are displayed. | Shortened URLs are displayed in the end user's device. |