Create a customer service chatbot to answer frequently asked questions
This tutorial explains how to create an Answers chatbot that provides automated responses to frequently asked questions from end users. For complex questions, the chat can be handed over to a human agent.
The chatbot uses the predefined Customer service WhatsApp chatbot with human agent handover template.
The template uses the WhatsApp channel and is available in English language.
Features [#features]
The chatbot does the following.
- Answers frequently asked questions.
- For complex questions, hands over the chat to a human agent.
- Collects end users' contact information and saves the information in People.
- Helps end users book appointments.
- Provides information about products. Example: Information about new products and videos about how to use your products.
- For queries about products, offers end users a callback option from your business.
- Provides information about your business. Example: About the company, press releases, and news.
- Provides information about locations. Example: Location of your offices.
- Provides options for the end user to contact your business. Example: Your support email and phone number.
- Sends a CSAT survey after the conversation ends.
Products and channels [#products-channels]
Prerequisites [#prerequisites]
-
Infobip account. If you do not have an account, sign up for an account.
-
The following products must be enabled in your Infobip account.
- Answers to create the chatbot.
- Conversations to transfer the chat to a human agent.
- WhatsApp channel to communicate with end users.
NotePeople is enabled by default.
-
Integration setup: Ensure you have a WhatsApp Business API account set up and registered with Infobip.
-
A WhatsApp phone number that is registered with Infobip. End users can contact your chatbot on this number. If you do not have a registered phone number, go to the Infobip web interface > Numbers section to get your WhatsApp number.
You can also use Infobip's test number for this tutorial. In this case, you can only test the chatbot but cannot share it with others. For end users to contact your chatbot, you must use a registered WhatsApp phone number.
-
Customer entry points: Provide multiple entry points for end users to contact your chatbot. Example: QR codes or website buttons that open WhatsApp.
Process flow [#process-flow]
The following diagram shows an overview of how to create the chatbot and customize it to meet your requirements.
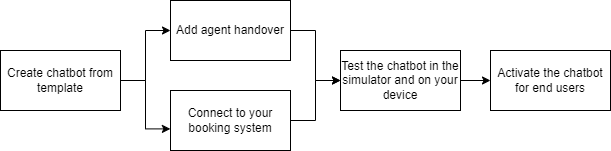
Implementation steps [#implementation-steps]
Complete the steps in each of the following sections sequentially.
Create the chatbot [#implementation-create-chatbot]
The fields in the template contain sample content. Replace the content with the relevant information.
Follow these steps to create the chatbot.
-
On the Infobip web interface, go to Experiences.
-
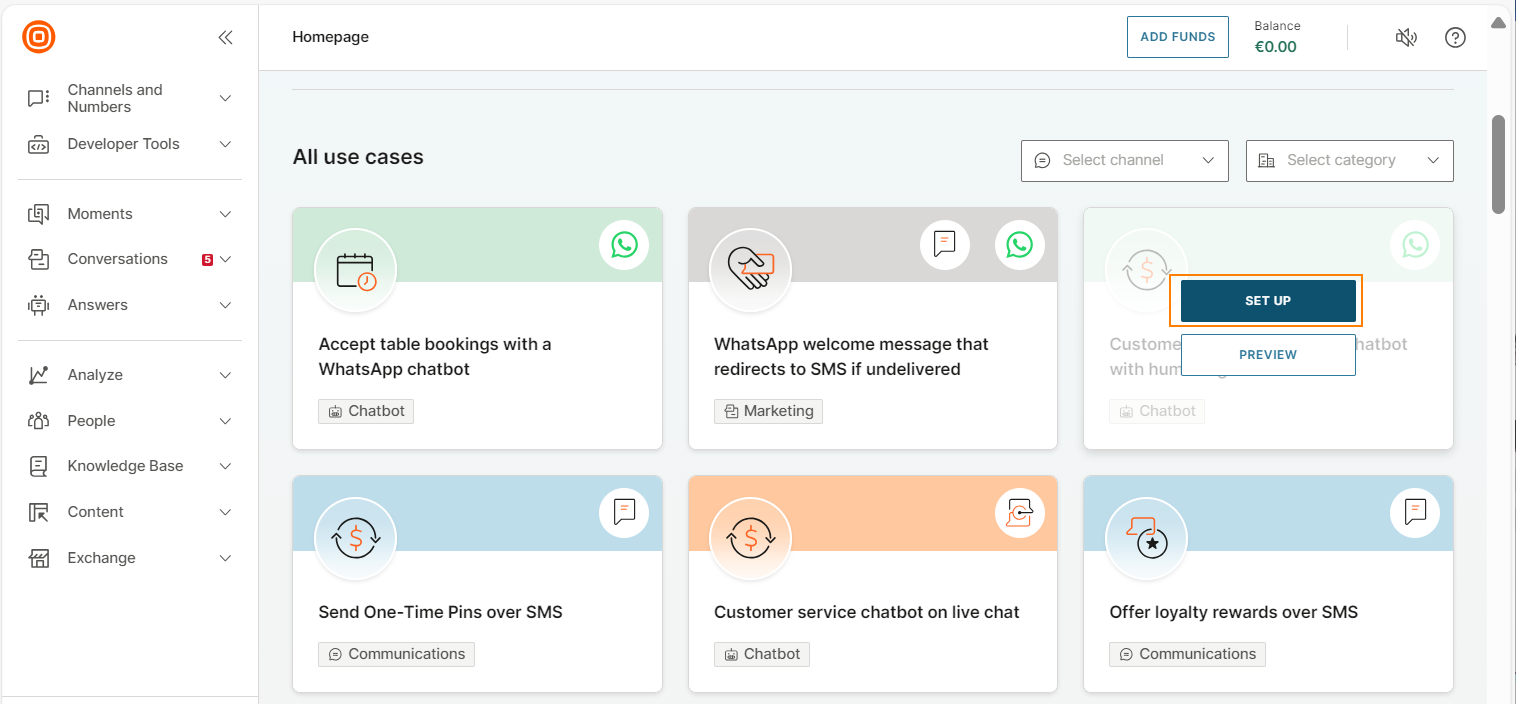
Go to the Customer service WhatsApp chatbot with human agent handover template. You can use Search and Filter options to find the template.
-
(Optional) Hover over the template and select Preview to view information about the template.
-
Hover over the template and select Set up.
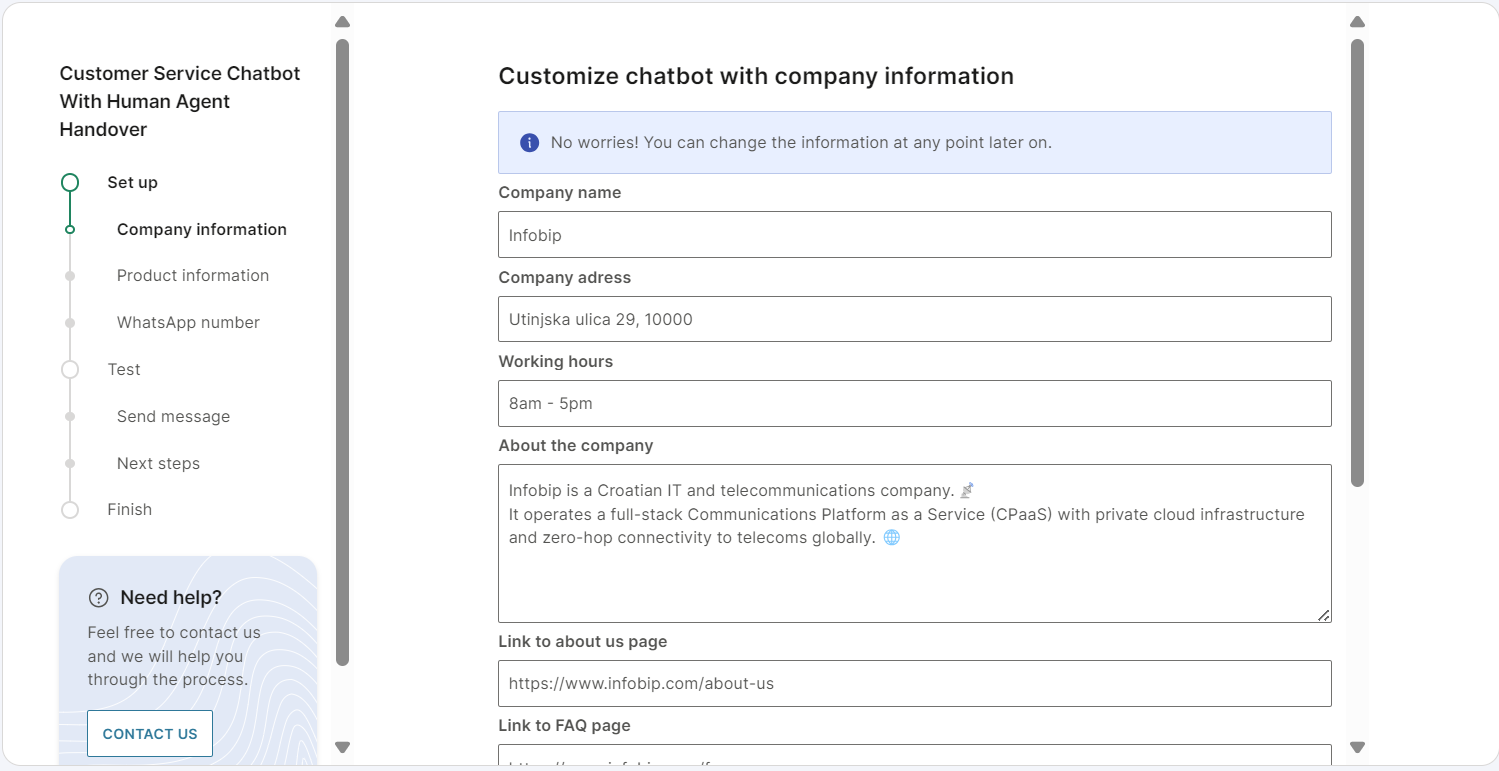
-
In the Company information section, complete the fields and select Next. Example: Add the company name, working hours, and a link to the FAQ page.
-
In the Product information section, add information about your products and select Next. These are the products about which end users will contact the chatbot.
You can add information for a maximum of 3 products.
-
In the WhatsApp number section, select the WhatsApp phone number on which end users can contact your chatbot.
If you use Infobip's test number, you can only test the chatbot but cannot share it with others. For end users to contact your chatbot, you must use a registered WhatsApp number.
-
Select Finish setup.
The system creates the chatbot and activates it. You can view the chatbot in Answers > Chatbots.
This process takes up to 3 minutes.
At this stage, if you want to update the field values in the template, select Previous. After you make the changes, select Next and select Finish setup again to save your changes.
Each time you select Finish setup, the system creates a new chatbot with the updated information and activates it. The older chatbot is automatically deactivated.
You can test the chatbot in the simulator and on your device.
Customize the chatbot to meet your requirements [#customize-the-chatbot]
You can customize the chatbot to meet your requirements. Example: Rename the chatbot, update the sender, edit the chatbot design, or update field values in dialogs.
To customize the chatbot, do the following.
- Go to Answers > Chatbots and find your chatbot.
- Deactivate the chatbot.
- Make the required changes.
- Activate the chatbot so that you can share it with end users.
Add agent handover [#customize-add-agent-handover]
Use one of the following options to enable handover to a human agent.
Connect booking system [#customize-add-booking-system]
In the Booking dialog, use the API element to connect the chatbot with your booking system.
Test the chatbot [#test-the-chatbot]
You can test the chatbot in the simulator and on your device.
Test the chatbot in the simulator [#test-the-chatbot-simulator]
In Answers, go to Chatbots and open your chatbot. In the Test tab, you can simulate the conversation with the chatbot.
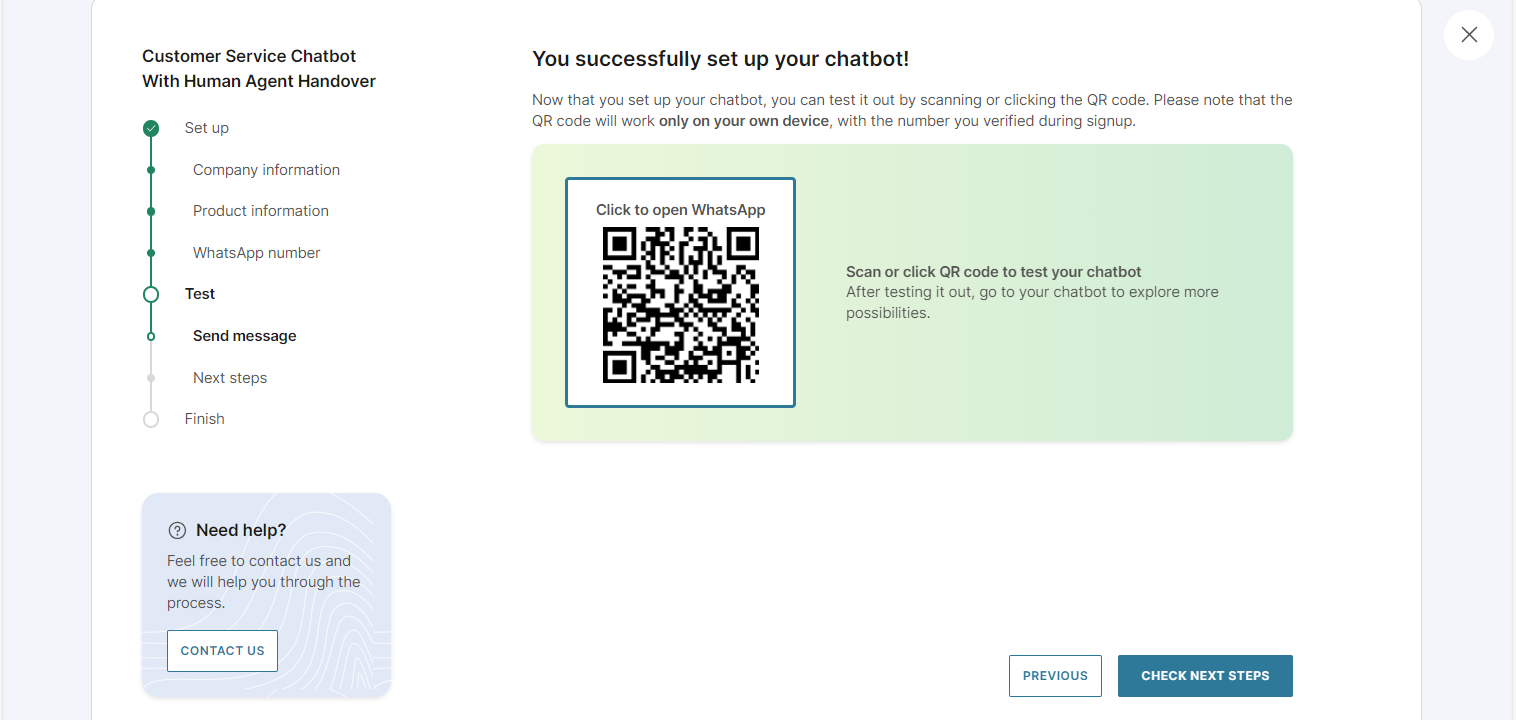
Test the chatbot on your device [#test-the-chatbot-device]
After you set up the chatbot, a QR code is generated. To test the chatbot, use this QR code on your device.
If your chatbot uses the Infobip test sender, you cannot share the chatbot with others. You can only test the chatbot on the device that uses the phone number, which you used to sign up to your Infobip account.