Register a WhatsApp sender
Infobip's WhatsApp sender registration process enables businesses to link a phone number to WhatsApp for messaging. This registered number is called a WhatsApp sender, and it allows you to send and receive messages through the Infobip web interface and WhatsApp API.
To familiarize yourself with account types and sender specifications, refer to Understand WhatsApp sender registration.
How to register a WhatsApp sender
To register your WhatsApp Business Account (WABA) and WhatsApp sender, follow the steps below.
-
In the web interface, navigate to Channels and Numbers > Channels and select WhatsApp.
-
In the Overview tab, select Register sender.
-
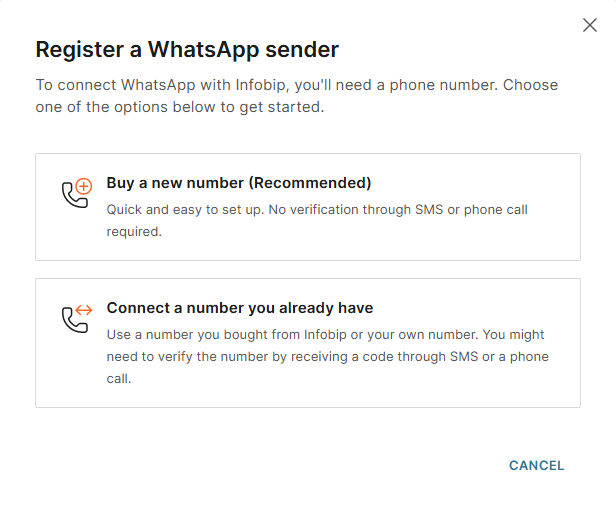
You will see a pop-up informing you that to continue, you will need a Meta Business Account and a valid phone number. When ready, select Continue.
-
You can either buy a new number or connect a number you already have (your number, a number you bought from Infobip, or migrate a number from another solution provider)
-
Buy a new number (Recommended): The fastest way to connect a number, as Infobip provides a pre-verified WhatsApp number, allowing you to start messaging immediately without manual verification.
-
Connect a number you already have: Use your number, a number you bought from Infobip, connect a number from your existing WhatsApp Business App, or migrate a number from another solution provider. Choose one of the following options:
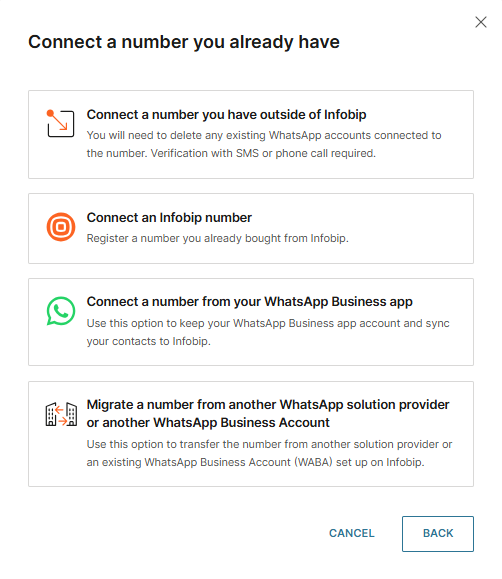
- Connect a number you have outside of Infobip: Choose this option if you want to use a new number or one previously linked to a personal or business WhatsApp account (you will need to delete any pre-existing WhatsApp accounts)
- Connect an Infobip number: Use this option if you have already purchased a number from Infobip and want to register it for WhatsApp messaging.
- Connect a number from your WhatsApp Business App: After registration, contact information from your WhatsApp Business app is forwarded to Infobip as events and can be received through webhooks.
- Migrate a number from another WhatsApp solution provider or another WhatsApp Business Account: Select this if you are migrating a WhatsApp-enabled number from another provider to Infobip, ideally timing the transfer near the end of the month to minimize downtime.
If you are not buying a new number, you will need to verify your existing number by receiving a two-factor authentication (2FA) code through SMS or voice call. You can either verify an existing number or purchase a pre-verified number that does not require 2FA.
To see the signup registration process in action, check our demo video below:
Buy a new number (Recommended) [#buy-a-new-number-how-to-register-a-whatsapp-sender]
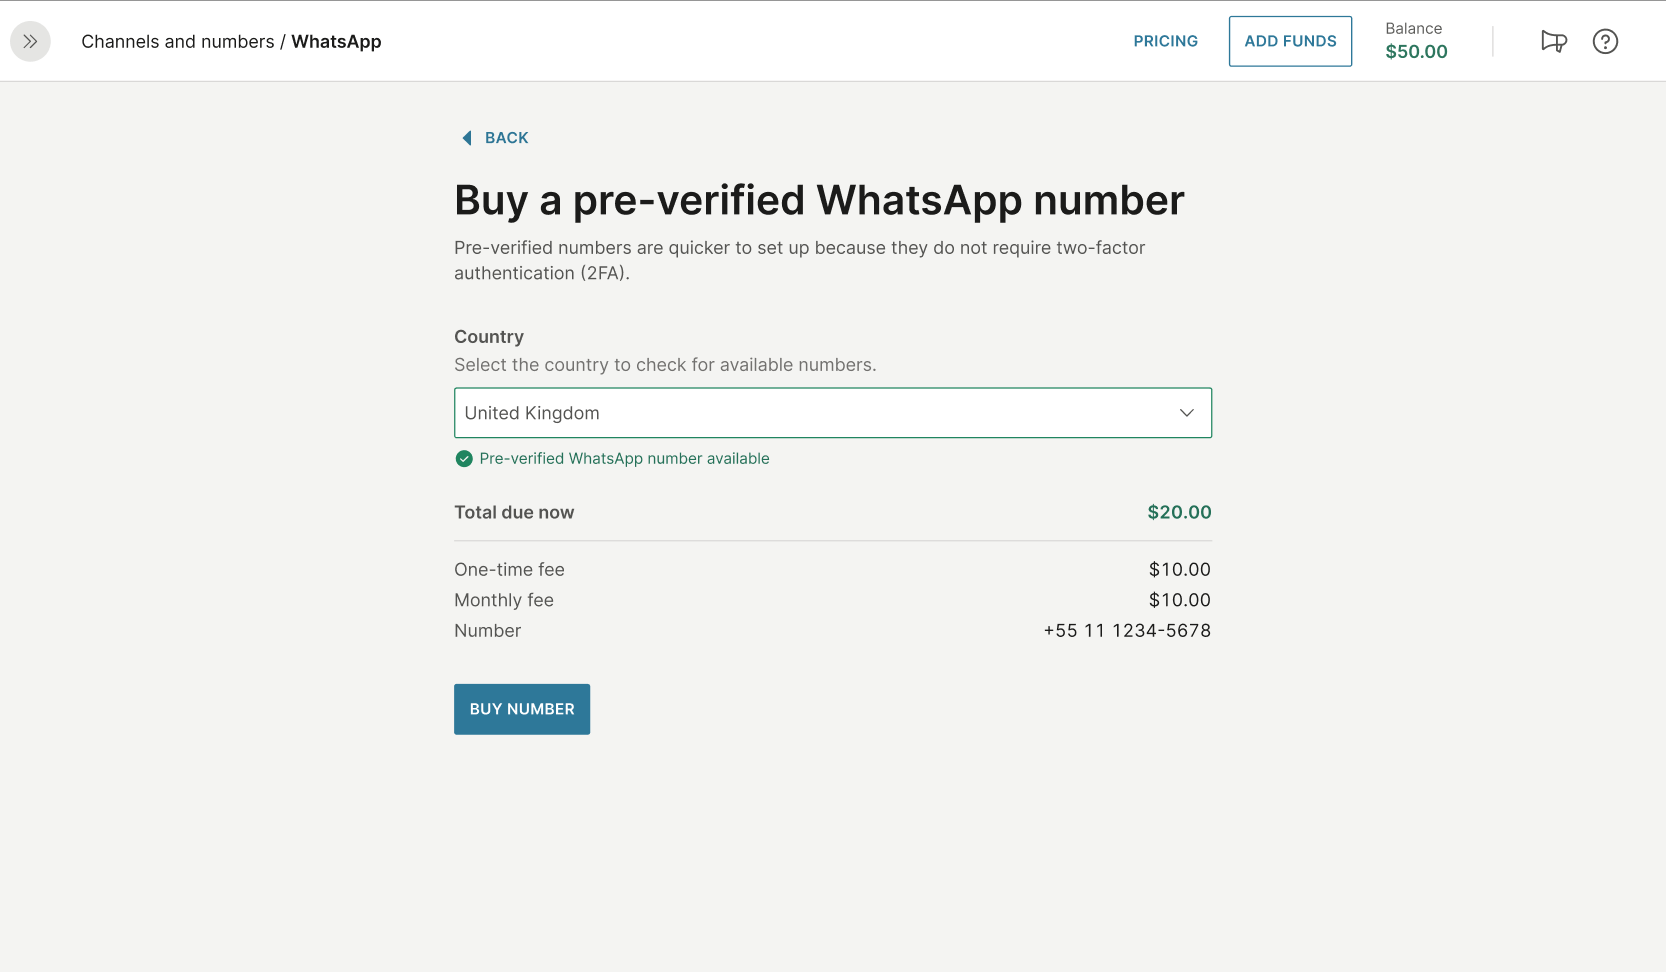
Buying a pre-verified WhatsApp number is the fastest way to register your sender. These numbers are already verified and do not require SMS or voice call authentication.
-
In the Register a WhatsApp sender dialog, select Buy a new number (Recommended).

-
On the Buy a pre-verified WhatsApp number screen, select your country from the dropdown list.
-
If a number is available:
- The number and total price will be displayed.
- Review the pricing and select Buy number to complete the purchase.
If there is no number available for your country
- Choose a number from another country, as there are no limits on sending WhatsApp messages between countries.
- Contact your account manager or Support to order a number from your country.
- Get a number outside of Infobip and restart the WhatsApp sender registration process again by selecting the Connect a number you have outside of Infobip option.
-
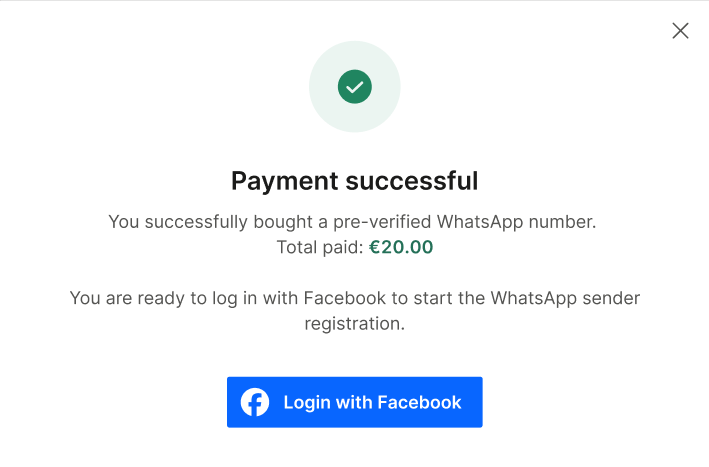
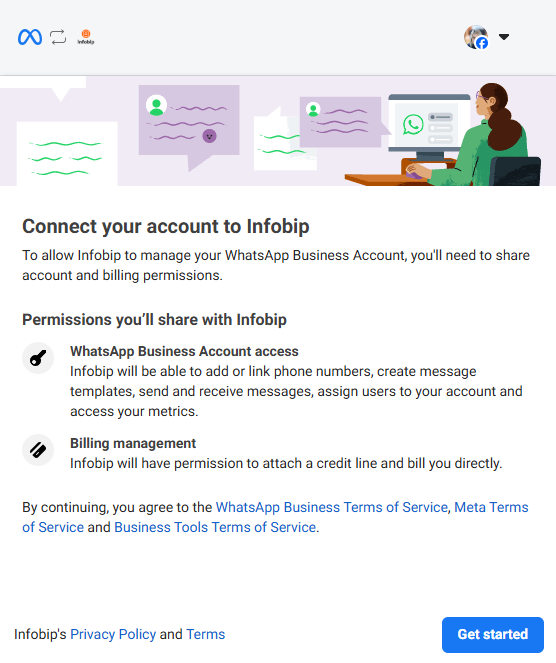
After a successful payment, a confirmation window will appear. Select Login with Facebook to continue with the WhatsApp sender registration.
-
Enter your Facebook email address or phone number, review the permissions you will grant Infobip, and select Get started.
-
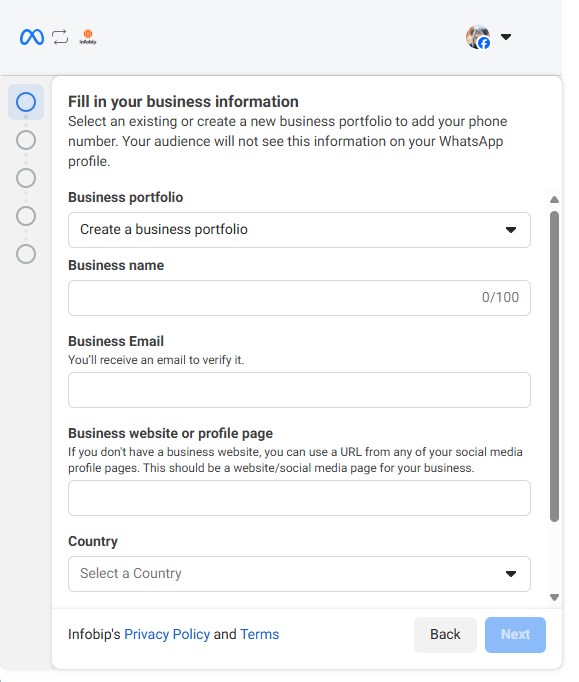
Enter your business information:
- Provide details such as business portfolio, name, email, website or profile page, and country.
NOTEIf you do not provide a valid website link, your WhatsApp Business Account is more likely to be banned by Meta. To reduce this risk, always include your website or profile page.
- You can select an existing business portfolio or create a new one to connect with your phone number.
- Once you are ready, select Next.
-
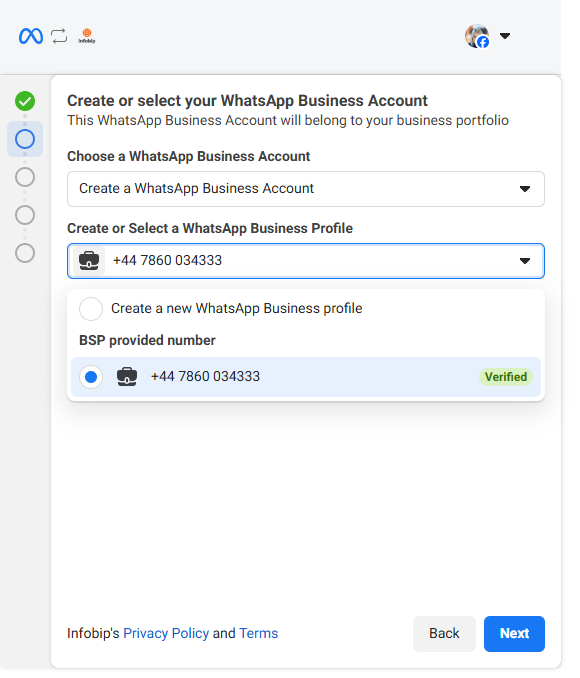
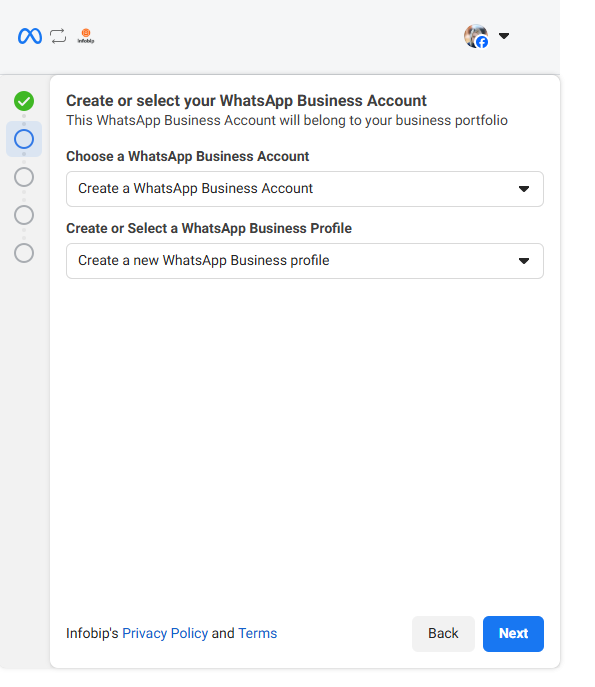
Create or select your WhatsApp Business Account (WABA) and select your WhatsApp Business Profile.
- Under Create or Select a WhatsApp Business Profile, you should see the number you bought from Infobip (BSP provided number)
- Once you are ready, select Next.
-
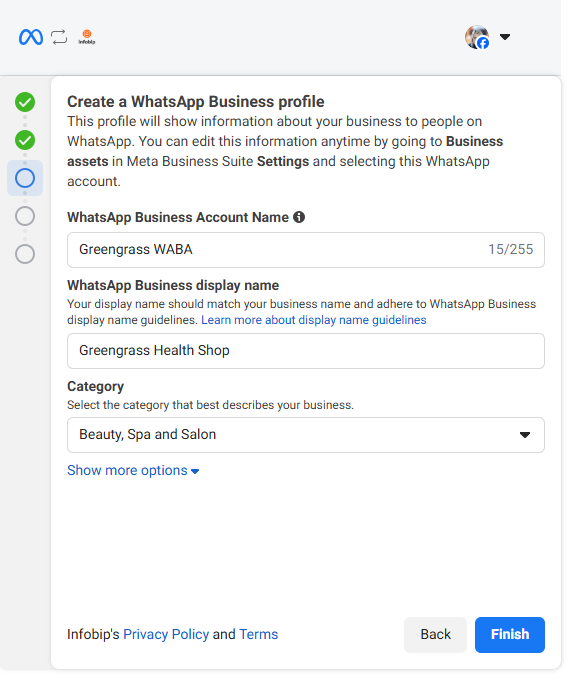
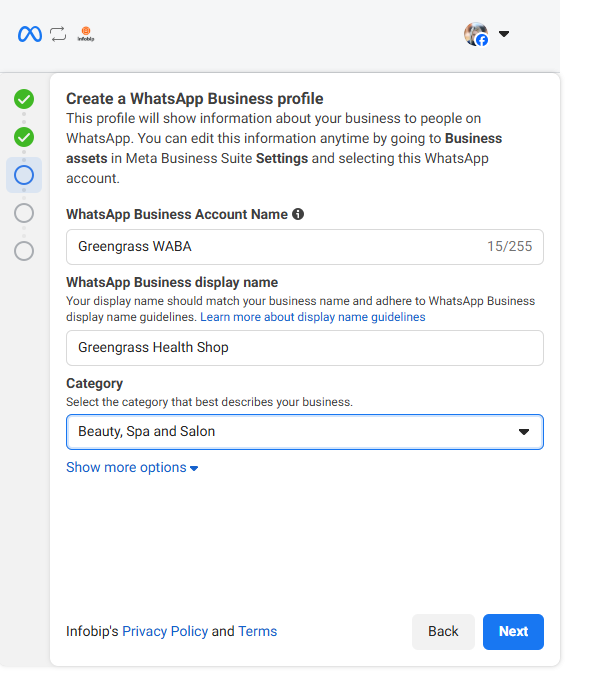
Name and categorize your WhatsApp Business Account (WABA).
- Enter the name for your WABA (if you do not have one already), add a display name, and choose the appropriate category.
- Under more options, you can also set the timezone, business description, and website.
- Once ready, select Finish.
 NOTE
NOTEThe WhatsApp business account name is not shown to your audience, only the profile information.
-
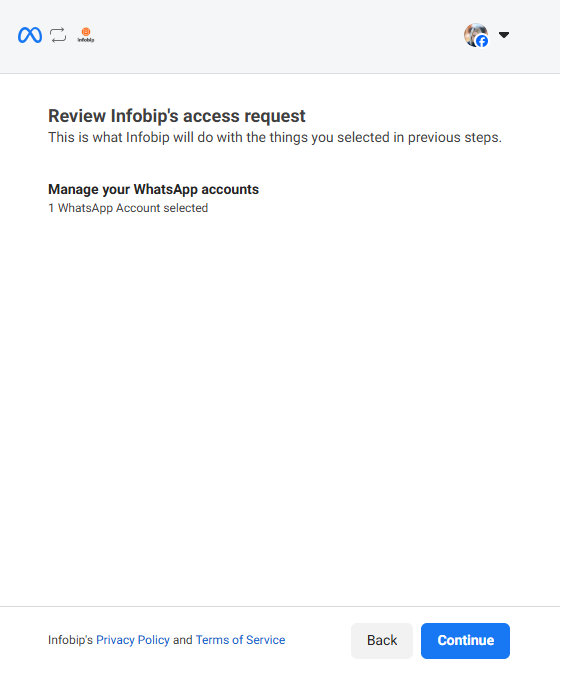
Review Infobip's access request and select Continue.
-
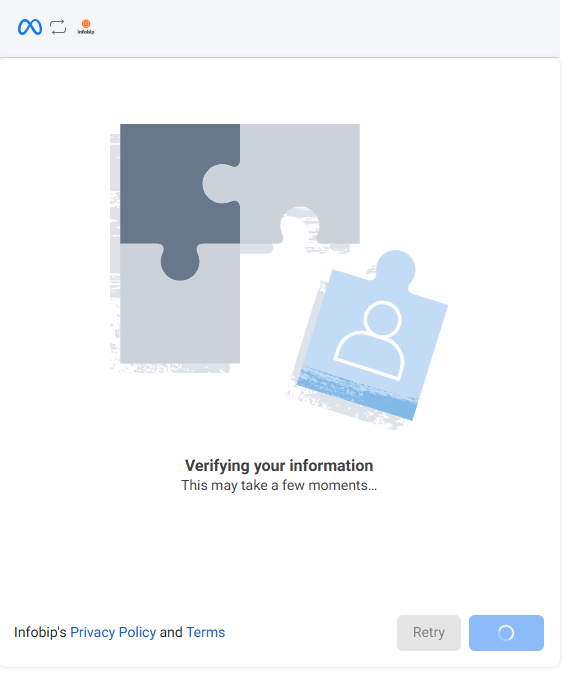
Wait for your information to get verified and finish the registration.
- You will see a window telling you that your information is being verified. Do not close it until the verification process finishes.
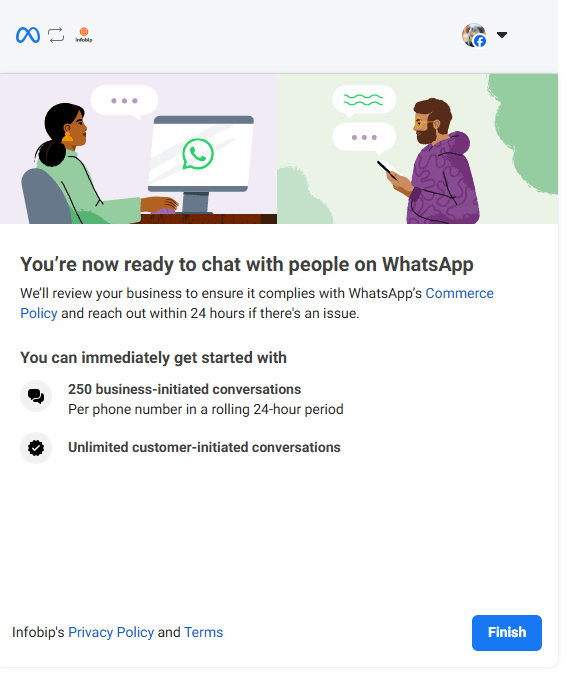
- Once your verification is completed, you will be notified that your account is ready. Review the initial benefits and select Finish.
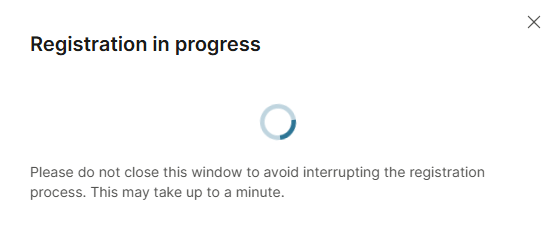
- If you see the screen that registration is in process, wait and let it finish. Do not close the window.
- Once the process finishes, your sender is registered.
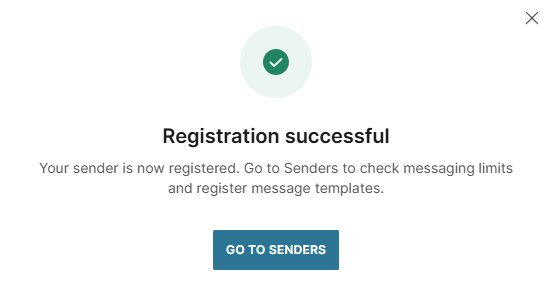
You have now registered your WhatsApp sender and can start communicating with your customers.
Connect a number you have outside of Infobip [#connect-a-number-outside-infobip-how-to-register-a-whatsapp-sender]
If you already have a new number or one connected to a personal WhatsApp account or WhatsApp Business App, select this option.
If your number is already connected to a personal WhatsApp account or WhatsApp Business App, you must delete your account before you continue. Otherwise, you will not be able to complete the registration.
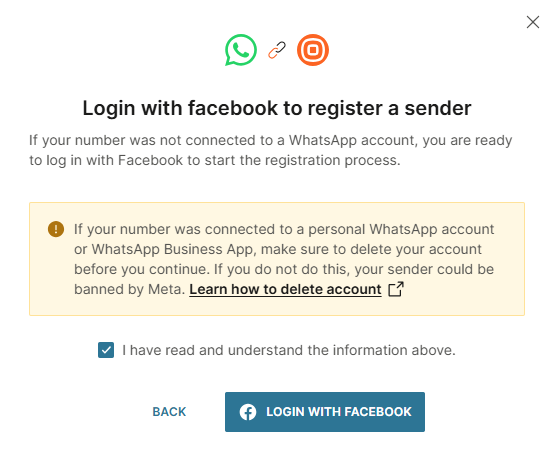
To delete your account, follow these steps:
- Open WhatsApp or WhatsApp Business App on your phone.
- Go to Settings > Account and select Delete my account.
- Complete the process to delete your WhatsApp account. It may take up to 3 minutes for the disconnected number to become available, and messages sent to this number will be queued.
When ready to proceed, return to the screen above and follow the steps below.
-
Confirm you have understood that you must delete any pre-existing WhatsApp account and select Login with Facebook to continue with the sender registration process.
-
Review the permissions you will grant Infobip and select Get started.
-
Enter your business information:
- Provide details such as business portfolio, name, email, website or profile page, and country.
NOTEIf you do not provide a valid website link, your WhatsApp Business Account is more likely to be banned by Meta. To reduce this risk, always include your website or profile page.
- You can select an existing business portfolio or create a new one to connect with your phone number.
- Once you are ready, select Next.
-
Create or select your existing WhatsApp Business Account (WABA) and business profile.
-
Name and categorize your WhatsApp Business Account (WABA).
- Enter the name for your WABA (if you do not have one already), add a display name, and choose the appropriate category.
- Under more options, you can also set the timezone, business description, and website.
- Once ready, select Next.
 NOTE
NOTEThe WhatsApp business account name is not shown to your audience, only the profile information.
-
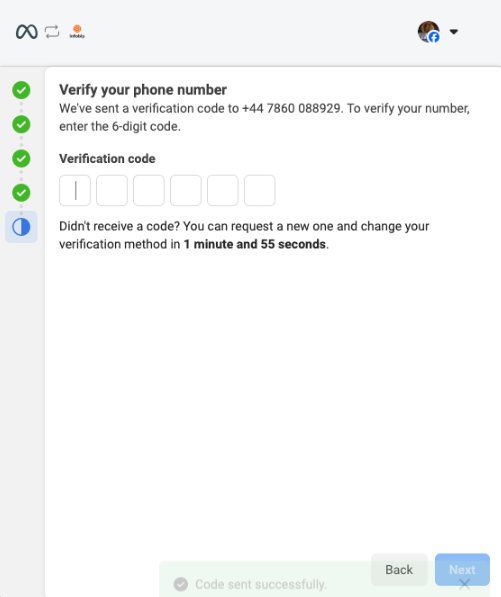
Next, add a number you have outside Infobip you want to use as your WhatsApp sender. Ensure that the number is active, meaning it can receive an SMS or a phone call for verification purposes.

-
Enter the verification code you received and select Next.
-
Review the initial benefits and select Finish.
- If you see the screen that registration is in process, wait and let it finish. Do not close the window.
- Once the process finishes, your sender is registered.
You have now registered your WhatsApp sender and can start communicating with your customers.
Connect an Infobip number [#connect-infobip-number-how-to-register-a-whatsapp-sender]
If you already have a number you bought from Infobip that you use for our other solutions and want to use it with WhatsApp, choose this option.
-
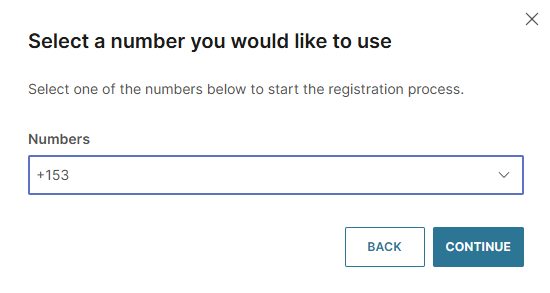
Select your number from the dropdown, and select Continue.
-
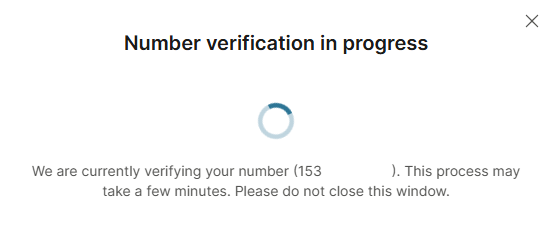
You will see a pop-up telling you that the number verification is in progress, which may take several minutes. Do not close this window until the verification finishes.
-
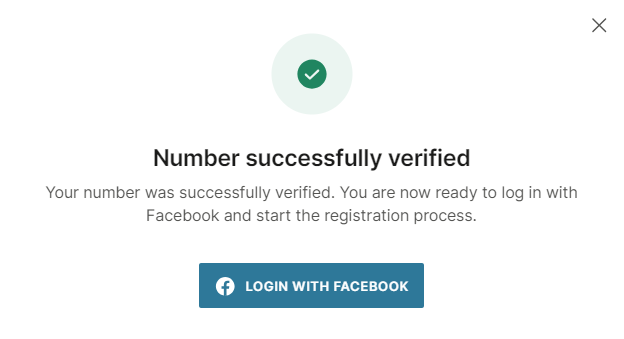
Once verification is complete, a pop-up window will confirm that the number has been successfully verified. Select Login with Facebook to start the registration process.
-
Enter your Facebook email address or phone number, review the permissions you will grant Infobip, and select Get started.
-
Enter your business information:
- Provide details such as business portfolio, name, email, website or profile page, and country.
NOTEIf you do not provide a valid website link, your WhatsApp Business Account is more likely to be banned by Meta. To reduce this risk, always include your website or profile page.
- You can select an existing business portfolio or create a new one to connect with your phone number.
- Once you are ready, select Next.
-
Create (or select if you already have one) your WhatsApp Business Account (WABA) and WhatsApp Business Profile.
- Under Create or Select a WhatsApp Business Profile, you should see the number you bought from Infobip (BSP provided number)
- Once you are ready, select Next.
-
Name and categorize your WhatsApp Business Account (WABA).
- Enter the name for your WABA (if you do not have one already), add a display name, and choose the appropriate category.
- Under more options, you can also set the timezone, business description, and website.
- Once ready, select Finish.
NOTEThe WhatsApp business account name is not shown to your audience, only the profile information.
-
Review Infobip's access request and select Continue.
-
Wait for your information to get verified and finish the registration.
- You will see a window telling you that your information is being verified. Do not close it until the verification process finishes.
- Once your verification is completed, you will be notified that your account is ready. Review the initial benefits of your registered sender and select Finish.
- If you see the screen that registration is in process, wait and let it finish. Do not close the window.
- Once the process finishes, your sender is registered.
You have now registered your WhatsApp sender and can start communicating with your customers.
Connect a number from your WhatsApp Business app [#connect-a-whatsapp-business-app]
This onboarding option is currently available only for selected accounts. To onboard using this flow, contact Support.
If you connect an existing WhatsApp Business app, your display name will not be reviewed or shown in WhatsApp chats unless your business has Meta Verified status.
To enable display name approval, apply for Meta Verified. See Meta's public documentation for availability, eligibility, and setup steps.
Use this option if you already use the WhatsApp Business app with a phone number and want to connect it to Infobip without removing the app. After registration, you can continue using the WhatsApp Business app, and Infobip will use the same number as a WhatsApp sender.
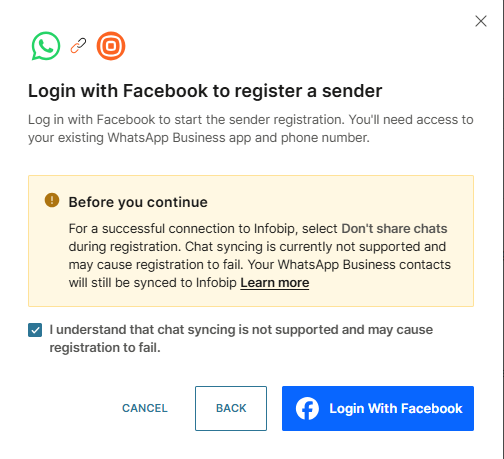
During registration, Meta will ask you whether to share chats from your WhatsApp Business app. For a successful connection to Infobip, select Don't share chats. Chat syncing is not supported in this flow and may cause registration to fail. Your WhatsApp Business contacts will still be shared to Infobip.
To connect a number from your WhatsApp Business app:
-
In the Login with Facebook to register a sender window, select the checkbox to confirm that you understand that chat syncing is not supported and may cause registration to fail, then select Login with Facebook.
-
Review the permissions you will grant to Infobip and Meta, and select Continue.
-
As your setup, choose Connect your existing WhatsApp Business App.
-
Enter your WhatsApp Business app phone number, select the correct country code, then select Next.
-
Open the WhatsApp Business app, find the message from WhatsApp, and use it to scan the QR code displayed in the sender registration flow window.
-
When asked whether to share chat history, select Don't share chats.
-
Complete the remaining steps in the sender registration flow and return to the Infobip web interface. When the process finishes, the sender appears in the list of WhatsApp senders, on the tab Senders.
Limitations
When connecting an existing WhatsApp Business app, the following limitations apply:
- The WhatsApp Business app must be version 2.24.17 or later.
- This onboarding flow is currently not supported for number registered in Nigeria and South Africa.
- Senders onboarded to both WhatsApp Business app and WhatsApp Business API have a maximum throughput of 20 messages per second.
In the WhatsApp Business app, you can use the same phone number on up to five devices, with one primary device. After you connect the number to Infobip:
- All companion devices are unlinked.
- Only the primary device remains connected.
- To use the number on multiple devices again, you must relink companion devices in the WhatsApp Business app.
Changes to WhatsApp Business app features after onboarding
When you connect an existing WhatsApp Business app to Infobip (Cloud API), some WhatsApp Business app features change or become unavailable.
| WhatsApp Business app feature | Behavior after onboarding to Cloud API |
|---|---|
| Individual (1:1) chats | Supported. Message edit and revoke are no longer available. Messages sent and received are mirrored between the app and Cloud API. |
| Contacts | Remain available in the WhatsApp Business app. Contact data is not yet synchronized to Infobip in this onboarding flow. |
| Group chats | Remain available in the WhatsApp Business app, but are not synchronized and are not supported through the Cloud API. |
| Disappearing messages | Turned off for all individual (1:1) chats. |
| View-once messages | Disabled for all individual (1:1) chats. |
| Live location messages | Disabled for all individual (1:1) chats. |
| Broadcast lists | Disabled. You cannot create new broadcast lists. Existing broadcast lists become read-only. |
| Voice and video calls | Remain available in the app, but are not supported through the Cloud API. |
| Business tools (catalog, orders, status) | Remain available in the app, but are not supported through the Cloud API. |
| Messaging tools (greeting message, away message, quick replies, labels) | Remain available in the app, but are not supported through the Cloud API. |
| Business profile information | Remain available in the app, but are not supported through the Cloud API. |
| Channels | Remain available in the app, but are not supported through the Cloud API. |
| Message history | Message history from the WhatsApp Business app is not transferred during onboarding. After the number is connected, Infobip receives message events and message echoes only for new messages, which can be delivered through webhooks. |
Migrate a number from another WhatsApp solution provider or another WhatsApp Business Account [#migrate-a-number-how-to-register-a-whatsapp-sender]
Select this option if you want to migrate your phone number from another provider to Infobip.
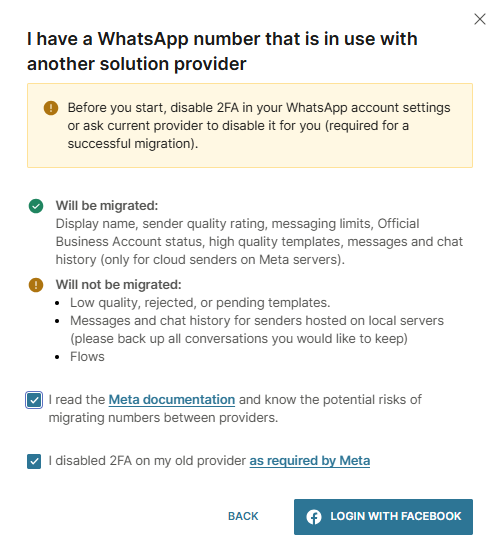
To complete the migration process, you must meet the following requirements:
- Your Meta Business account must be verified.
- Your existing WABA and display name must be approved.
- You have resolved any pending display name change requests.
- Your existing WABA must have a valid payment method set up.
- The two-step verification (2FA) has been disabled for your number. If you own your WABA, you can use the WhatsApp Manager to disable the 2FA. Otherwise, you must ask your previous provider to disable it for you.
When you are ready to process, return to the screen above and follow the steps below.
-
Confirm you have read Meta's documentation and disabled 2FA. Then, select Login with Facebook to continue with the sender registration process.
-
Review the permissions you will grant Infobip and select Get started.
-
Enter your business information:
- Select your existing business portfolio (you cannot migrate to a new portfolio).
- Add your business name, email, website or profile page, and country.
NOTEIf you do not provide a valid website link, your WhatsApp Business Account is more likely to be banned by Meta. To reduce this risk, always include your website or profile page.
- Once you are ready, select Next.
-
Create or select your existing WhatsApp Business Account (WABA) and business profile.
-
Name and categorize your WhatsApp Business Account (WABA).
- Check the name of your WABA (if you do not have one already), add a display name, and choose the appropriate category.
- Under more options, you can also set the timezone, business description, and website.
- Once you are ready, select Next.
NOTEThe WhatsApp business account name is not shown to your audience, only the profile information.
-
Next, add a number you used with your previous provider as your WhatsApp sender. Ensure that the number is active, meaning it can receive SMS or a phone call for verification purposes.
-
Enter the verification code you received and select Next.
-
Review the initial benefits and select Finish.
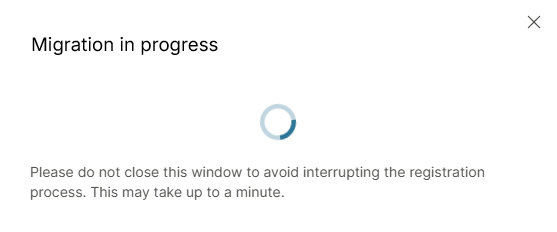
- If you see the screen that migration is in process, wait and let it finish. Do not close the window.
- Once the process finishes, your sender is migrated.
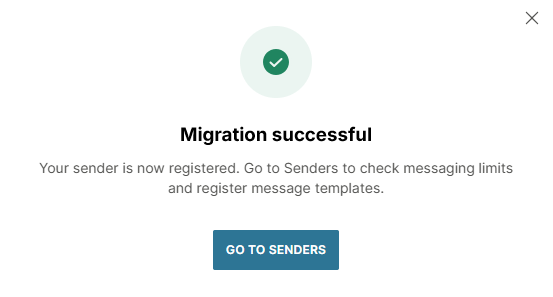
You have now migrated your WhatsApp sender and can start communicating with your customers.
Once you complete the migration flow, the system generates a new WhatsApp Business Account (WABA), associates it with your Meta business portfolio, grants app access to the WABA, and generates a new WABA ID. Your phone number remains unchanged, ensuring that key account attributes are preserved.
What items will be migrated
- Display name
- Sender quality rating
- Messaging limits
- Official Business Account status
- Eligible templates (duplicated with the same statuses as their source counterparts)
- Messages and chat history (only Cloud senders)
Low-quality, rejected, or pending templates, messages and chat history for hosted senders, and Flows will NOT be migrated.
Eligible templates are duplicated in the new WABA and are subject to Template categorization guidelines. Only templates that meet the following criteria are eligible for duplication:
- Status: APPROVED
- Quality score: GREEN
Template quality ratings will NOT be migrated. Duplicated templates will start with an UNKNOWN quality rating, which remains for the first 24 hours. A new quality rating will be assigned after sufficient data is collected.
Messages sent before the migration is complete are charged to your old provider. Messages delivered after the migration will still be charged to your old provider if they were sent before the migration. Messages sent after the migration is complete will be charged to Infobip.