Getting started
Prerequisites
Before working with Infobip to get Instagram Messaging enabled, you must have the following:
- Infobip official account. If you do not have an Infobip account, sign up for an account.
- Administrator access to Facebook and Instagram accounts.
Connection
Contact your Infobip Account Manager to request this channel to be enabled in your Infobip web interface. The Infobip Account Manager will inform you when the request is approved and the channel is enabled.
After the channel is enabled, go to the Infobip web interface > Channels and Numbers > Instagram Messaging, and carry out the instructions in the following sections.
Convert your Instagram account into a Business account [#convert-your-instagram-account-into-a-business-account-connection]
If you have a business Instagram account already, ignore this section.
To convert your Instagram account into a professional account, follow these steps:
- Log in to your Instagram account.
- In the top-right corner of the page, click your profile > Settings.
- In the menu on the left, click Switch to Professional Account.
- Click Continue.
- Choose a category for your account.
- Follow the onscreen instructions to complete the conversion.
Connect your Instagram account with your Facebook account [#connect-your-instagram-account-with-your-facebook-account-connection]
If your Instagram account is connected with your Facebook account already, ignore this section.
To connect your Instagram account with your Facebook account, follow these steps:
- Log in to your Facebook business page as an administrator.
- Open your Facebook business page.
- In the menu on the left, choose Settings.
- Choose Instagram.
- To add an Instagram account to your page, choose Connect account.
- Enter your Instagram username and password.
Connect your Instagram account with your Infobip account [#connect-your-instagram-account-with-your-infobip-account-connection]
- Click Instagram Messaging.
- Click Connect account.
- Log in to your Facebook account. You must be the administrator of the Facebook page that you have connected to your Instagram page.
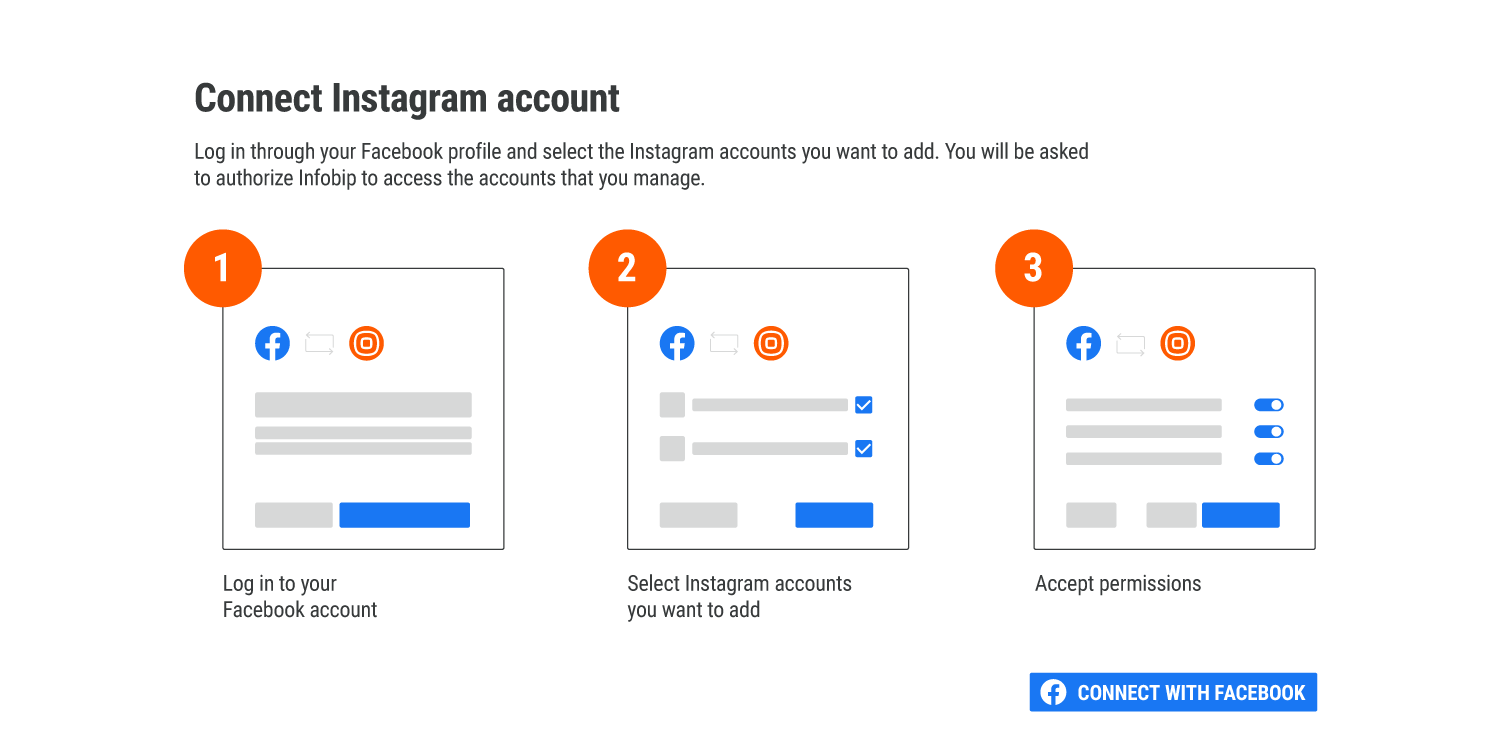
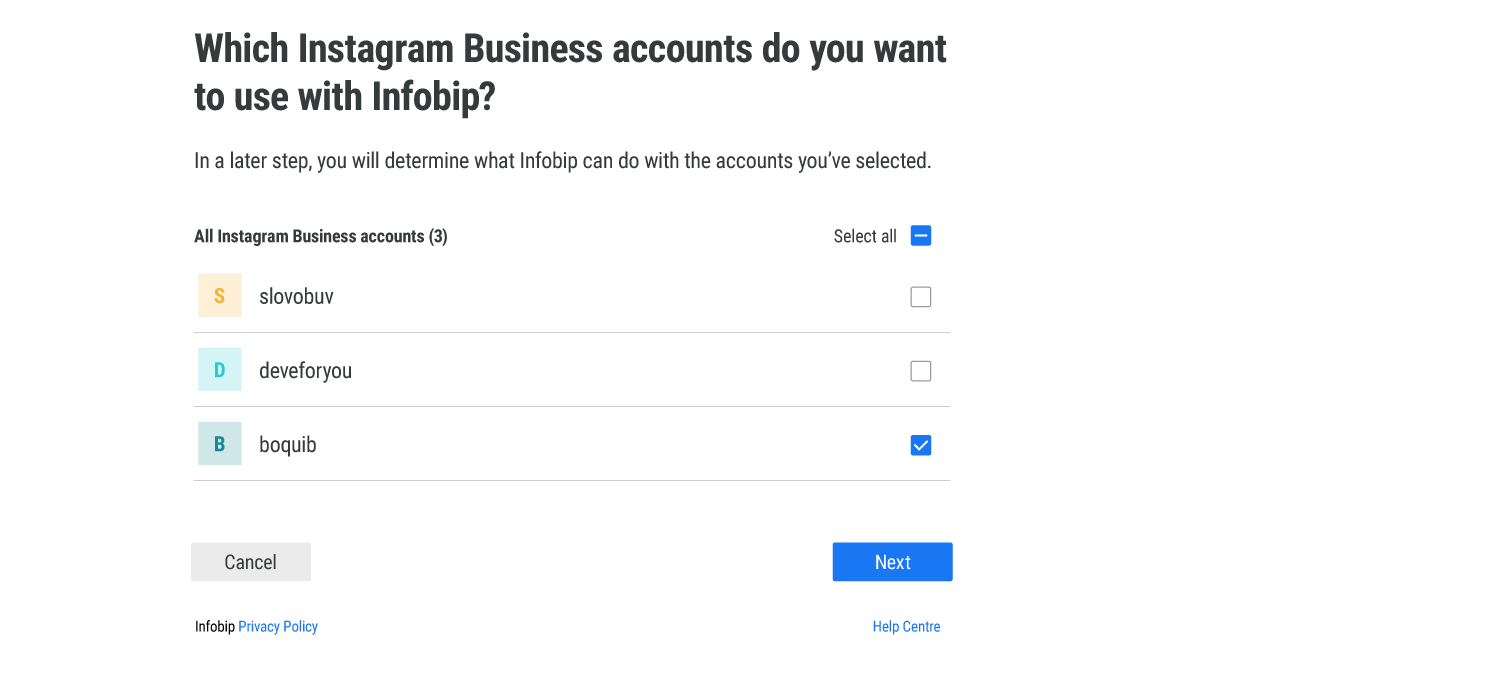
- Choose the Instagram pages that you want to integrate with Infobip.
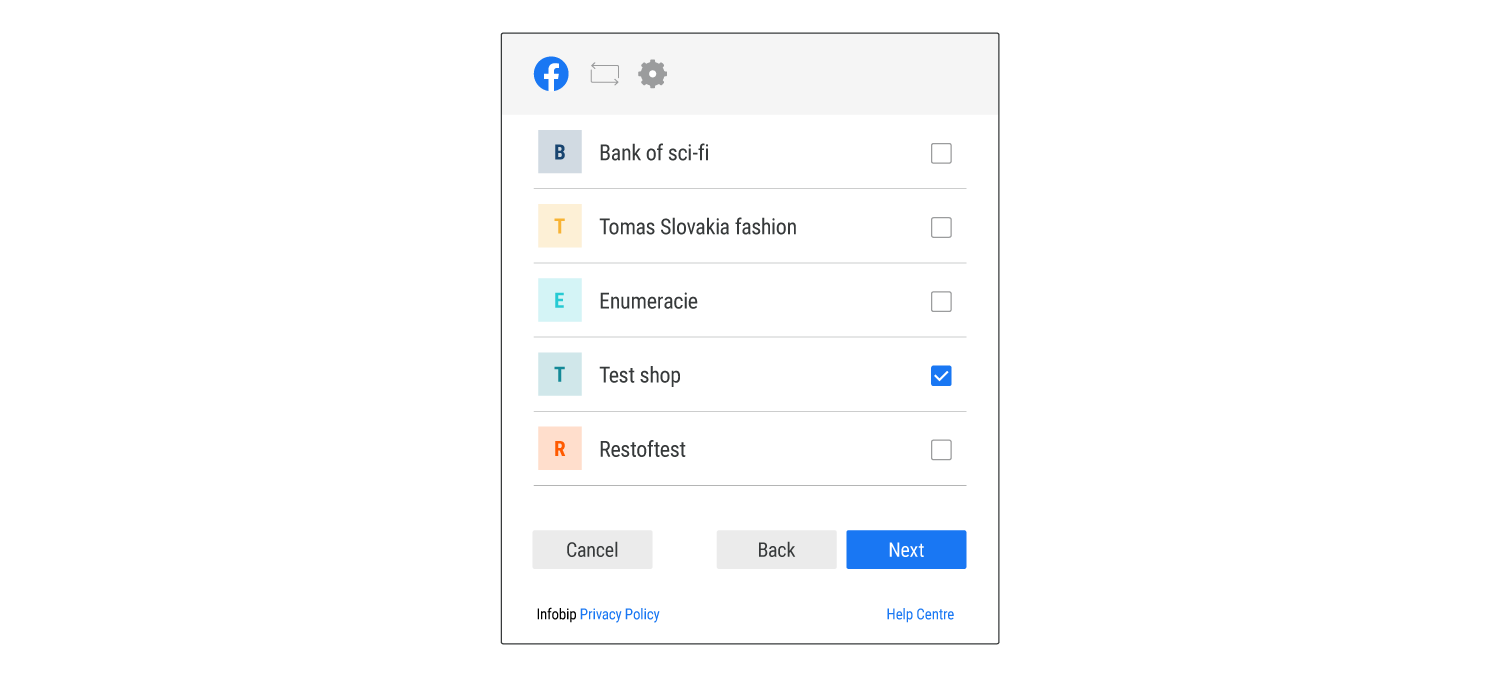
- Choose the Facebook page that you have connected with the Instagram page.
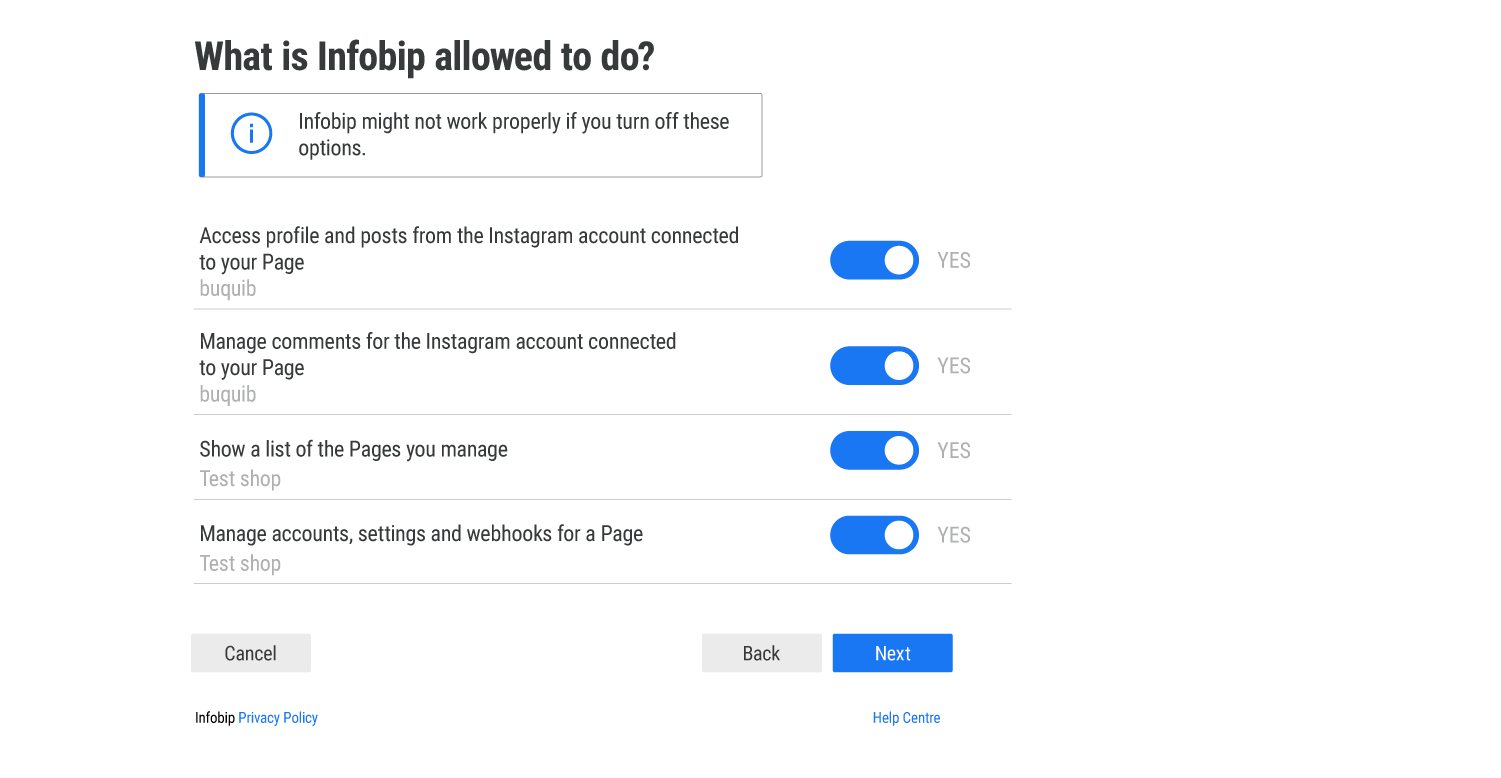
- Enable the permissions that are required for Infobip to manage the Instagram pages.
You will receive a notification that you have successfully connected your Instagram account with Conversations.
Configure your Instagram account [#configure-your-instagram-account-connection]
To send messages from your Instagram account through the Infobip web interface, you must enable permissions in your Instagram account.
Follow these steps:
- In the Instagram Messaging application, log on to your Instagram account.
- Go to Settings > Privacy > Messages.
- Under Connected Tools, enable Allow Access to Messages.
Channel specifics
Instagram Messaging is a session-based channel.
Bots can message a customer directly within 24 hours of receiving the last message from the customer.
Agents can message a customer directly within 7 days of receiving the last message from the customer. When an agent responds within this period, the tag ''HUMAN_AGENT'' is added to the message automatically.