Users and authentication
Anyone who interacts with your business through Live Chat is considered a user.
By default, Live Chat users are unauthenticated and have limited access to features and chat history. You can authenticate users by providing a unique identifier, such as an email address or phone number.
Authenticated users gain the following benefits:
- Persistent chat history
- Unique user identifier
- Access to chat history across multiple devices
Chat history retention is subject to your account’s Data retention settings.
Each user is automatically tracked in People, which distinguishes between two user types: Leads and Customers
All unauthenticated users are assigned a Lead profile and once authenticated, they are automatically promoted to a Customer.
You can configure your widget to retain authenticated users as Leads.
User authentication
You can authenticate users before they start a chat session or after they have begun chatting. If you authenticate a user who already has an existing chat history, the authenticated user will inherit that chat history.
When you authenticate a user for the first time, Live Chat automatically creates a new profile with the provided unique identifier, if a Person profile with that identifier does not already exist in People.
Authentication in Live Chat is achieved differently depending on whether you are authenticating a user on a website or in a mobile app.
Web authentication
Web user authentication is managed via a personalization token, specifically, a JSON Web Token (JWT) signed with your widget's secret key.
As long as the token is correctly signed, Live Chat fully trusts that any data encoded within it is correct and was provided by you. Infobip does not take responsibility for any incorrect data that might, for example, result in users viewing another user’s chat history.
Anyone with access to a JWT can read its contents. Do not include confidential information, such as a password, in the token payload.
As an integrator, you are responsible for generating the personalization token and providing it to the Live Chat widget.
To authenticate users, complete the following steps:
- Obtain your widget's secret key.
- Get the unique identifier of the user.
- Generate the personalization token.
- Submit the personalization token to the widget.
Obtain your widget's secret key [#obtain-your-widgets-secret-key-web-authentication]
Each Live Chat widget can have one or more secret keys, which are used to sign personalization tokens.
To obtain a secret key:
- Go to your widget's configuration page.
- Navigate to the Installation and Security section → Generate secret keys.
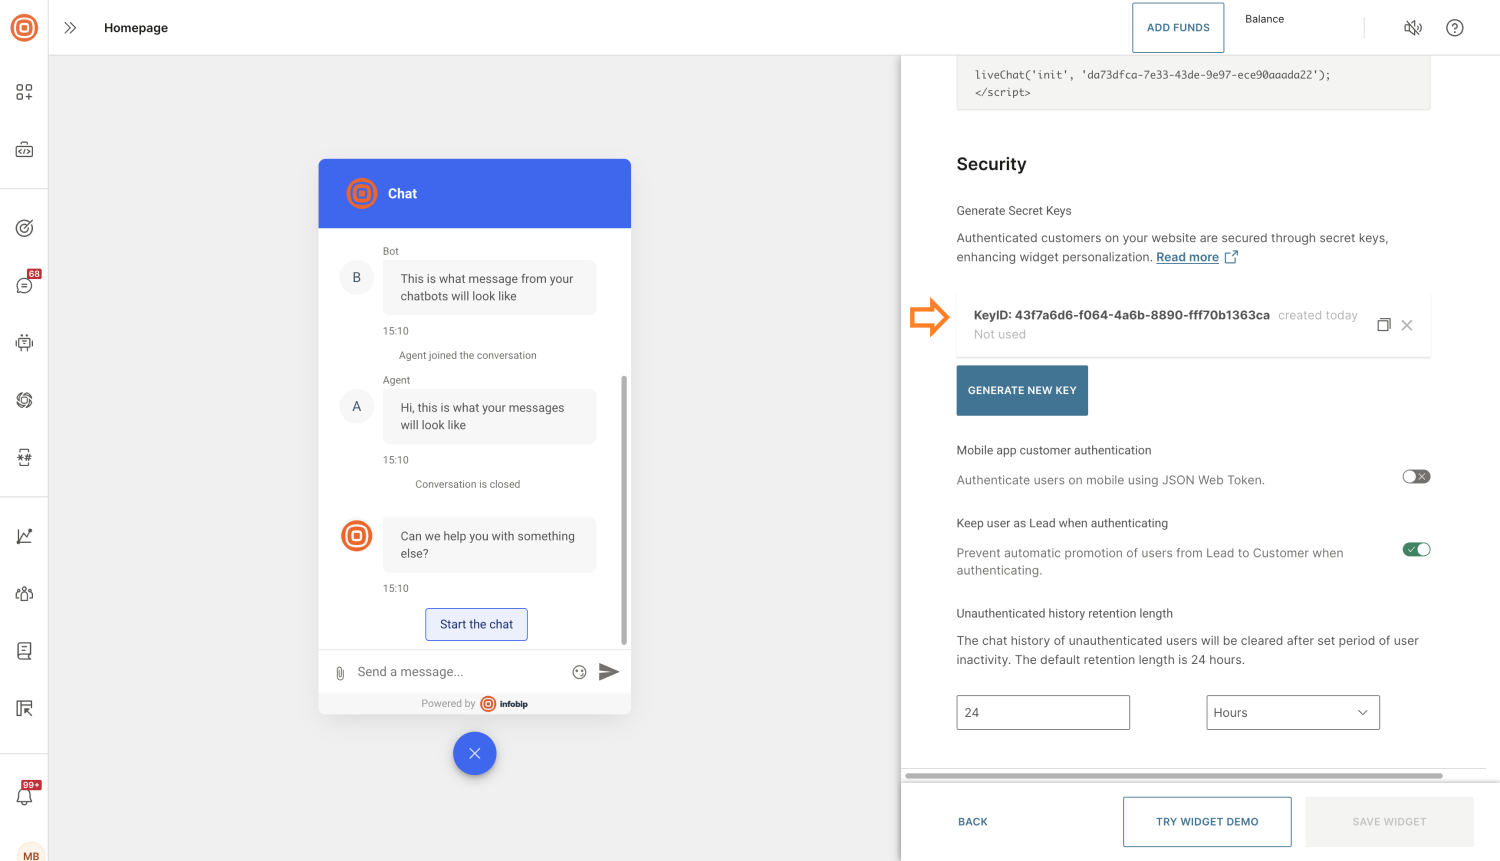
Example of a key structure:
id:The unique identifier for your secret key. This value is included in the JWT'sskifield.key:The secret value encoded in Base64, used to sign the JWT. Treat this key as confidential and handle it with the same care as a password.
You can remove a secret key at any time via the configuration interface.
Obtain the unique identifier of your user [#obtain-the-unique-identifier-of-your-user-web-authentication]
To distinguish each user, you will need to supply a unique identifier. Live Chat supports three types of identifiers:
- Email - The user's email address
- MSISDN - The user's phone number, in MSISDN format
- External ID - Any string ID from your system that is unique per user
If a user’s profile contains multiple identifiers, any of them can be used for authentication.
Generate the personalization token [#generate-the-personalization-token-web-authentication]
If you are not familiar with JSON Web Tokens (JWT), we strongly recommend reviewing their structure and creation process before proceeding.
To generate a personalization token, you must implement a JWT generator. The generated token must:
- Follow the structure defined in the JWT payload structure section
- Be signed with the secret key obtained in the first step
- Be Base64 encoded
Once the token is generated and encoded, supply it to the front end where Live Chat is embedded.
Tokens can only be used to authenticate a user once. You must generate a new token for each authentication attempt. Live Chat will maintain the authenticated session until you explicitly de-authenticate the user.
You can find JWT generator examples in the Token generator examples section.
JWT payload structure
| Field | Required | Description |
|---|---|---|
alg | Yes | (Header value) Encryption algorithm. Supported value: HS256 |
typ | Yes | (Header value) Type of the token. Supported value: JWT |
iat | Yes | Issued at: Unix timestamp in seconds when the token is created. |
iss | Yes | Issuer: your widget's ID. |
jti | Yes | JWT ID: must be unique for each token. Any string, max 50 characters. |
ski | Yes | Secret key ID: the ID (not the value) of the secret key you're using to sign the token. |
stp | Yes | Subject type: type of identifier in sub. Allowed values: • email: standardized email format.• msisdn: phone number in MSISDN format.• externalPersonId: any string user identifier unique to your system, max 100 characters. |
sub | Yes | Subject: value of the unique identifier, matching the type in stp. |
exp | No | Expiration: Unix timestamp when the token expires in seconds. If not set, defaults to iat + 15 seconds.Values less than iat + 15 seconds are not recommended. |
sid | No | Session ID: your unique user session identifier, used for Session Invalidation API. Max 50 characters. |
Example decoded token
Example encoded token
eyJhbGciOiJIUzI1NiIsInR5cCI6IkpXVCJ9.eyJpYXQiOjE3NDg1OTk4OTcsImlzcyI6ImRhNzNkZmNhLTdlMzMtNDNkZS05ZTk3LWVjZTkwYWFhZGEyMiIsImp0aSI6ImMwNjI1ZjVhLTY3NmMtNGRjYy04ODNkLWVlYThmMDZmNGFlNSIsInNraSI6IjQzZjdhNmQ2LWYwNjQtNGE2Yi04ODkwLWZmZjcwYjEzNjNjYSIsInN0cCI6ImVtYWlsIiwic3ViIjoiam9obi5kb2VAaW5mb2JpcC5jb20iLCJleHAiOjE3NDg1OTk5MTIsInNpZCI6IjhiNTJlNzU5LTU5NTUtNDlkOS1iYjQ0LWJjMWIxY2EyMjc0NSJ9.e4OIOAxyyjLNOk2TglcOmx4tpstrc4rBzYL-_gU1_I0
Submit the personalization token to the widget [#submit-the-personalization-token-web-authentication]
Once you generate your token, use the SDK's Auth command to submit it to your widget. Make sure to provide the token in its Base64 encoded form.
After you successfully submit the token to the widget, the user will be authenticated.
Mobile app authentication
For mobile app installations, Live Chat uses the Mobile SDK (Android, iOS) to manage users in People.
To learn more about how the Mobile SDK manages your users, see the Users and installations section in the Android or iOS documentation.
Because Push Registration ID (Infobip's unique identifier for the user's device) also uniquely identifies anonymous users, all mobile users with a profile in People retain their chat history indefinitely, regardless of their Lead or Customer status.
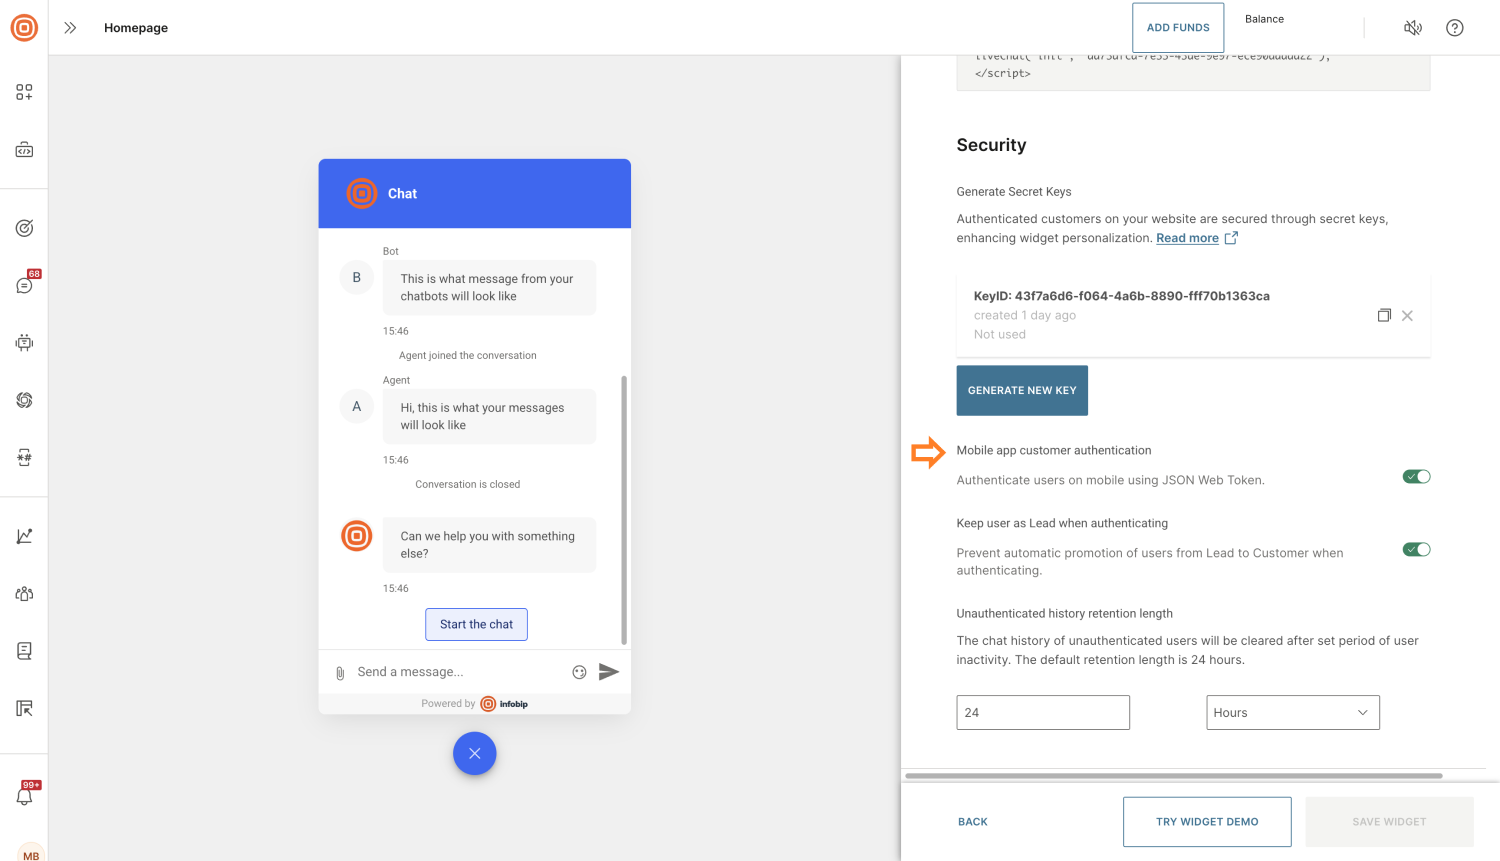
Additional security [#additional-security-mobile-app-authentication]
For enhanced security, you can require a personalization token during mobile app authentication. The token must be generated in the same way as for web authentication, then provided to the Mobile SDK.
For detailed instructions on how to provide the token to the Mobile SDK, refer to the Android or iOS documentation.
When authenticating on mobile using a personalization token, Live Chat does not automatically add the unique identifier to the user’s People profile or create a new profile. The unique identifier provided in the token must already exist in the user’s profile.
You can ensure this by one of the following methods:
- Update the user profile manually
- Use the Personalize function in the Mobile SDK
- Call the Personalize push instance REST API
To enable additional security for your mobile users:
- Go to your widget's configuration page.
- Navigate to the Installation and Security section.
- Turn on Mobile app customer authentication.
Best practice
When authenticating users on mobile, it is recommended to use a longer TTL (time-to-live, set in the token’s exp field). The personalization token supports both initial authentication and automatic re-authentication if certain errors occur. Setting a longer TTL helps keep users authenticated and reduces interruptions during the chat experience.
De-authenticating users
Typically, you authenticate users with Live Chat when they authenticate or log in to your platform. For a seamless experience and better security, it is recommended to de-authenticate users when they log out.
You can de-authenticate users by:
- Web - Use the Log out Live Chat SDK command.
- Mobile app - Use the Depersonalize function in Mobile SDK (Android, iOS).
- Web and mobile app - Call the Invalidate session API. Note that to use this API, you must include a Session Identifier (
sid) in the personalization token.
Token generator examples
Do not forget to decode your secret key from Base64 before using it for the signature.