Getting Started
To get started using Mobile SDK, you first need to complete a few configuration steps:
- Create and Enable a Mobile Application Profile
in the Infobip web interface - Configure the Mobile SDK
into your mobile application project, and build and test your application
Create and Enable a Mobile Application Profile
A mobile application profile within the Infobip platform is an entity that groups all connected mobile app installations. You need to create a mobile application profile and get a unique identification of the application, known as an Application Code, to start gathering data about mobile users and reach them via push notifications and in-app messages.
Create Profile
-
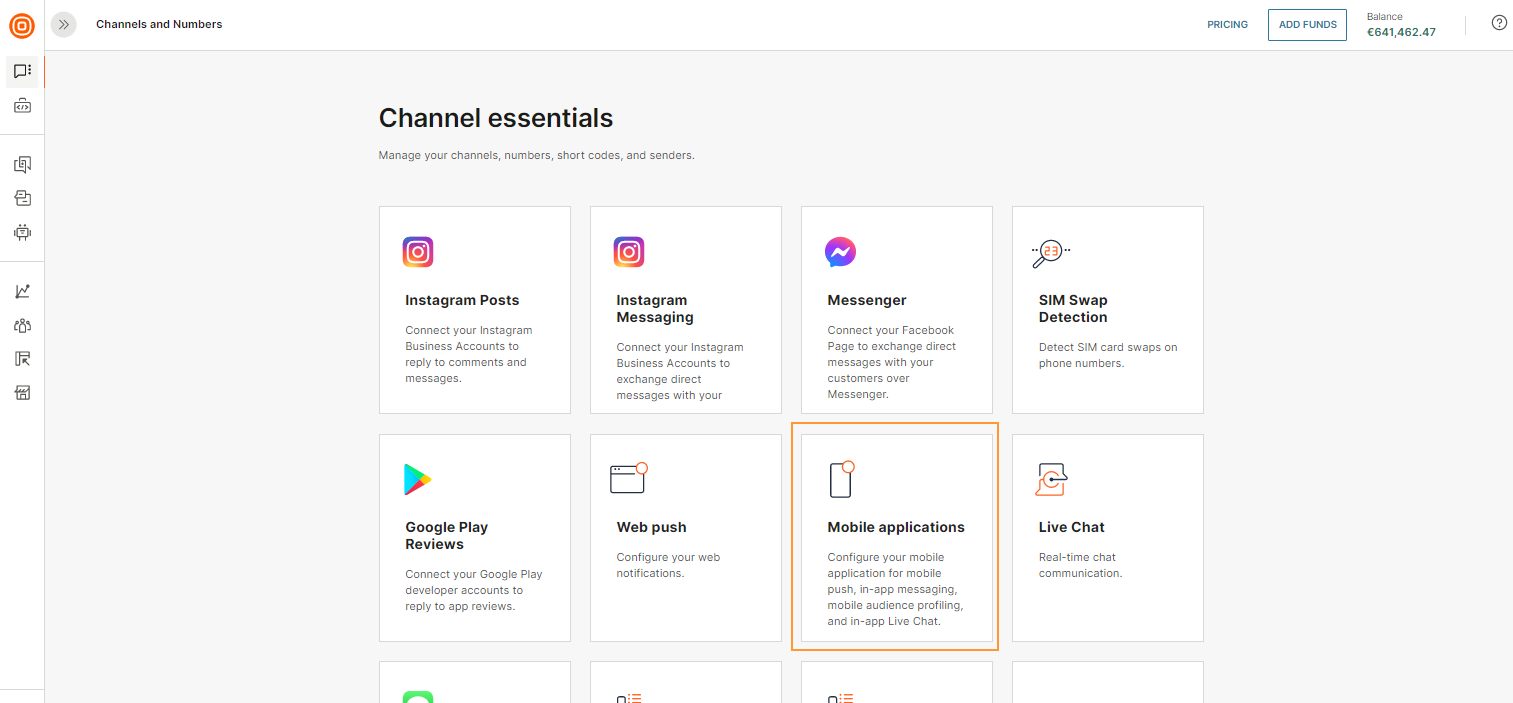
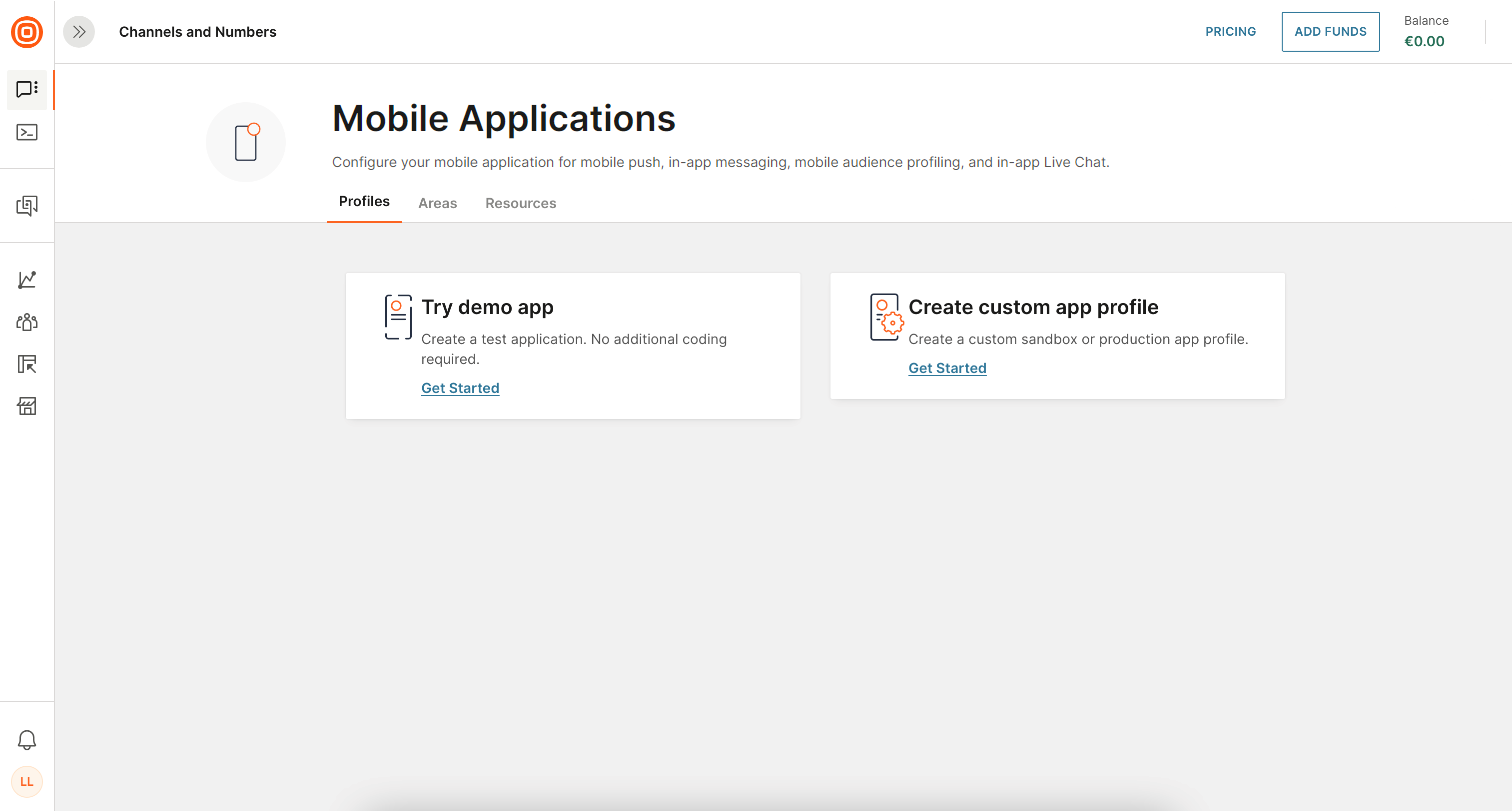
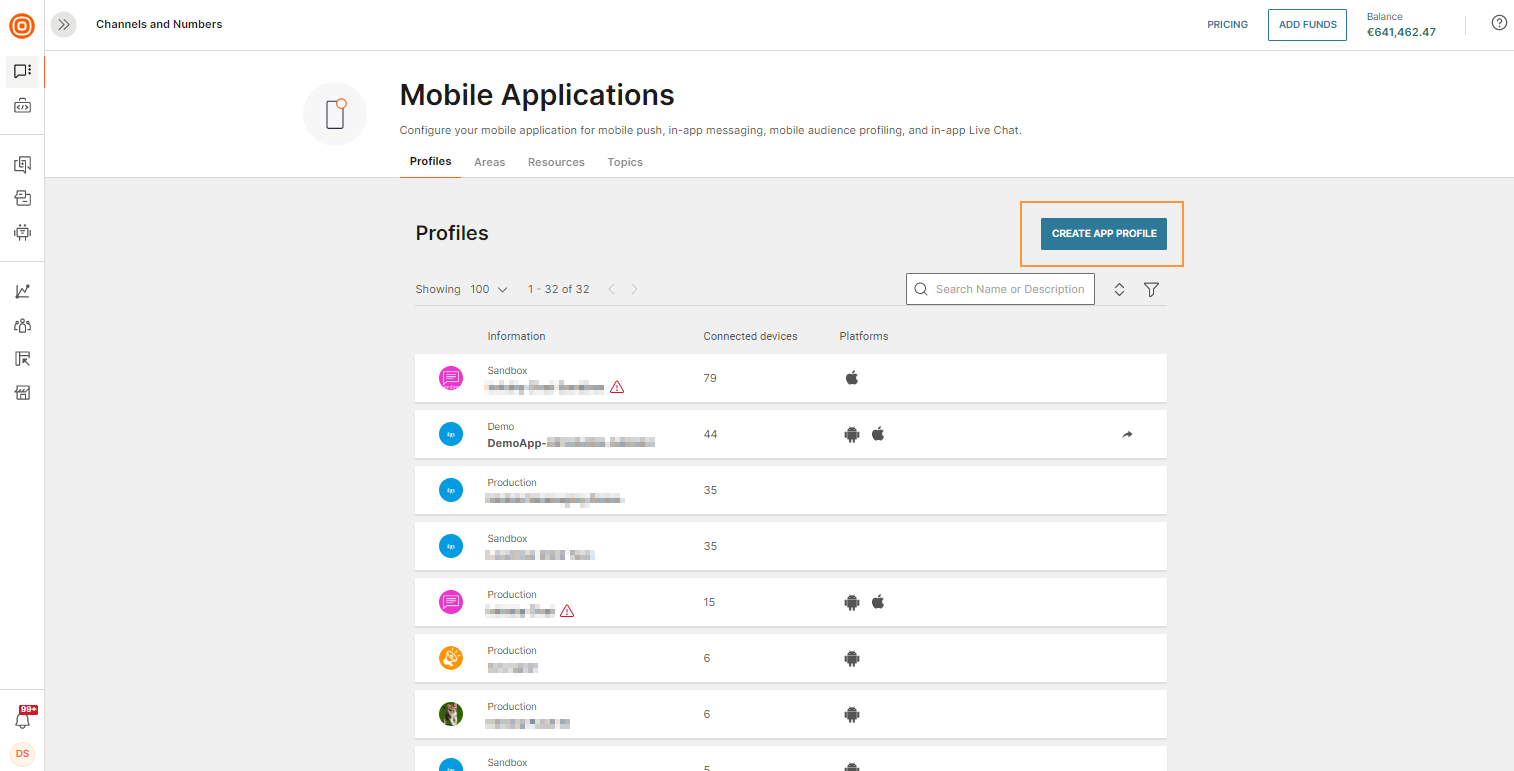
To create a mobile application profile, from the Infobip web interface navigate to Channels and Numbers> Mobile Applications
-
Click Create App Profile to configure your mobile application profile on the Infobip platform.
or
-
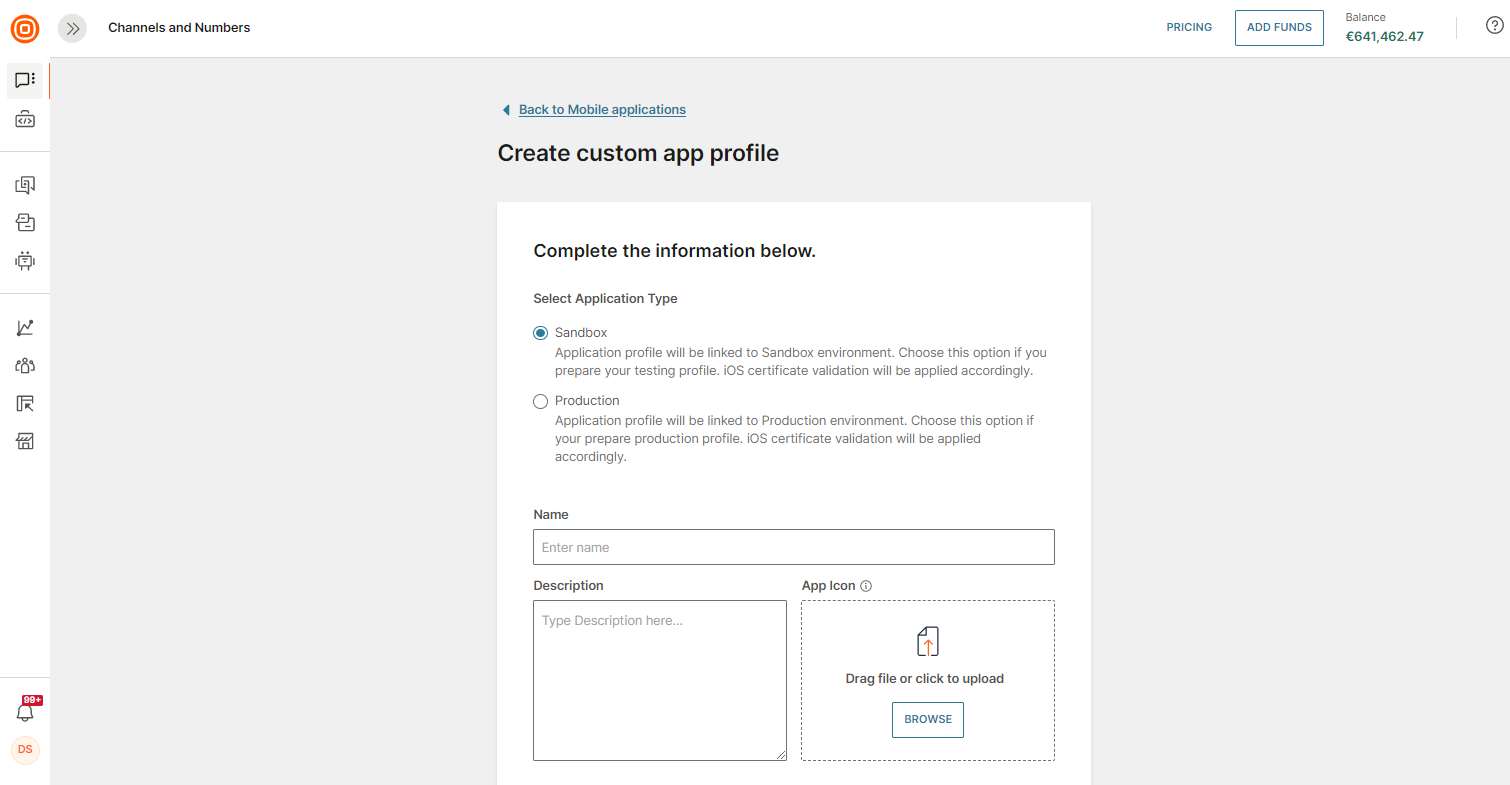
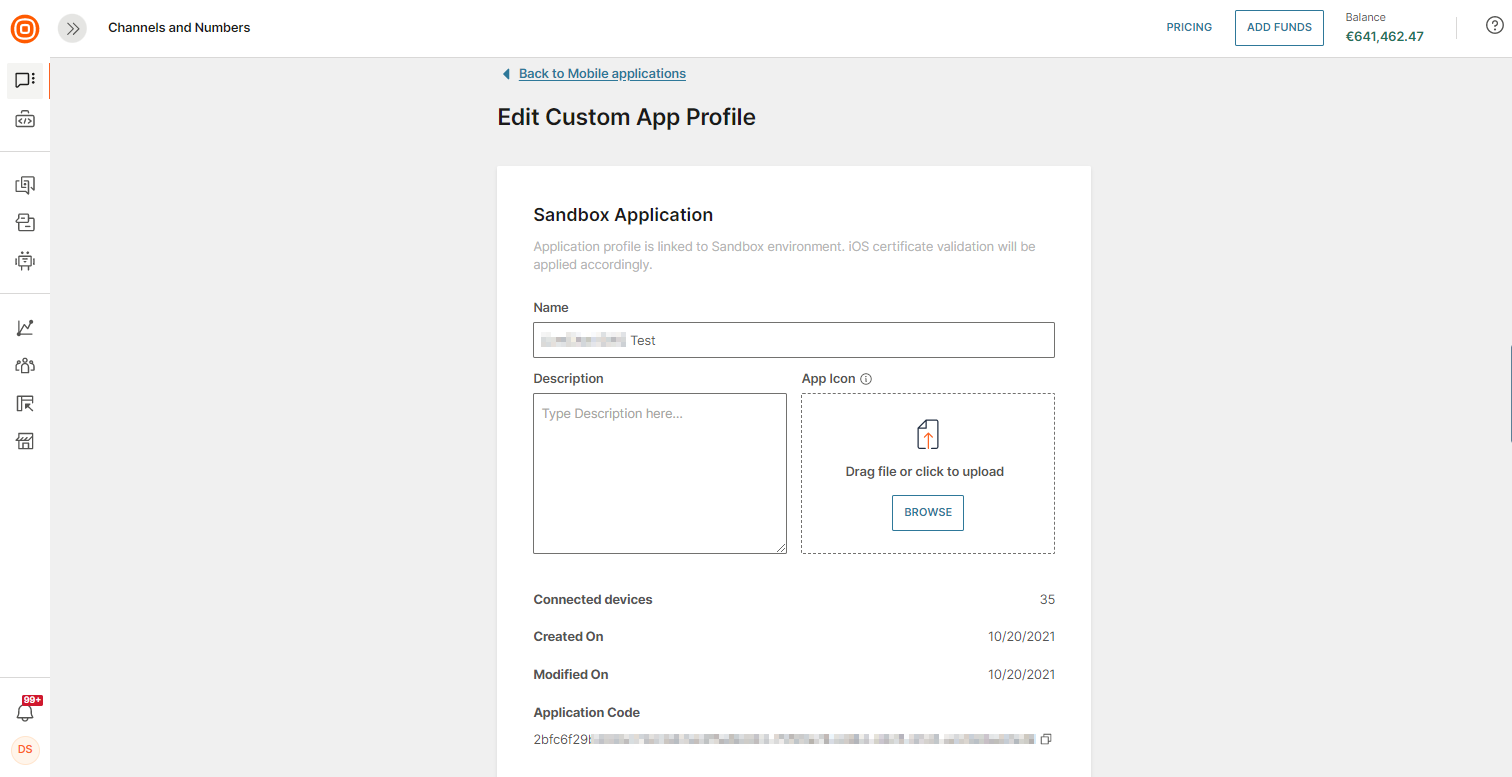
Choose an application profile type: SANDBOX or PRODUCTION. The Infobip platform separates these two application profile types so that your testing environment and product releases can be divided into different flows. Both environment types include unified settings for iOS and Android clouds configuration.
- Sandbox – is used in the testing environment which is crucial to define for iOS. Application instances created with the iOS sandbox provision profile aren’t applicable to the production environment.
- Production – use the production environment when the application is almost ready for release. The production application instance isn’t applicable to the sandbox environment.
-
Name your mobile app profile, provide a description, and add an app icon to make it more recognizable.
-
Enable push notifications for the profile by selecting the necessary checkboxes to enter credentials for cloud push notification services in iOS, Android, and Huawei applications.
You can create a mobile application profile without entering that platform's credentials. However, you need to add the credentials if you want to send push notifications.
iOS
To enable your Push Application Infobip web interface for iOS you need to add the Apple Push Notification Services (APNS) certificate tied to your iOS App ID so that you can send push notifications through the Infobip platform.
If you already have an APNS certificate, upload it to your mobile application profile (opens in a new tab). If you need assistance on how to obtain the APNS certificate, follow the instructions in the link below.
The APNS certificate is usually issued for a 1-year period and requires renewal. We will notify you via email when your certificate is about to expire. For the certificate renewal, please refer to How to Renew APNS Certificate in the link below.
APNS Certificate Setup Guide (opens in a new tab)
Android
To enable your mobile application profile for Android, you need to add the Private Key JSON file to your mobile application profile.
Do the following:
- Get the JSON file (opens in a new tab) containing the private key for your mobile application profile. If you already have the file, ignore this step.
- In your Infobip account, go to Channels and Numbers > Mobile Applications > Profiles (opens in a new tab).
- In the Google Private Key JSON field of the profile, upload the JSON file.
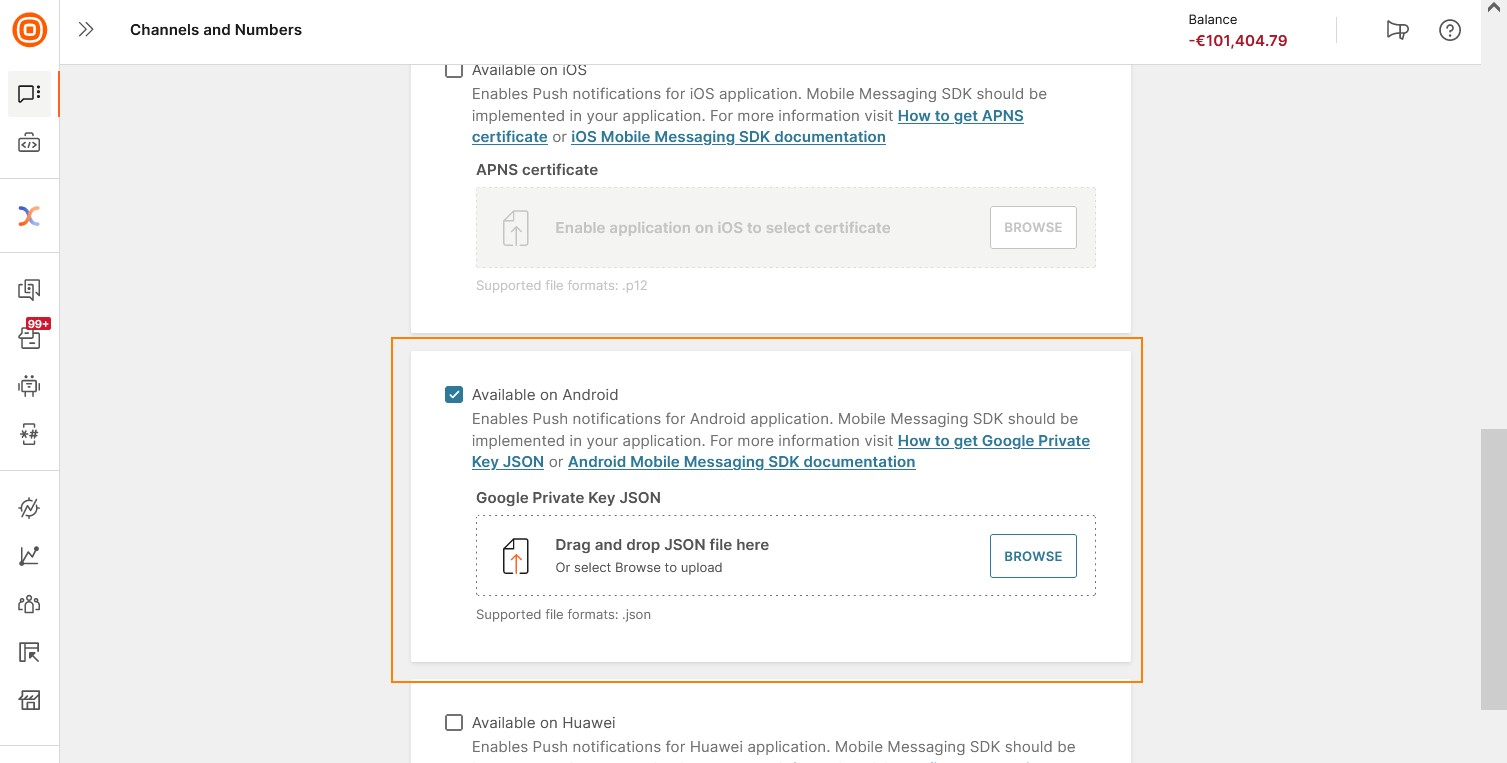
- Select Save.
Huawei
To enable your mobile application profile for Huawei, you need to generate a signing certificate fingerprint and enable the Huawei Pushkit.
If you have already obtained a signing certificate, add it to your mobile application profile (opens in a new tab). If you need assistance on how to generate a signing certificate fingerprint, and how to enable the Huawei Pushkit, follow the instructions in the link below.
APP Gallery Connect Setup Guide (opens in a new tab)
Copy Application Code
When you click Save in your mobile application profile for the first time, an Application Code will be generated for the app profile.
The Application Code is an application identifier that links your mobile application to the application profile created within the Infobip web interface.
You need to copy the code to your Mobile SDK configuration as documented in the Configure the Mobile SDK section below:
Set up Mobile SDK
The Mobile SDK is a ready-to-use set of components to integrate your mobile application with the Infobip platform. Get started configuring a basic integration of the Mobile SDK using the quick start guides below. It is very important that you follow each step of the quick start guide carefully to avoid issues with push messages.
Remember, as part of the configuration process you will need to copy the application code from your mobile application profile in the Infobip web interface. Take a look at Copy Application Code to learn more.
Mobile SDK Quick Start Guides
Plugins for Cross-Platform Frameworks
- React Native guide (opens in a new tab)
- Flutter guide (opens in a new tab)
- Cordova guide (opens in a new tab)
The application build process differs depending if you create an application for iOS or Android.
For iOS applications, you will need to build and install your application directly on a test device. For Android, you can build and install your application on an emulator without the need for physical test devices.
If your build is failing or you find errors in your application logs related to Mobile SDK then please check the error text, rectify the problem, and re-attempt the build.
Take a look below to see an example application for you to integrate and test:
- Example application for Android (opens in a new tab)
- Example application for iOS (opens in a new tab)
- Example application for Huawei (opens in a new tab)
For cross-platform frameworks
- Example application for ReactNative (opens in a new tab)
- Example application for Cordova (opens in a new tab)
- Example application for Flutter (opens in a new tab)
Test sending mobile push notifications using the web interface and Push API (opens in a new tab).
Once you have installed your test application build integrated with the Mobile SDK, you can verify the application works correctly by checking the number of registered devices in the application profile in the Infobip web interface.
As people install your application build you will see the number of registrations increase.
After you have verified that the application build is working correctly, you can then set mobile audience profiling to personalize the app for customers and then use it to track customer behavior.
Head over to GitHub for full implementation details on all Mobile SDK functionality, including deep links, in-app messages, inbox, and live chat):
- Android SDK wiki (opens in a new tab)
- iOS SDK wiki (opens in a new tab)
- Huawei on Android wiki (opens in a new tab)
- React Native wiki (opens in a new tab)
- Flutter wiki (opens in a new tab)
- Cordova SDK wiki (opens in a new tab)
You can check all functionality of the Mobile SDK before implementing it in your mobile app by using our Demo Application. Check out our Demo app guide to get started.