Send a Mobile push notification
Mobile push notifications are notifications that are displayed outside the mobile app when the app is not being used. These notifications are displayed in the Notifications center.
Use Mobile push notifications to send automated communications to mobile app users based on their behavior in the app. Example: Based on events, tags, and end users' preferences and subscriptions in the mobile app.
To receive push notifications, the end user needs to enable notifications in their device settings.
You can send push notifications over the following.
- Flow in Moments
- Broadcast
- Infobip API
You can also use communication templates to create push notifications and provide a consistent communication experience to mobile app users.
Send Mobile push over Flow [#mobile-push-over-flow]
Use Mobile push in a flow in Moments.
Create the flow [#mobile-push-create-flow]
-
On the Infobip web interface, go to Moments > Flows.
-
Select Create flow.
-
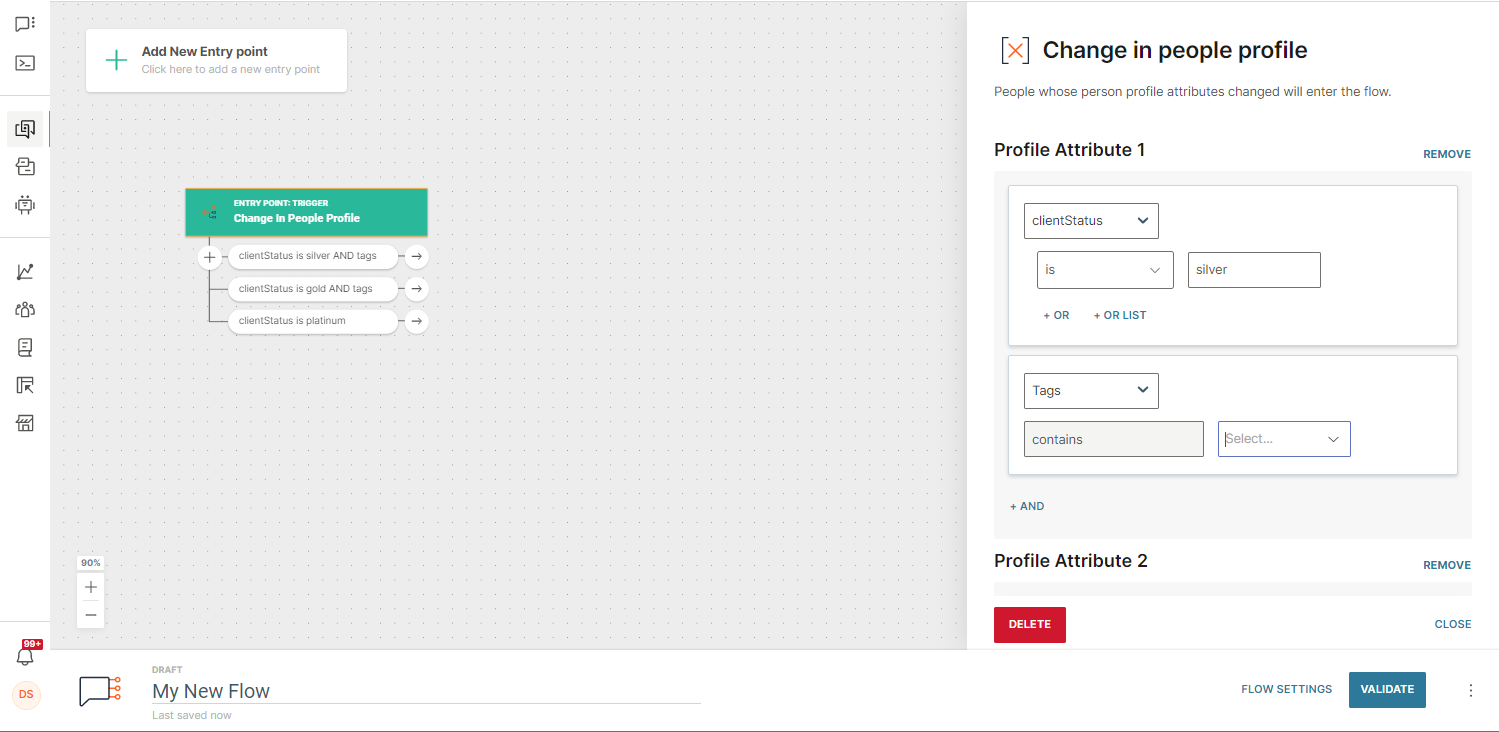
Configure the required entry point. Example: Change in Person profile.
In the entry point, define the audience. Specify the tags and attributes that the person profile needs to have to be included in the flow.
NoteYou can use different combinations of attributes and tags to make sure that the person profile meets the criteria for the flow.
-
Add the Send Mobile push element in the relevant section of the flow.
-
In the Send Mobile push element, configure the push notification.
-
Select Validate.
-
Select Launch now.
Mobile app users whose attributes changed after the flow started are automatically added to the flow.
To improve mobile apps communication in your flow, use the audience profiling capabilities.
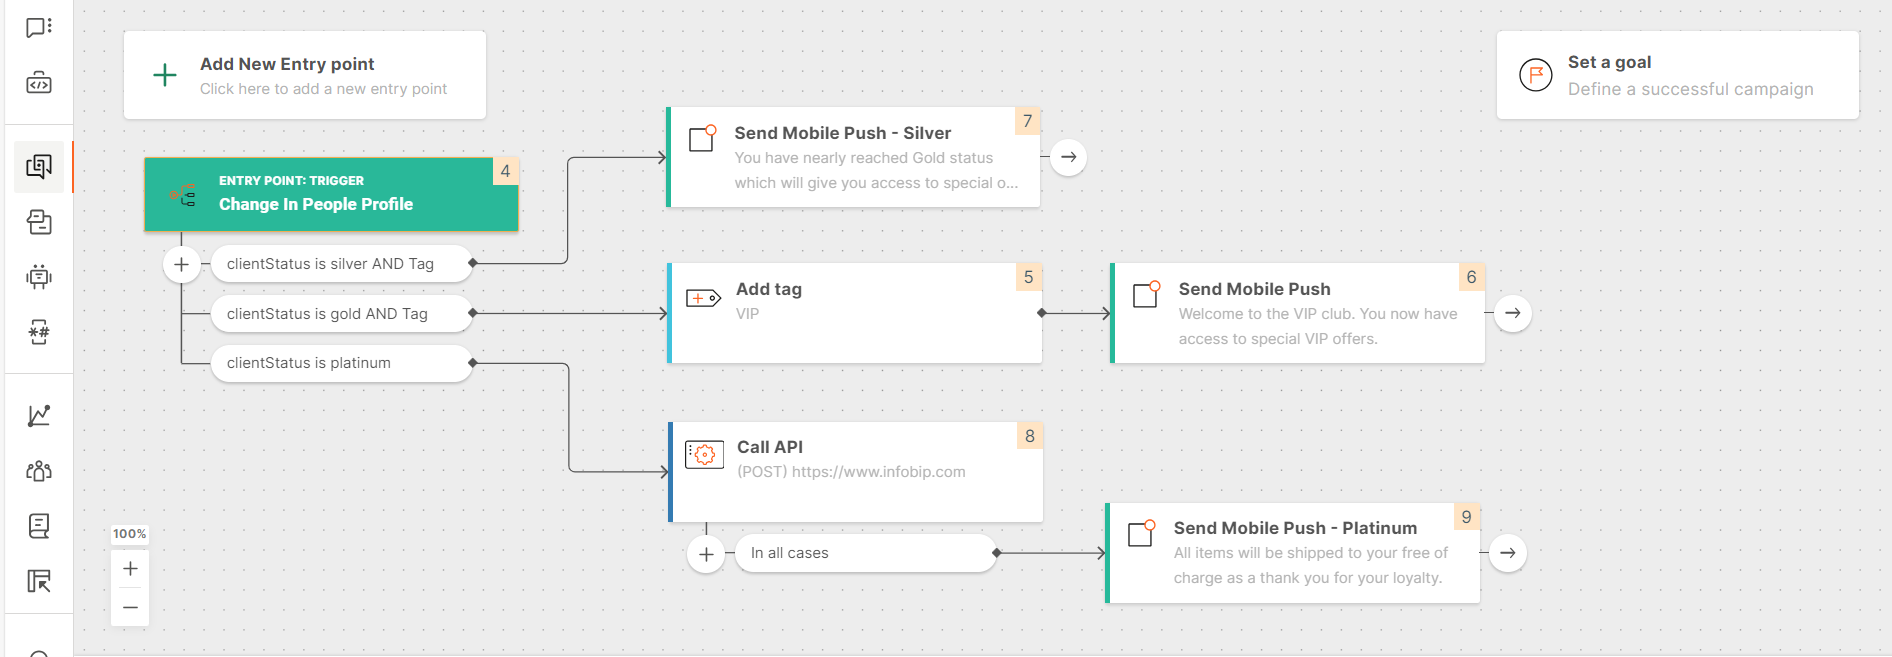
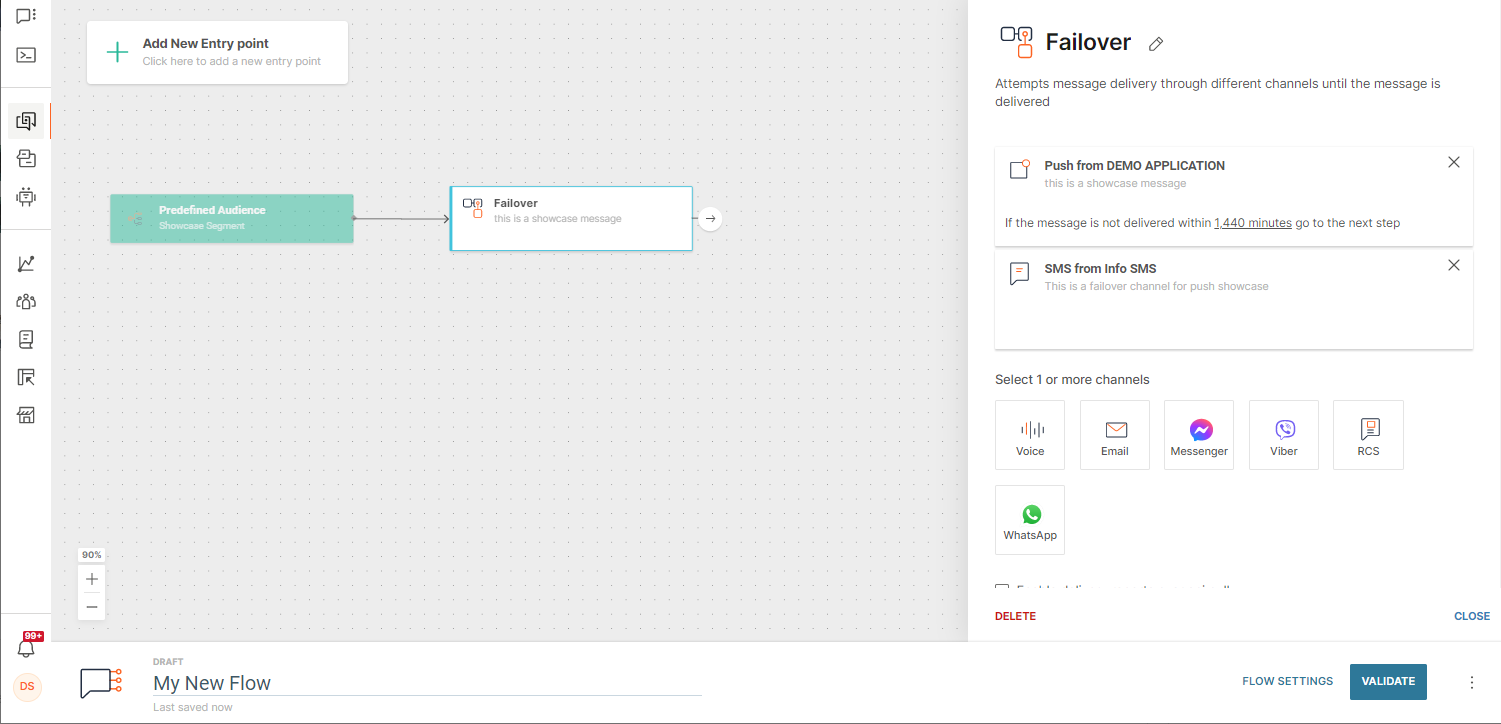
The following image shows an example of a flow that uses the Mobile push channel.
Configure the Mobile push element [#configure-mobile-push-element]
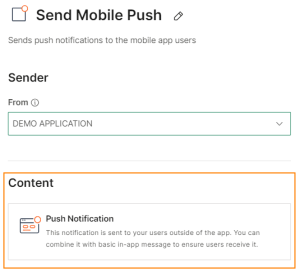
Select the Send Mobile push element to open the side panel and configure the following fields.
Sender
In the From field, select the mobile application that sends the push notifications.
Content
Select Push notification. Configure the push notification.
Configure delivery options
In-app expiration period: Specify the maximum period during which the flow delivers the notification within the app. This field is applicable only if you select Mirror push notifications inside an app in the push notification editor.
Push validity period: Set the period during which the flow tries to deliver the message to the end user. If the validity period is over and the message has not reached the mobile device, the message expires and is canceled automatically. For more information, refer to the Validity period documentation.
Enable delivery reports over API pull: Select this option to identify the number of delivered messages.
Push iOS Badge Number: Specify the number to be displayed on your mobile app's icon to alert the end user that a message is waiting for them. This option is available only in iOS.
Push Notification Preferences: In the Type field, select one of the following options.
-
Silent: When you use this option, the notification is not displayed in the Notification center. Use this option to send delivery information to a mobile device over custom payload, or to show the notification within the app without showing a push notification.
-
Standard: Show the notification as a push notification and within the app. You can also select the following options.
-
Play sound on device: You can either play a custom sound or use the default sound.
To play a custom sound, you must have the required sound file uploaded in your application. Specify the name of this file in the Sound name field. For more information, refer to the Android and iOS documentation.
To play the default sound, leave the Sound name field blank.
-
Vibrate (Android only)
-
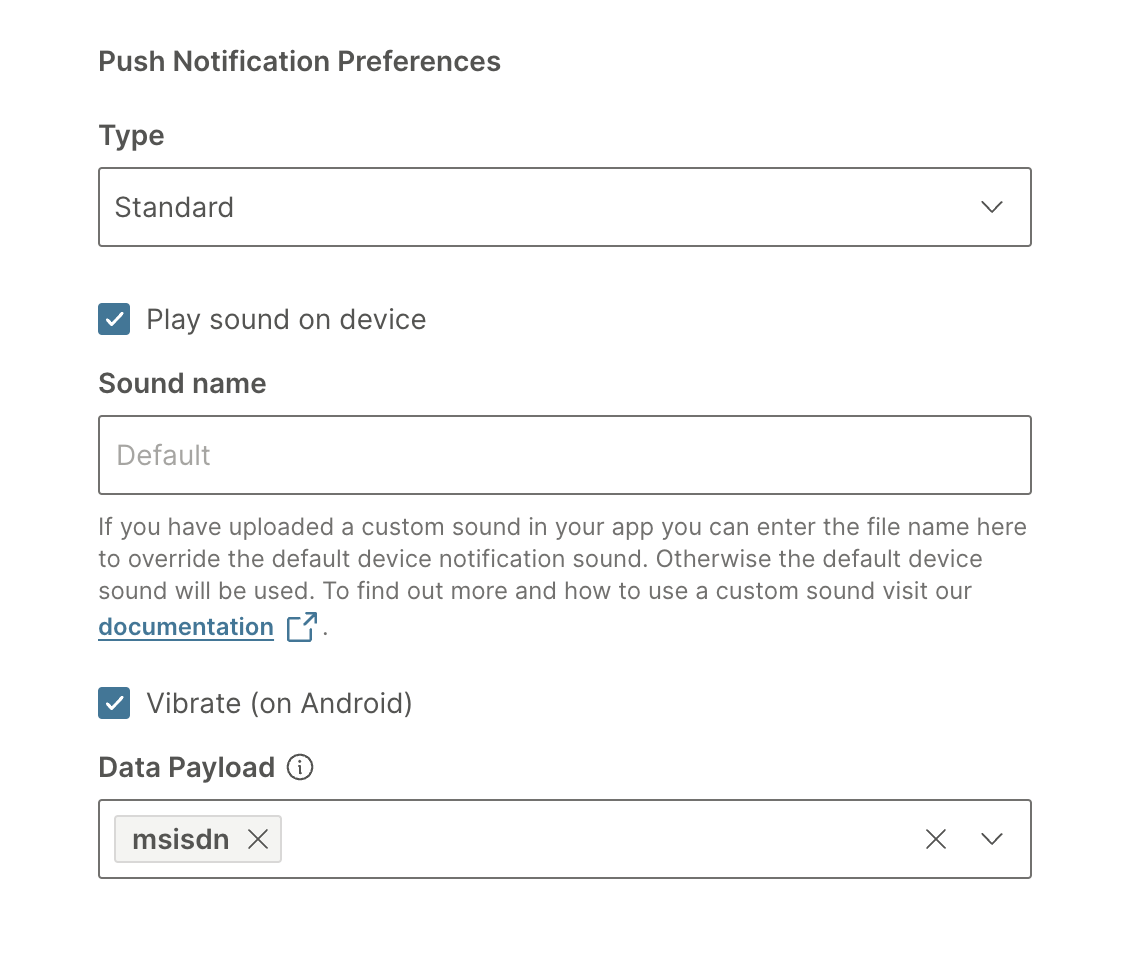
Data payload: Select additional data from stored or imported contacts and add it to the message. This data is visible in message reports.
You can use placeholders from person profiles and tags. Example: first name and country. The default placeholder is a phone number.
You can use the data to find end user messages in Logs. Example: Use the phone number to find the messages sent to that number.
For more information about data payload, refer to the Data payload documentation. For more information about what you can do with the mobile apps audience data, refer to the Mobile audience profiling documentation.
Delivery time window: Set the time and time zone for your communication. For more information, refer to the Delivery time window documentation.
Send-time optimization: Enable the flow to determine the best time to send messages to end users. For more information, refer to the send-time optimization documentation.
Message sending speed: Use this field to control the rate at which messages are sent from the platform to the mobile app. Enter the number of messages that you want to send within a specified period. For more information, refer to the Message sending speed documentation.
Use failover [#mobile-push-over-flow-failover]
In some cases, the end user might not receive your push notifications. Example: The end user is not online or they have disabled push notifications. Add a different channel as fallback to make sure that the end user receives your message.
You can add multiple fallback channels. The flow performs an automatic failover to these channels in the order that you define.
To add a fallback, do the following.
- In your entry point, either define the audience or use a predefined segment.
- Add the Failover element.
- Select Push as the first channel and define the message content.
- Select another failover channel. Example: SMS.
- Select Validate.
- Select Launch now.
Send Mobile push over Broadcast [#mobile-push-over-broadcast]
A broadcast is a one-time communication with your mobile app audience. Use Mobile push over Broadcast to send targeted messages to selected audience segments.
Create the broadcast [#create-broadcast]
- On the Infobip web interface, go to Moments > Broadcasts.
- Select Create broadcast.
- Select Mobile push as the communication channel.
- Configure the broadcast.
- Configure the push notification in the broadcast.
Configure the broadcast [#configure-broadcast]
Configure the following fields.
Recipients
Specify the recipients of the push notification. You can do the following.
When you start typing in the field, the system automatically provides suggestions based on your person profiles, segments, or tags. Select View all in a category to view all available profiles for that category. Example: Select View all segments.
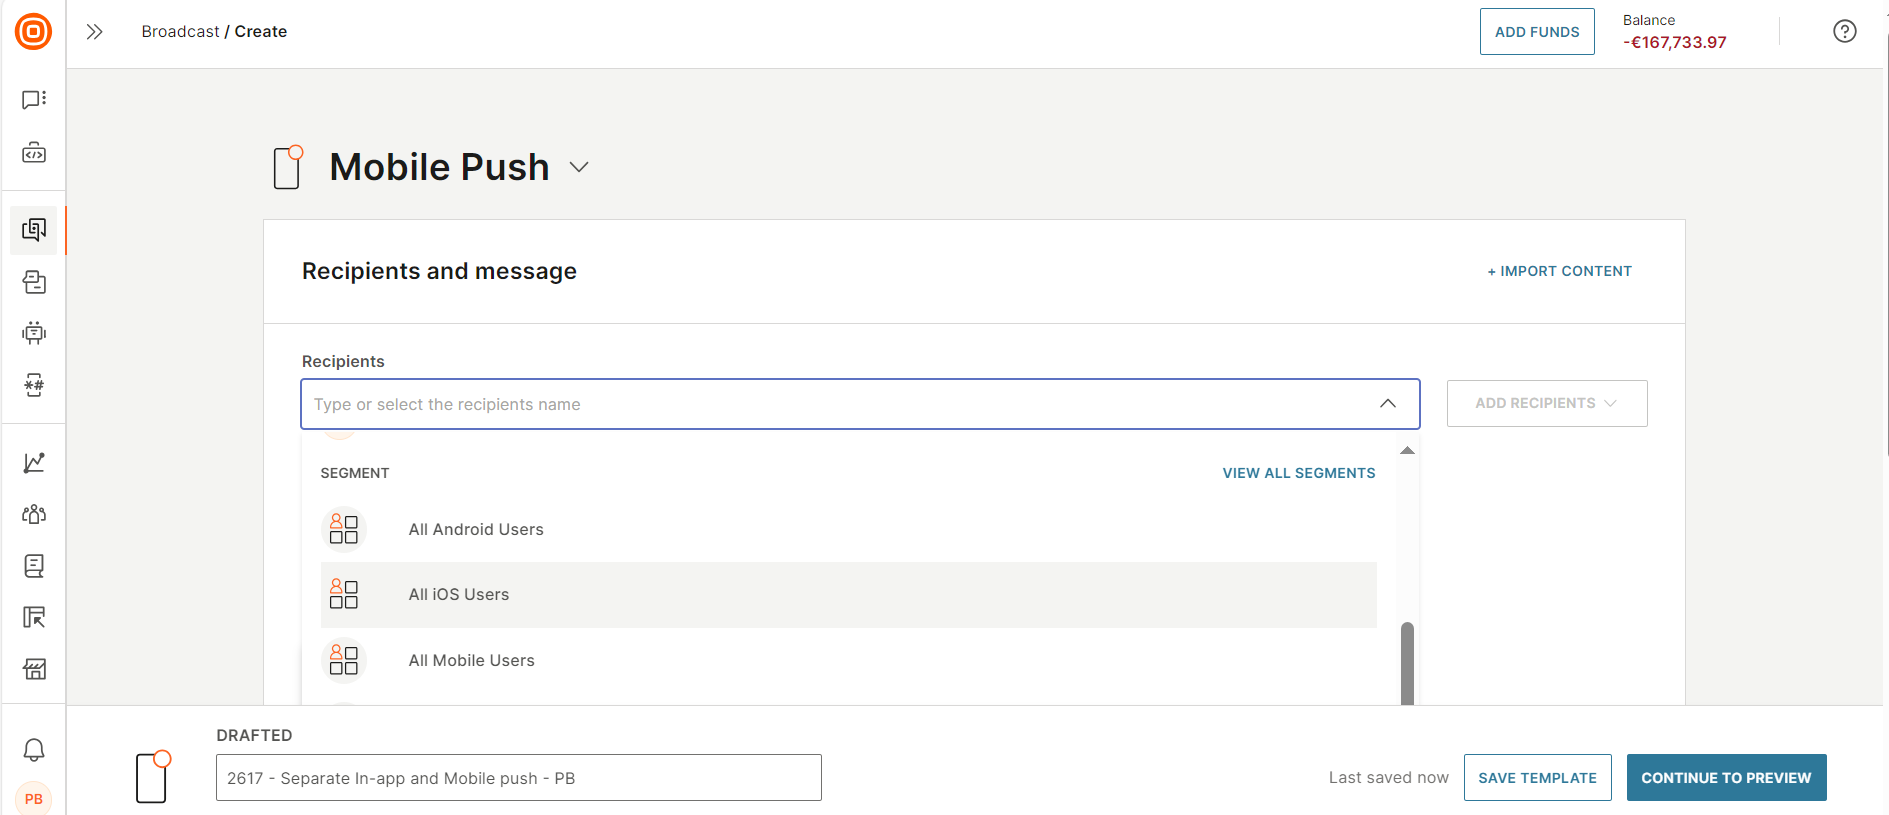
Sender
Select the mobile application that sends the push notifications. The system checks whether the recipients are associated with the selected app.
Content
Select Push notification. Configure the push notification
Configure message scheduling
To schedule the broadcast, go to the Message scheduling section of the Create a broadcast screen. Set the start date and time, delivery time window, and time zone.
Send-time optimization
Enable the broadcast to determine the best time to send messages to end users. For more information, refer to the send-time optimization documentation.
Configure tracking and reporting
Enable delivery reports over API pull
Select this option to identify the number of delivered messages.
Push delivery reports to webhook
Subscribe to receiving information in your webhook about delivery of messages.
Data Payload
Select additional data from stored or imported contacts and add it to the message. This data is visible in message reports.
You can use placeholders from person profiles and tags. Example: first name and country. The default placeholder is a phone number.
You can use the data to find end user messages in Logs. Example: Use the phone number to find the messages sent to that number.
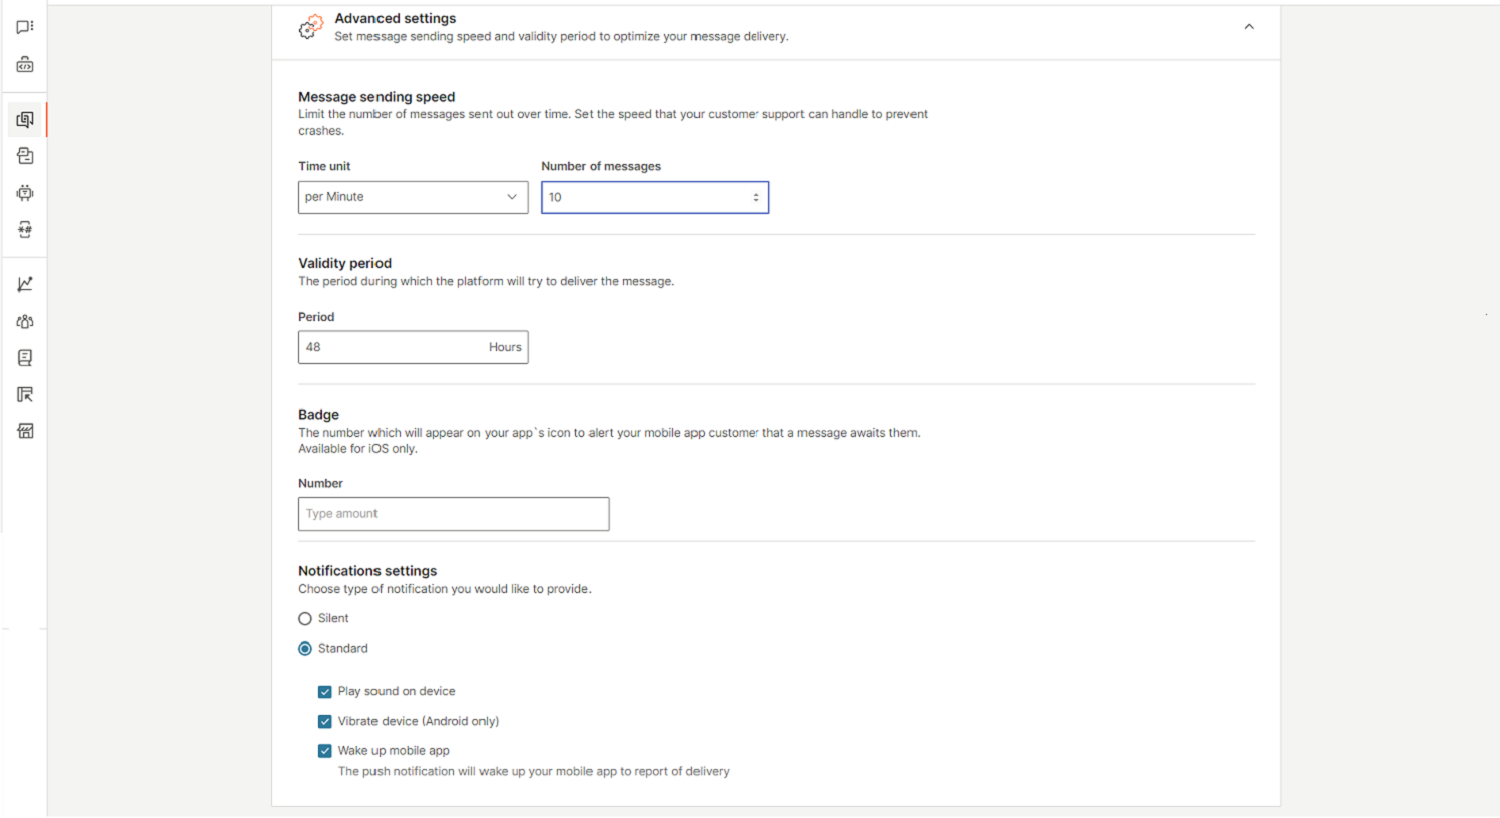
Configure advanced settings
Message sending speed
Use this field to control the rate at which messages are sent from the platform to the mobile app. Enter the number of messages that you want to send within a specified period.
Validity period
The period during which the broadcast tries to deliver the message to the end user. If the validity period is over and the message has not reached the mobile device, the message expires and is canceled automatically.
The default value is 48 hours.
Badge
In the Badge section > Number field, specify the number to be displayed on your mobile app's icon to alert the end user that a message is waiting for them.
This option is available only in iOS.
Notification settings
Select one of the following options.
- Silent: When you use this option, the notification is not displayed in the Notification center. Use this option to send delivery information to a mobile device over custom payload, or to show the notification within the app without showing a push notification.
- Standard: Show the notification as a push notification and within the app. You can also select the following options.
- Play sound on device
- Vibrate device (Android only)
- Wake up mobile app: The push notification wakes up the mobile app when the message is delivered
Configure the Push notification [#configure-push-notification]
In the Mobile push editor, configure the following fields. Select Finish editing after making the changes.
Create the notification [#create-push-notification]
Configure the following fields in the Design tab.
Title (Optional)
Add the title of the notification. You can add a maximum of 50 characters including spaces, special characters, emojis, and placeholders.
Message
Create the content of the notification. Personalize your message with placeholders from People profiles. Example: First name.
You can add a maximum of 2,048 characters, including spaces, special characters, new line, emojis, and placeholders.
The push notification is cut off when it is displayed in the Notification center of the device. The cut-off length depends on the device operating system. The preview reflects the approximate device behavior.
In the Inbox, the entire message is displayed.
On-tap action
Define the action to be performed when the end user selects the notification. Select one of the following actions.
-
App home screen (default): Opens the home screen of the mobile application.
-
Open URL within a webview: Loads a specified webpage inside the mobile application, without opening an external browser. Specify the URL of the webpage. For more information, refer to the iOS or Android documentation.
-
Page in mobile app: Redirects the end user to a specific section in the mobile application. Specify the deep link for the section. For more information about enabling deep links, refer to the iOS or Android documentation.
-
Open URL in browser: Loads a specified webpage in an external browser. Specify the URL of the webpage.
-
Open chatbot in LiveChat: Redirects the end user to a Live Chat chatbot. To redirect the end user to a specific dialog in a chatbot, include the relevant Keyword.
NoteYou must have an active Live Chat chatbot that uses an active Live Chat widget as the sender.
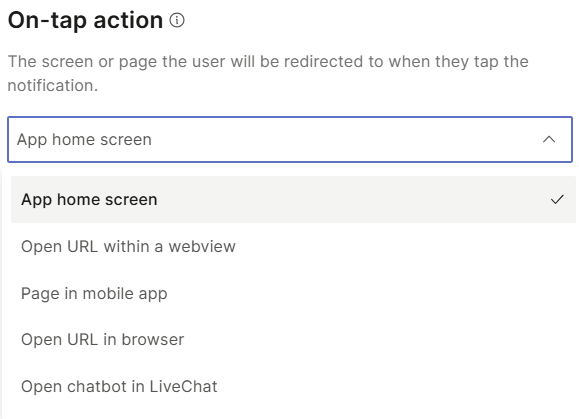
Image (Optional)
Select Add image to add an image to the notification. You can either upload the image or add a publicly-accessible URL of the image file.
| Maximum file size | 5 MB |
| Supported file formats | .png, .jpg, .jpeg, .gif In Android devices, GIFs are displayed as static images. |
To add to the user experience, configure rich notification settings in the push notification. For more information about the supported formats and settings, refer to the following documentation.
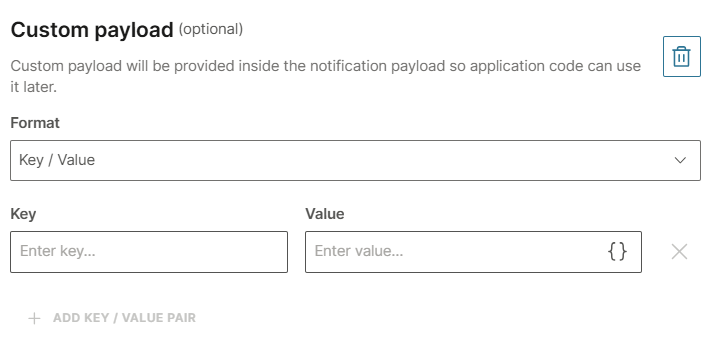
Custom payload (Optional)
Add a custom payload to the Push notification payload to include additional data that can be used in later steps of the end user's journey.
The payload is sent together with the push notification over the Push notification cloud service, which manages delivery to end users' devices.
To enable custom payload, select Add custom payload.
In the Format field, select either Key/value or JSON and configure the fields.
If you configure this field, you must implement custom payload processing in the mobile app.
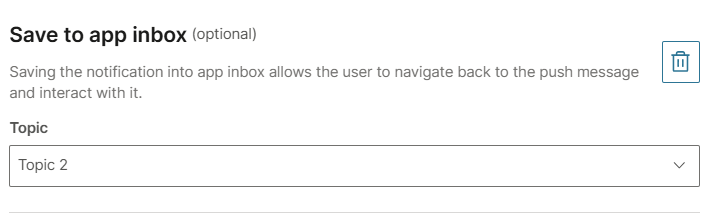
Save to app inbox (Optional)
This field is applicable if you use inbox for Mobile push notifications.
Configure this field to save the notification in the app inbox after end user dismisses the notification.
Select Save to app inbox. In the Topic field, select the topic to add to the notification.
Mirror push notification
In addition to showing a push notification, you can also show the notification within the app. When the end user is using the app, the notification is displayed as a pop-up within the app.
The mirrored notification uses the message title, message content, image, and on-tap action from the push notification.
Select Add mirror push notification and configure the following fields.
Primary Button: This button triggers the action that you select in the On-tap action field. In the Button text field, specify the text to display on the button. Example: Open.
Dismiss button: The end user can select this button to dismiss the notification within the app. In the Button text field, specify the text to display on the button. Example: Cancel.
If you send several notifications within the app, the mobile SDK displays only the most recently received message.
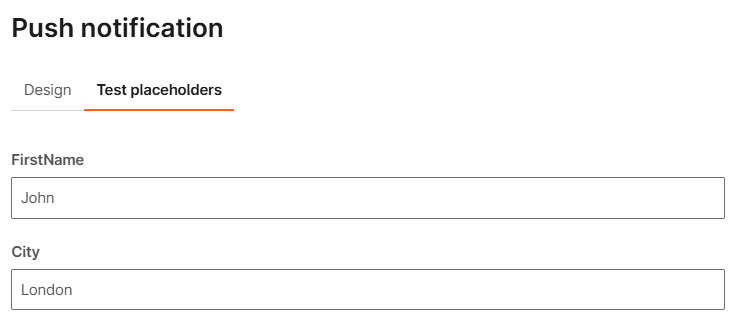
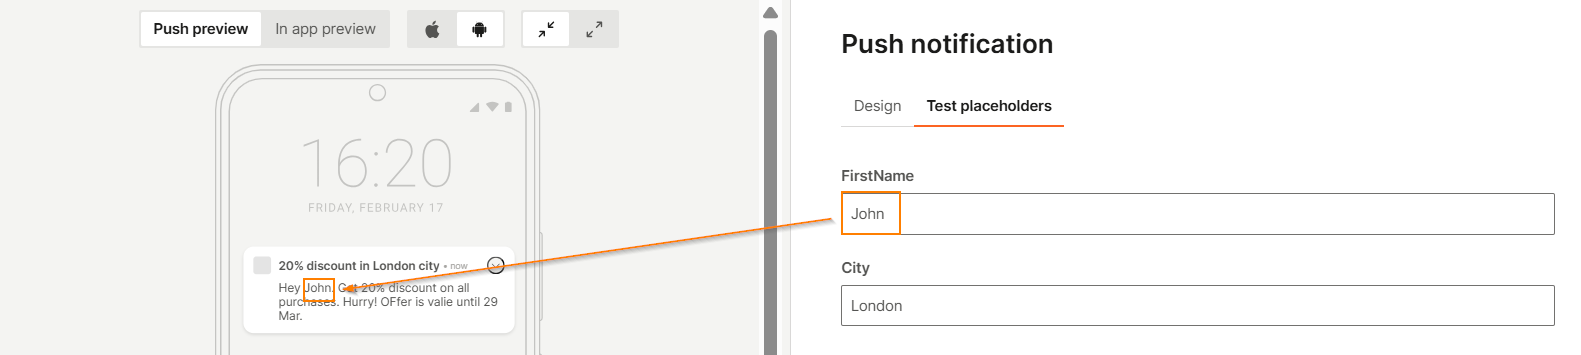
Test placeholders in the notification (Optional) [#test-placeholders]
If you used placeholders in any of the fields in the notification, you can test whether they work as expected. In the Test placeholders tab, add sample values for the placeholders.
Preview the notification [#preview-push-notification]
You can see what your notification would look like on an end user's device. You can preview the following.
- As a push notification or within the app.
- On Android and iOS devices
- As standard and expanded view
The push notification is cut off when it is displayed in the Notification center of the device. The cut-off length depends on the device operating system. The preview reflects the approximate device behavior.
In the Inbox, the entire message is displayed.
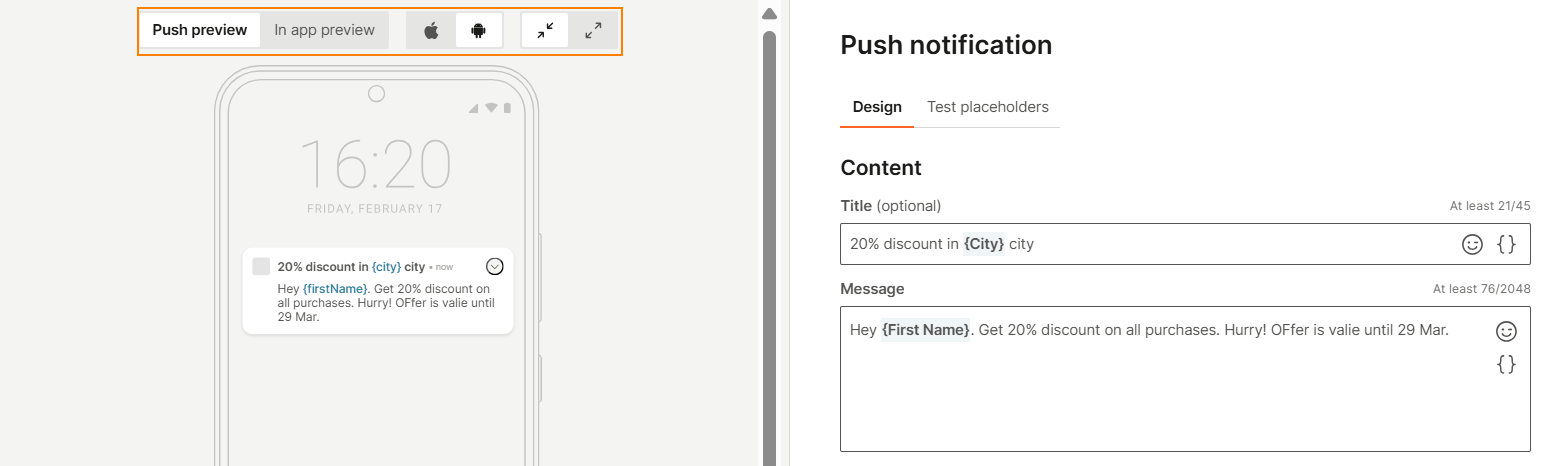
If you added sample values for placeholders, they are displayed in the preview.
Mirror push notifications [#mirror-push-notifications]
In addition to showing a push notification, you can show the notification within the app. When the end user is using the app, the notification is displayed as a pop-up within the app and overlaps a part of the screen. Use this feature for scenarios when you want to get the full attention of the end user and ask them to do something.
This feature is useful for the following reasons.
- If the end user misses a push notification, they can get the notification within their app.
- Mirrored push notifications are triggered within the app even if the end user has opted out from push notifications.
Supported SDK versions [#mirror-push-notifications-sdk-version]
Mirrored push notifications are supported on the following SDK versions.
| SDK | Supported version for mirrored push notifications |
|---|---|
| SDK for iOS | since 3.6.0 |
| SDK for Android | since 1.13.0 |
| SDK for Huawei | since 1.0.0 |
| Plugin for Cordova | since 0.7.0 |
| React Native | All versions |
| Flutter | All versions |
Send mirrored push notification over Broadcast and Flow [#mirror-push-notifications-over-broadcast-flow]
You can send notifications within the app in the following ways.
-
Show the notification as a push notification as well as within the app. Select Mirror push notifications inside an app in the Mobile push editor in the broadcast or flow.
-
Show the notification only within the app without showing it as a push notification. Do the following.
- Broadcast: Select Silent in Advanced - Notification settings.
- Flow: In the Send mobile push element, select Silent in the Delivery options - Push notification preferences - Type field.
For more information, refer to the Send Mobile push over Broadcast and the Send Mobile push over Flow sections.

Communication Templates [#communication-templates]
Use templates to build your communication campaign. Templates are useful for the following reasons.
- You can provide a consistent communication experience to end users.
- Instead of creating a communication from scratch, you can use an existing template and customize it.
- You can learn how to create a communication campaign.
You can either use predefined templates or create your own templates.
Flow templates [#flow-templates-communication-templates]
The following are some predefined templates and tutorials that you can use to build your Flow campaigns.
- Welcome series: Send a mobile app message to welcome new users to your product or service.
- Login reminder for mobile users: Send a mobile app message to provide the user a login reminder or to authorize access to your app or site.
- Engage new mobile users: Contact your new app users to increase engagement and encourage app usage.
- Engage inactive mobile users: Contact inactive users of your app to encourage them to return and engage.
- Favorite Reminder for mobile users: Remind end users that they have items in their shopping cart and encourage them to complete the purchase.
- Abandoned cart reminder for mobile users: Contact end users who have items in their shopping cart but have still not completed their order.