Flow templates
Flow templates are pre‑built flows that help you design and launch campaigns. Instead of starting from scratch, you can select a ready‑made template and customize it to meet your requirements.
Templates are useful for the following reasons:
- Consistency: Ensure that end users receive a consistent communication experience across campaigns.
- Efficiency: Save time by customizing existing flow templates instead of creating new ones from scratch.
- Reusability: Create once and reuse across multiple campaigns instead of recreating flows.
- Learning tool: View templates to learn how flows are structured and how to create flow campaigns.
You can access Flow templates on the Templates page of the Infobip web interface.
Types of Flow templates
Flow templates are of the following types.
- Predefined: Ready‑made templates that are designed by Infobip.
- Custom: User‑created templates that are designed to meet specific business needs.
Predefined templates [#predefined-templates]
Predefined templates are ready‑made flow templates that are designed by Infobip for the most common use cases.
Examples of predefined templates [#predefined-templates-examples]
The following are examples of predefined Flow templates.
- Cart abandonment
- Survey
- Simple chatbot over Viber
- Payment and appointment reminders
- Promotional messages
- Welcome messages and more.
Behavior of predefined templates
- You cannot delete a predefined template.
- You can access templates only for the channels that are set up in your Infobip account.
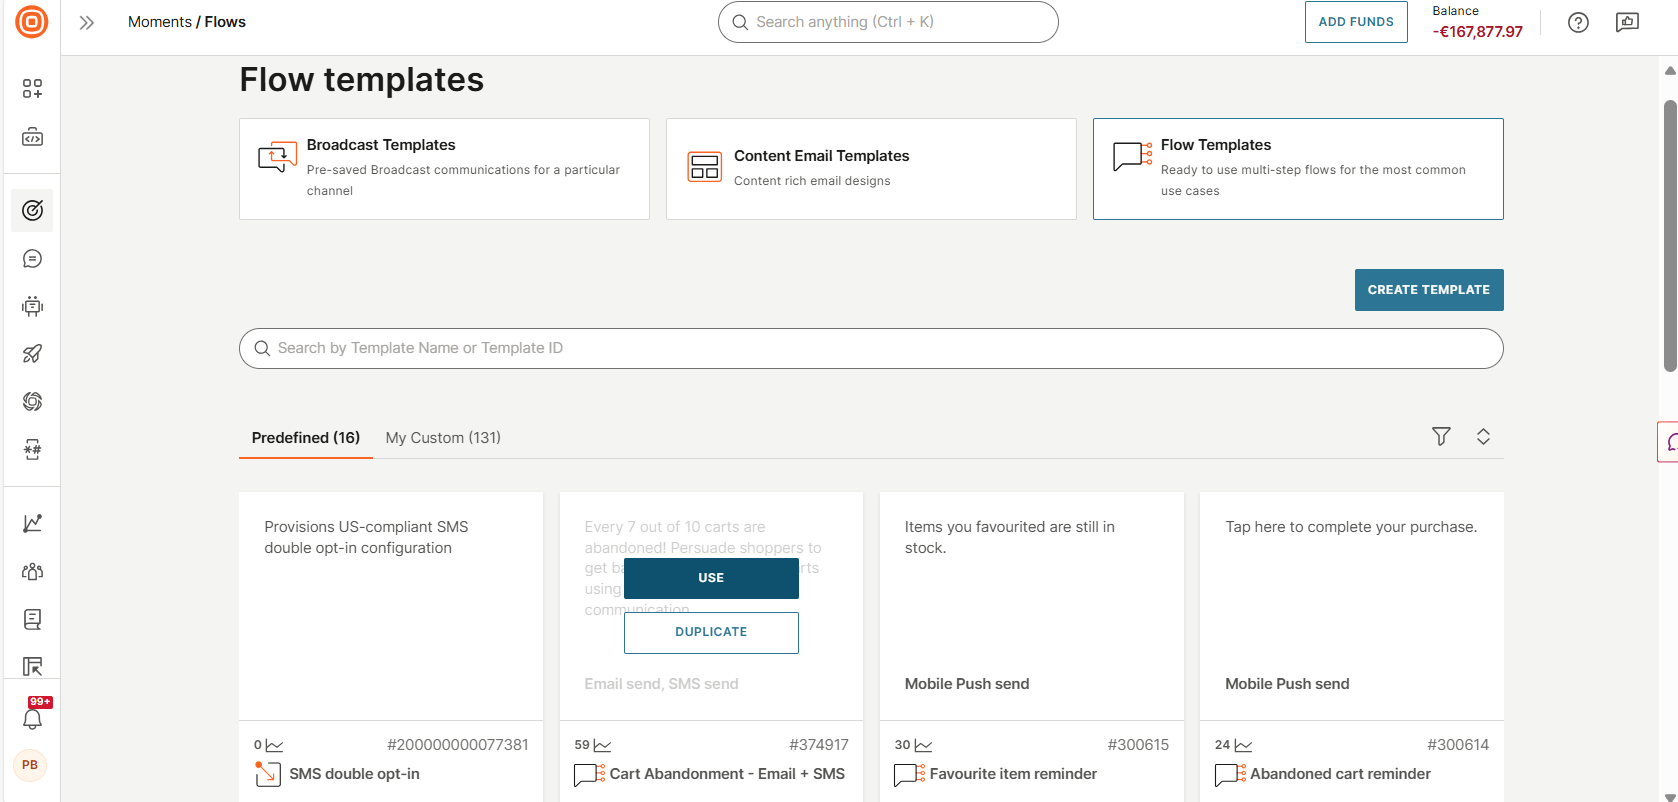
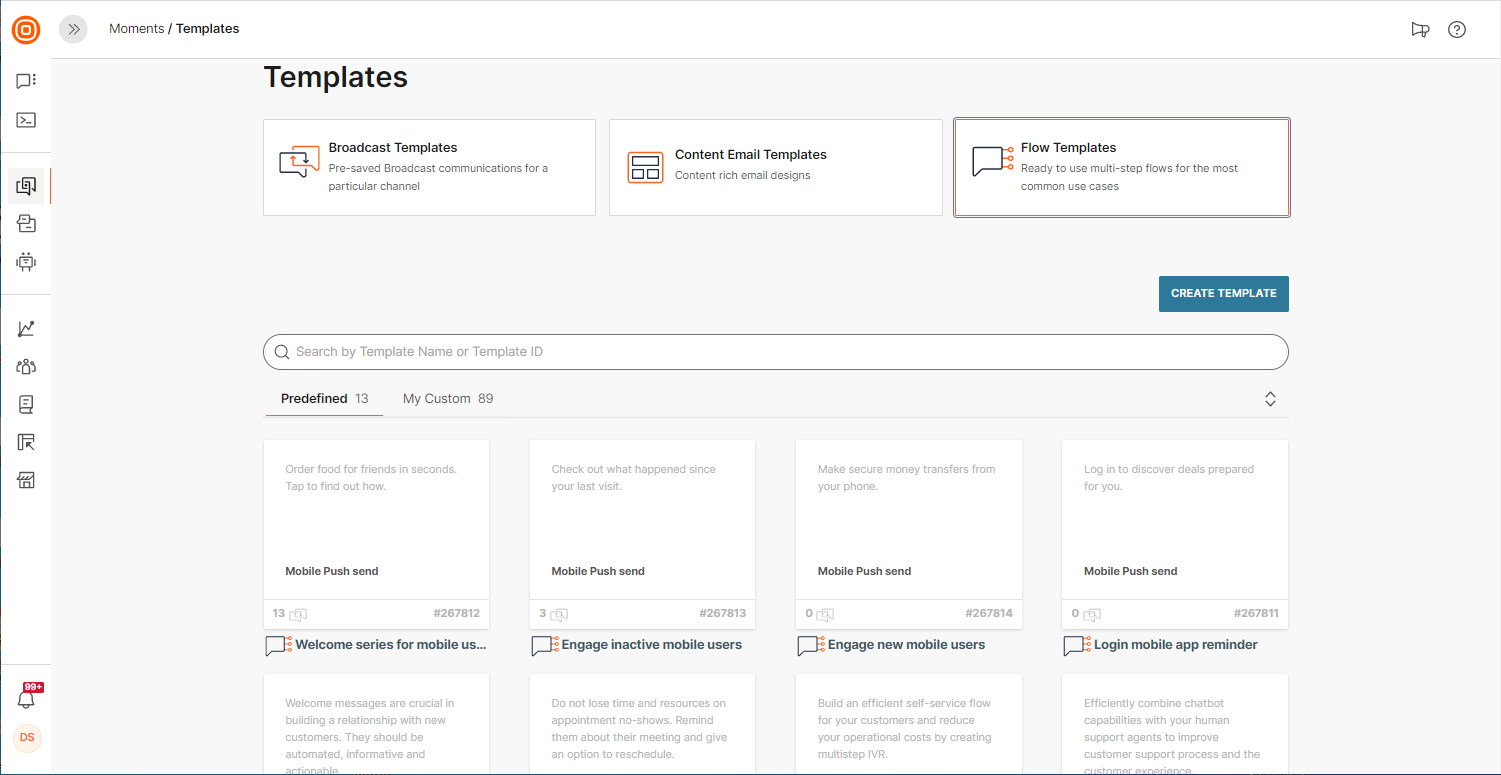
Predefined templates page
The Predefined templates page shows a list of all predefined templates that are available in your account.
To access this page, go to the Infobip web interface > Moments > Templates > Flow templates > Predefined tab.
On this page, you can do the following:
- View a list of predefined templates.
- Search for a template: Use the Search box to search by template name or ID.
- Filter by template tags. Select the Filter icon.
- Sort templates. Select the Sort icon.
- Duplicate a template to create a custom template.
- Create a flow from a template.
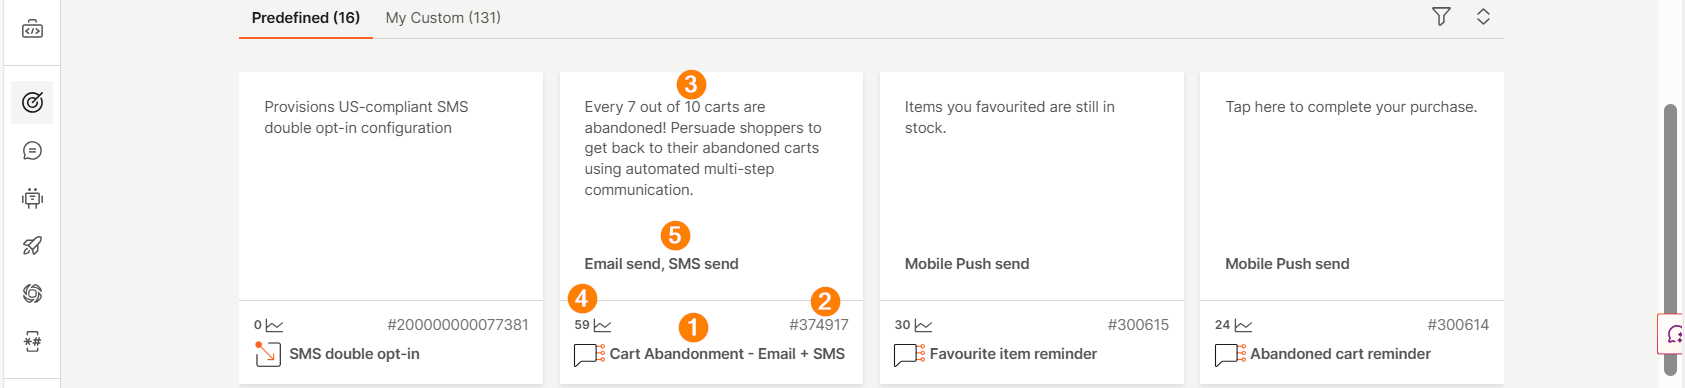
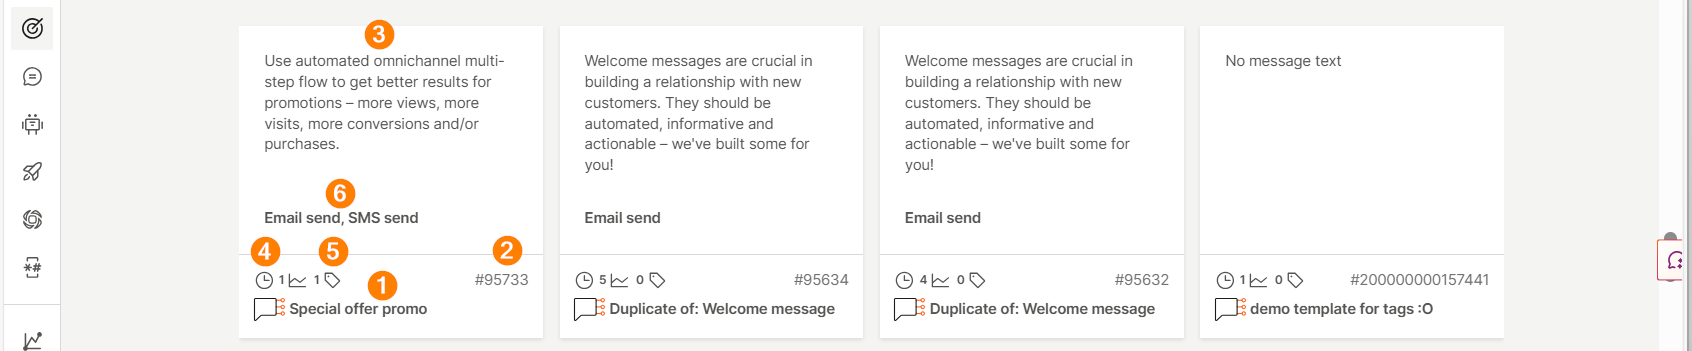
For each template, you can view the following information:
- Name
- ID
- Description
- Number of communications in which the template is used
- Send elements that are used in the template
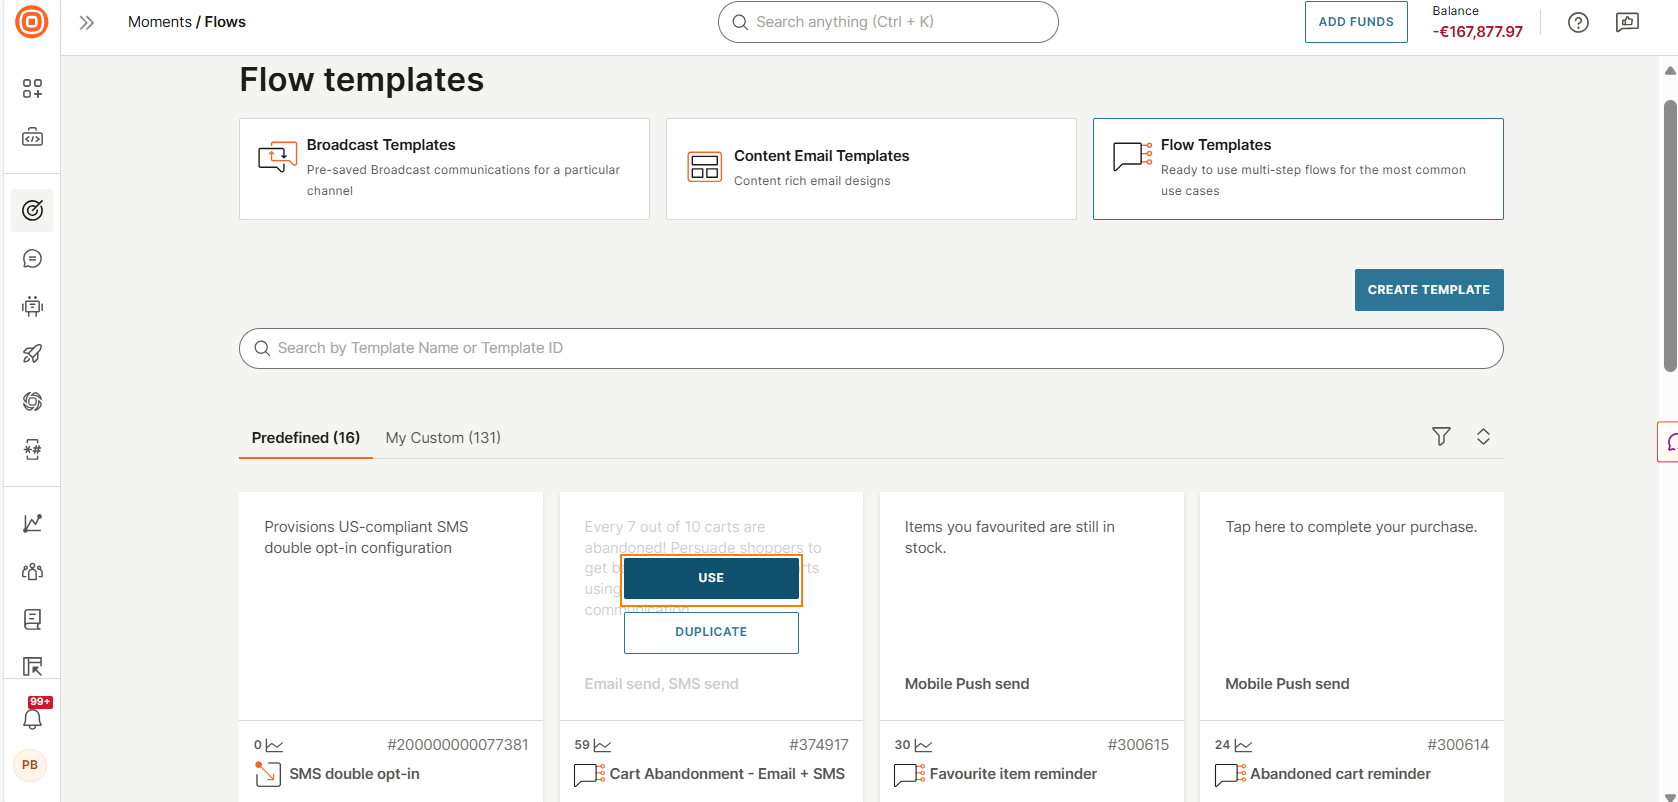
Create a flow from a predefined template [#predefined-template-create-flow]
To create a flow from a predefined template, follow these steps.
- On the Infobip web interface, go to Moments > Templates.
- Select Flow templates.
- Find the required template.
- Select Use.
A new flow is created and is listed in the All flows page.
Create a custom template from a predefined template (Duplicate) [#duplicate-predefined-template]
You can duplicate a predefined template to create a custom template.
Follow these steps:
- On the Infobip web interface, go to Moments > Templates > Flow templates > Predefined tab.
- Find the required template.
- Select Duplicate.
The new template is created and is listed in the My custom tab.

Custom templates [#custom-templates]
Custom templates are templates that you create to meet specific business needs.
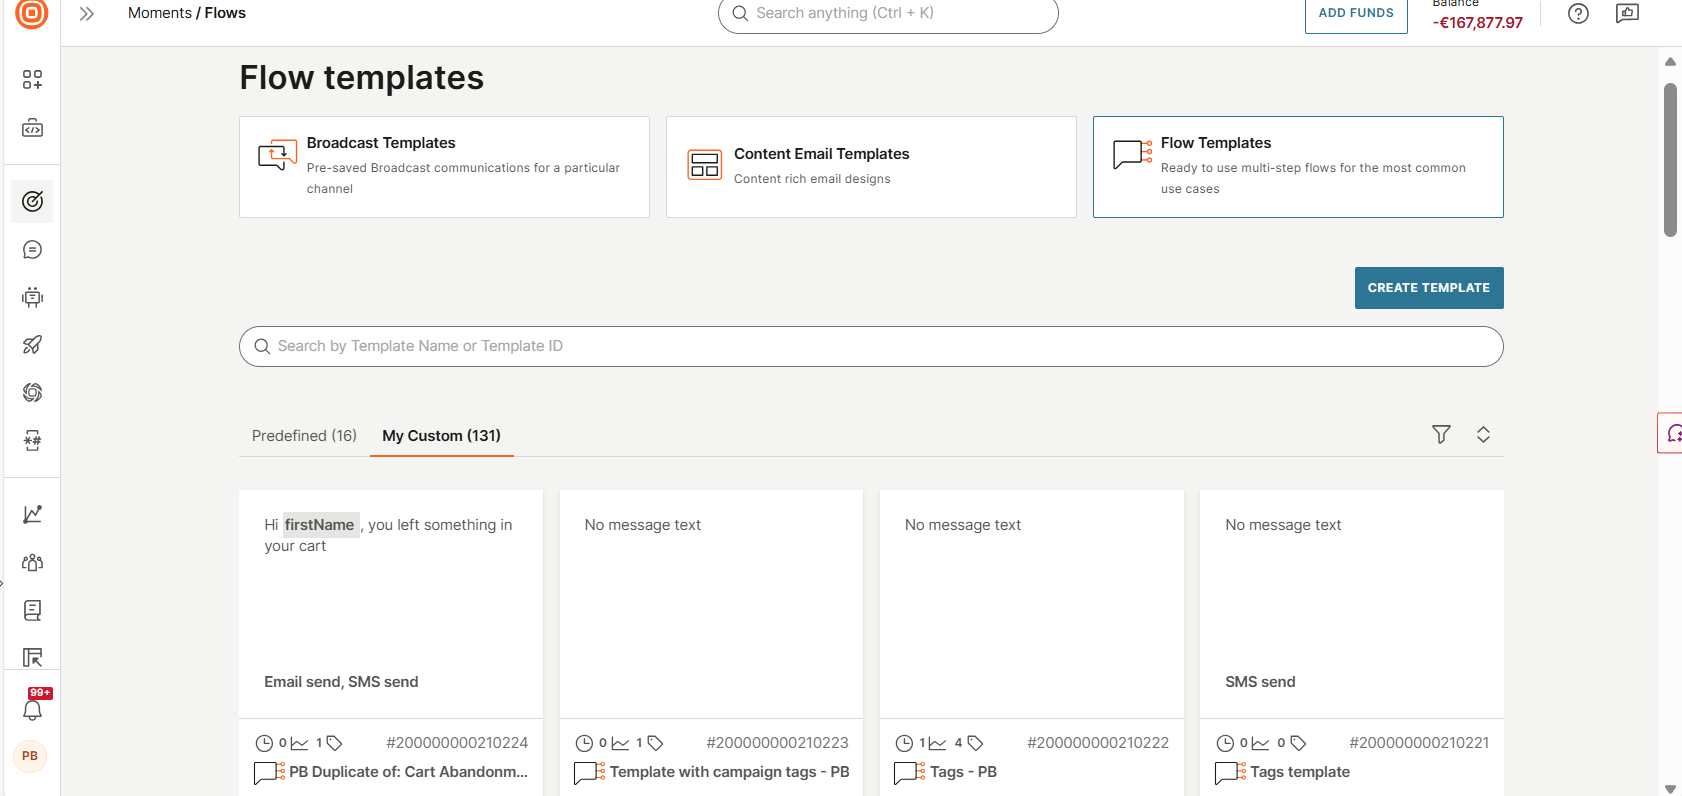
Custom templates page
The Custom templates page shows a list of all custom templates that are available in your account.
To access this page, go to the Infobip web interface > Moments > Templates > Flow templates > My custom tab.
On this page, you can do the following:
- View a list of custom templates.
- Search for a template: Use the Search box to search by template name or ID.
- Filter by template tags. Select the Filter icon.
- Sort templates. Select the Sort icon.
- Create a template from scratch.
- Edit a template.
- Delete one or more templates.
- Duplicate a template.
- Create a flow from a template.
- Manage template tags for one or more templates.
For each template, you can view the following information:
- Name
- ID
- Description
- Number of communications in which the template is used
- Number of template tags
- Send elements that are used in the template
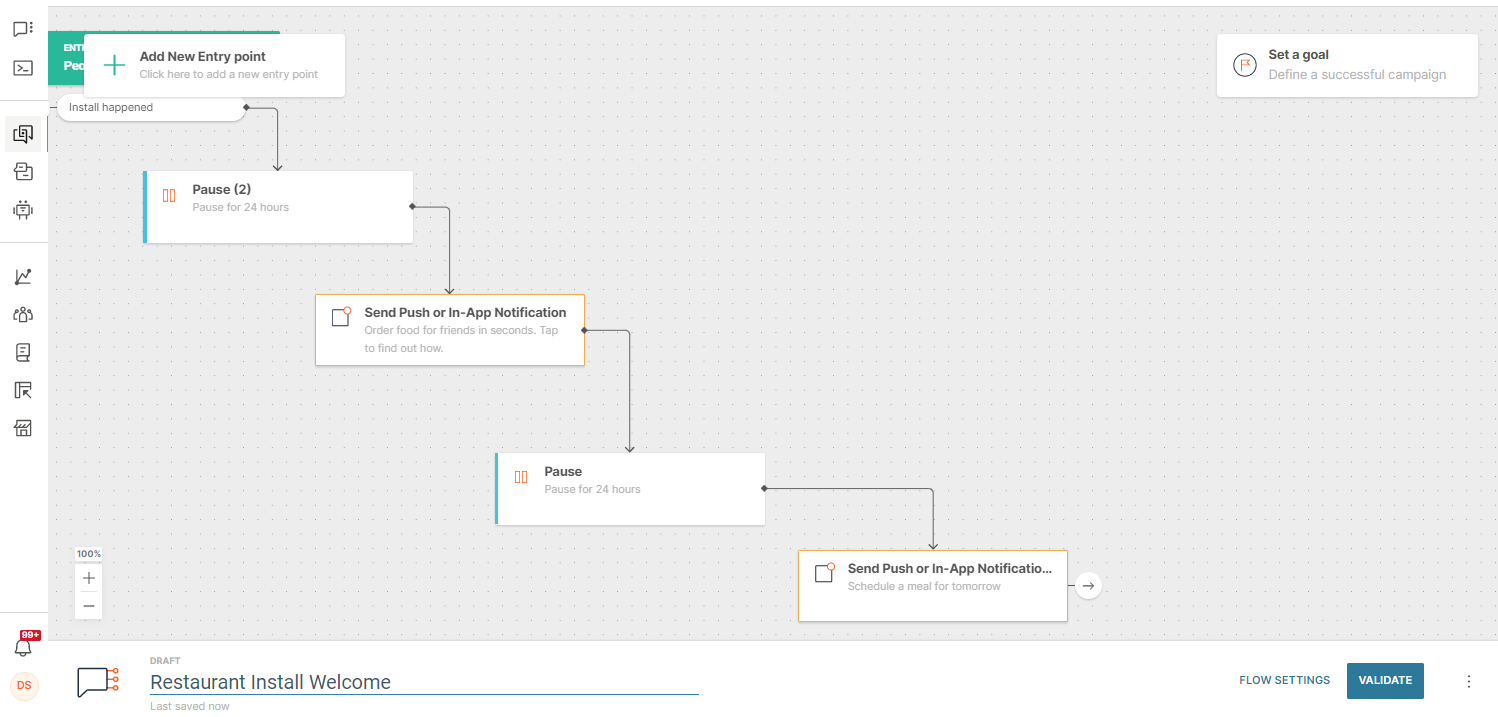
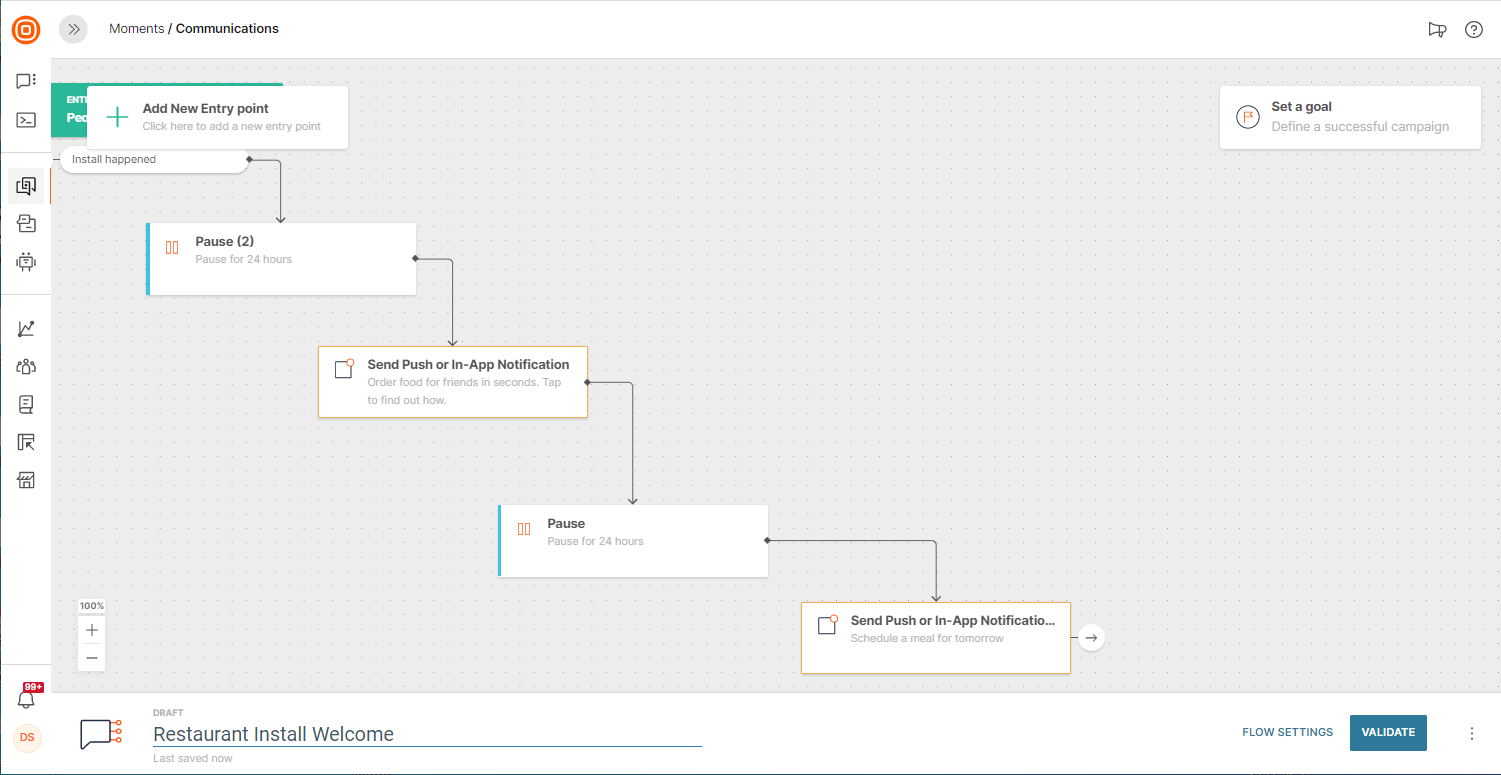
Create a custom template from scratch [#custom-templates-create-from-scratch]
To create a custom template from scratch, follow these steps.
- On the Infobip web interface, go to Moments > Templates.
- Select Flow templates.
- Select Create template.
- Select an entry point and create the flow. For more information, refer to the Start from scratch documentation.
- Name the template.
- (Optional) Add template tags to the template.
The flow is automatically saved as a template and is listed in Moments > Templates > Flow templates > My custom tab.
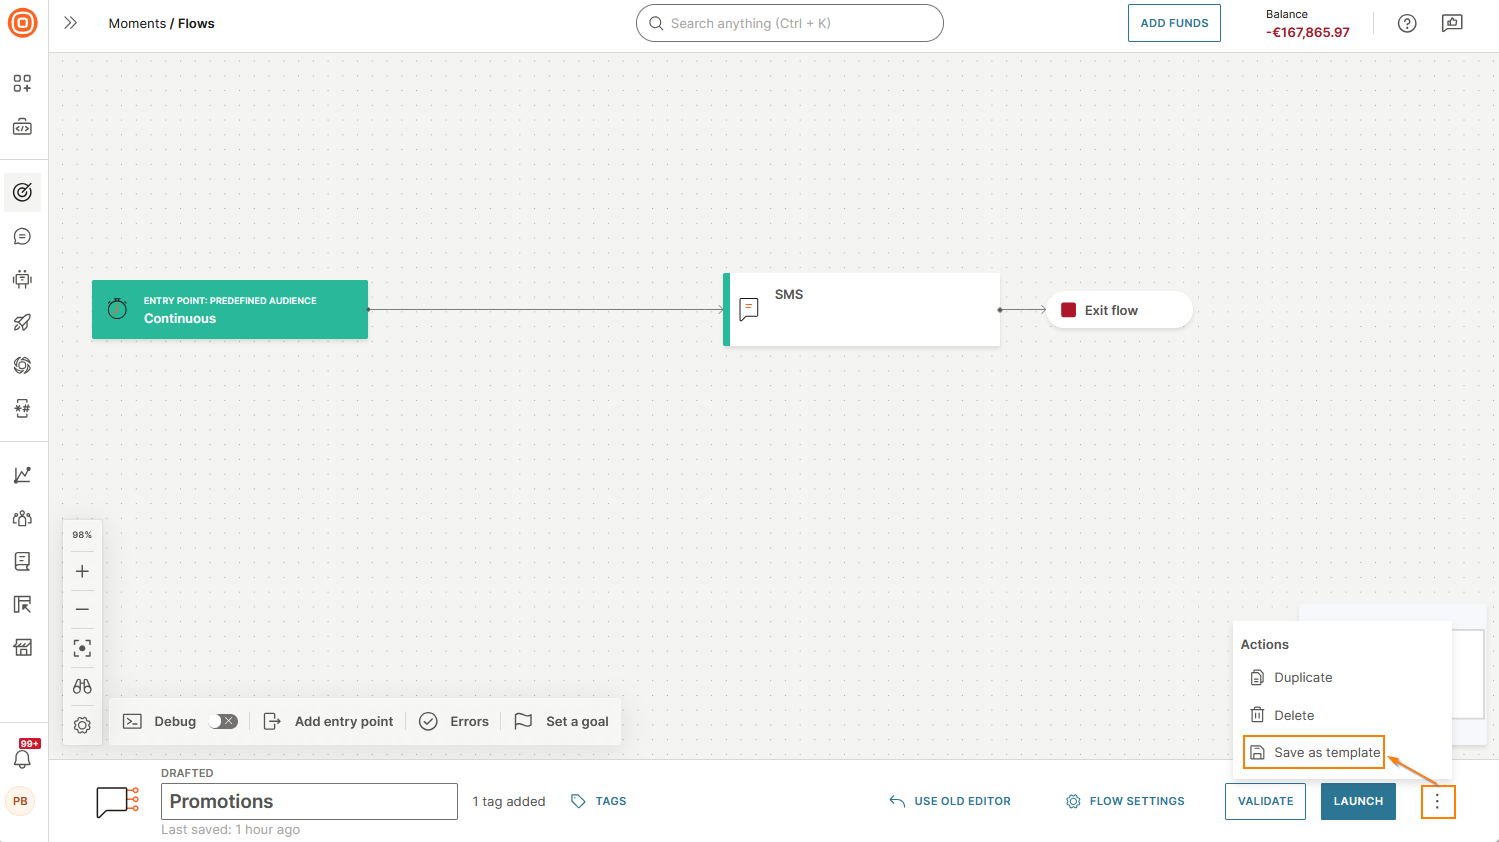
Create a custom template from an existing flow [#custom-templates-create-from-flow]
To save an existing flow as a template, select the three dots in the footer and then select Save as template.
Edit a custom template [#custom-templates-edit]
To edit a custom template, follow these steps.
- On the Infobip web interface, go to Moments > Templates.
- Select Flow templates > My custom tab.
- Find the required template.
- Select Edit.

Delete custom templates [#custom-template-delete]
Delete a single template
To edit a single custom template, follow these steps:
- On the Infobip web interface, go to Moments > Templates.
- Select Flow templates > My custom tab.
- Find the required template.
- Select the three-dots menu and select Delete.
Delete one or more templates
To edit one or more custom templates, follow these steps:
- On the Infobip web interface, go to Moments > Templates.
- Select Flow templates > My custom tab.
- Select one or more templates that you want to delete.
- Select Delete templates.

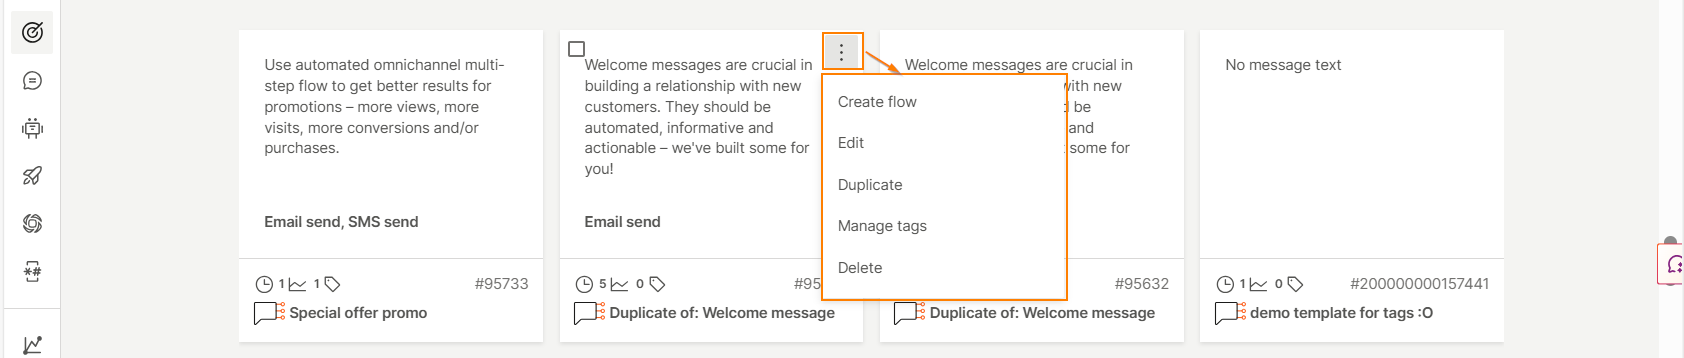
Duplicate a custom template [#custom-template-duplicate]
To duplicate a custom template, follow these steps:
- On the Infobip web interface, go to Moments > Templates.
- Select Flow templates > My custom tab.
- Find the required template.
- Select the three-dots menu and select Duplicate.
A new custom template is created.

Create a flow from a custom template [#custom-templates-create-flow]
To create a flow from a custom template, follow these steps:
- On the Infobip web interface, go to Moments > Templates.
- Select Flow templates > My custom tab.
- Find the required template.
- Select Use.
A new flow is created and is listed in the All flows page.
If the template contains template tags, these are not added to the flow.
Template tags [#template-tags]
Template tags are labels that are used to categorize and organize templates. Example: Organize by purpose, channel, or business unit.
Difference between template tags and campaign tags
Template tags are different from campaign tags. The following table explains these differences:
| Template tags | Campaign tags |
|---|---|
| Used to categorize templates | Used to categorize Flow campaigns |
For each flow template, the template tags are displayed on the Flow templates page and within the template | For each flow, the campaign tags are displayed on the Flows page and within the flow |
| Managed through the Flow templates page | Managed through Campaign tags |
Example: Tag templates by business unit, use case, or channel type | Example: Tag campaigns by audience, region, or campaign goal |
Create a template tag
You can create template tags only for custom templates.
To create a template tag, follow these steps:
- On the Infobip web interface, go to Moments > Templates.
- Select Flow templates > My custom tab.
- Select any template.
- Select Manage tags > Create new tag.
- Enter the name of the template tag and select the checkmark.
The template tag is now available to add to custom templates.

Add or remove template tags from custom templates
You can add or remove template tags only from custom templates.
Add or remove template tags from a single custom template
To add or remove template tags from a single custom template, follow these steps:
- On the Infobip web interface, go to Moments > Templates.
- Select Flow templates > My custom tab.
- Find the required template.
- Select the three-dots menu and select Manage tags.
- Select one or more template tags from the list to add or remove them.

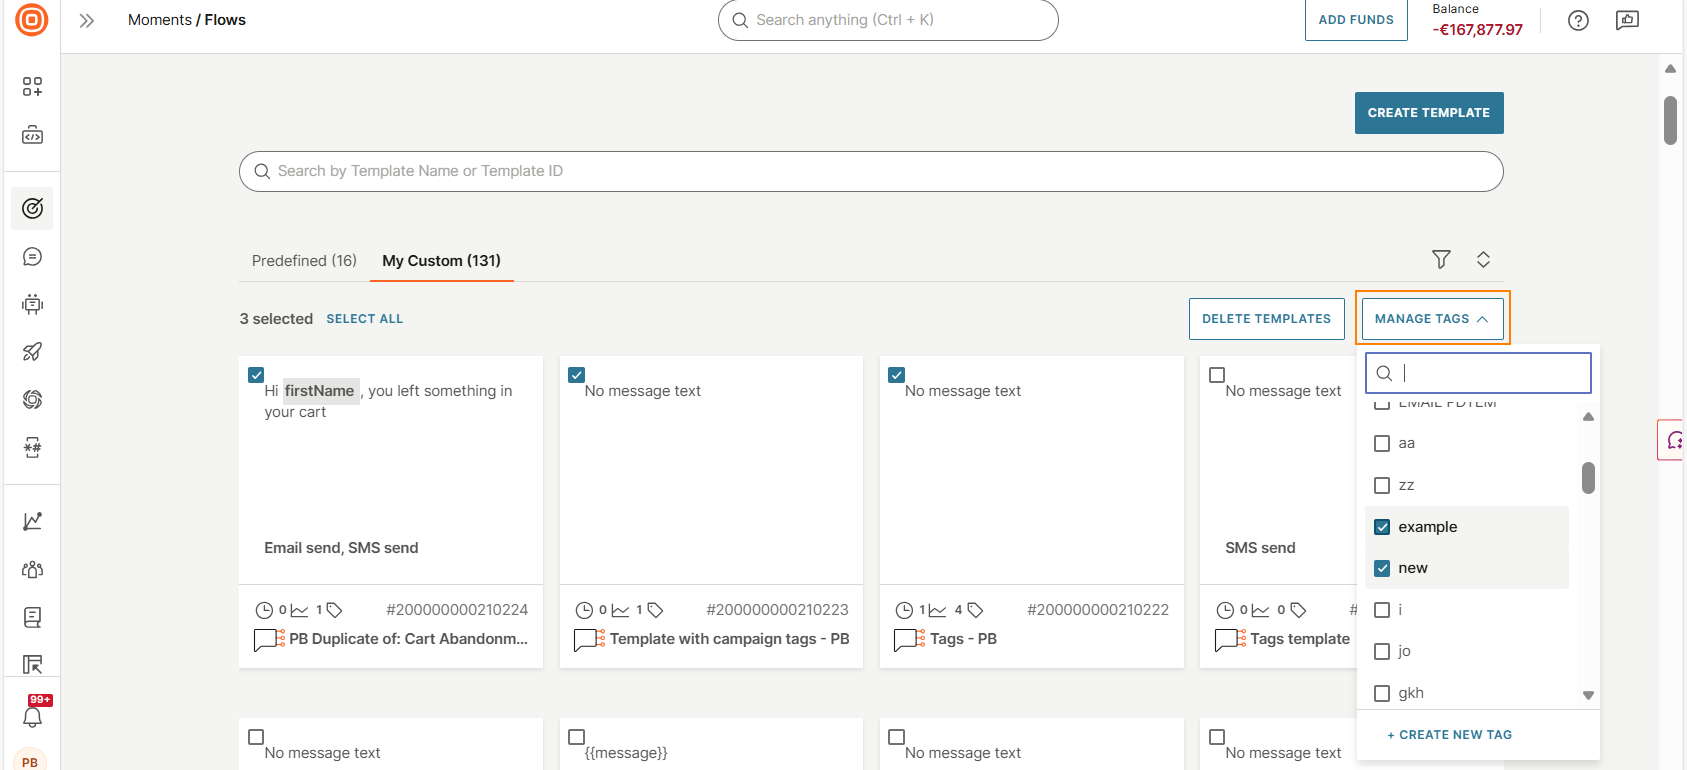
Add or remove template tags from one or more custom templates
To add or remove template tags from a one or more custom templates, follow these steps:
- On the Infobip web interface, go to Moments > Templates.
- Select Flow templates > My custom tab.
- Select one or more templates for which you want to add or remove template tags.
- Select Manage templates.
- Select one or more template tags from the list to add or remove them.