Frequency Capping
When you run multiple marketing campaigns at the same time across your business, there is a risk that you may send your users too many messages in a short time period. This may lead the user to feel overwhelmed and there is a risk that the they will disengage from your marketing communications (i.e. switch off push notifications or unsubscribe from email or messages), uninstall your app, or even move away from your brand completely.
Use frequency capping to limit sending too many messages to users and ensure that only the most important communications are delivered.
With frequency capping you can control the number of messages that a person will receive during a defined time span and prioritize the importance of your Flows to ensure that key communications, like password reset messages, always arrive.
When a user enters a flow with a capping rule and reaches a channel messaging element the system will validate how many 'sends' are available for the user.
If there are empty slots (i.e. the user has not reached the message send limit you define) then the system will check the flow priority. If there are no sends pending from the other high priority flows then the system will send the message to the user.
Create
A Frequency Capping plan comprises of three main elements:
- Flows - Add the Flows that the capping plan will work on
- Rules - Set the frequency capping rules the plan will follow i.e. channels, number of messages and frequency
- Priorities - Set the priority order of the Flows in the capping plan
The Frequency Cappingpage in Moments is where you can manage the frequency capping for your Flows.
To get started take a look at Add Flows
Add Flows [#add-flows-create]
To get started we need to create the capping plan and begin assigning flows to it.
There must be a minimum of one flow added to the capping plan to be able to activate it. Additionally, a flow can only be part of one capping plan. The flow will not be selectable if you attempt to add it to another capping plan.
-
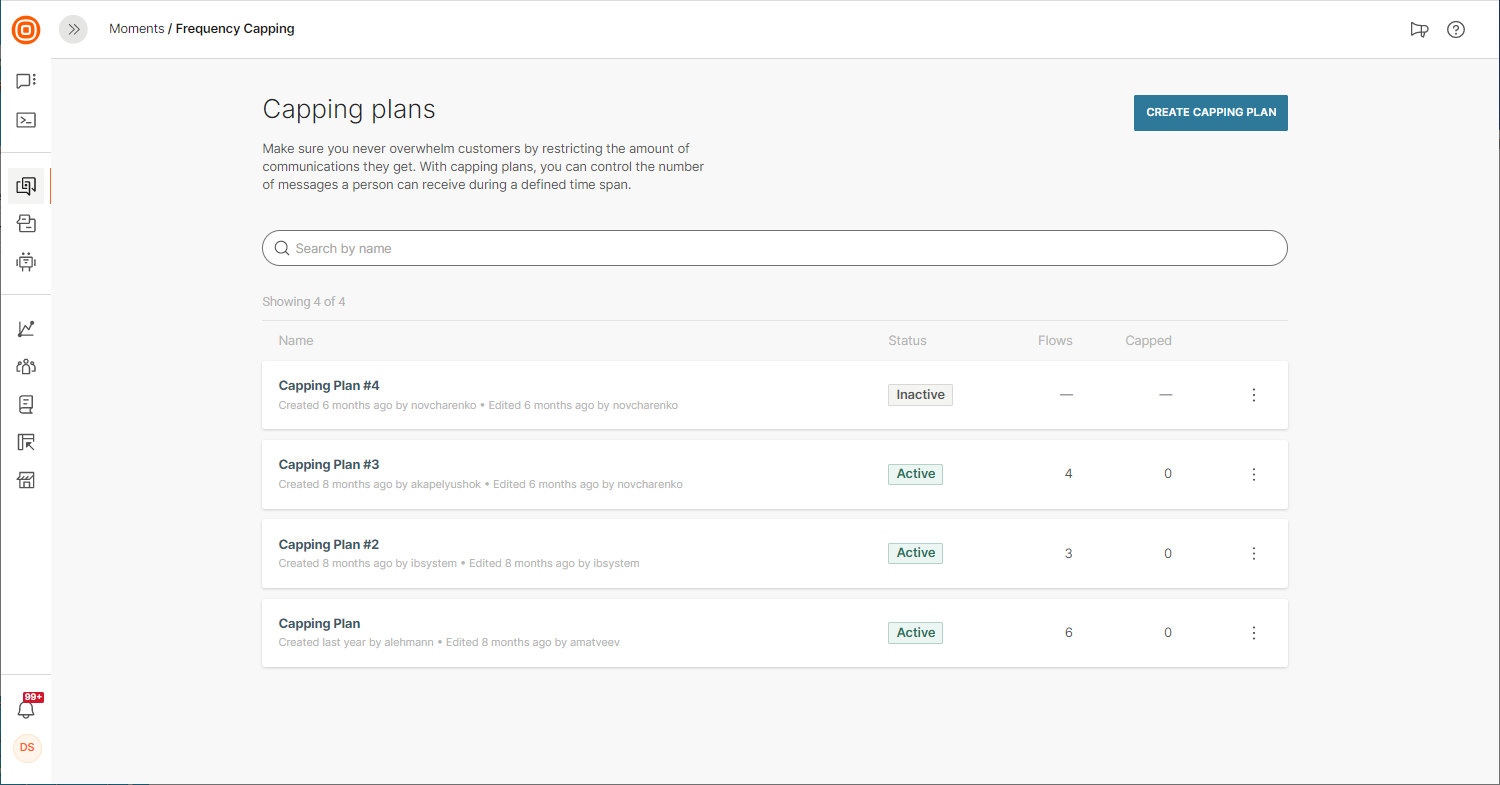
Click Frequency Capping in Moments to access the capping plans area. You will see a list of all capping plans that have been configured for your account.
-
Click Create Capping Planto open the configuration page
-
Enter a name for the capping plan.
-
Click Add Flowto open the flow selector pane.
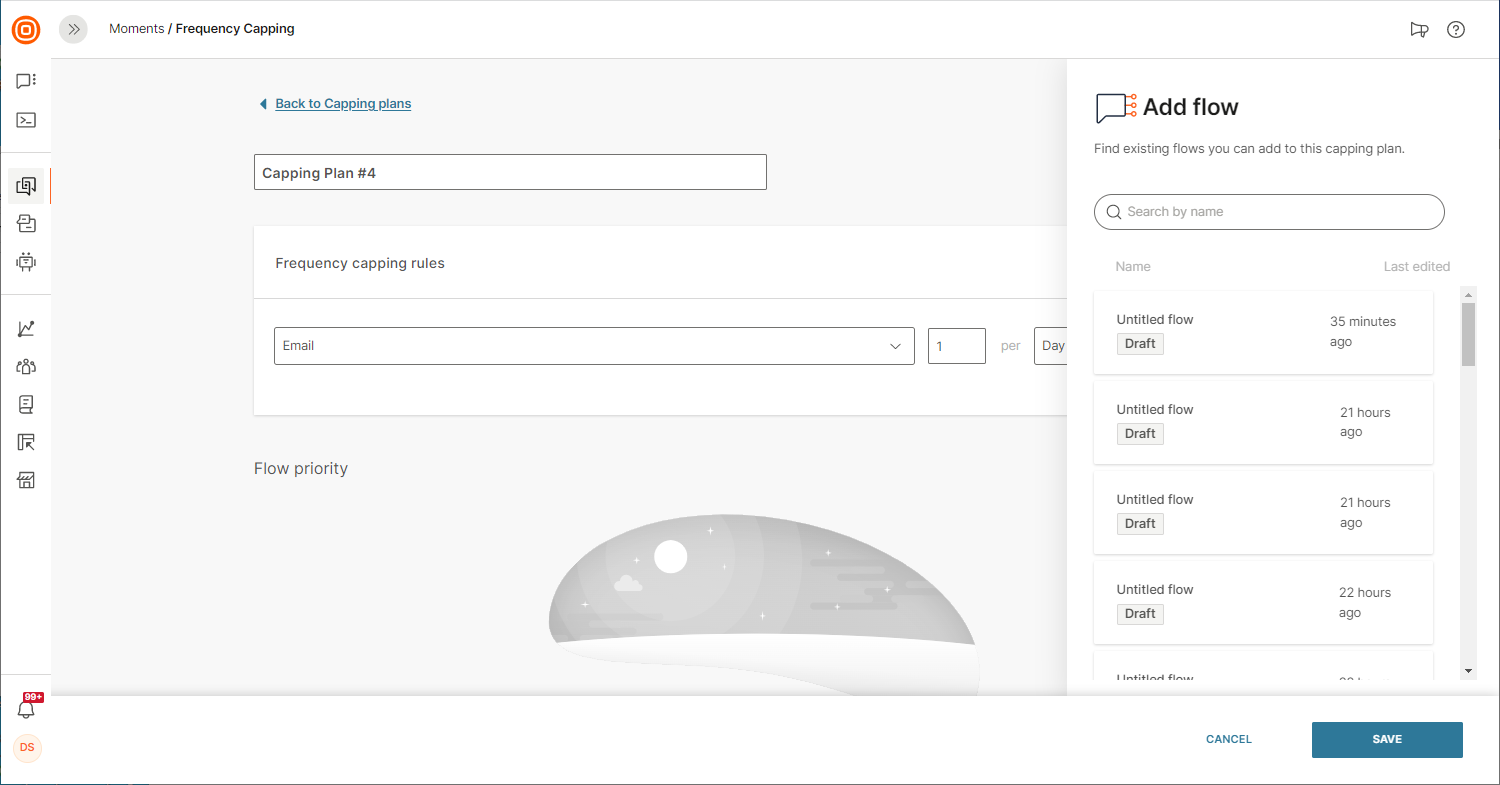
-
Add Flows that you want to include in your capping plan.
IMPORTANTFlows that are greyed out and cannot be selected may contain a throttling element (such as a delivery time window or send time optimization) or they are already in use in a different capping plan.
-
When you have added your flows then click away from the flow selector pane. You will see the flows listed and the flow status.
Your capping plan is still in an inactive state so you can always return to it and make edits if you wish.
Next, start applying frequency capping rulesthat will be applied to the flows.
Frequency Capping Rules [#frequency-capping-rules-create]
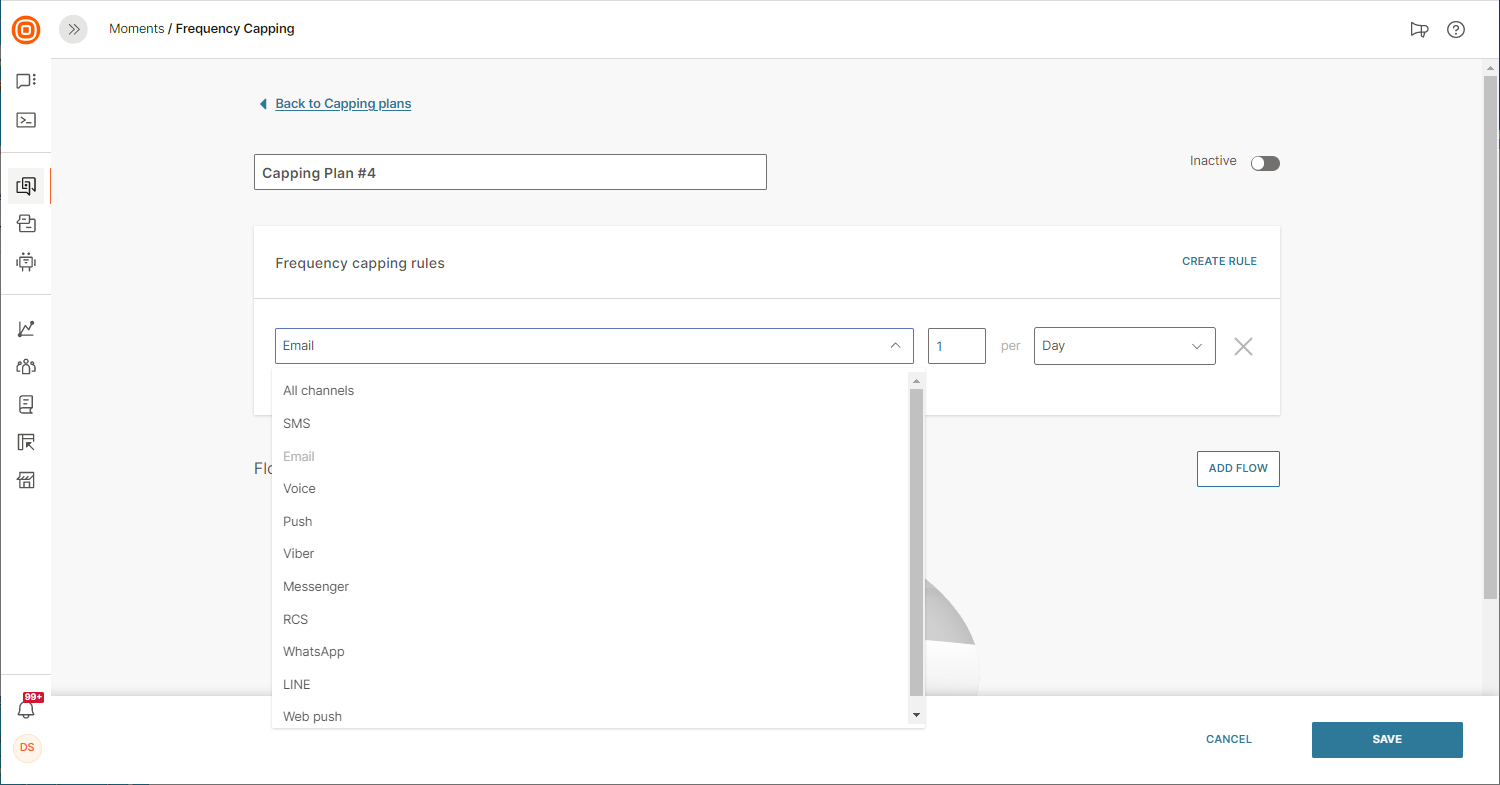
The rules you define in your frequency capping plan will determine the maximum amount of messages that will be sent per channel over a defined period.
You can set one rule per channel or implement multiple rules for different channels if you wish. Additionally, you can set the rule to run for 'All Channels' in your Flows.
To set a rule click Create Rule when you are viewing the capping plan you would like to edit. Select the channel, number of messages, and frequency (hour, day, week, month).
Prioritization [#prioritization-create]
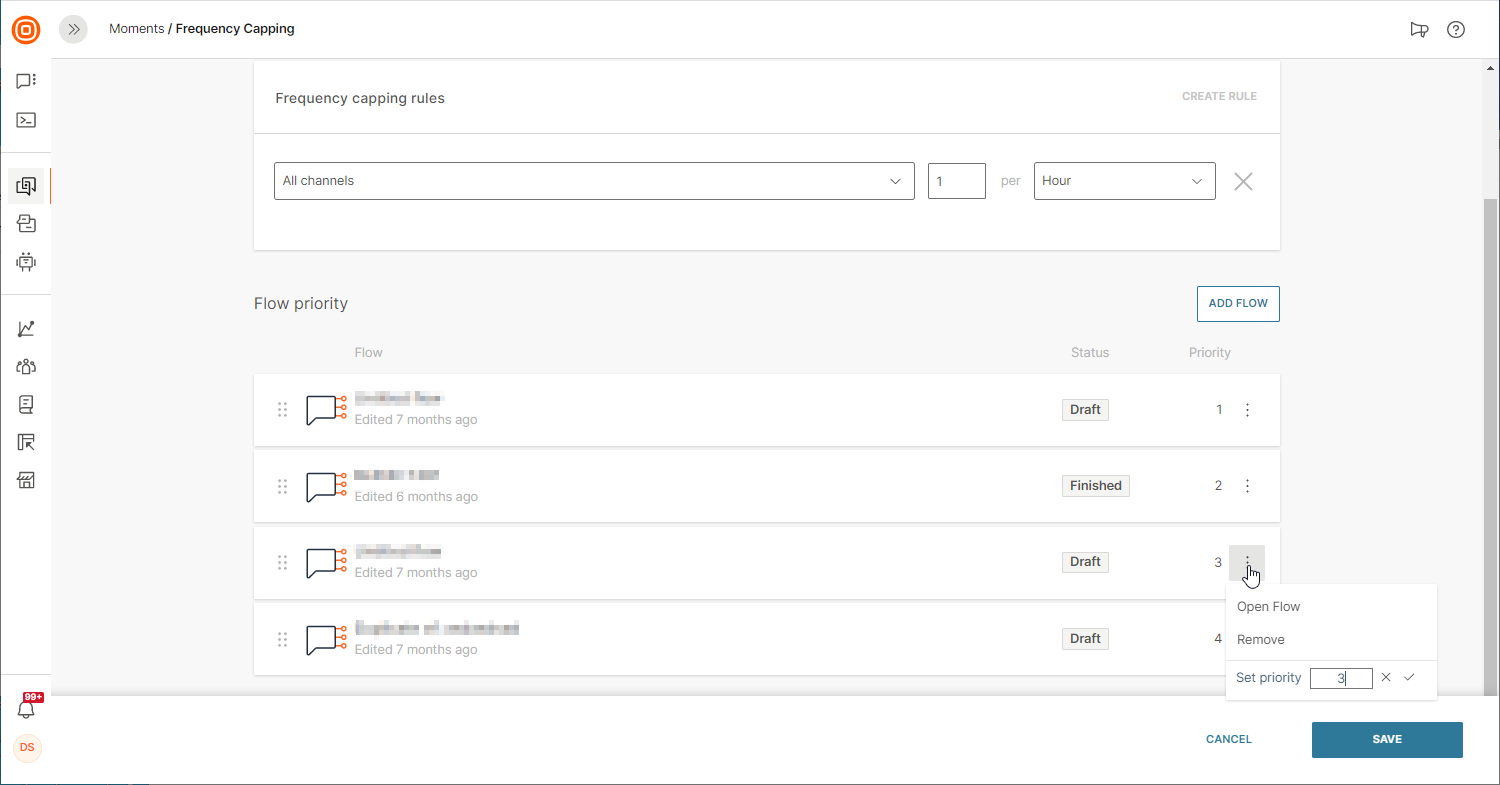
Once you add flows and set rules to your frequency capping plan you can set the priority order of the Flows.
Flows are sorted by priority from top (highest priority) to bottom (lowest priority). The priority order determines the order the capping plan will scroll through the flows. This means that higher priority messages flows will be processed/sent before less priority flows.
By changing the prioritization you can ensure that your users always receive the most important communications subject to the frequency capping rules you have set.
Drag and drop the flows into a different order to change the priority of flows.
You can make as many changes as you like to your capping plan while it is in Draftbut when you are ready to activate your plan you can simply toggle the plan to Active.
When the capping plan is active it will run for each user as they transition through flows, The capping plan will count when the user next hits a messaging element of an active flow of a capping plan. The message will be be sent if the user has not received more messages than defined in your capping rules. Messages will be 'capped' if the user has been sent the number of messages defined in the capping rules.
If you set a capping plan to inactive a popup will show you how many messages have been capped by the capping rule and will ask if you want to send the capped messages or delete them.
Edit
Edit your capping plan at any time from the main capping plans area.
If you edit an active capping plan you will be prompted to decide what you would like to do with messages that have already been capped when you click Save.
You can choose to send the capped messages or delete them.
Delete
You can delete a capping plan from the Frequency capping page in Moments. When you delete the capping plan you will be prompted to confirm if you would like to delete it.
If any of the flows inside the plan contain messages that have been capped (i.e. not sent) you will be prompted to either send all the capped messages to recipients or delete the plan without sending them.