Use IVR to get survey responses from end users
IVR (Interactive Voice Response) is an automated voice call process that enables end users to choose from voice menu options and respond by using the keypads on their device.
Example: Offer a list of options to end users - Press 1 for English, press 2 for Spanish. Depending on whether the end user selects 1 or 2 on their keypad, you can take the relevant action.
This tutorial explains how to use IVR in a flow in Moments to conduct a survey among end users who recently purchased a product.
For more information about IVR and IVR elements, refer to the IVR documentation in Moments.
Products and channels [#products-channels]
Prerequisites [#prerequisites]
- Infobip account. If you do not have an account, sign up for an account.
- Moments and Voice channel enabled in your account. For more information about enabling Voice channel, contact your Infobip account manager.
- A phone number that is registered with Infobip. If you do not have a registered phone number, go to the Infobip web interface > Numbers section to get your Voice number.
Implementation steps [#implementation-steps]
Modify this flow to suit your requirements.
The details about configuring a flow element are provided only for the first occurrence of the element in the instructions.
Ask end users if they want to participate in the survey [#implementation-opt-in]
Use IVR to call end users who recently purchased your product and ask them if they want to participate in the survey.
-
On the Infobip web interface, go to Moments > Flows.
-
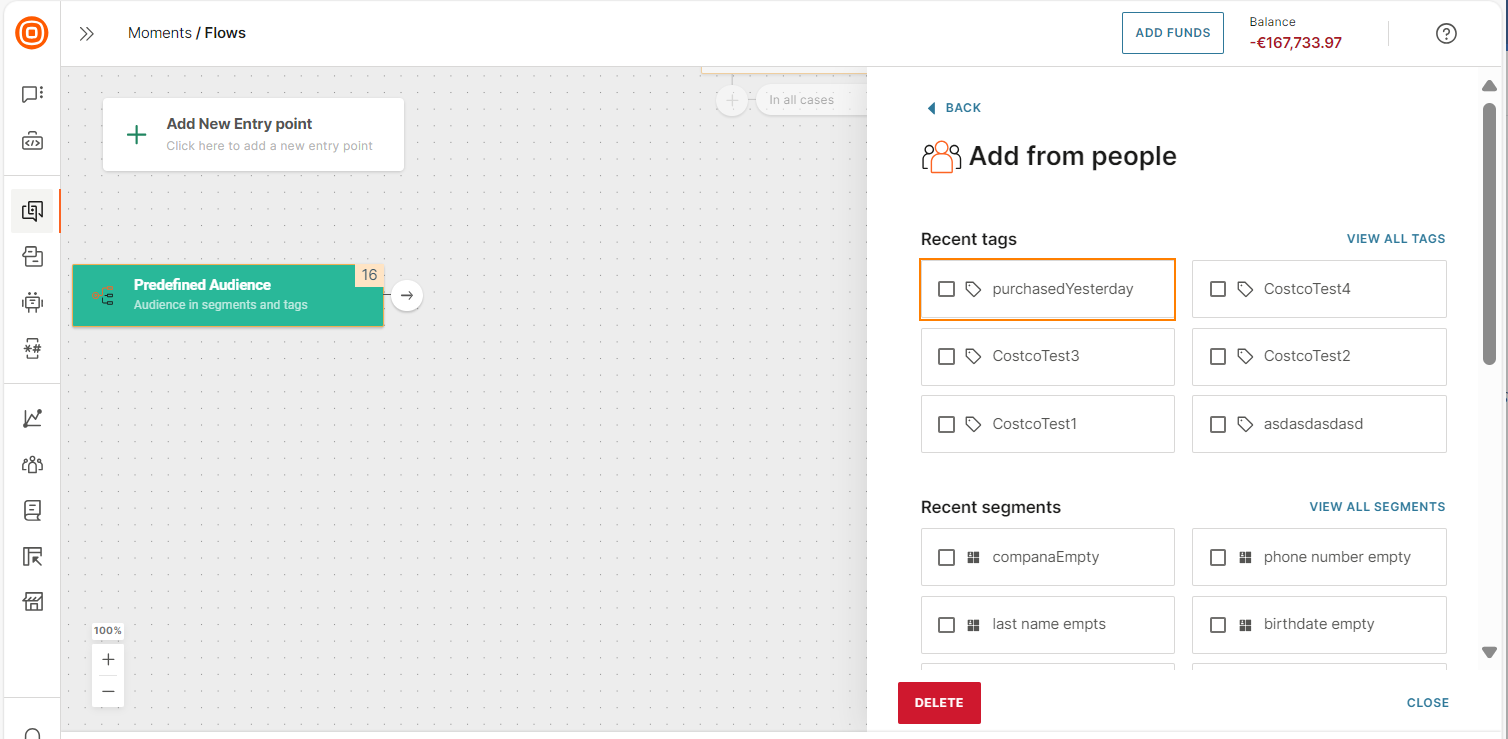
Select Create flow > Start from scratch > Predefined audience.
-
In the Predefined audience entry point, select the purchasedYesterday tag to target the end users who purchased your product yesterday. To learn how to create a tag, refer to the People documentation.
-
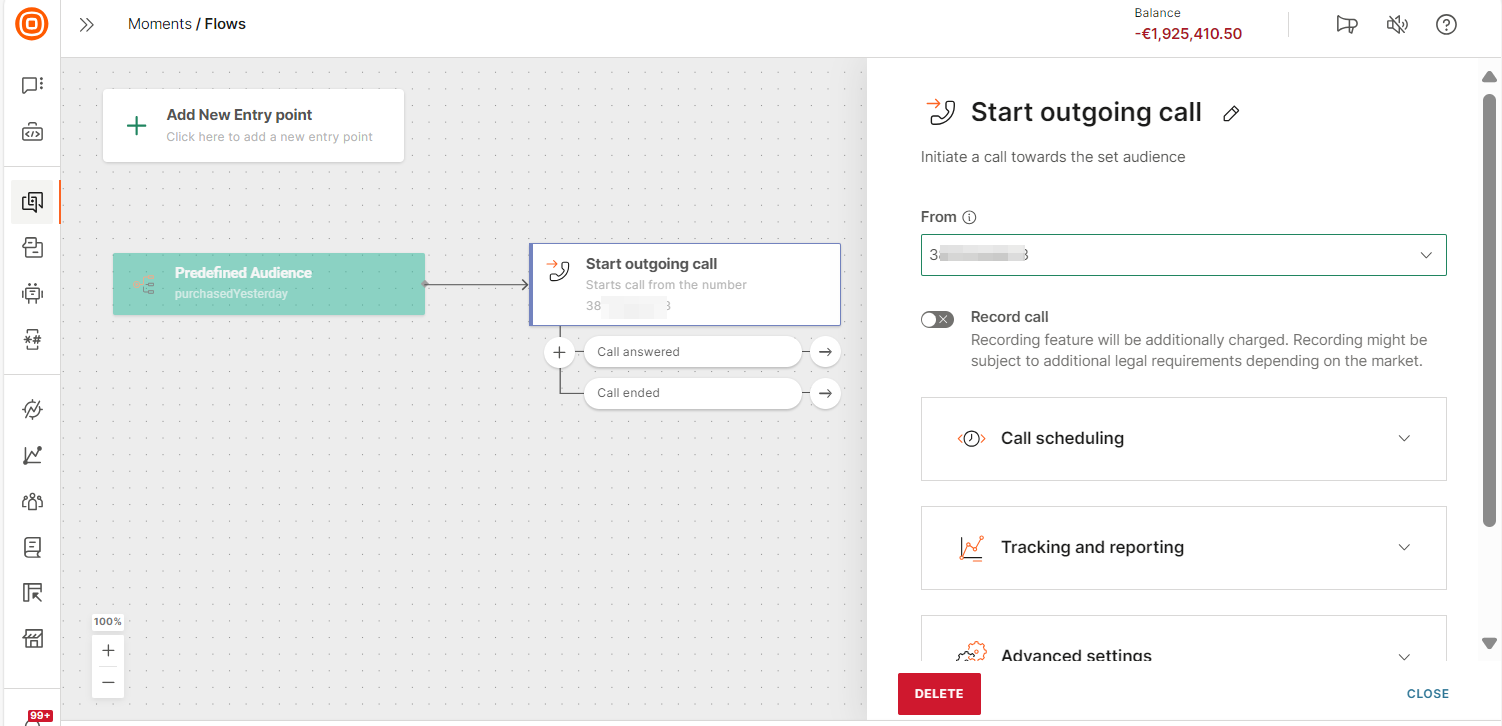
Add the Start outgoing call element.
-
Select the required sender in the element.
-
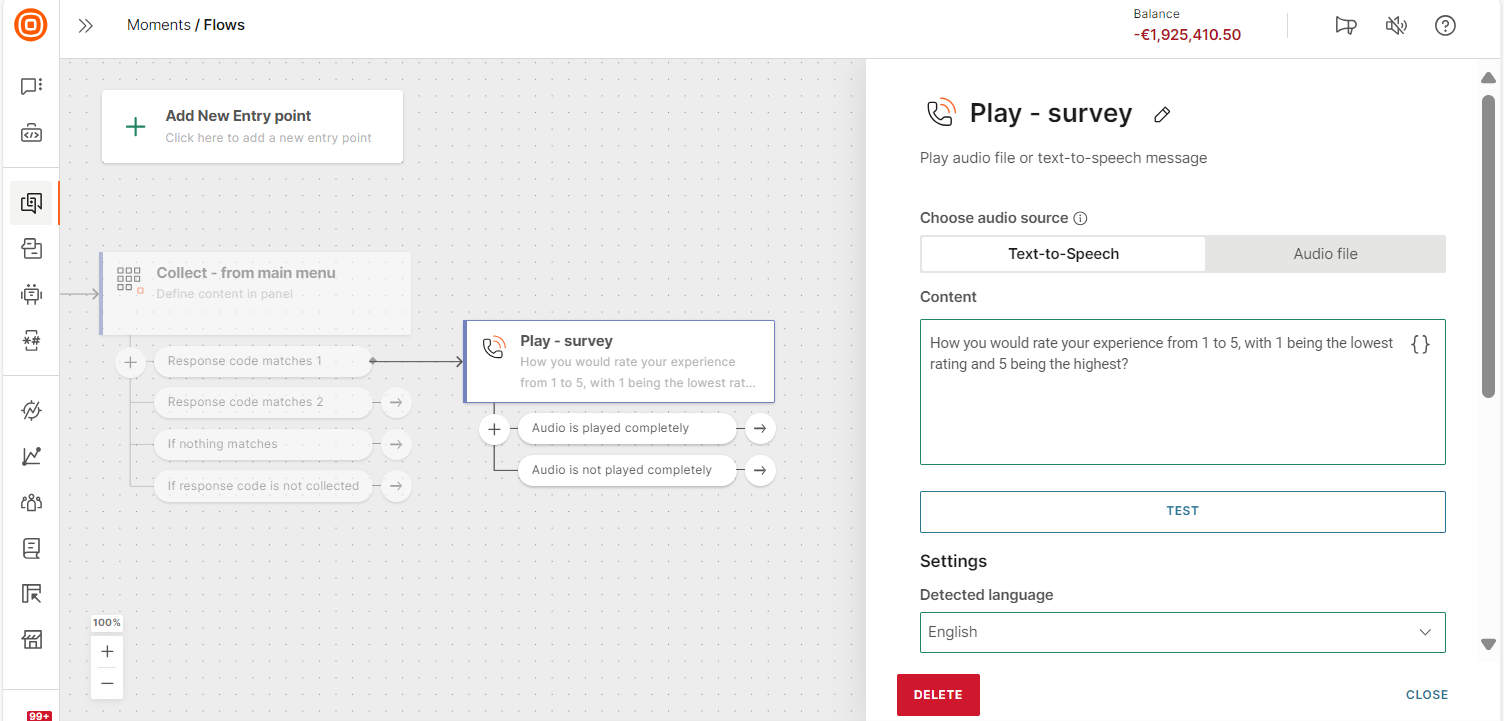
In the Call answered branch of the Start outgoing call element, add the Play element. The Play element plays a message and offers options to the end user.
-
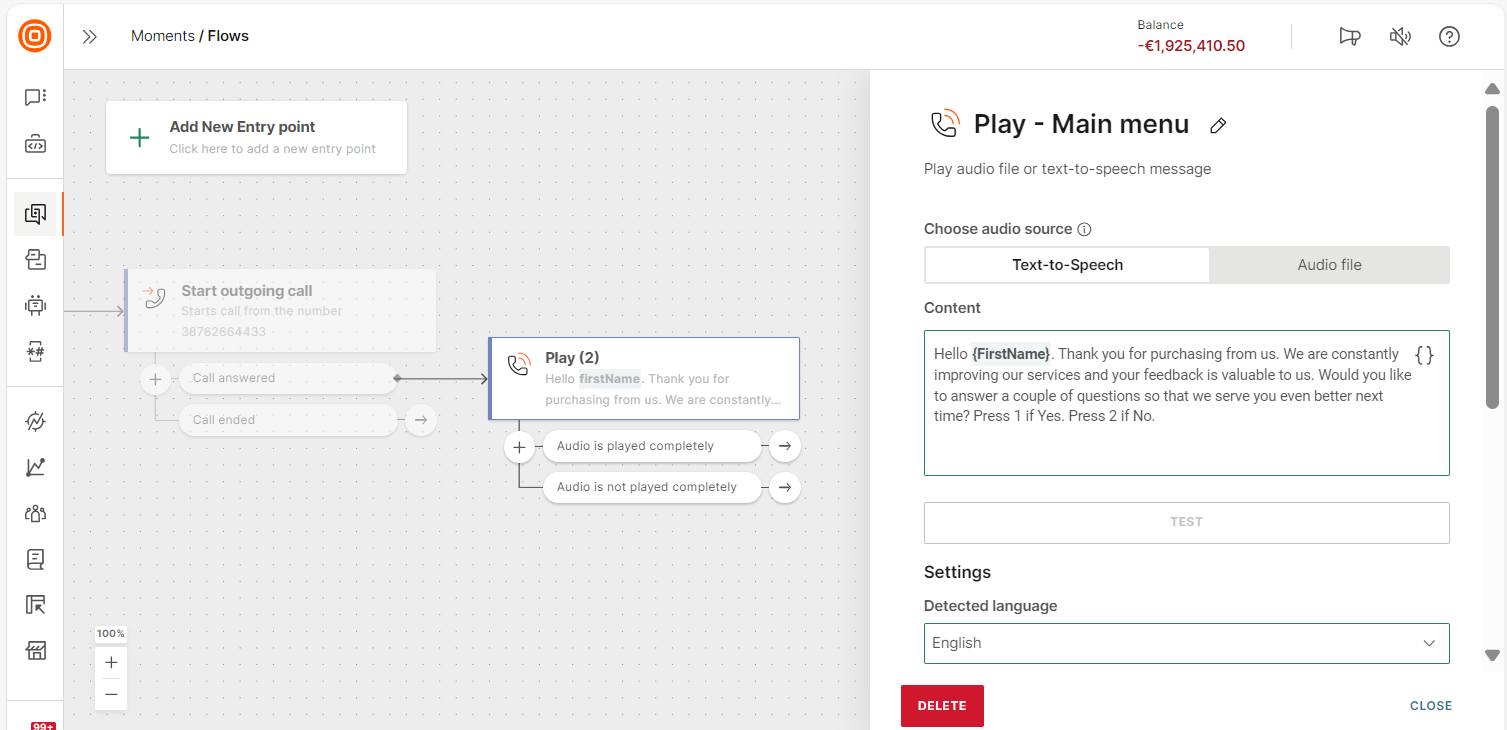
In the Play element > Choose audio source section, go to the Text-to-Speech tab.
NoteThis tutorial uses the text-to-speech (TTS) functionality. You can choose other audio sources.
-
In the Content field, enter the following message.
Hello {First Name}. Thank you for purchasing from us. We are constantly improving our services, and your feedback is valuable to us. Would you like to answer a couple of questions so that we serve you even better next time? Press 1 if Yes. Press 2 if No.
where {First Name} is the placeholder to personalize the message. This placeholder is a standard attribute from the end user's profile in People.
-
Configure the other fields in the side panel. For more information, refer to the Play documentation.
-
Select Test to make sure that the message is as required.
After the message in the Play element is played, the end user can enter a response (1 or 2) on their keypad.
Collect response for main menu and branch the flow [#implementation-collect-opt-in-response]
After the end user enters the response, this response needs to be collected, and the flow must be branched accordingly.
-
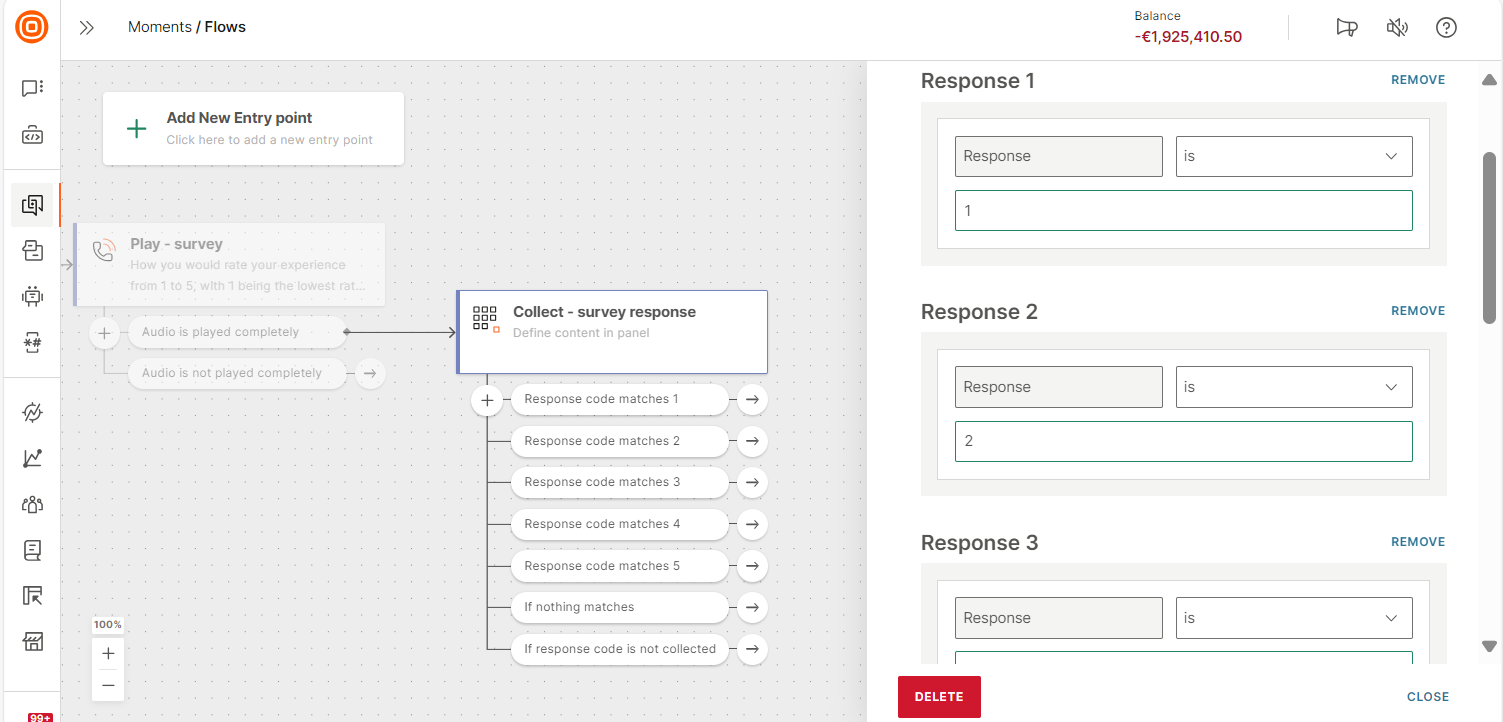
In the Audio is played branch of the Play element, add the Collect element to get the response that the end user presses on their keypad.
-
In the Collect element, branch the flow based on the response to your message. To do this, select Add response. Add 2 responses, one for 1 and one for 2. This adds 2 branches to the Collect element.
Configure the responses as follows.
Response 1
Option: Response
Operator: is
Value: 1Response 2
Option: Response
Operator: is
Value: 2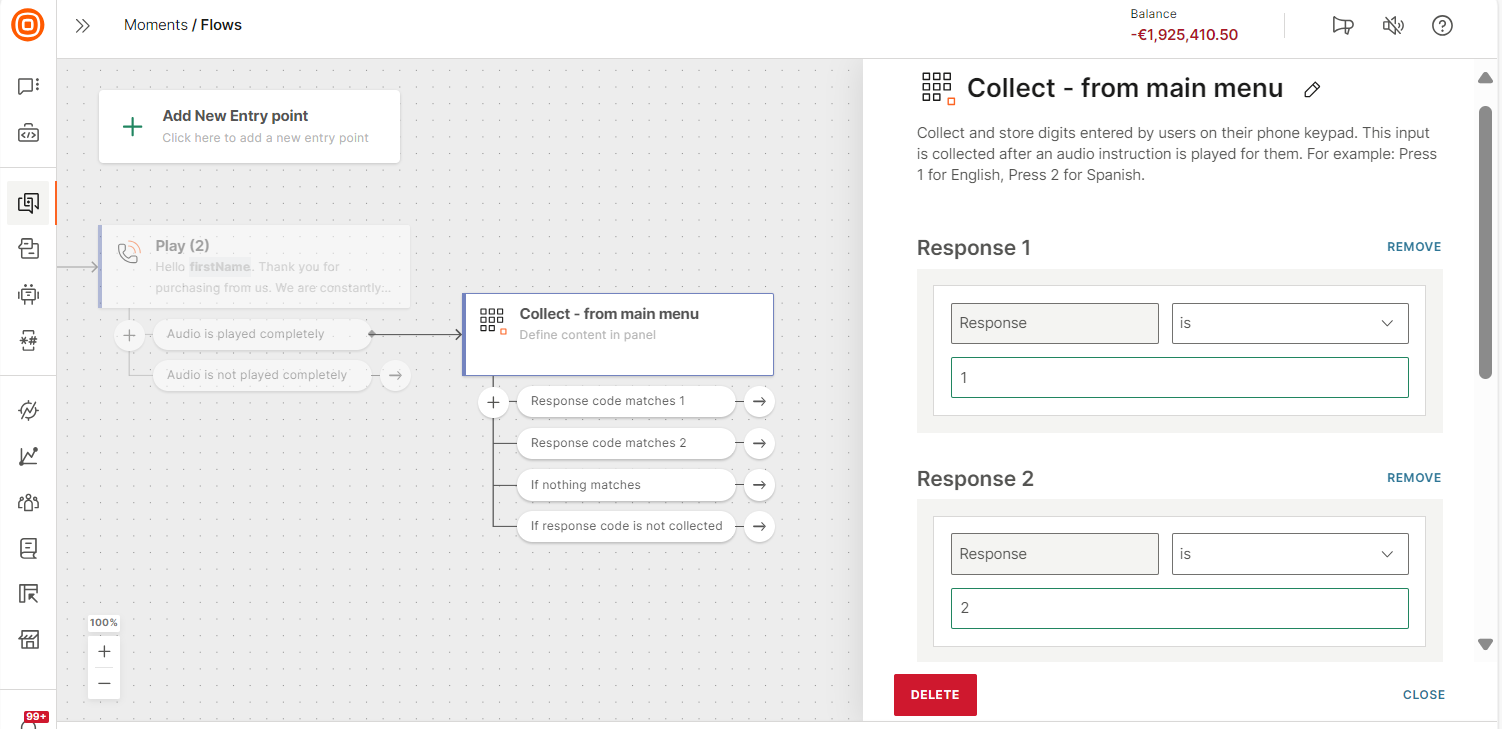
-
(Optional) In the Response settings > Response reporting options section, choose whether you want to see the response code in Voice reports and logs. For more information, refer to the Collect documentation.
Send the survey and collect the response [#implementation-send-survey]
Send the survey to end users who are willing to participate and collect their response.
In the Response code matches 1 branch of the Collect element, do the following.
-
Add a Play element and add the following message.
How you would rate your experience from 1 to 5, with 1 being the lowest rating and 5 being the highest?
-
In the Audio is played branch of the Play element, add a Collect element to get the survey response from the end user.
-
To branch the flow based on the survey response, add a response for each rating. Example: Response is 1 and Response is 2.
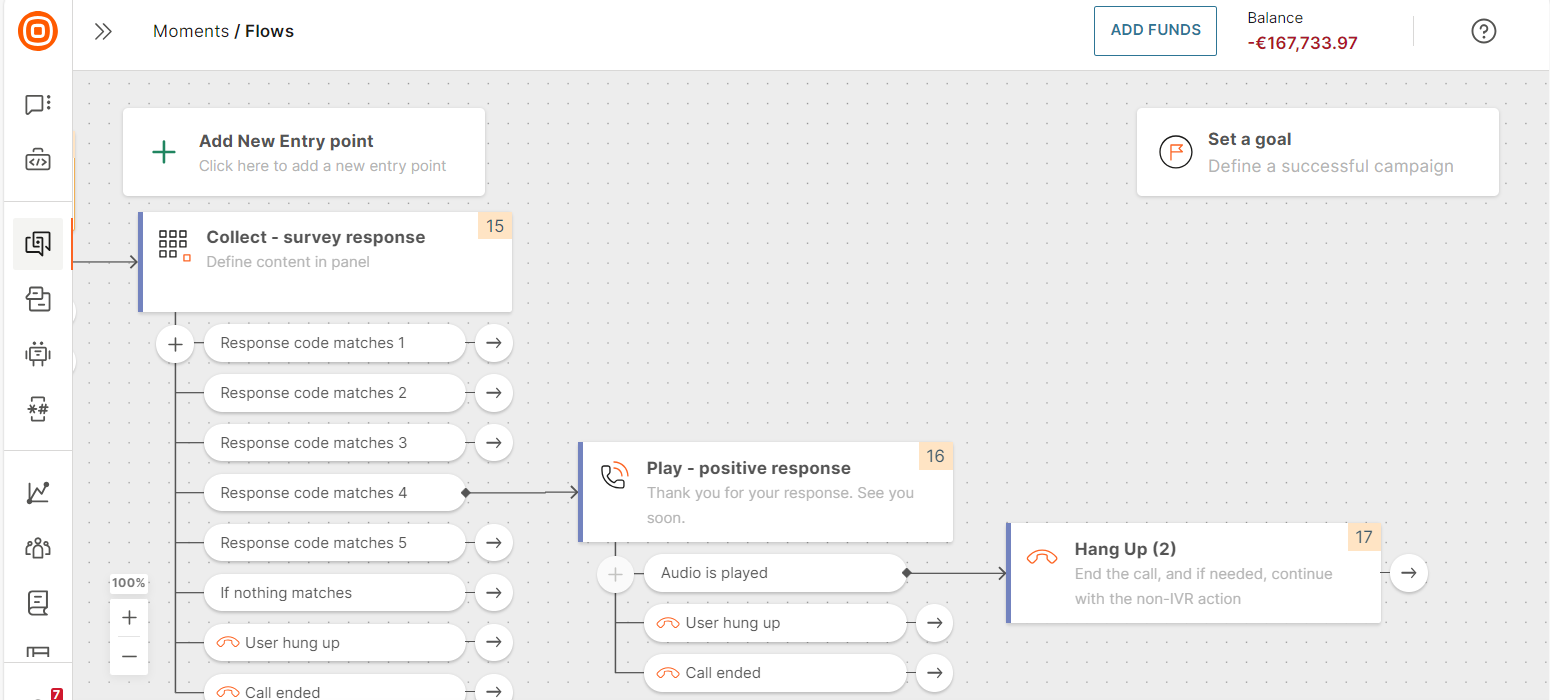
Configure next steps based on survey response [#implementation-next-steps-after-survey]
Thank end users who gave a positive rating. If end users give a negative rating, transfer the call to a customer care manager.
Add the next steps for each branch of the Collect element.
For ratings 4 and 5, send a thank you message and end the call. To do so, add a Play element with the following message.
Thank you for your response. See you soon.

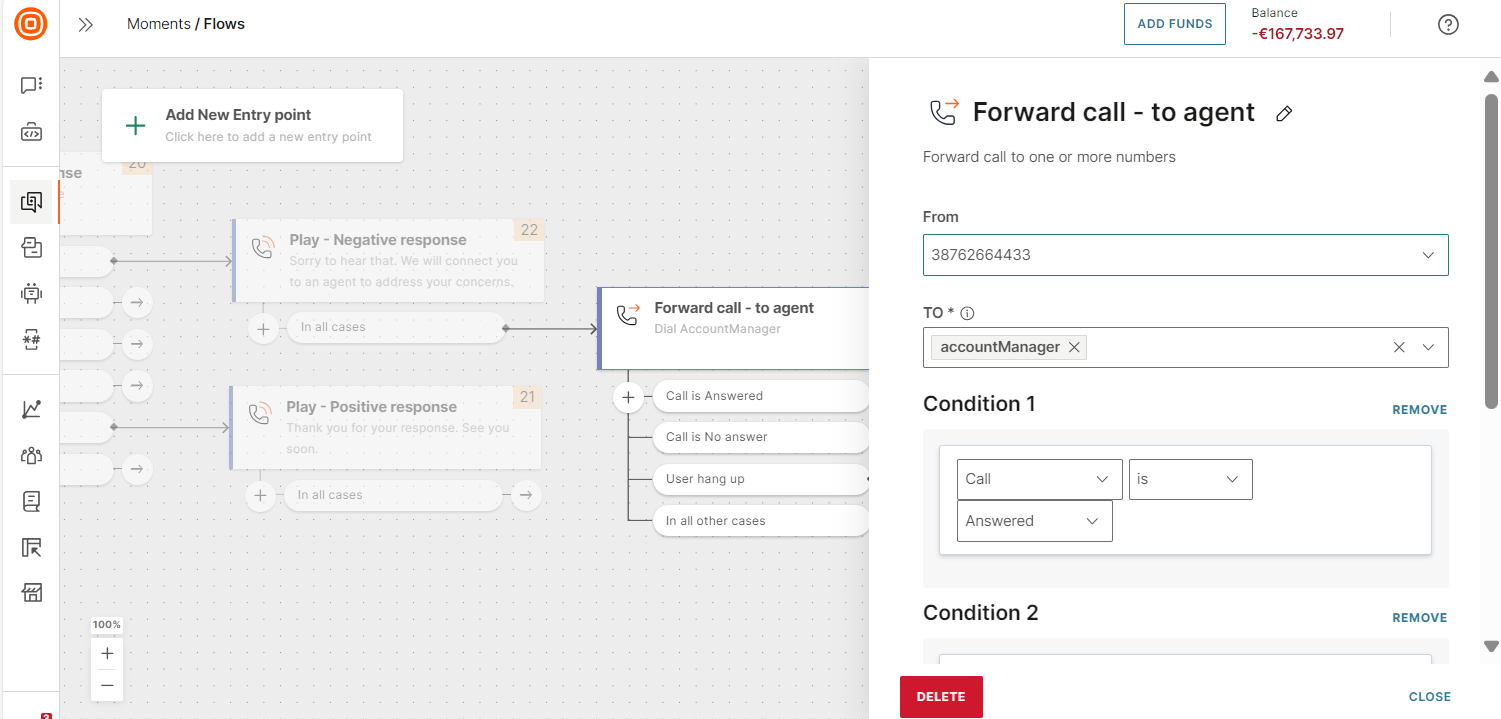
For ratings 1, 2, and 3, forward the call to an agent. Do the following.
-
Add a Play element with the following message.
Sorry to hear that. We will connect you to an agent to address your concerns.
-
In the Audio is played branch, add a Forward call element.
-
In the From field of the Forward call element, select your sender.
-
In the To field, select accountManager to add the phone number of your customer care manager. This placeholder is a custom attribute from the end user's profile in People.
-
To manage situations where the call is not answered, select Condition, and select No answer. This adds a branch to the element.
-
Configure the next steps for each branch of the Forward call element.
-
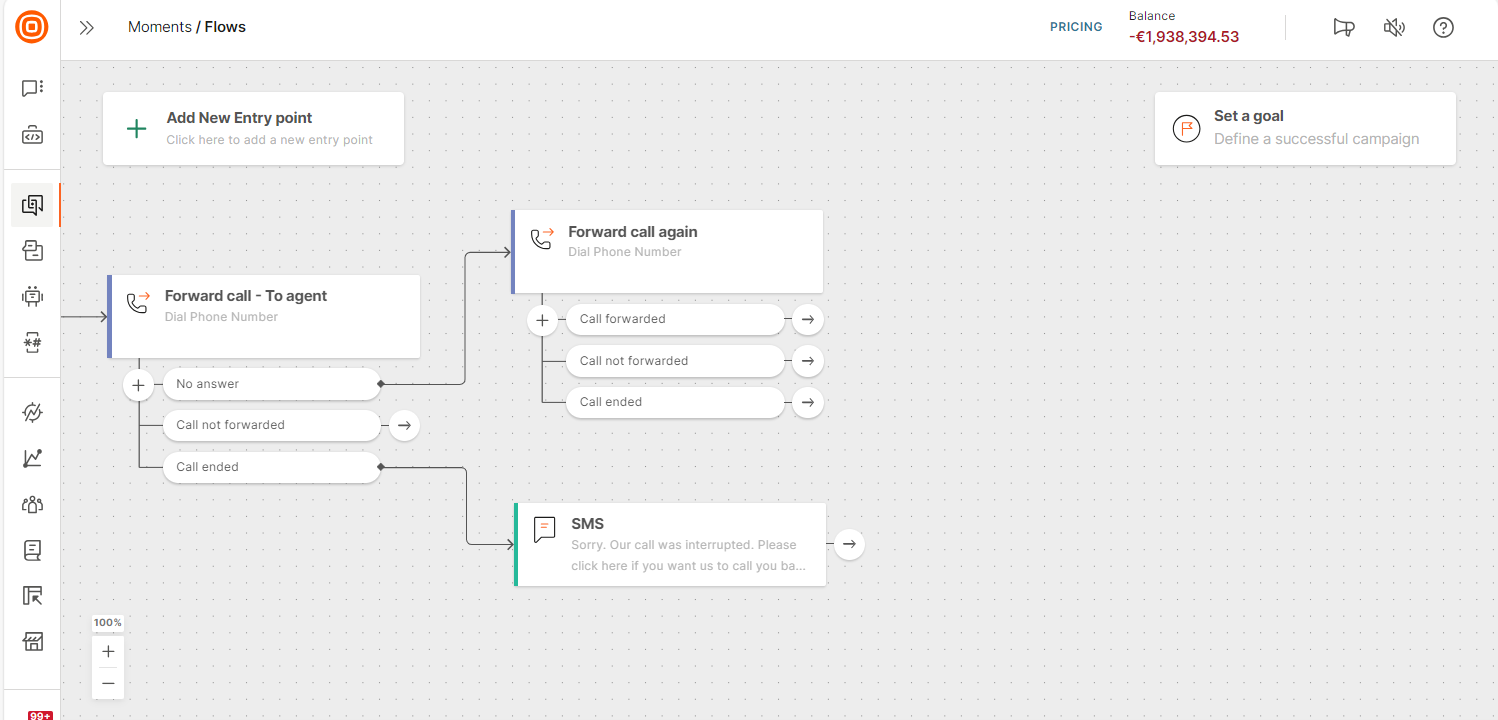
No answer: This branch is used when there is no answer when you forward the call. You can forward the call to the same phone number again or forward the call to a different number. To do so, add another Forward call element that uses either the same number or a different number.
-
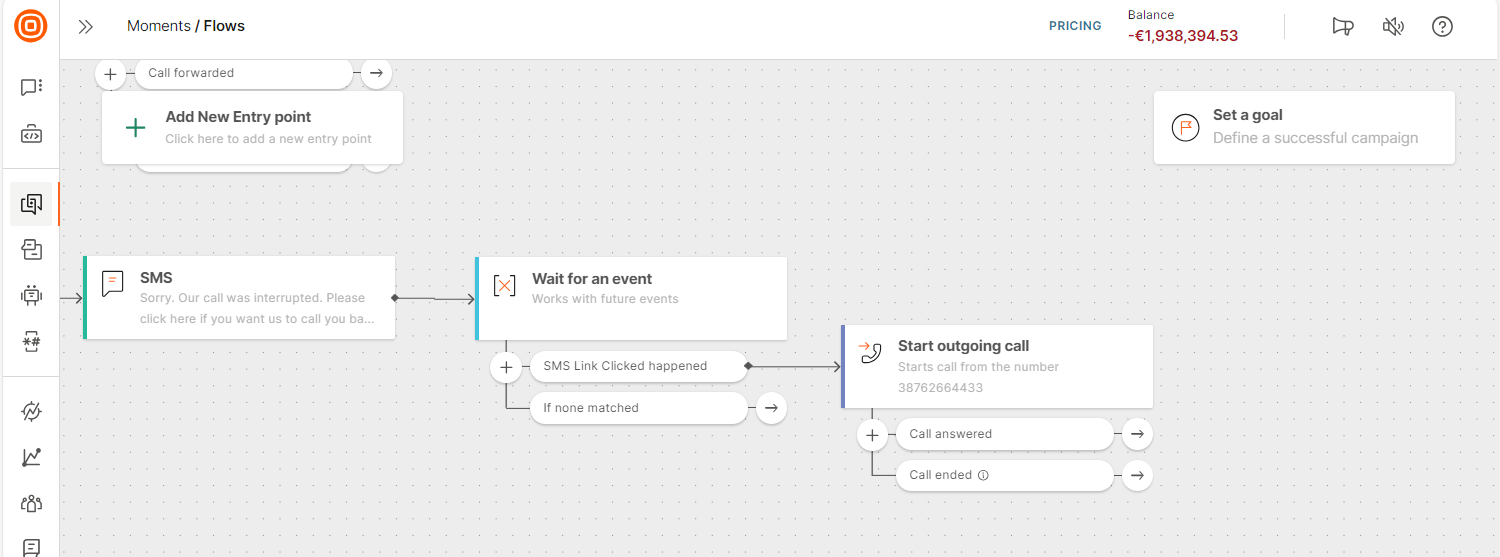
Call ended: This branch is used if the end user ends the call or if there are technical issues. In this branch, add a Send SMS message element with a link to get the end user back to the call. Specify the following message.
Sorry. Our call was interrupted. Please click here if you want us to call you back.
NoteYou must have an SMS sender configured.
-
-
To make sure that end users who select the link in the SMS message get a phone call from your business, add a Wait for an event element. In this element, select the SMS link click happened event. Define the time that you want to wait for the link click to occur. Example: 1 day.
When the end user selects the link in the SMS, the Wait for an event trigger is activated.

-
To call end users who clicked the link, in the SMS link click happened branch, add a Start outgoing call element.
Finish the call [#implementation-finish-call]
You need to make sure that the call ends and that end users are not left in the call. Use the Hang up element to end the call.
Validate and launch [#implementation-launch-flow]
Validate and Launch the flow.
A Hang up element is automatically added to each open branch in the IVR flow.
Analytics [#analytics]
Depending on the settings that you configure in the IVR elements, you can view the following information in Voice reports and logs.
- For outgoing calls, you can identify the number of successful calls and get other call-related payload data.
- You can view the responses that end users enter on their keypads.