Flow elements
Use the elements in Flow to create personalized conversations. You can use the following types of elements.
- Entry points and exit: The different ways in which an end user can enter a flow and exit the flow. Example: Trigger the flow and start a personalized journey when there is a change in the person profile.
- Channels: The different channels such as SMS, Email, or WhatsApp through which you can engage your audience during a flow journey.
- IVR: Build interactive voice menus and combine them with other channels and actions.
- Functions: Track your audience preferences and behavior, and personalize their journeys. Example: Use Wait for an event to target a person at the right time."
- Integrations: The elements that enable you to connect to external platforms such as your CRM or BI reporting system.
You can add a maximum of 100 elements to a flow.
Options in flow elements
This section shows options that you can configure in flow elements. Refer to the documentation for a specific element to check if the option is available in that element.
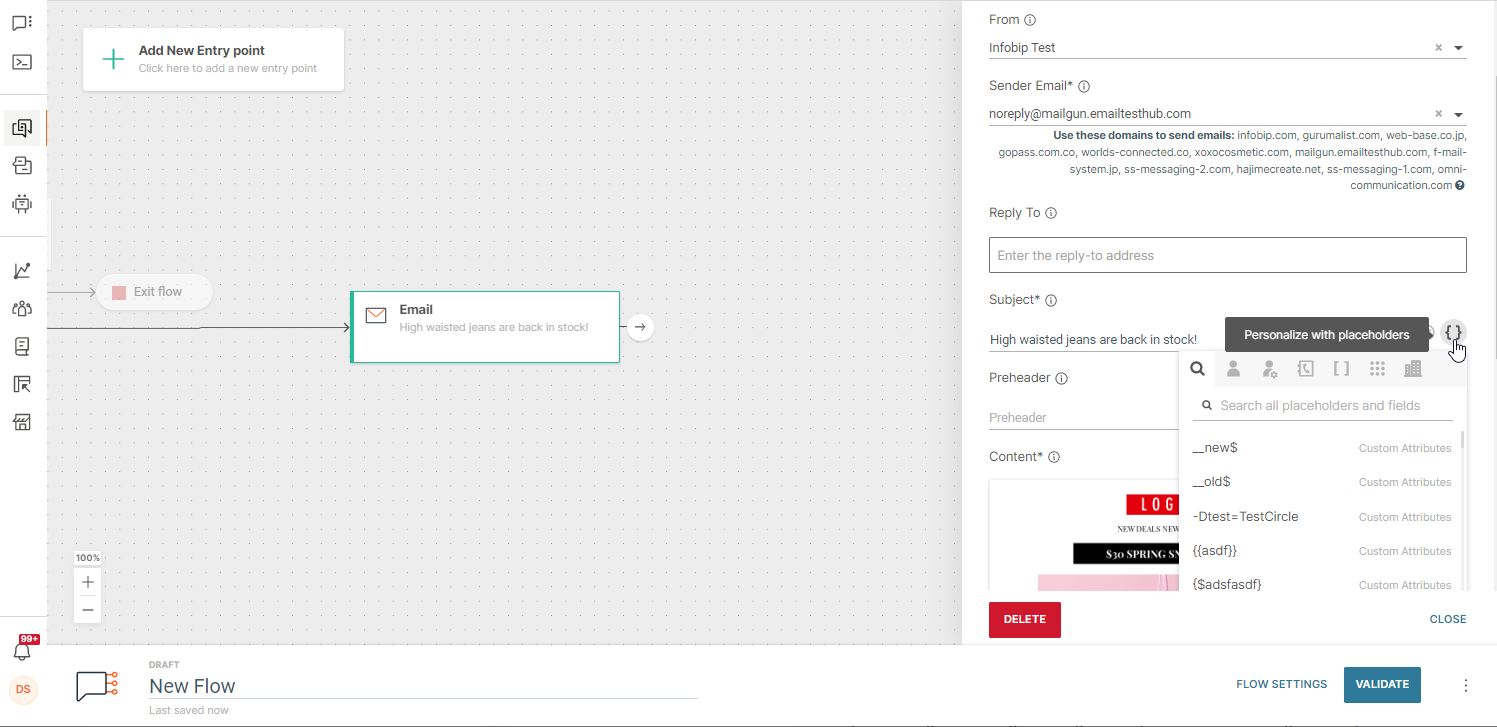
Personalization using placeholders
In flow elements, you can use placeholders to personalize messages that you send to end users.
Example: Add firstName to include the end user's name. Add orderID as context when contacting the end user about their order.
In the flow elements, you can use placeholders in various fields, such as messages and URLs. The fields in which placeholders are available depends on the element. Example: In the Send email message element, you can add placeholders in the Subject field.
You can use more than one placeholder in the same field.
To add a placeholder, select the curly brackets {} icon in the field. Select the relevant placeholder from the list.
You can use the following as placeholders.
- Standard attributes
- Custom attributes
- Contact information
- Variable names
- Channel specific attributes
- Computed attributes
If you use DateTime attributes and variables, the date output is in the format 2021-12-15T14:24:00Z. So, using DateTime attributes in messages or Voice IVR flows might cause problems.
To avoid this situation, use the formatDateTime function in expression language to change the attribute value to the required format.