Custom templates
EARLY ACCESS
Create standardized, high-quality chatbot templates that meet your requirements, incorporate your organization's best practices and branding guidelines, and comply with your organization's policies. Example: You can create a template that contains frequently used chatbot building blocks, messages, dialogues, and dialog groups.
Custom templates are available only within your organization. So, any sensitive data or proprietary chatbot building blocks within these templates are secure.
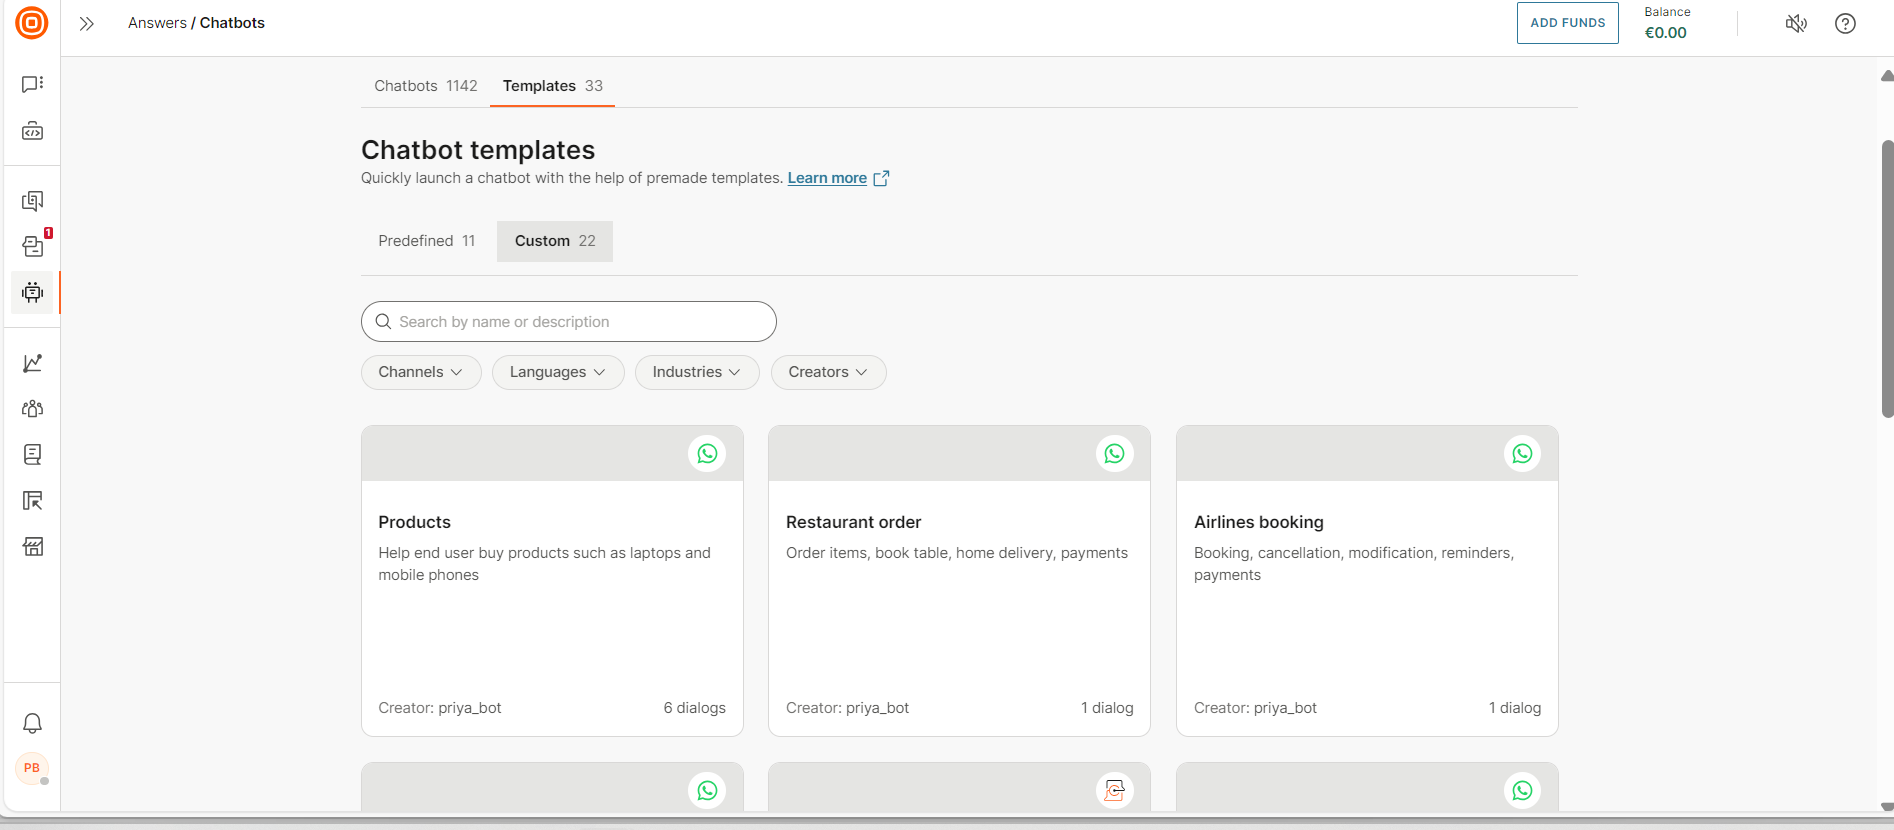
Templates dashboard [#templates-dashboard]
To view templates, in the Infobip web interface, go to Answers > Chatbots > Templates tab.
Each template is for a specific channel and language.
You can do the following:
- View a list of predefined and custom templates in the Predefined and Custom tabs. In the Predefined tab, only the templates that are available for your Answers plan are listed.
- Filter templates by language, channel, industry, and template creator.
- Search for a template by either its name or its description. Use the search box.
- View information about the template.
- (Predefined templates only) Simulate the conversation in the template.
- Create a chatbot from a template.
- Delete a template.
Create a custom template [#create-custom-template]
You can create a template in the following ways.
- Save the entire chatbot as a custom template.
- Create a custom template from selected dialogs or dialog groups in a chatbot.
Save a chatbot as a custom template [#save-chatbot-as-template]
This section explains how to save the entire chatbot as a template.
The chatbot can be in any state.
- It can be active or inactive.
- It can be functional or non-functional.
What is included in the template [#save-as-template-what-is-included]
The template contains the following building blocks from the source chatbot.
-
All dialogs and dialog groups, which includes the chatbot elements in the dialogs
-
The following are included if they are used in the dialogs. Any chatbot building blocks that are not used are not added to the template. Example: If you create an attribute but do not use it in a dialog, the attribute is not included in the template.
- Intents
- Keywords and synonyms
- Attributes
- NER attributes and custom data types
-
Chatbot settings
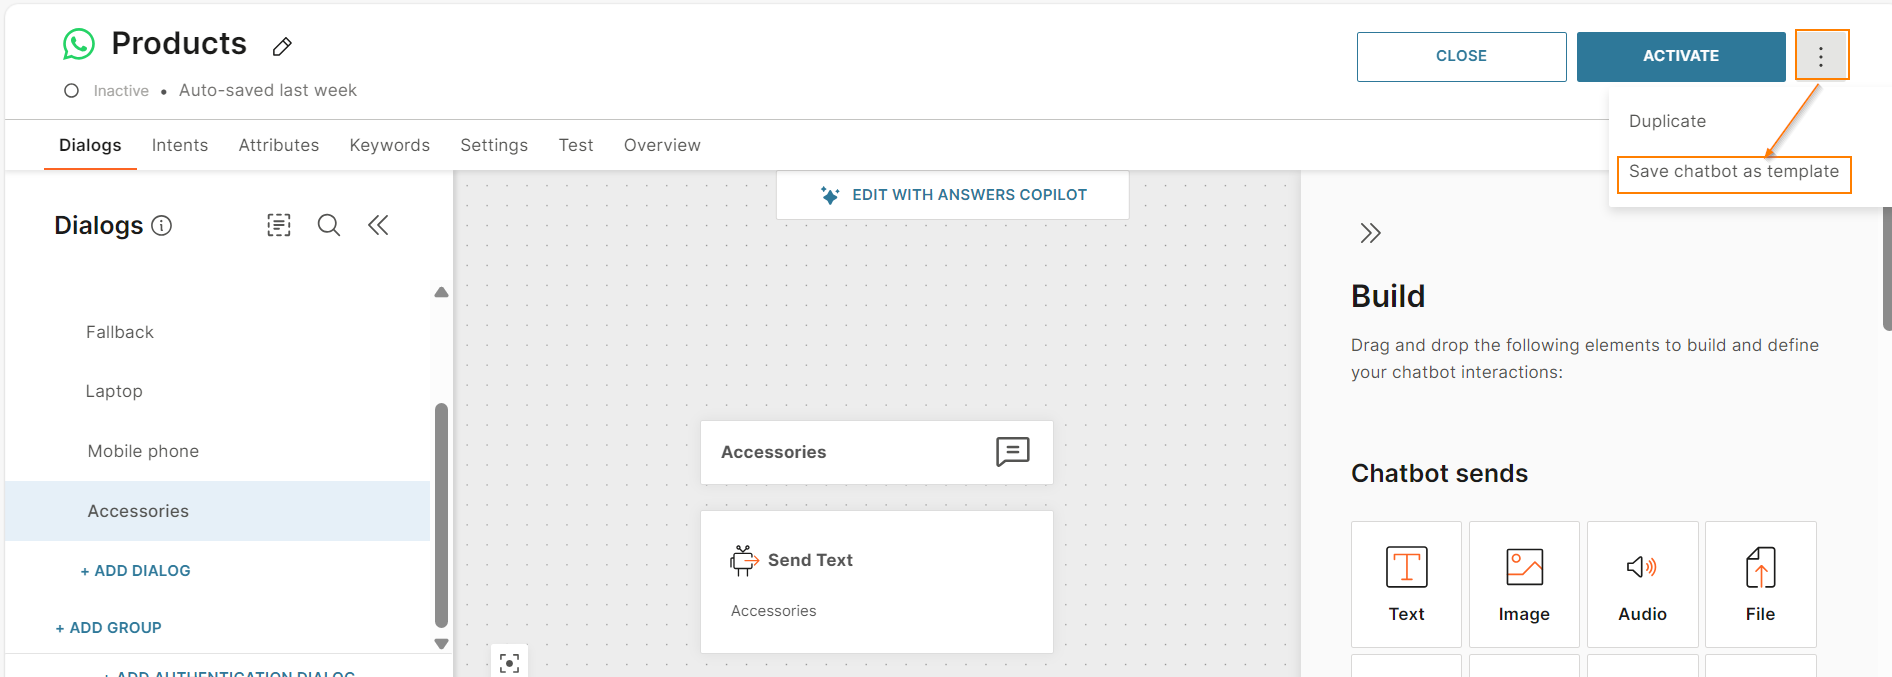
Create the template [#create-template-from-chatbot]
Do the following:
-
In the chatbot, select the three dots at the right and select Save chatbot as template.
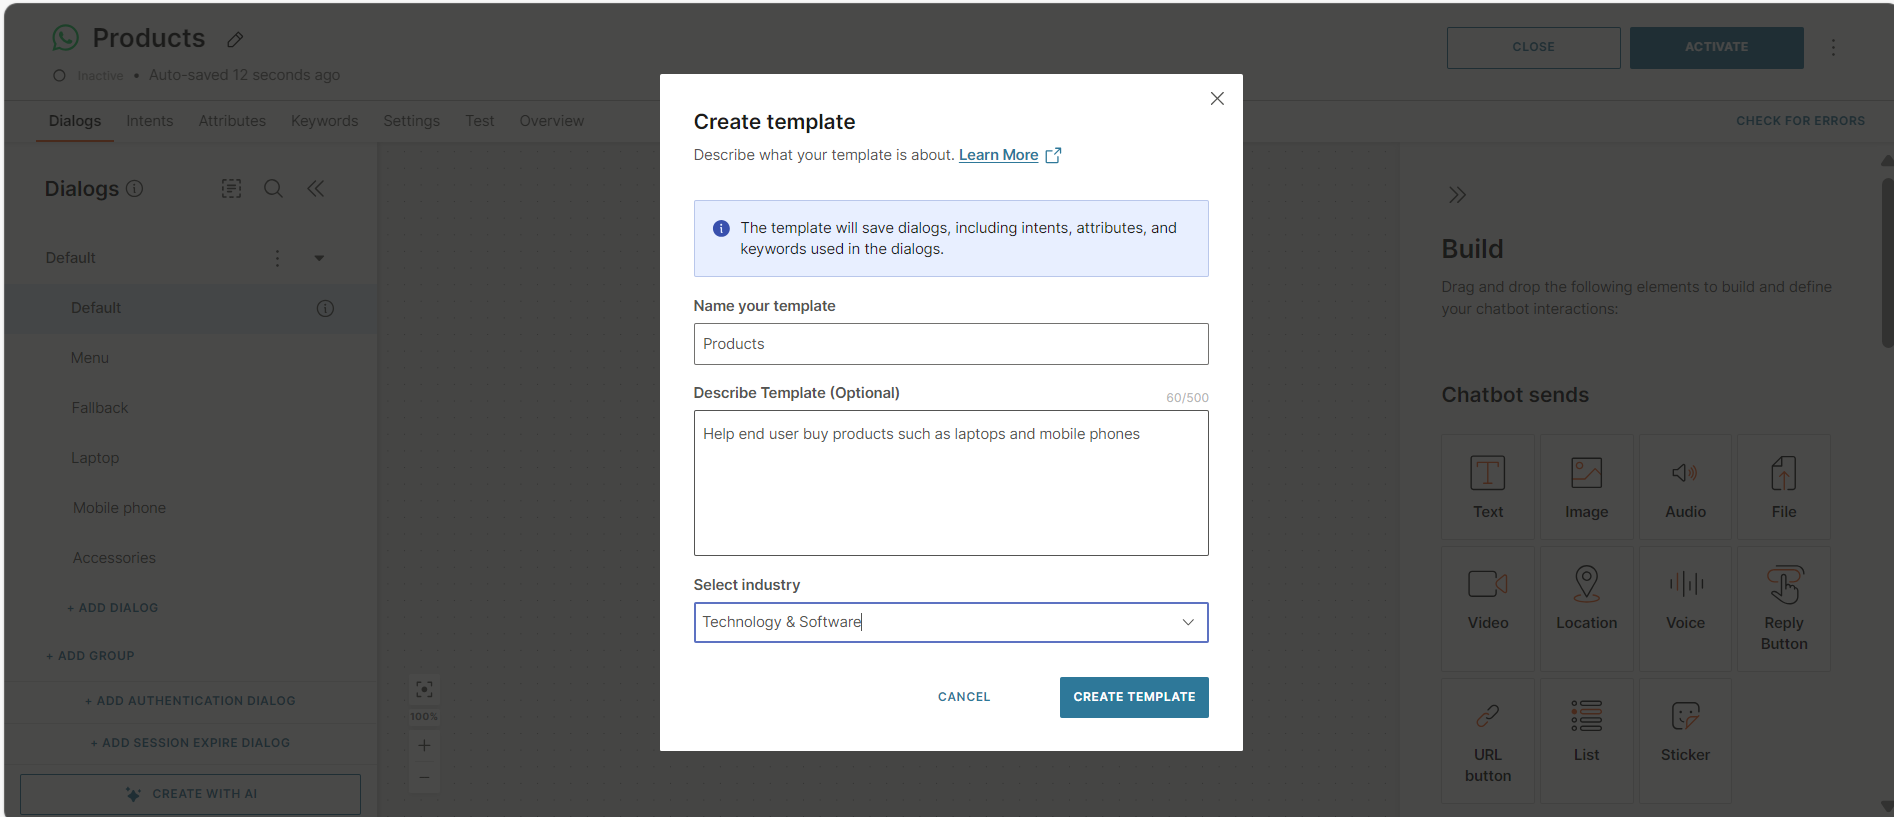
-
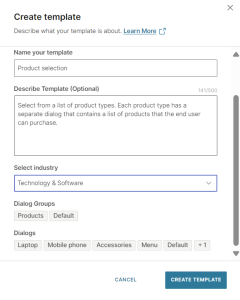
In the Create template screen, complete the following fields.
- Name your template: Enter a name for the template. Follow these guidelines.
- The name must not contain any special characters.
- The name must not begin with a number.
- (Optional) Specify a unique name so that you can identify the template.
- Describe template (Optional): Add a description to help other users identify the most relevant template for their use. You can add a maximum of 500 characters.
- Industry (Optional): Select an industry.
- Name your template: Enter a name for the template. Follow these guidelines.
-
Select Create template.
The chatbot is saved as a template.
Create a custom template from sections of a chatbot [#create-template-from-sections-of-chatbot]
You can create a template from specific dialogs and dialog groups in your chatbot.
What is included in the template [#save-sections-as-template-what-is-included]
The template contains the following building blocks from the source chatbot.
- The dialogs and dialog groups that you select
- The following are included if they are used in the selected dialogs. Any chatbot building blocks that are not used in these dialogs are not added to the template.
- Intents
- Keywords and synonyms
- Attributes
- NER attributes and custom data types
- Chatbot settings
Create the template [#create-template-from-sections-of-chatbot]
Do the following:
-
In your chatbot, select the dialogs and dialog groups that you want to add to the new template. To select all dialogs and dialog groups, use Select all.
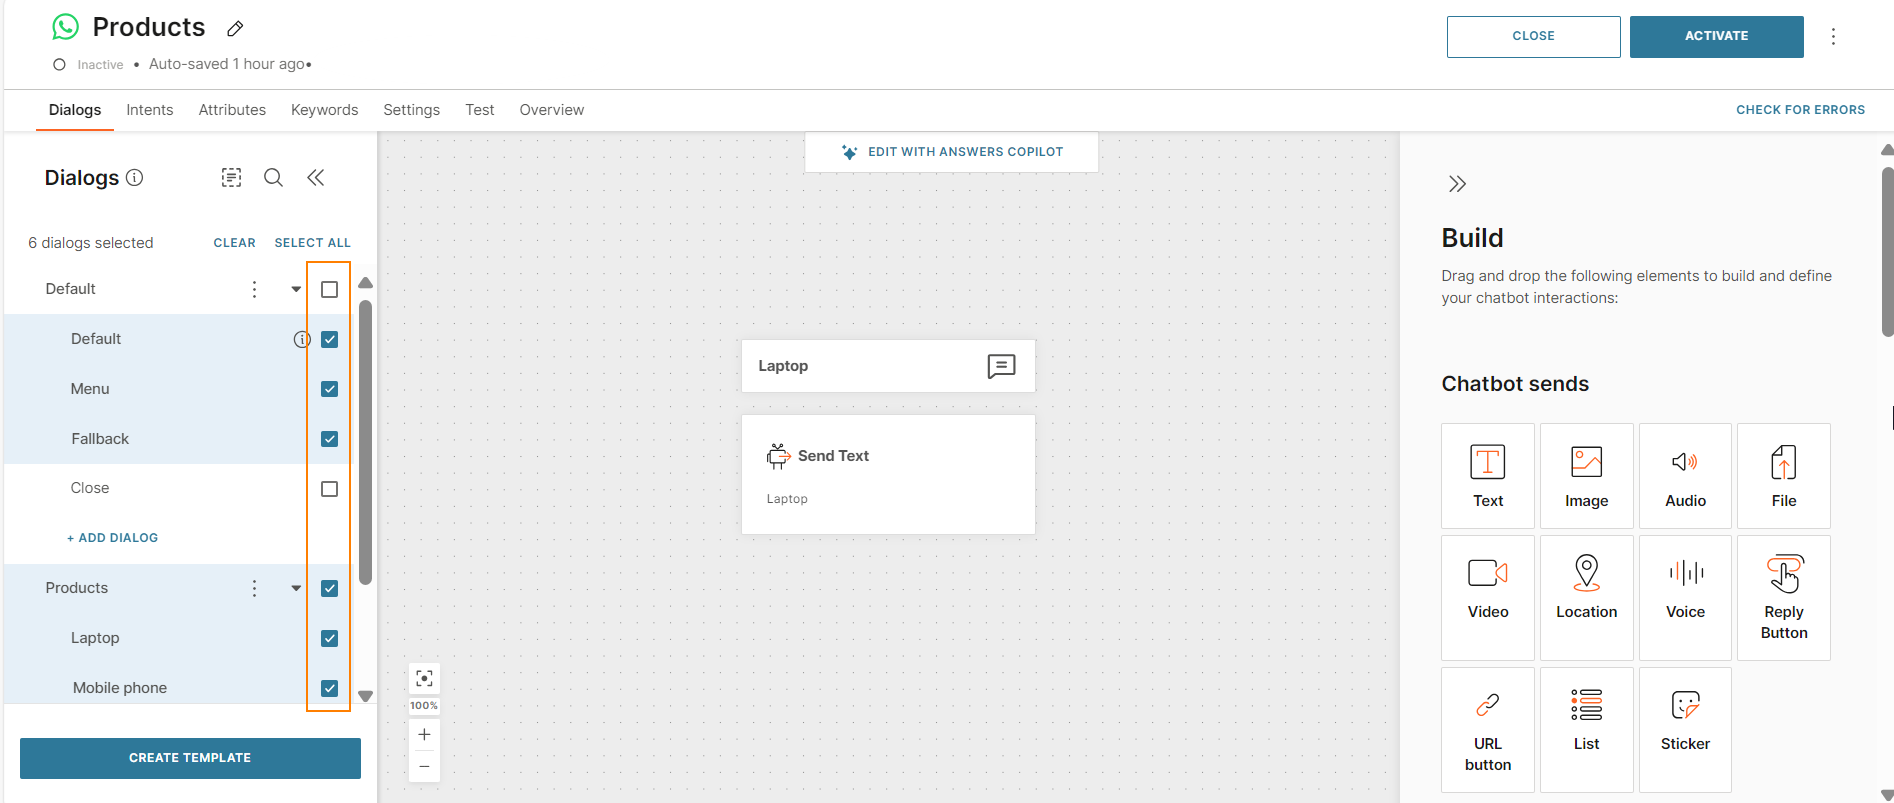
-
Select Create template.
-
In the Create template screen, complete the following fields.
- Name your template: Enter a name for the template. Follow these guidelines.
- The name must not contain any special characters.
- The name must not begin with a number.
- (Optional) Specify a unique name so that you can identify the template.
- Describe template (Optional): Add a description to help other users identify the most relevant template for their use. You can add a maximum of 500 characters.
- Industry (Optional): Select an industry.
You can view the list of the dialogs and dialog groups that will be added to the template.
- Name your template: Enter a name for the template. Follow these guidelines.
-
Select Create template.
The selected dialogs and dialog groups from the chatbot are saved as a template.
Create a new chatbot from a template [#create-chatbot-from-template]
Use this section when you want to create a new chatbot that is a duplicate of a template.
The new chatbot uses the same channel as the template.
What is included in the chatbot [#create-chatbot-from-template--what-is-included]
The new chatbot contains the following from the template.
- Dialogs and dialog groups, which include the chatbot elements.
- Intents
- Keywords and synonyms
- Attributes
- NER attributes and custom data types
- Chatbot settings
View information about the template [#create-chatbot-from-template-view-information]
View details about the templates to identify the one that is suitable for your use case.
Do the following.
- On the Infobip web interface, go to Answers > Chatbots > Templates tab.
- Go to either the Predefined or Custom tab as required.
- Hover over a template and select Preview.
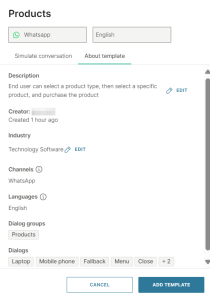
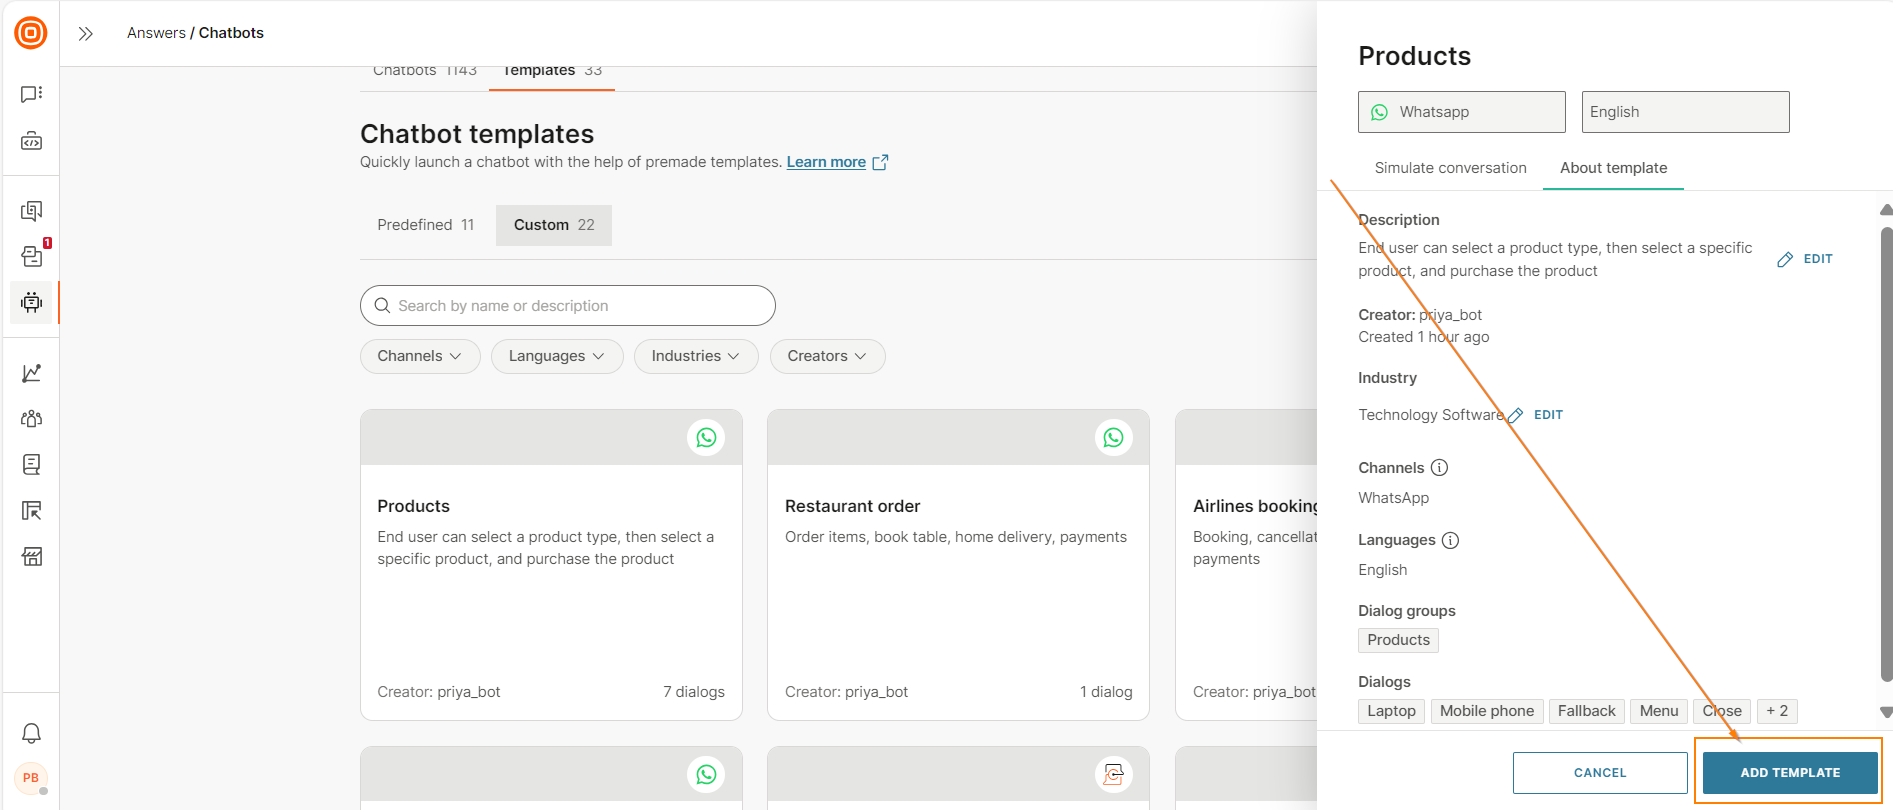
- Go to the About template tab.
You can view the following information.
- Description of the chatbot
- Channel
- Language
For predefined chatbots, you can view the following additional information.
- Use cases: Examples of where you can use the chatbot
- Type of chatbot. Example: Rule-based chatbot
For custom chatbots, you can view the following additional information.
- Creator
- Industry
- Dialog groups in the template
- Dialogs in the template
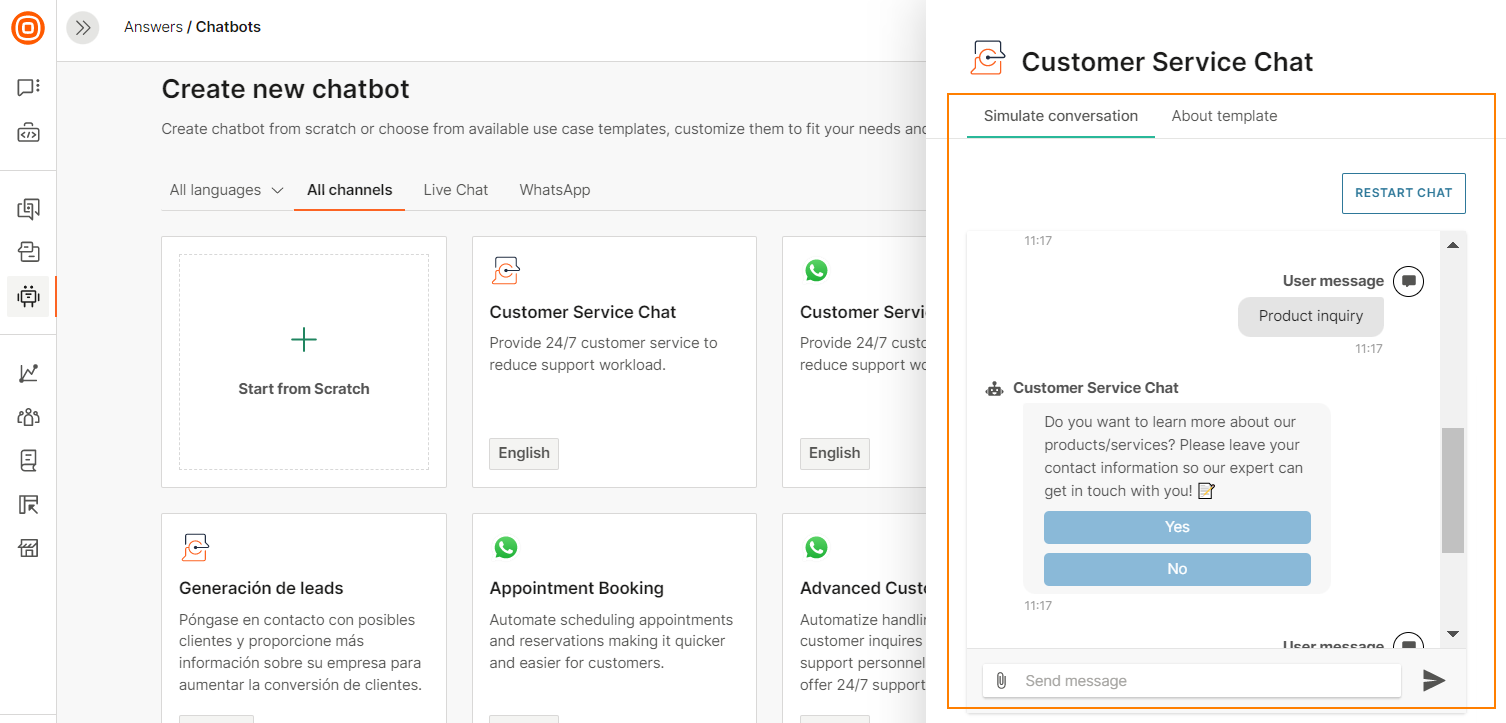
Simulate the conversation in a template [#create-chatbot-from-template-simulate-conversation]
You can simulate the conversation only for predefined templates.
Simulate the conversation in a predefined template to see whether it is suitable for your requirements.
Do the following.
- On the Infobip web interface, go to Answers > Chatbots > Templates tab > Predefined tab.
- Hover over a template and select Preview.
- Go to the Simulate conversation tab.
- Select Start the chat.
You can interact with the chatbot to understand the flow and features.
Create the chatbot [#create-chatbot-from-template-create]
- On the Infobip web interface, go to Answers > Chatbots > Templates tab.
- Go to either the Predefined or Custom tab as required.
- Do one of the following.
- Hover over the template that you need and select Add.
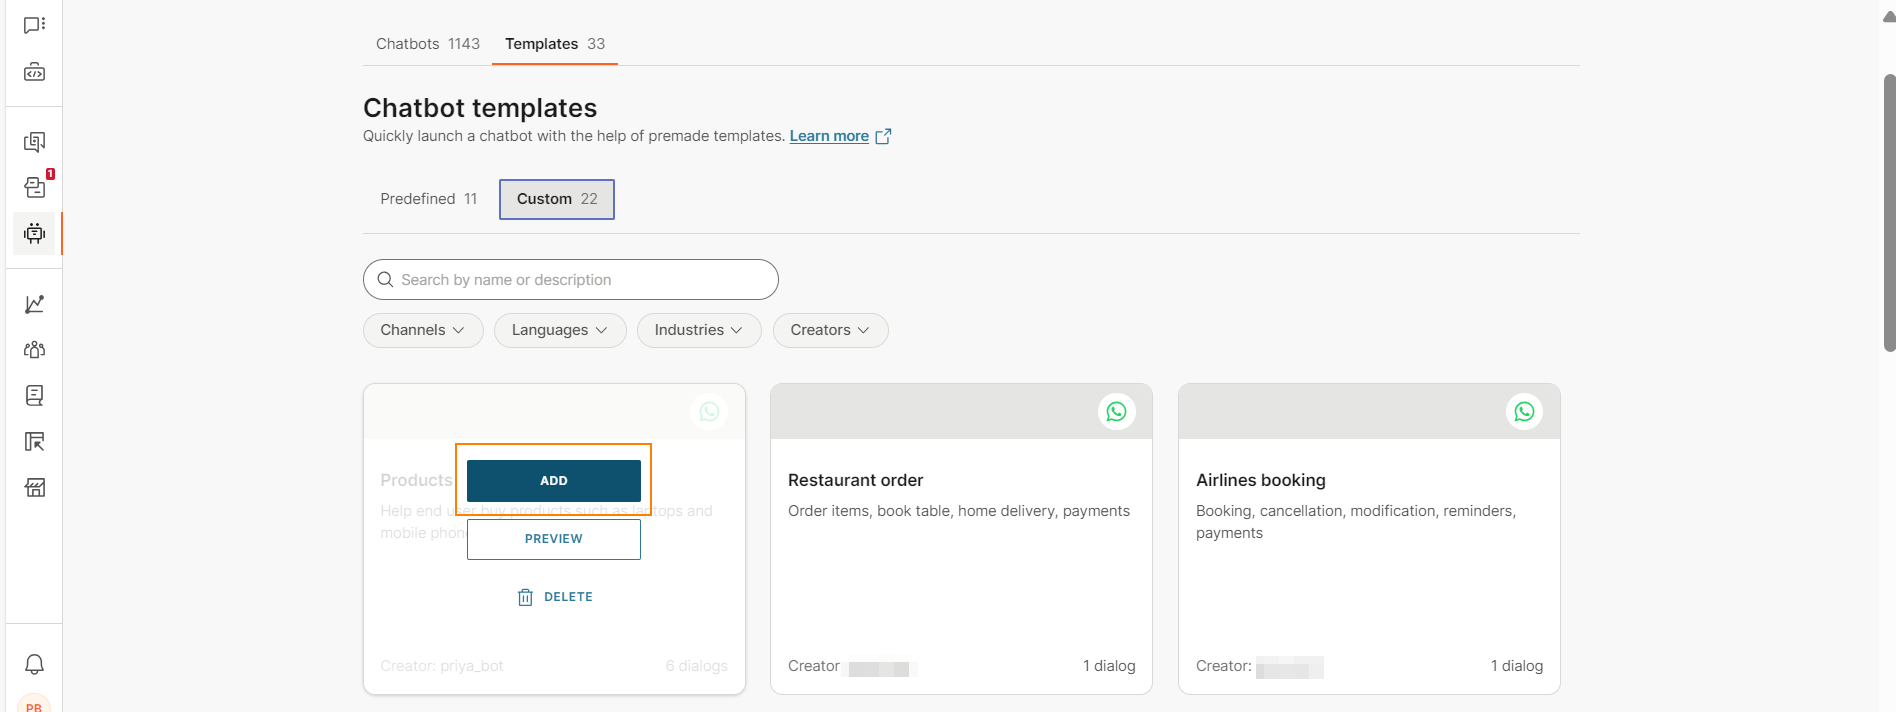
- Hover over the template that you need and select Preview > Add template.
- Hover over the template that you need and select Add.
A new chatbot, which is a duplicate of the template, is created.
Next steps [#create-chatbot-from-template-next-steps]
- In the new chatbot, make the changes that are required for your use case. Refer to the Guidelines and best practices and Customize the Chatbot sections.
- In the Settings tab, update the sender if required.
- In the Test tab, test the chatbot.
- To use the chatbot in a live environment, select Activate.
Import a template into an existing chatbot [#import-template-in-chatbot]
Use this section when you want to import a template into an existing chatbot.
You can import only custom templates into a chatbot.
You can import only templates that use the same channel as the chatbot. Example: In a WhatsApp chatbot, you can import only WhatsApp templates.
What is imported [#import-template-in-chatbot-what-is-imported]
The following are imported from the template.
- Dialogs and dialog groups, which include the chatbot elements. The default dialog from the template is imported as a regular dialog into the chatbot.
- Intents
- Attributes
- NER attributes and custom data types
- Keywords and synonyms
- Chatbot settings
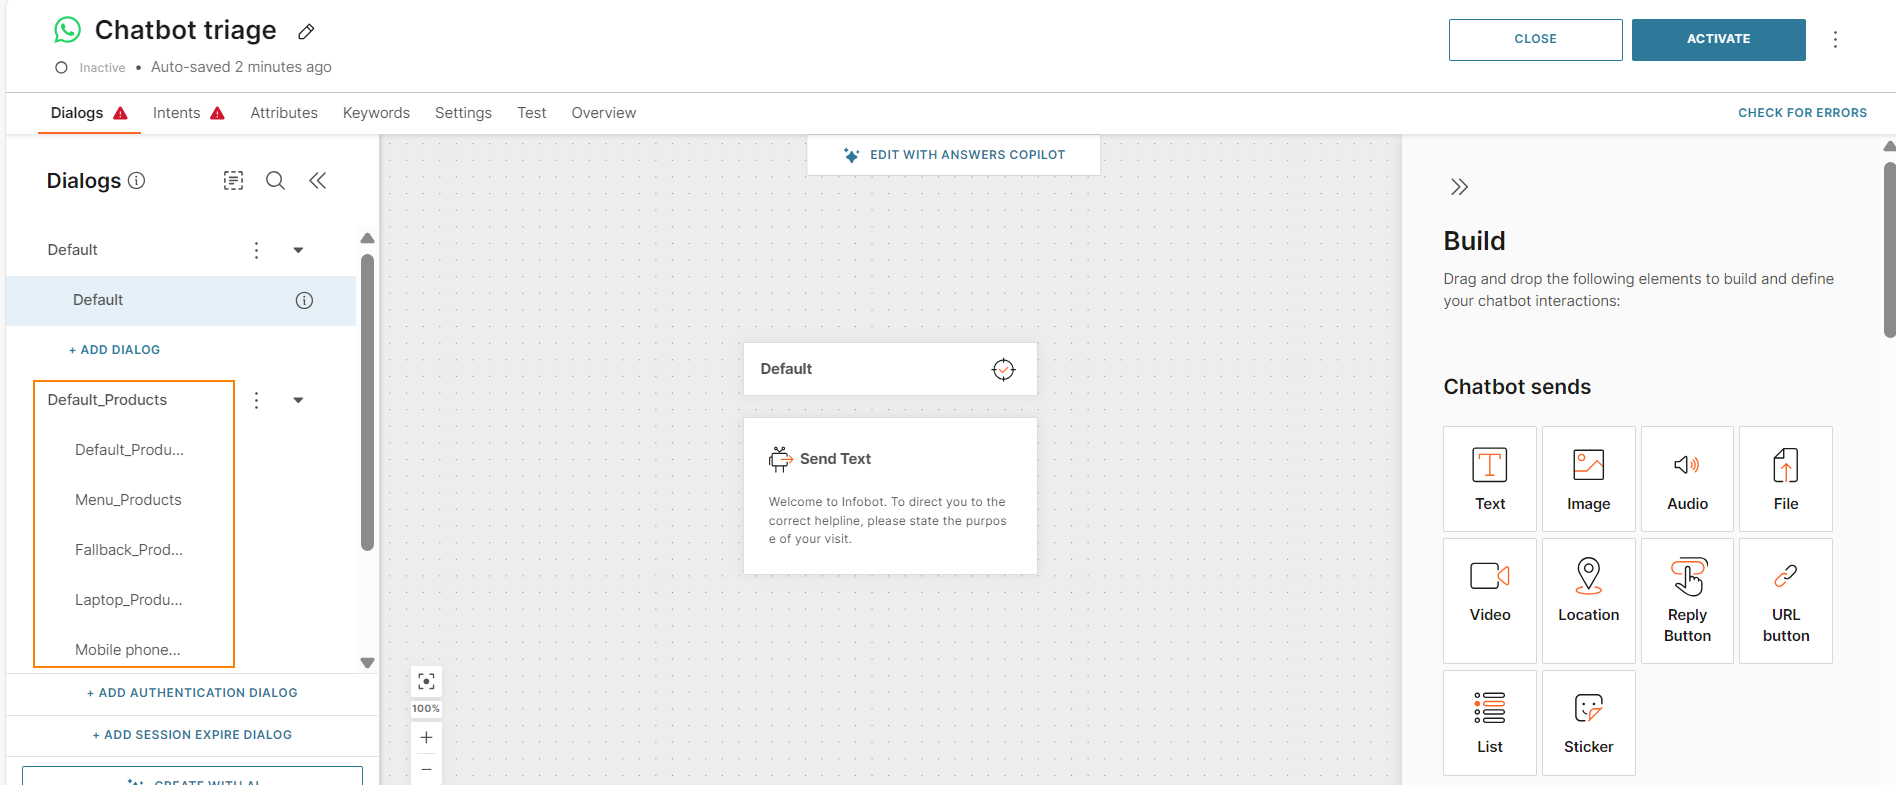
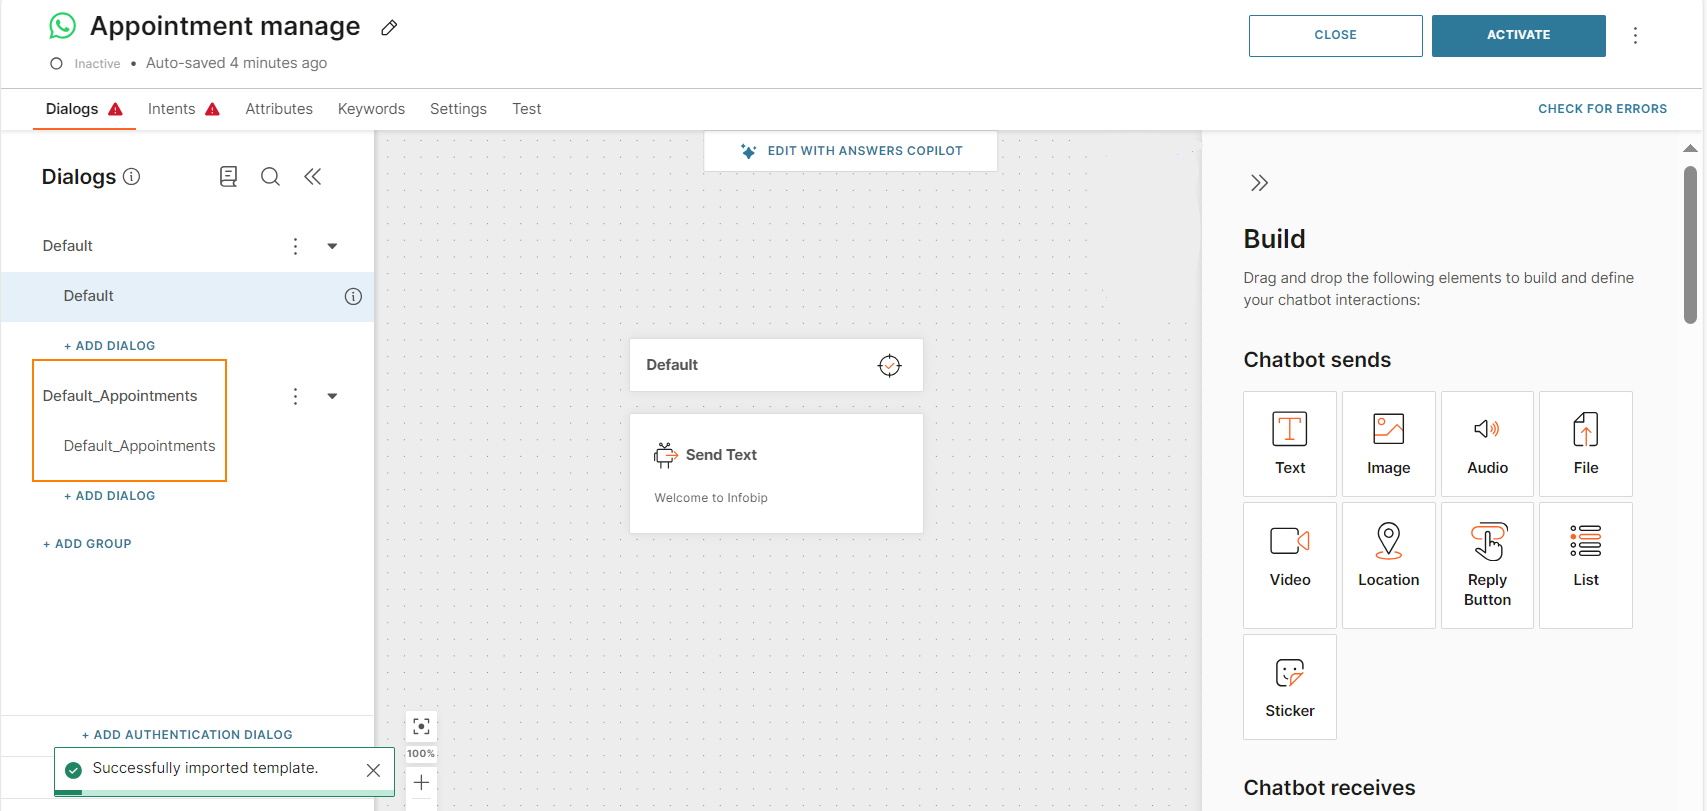
The imported chatbot building blocks have the template name as the suffix. This suffix helps you identify which building blocks are from your chatbot and which ones are from the template.
Example: When you import the Products template into the Chatbot triage chatbot, the imported dialogs have the _Products suffix.
Import the template [#import-template-in-chatbot-import]
- In your chatbot, select the Add from library icon.
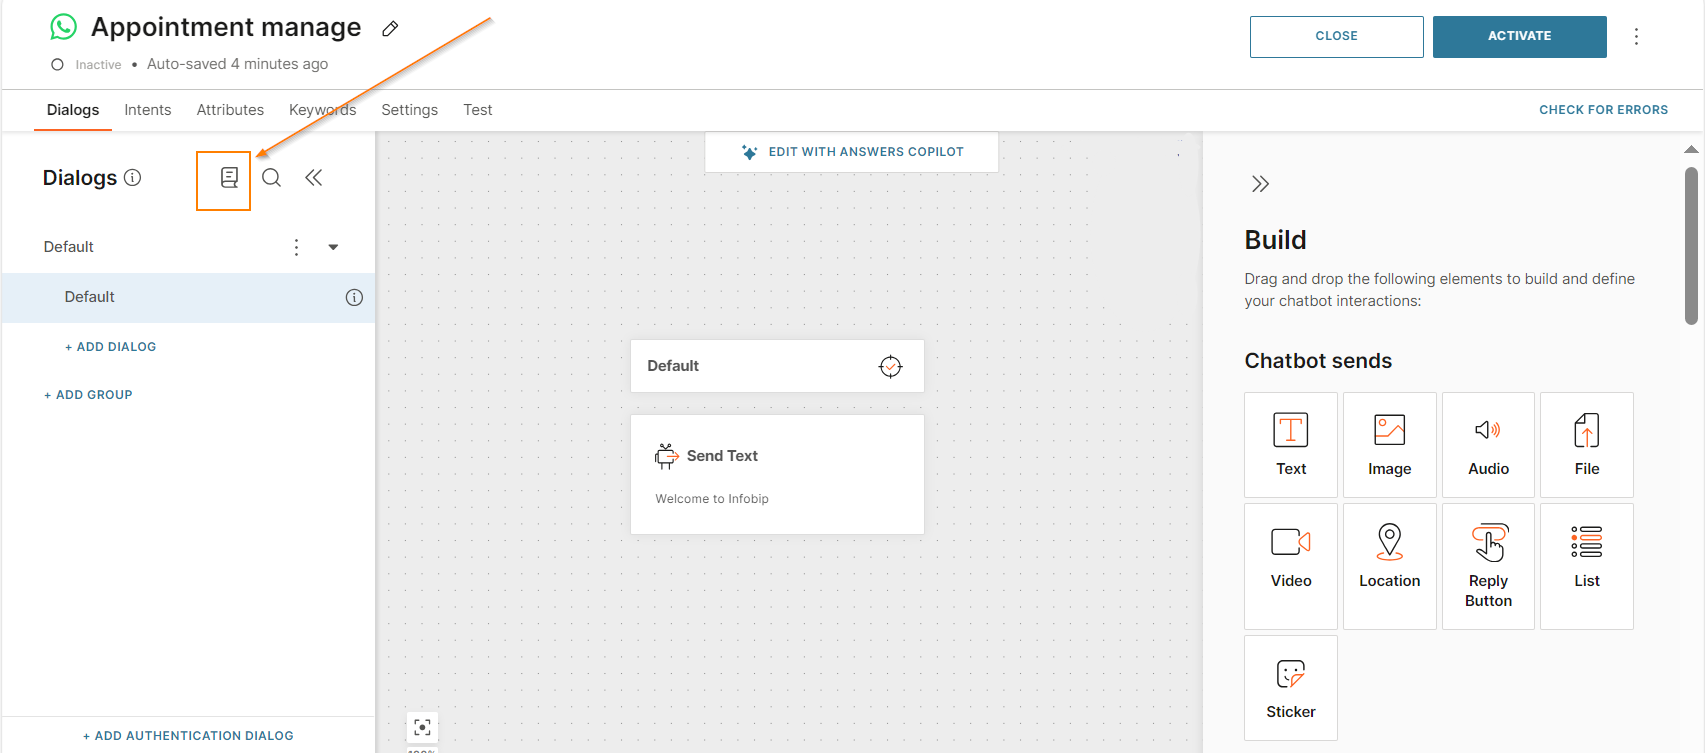
- Hover over the template that you want to add and select Add.
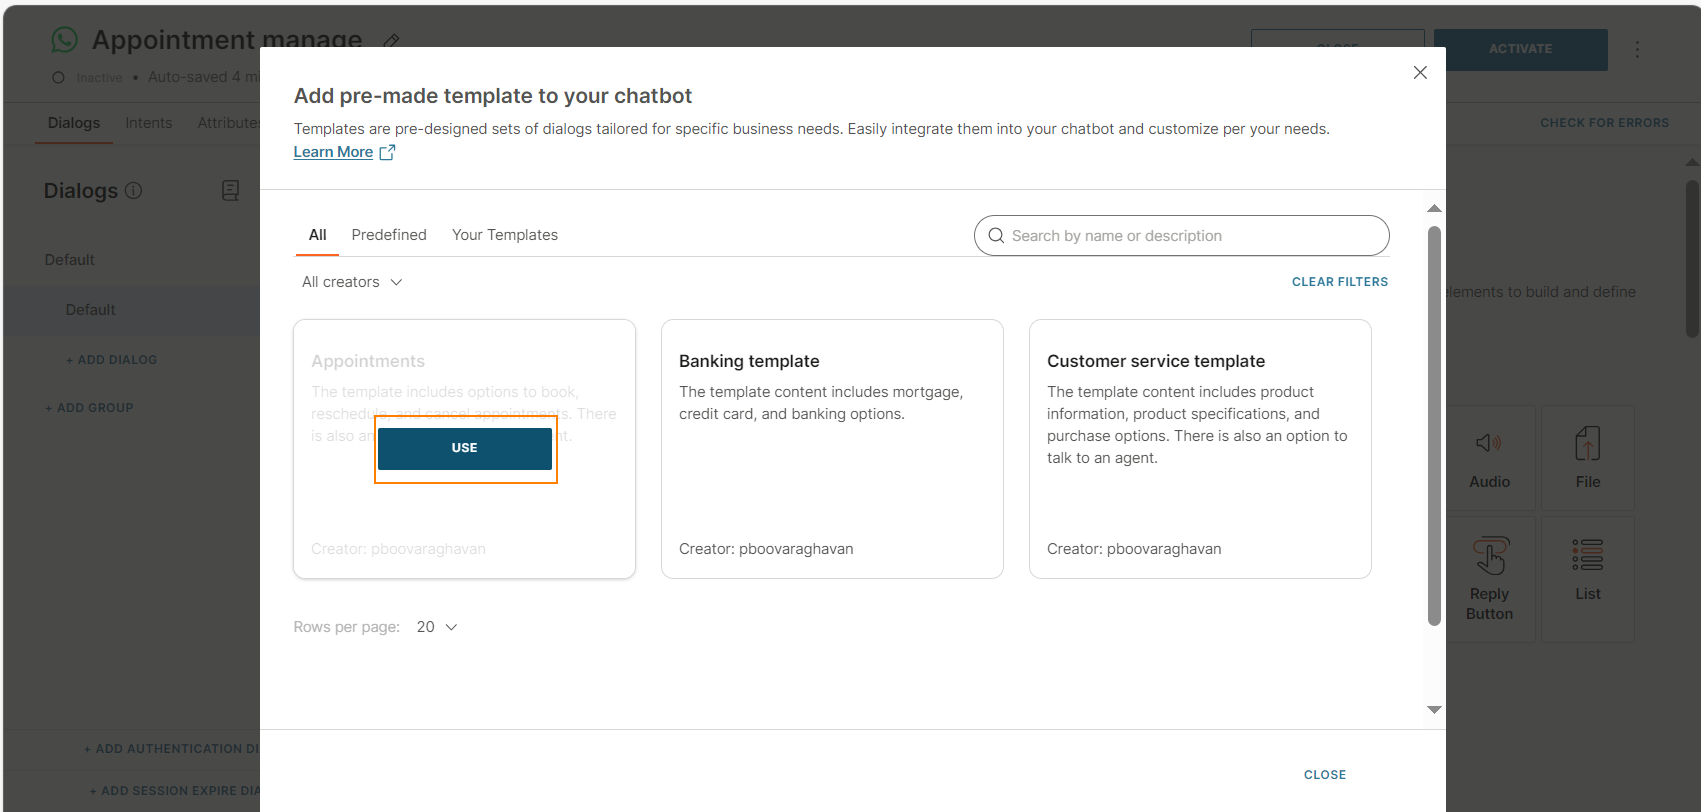 All dialogs from the template are added to your chatbot as a new dialog group.
- Continue to configure the chatbot.
Next steps [#import-template-in-chatbot-next-steps]
- For the imported chatbot building blocks, make the changes that are required for your use case. Refer to the Guidelines and best practices and Customize the Chatbot sections.
- Rename the imported dialogs if required.
- If the imported default intent does not have any training phrases, do one of the following.
- Add training phrases to the intent.
- Delete the intent.
- In the Settings tab, update the sender if required.
- In the Test tab, test the chatbot.
- To use the chatbot in a live environment, select Activate.
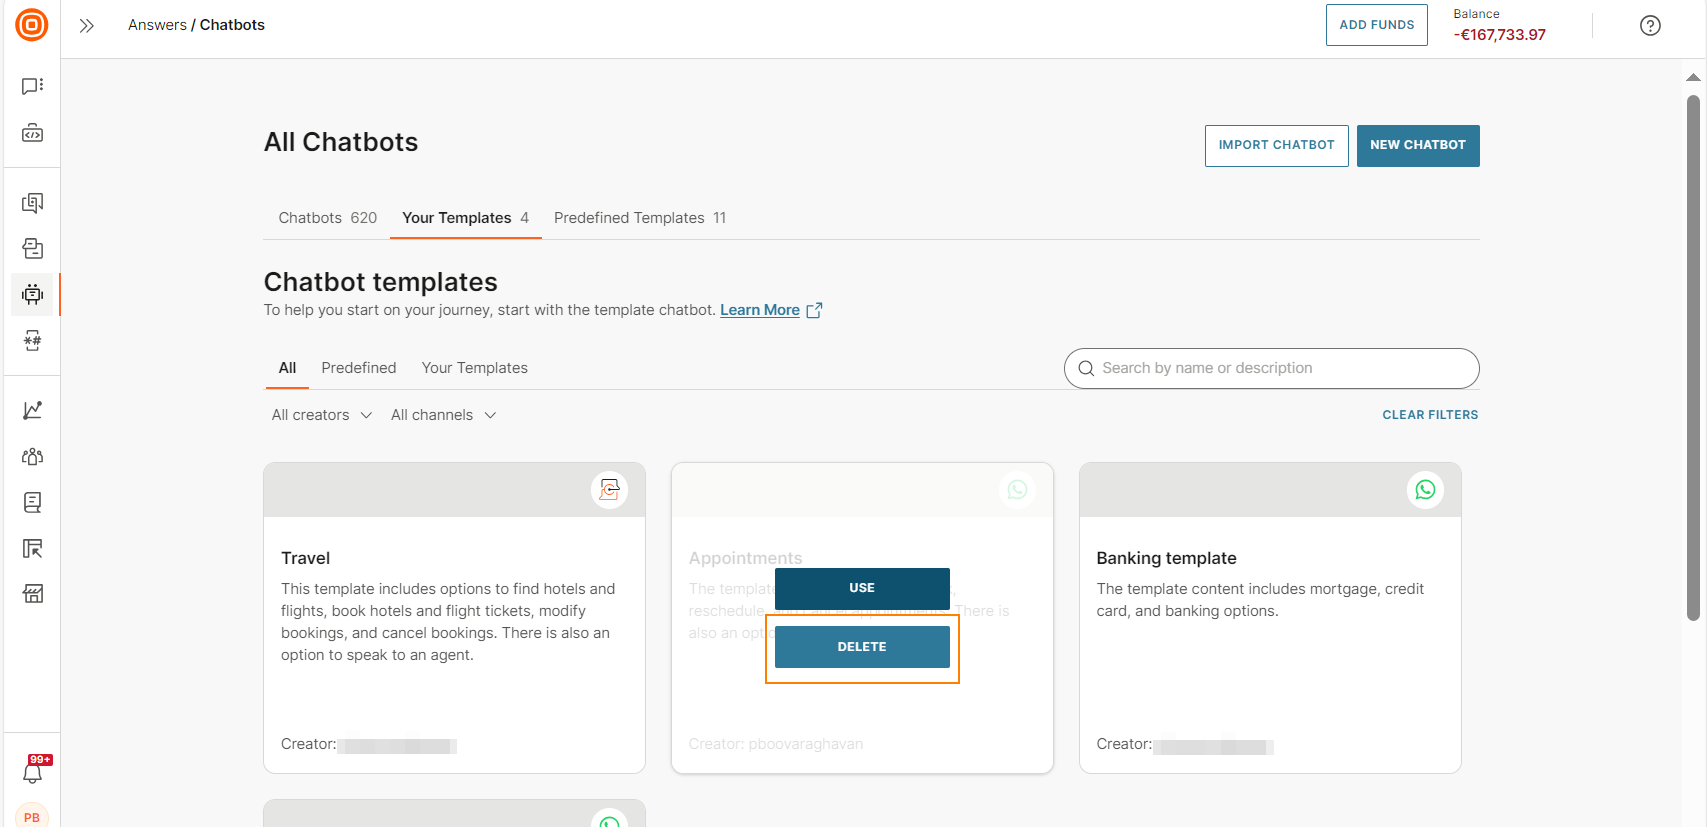
Delete a template [#delete-template]
You can delete only custom templates. You cannot delete predefined templates.
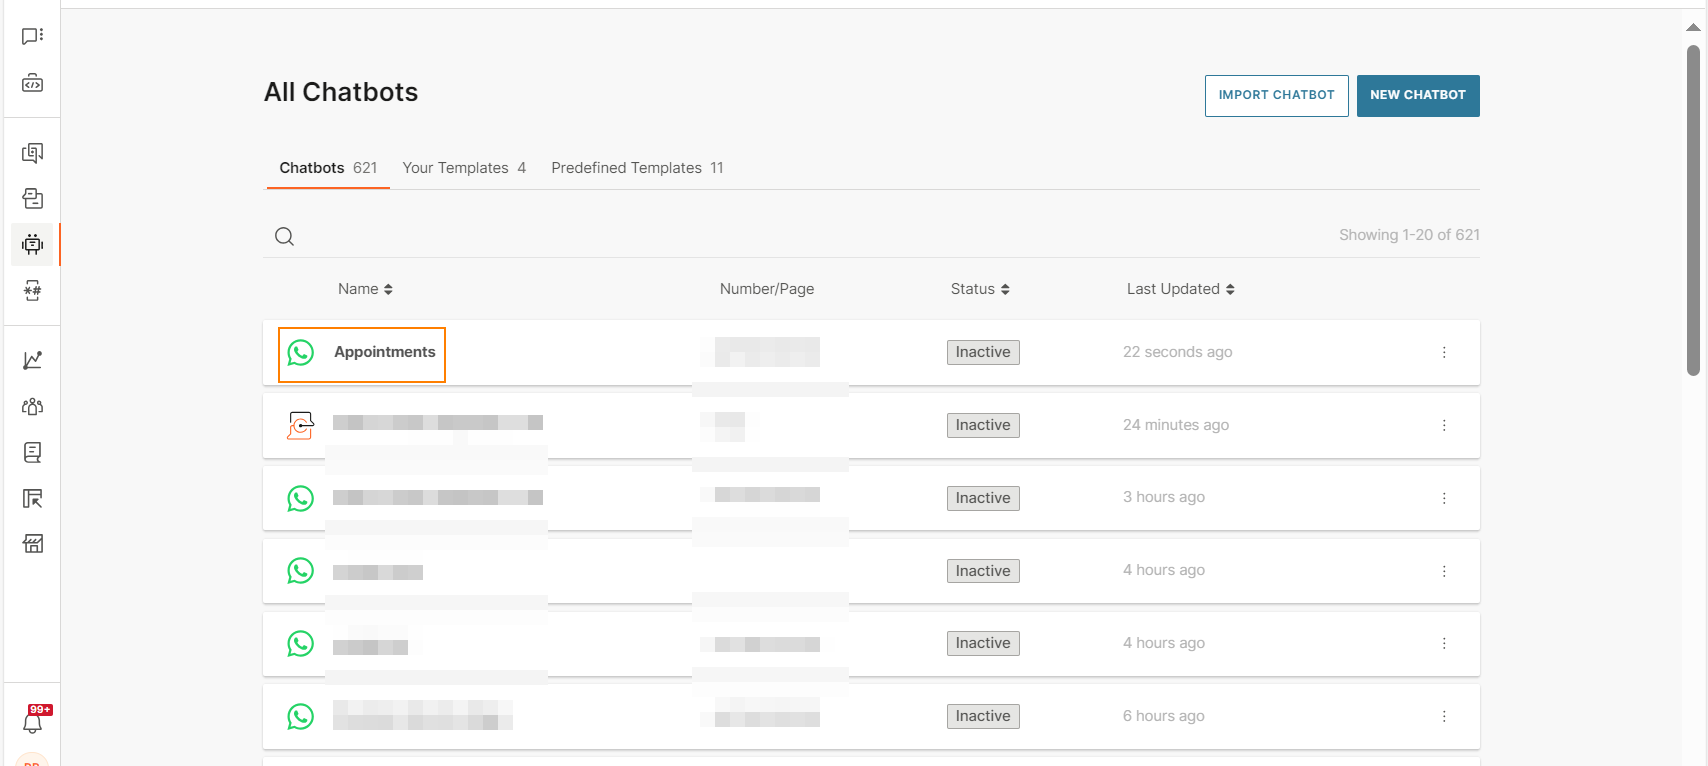
- On the Infobip web interface, go to Answers > Chatbots > Your templates.
- Hover over the template that you want to delete and select Delete.
Audit logs [#audit logs]
For information about the template events that you can view in audit logs, refer to the Audit log documentation.