Jira for Conversations
 Conversations
Learn how to set up and use different ticketing systems such as Jira to track issues and other development processes.
Jira is a software by Atlassian used to track product development, issues, tickets, and agile project management. Conversations supports Jira integration and allows you to exchange data with your Jira account.
Jira integration consists of the following parts:
- Configuration
- Customization
- Usage
What you will need
- An Infobip account. If you do not have one you can create one. You need to have the Supervisor role in Conversations.
- A Jira account
This integration supports Jira Cloud, and Jira Server and Data Center versions 7 up to 9+.
Configuration
To configure Jira in Infobip, you need to set up the connection between the web interface and your Jira account, and then customize which fields you want to see in Conversations.
The steps below will guide you on how to configure Jira in the web interface.
Log in to the web interface, go to Exchange and search for Jira for Conversations.
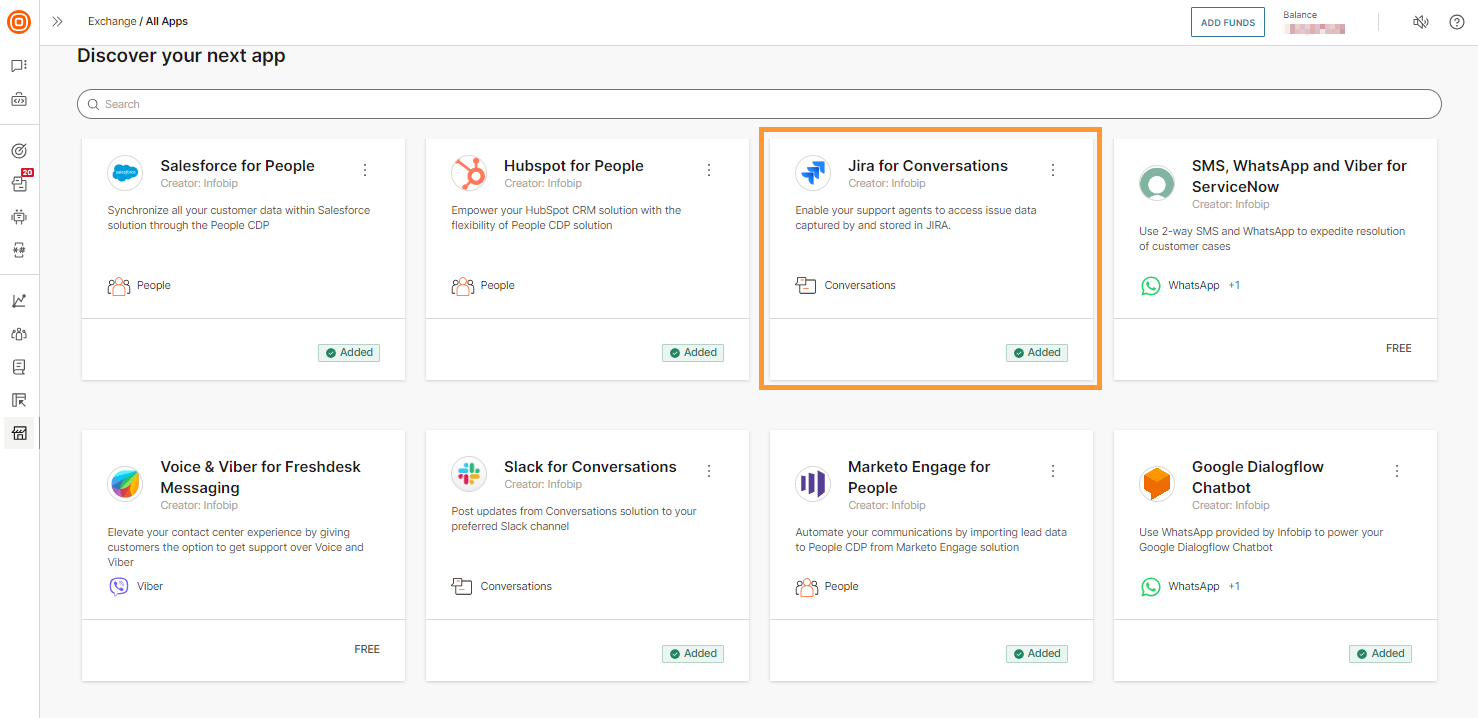
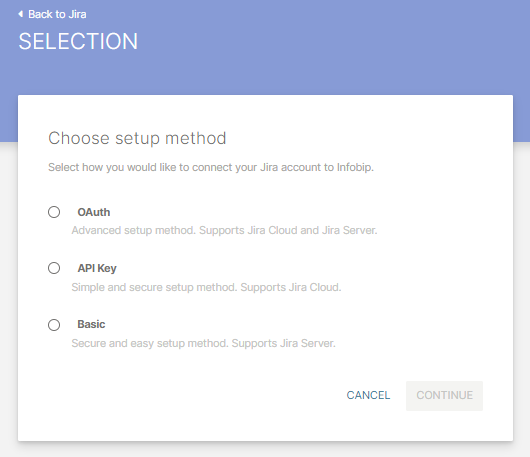
Setting up the connection depends on the type your existing Jira account. Infobip supports three options:
- OAuth connection
- API Key connection
- Basic connection
In the following paragraphs, you will learn how to connect Jira using these methods.
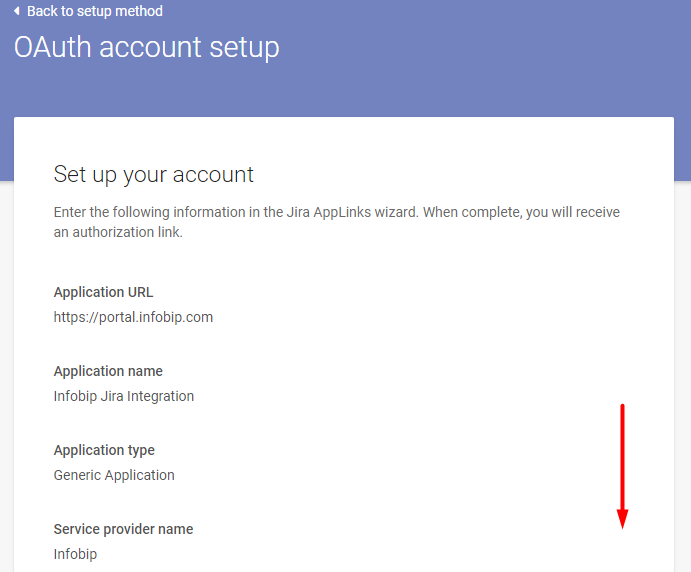
OAuth account setup [#oauth-account-setup-configuration]
-
Select OAuth, click CONTINUE and enter your Jira instance URL.
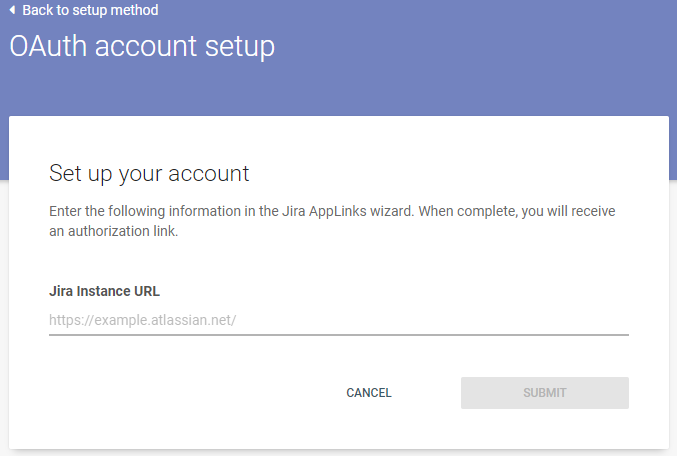
-
Atlassian will return required data you need to finish the connection on Atlassian side.
-
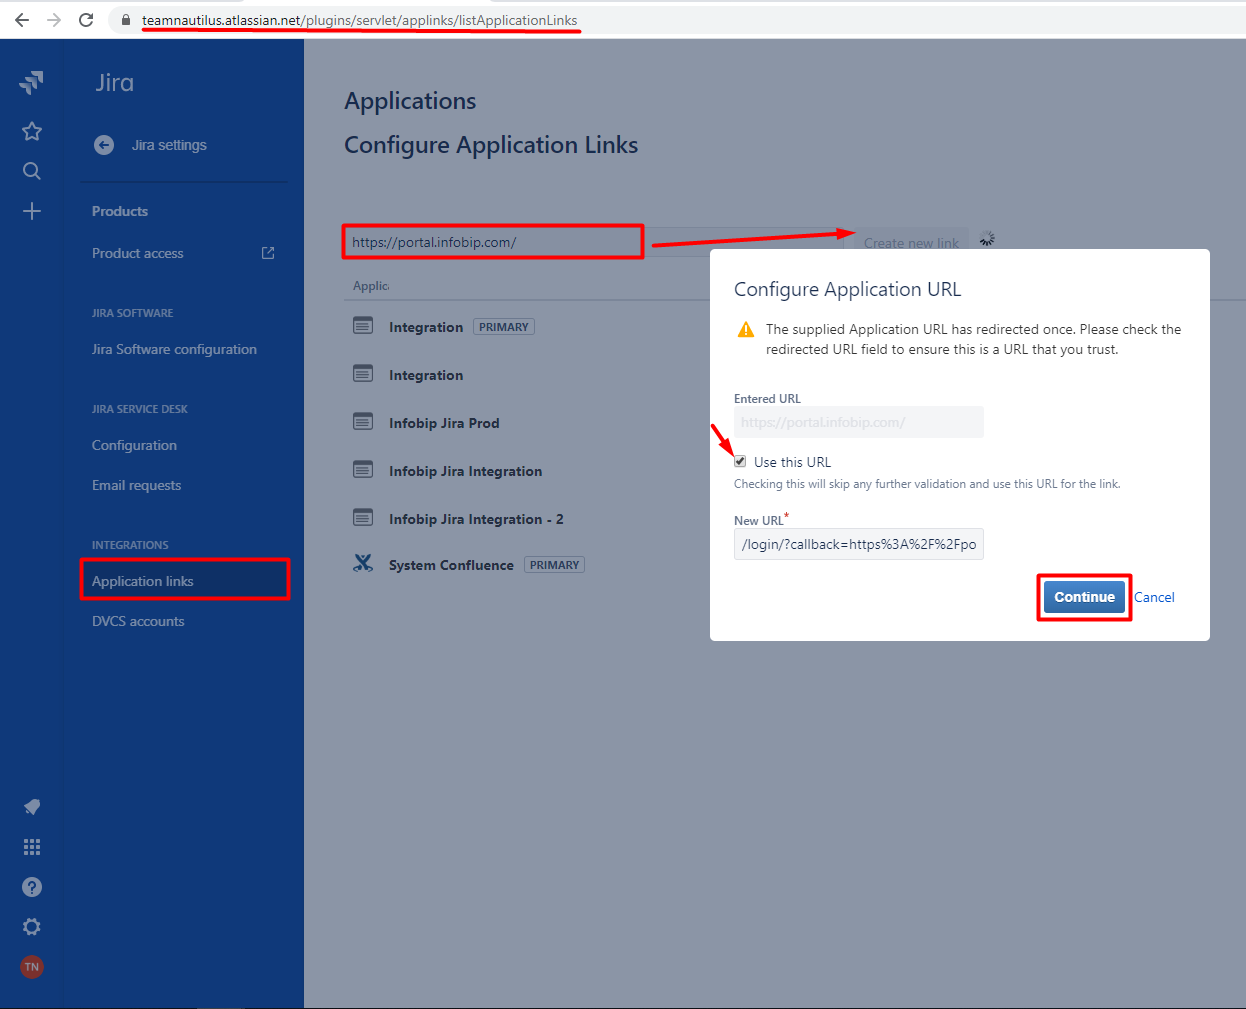
Open Jira, go to Settings > Products > Application links to create a new link.
-
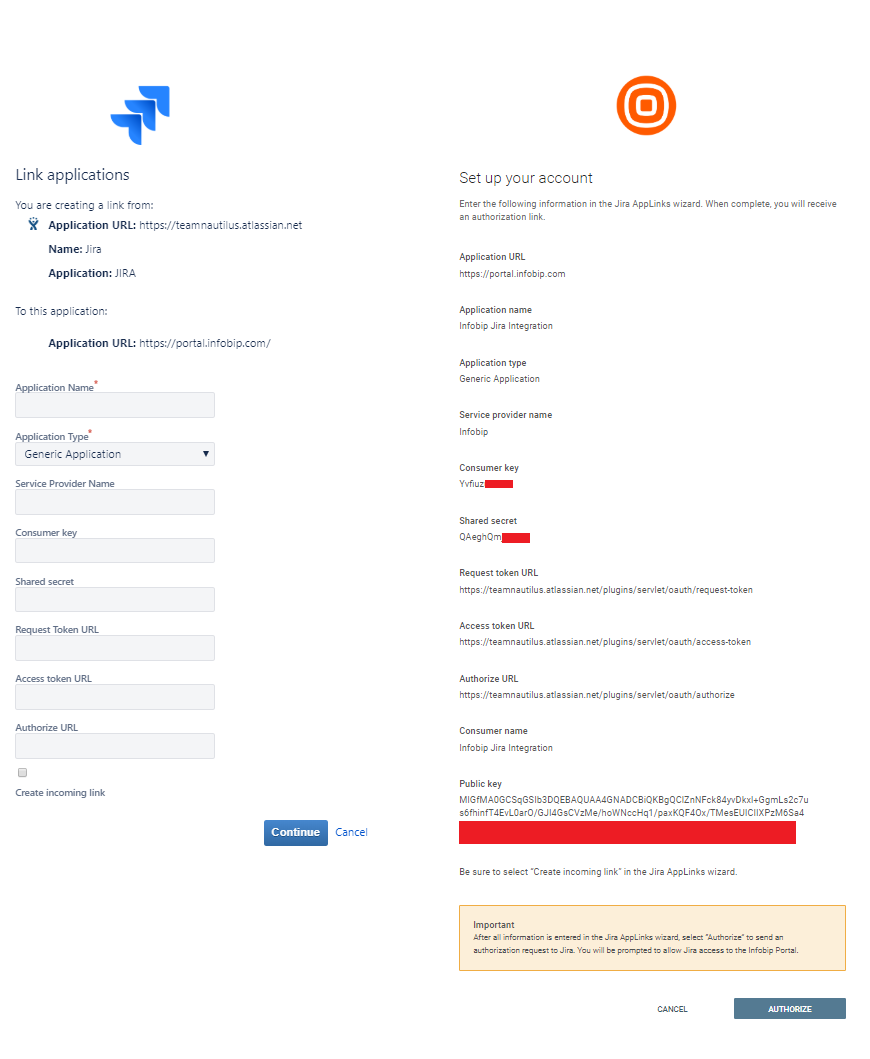
Provide all the necessary data. Use copy/paste. Allow the application to read and write access to your data on your Jira account. Click AUTHORIZE.
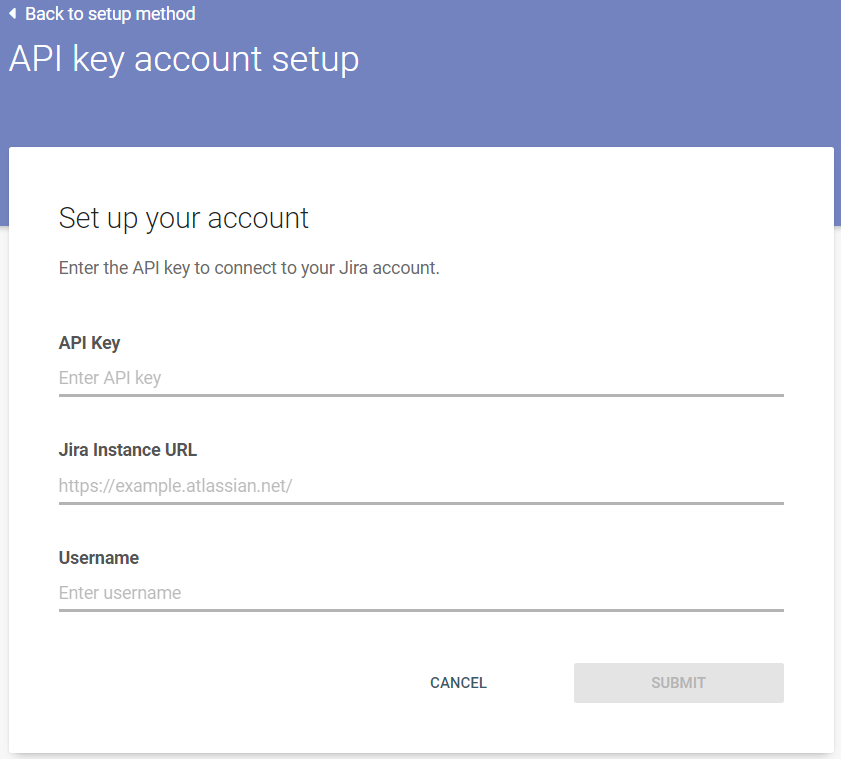
API key account setup [#api-key-account-setup-configuration]
This method supports Jira Cloud instances only and it requires an API Key, Jira instance URL, and Username.
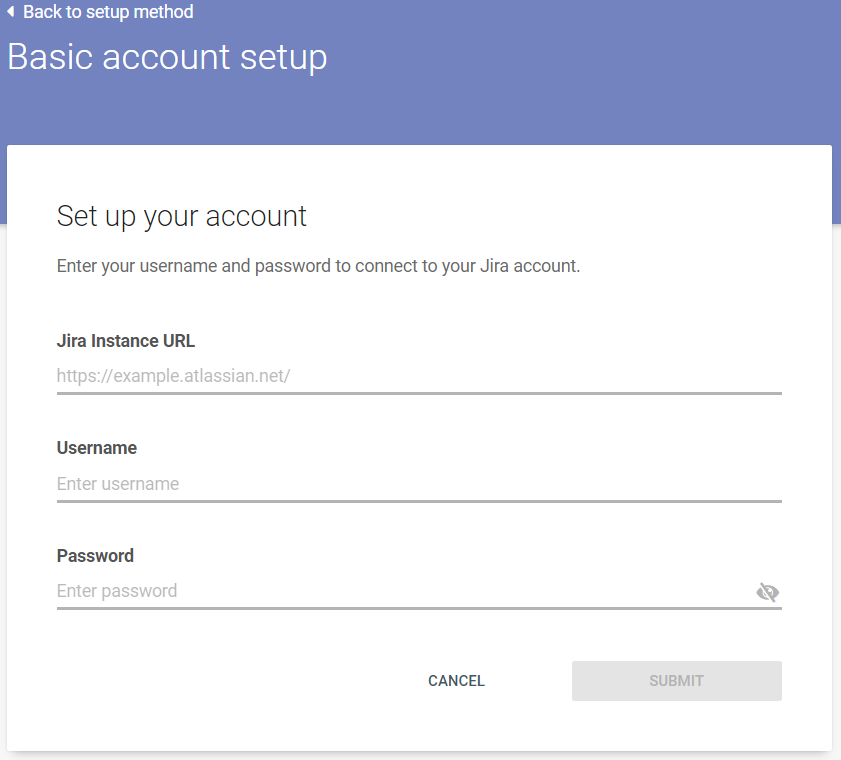
Basic account setup [#basic-account-setup-configuration]
This method only supports Jira Server instances and it requires a Jira Instance URL, Username, and Password.
Customization
After you’ve configured Jira in the web interface, you can customize which data (fields) you want to display to Agents. You can also set up the values in the Summary and Description fields that Agents need to fill out when creating a ticket.
Go to Exchange, select Jira for Conversations, and then select your Jira account. You can enable or disable the integration by switching the toggle.
Select the fields that you want to be visible to the agents in the Jira context card.
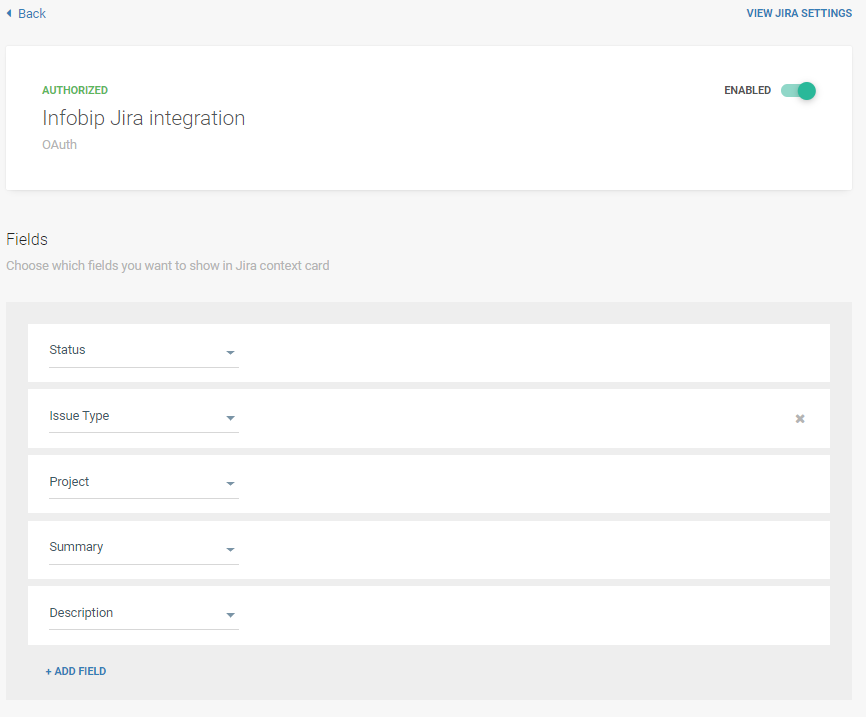
Jira integration does not support: Issue color, Epic color, Issue links, Epic link, Sprint, Labels, Version, Attachment. Additionally, it does not support any user-type fields (for example, Reporter). This means that you won’t be able to create issues that have one of these fields set as required. If you want to use these fields, make sure to mark them as optional in your Jira system.
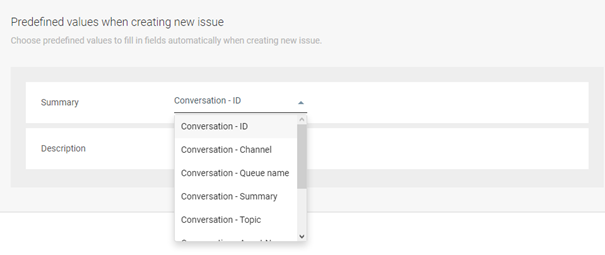
You can select the values that will be predefined for Agents when they create a new ticket. When you choose predefined values, when an Agent creates a new ticket, the fields are filled automatically. Agents can change these values if needed.
Using Jira in Conversations
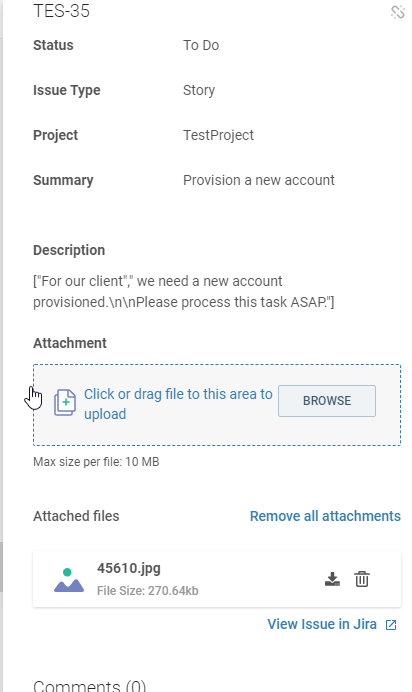
After you’ve completed the configuration and customization, Agents can see the Jira context card in Conversations. Agents can then manage, create new, or link existing issues and tickets to a certain conversation.
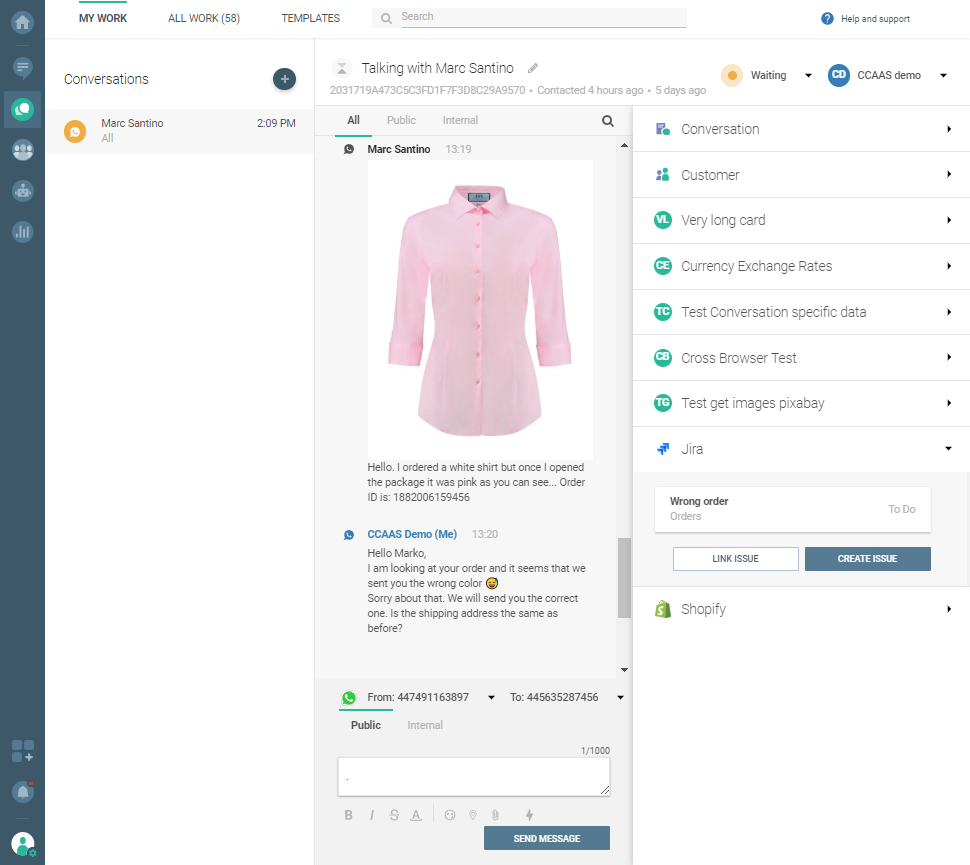
Jira tickets that contain all the relevant data that you need to solve greatly improve your efficiency, and, in turn, the efficiency within the company as you spend less time going through tickets manually. [#jira-tickets-that-contain-all-the-relevant-data-that-you-need-to-solve-greatly-improve-your-efficiency-and-in-turn-the-efficiency-within-the-company-as-you-spend-less-time-going-through-tickets-manually-using-jira-in-conversations]
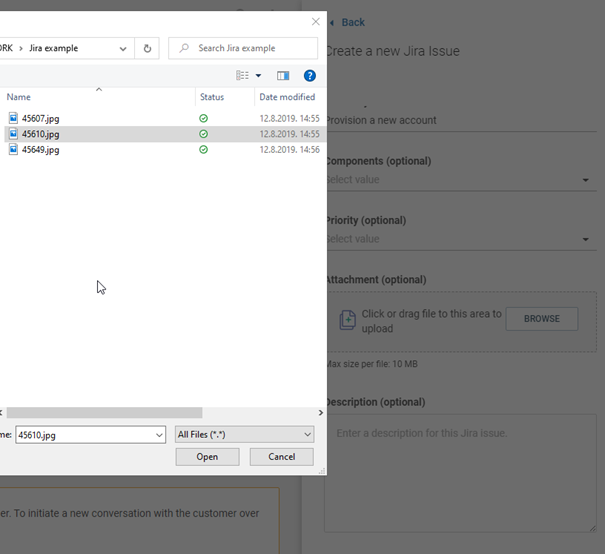
You can describe some issues at length using screenshots/pictures, videos, or other types of attachments that supplement the text in the ticket description.
Jira integration allows agents to upload attachments to tickets while they're creating a ticket. And yes, they can also add attachments to any existing tickets.
While in a conversation, agents will see all the attachments already attached to the ticket in the agent panel. They can review, download or remove attachments based on their needs and what the ticket is about.
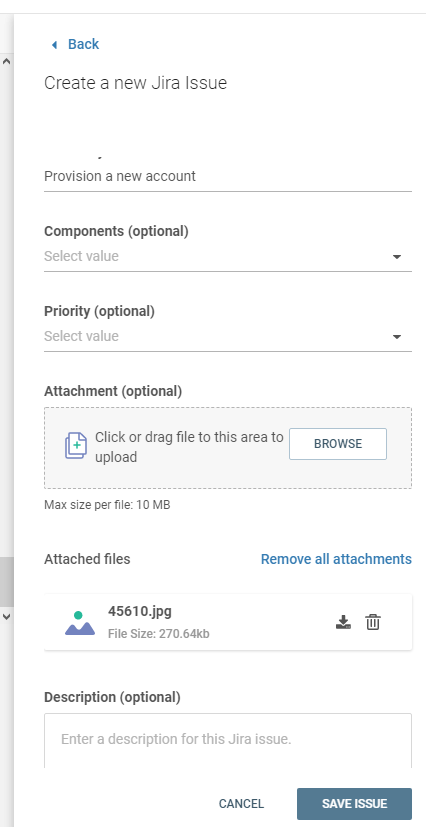
Note that the maximum size to upload a file is 10MB.