Microsoft Dynamics 365 and People
Connect Microsoft Dynamics 365 with People to use CRM data for targeting and personalization in Infobip.
Microsoft Dynamics Sales, otherwise known as Microsoft Dynamics 365, is a customer relationship management software package. It is part of the Dynamics family of products.
The data stored in MS Dynamics 365 can be used to improve the quality, targeting, and personalization of your communication executed in Infobip.
What you will need
To start using People via Microsoft Dynamics 365, you need the following:
- If you already have an Infobip account, ensure you have Integrations Manager permissions and contact your dedicated Account Manager.
- New users must sign up for the Infobip account and then contact our Account Managers.
- Microsoft Dynamics 365 user account with administrator privileges.
Installation
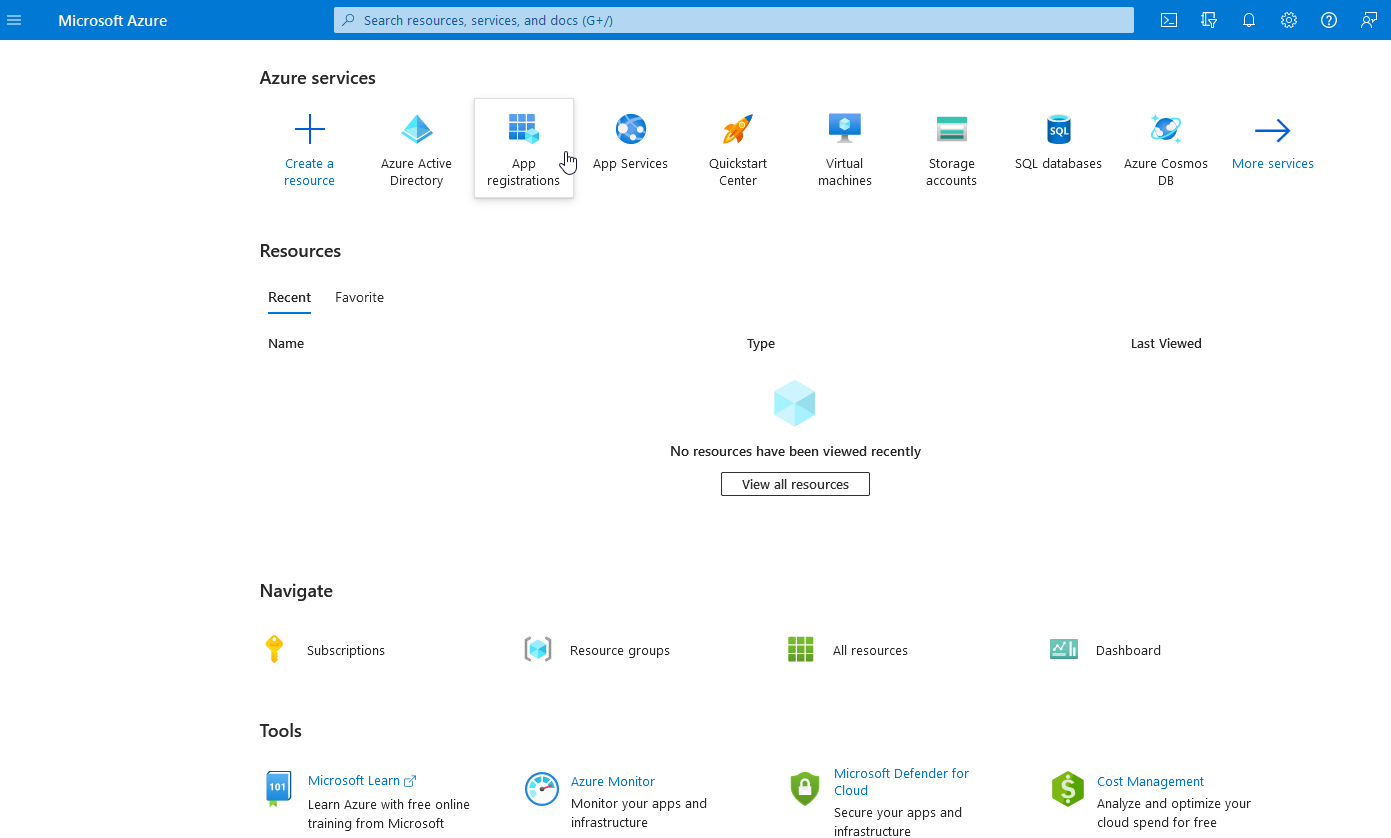
- Log in to Infobip and go to Exchange > App Apps.
- Open the Dynamics CRM for People integration and select the Integrations tab.
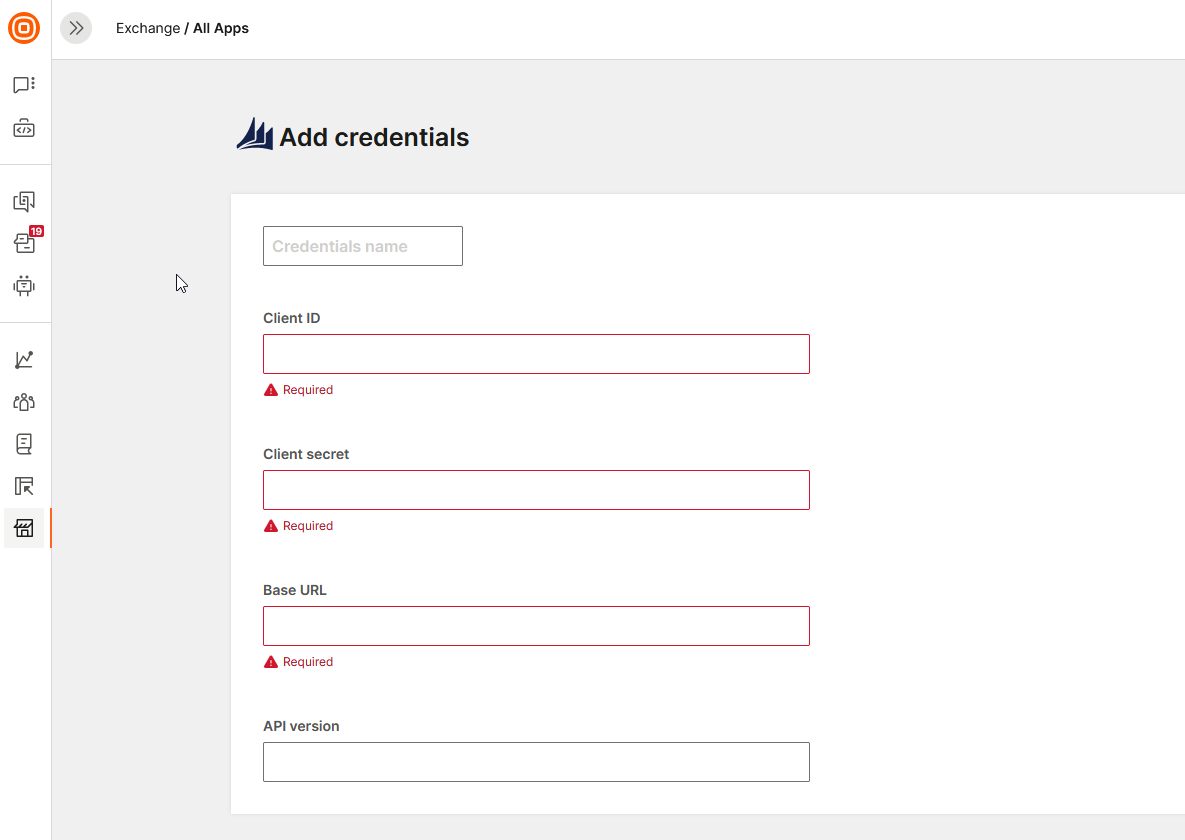
- Select Set Credentials and then provide the credentials that will allow data exchange between Infobip and Dynamics. For more information, see Set credentials.
- Select a Profile sync that you want to use. For example, DynamicsCRM Contacts to People Customers. Each Profile sync component represents the type of data that you want to sync between Dynamics and Infobip.
- Select Configure.
- Map the entities and the field mappings. See Map entities and fields for integration.
- Select Activate to start the flow.
Set up credentials
For Infobip to connect with Dynamics, you must set up credentials in the Microsoft Azure. The integration uses APIs provided by Microsoft to access data stored in Dynamics or to update them. The credentials are used to authenticate against those APIs.
The following steps describe how to create credentials that will be used for the integration.
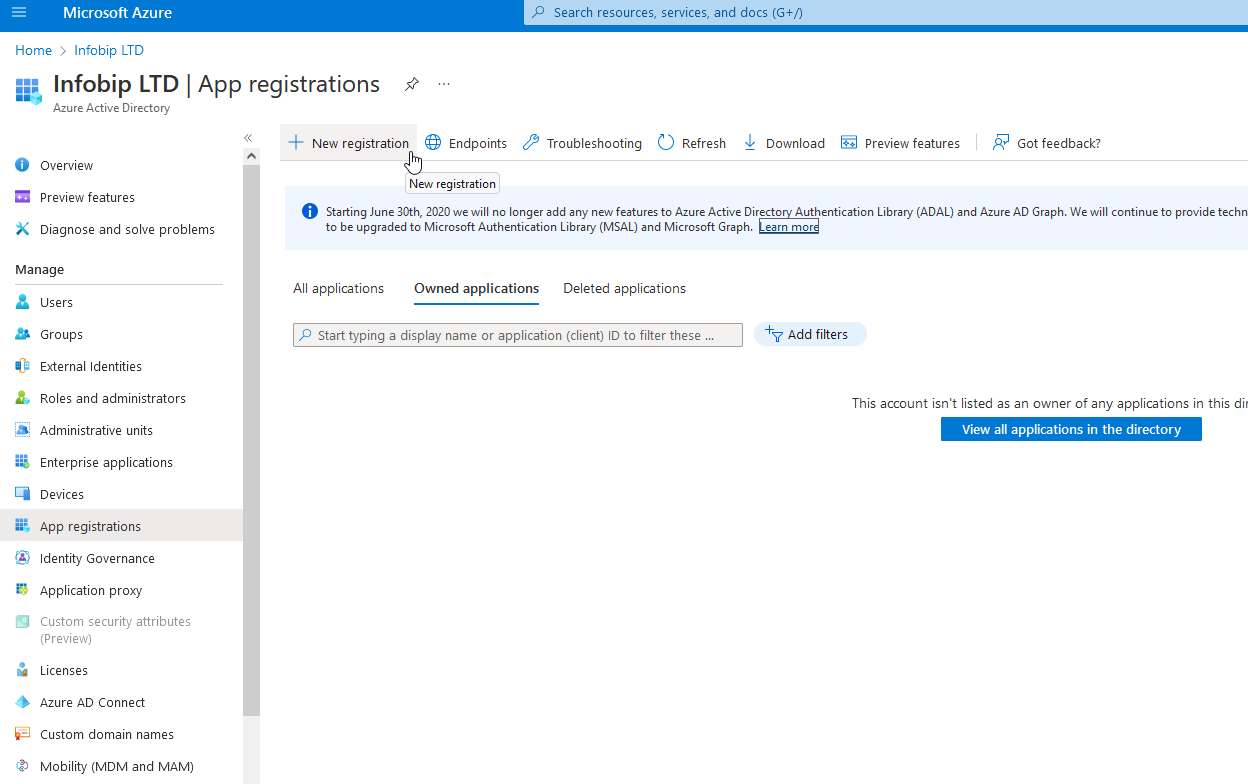
Access Azure app registrations [#access-azure-app-registrations-set-up-credentials]
-
Go to https://portal.azure.com.
-
Go to App registrations.
-
Select New Registration.
-
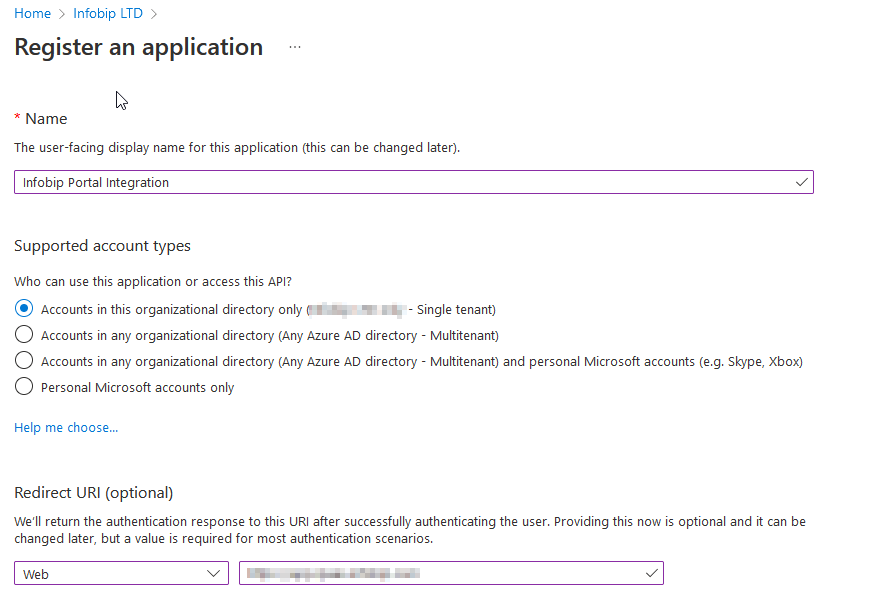
Register the applications using the following values:
- Name: the name for the App (Access credentials)
- Supported account types: Accounts in this organizational directory only
- Redirect URL:
- Platform: Web
- URL: https://app.ipaas.infobip.com/callback/oauth2
-
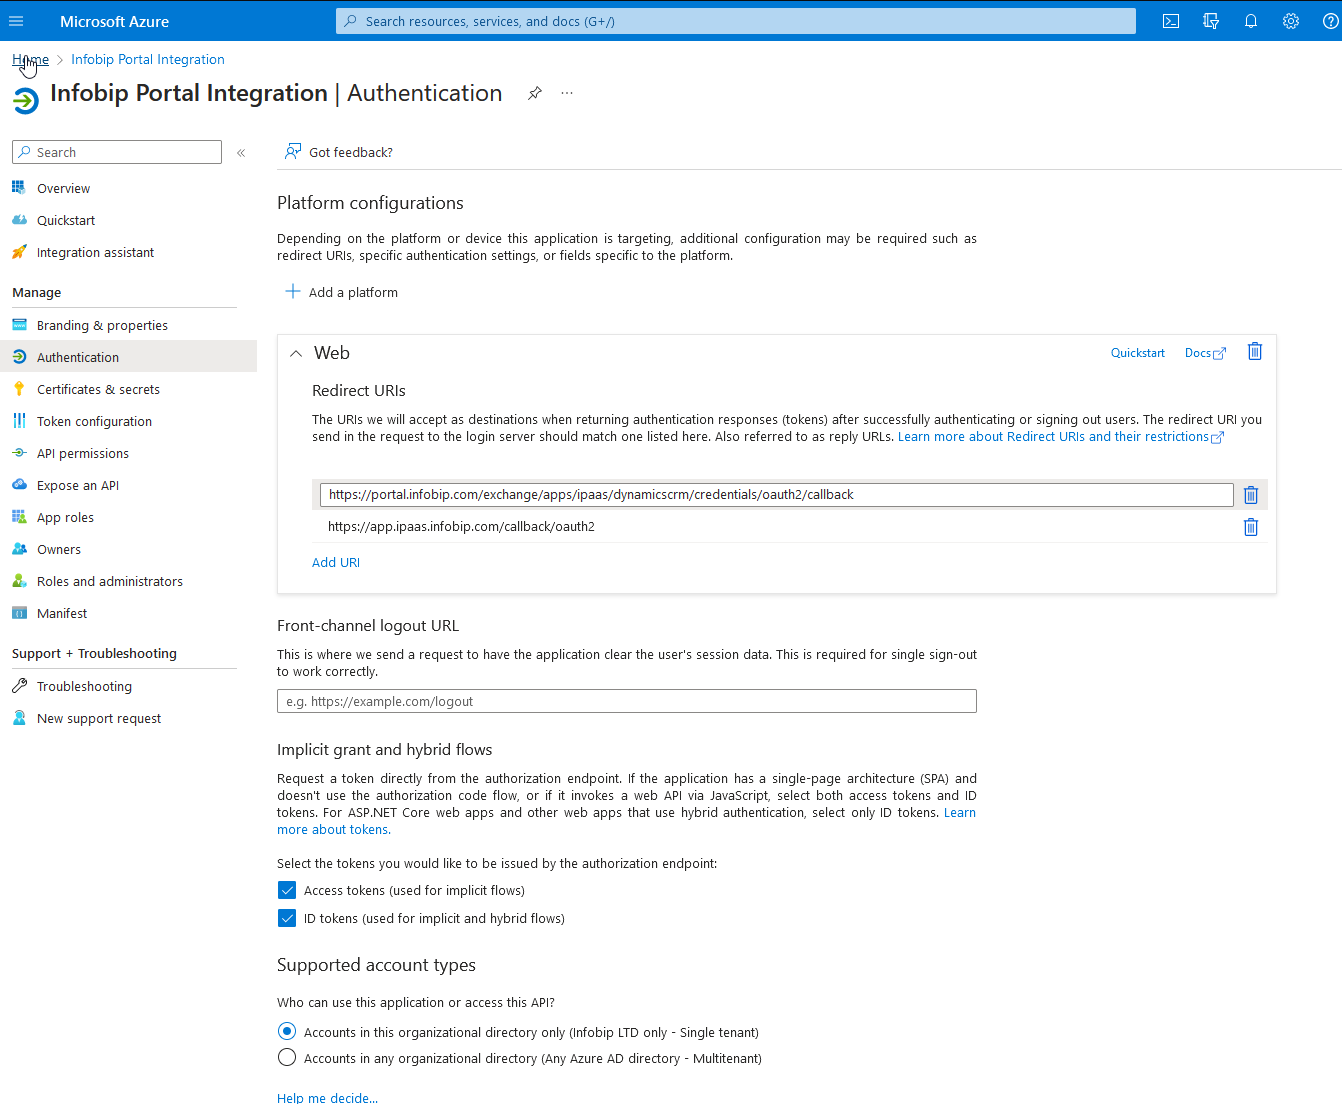
Add an additional redirect URL:
- For the credentials (token) to be successfully acquired and refreshed, there must be two redirect URLs set up. One for the receiving token, which is performed in the Infobip web interface, and the other for refreshing it.
- Add the following URLs:
- https://portal.infobip.com/exchange/apps/ipaas/dynamicscrm/credentials/oauth2/callback
- https://app.ipaas.infobip.com/callback/oauth2
-
Set up permissions. To allow the app to manage data in Dynamics CRM, add the required permissions.
- Go to API permissions in the side panel.
- Select Add a permission and then Dynamics CRM.
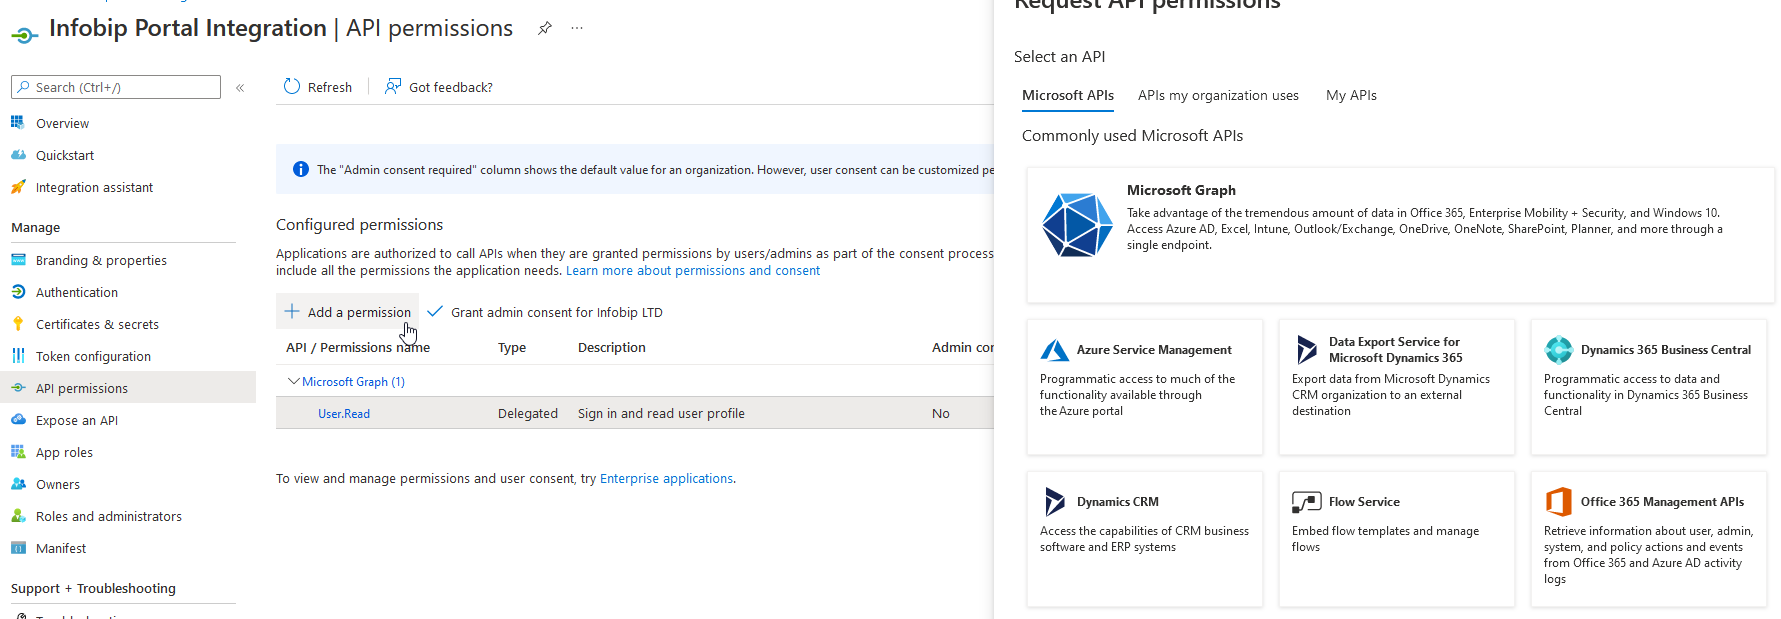
- Select
user_impersonationand then select Add permissions. - Select Add a permission. In the panel on the right-hand side, select Microsoft Graph and select Delegated permissions.
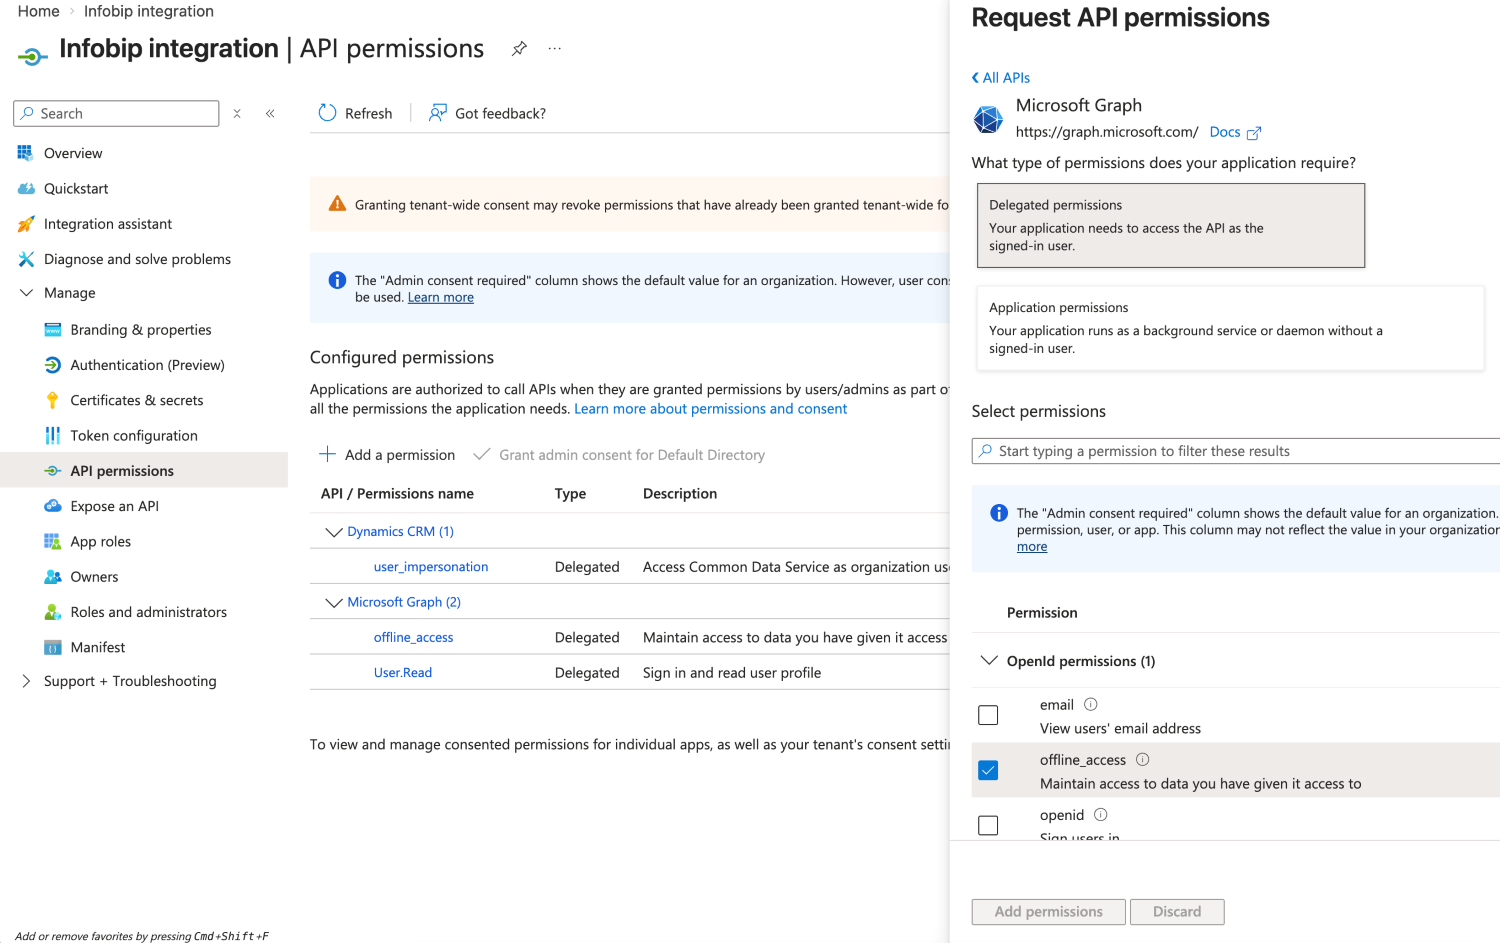
- Select
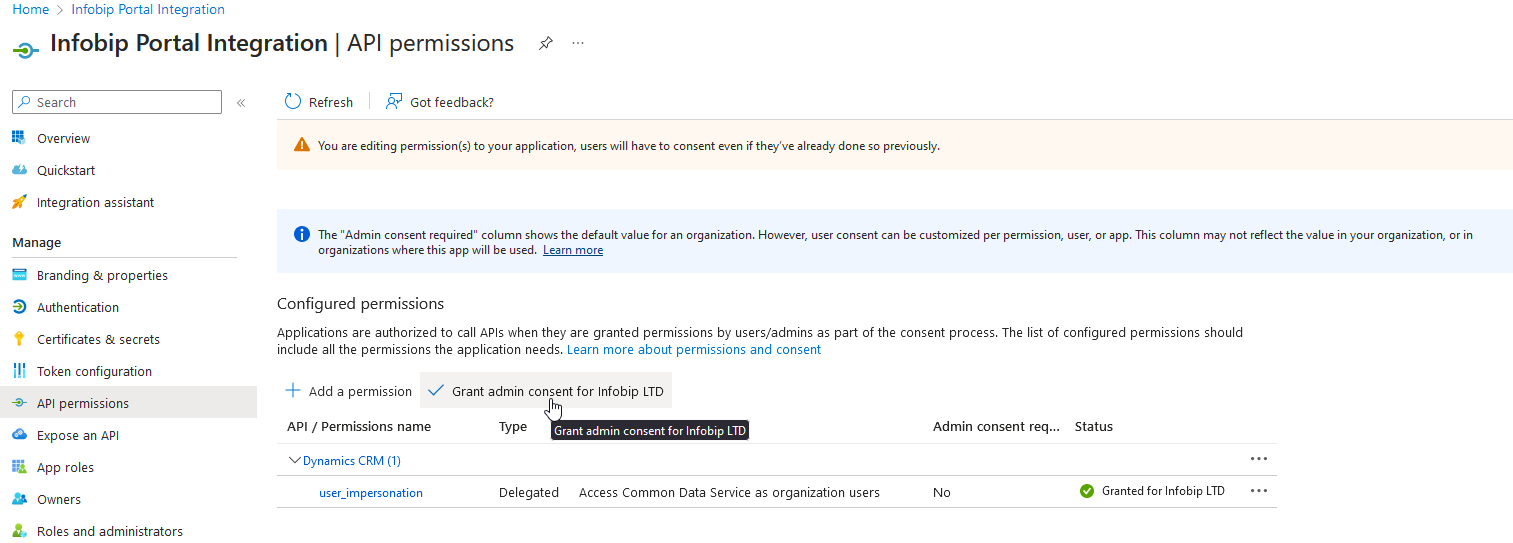
offline_accessand confirm by selecting Add permissions. - Select Grant admin consent for org.
Generate secret for the app [#generate-secret-for-the-app-set-up-credentials]
To generate the app secret, select Certificates and secrets and then New client secret. Note the Value field content. It is only visible once. When connecting the app in Infobip, add the value in the Client Secret field.
Get the Client ID from the App Overview screen in Azure.
Connect the integration in Infobip [#connect-the-integration-in-infobip-set-up-credentials]
In the Microsoft Dynamics CRM integration within Infobip, create the credentials with the following values:
- Credentials name: give your credentials a name
- Client ID: get the Client ID from the App Overview in Azure
- Client Secret: the value from the Value field you got when you created a secret for the app in Azure
- Base URL: the URL of your Dynamics CRM instance. For example, https://orge0000000.crm00.dynamics.com/
- [Optional] API version - the default settings will be applied if left empty (recommended)
Map entities and fields for integration
On the Infobip Dynamics CRM integration page, include the information that you want to be a part of this integration. Make sure that this information corresponds both on the Dynamics CRM side and on the Infobip side.
The following entities are available for mapping in Dynamics:
- Lead: Someone who is not your client yet, but there are chances they might become one
- Contact: Someone who is your client and you are doing business with them
The following entities are available for mapping in People:
- Lead: Person in the Infobip People whose information has not been confirmed
- Customer: A person with confirmed contact information
In People, you can add or change standard (first and last name, country, and city) and custom attributes. In Dynamics CRM, you can edit information about Contacts and Leads.
When using profiles sync from Infobip People to Dynamics CRM, you must include the entityID in the data mapping. Otherwise, you may see duplicated records in Dynamics. The best way to ensure that the data is properly synchronized is to activate both Dynamics to People and People to Dynamics syncs with the entityID stored in the external ID field in People.
Automatic synchronization of leads, contacts, and person profiles [#automatic-synchronization-of-leads-contacts-and-person-profiles-mapentities-and-fields-for-integration]
Any customer information and profiles that you create integrate between Dynamics CRM and Infobip, either within bulk integrations or each time you enter new or modify the existing information in either system.
Changes on the Dynamics CRM side appear in Infobip People with a delay of up to ten minutes.
Create new lead or contact in Dynamics CRM [#create-new-lead-or-contact-in-dynamics-crm-mapentities-and-fields-for-integration]
In Infobip People, confirm that the lead or contact you want to create does not already exist. Infobip uses email to match the profile.