VTEX
 Conversations
When you connect your VTEX Store to Infobip with our Exchange app, you can:
- Sync your customer data to People so that you can use it in all Infobip products. For example, if you use Moments, you can use your VTEX contacts in campaigns and broadcasts
- Connect your chatbots easily in VTEX for Answers by having the order, product, and customer information available for the chatbot to enhance the interaction
- Create VTEX Context Cards in Conversations to enable a full shopping experience so that agents can access the relevant eCommerce data, such as orders and related customer details without navigating to another tab.
What you will need
- An Infobip account
- API Base URI (for example:
https://bestpartnerbr.myvtex.com/orbestpartnerbr) - A VTEX account
- A VTEX application key and application token
Set up authentication
Use the following steps to set up authentication.
VTEX application keys [#vtex-application-keys-set-up-authentication]
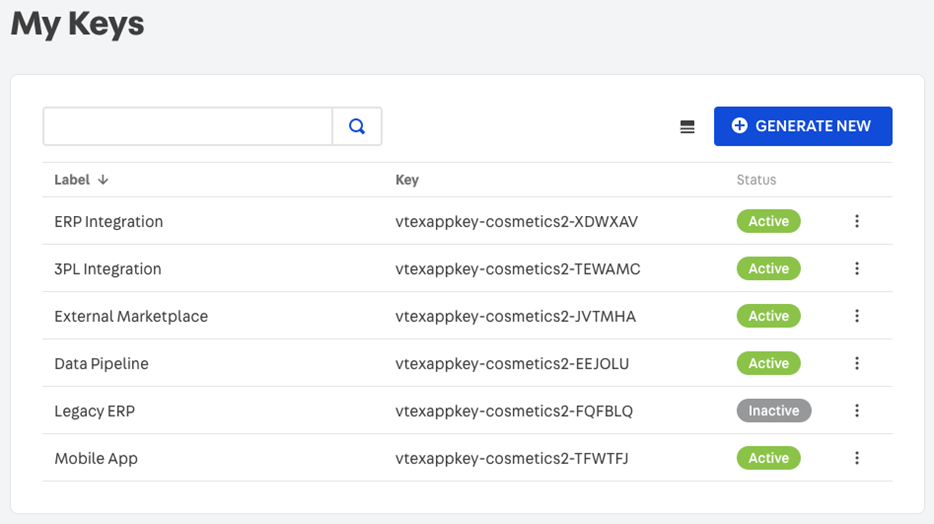
The My Keys page in VTEX lists all of the internal app keys. To access this page, go to Account settings > Account management > Application Keys and click on the Manage my keys button.
- Label gives the purpose of the app key
- Key contains the unique identifier for the app key
- Status is a boolean value that indicates whether the app key is active or inactive
Generate a new application key [#generate-a-newapplication-key-set-up-authentication]
Application keys allow the external system to access your account, so your VTEX account must have this role: License Manager / Services access control / Save user.
- Click Generate New.
- In the Label field, enter the application key's purpose. This is optional. If you leave the field blank, it is set to the Key value of the generated key.
- Click Add roles to manage key permissions.
- Click Generate.
- Copy the Application Token and save it in a safe place. It is displayed only once.
Add the credentials to Infobip [#add-the-credentials-to-infobip-set-up-authentication]
- Log into Infobip and go to Exchange > VTEX.
- Click Add and accept the Exchange Terms & Conditions. Next, you see a configuration page.
- Select the Credentials tab and click Add Credentials.
- Enter the app key, the app token, and the base URI (for example:
https://bestpartnerbr.myvtex.com/orbestpartnerbr).
Using VTEX in People
The last integration step is to map VTEX data fields to People.
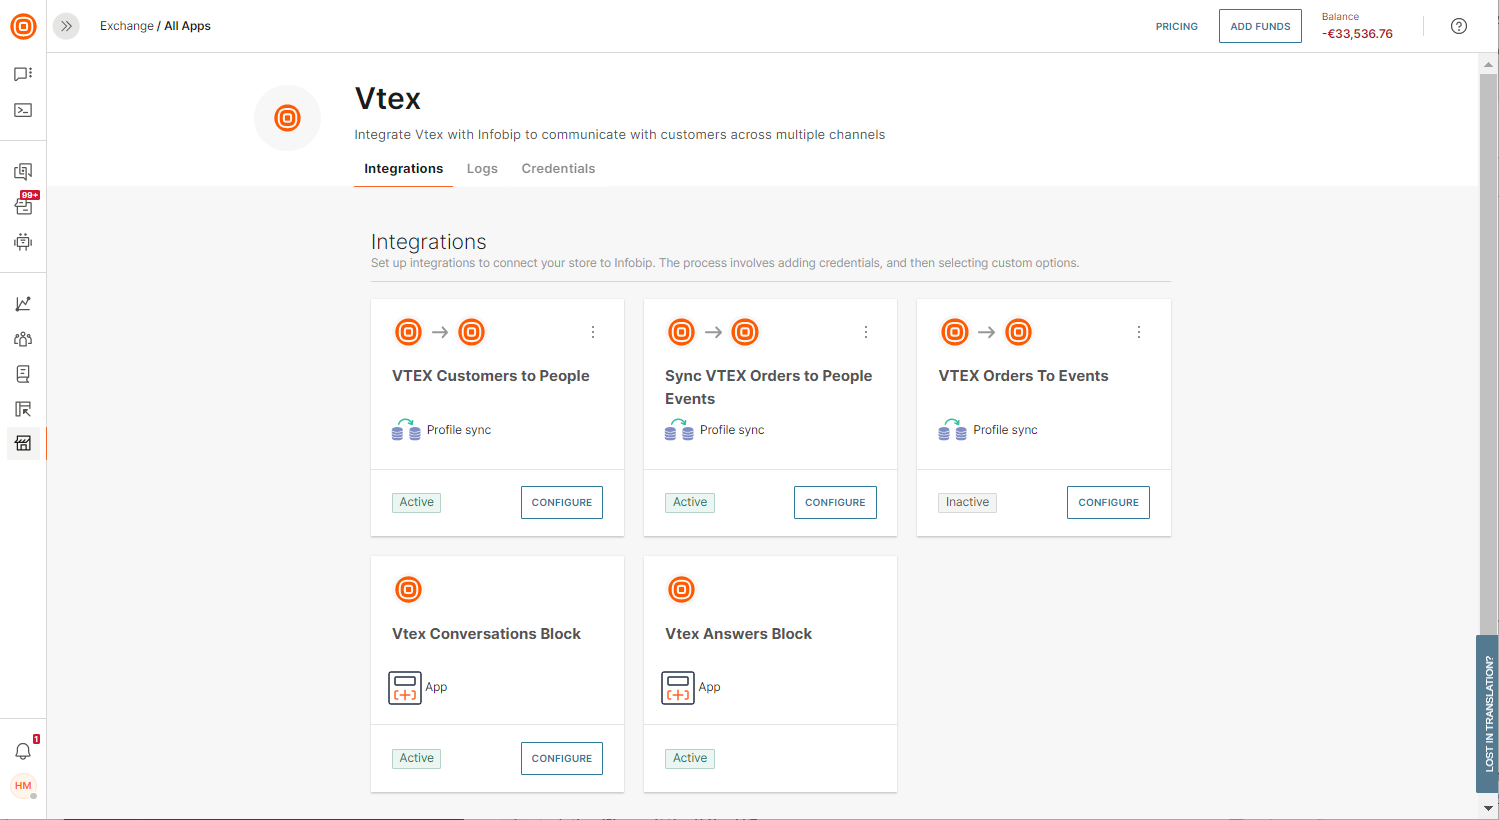
- Logon to Infobip and go to Exchange > App Apps.
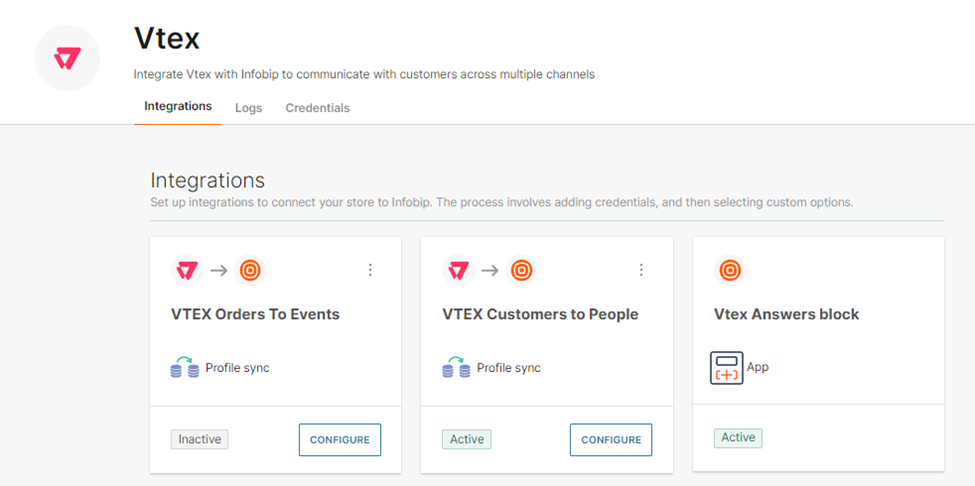
- Open the VTEX integration and select the Integrations tab.
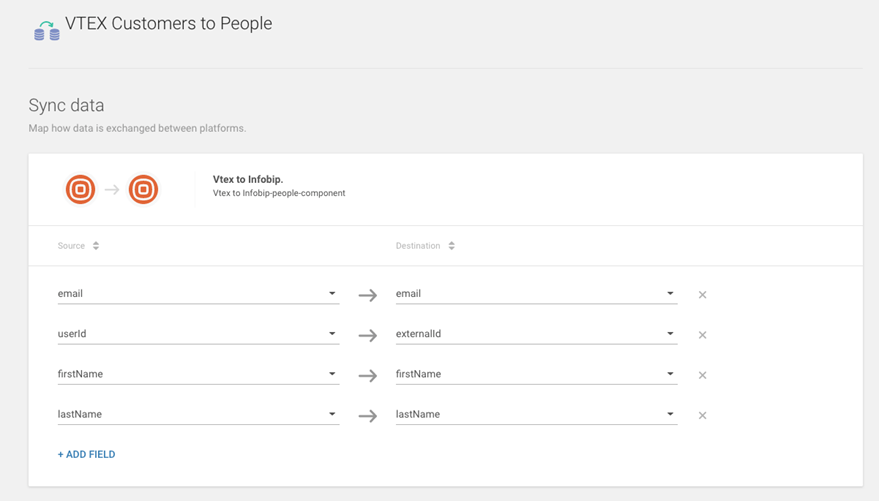
- On VTEX Customers to People, click Configure to update the mappings.
- The left column displays your VTEX fields and the right column displays the available People fields. Map the fields you want to make available in People so they are available to other Infobip products.
Using VTEX in Answers
You can make store owners' and customers' communication easy and automated by including the order, product, and customer information in the chatbot interaction with the Answers connection to VTEX. Let your customers use their favorite channel to buy directly from the VTEX store.
Example use-cases:
- Providing product information
- Providing order status information
- Providing Customer information
- Product Stock validation
Activate the Answers Block Card [#activate-the-answers-block-card-using-vtex-in-answers]
Before using the block in Answers, you need to activate the integration:
- Log into Infobip and go to Exchange > All Apps > VTEX.
- Go to the Integrations tab.
- Click on the three dots over the VTEX Answers Block card.
- Select Activate.
- Choose the credentials you want to use.
- Click Save.
VTEX Answers block [#vtex-answers-block-using-vtex-in-answers]
You can find the VTEX block in the right-hand side panel under the Integrations section.
The VTEX block provides a set of functions that can be used in any journey Drag and drop the block on any part of the dialog where you need to use some function of the block.
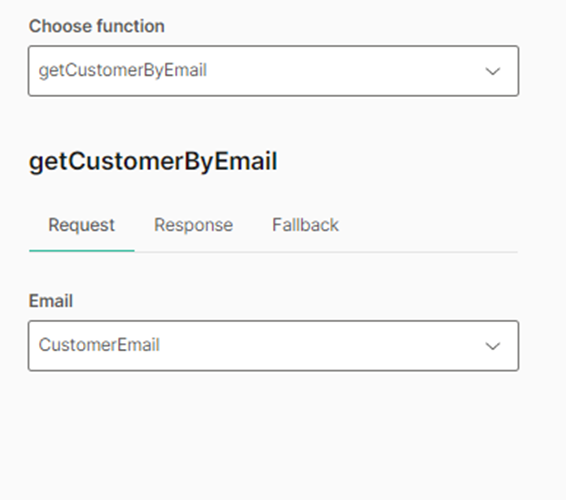
Once the block is added in the dialog, choose the function you want from the drop-down list.
Each function has its own set of parameters in the request tab. For example, the GetCustomerByEmail function expects an email address as a parameter. The value is used to filter the VTEX customer database for a customer with that email address.
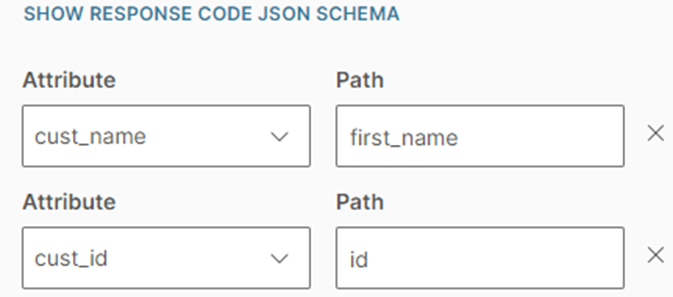
Most of the functions return data that are useful for the bot and/or the journey. The data retrieved from the function can be stored in Answers attributes using the Response tab. The data in transfer uses JSON format and in order to get the data you can use the dotted notation.
For example, the GetCustomerByEmail function returns the customer object from VTEX that contains all of the information stored there. If you'd like to store the customer's first name in an Answers attribute, refer to it as:
first_name or $.first_name
where the $ sign indicates the root of the JSON payload.
The functions available on the VTEX Answers Block are:
- Get Customer by Email: Automate the customer search process for getting data in VTEX associated with a specific customer based on their email address.
- Get Customer by ID: Automate the customer search process for getting data in VTEX associated with a specific customer based on their client ID.
- Get Order by ID: Automate the order search process for getting information in real-time about a specific order in VTEX based on the order ID.
- Get Orders for Customer: Automate the order search process for getting information in real-time about the order list of a specific customer.
- Search for a Product: Automate the search of products available in your VTEX Store based on a keyword.
- List Product Categories: Get the information of all product categories listed on your VTEX store.
- Products In Category: Get the information of all products listed on a specific category in your VTEX store, based on the Category ID.
- Get Product by SKU: Get the information of a specific product on your VTEX store, based on the SKU code.
- Add item to cart: Add a new item to the cart checkout URL, where the user can then finish the order. Parameters needed are SKU of the product to be added, quantity, Seller ID, Answers Session ID and Temporal URL, which is optional and used when you are adding an item over an existing cart checkout URL. If you are adding the first item, Temporal URL can be empty.
Get order status in Answers Webhook [#get-order-status-in-answers-webhook-using-vtex-in-answers]
You can inform the user of their order number and status after they finish the checkout using the cart checkout URL created with the add item to cart function. To create the webhook:
-
Create an order hook configuration in VTEX using the API: https://developers.vtex.com/docs/api-reference/orders-api#post-/api/orders/hook/config. Use the following parameters:
- type: FromWorkflow
- status: You can select and include all status needed for your use case from the VTEX order status list, see the VTEX help order status details
- url in hook object: Contact your Infobip account manager to get the required endpoint
-
Add a Webhook block in a dialog of your chatbot where you are expecting to receive the order status. An example of the JSON structure that you receive in the Webhook block is:
json12 {34 "body": {5 "Domain": "Marketplace",6 "OrderId": "1337610500455-01",7 "State": "order-created",8 "LastState": "not-started",9 "LastChange": "2023-06-06T16:58:55.9988137Z",10 "CurrentChange": "2023-06-06T16:58:56.0883772Z",11 "Origin": {12 "Account": "YourAccount",13 "Key": "vtexappkey-youraccountKey"1415 }16 }17 }
Save the information you want to use in attributes and use them for sending a personalized message from your chatbot with the order status.
Using VTEX in Conversations
An agent using Conversations may wish to access some information from their VTEX platform to support communication with a client. They may need to access details about the history of the orders and any related customer details about the order. To use VTEX in Conversations, you use the VTEX Context Card. For more information about Context Cards, see Conversations setup.
The VTEX Context Card supports the ability to:
- View the full order history
- View customer information for an order
When an agent is in conversation with a customer, the context cards on the right side of the Conversation Work panel can provide additional information or context that supports the customer conversation. You can find the VTEX in the context cards list.
Context cards in the Conversations panel are activated by default. This means that you see all the available context cards, even if you have not configured the fields.
If you have not set up the authentication and your preferred field values for the VTEX context card, you see a Configuration Pending message. Follow the instructions in Set up authentication and configure the context card.
Activate the Context Card [#activate-the-context-card-using-vtex-in-conversations]
Before using the VTEX Context Card, you need to activate it and configure the fields.
- Log into Infobip and go to Exchange > All Apps > VTEX.
- Go to the Integrations tab.
- Click on the three dots over the VTEX Conversations Block card.
- Select Activate.
- Choose the credentials you want to use.
Configure the Context Card [#configure-the-context-card-using-vtex-in-conversations]
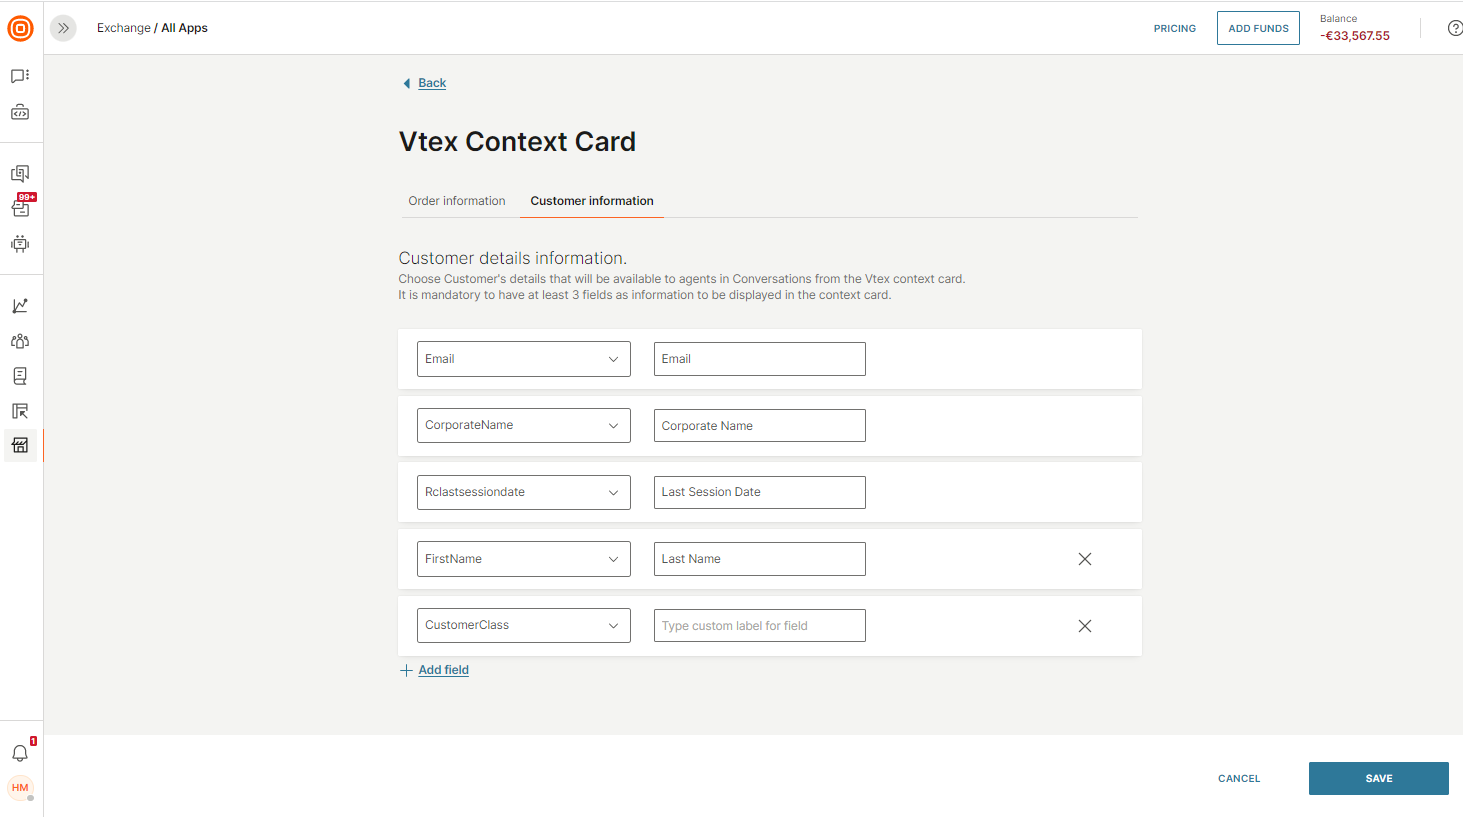
Use the Configuration page to define which details are available to the agent in the VTEX Context Card in Conversations.
- Go to the Integrations tab.
- Click Configure on the VTEX Conversations Block card. You see the Vtex Context Card fields. The left column displays the available VTEX fields. In the right column, you can enter a label that displays in the Context Card to represent the VTEX field. There are two tabs for Order information and Customer information.
- Map the fields for order information.
- Order card information - Define the most relevant order information available to the agent. You can select a maximum of three fields.
- Order details information - Define the order details available to the agent. By default, it is mandatory to define three fields. To add more fields, click Add Field. To remove a field, click the X on the right.
- Map the fields for the Customer details information - Define the customer details available to the agent. By default, it is mandatory to define three fields. To add more fields, click Add Field. To remove the field, click the X on the right.
- Click Save to save the mappings.
Supported channels [#supported-channels-using-vtex-in-conversations]
The VTEX Context Card is supported in Conversations through the following channels:
- SMS
- Voice
- Viber
- Instagram Messaging
- Facebook Messenger