Google Click-to-WhatsApp (CTWA)
 WhatsApp
Google Click-to-WhatsApp (CTWA) connects your Google Ads to WhatsApp chats, helping you convert ad clicks into real conversations.
This guide will help you track these sessions, measure impact, and improve ad performance across platforms.
Overview
CTWA lets users message your business on WhatsApp by clicking on a Google ad. While this moves user into a private chat, it also interrupts standard online tracking. To counter this, the system uses two values:
- Click ID (GCLID) from Google Ads: Identifies which ad the user clicked.
- Chat ID: Added to the messages to link the chat session to the ad.
Together, these two values provide visibility into what happens after the ad is clicked, for example, if the user asked about the product, booked a service, or submitted their details. This makes it possible to report conversions from WhatsApp back into Google Ads and improve campaign performance.
This guide explains how to:
- Connect your Message Ads with Infobip
- Redirect users to WhatsApp with personalized messages
- Enable conversion tracking using Ads Data Manager
Features
Seamless ad-to-chat experience
Automatically redirect users from Google Ads into a WhatsApp chat with zero friction.
Campaign tracking automation
Captures both GCLID and a unique Chat ID to attribute conversations to paid clicks.
Custom starter message
Prefill messages in WhatsApp to create a personalized and consistent user entry point.
Offline conversion syncing
Supports daily data uploads to Google Ads through Amazon S3 for performance attribution.
What you will need
To complete this setup, prepare the following:
- Infobip account: If you do not have an account, you can create one.
- Google Ads account: You must have a Google Ads account with Message Ads enabled.
- Your account manager will share the rest of the necessary info with you:
- Active WhatsApp sender (without the
+prefix) - Conversion import URL: The webhook URL provided by Infobip to capture GCLID and Chat ID for each click.
- Amazon S3 bucket: Provided and shared by Infobip to upload offline conversions to Google Ads using Ads Data Manager.
- Active WhatsApp sender (without the
Set up Google Click-to-WhatsApp
Configure Google Click-to-WhatsApp Integration app
-
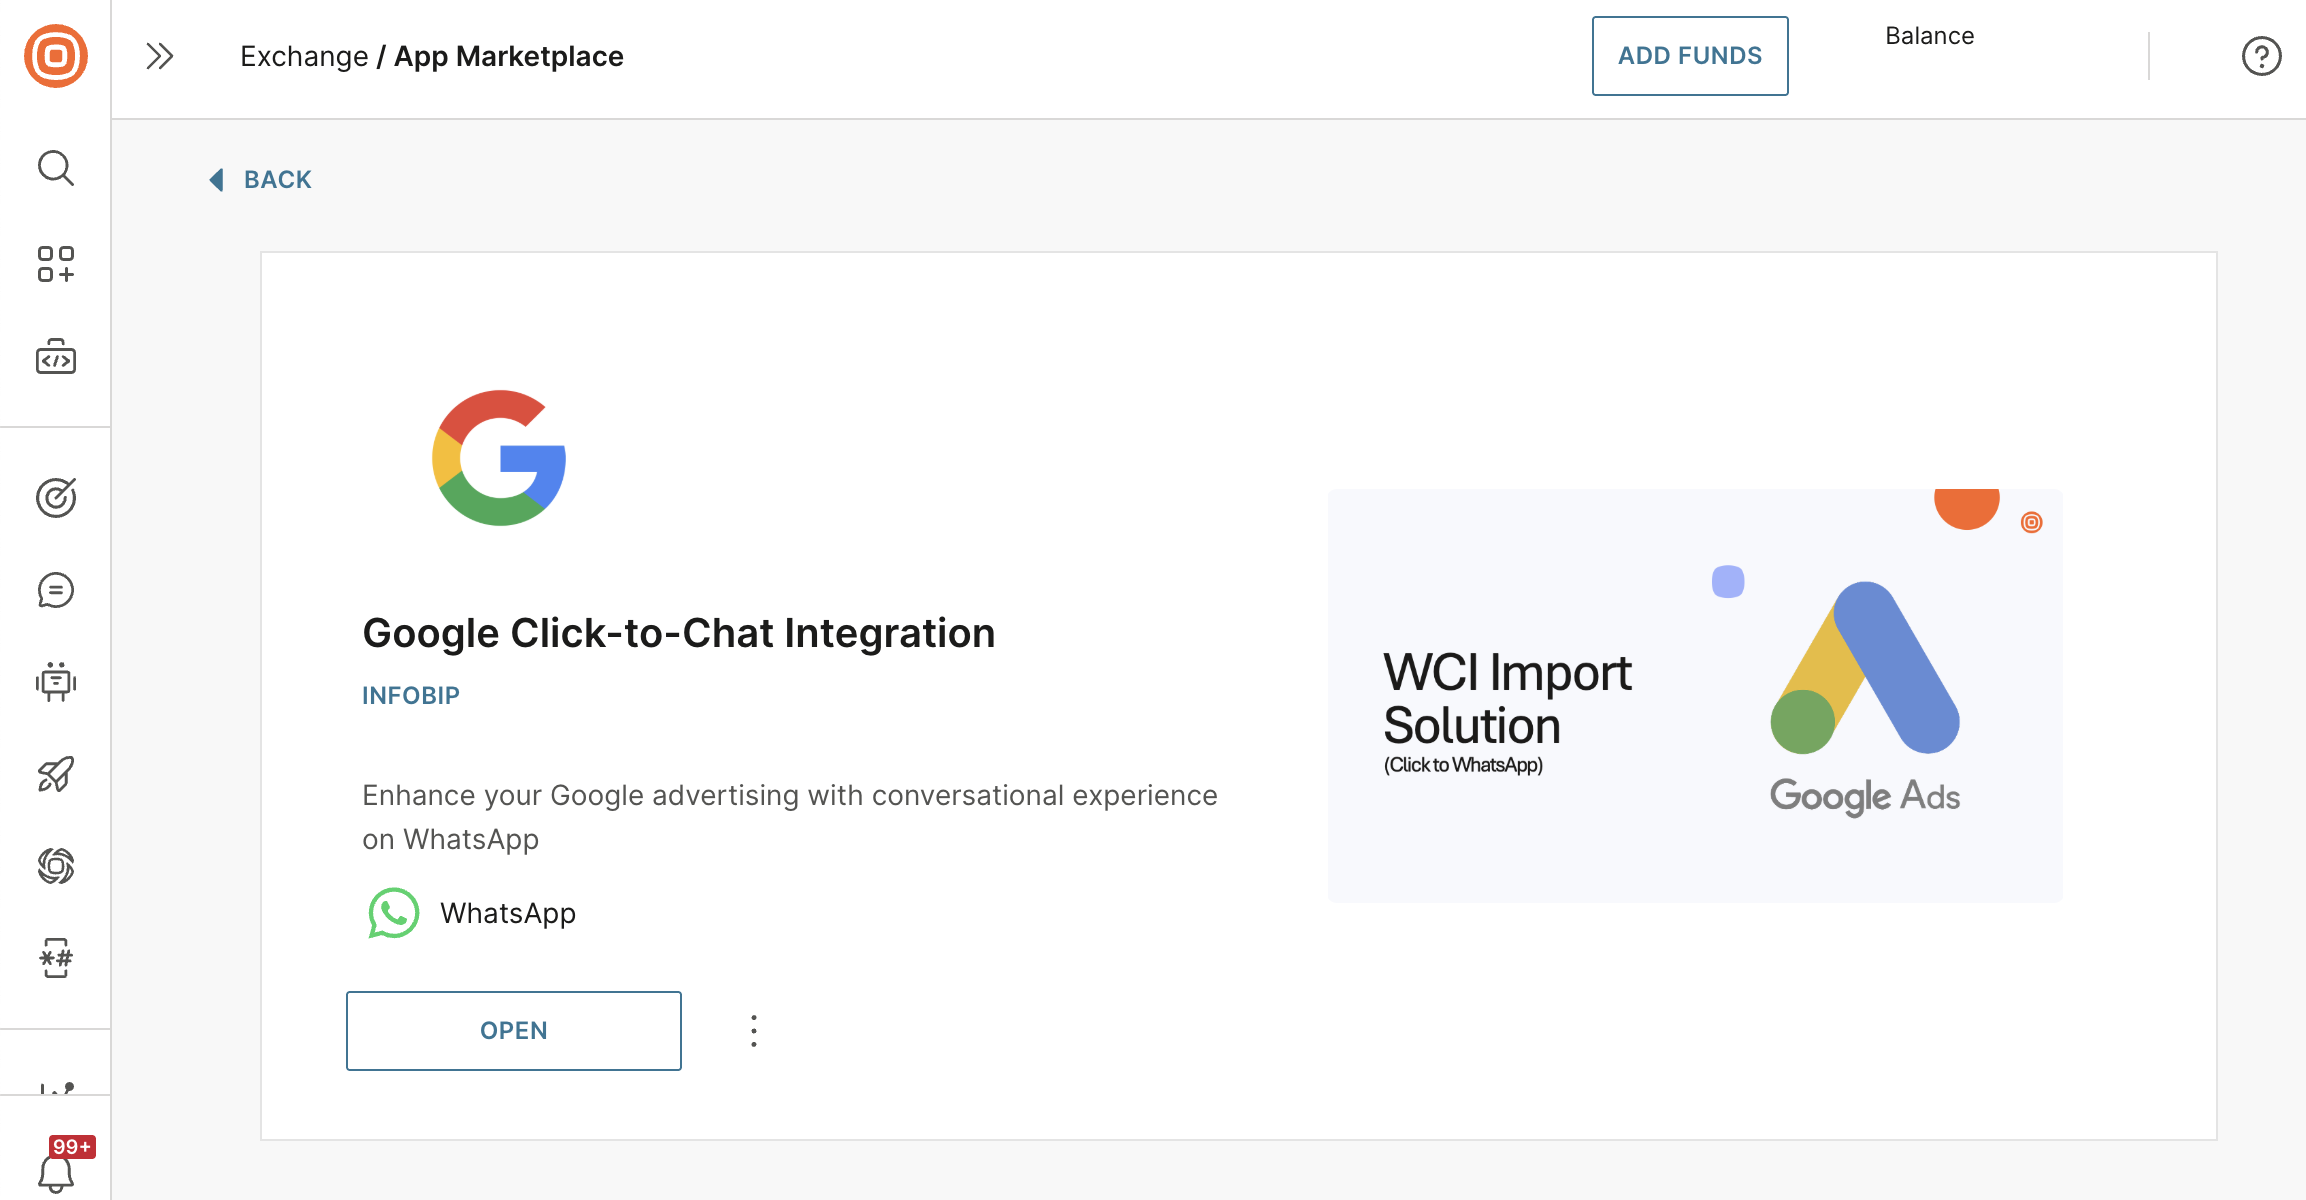
Install the Google Click-to-Chat Integration app from the App Marketplace. If you need access, contact your account manager.
-
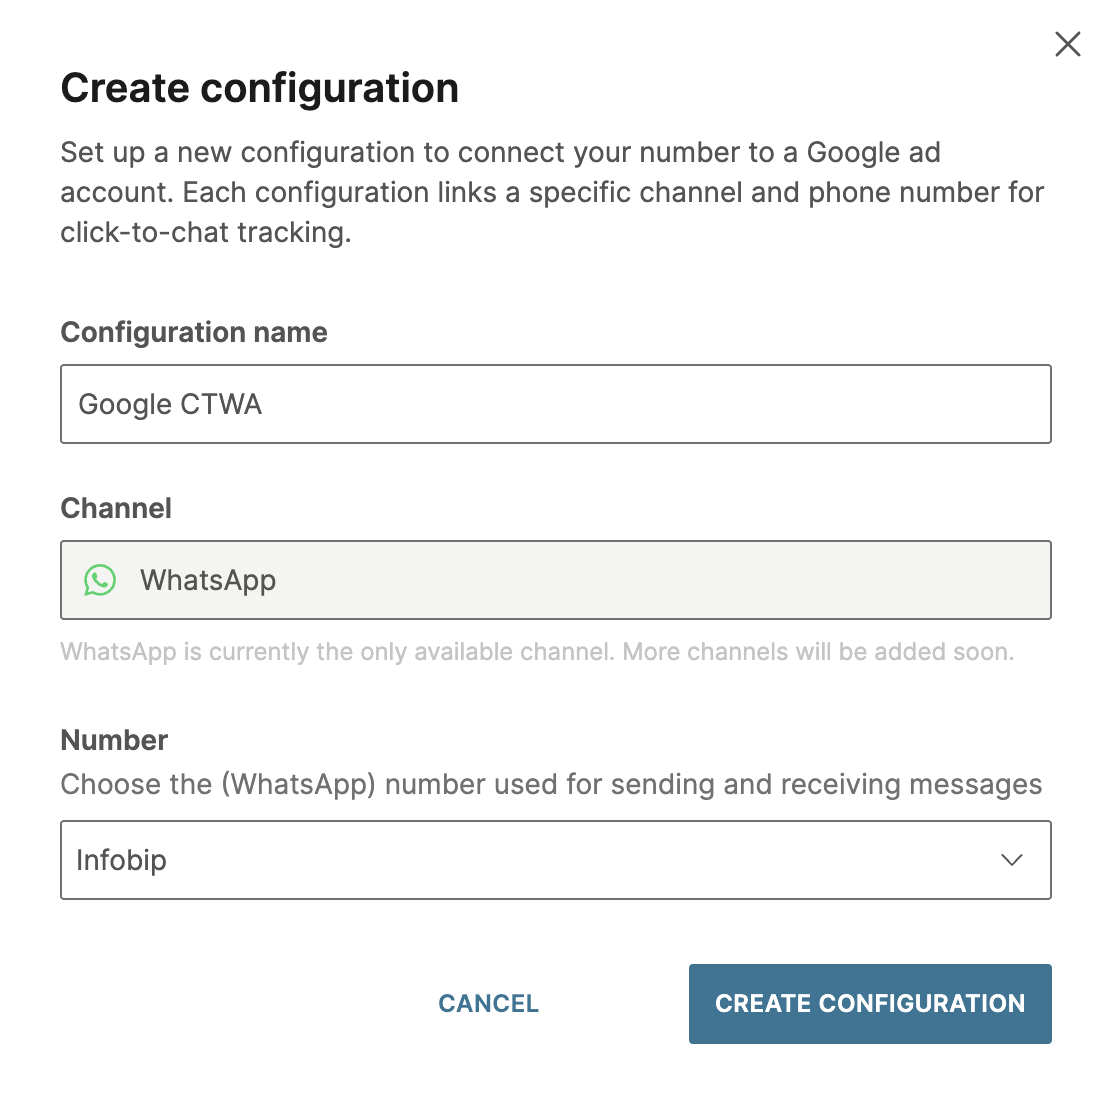
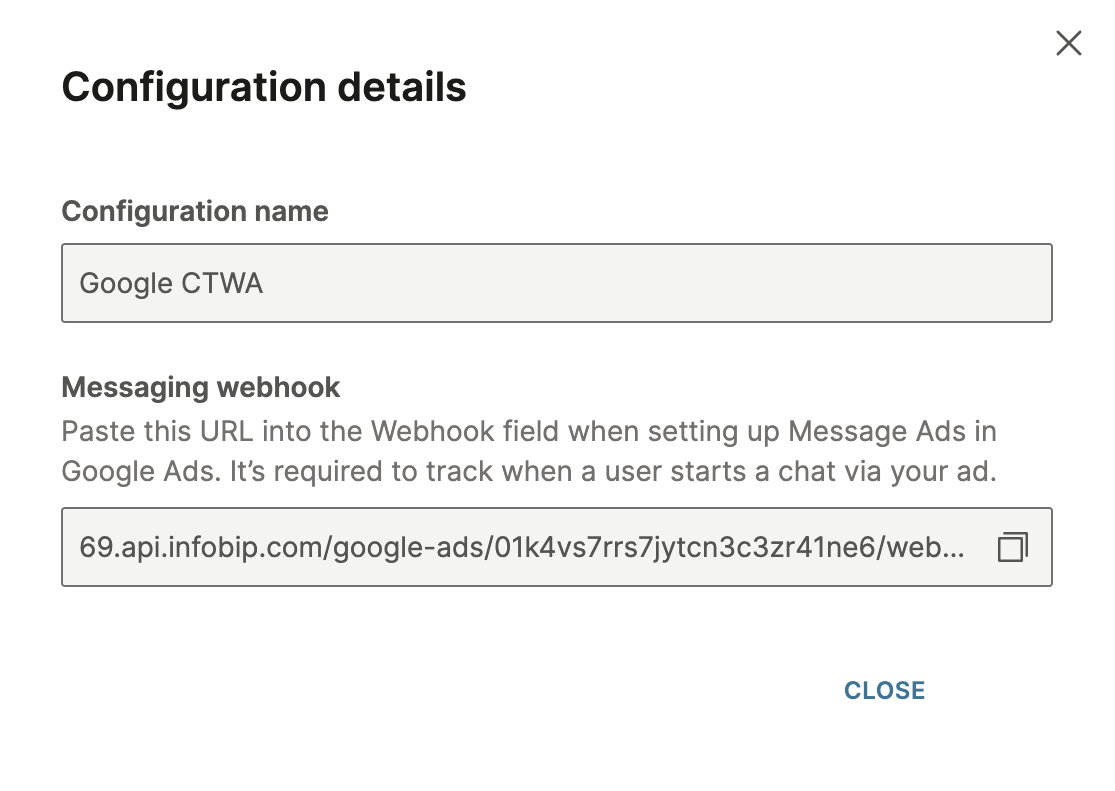
After installation, select Create configuration.
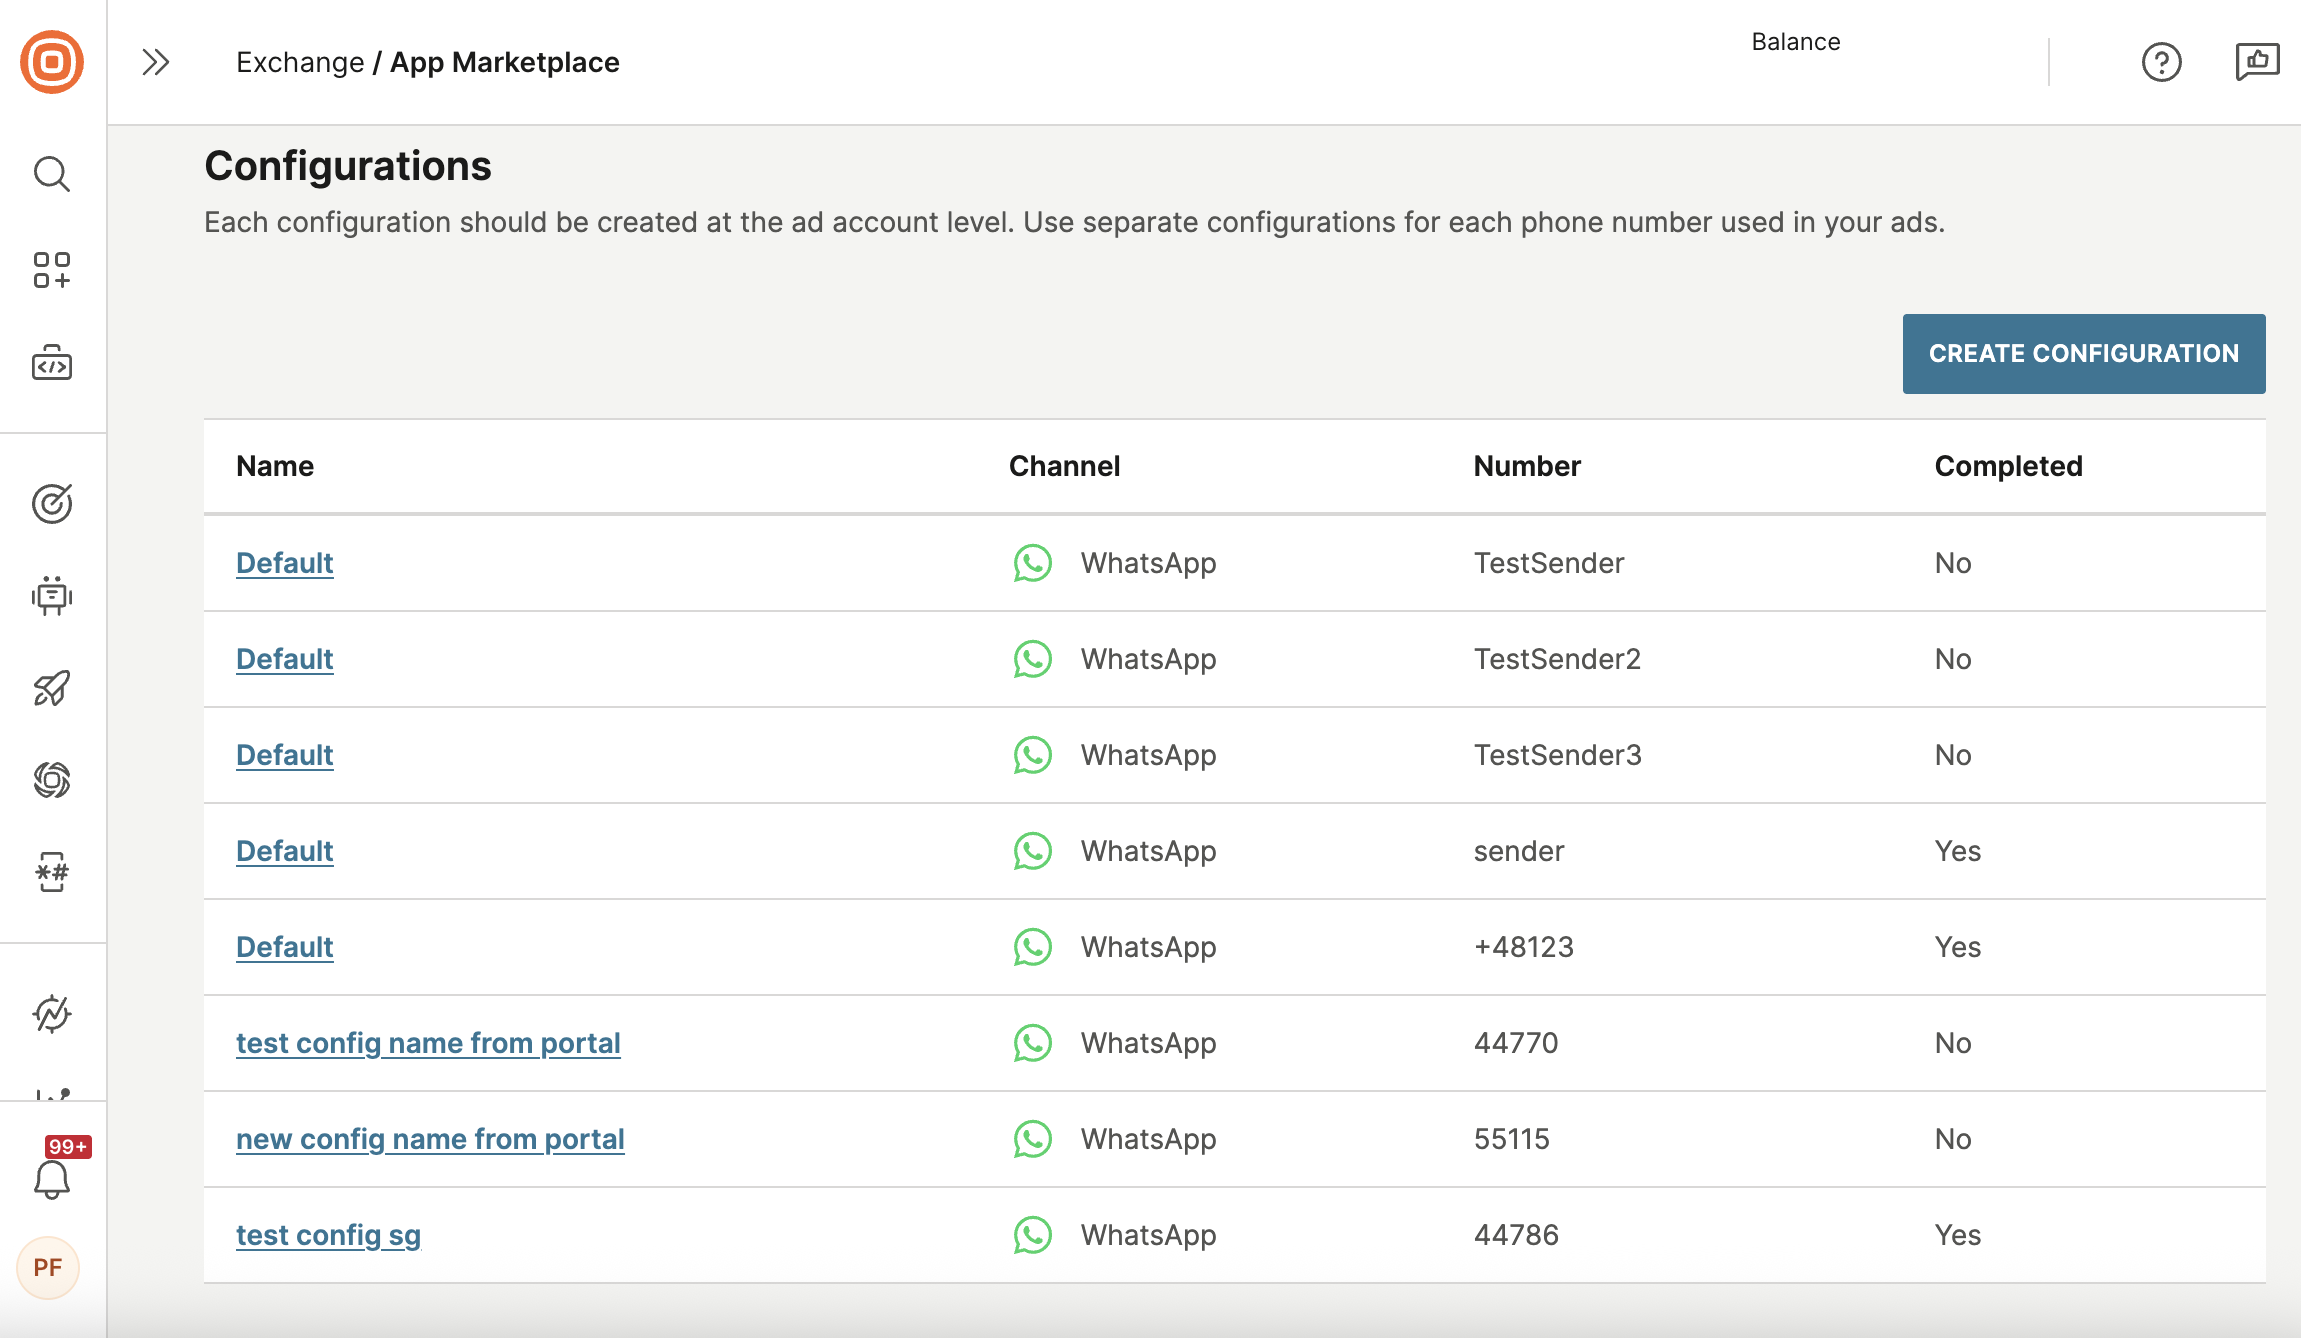
-
Choose the phone number you will be using, enter a name for the configuration, and select Create configuration.
-
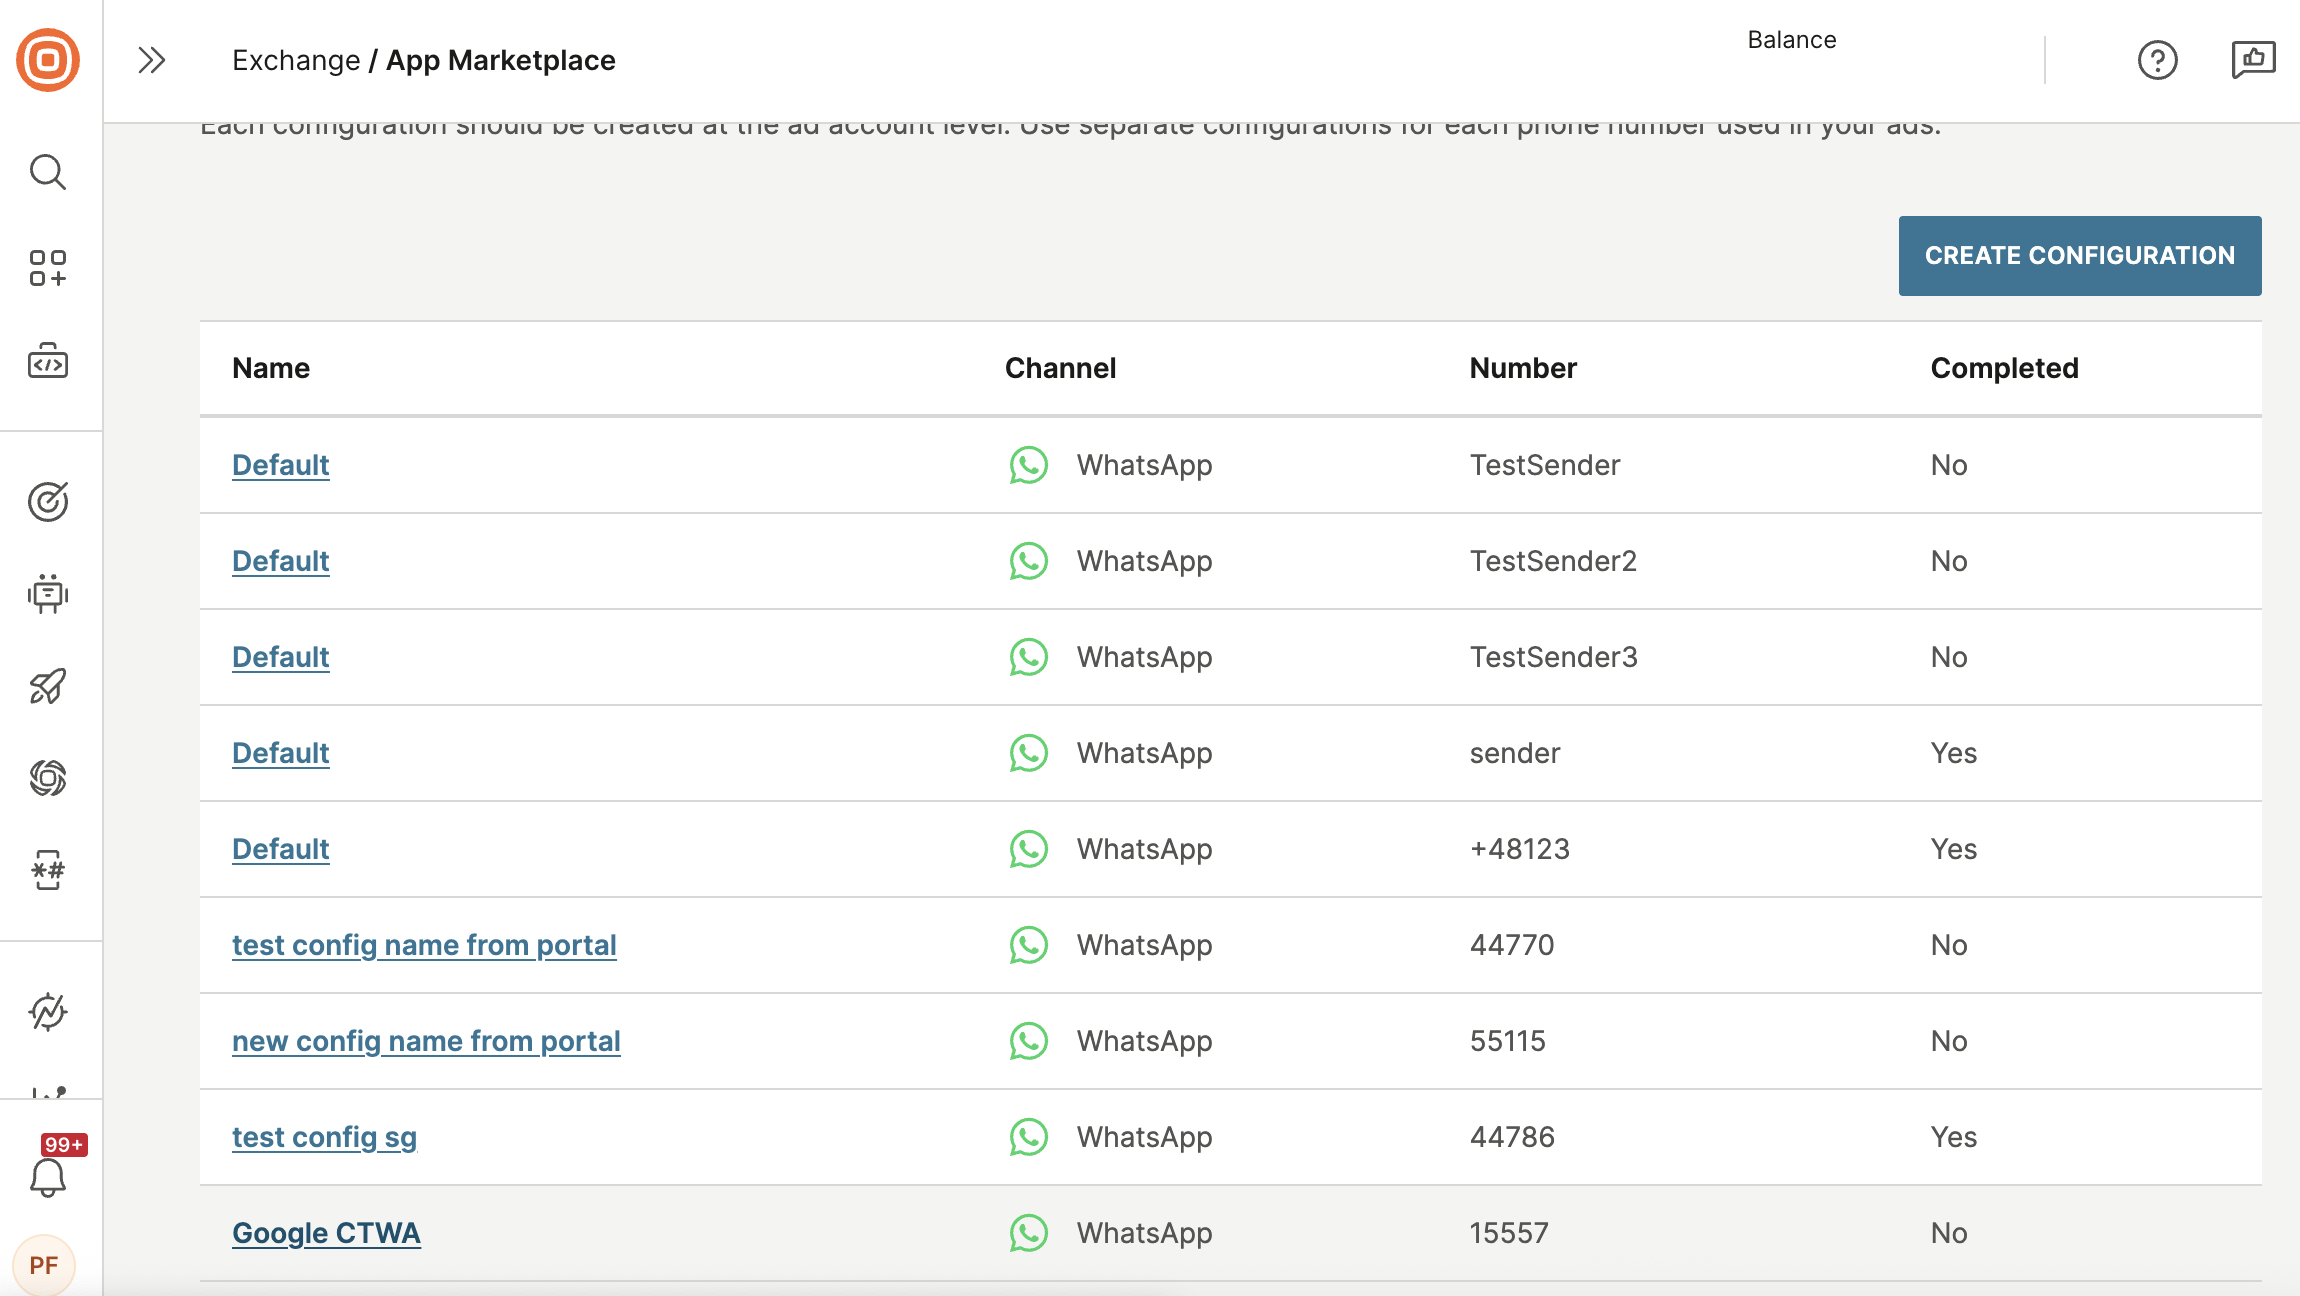
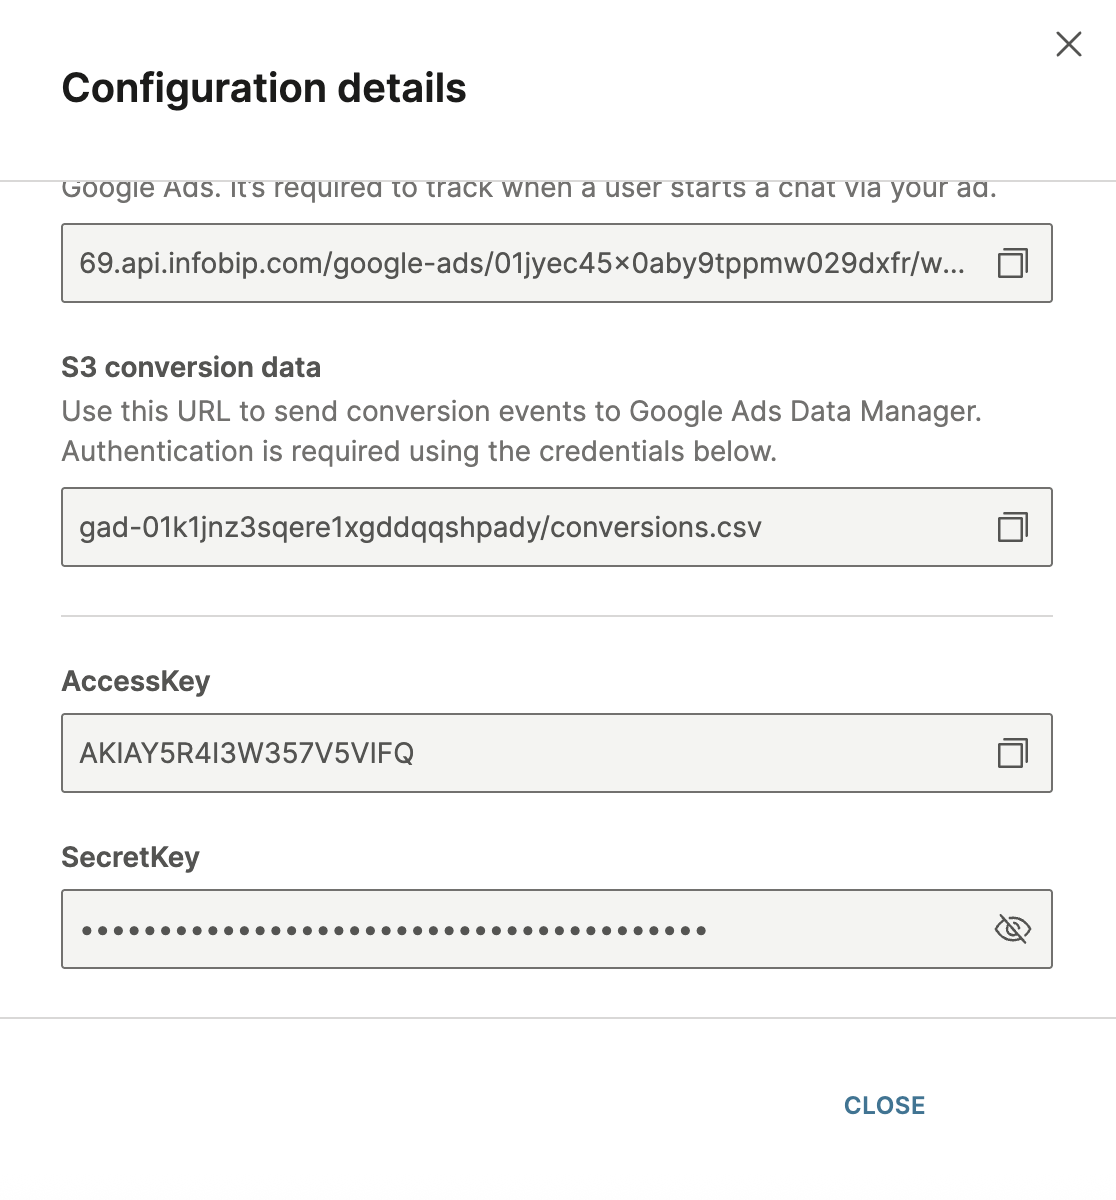
Fetch the conversion import URL (messaging webhook) by selecting the configuration name.
Add the Amazon S3 bucket
To collect converted leads, continue with these steps:
-
Contact your account manager to create the Amazon S3 bucket that will be used to collect converted leads.
-
Once the bucket is created, your account manager will notify you. Return to the Google Click-to-Chat Integration app and select your configuration.
-
You will now see additional details about the S3 bucket.
Configure Google Message Ads
Create a Message Asset
-
Go to your Google Ads account and open the Message Asset configuration.
-
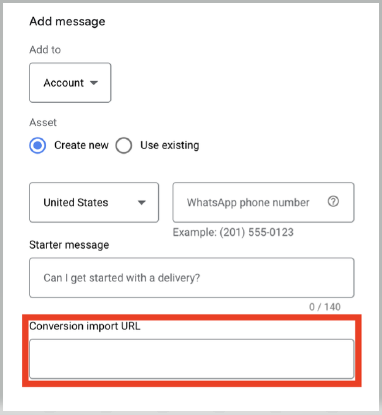
Set the Conversion Import URL to the webhook provided by Infobip.
-
Add your Infobip-provisioned WhatsApp number (without the
+sign). -
Define your starter message, for example:
Hi, I am interested in learning more.
NOTEThe starter message is what the user sends to you, not your welcome message. Write it to reflect user intent.
-
Save the asset and apply it to your ad campaign.
Import conversions using Ads Data Manager
-
In Google Ads, go to Goals > Conversions > Summary and select New conversion action.
-
Choose Amazon S3 as your data source with a direct connection.
-
Enter the credentials and bucket link provided by Infobip.
-
Upload a sample CSV file with at least one row of data to validate the schema. This is an important step as the setup will not complete without this.
-
Define your synchronization schedule (recommended to set to once per day).
Send conversions using Google Ads API
After Ads Data Manager is set up, you can also send real-time offline conversions using the Google Ads API. You can trigger these from Infobip's customer engagement solution flows or call Infobip's API directly.
Contact Infobip support to enable the required API scope for your API key. This unlocks the /google-ads/conversion endpoint.
Example request