Integrations
The Integrations settings allow you to extend Conversations with external systems.
Configure custom context cards to display relevant data from third-party sources directly in the agent panel, and connect external chatbots to automate interactions or provide support before routing to an agent.
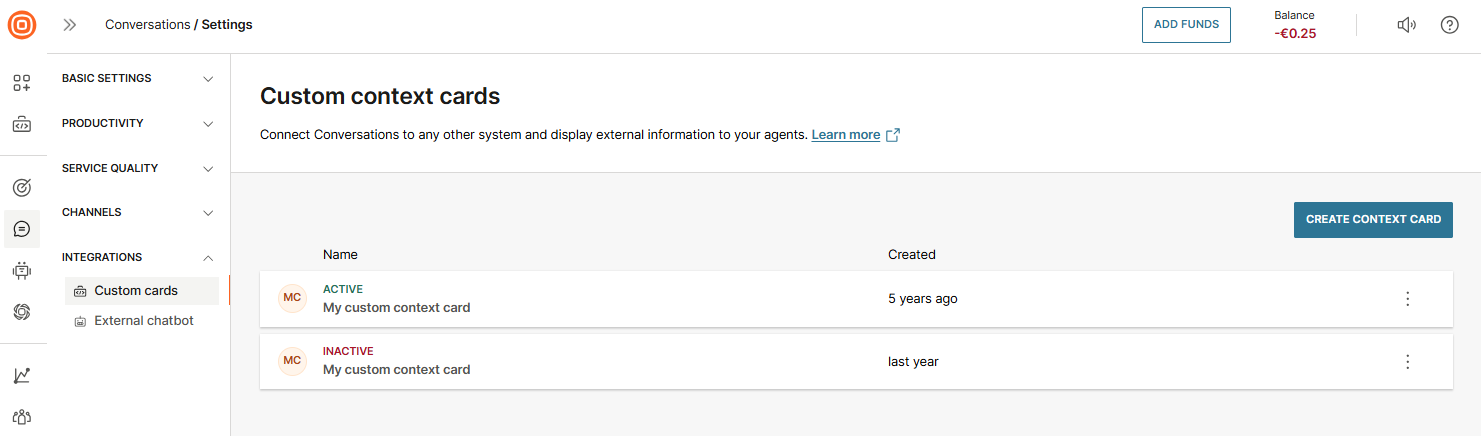
Custom cards
You can integrate an external application with Conversations to display relevant information to agents during a conversation. This is done by setting up a custom context card, which appears in the conversation panel and shows data pulled from systems like Jira, CRMs, or other tools.
Custom context cards can be configured and styled to match your needs. They provide agents with useful context, such as ticket details or user information, without needing to leave the conversation view.
Learn more about integrating external apps in Conversations and Integrations.
Create a custom context card [#create-a-custom-context-card-custom-cards]
To create a custom context card, follow these steps:
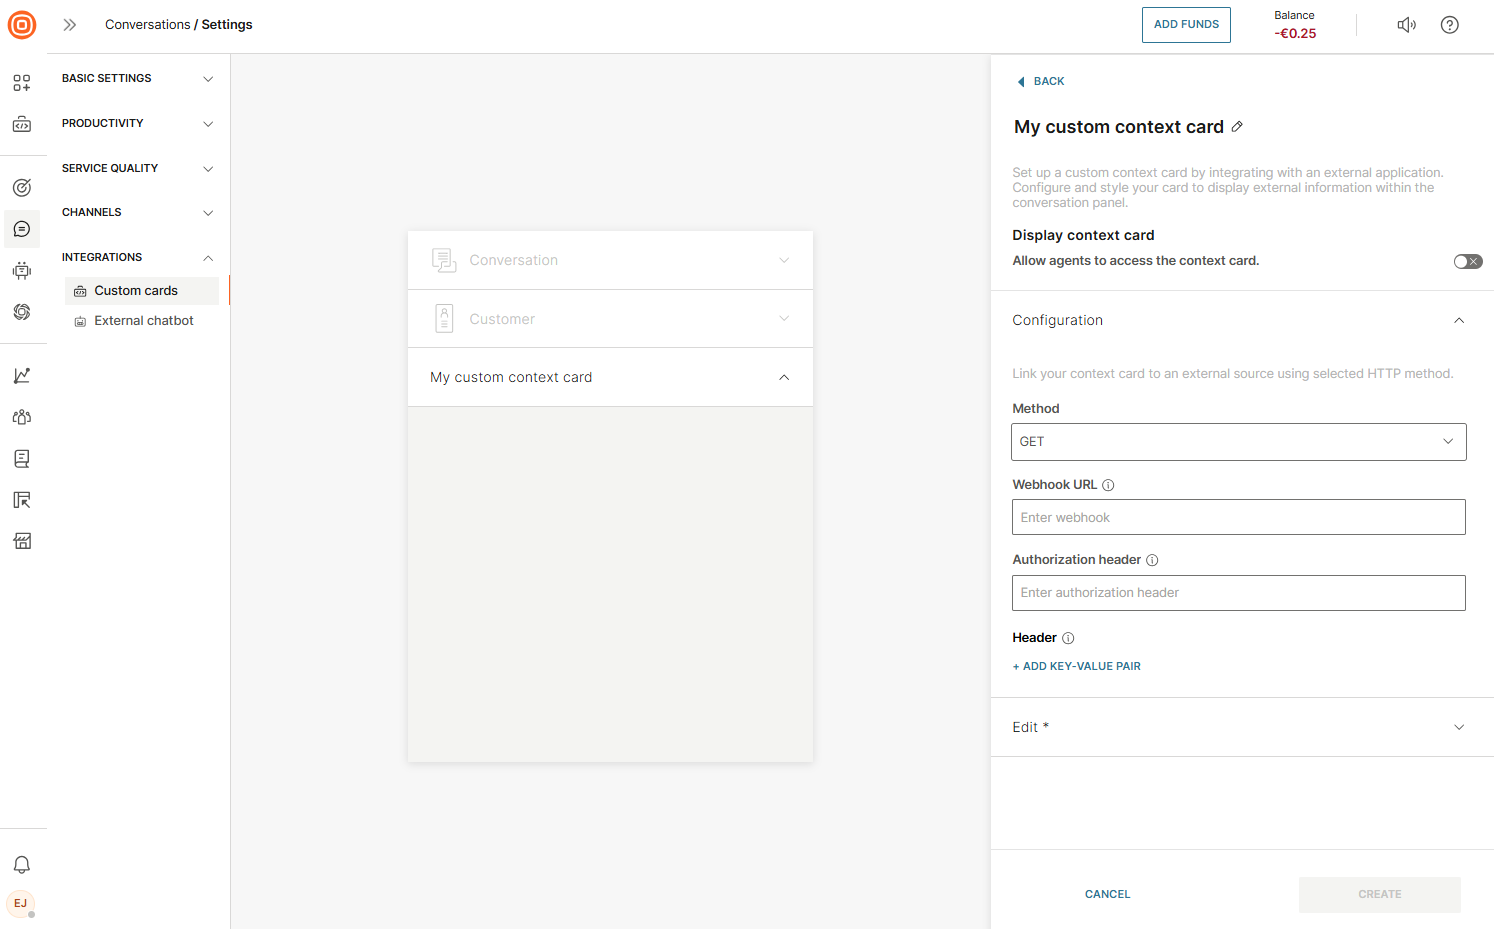
- Log in to your Infobip account and go to Conversations → Settings → Integrations → Custom cards.
- Select Create context card.
- In the Display context card section, enable the toggle to allow agents to view the context card during conversations.
- In the Configuration section, link the context card to an external source by providing the following information:
- Method - Choose the HTTP method (
GET,POST,PUT,PATCH, orDELETE). - Webhook URL - Enter the endpoint to which the request will be sent. You can include conversation variables in the URL:
{{conversation.agentNumber}}{{conversation.agentId}}{{conversation.channel}}{{conversation.conversationId}}{{conversation.customerDisplayName}}{{conversation.customerNumber}}{{conversation.priority}}{{conversation.queueId}}
- Method - Choose the HTTP method (
- Ensure you encode any invalid URL characters. Use the Liquid filter:
{{ '[email protected]' | url_encode }}- Authorization header - Add any required authentication credentials.
- Header - Provide any additional key-value pairs to include in the request header.
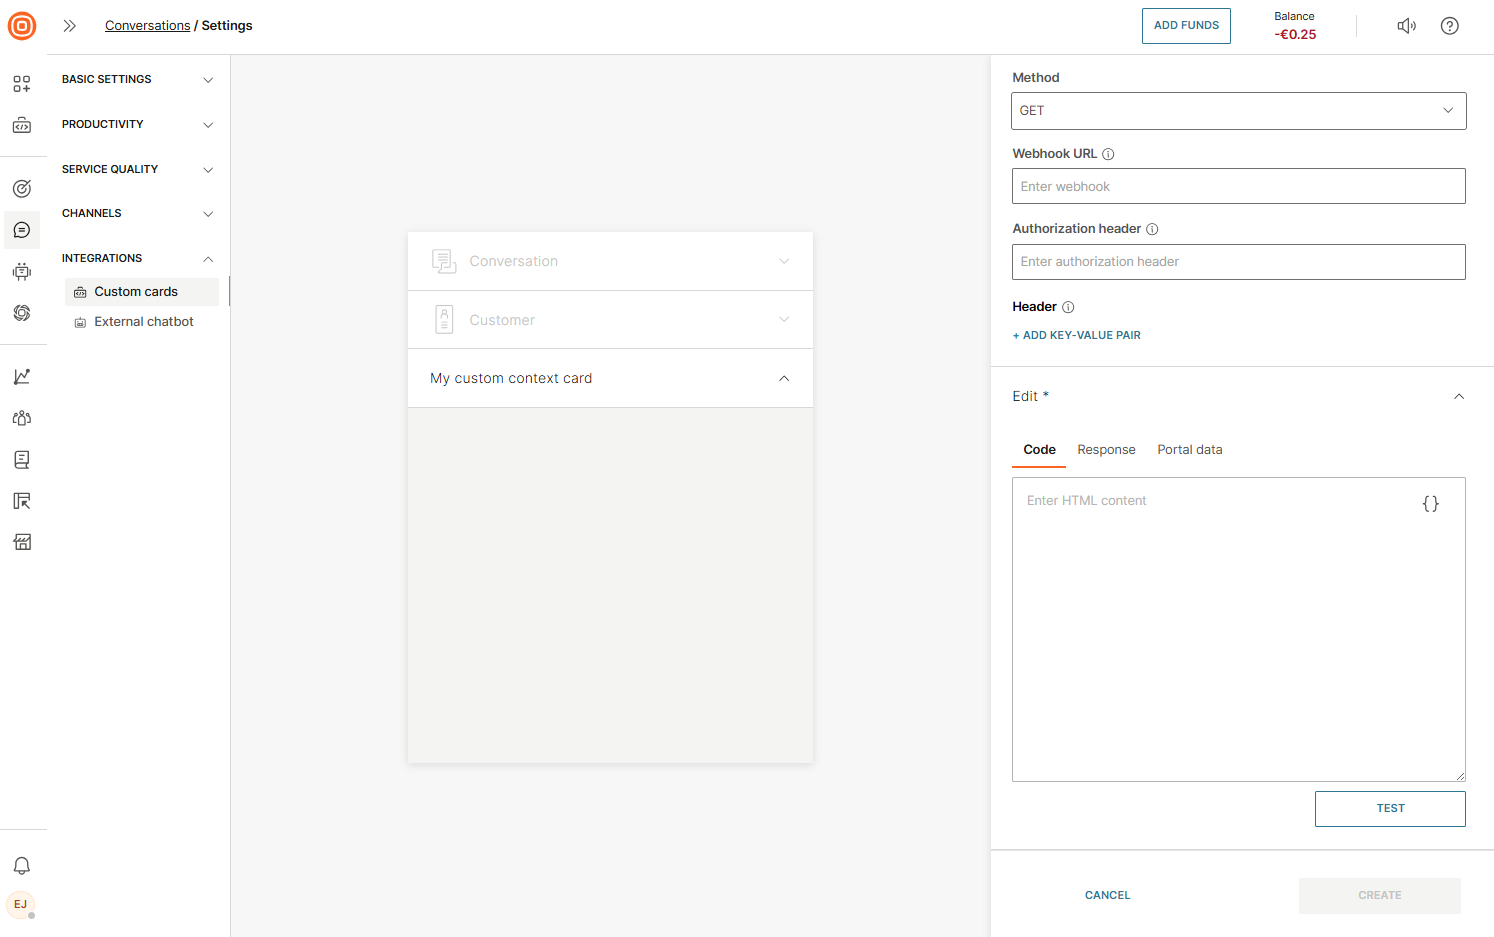
- In the Edit section, use the Code, Response, and Portal data tabs to enter relevant data.
In the Code tab, you can customize the visual appearance of the card by using CSS.
- Select Test to preview how the context card will behave. A live preview appears on the left, showing all changes as you edit.
- Once you finish configuring and testing, select Create to save your custom context card.
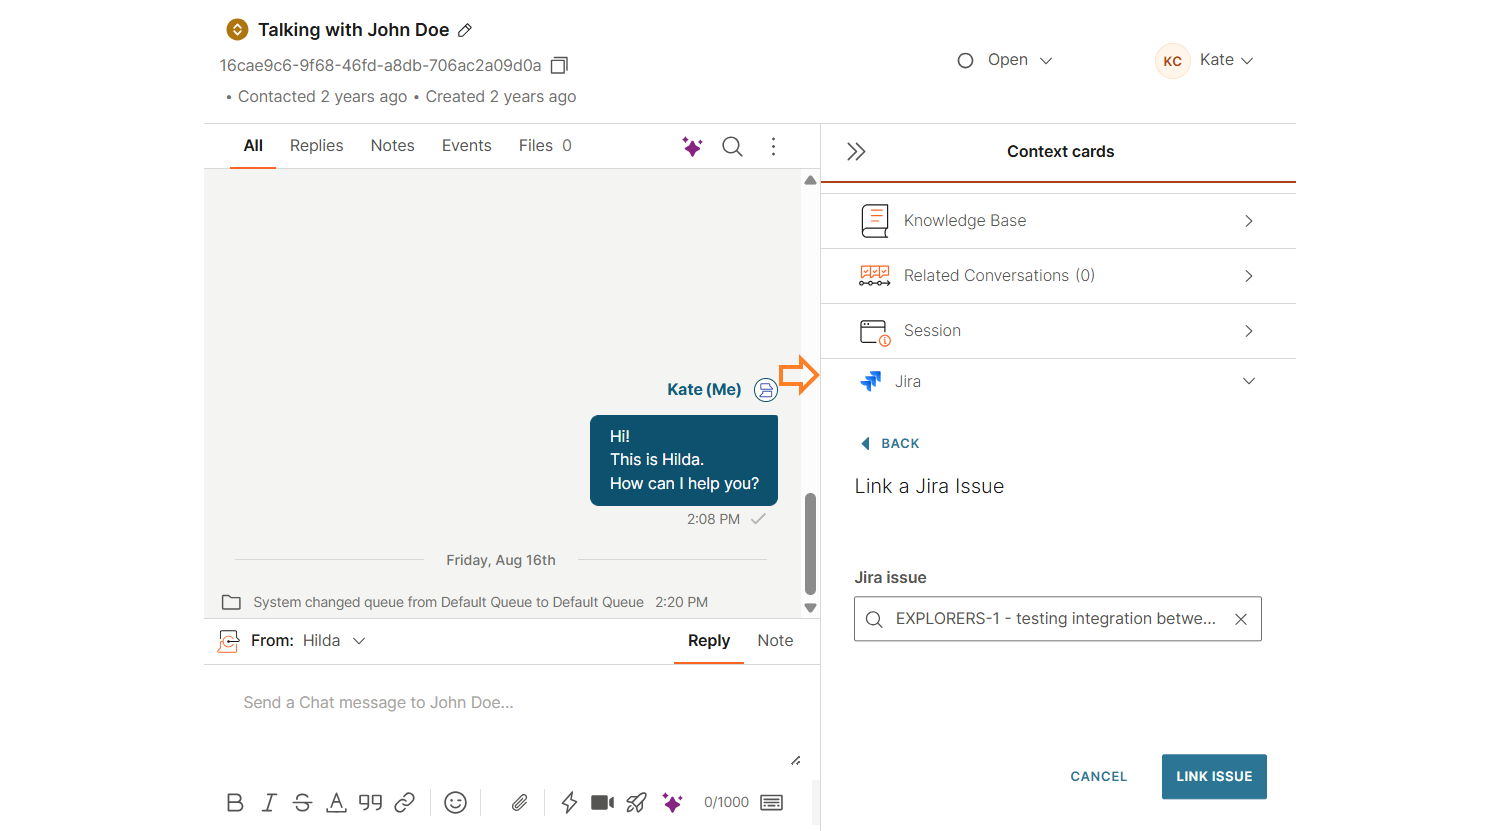
When you set up the custom context card, agents will see it within the Context cards.
For instance, configuring a Jira custom context card gives agents the choice to either link to an existing Jira issue or create a new one.
External bots
External bots can automate parts of the customer journey while still integrating with Conversations.
When a bot triggers an API endpoint, it allows seamless handoff from automated interactions to live agents.
Conversation history and metadata ensure that agents have full context, so the customer does not need to repeat information when taking over from the bot.
Set up an external bot [#set-up-an-external-bot-external-bots]
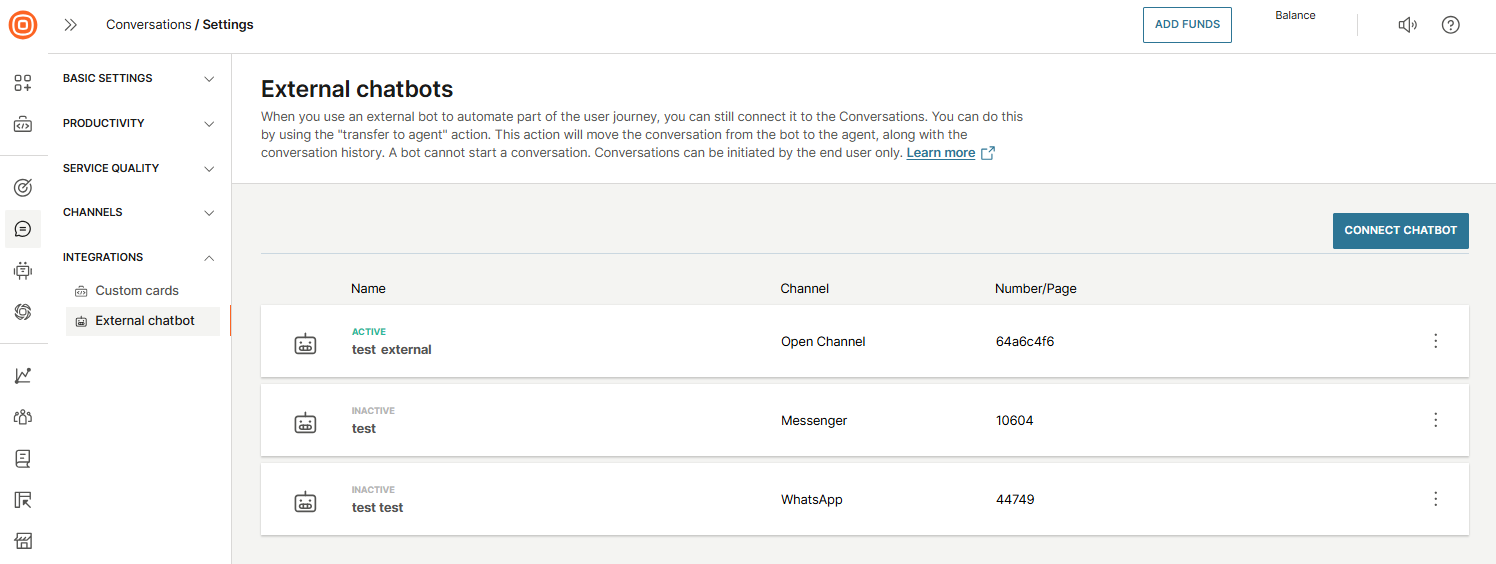
- Go to Conversations → Settings → Integrations → External chatbot.
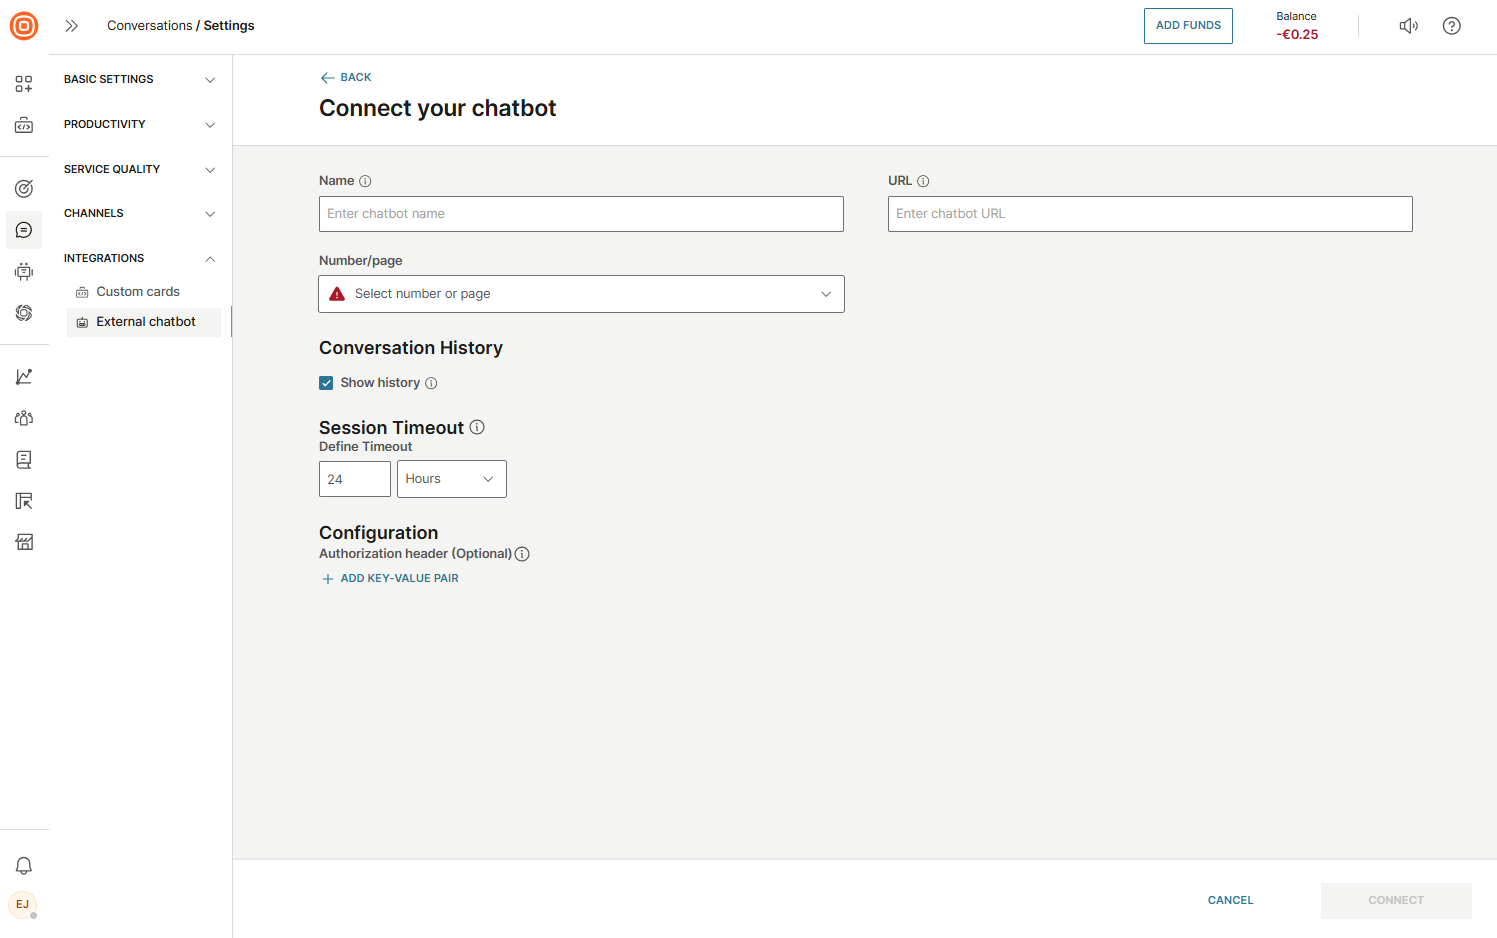
- Select Connect chatbot to open the configuration.
- Copy the UUID from the URL; this will be used as the
x-agent-id. - Define the following settings:
- Bot name - A unique name visible in the bot conversations queue.
- Bot URL - The endpoint where all inbound customer messages are forwarded until the bot triggers a transfer.
- Number/page - Any inbound message sent to this number or page is forwarded to the bot.
- Conversation history - Decide if messages exchanged between the customer and bot are visible to agents when they take over.
- Session timeout: Define a period after which the bot session expires if no messages are exchanged.
- (Optional) Authorization header increases data transfer security. This is data that will be sent in the request headers and contains credentials to authenticate communication with a server.
Bot message handling [#bot-message-handling-external-bots]
- Receiving messages: All inbound messages sent to the bot number are automatically forwarded to the bot URL via a POST HTTP method. If a conversation is ongoing, messages are added to it; otherwise, a new conversation is created.
- Sending messages: Use the standard Conversations Messaging API with
conversationIdin the URL path andx-agent-idin the header to send messages from the bot.
Transferring conversation to agents [#transferring-conversations-to-agents-external-bots]
The conversations can be transferred to agents in two ways:
- Automatic routing: Invoke the Route conversation endpoint to transfer the conversation to an agent using routing rules. The bot stops receiving messages.
- Direct assignment: Use the Change conversation assignment endpoint with the new
agentIdto bypass routing and assign the conversation directly.
Conversation metadata [#conversation-metadata-external-bots]
Metadata provides agents with additional context about the conversation when they take over.
For example:
{ "Manufacturer": "Mazda", "Model": "CX-5", "EngineType": "Diesel", "EnginePower": 90.0 }
This ensures continuity, reducing repetitive customer queries and improving the overall support experience.