Productivity
The Productivity settings section defines the options that improve efficiency in your contact center.
Key aspects include:
- Saving time and enhancing agent workflow - help agents complete tasks faster, reduce manual effort, and allow them to focus on higher-value work.
- Supporting agent decision-making - provide insights or guidance to help agents make better decisions more quickly.
To configure productivity settings, log in to your Infobip account and go to Conversations → Settings → Productivity.
See the sections below for details on each setting.
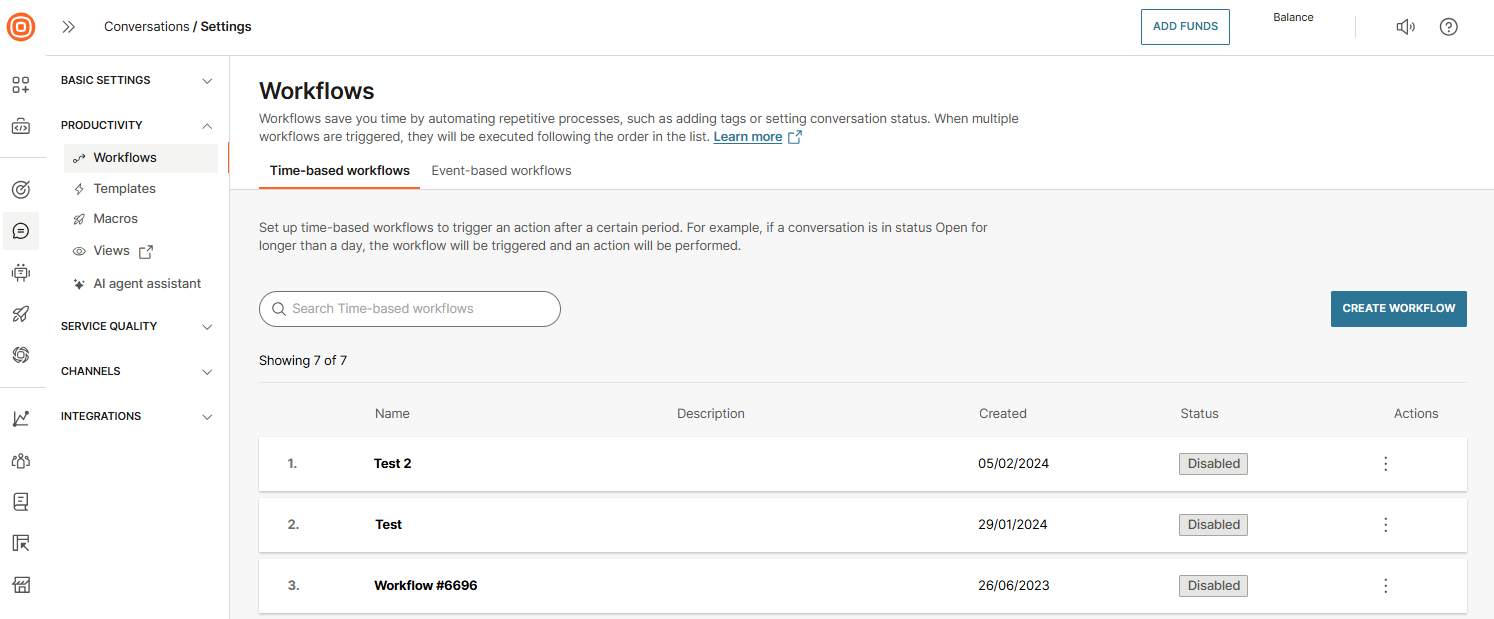
Workflows
Workflows are easy-to-use automations created within a simple “if-this-then-that” editor.
You can set up workflows in Conversations → Settings → Productivity → Workflows.
There are two types of workflows:
- Time-based - Built on a good sense of order, these workflows will be triggered after a certain time period, for example, if a conversation has been in the Solved status for more than 24 hours. They can affect older conversations too, as long as the triggering update occurred after the workflow was set up. You can define time-based automations with a duration of up to 90 days. For bot conversations, the time since the conversation was handed over is taken into account, rather than when the agent was assigned to it. Additionally, the system will not make another attempt unless specific conditions are met and the conversation is updated. The minimal pending time is 10 seconds.
- Event-based - Triggered right after a certain event occurs. For example, when a conversation status changes to Solved.
Workflow elements [#workflow-elements-workflows]
A workflow consists of:
- Trigger(s) (mandatory) - Refers to a time period or an event that triggers the workflow. You can set multiple triggers in a single workflow. If you have set up multiple triggers in a workflow, they will be tied to an
ORoperator, meaning that if any trigger is performed, the workflow will activate. - Conditions (optional) - These are additional statements that allow you to select the actions that should be performed on different entities. The
ORoperator is supported in conditions, allowing for a combination of multiple conditions where only theANDoperator is applicable between them. As a result, you can achieve any desired combination of conditions through these combinations. It is important to note that within the setup of a single workflow, one attribute in conditions cannot be utilized multiple times as a condition. - Action(s) (mandatory) - Performed when triggers and conditions are met. You can add single or multiple actions. If you add the "Close conversation" action, bear in mind that no other actions can follow this one. Add all other actions you need before you add the "Close conversation" action.
To put it simply, when certain triggers happen and conditions are met, actions will be performed. You can order created workflows, meaning they are activated one after another and the result of one workflow can trigger one or more workflows later on the list.
- Workflows are triggered for Open, Waiting, and Solved conversations.
- You can only use workflows in chat channels at this moment.
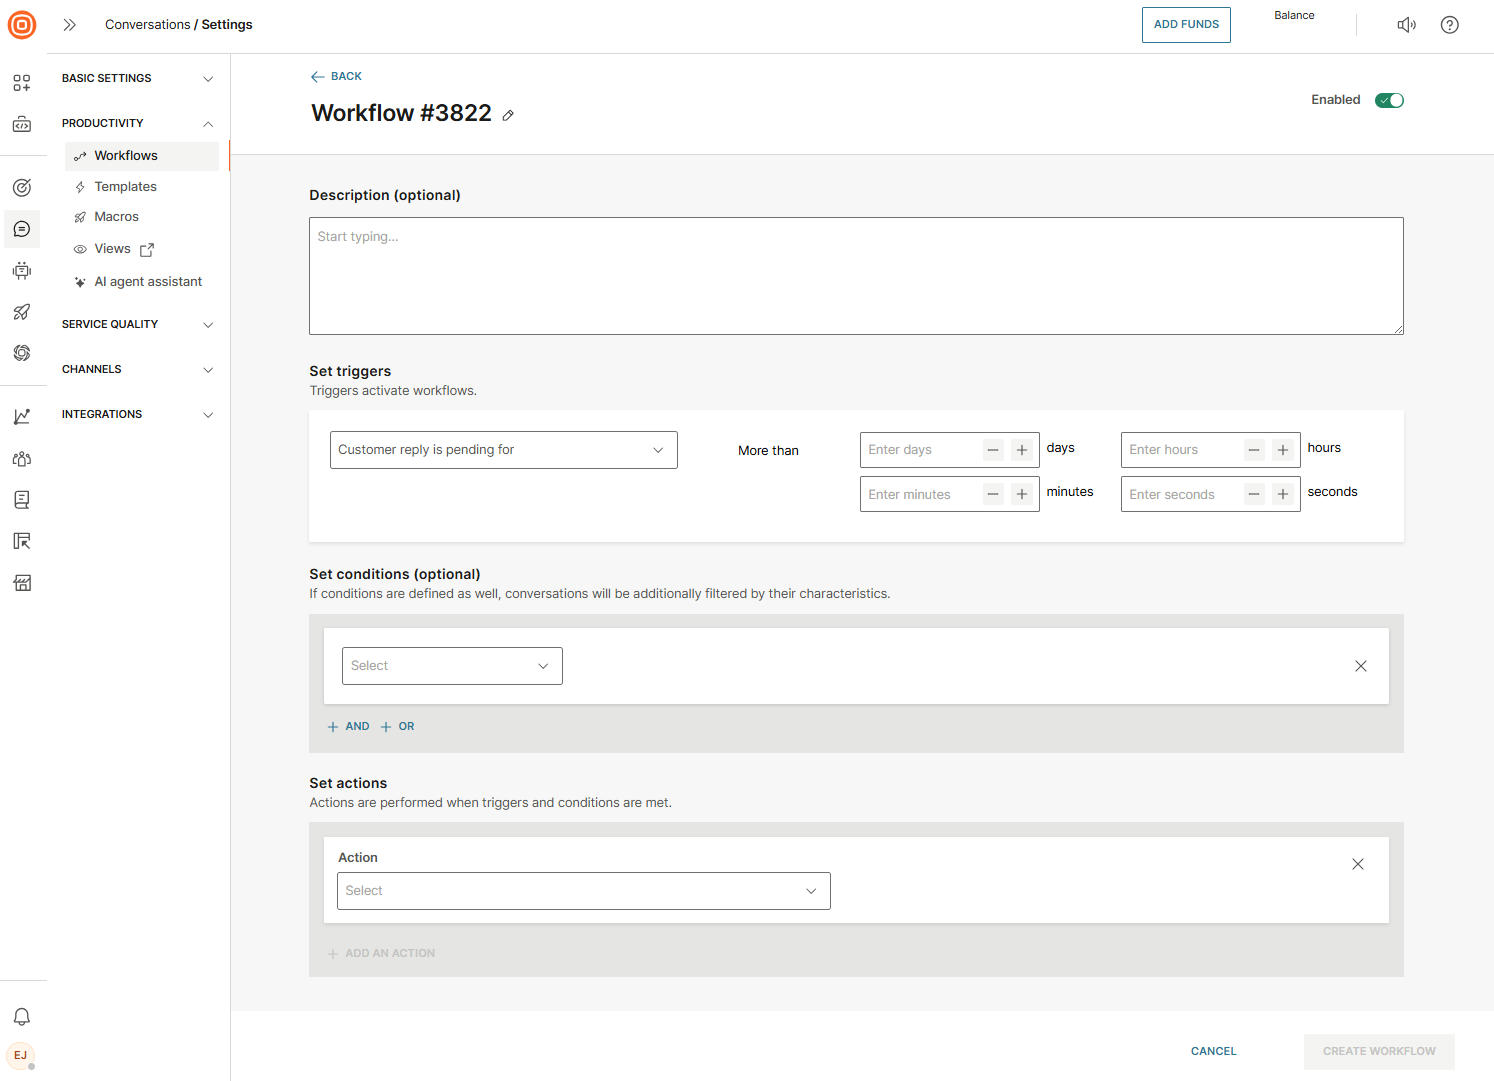
Create workflow [#create-workflow-workflows]
To create a new workflow, whether time-based or event-based, select the Create new button. Then, proceed to configure the following:
- Name of the workflow
- Description (optional)
- Set triggers
- Set conditions (optional)
- Set actions
- Additionally, you can enable or disable the workflow by using the toggle in the upper right corner. This is useful if something goes wrong or if you need more time to complete the setup, allowing you to temporarily disable it until it is ready.
- Once you set up everything, select the Create workflow button.
Edit, delete, and reposition workflows [#edit-delete-and-reposition-workflows-workflows]
Clicking the three dots in the Actions column provides options to organize your workflows:
- Edit - Modify the workflow
- Delete - Remove the workflow permanently
- Send to bottom - Move the workflow to the bottom of the list
- Send to position - Specify the workflow’s position (for example, position 7)
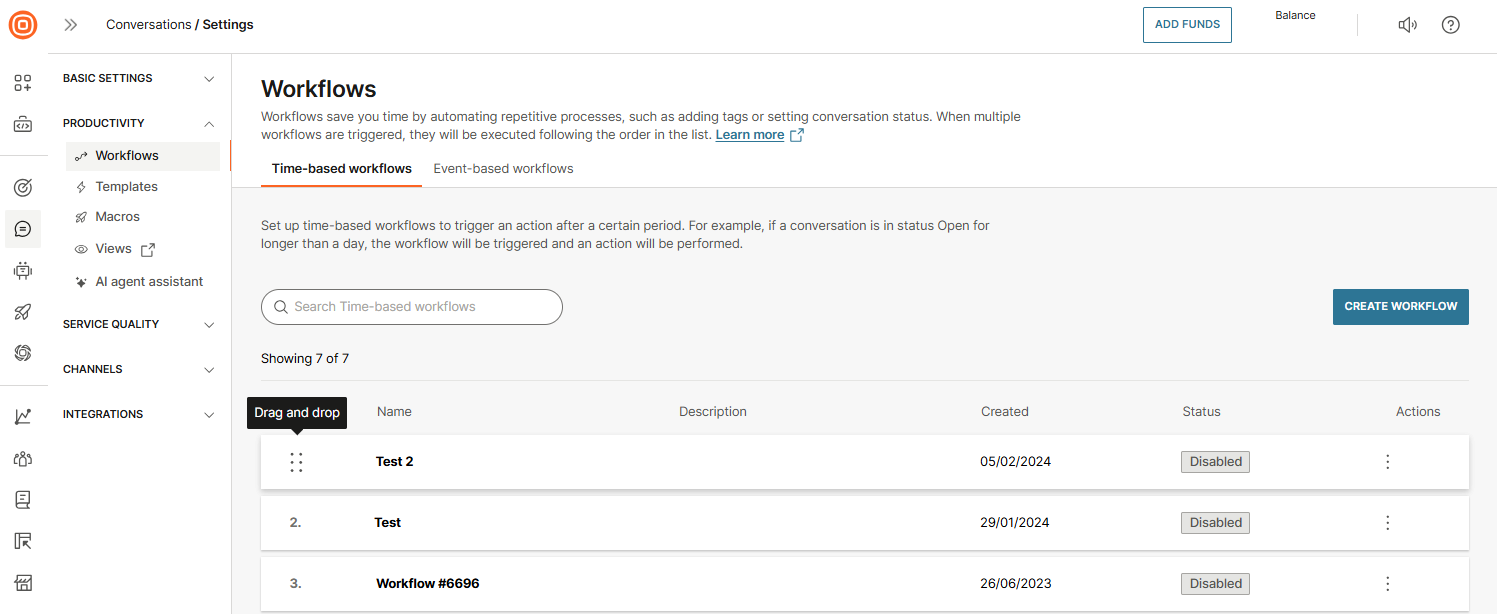
Ordered lists
You can organize workflows by dragging and dropping them into ordered lists. The system will execute workflows according to their order, starting with the first, followed by the second, and so on.
This structured execution ensures more precise use cases and helps prevent issues like random workflow execution or cyclical dependencies.
Placeholders for automatic replies [#placeholders-for-automatic-replies-workflows]
You can configure placeholders to customize automated replies for the following actions:
- Send message to customer (content)
- Email customer (content + subject)
- Email external recipient (content + subject)
- Email transcript (subject)
- Notify by email (subject)
- Message on Slack (content)
- Populate form fields (value)
Moreover, you can configure identical variables already supported in the Call API actions, along with a new placeholder referred to as the Short ID (also included among the supported placeholders in API actions).
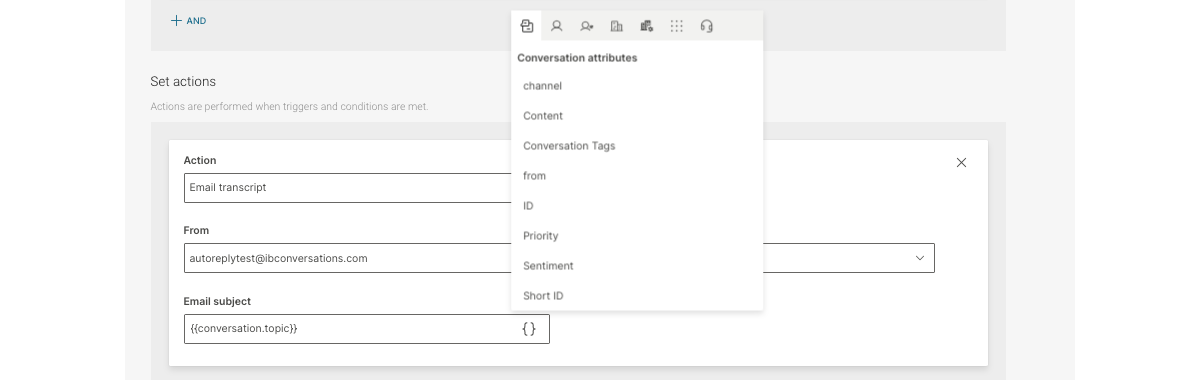
Workflow actions placeholders
You can use placeholders to dynamically insert conversation, channel, agent, form, or People data into workflow actions.
When a workflow is triggered, placeholders are resolved with the most recent or relevant values available at that moment.
Check the tables below for details on supported attributes.
Conversation attributes
Channel attributes
Agent attributes
Form fields input
People attributes
Company attributes
Workflow conditions attributes
Workflow conditions let you define rules that must be met for an action to run.
Conditions are evaluated at the moment the workflow is triggered, based on conversation, agent, channel, form, or People data.
Placeholders not available in conditions
Some conversation placeholders do not have matching workflow conditions, for example:
{{content}}{{queueDefaultSender.name}}{{message.from}}{{conversation.id}}{{sentiment}}{{conversation.shortId}}{{conversation.summary}}{{survey.comment}}{{survey.rating}}{{message.to}}{{conversation.topic}}
Check the tables below for details on supported attributes.
Conversation attributes
Form fields input
Internal form fields (dispositions) are defined under Conversations → Settings → Service quality → Internal forms.
They can be strings, numbers, dates, or booleans.
People attributes
Workflow conditions support a limited set of People attributes.
Placeholders for outbound email templates
The placeholders below can be used in outbound email templates. Values are resolved at the moment the email is sent.
Check the tables below for details on supported attributes.
Conversation attributes
Channel attributes (resolved based on the outbound email message)
People attributes
Call API action
As mentioned in the table above, the Call API action in workflows triggers Infobip and third-party APIs when a customer sends a message to differentiate if they reached out to Support or Marketing. It consists of the following parameters:
- Method
- URL
- Content type
- Headers
- Body
As mentioned, the "Content", "From", and all Email variables within the Call API action are only available when using the "Outbound agent message is sent" and "Inbound message received" triggers.
Method
The Method parameter is used to specify the type of HTTP request you want to make to the endpoint. The method parameter indicates the desired action to be performed on the resource identified by the URL.
GET: It is a read-only method and does not modify the resource. For example, when you want to retrieve information about a user from an API, use theGETmethod.POST: Used to submit data to the server to create a new resource. It is often used for creating or submitting data, such as submitting a form or creating a new user. When you want to create a new resource, use thePOSTmethod.PUT: Used to update an existing resource on the server. It replaces the entire resource with the new data provided. For example, if you want to update the details of a user, use thePUTmethod.PATCH: Similar to thePUTmethod, but instead of replacing the entire resource, it applies partial updates to the resource. It allows you to update specific fields or properties of an existing resource.DELETE: Used to delete a resource from the server. When you want to remove a resource, use theDELETEmethod.
URL
The URL in an API Call is the specific address where the API is located and the desired resource or action is identified. It consists of the base URL (API location) and the path (resource/action within the API). The endpoint uniquely represents the location within the API that you want to interact with.
For example, https://api.example.com/users represents the endpoint for the users resource in the API.
Content Type
The Content Type in an API Call refers to the format of the data being sent or received, and it specifies how the data should be interpreted. It includes the following options:
- RAW
- JSON (application/json)
- Text (text/plain)
- XML (application/xml)
- URL-encoded (application/x-www-form-urlencoded)
- Form Data (multipart/form-data)
Setting the correct content type is important to ensure the data is processed accurately by the API.
Headers
Headers in an API Call are the key-value pairs that provide additional information in the HTTP request or response. They include details like authentication credentials, content type, caching directives, and more. Headers help the client and server communicate effectively and handle various aspects of the API interaction.
Body
The Body refers to the data transmitted in the HTTP request or response. It can contain various formats as explained under the Content Type. The Body allows for exchanging and manipulating data between the client and server and it can be set using key-value pairs or as text using the editor option.
Use triggers, conditions, and actions listed in the tables below to create dynamic, customized, and efficient automations. Setting advanced conditions and operators optimizes workflows, making automations more precisely aligned with your unique requirements.
Triggers [#triggers-workflows]
Find the available triggers for initiating workflows in the table below.
| Trigger | Operator | Parameters | Type | Description |
|---|---|---|---|---|
| Customer reply is pending for/Customer did not reply for | More than | Days, hours, minutes (all set to 0 by default) | Time-based | Triggers a workflow when a customer does not reply for a set period of time. If an agent sends multiple messages, the set period starts when the first agent message is sent. |
| Agent reply is pending for/Agent did not reply for | More than | Days, hours, minutes (all set to 0 by default) | Time-based | Triggers a workflow when an agent does not reply for a set period of time. If a customer sends multiple messages, the set period starts when the first customer message is sent. |
| Solved conversation is unmodified for | More than | Days, hours, minutes (all set to 0 by default) | Time-based | Triggers a workflow when a conversation has been solved for a set period of time AND if there were no changes in the conversation. |
| Conversation is solved for | More than | Days, hours, minutes (all set to 0 by default) | Time-based | Triggers a workflow when a conversation has been in the Solved status for a set period of time, regardless if there were any changes. |
| Conversation status changed | To | Open, Waiting, Solved | Event-based | Triggers a workflow when the conversation status is changed to the set one. |
| Conversation form changed | - | - | Event-based | Triggers a workflow when an agent changes the conversation form or if the change happens automatically. |
| Conversation queue changed | - | - | Event-based | Triggers a workflow when the conversation is moved from one queue to another. |
| Conversation tag changed | - | - | Event-based | Triggers a workflow when tags are added or removed in a conversation. |
| Conversation customer changed | - | - | Event-based | Triggers a workflow when an agent unlinks a customer from the conversation. |
| Conversation channel changed | From/To | Any, SMS, Viber, Messenger, WhatsApp, Email, RCS, Apple Messages for Business, Line, Telegram, Calls, Instagram, KakaoTalk | Event-based | Triggers a workflow when the first message over the second channel in the same conversation is sent. |
| Conversation closed | Is | - | Event-based | Triggers automations when the conversation is closed. Depending on whether Email is configured as a channel, you can perform the following actions with the Conversation closed trigger: - Email external recipient - Email transcript - Notify by email - Message on Slack - Call API - Email survey to the customer |
| Conversation in status waiting for | - | - | Time-based | Expands the functionality to work with all conversation statuses (except Closed), enhances automation abilities and introduces new use cases. |
| Note is created | - | - | Event-based | Triggers a workflow when an agent adds a note. |
| Outbound agent message is sent | - | - | Event-based | Triggers a workflow when an agent sends a message. |
| Inbound message received | - | - | Event-based | Triggers a workflow when an agent receives a message from a customer. |
| Survey feedback received | With score | Happy, Not happy (both can be picked) | Event-based | Triggers a workflow when a customer sends survey feedback (for example, send a message to Slack). It can be used in combination with the existing workflow/automation conditions and actions. Works with the text channel surveys, however, if you also configure a follow-up question in the survey, both the survey score and the follow-up answer need to be received for the trigger to be activated. |
| Form field updated | - | - | Event-based | Triggers a workflow when any form value has been updated in a certain conversation. |
| Inbound call received | - | - | Event-based | Triggers a workflow when an inbound call is received through the call center. Note: When this trigger is selected, the Set conversations, Unassign agent, and Close conversation actions are unavailable. Similarly, if you select one of these actions first, this trigger is disabled. |
| Outbound call started | - | - | Event-based | Triggers a workflow when an outbound call starts, including agent-initiated calls, automatic callbacks, and manual callbacks. Note: When this trigger is selected, the Set conversations, Unassign agent, and Close conversation actions are unavailable. Similarly, if you select one of these actions first, this trigger is disabled. |
Conditions [#conditions-workflows]
Find the available conditions that, when set, further filter conversations based on their characteristics.
| Condition | Operator | Parameters | Description |
|---|---|---|---|
| Queue | Is in list, Is not in list | Multiselect of all existing queues | If you use the "Conversation queue changed" trigger, the condition refers to the destination queue. |
| Conversation direction | Is | Inbound, outbound | Inbound conversations are the ones initiated by a customer, and outbound ones by an agent. |
| Conversation tag | Contains all in list, Contains any from list, Missing all from list, Missing any from list | Multiselect of all existing conversation tags | If the conversation has any or none of the tags selected from the drop-down. |
| Conversation channel | Is, Is not, Is in list, Is not in list | For is/is not a single-select option: Internal, Multichannel, Chat, Email, Messenger, Apple Messages for Business, Telegram, Calls, Viber, LINE, Instagram Messaging, SMS, WhatsApp, RCS. For is on the list/is not on the list: multiple-select option of all channels listed above. | If the conversation is/is not ongoing over the selected channel;
|
| Conversation form | Is, Is in list, Is not in list | For is a single-select option of all existing forms; For is on the list/is not on the list: multi-select of all forms. | If a conversation has a selected form assigned to it: If any of the Conversation forms is/is not assigned to the conversation. |
| Conversation status | Is in list, Is not in list | Drop-down with statuses (Open, Waiting, Solved, Pending) | This condition allows you to filter and run the appropriate automation solely for conversations in specific statuses. |
| Conversation priority | Is in list, Is not in list | Drop-down with priority statuses (Low, Normal, High, Urgent) | This condition allows users to filter and run the appropriate automation based on conversation priority. |
| Email subject | Contains, Does not contain | Tag lookalike string adding | If the email subject contains or does not contain any of the defined strings. |
| Message | Is | First in the conversation | If a message is the first message sent in the conversation (by customer or agent). Only works for the following triggers: - Outbound agent message is sent - Inbound message received |
| Hours since assignee updated | Greater than | 6,12 | Denotes when was the last time the agent updated the conversation. |
| Agent | Is | Assigned, Unassigned | If the conversation is/is not assigned to an agent. |
| Agent status | Is in list, Is not in list | Active, Busy, Offline, Away | If the agent currently assigned to the conversation is/is not marked with any of the statuses selected from the drop-down. |
| Agent contact | Is in list, Is not in list | Drop-down with available chat senders | The contact details to reach the company (such as email, phone number, ID, and more). |
| Agent domain | Is, Is in list, Is not in list | Is: A single-select option of all domains Is on the list/is not on the list: A multi-select option of all domains | If the email address the agent is using has a domain that was selected from the drop-down; If the email address has any or none of the domains selected from the drop-down. |
| Sender | Is in list, Is not in list | Queues drop-down | Starts interactions only with the senders you add to a certain queue. For incoming emails, the actual recipient for whom the conversation was triggered is taken into consideration. |
| Customer contact | Is in list, Is not in list | Parameters are added as input | If a workflow is triggered with an event, the condition is used as a filter. For example, when a message arrives from a specific customer, a tag is added to the conversation. |
| Inside working hours | Is | True/False drop-down | Use this condition to trigger automations only for conversations inside or outside of working hours. |
| People tag | Is in list, Is not in list | Multi-select option of all defined tags | If the customer in the conversation has/does not have any of the tags assigned in the drop-down. |
| Person country | Is in list, Is not in list | Tag lookalike string adding | If the customer in the conversation has/does not have a country attributed in the People data platform match with any of the countries entered. |
| Agent email address | Is in list | Multiple-select option of all agent addresses | If the email sent by a customer is sent to an agent address selected from the drop-down. |
| Email routed to recipient | Is in list, Is not in list | List of registered email addresses for Conversations where only one can be chosen | To ensure accurate internal conversation routing, this condition takes into account the actual recipient of the incoming email that triggered the conversation, i.e., this condition represents the email address to which that email has actually been sent. |
| Company | Is in list, Is not in list | Input value | Allows you to set specific automation based on the company of the client. |
| Company segment | Is in list, Is not in list | Input value | Allows you to set specific automation based on the company segment of the client. |
| Company tag | Contains all in list, Contains any from list, Missing all from list, Missing any from list | Input value | Allows you to set specific automation based on the company tag of the client. |
| Country | Is, Is not, Contains | Input value | Allows you to set specific automation based on the company country of the client. |
| Region | Is, Is not, Contains | Input value | Allows you to set specific automation based on the company region of the client. |
| Account Manager | Is, Is not, Contains | Input value | Allows you to set specific automation based on the company account manager of the client. |
| Stage | Is, Is not, Contains | Input value | Allows you to set specific automation based on the company stage of the client. |
| Industry | Is, Is not, Contains | Input value | Allows you to set specific automation based on the company industry of the client. |
| VAT Number | Is, Is not, Contains | Input value | Allows you to set specific automation based on the company VAT number of the client. |
| Notes | Is, Is not, Contains | Input value | Allows you to set specific automation based on the company notes of the client. |
| Domains | Is, Is not, Contains | Input value | Allows you to set specific automation based on the company domains of the client. |
| Custom company attribute - text | Is, Is not, Contains | Input value | Allows you to set specific automation based on the custom company attribute based on the text assigned to company to which the user belongs to. |
| Custom company attribute - Decimal/Wholenumber/False-True/Date | Is, Is not, | Input value | Allows you to set specific automation based on the custom company attribute based on the Decimal/Wholenumber/False-True/Date assigned to the company the user belongs to. |
| Form fields input | Is, Is not, Is in list, Is not in list (the options vary based on the chosen form field type) | All existing custom conversations form fields created in a conversation form. | This condition allow you to trigger the workflow based on a specific value updated in a specific form field. |
Actions [#actions-workflows]
Find the available actions that are performed when triggers and conditions are met.
| Actions | Parameters | Description | Note |
|---|---|---|---|
| Send a message to the customer | Channel (hardcoded to the last used channel) Message (1000 chars) - no placeholders | Sends a message to the customer that participated in the conversation that triggered the workflow, over the last channel that the customer used.The content of the message needs to be manually added. | The message is sent over the channel that was used for the last inbound message, not the last used channel overall. |
| Apply tag(s) | A multi-select option of all tags | Adds selected tags to the conversation. | |
| Remove tag(s) | A multi-select option of all tags | Removes selected tags from the conversation. | |
| Email the customer | Email subject (no placeholders) Email content (no placeholders) | Sends an email to the customer that participated in the conversation that triggered the workflow. | The last message in the conversation has to be an e-mail, otherwise, this action will not be executed. |
| Email the external recipient | From: A drop-down with senders registered for this purpose. To: Tag lookalike string adding. Email subject Email content (no placeholders; basic formatting options) | Sends an email to any defined recipient(s), regardless if they were involved in the conversation that triggered the workflow, or not. The sender's email address used to send these emails must be manually set as a no-reply address. | |
| Email transcript | From: A drop-down with senders registered for this purpose Email subject | Sends the transcript of the conversation that triggered the workflow, using the sender's email address that must be manually set as a no-reply address. | The customer must have a defined email address in the People data platform. |
| Notify by email | From: A drop-down with senders registered for this purpose | Sends an email notification using the sender's email address that must be manually set as a no-reply address. Recipients need to be manually defined. | |
| Message on Slack | Type: A drop-down with two options (Select recipient from conversations - shows a drop-down with form fields, free entry of recipients; (Manual) - shows 2 To fields (Channels and Users)
| Sends a Slack message to a person or a channel defined by the user, or to Conversation users subscribed via Infobip Tools. To be able to use this action, Slack for Conversations integration on Exchange must be enabled. | |
| Set conversation status | Drop-down with an option to mark conversations as Solved | Changes the conversation status to Solved. | |
| Set conversation priority | Drop-down with priorities (low, normal, high, urgent) | Sets the conversation priority to the chosen one. | |
| Unassign agent | - | Unassigns agent. | |
| Email survey to the customer | - | Sends an email with the link to the CSAT survey. | |
| Close conversation | - | Closes the conversation. No other action can be added after this one. | |
| Call API | Method URL Content type Headers Body | Triggers Infobip and third-party APIs. When a customer sends a message and a conversation is created, Infobip needs to know if the customer reached out to Support or Marketing. When a conversation is created, the workflow is triggered to check to which sender the inbound message is sent. If the message is sent to a Support sender, the Call API action is triggered which updates the person's attribute with the "SUPPORT CUSTOMER" value. If the message is sent to a Marketing sender, the person's attribute is updated with the "MARKETING CUSTOMER" value. | The "Content", "From", and all Email variables within the Call API action are only available when using the "Outbound agent message is sent" and "Inbound message received" triggers. |
| Populate form fields | Drop-down with all available input fields. | When used, a list of all existing input fields is available in the autocomplete drop-down. The attribute can be populated with fixed text or a value picked from the standard attribute picker. | In order for the input fields to appear in the drop-down menu, they first need to be configured in the Conversation Forms. |
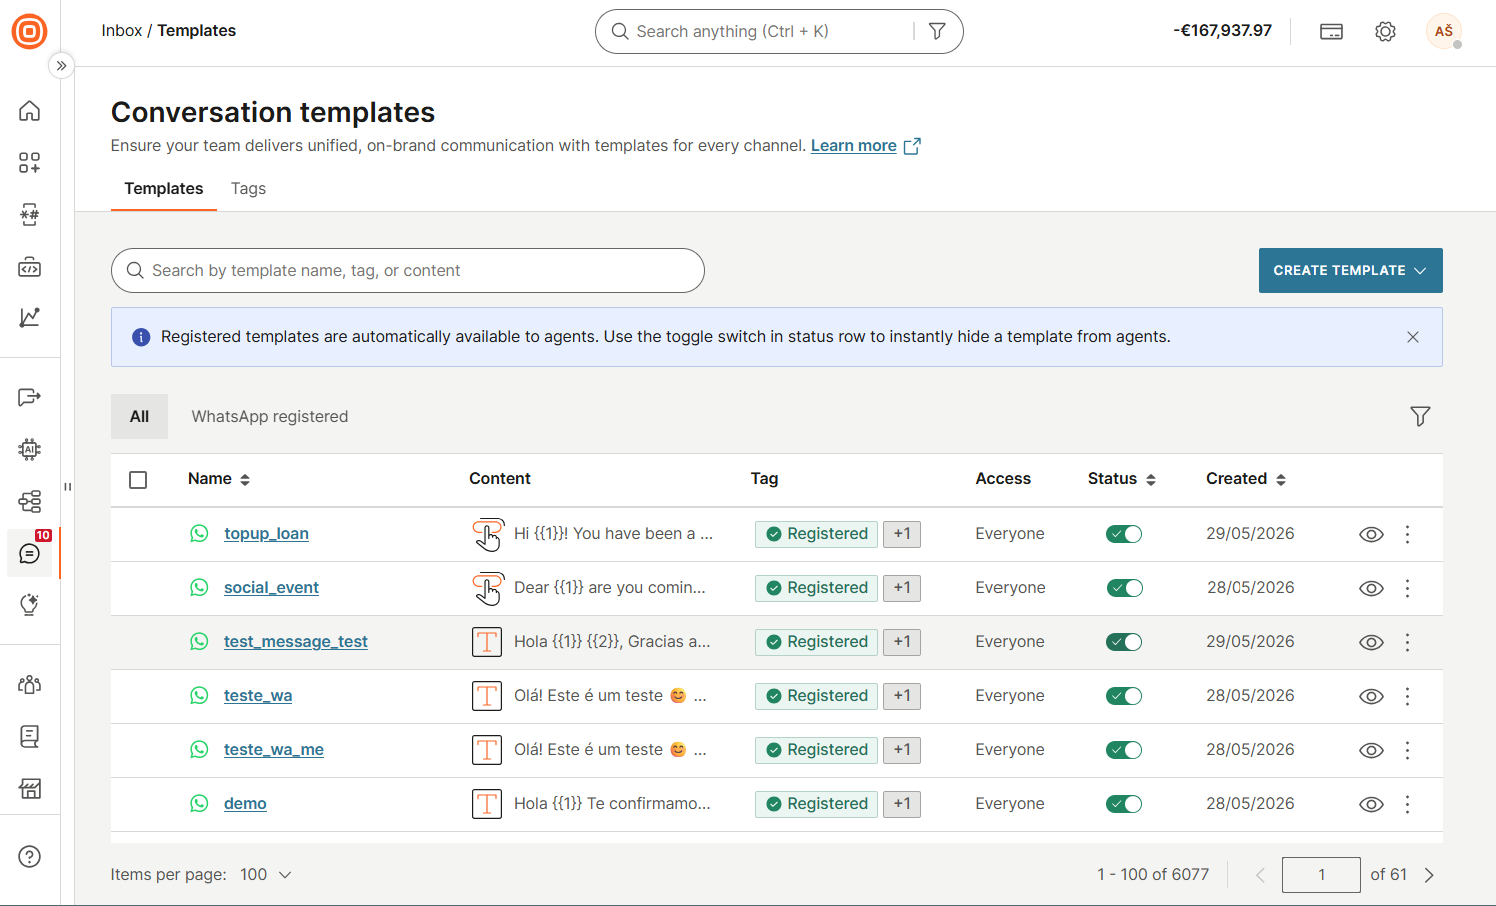
Templates
Predefined templates help reduce repetitive work and make handling common requests more efficient. Agents can use ready-made replies with a single click instead of typing the same responses repeatedly.
Each template in the Templates list has a status toggle. For WhatsApp templates, use the toggle to instantly make a template available to agents or hide it without deleting it. For templates on other channels, the toggle is visible but disabled. Those templates are always active by default.
Go to Conversations → Settings → Productivity → Templates.
The Templates page has two tabs:
- All: Lists all templates across channels.
- WhatsApp registered: Lists only WhatsApp templates pre-approved by Meta. For more information, see Pre-registered WhatsApp templates.
From the Templates page, you can:
- Search templates
- Create templates
- Filter templates by access, channel, language, status, tags, or validity
- Toggle template availability on or off (WhatsApp templates only; the toggle is visible but disabled for other channels, where templates are always active by default)
- Preview, edit, duplicate, or delete templates
- Manage tags
Create templates [#create-templates-templates]
To create a new template:
- Go to Conversations → Settings → Productivity → Templates.
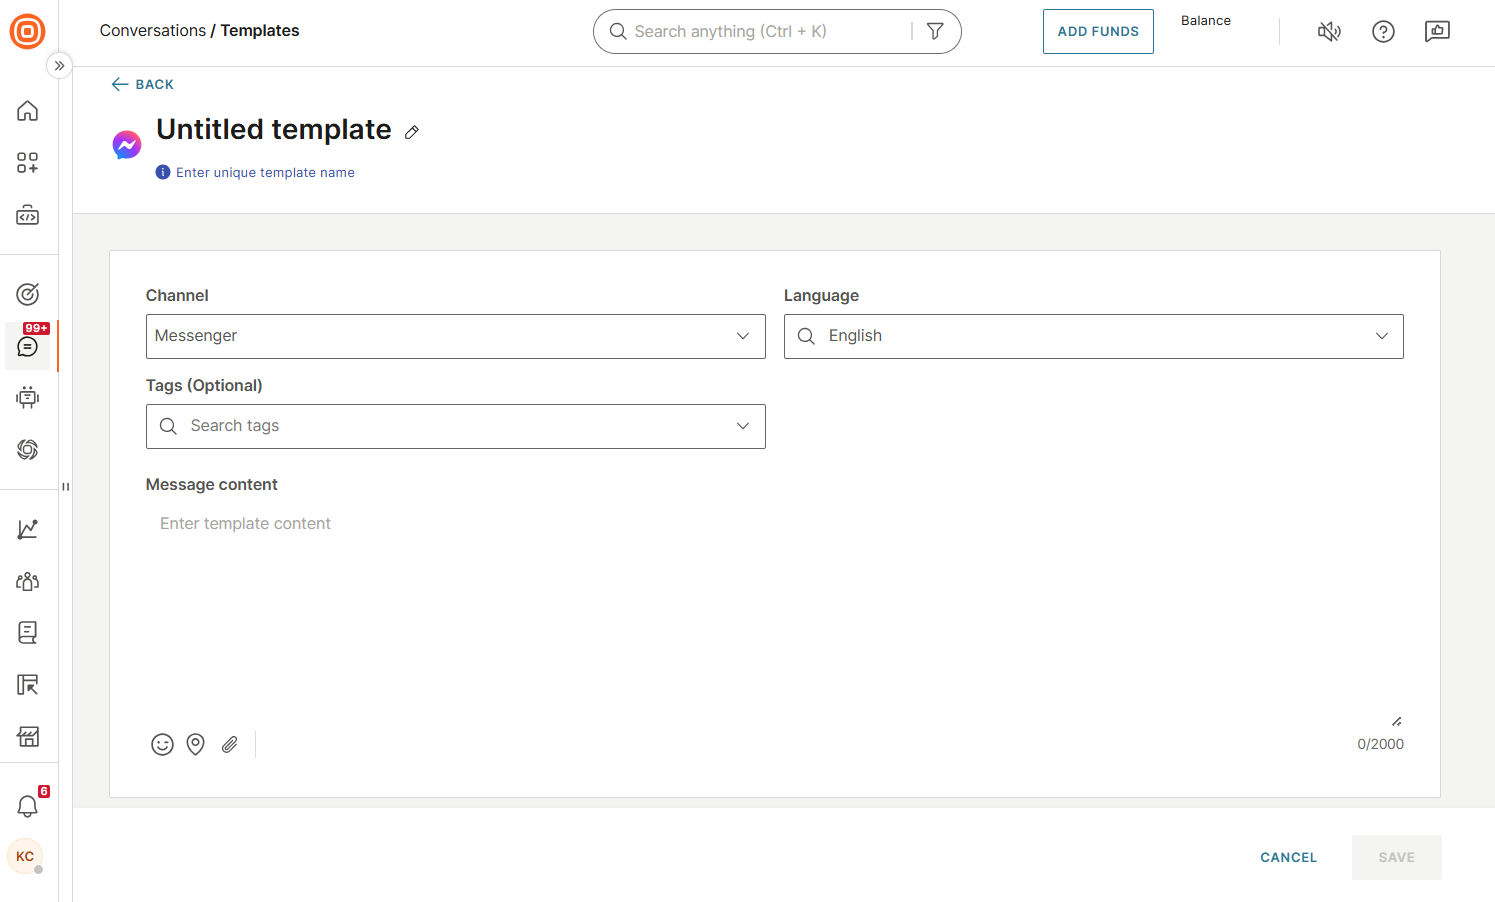
- Select Create template, then choose the channel from the drop-down menu.
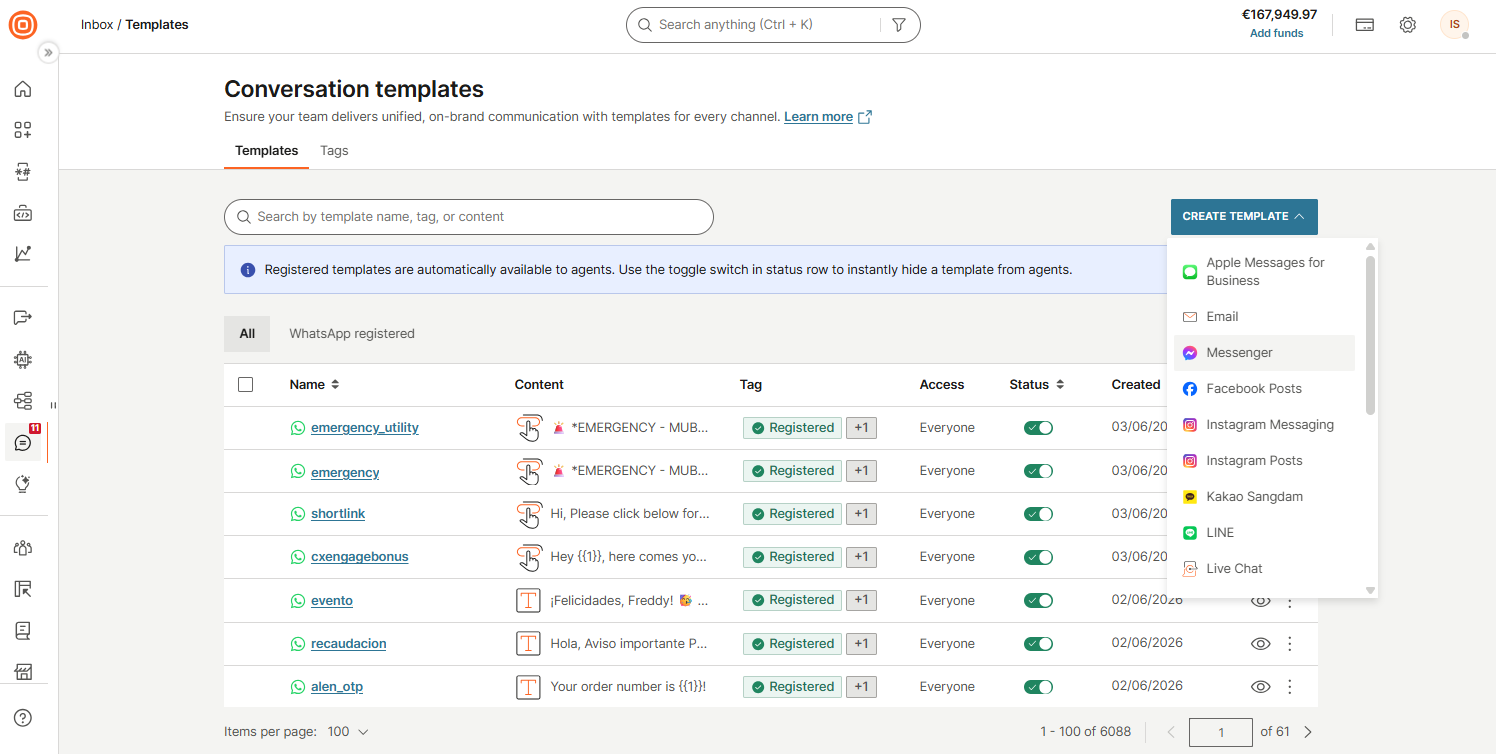
- Define the following:
- A unique template name
- Language
- Tags (optional)
- Message content
- Depending on the channel type, you can add attachments or emojis.
- Select Save.
WhatsApp templates with rich content [#whatsapp-templates-with-rich-content-templates]
These templates are created in Conversations for quick replies during ongoing conversations (within the 24-hour customer session window). Agents can fully edit the content before sending.
Supported content types:
- Text
- Image
- Video
- Audio
- Document
- Sticker
- Location
- Location request
- List message
- CTA URL button
- Reply button
You can also use automatic placeholder mapping from standard People attributes to personalize templates with customer data.
To help agents find the right template and give supervisors more control over template access, WhatsApp templates support the following options in addition to tags and language:
- Queue-based access: Agents can access all templates assigned to queues they belong to, regardless of the queue of the active conversation.
- Time validity: Supervisors can make a template available only during a specific period. For example, a template tied to a seasonal campaign can be set to expire when the campaign ends, so it does not appear in the agent's template list afterwards.
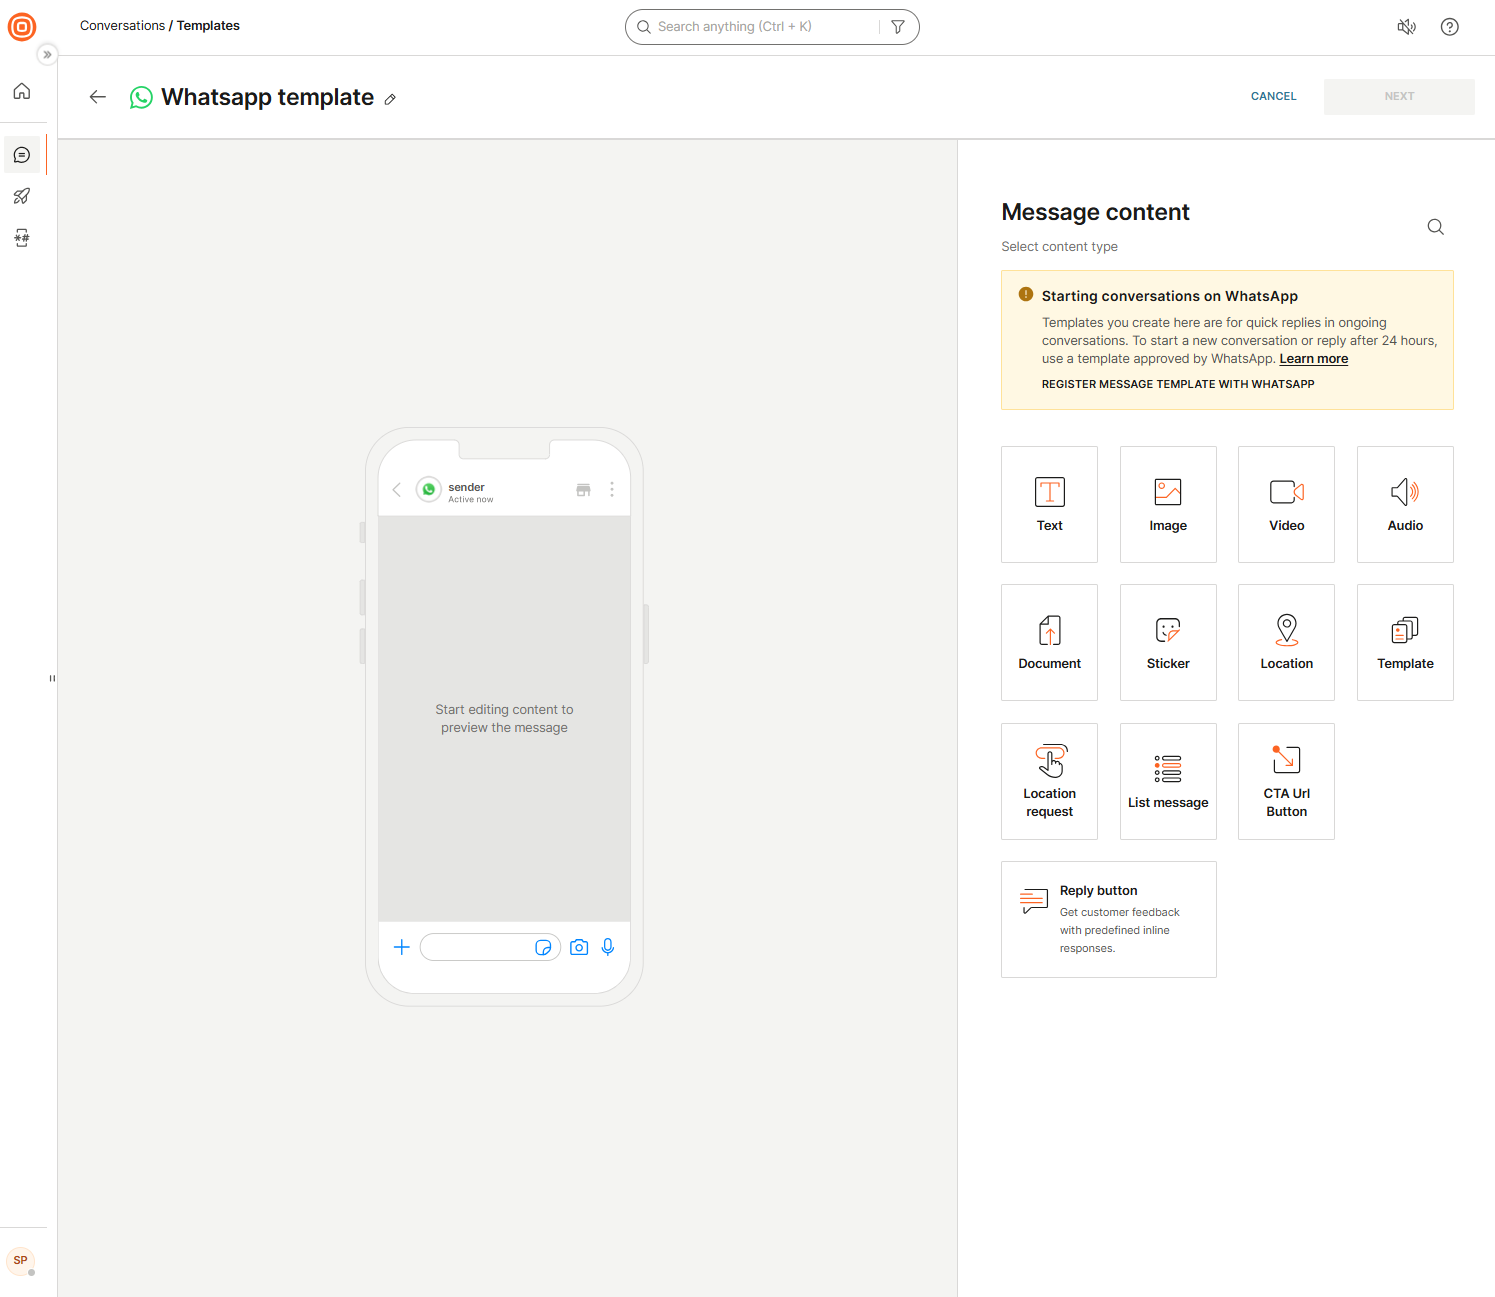
Create a WhatsApp template
To create a WhatsApp template:
- Go to Conversations → Settings → Productivity → Templates.
- Select Create template and choose WhatsApp from the drop-down menu.
- Enter a template name at the top, then add and configure the template content. You can use the following content types:
- Text
- Image
- Video
- Audio
- Document
- Sticker
- Location
- Location request
- List message
- CTA URL button
- Reply button
- For media content types (image, video, document), enter a URL to the media file. You can also configure headers, footers, and buttons, and use placeholders mapped to People attributes to personalize content with customer data.
- Select Next.
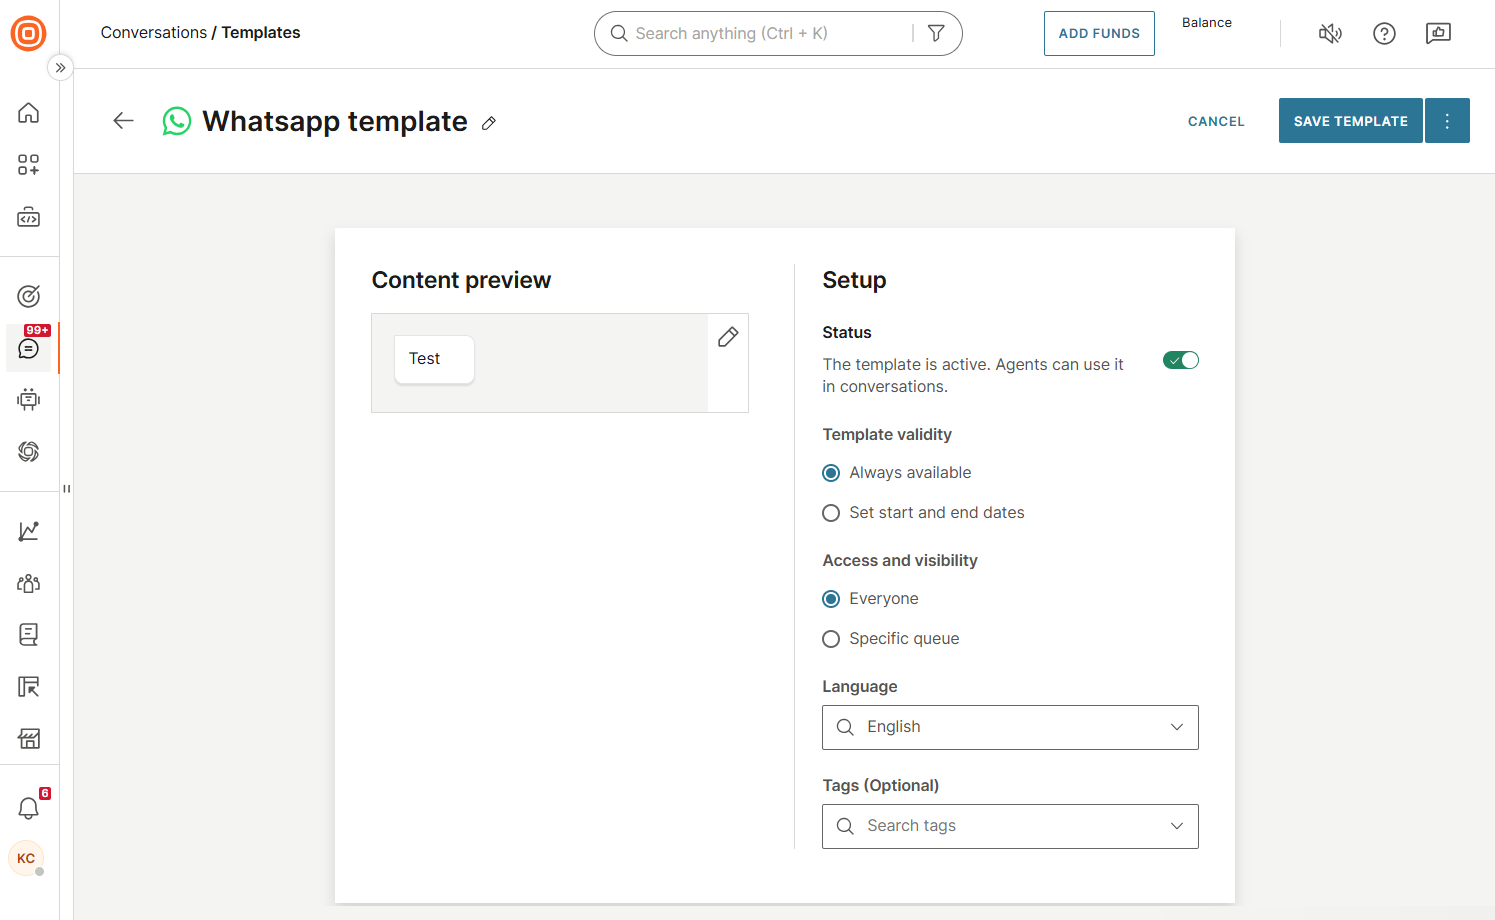
- On the Setup screen, configure the following:
- Status: Toggle on to make the template active and immediately available to agents. Toggle off to save the template without publishing it. You can change the status later from the Templates list.
- Template validity: Choose Always available, or Set start and end dates to limit when the template is available.
- Access and visibility: Choose Everyone, or Specific queue to limit which queues can use the template.
- Language: Select the template language.
- Tags (optional): Add tags to help agents find the template.
- Select Save template.
Pre-registered WhatsApp templates [#pre-registered-whatsapp-templates-templates]
WhatsApp message templates are pre-approved messages required by WhatsApp Business rules. They are reviewed and approved by Meta before use to ensure compliant outbound communication.
Agents cannot edit the content of a pre-registered template. They can only fill in placeholders that the supervisor has marked as editable.
For more information, see Use WhatsApp message templates.
When templates are required
When WhatsApp is selected as a channel, the system automatically checks the conversation context and determines whether:
- This is the first interaction with the customer, or
- More than 24 hours have passed since the last customer message
If more than 24 hours have elapsed, you must use a WhatsApp template to start a new conversation. In this case, an alert is displayed in the message reply box to indicate that a template is required.
Supported WhatsApp registered media templates
Conversations supports the following types of WhatsApp registered media templates:
Text and rich media
Text and rich media templates include the following components:
- Header
- Content (body)
- Footer
- Buttons
Buttons are supported with specific limitations, as described below.
Supported button types
Text and rich media templates include the following button types:
- Quick reply
- Call button
- WhatsApp Call button
- Click-to-URL
Call permission request templates
Call permission request templates include the following components:
- Header
- Content (body)
- Footer
Template availability and queue-sender limitations
If no templates are available in the template selector, this may be because:
- No templates are assigned to the agent's queue.
- All assigned templates have expired (time validity has passed).
- Templates are distributed across specific queues and the agent's queue has none assigned.
If this happens, review the template configuration.
WhatsApp templates are bound to specific senders. If Select senders for each queue is enabled, be aware of the following:
- Each queue has a limited set of senders, and only the default sender is available when starting a new conversation.
- If a template is assigned to a queue but its sender is not available in that queue, agents cannot use the template.
- This can result in a mismatch where a template appears to be configured for a queue but is not usable because the sender is restricted.
To avoid this, make sure that the sender associated with each WhatsApp template is also assigned to the queues where the template is available. For more information, see Senders configuration.
Review templates with missing content
When a registered template is approved by Meta, it becomes visible in Conversations with the status Active. Supervisors can review these templates in the Templates list (Conversations → Settings → Productivity → Templates) and fill in any missing content (for example, a body placeholder, header media, or button URL).
Supervisors can choose how to handle the missing content:
- Pre-fill the template: Open the template and add the missing content yourself, such as mapping a People attribute or adding an image or video. Agents then see a complete, ready-to-send template and no further action is required from them. Use this option when the content is not variable.
- Leave it editable by agents: Keep the relevant fields editable by agents (enabled by default). Each agent fills in the missing content manually before sending the template.
This gives supervisors more control over the content agents send and helps agents work more efficiently.
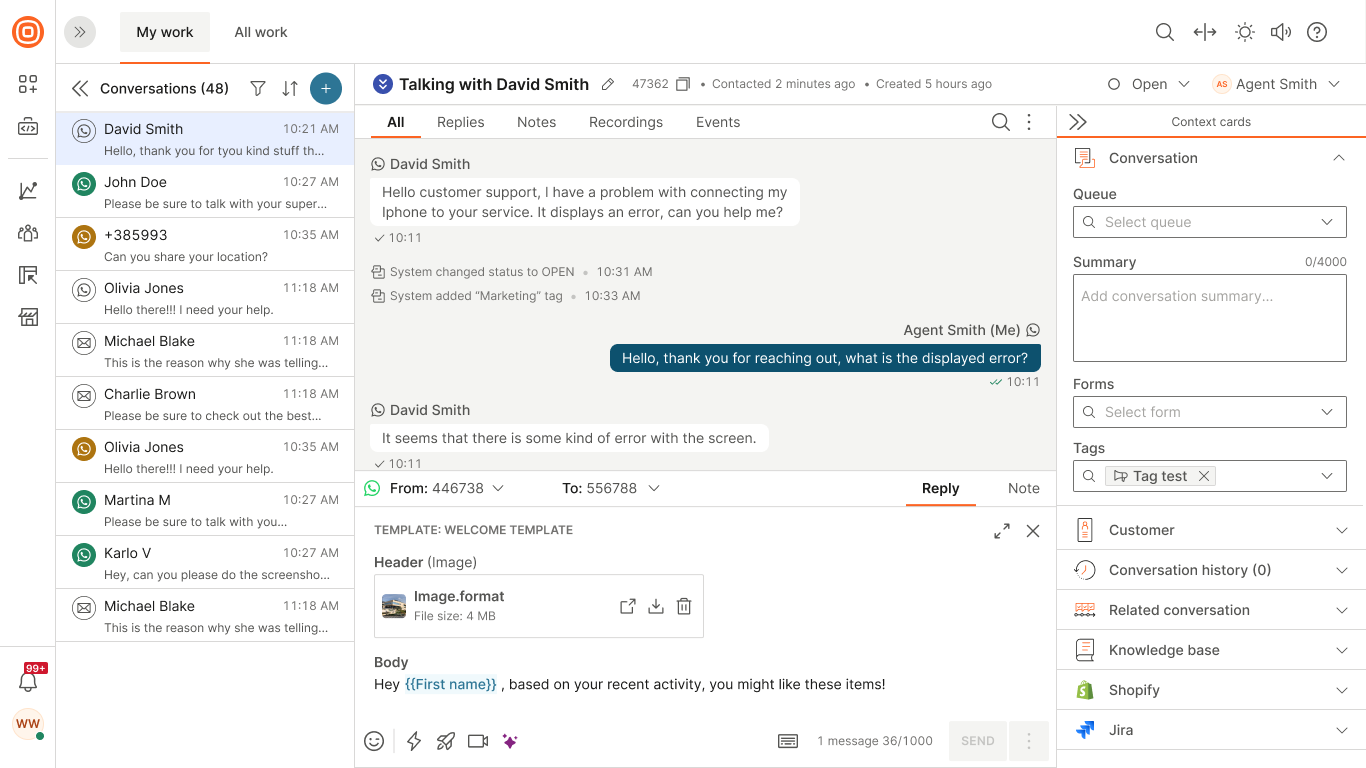
Send a message using a WhatsApp template
Use a WhatsApp template when sending the first message to a customer or when more than 24 hours have passed since the customer’s last message.
Once selected, the template appears in the message composer. Agents can preview templates in the template picker before selecting one.
Agents cannot edit the template text and can modify only variable fields set by the supervisor as editable. If a variable field is not automatically filled (for example, when a People attribute does not match the given customer), the agent must fill it in manually.
If the template includes media placeholders that the supervisor has left editable, agents must add the required media (image, video, document, or location) before sending the message, in accordance with WhatsApp rules.
First interaction with a customer
- Go to Conversations → All Conversations → My Work.
- Select the + button and choose Start a new conversation.
- (Optional) Add a topic.
- Select the WhatsApp number you are sending the message from and the customer’s WhatsApp number.
- Select Choose a message template.

- Choose a template from the list of approved WhatsApp templates.
- Select Start conversations.
After more than 24 hours since the last customer message
- Open the existing conversation.
- In the message reply box, click the Select template option.
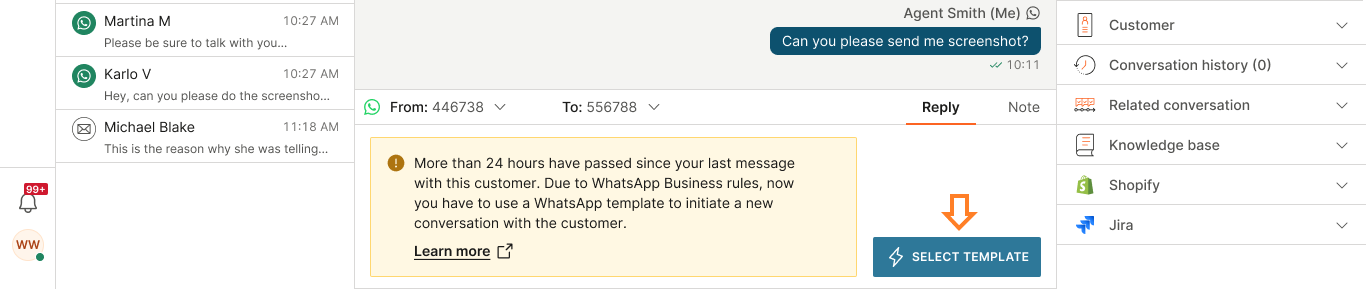
- In the pop-up window, choose a template from the list of registered and approved WhatsApp templates.
Complete and send the message
- Fill in values for all placeholders.
- If enabled by the template configuration, add missing media (image, video, document, or location).
- Send the message.
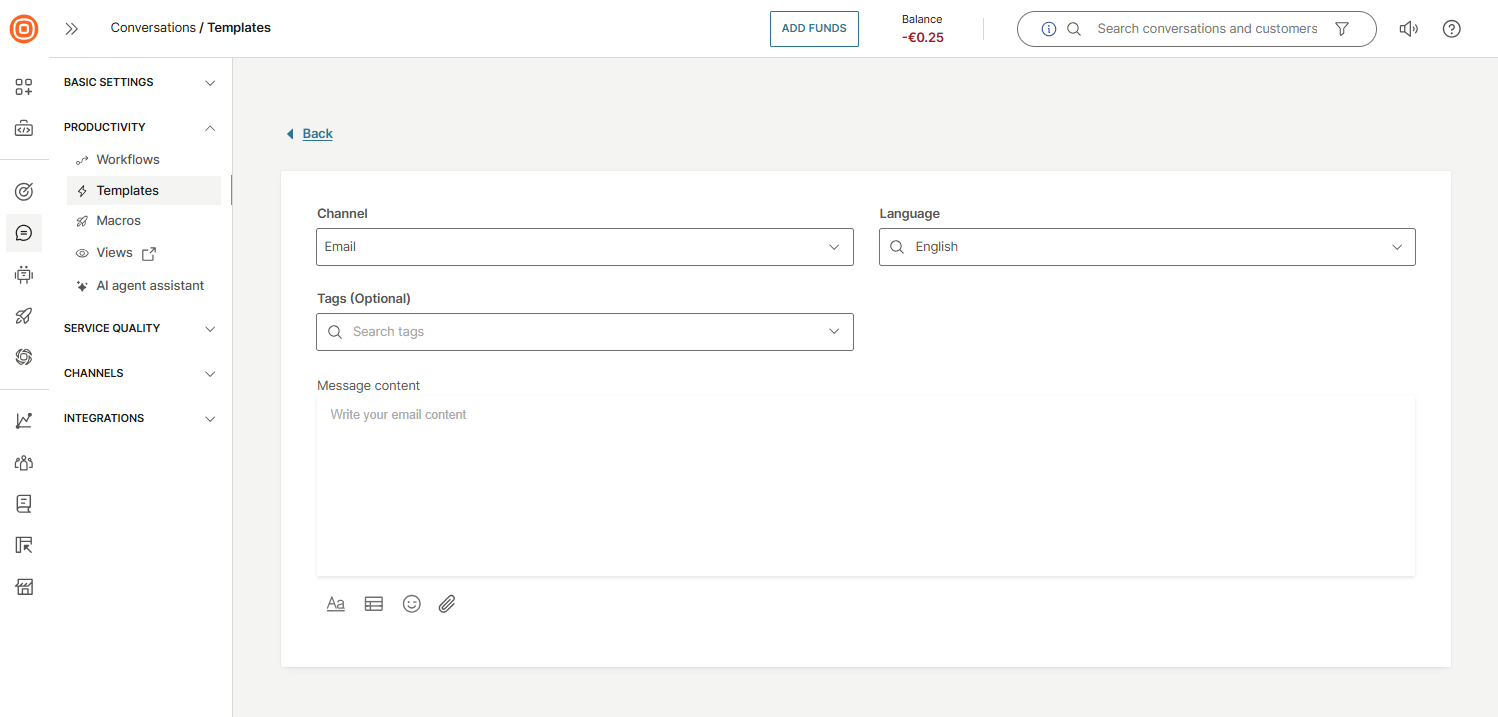
Email templates [#email-templates-templates]
Email templates offer a wider range of formatting options and content elements compared to other channels. Refer to the Supported attachments and templates table to see which templates and attachments are compatible with the Email channel.
You can create email templates to enable your agents to quickly draft and send messages to end users:
- Go to Conversations → Settings → Productivity → Templates → Create template.
- Select the Email channel, and give a name to your email template. Choose your language, and optionally, add or create tags.
- Enter your message content. In this message box, you can use different styling options to tidy up the final product and how you want your email to be presented to your end users. If necessary, add attachments as well.
- Once ready, select Save in the lower right corner.
Afterwards, agents can look for and use this template when interacting with customers via email. For insights into the agent experience, review the Conversation templates section.
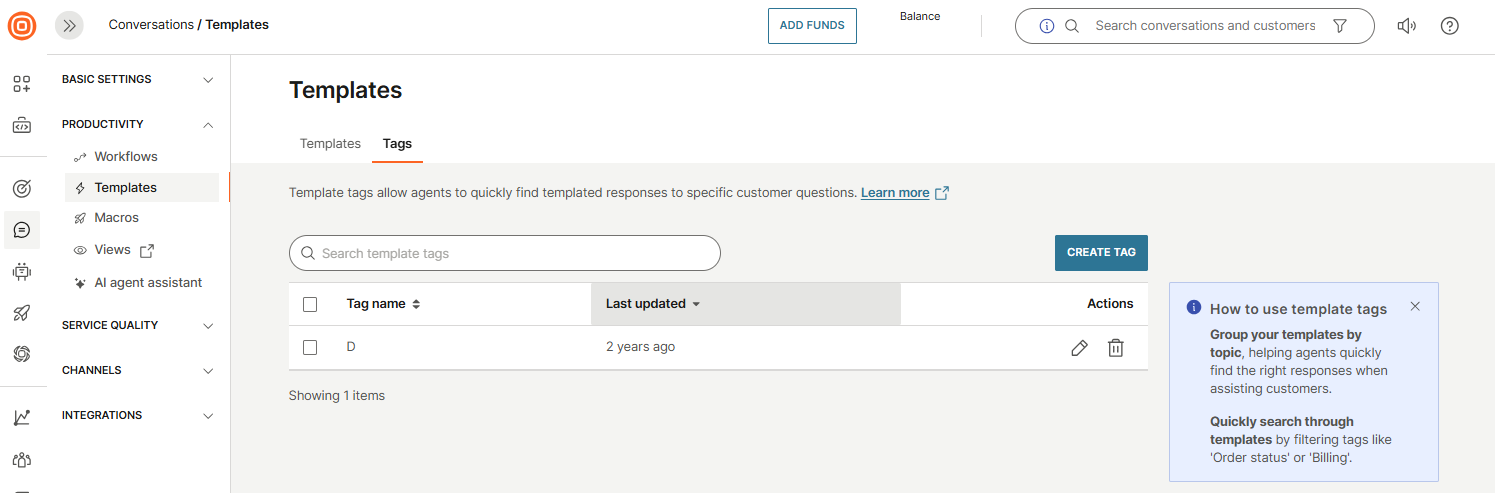
Template tags [#template-tags-templates]
Template tags help agents quickly locate pre-written responses for specific customer questions. You can group templates by topic and filter specific tags to quickly search through the templates:
- Go to Conversations → Settings → Productivity → Templates → select the Tags tab.
- You can search for specific template tags, edit or delete existing tags, or create new ones.
- To edit or delete a tag, select the appropriate option in the Actions column.
- Additionally, to delete multiple tags, select the box next to each tag name, click the trash bin icon, and confirm the action by selecting the Delete button.
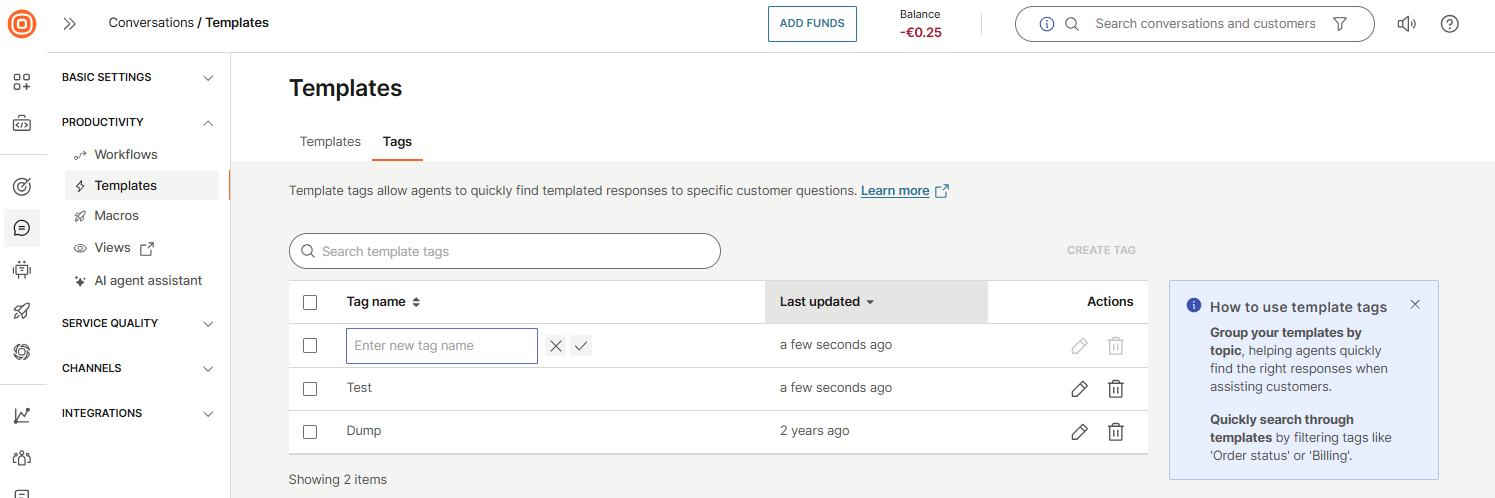
Create template tags [#create-template-tags-templates]
To create a new template tag, select the Create tag button, enter the tag name, and click the check mark to save the new tag.
Macros
Macros are primarily used to help agents resolve repetitive tasks more quickly. These are previously made responses for agents to faster respond to customers if they often ask similar things or discuss the same topics, as well as create escalations to external sources, internal escalations within Conversations, and more.
Macros simplify the agent's work and enable automation of the needed steps for the same use cases by simply choosing the appropriate macro, whether in open or new conversations, where all steps are completed automatically.
Available actions to automate are:
- Status (change the status of conversations)
- Priority (change the priority)
- Forms (fill in the form values/choose the correct form to be displayed to the agent)
- Template (pre-fill the template in the message composer)
- Tags (add tags to the conversation)
- Agent assignment (assign the agent to whom the conversation should be directed after the macro is applied)
- Queue assignment (set the queue to which the conversation should be assigned once the macro is applied)
- Topic or email subject (set the conversation topic or email subject)
- Recipient field (choose a channel, and upon applying the macro, it will be utilized based on the sender previously selected)
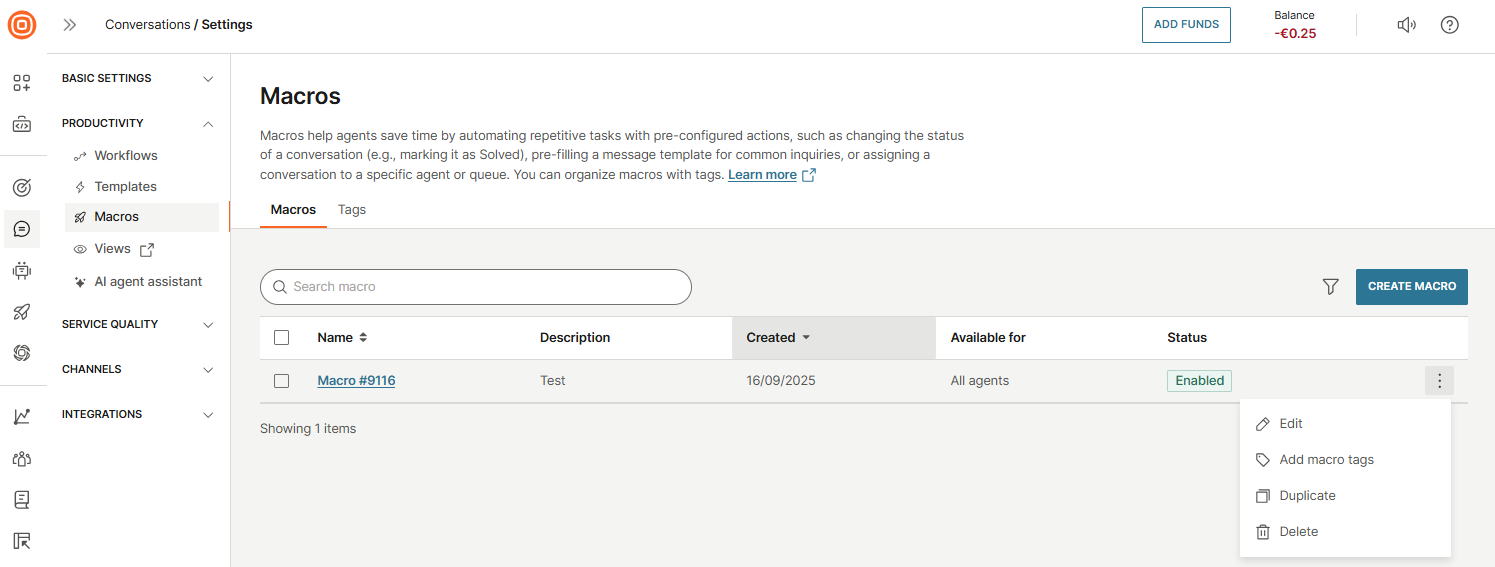
On the Macros page, you can:
- Create new macros
- Search for the existing ones
- Filter them by:
- All
- Tags (these tags are not related to any other tags in Conversations since these are just macros tags that are used for faster searching or categorization of macros, for example, escalation macros, Sales macros, and more)
- Status
- The sorting is done by:
- Macro name A-Z
- Macro name Z-A
- Date created - Newer first
- Date created - Older first
- Edit macros
- Add macro tags
- Duplicate
- Delete
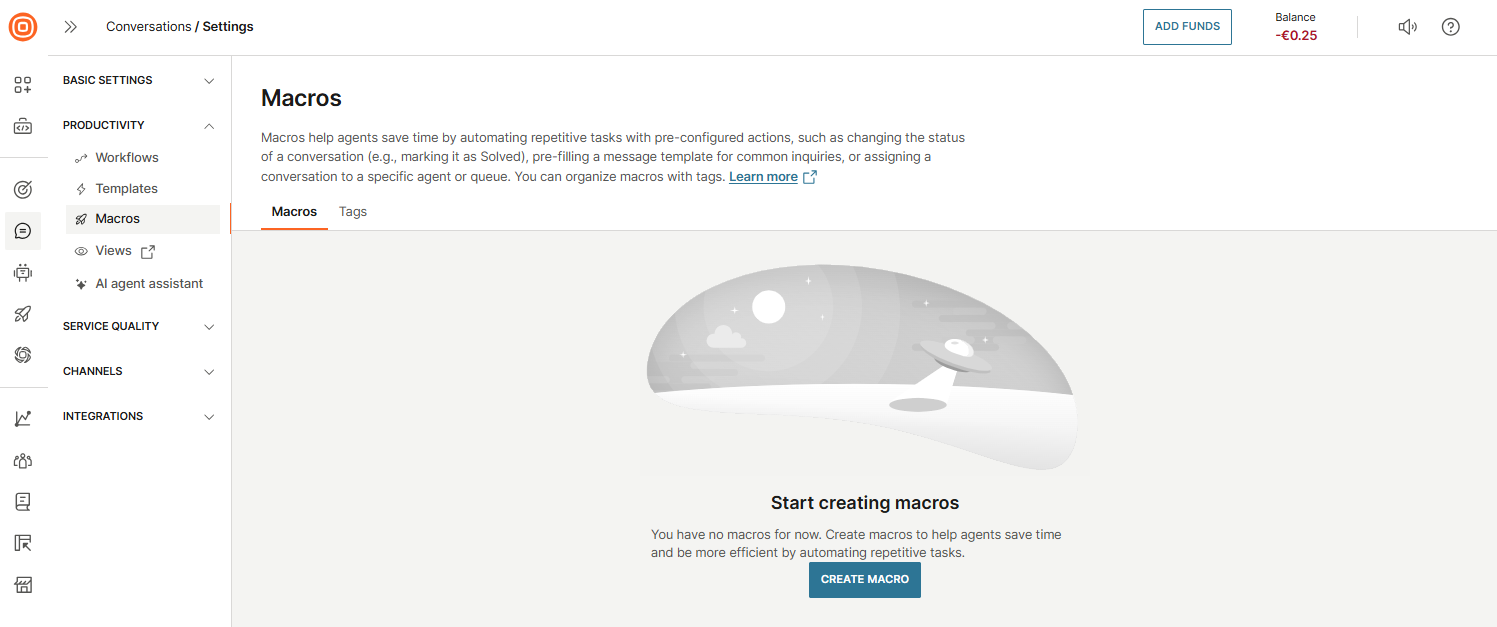
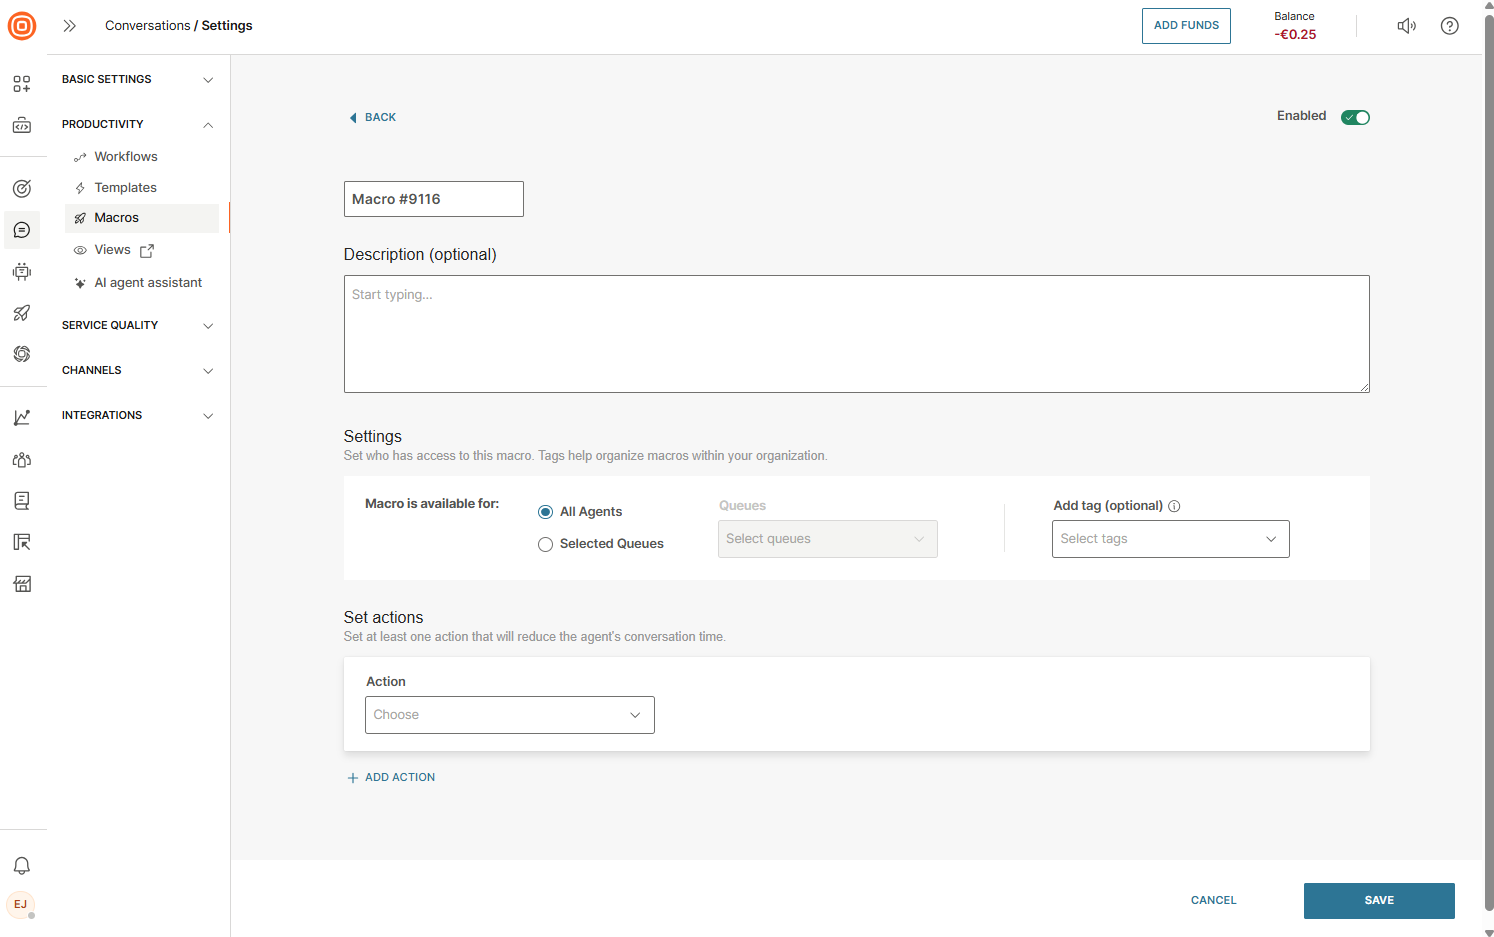
Create macro [#create-macro-macros]
To create a new macro:
- Go to Conversations → Settings → Productivity → Macros → Create macro.
- Once the page opens, add the macro name and description.
- In the Settings part, set up the following:
- Availability for:
- All agents (if you set it for all, then agents from all queues can use the macro)
- Selected queues (if you click this option, you can select specific queues that will have access to the macro, and agents assigned to that queue can use it)
- Add tag (optional, adding tags makes macros easier to find)
- Availability for:
- Set actions:
- Conversation status (change the status of conversations)
- Conversation priority (change the priority)
- Conversation form input fields
- Conversation form (you can choose which form is displayed to the agent once they apply the macro)
- Template (you can set a template per channel in one macro that is an omnichannel and can be used in multiple channels; in that case, the system automatically detects which channel the agent is in, and based on that, applies the proper template (if the template for that channel is not set, it is not populated))
- Tag conversation
- Assign agent to conversation (set the agent to whom the conversation should be assigned once the macro is applied)
- Set topic or email subject for conversation
- Set conversation queue (set the queue to which the conversation should be assigned once the macro is applied)
- Fill in recipient field (choose a channel, and upon applying the macro, it will be utilized based on the sender previously selected; only supported for SMS, Viber Business Messages, WhatsApp, and Email channel)
- + Add an Action button
- Note: When setting actions, it is crucial to carefully select their order, as it can significantly affect the macro's ability to execute successfully. For instance, changing the conversation status to Solved cannot occur before assigning a form to the conversation. The proper sequence should be to first set the form for the conversation, fill in the form data, and then proceed to change the status to Solved.
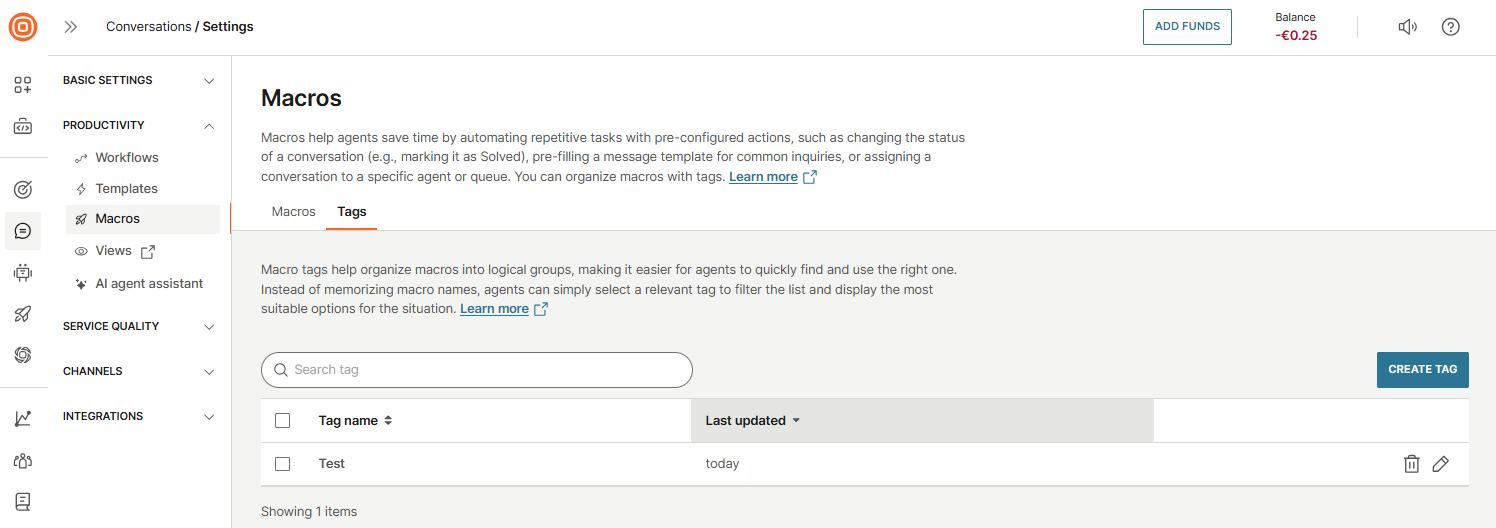
Macro tags [#macro-tags-macros]
Next to Macros, select the Tags tab to create new macro tags and/or edit/delete existing ones.
The main purpose of macro tags is to group the related macros under the logical group from the supervisor perspective that could help agents in finding and utilizing the appropriate macro much faster.
Such tags can be used based on:
- Customer process flow (for example,
Problem acknowledgment (tag1),Problem resolution postponed (tag2),Problem resolved (tag3), and more) - Importance of customer (for example, Gold customer macros, Silver customer macros, and more)
Once the agent uses a certain macro, they do not need to remember its name. They can use a tag suitable for the current situation they are handling, and based on that, get the needed macro faster because the list will be already filtered for the situation they are handling.
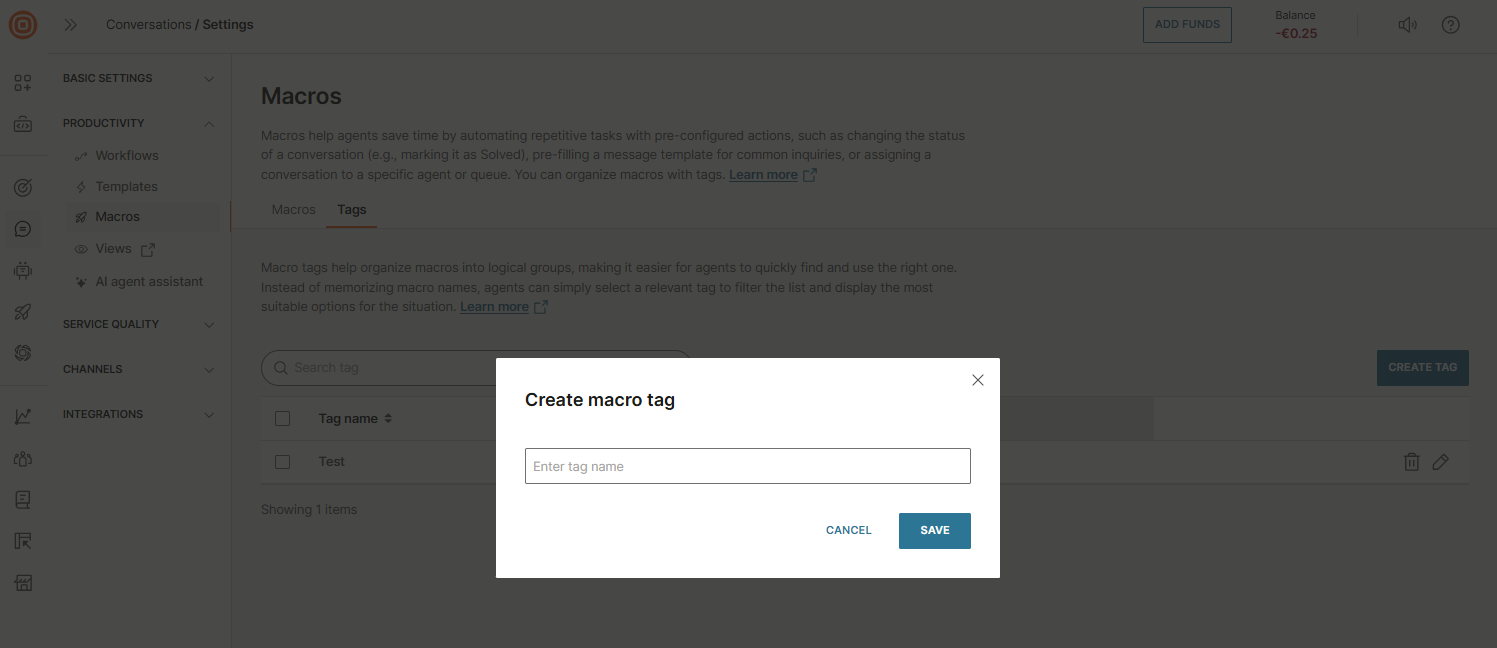
Create macro tag [#create-macro-tags-macros]
To create a new tag, select the Create tag button, enter the tag name and click Save.
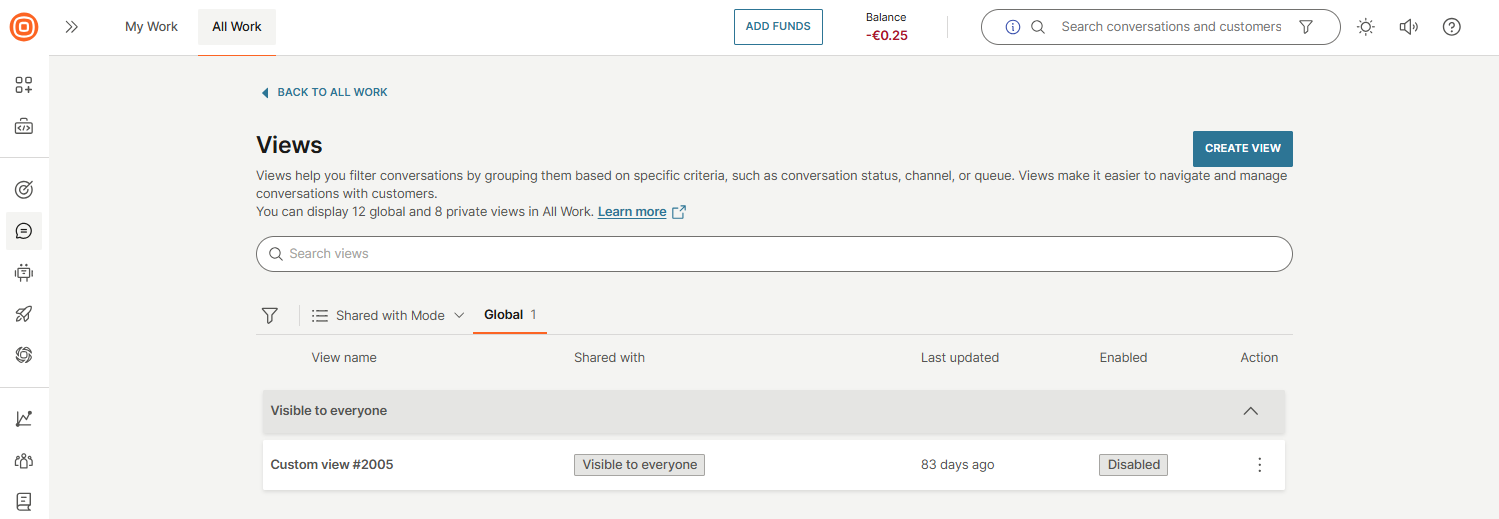
Views
The Views management is available for the Conversations manager role with the possibility to manage and maintain global/private views.
Views management provides users with the ability to search for specific views, create new views, or manage existing views. Users can create up to 100 global views per account where only the custom ones are taken into account.
The system will render a maximum of 12 custom shared views (displayed in the All Work side panel per user) depending on the configuration.
Managers can access Views management through the All Work panel by selecting the Manage views button or by navigating to Conversations → Settings → Productivity → Views.
You can edit a specific view by selecting the three-dot menu where you can:
- Duplicate the view to a private one (if the selected view is visible to everyone)
- Copy the view URL
- Edit
- Delete
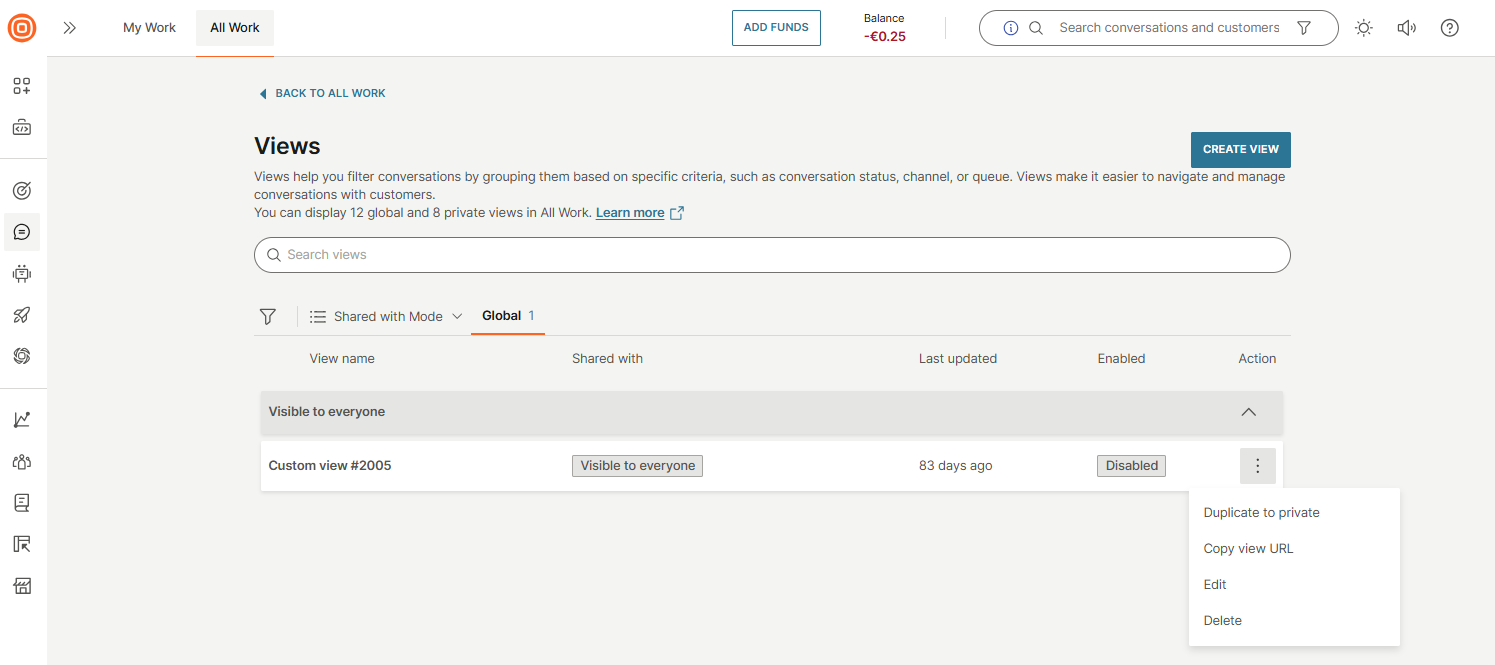
You have the option to search for specific views using a particular keyword, which will be reflected in the View name column. Additionally, the filtering option is available to effectively sort views based on whether they are enabled or disabled.
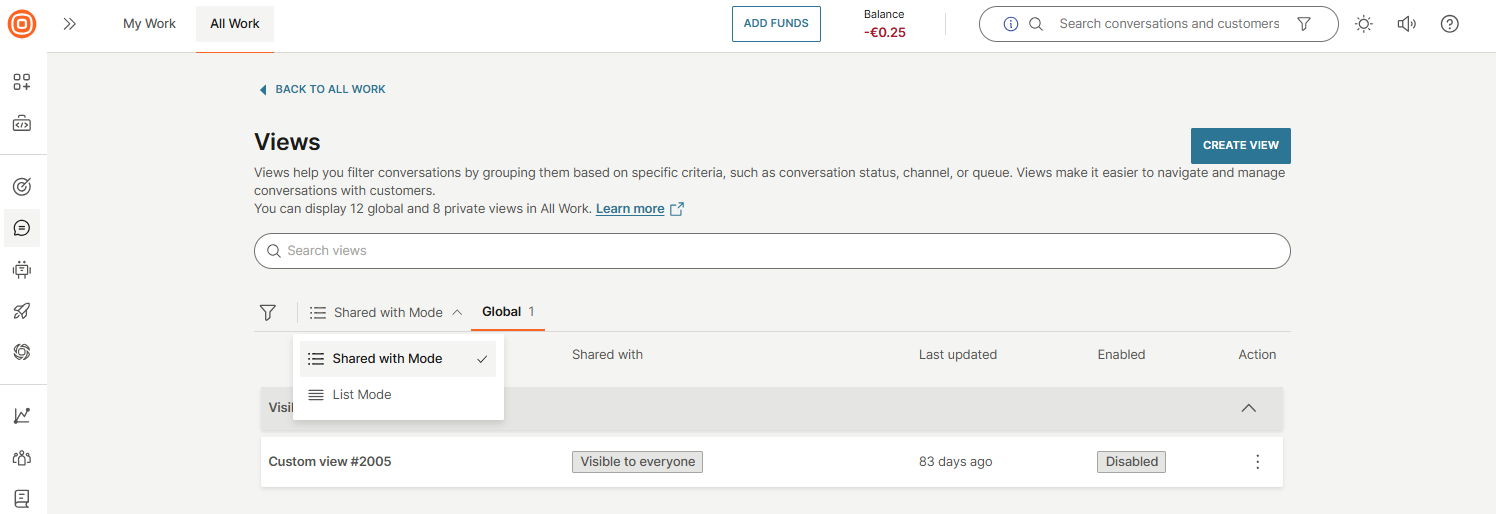
Then, you can display the views in two ways:
- List mode: Lists all existing views ordered based on the last update, from the newest to the oldest. Three tabs are available:
- All - Global and private views
- Global - Visible to everyone and specific queues
- Private - Private views that belong to the manager only
- Shared with mode: Listing all the existing views grouped first based on visibility:
- Shared with everyone
- Shared with specific queues
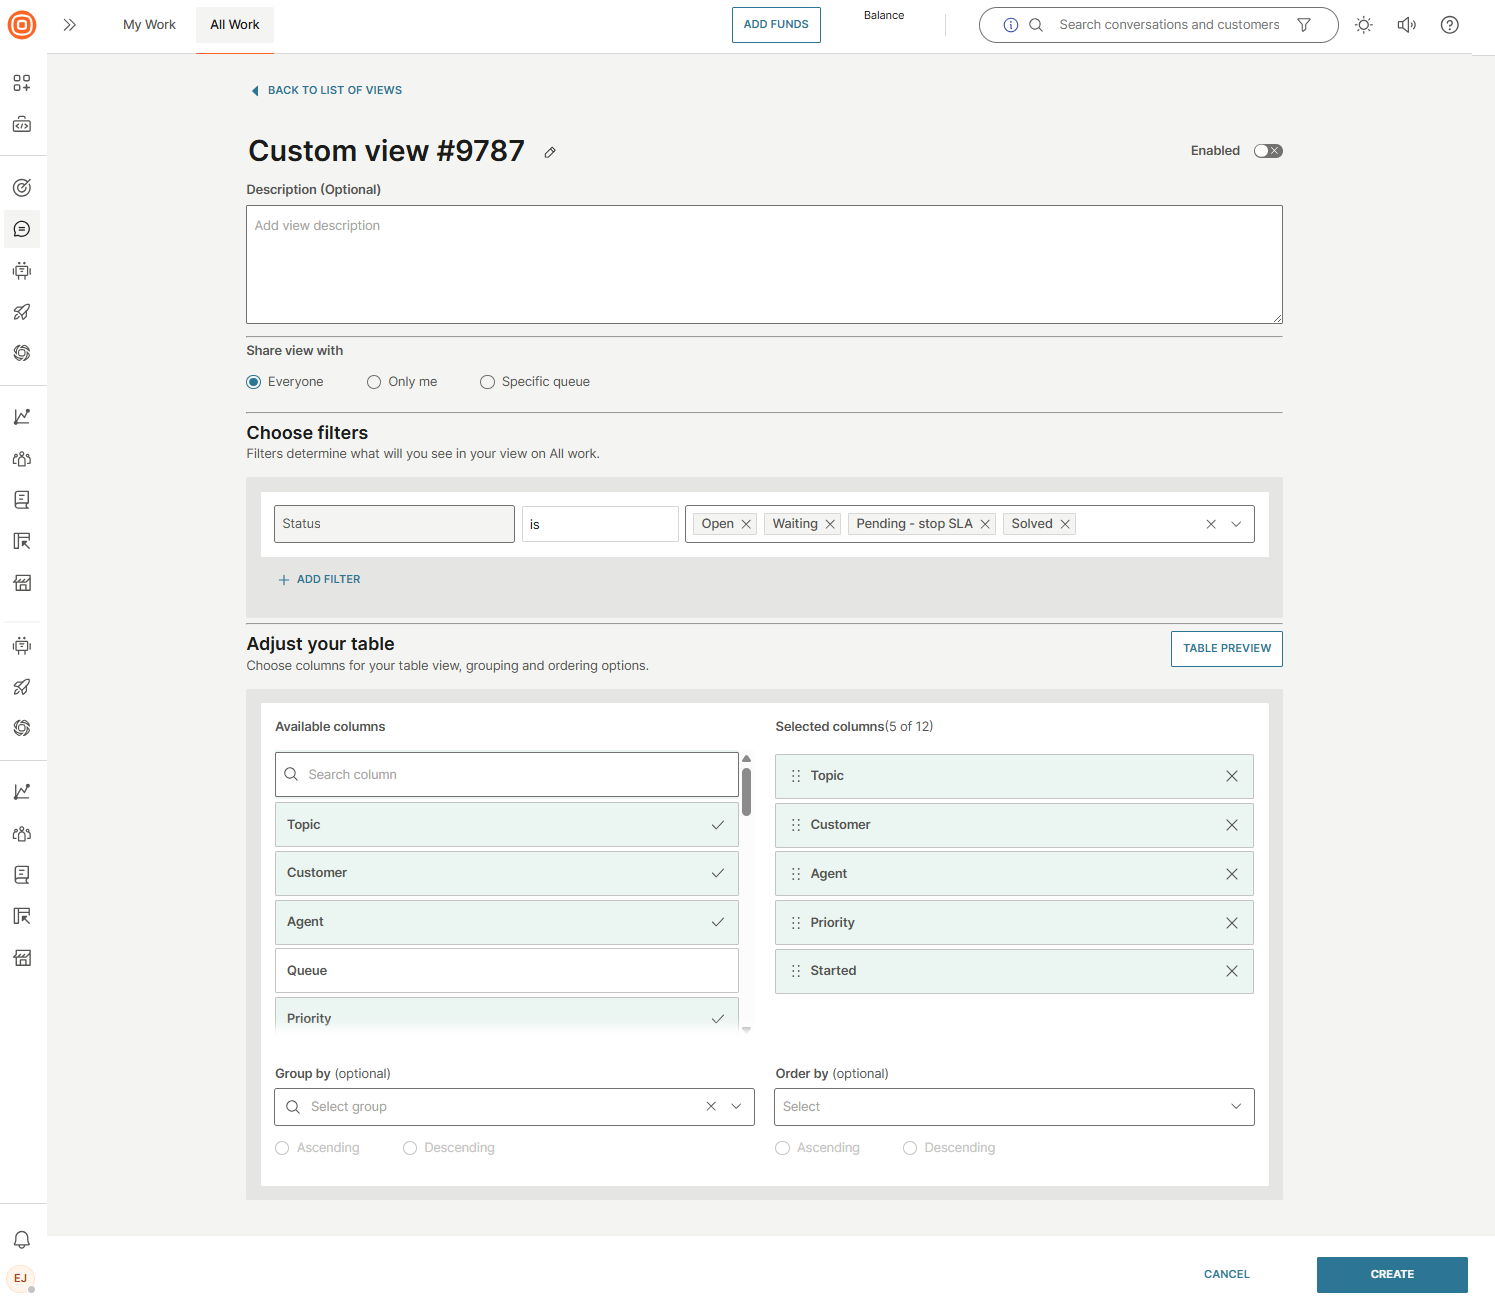
Create custom view [#create-custom-view-views]
To create a new view, go to Conversations → Settings → Productivity → Views → Create view. Define the following:
- Type a name for the view (mandatory).
- Optionally, add a Description.
- Choose who to share the view with:
- Everyone - Visible to all agents.
- Only me - Private view, visible only to you.
- Specific queue - A global view (counts toward the 12-view limit) that is visible only to users assigned to the selected queue(s).
- Choose filters:
- Add conditions using attributes like predefined attributes, SLA, conversation forms and fields, or date.
- Combine multiple filters; all must match (AND condition).
- For does not contain or is not, results include both different values and empty fields.
- If filtering by tags, choose between:
- is any (OR logic, default)
- is all (AND logic)
- Adjust your table:
- The system proposes default columns automatically.
- Add, remove, or reorder columns (minimum 2, maximum 12).
- Available columns include:
- Topic (default)
- Customer (default)
- Agent (default)
- Queue
- Priority (default)
- Sentiment (if enabled on account)
- Started (default)
- Closed
- Pending
- Status (shows the conversation status (Open, Waiting, and Solved))
- SLA (shows the most critical SLA timer (closest to breach or worst breach))
- Short ID
- Last Updated (date and time referring to the last message)
- Severity (refers to SLA severity applied to the conversation)
- Callback started
- Callback pending
- Form fields values (dispositions)
- The display of columns is completely customizable. You can choose custom columns and manage the order of the columns. The minimum number of columns in the new view is 2, and the maximum number is 12.
- Set ordering:
- Choose a default preview order: Ascending or Descending.
- Group data (optional):
- Group by Customer, Priority, Sentiment, Status, Severity, or Form fields (excluding date/time fields).
- If you do not set grouping, the system orders data by Pending by default.
Even if multiple tickets from different queues meet the filter criteria for that view, agents assigned to a specific queue will only see a list of tickets that match the filters for their designated queue.
AI agent assistant
For detailed pricing and activation, contact your account manager or reach out to our Support team.
The AI agent assistant feature in Conversations → Settings → Productivity offers the following AI options to empower your agents:
- AI conversation summary
- Enhance writing
- Translate agent messages
- Suggested replies
- Fill forms with AI
Refer the sections below to learn more about each feature.
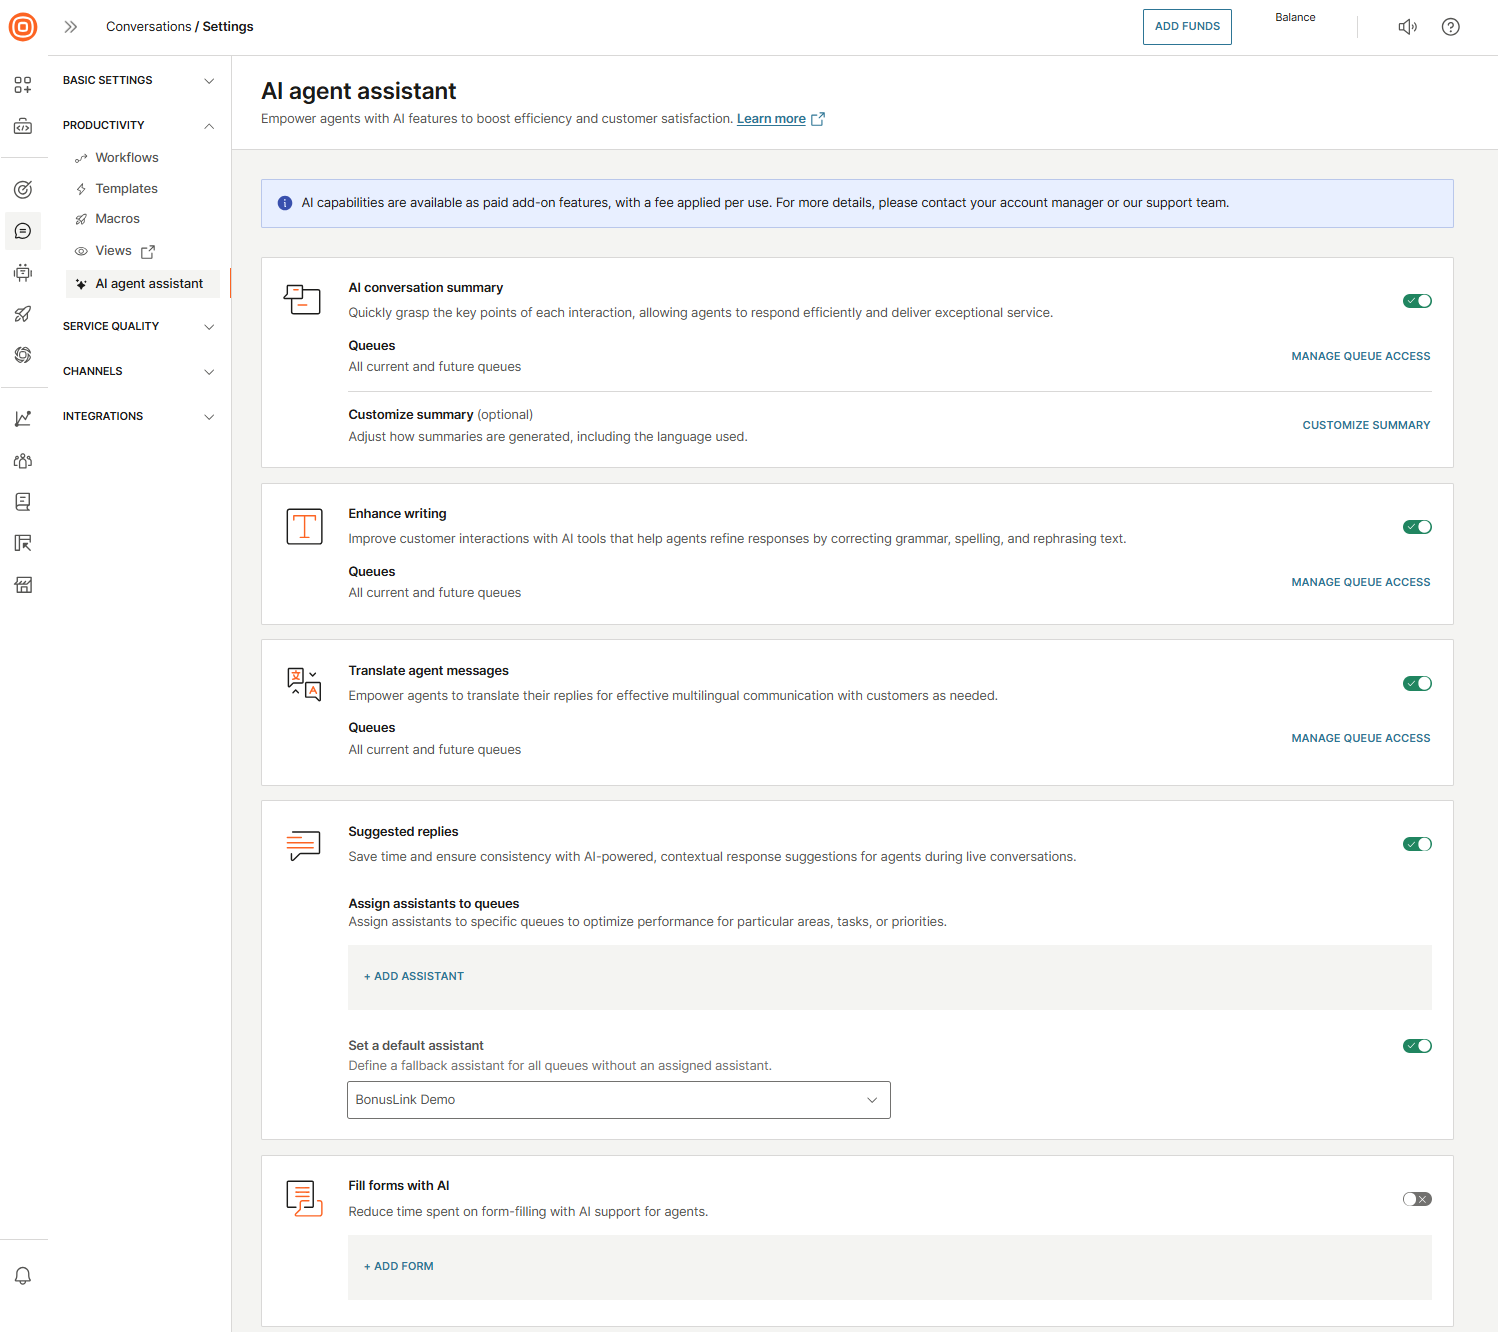
AI conversation summary [#ai-conversation-summary-ai-agent-assistant]
The AI-generated summary offers concise details about past and current customer interactions, including both chatbot and agent interactions, enabling agents to swiftly understand each interaction's key points, context, and history. Additionally, automating the summarization process reduces manual workload and optimizes workflow. Instead of searching for and remembering conversation topics, agents can simply click to generate the AI-driven conversation summary.
To activate this feature:
- Switch on the AI conversation summary option by clicking the toggle.
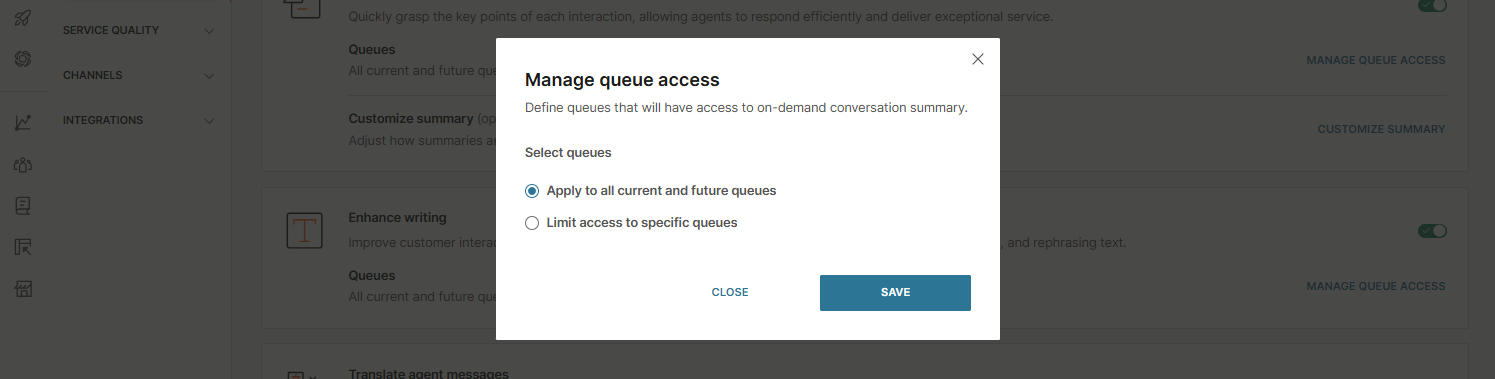
- Choose queues that will have access to on-demand conversation summary:
- Apply to all current and future queues
- Limit access to specific queues
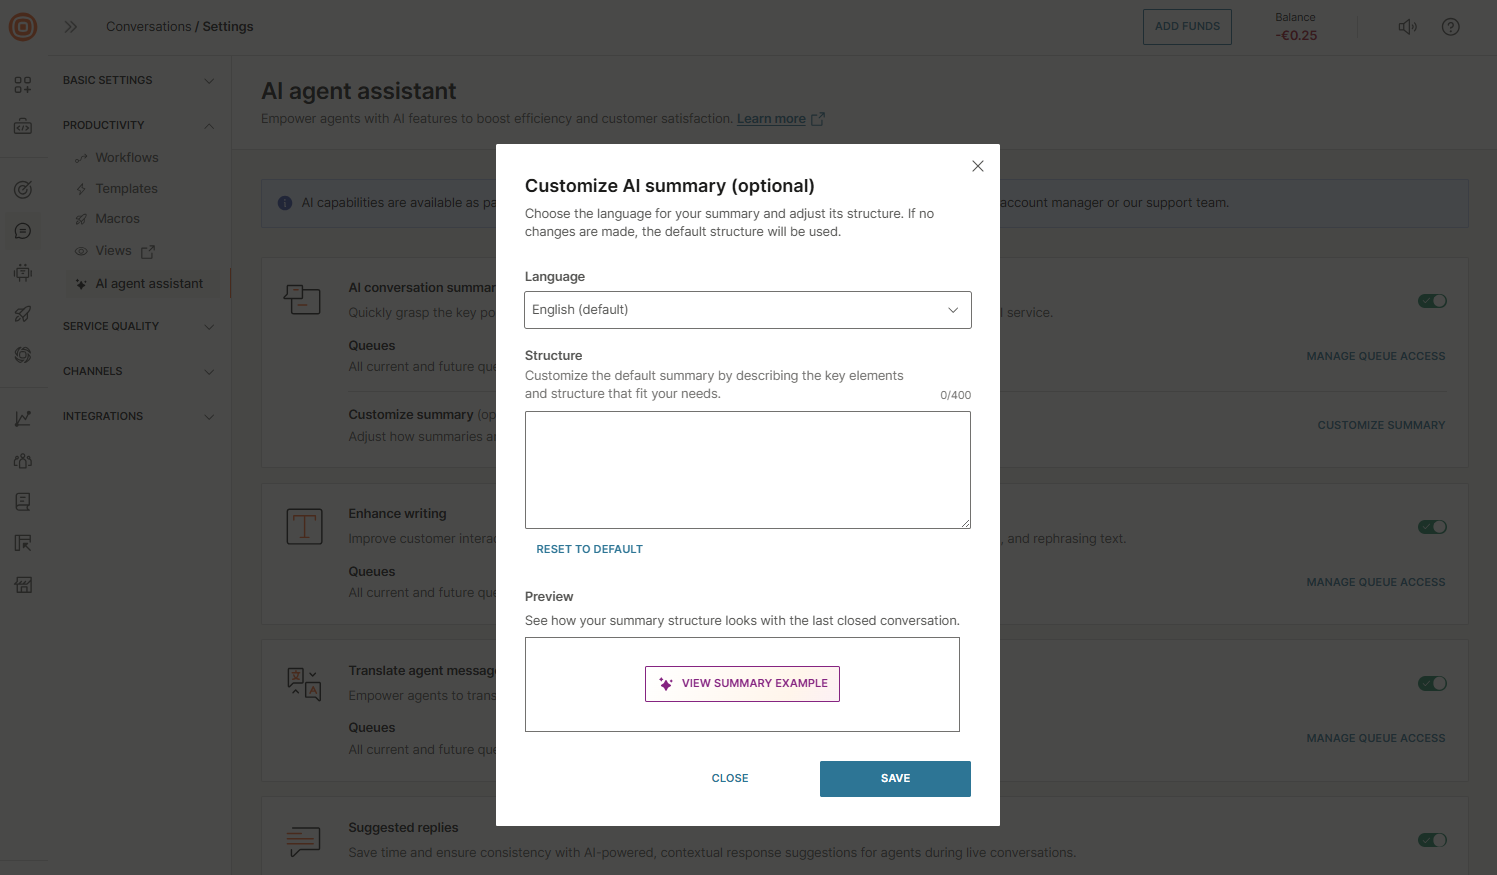
- Optionally, you can customize the AI summary by adjusting how summaries are generated. Select the Customize summary button, which will open a window displaying the following options:
- Language - Choose the language for your summary. You can choose between Spanish, Portuguese, English, Arabic, Chinese (simplified), and Croatian.
- Structure - Define the desired structure for the summary by outlining the key points you want to highlight. You can reset the structure to its default layout at any time.
- Preview - Review the appearance of your summary structure using the content from the last closed conversation. Select the View Summary Example button to view the summary.
- Once you customize the AI summary, select the Save button.
Enhance writing [#enhance-writing-ai-agent-assistant]
The Enhance writing feature assists agents in improving the quality of their responses by automatically refining the text. It corrects grammatical errors, fixes spelling mistakes, and suggests more effective phrasing.
This feature ensures that agents' communication is clear, professional, and polished, helping them deliver well-crafted responses with ease.
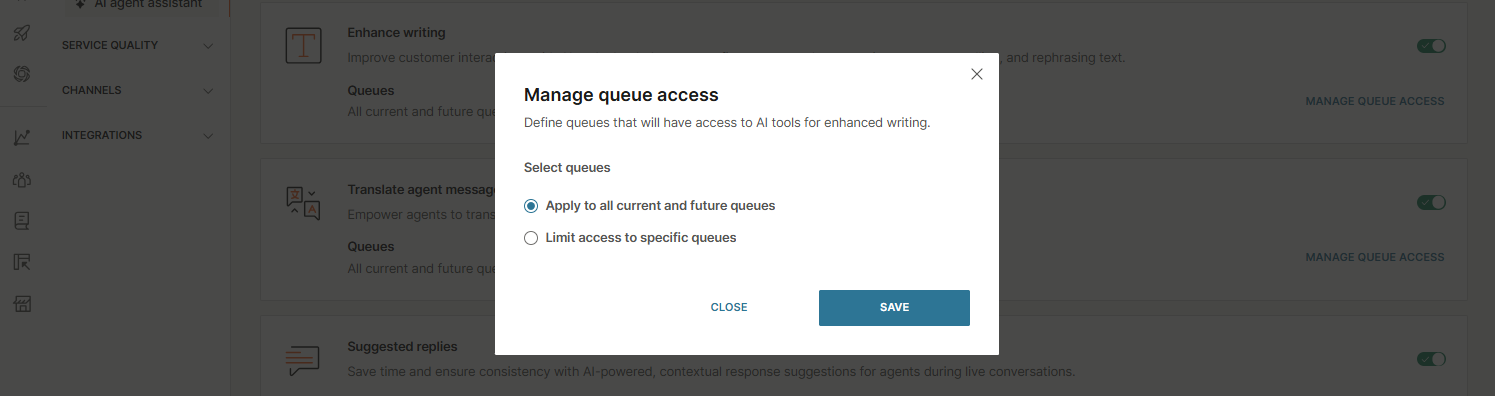
To activate the feature:
- Switch on the Enhance writing option by clicking the toggle.
- Choose queues that will have access to on-demand conversation summary:
- Apply to all current and future queues
- Limit access to specific queues
Translate agent messages [#translate-agent-messages-ai-agent-assistant]
The Translate agent messages feature allows agents to translate their messages, enabling seamless multilingual communication with customers whenever needed.
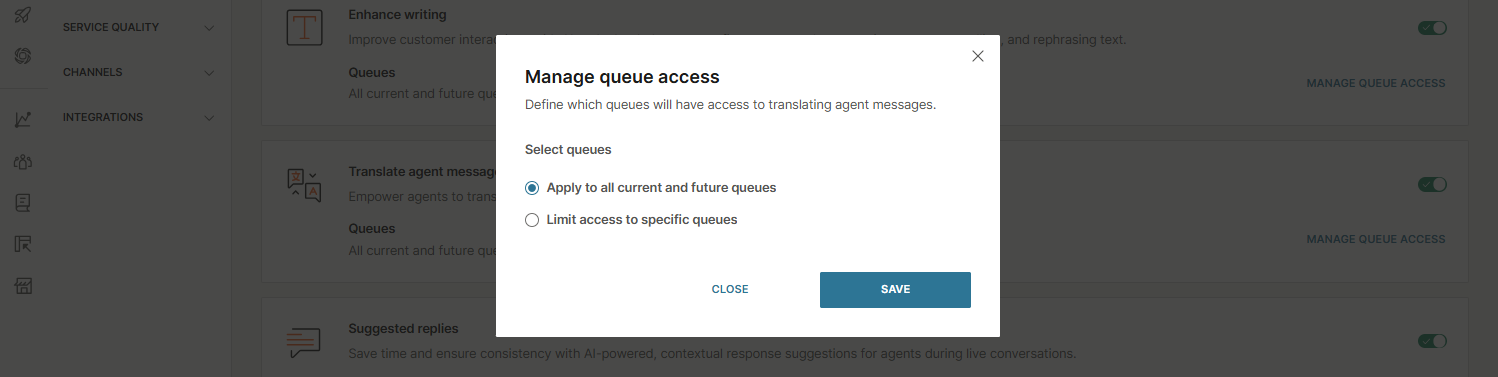
To activate this feature:
- Switch on the Translate agent messages option by clicking the toggle.
- Choose queues that will have access to on-demand conversation summary:
- Apply to all current and future queues
- Limit access to specific queues
Suggested replies [#suggested-replies-ai-agent-assistant]
The Suggested replies feature offers agents pre-formulated responses, saving them time on typing or formulating replies which boosts their efficiency and handling capacity. Additionally, it ensures consistent messaging by providing AI-powered suggestions for tailored responses.
To activate this feature, switch on the Suggested replies option by clicking the toggle.
Assign assistants to queues
A prerequisite for the Suggested replies is to have the AI assistant configured. Click here to learn how to configure the AI assistant. You have the option to assign assistants to queues for specific areas or tasks. After creating the AI assistant(s):
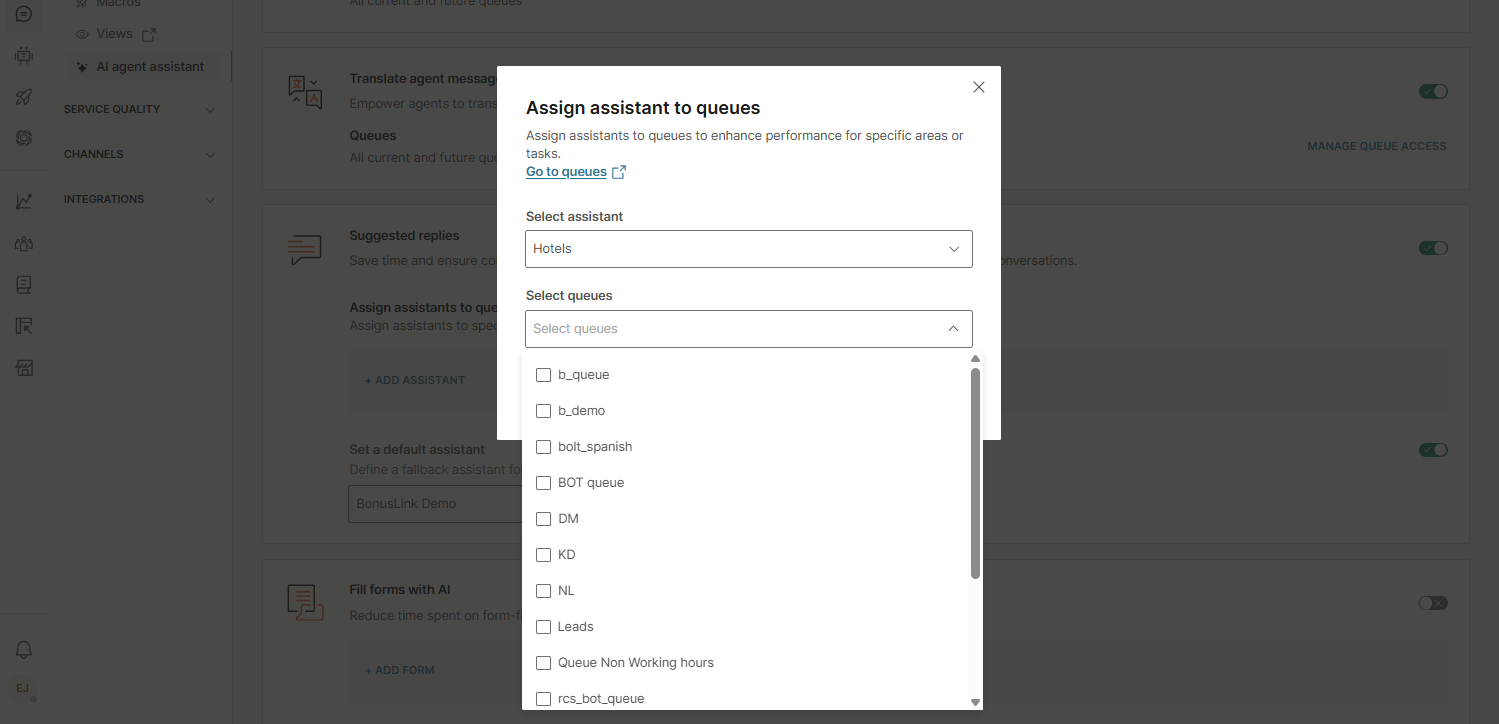
- Select the + Add Assistant button, which will display a drop-down list of configured AI assistants to choose from.
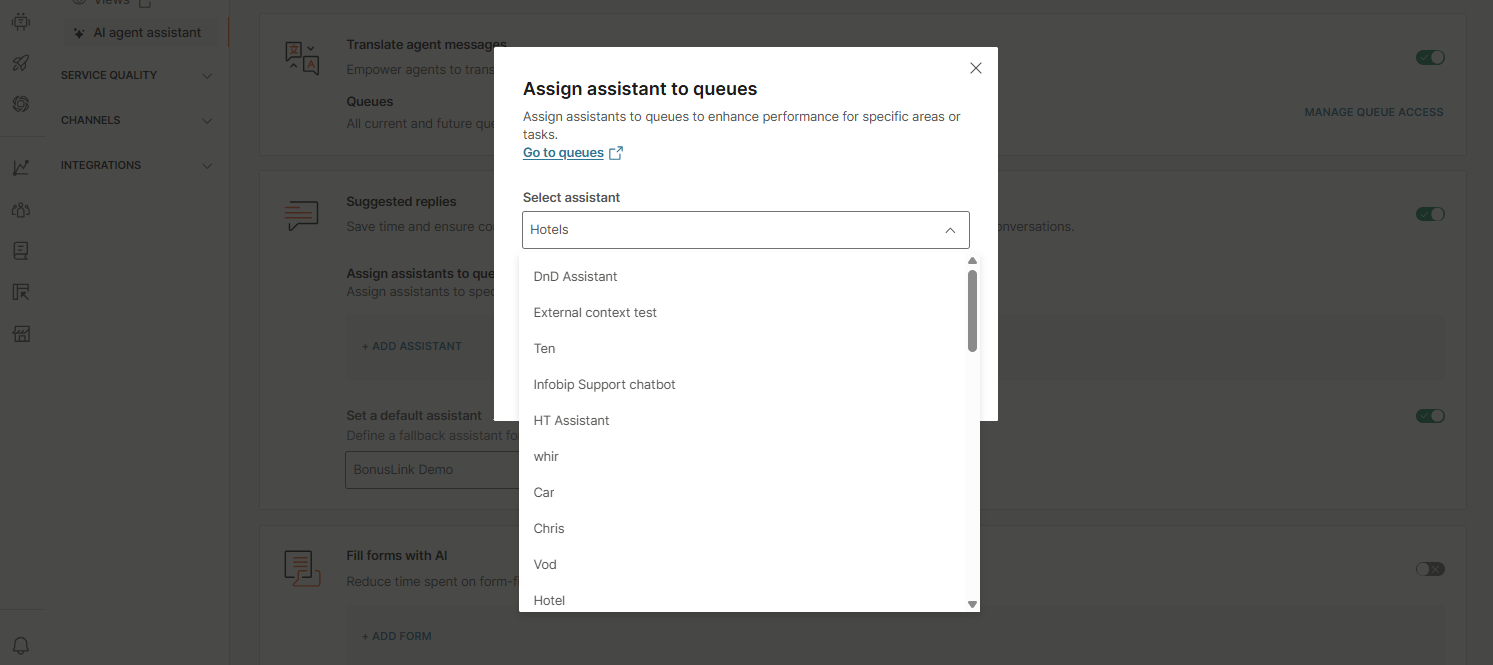
- After selecting the AI assistant(s), choose the appropriate queue(s) and click Save to apply the settings.
Set a default assistant
There is an option to set a default AI assistant that will be applied to all queues where a specific AI assistant has not been assigned. This setting is optional; if no default assistant is set, queues without a designated AI assistant will not have suggested replies available.
Fill forms with AI [#fill-forms-with-ai-ai-agent-assistant]
Turning on the Fill forms with AI option helps agents save time by using AI-assisted form completion.
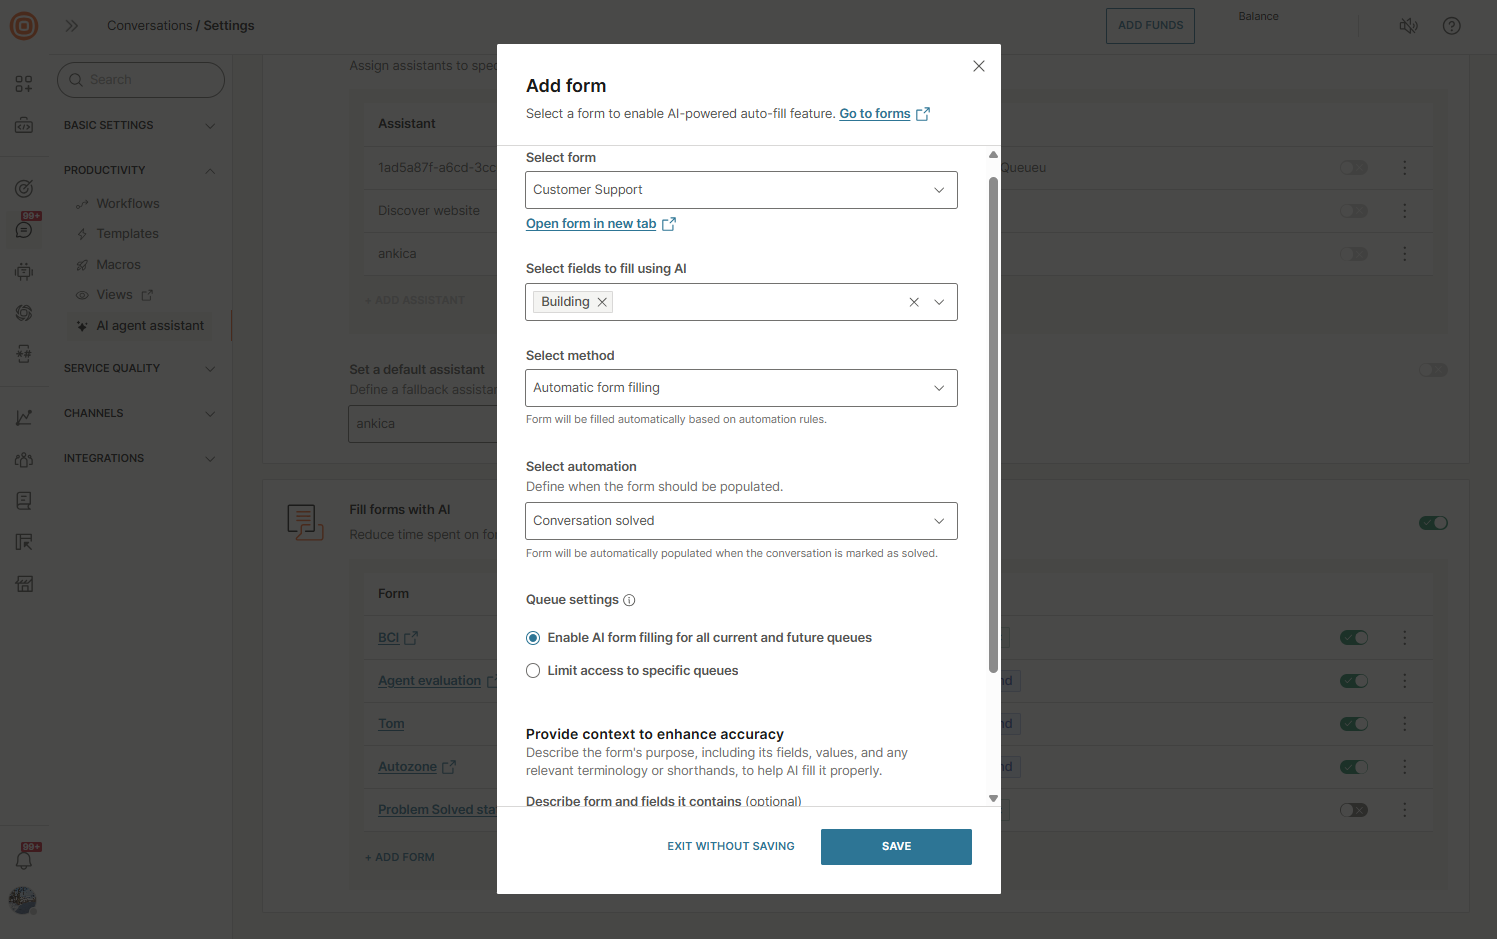
Select the + Add Form button to choose a form for the AI-powered auto-fill feature.
Once the tab opens, select the following:
- Select form - Select the desired form or forms from the drop-down menu. To open the form in a new tab, select the link below.
- Select fields to fill using AI - Select the fields you want to fill out using AI.
- Select the fill-out method:
- On demand - The form is populated only when the agent manually selects a button to trigger AI-driven form filling.
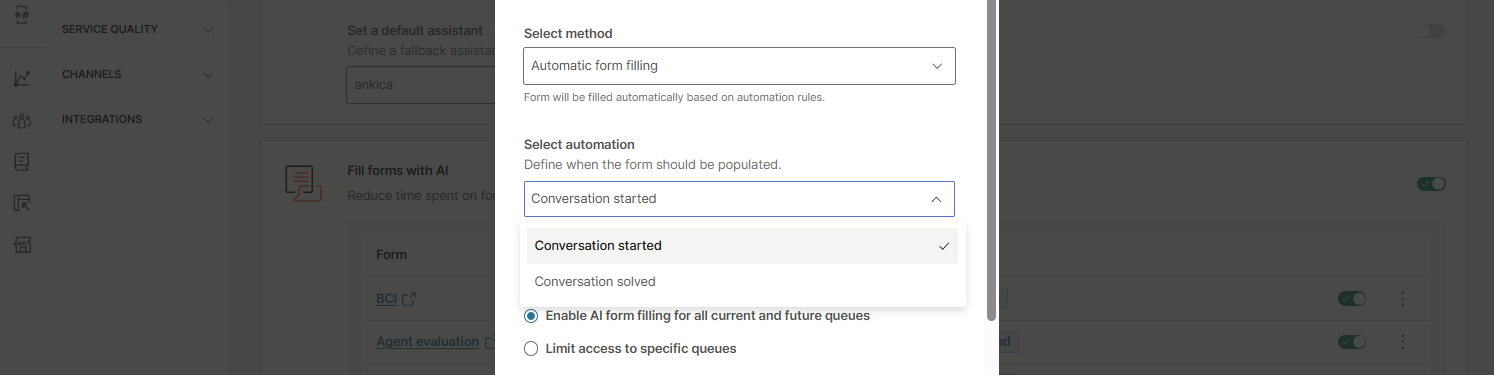
- Automatic form filling - The form is populated automatically based on automation rules. If you select automatic form filling, choose the automation and define when the form should be populated:
- Conversation started: The form is automatically populated after the first customer message is received.
- Conversation solved: The form is automatically populated when the conversation is marked as Solved.
When a form is created with automatic form filling, the system automatically generates a view-only workflow. You can find it in Settings → Productivity → Workflows → Event-based workflows. The workflow will be named
[AI] %FORM-NAME%.
- Queue settings - Define which queues will have access to filling the form with AI. You can apply the settings to all current and future queues, or restrict access to specific queues. The drop-down menu displays all available queues. If no queues are selected, AI form filling will be available to agents across all queues.
- Provide context to enhance accuracy - This optional field allows you to describe the form's purpose, including its fields, values, and relevant terminology or shorthands, to assist AI in accurate form filling. For example, you can write: "In the form_DateTime field, use the timestamp of the customer’s first message, and in the form_Text field, enter a short summary of the customer’s issue."
- Once all configurations are complete, select Save.
Check the agent experience here