Suppression management
Suppression management ensures that emails are not sent to recipients who have previously bounced, marked your emails as spam, or unsubscribed. Infobip automatically excludes suppressed contacts from future sends, helping to protect your domain and IP reputation.
You can manage suppressions through both the web interface and the API without support intervention. This allows for timely actions, especially important for transactional or service-related messages.
Key benefits of suppression management:
- Prevent repeated bounces or spam complaints.
- Comply with opt-out and unsubscribe requests.
- Improve email deliverability and sender reputation.
- Enable timely delivery of critical messages by removing addresses when appropriate.
Suppression categories
When managing your suppression list, there are three important suppression categories:
- Bounces: Addresses that hard bounced due to being invalid or inactive. These are automatically suppressed to prevent repeat delivery attempts.
- Complaints: Addresses that marked your emails as spam. These are automatically added to the suppression list and should not be removed manually.
- Overquota bounces: Valid addresses that have exceeded their mailbox storage limits. Suppression prevents retrying while the inbox remains full.
Access and permissions
To fully manage the suppression list, the following conditions must be met:
- User rights:
- Domain owners automatically have full permissions.
- Domain users must be granted permissions by the domain owner.
- Dedicated IP requirement: Removing addresses from the suppression list is only possible if the sender domain uses at least one dedicated IP. If the domain only uses shared IPs, deletion is not permitted, even for domain owners.
Suppression list permissions matrix [#suppression-list-permissions-matrix-access-and-permissions]
| Action | Bounces | Complaints | Overquota bounces |
|---|---|---|---|
| View | Domain owner: Yes Domain user: With permission | Domain owner: Yes Domain user: With permission | Domain owner: Yes Domain user: With permission |
| Add | Domain owner: Yes Domain user: With permission | Domain owner: Yes Domain user: With permission | Not supported |
| Delete | Requires dedicated IP Domain owner: Yes Domain user: With permission | Requires dedicated IP Domain owner: Yes Domain user: With permission | Requires dedicated IP Domain owner: Yes Domain user: With permission |
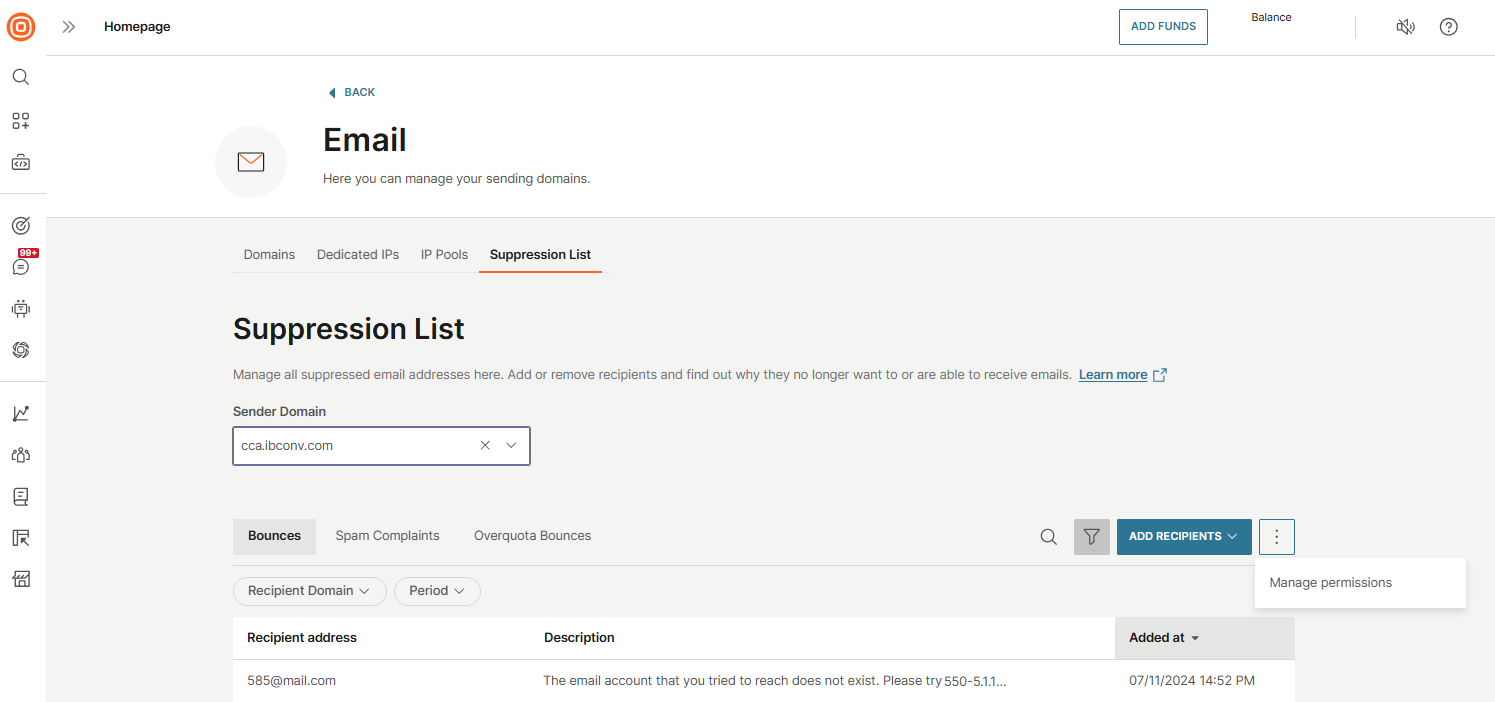
Manage suppressions
Suppressed recipients can be viewed and managed from the suppression list. You can filter the list by domain, contact, or reason for suppression (such as bounce or complaint). Review suppressions regularly to understand delivery challenges and prevent further sending to invalid or unengaged addresses.
Suppression data is shared across your account, ensuring that all users and subaccounts operate on the same suppression logic and avoid duplicate issues.
Manage suppressions via web interface [#manage-suppressions-via-web-interface-manage-suppressions]
To access and manage suppressions through the web interface:
- Go to Channels and Numbers → Channels → Email.
- Open the Suppression list tab.
- From the Sender domain drop-down, select the domain you want to manage.
- View the list of suppressed recipient addresses, organized under three tabs:
- Bounces
- Spam complaints
- Overquota bounces
- Each tab displays the following columns:
- Recipient address: The email address added to the suppression list for the selected sender domain.
- Description: The reason the recipient was suppressed. For example, bounce entries may show if the address was manually added, and complaint entries show the triggering sender.
- Added at: The timestamp when the address was added to the suppression list.
- Use the search icon to find a specific address by entering the email in the search field.
- Use filters to narrow down results by:
- Recipient domain
- Period (predefined or custom date ranges)
- Use the filter icon to toggle filter options and narrow down the list as needed.
- You can manually remove suppressions or export the list for auditing.

Add recipients to suppression list [#add-recipients-to-suppression-list-manage-suppressions]
You can manually add recipient addresses to the suppression list for a selected sender domain.
- In the Suppression list tab, select Add recipients.
- Choose the suppression category:
- Bounces
- Spam complaints
Note: Overquota bounces cannot be added manually and are not listed here.

- In the dialog that opens, select the sender domain. Suppressions are stored per sender domain.
- Choose how you want to add recipients:
- Add from file: Drag and drop a file or select Browse to upload a
.csv,.xls, or.xlsxfile.- CSV files must contain email addresses separated by commas.
- Excel files should have a single column of addresses.
- Make sure there are no syntax errors or empty records.
- Add one by one: Enter or paste email addresses into the text box, separating each with the Enter key.
- You can add up to 100 addresses this way.

- Add from file: Drag and drop a file or select Browse to upload a
- Select Add Records to complete the process.
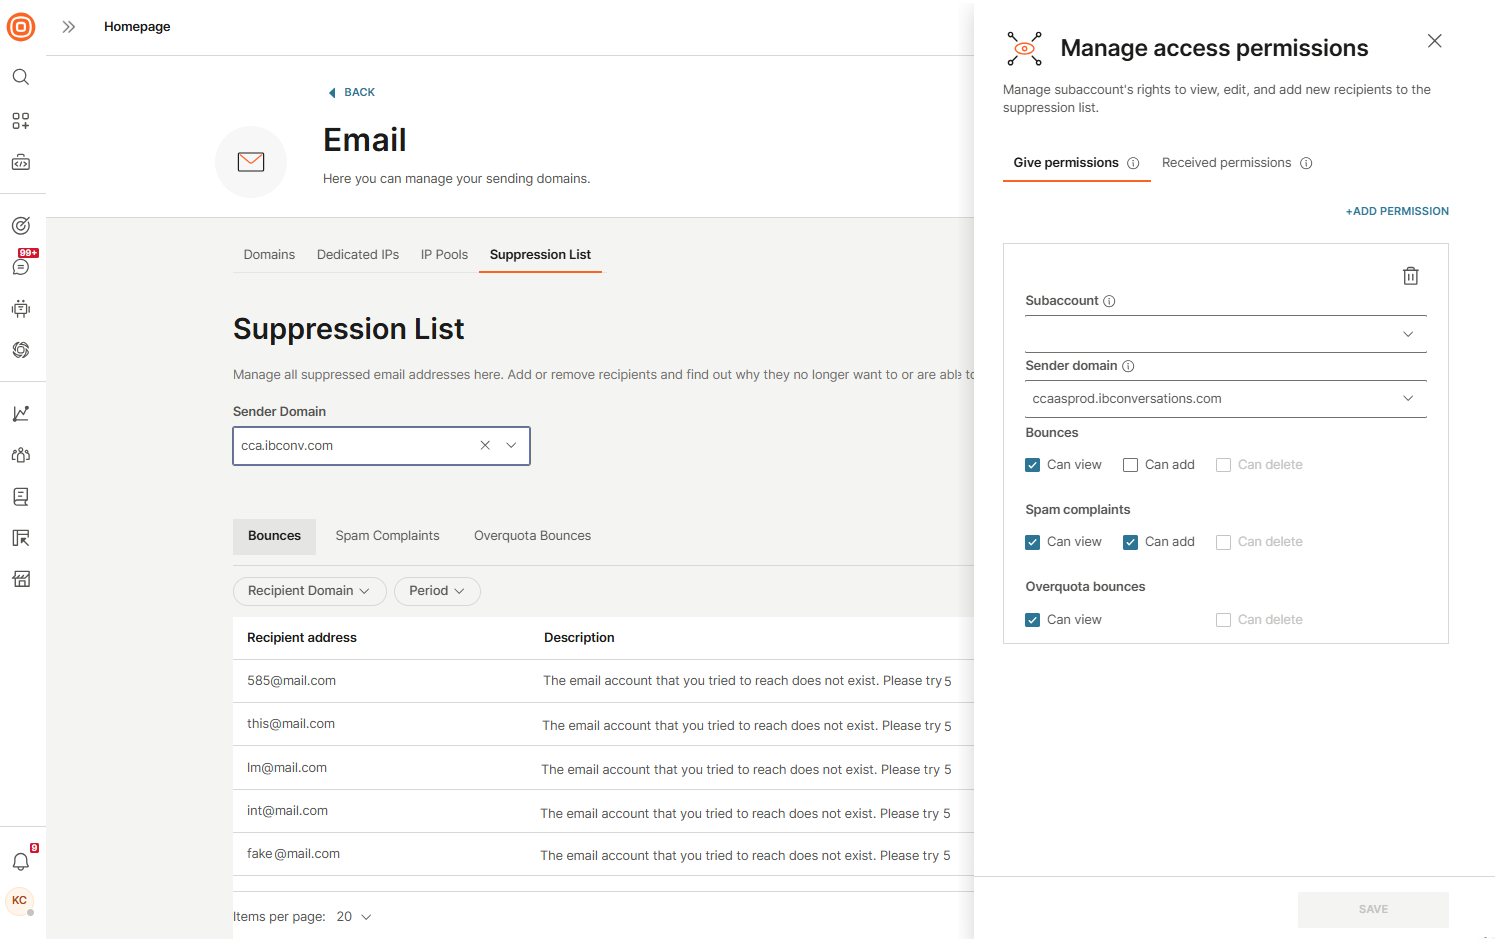
Manage access permissions [#manage-access-permissions-manage-suppressions]
If you are the owner of a sender domain, you can manage access permissions for other accounts (such as subaccounts) that use the same domain. Permissions allow you to grant rights to view, add, or delete suppression entries.
To manage permissions:
- In the Suppression list tab, select the three-dot menu next to the Add recipients button.
- Select Manage access permissions.
- A side panel opens with two tabs:
- Give permissions
- Received permissions

Give permissions
To assign permissions to another account:
- In the side panel, enter:
- Subaccount: The account to receive the permissions.
- Sender domain: The domain associated with the suppression entries.
- Select the permissions to grant:
- View and/or add bounces and spam complaints
- View overquota bounces
- Select Save to apply the changes.
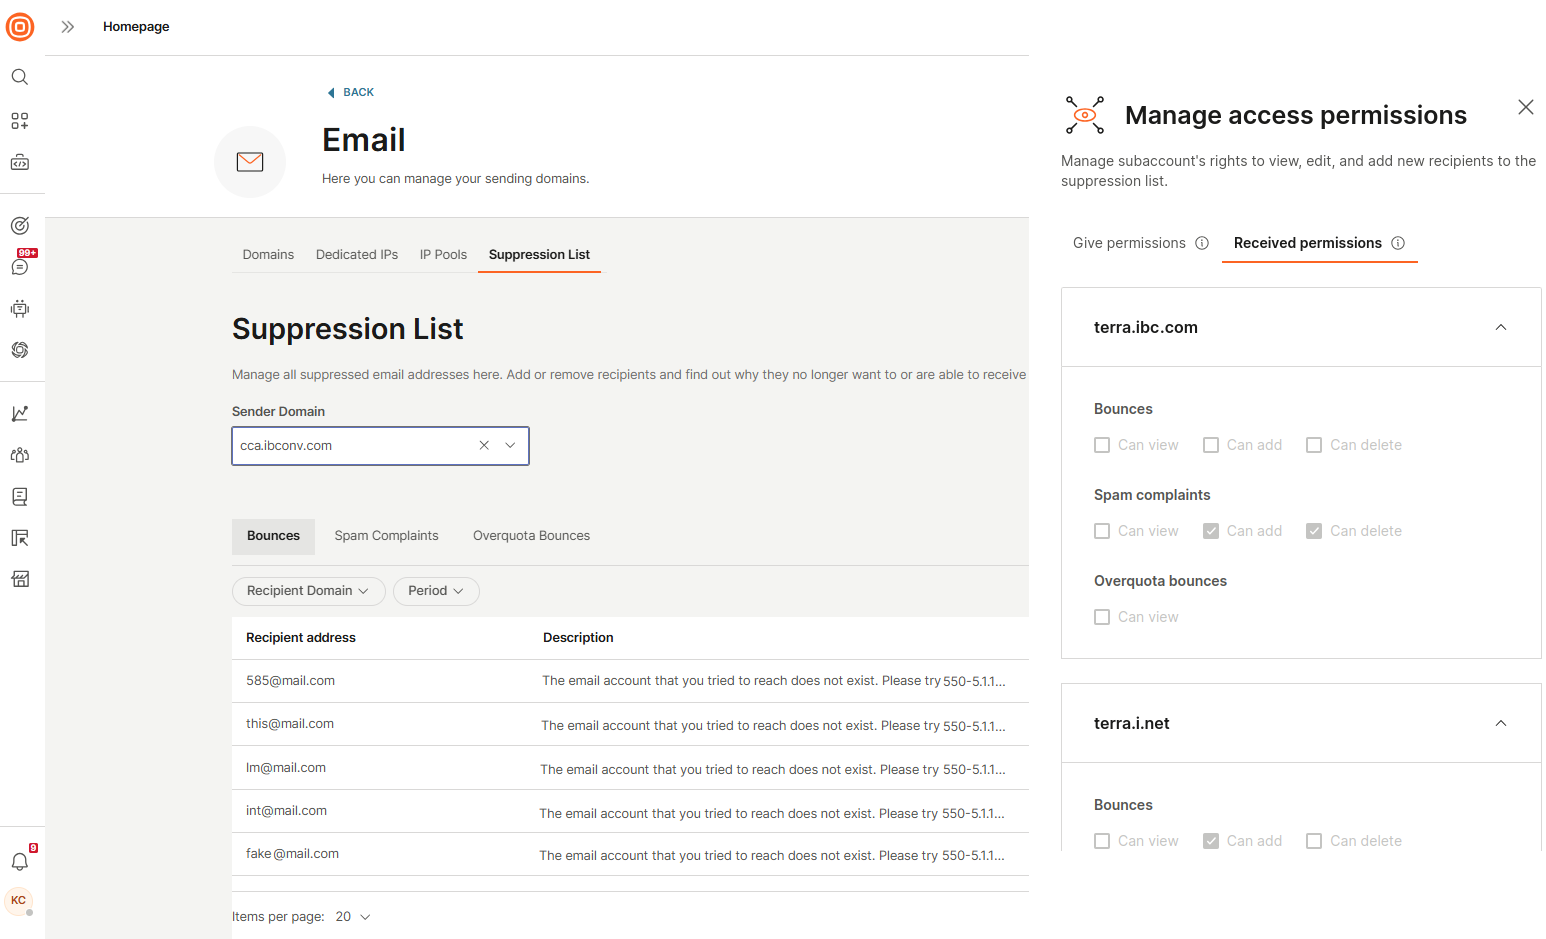
Received permissions
If another domain owner has granted your account access, you will see those permissions listed under the Received permissions tab:
- Permissions are grouped by sender domain.
- Select the domain to view the exact access rights granted to your account.
Manage suppressions via API [#manage-suppressions-via-api-manage-suppressions]
The Email API provides four endpoints for managing suppressions across sender domains. Use these endpoints to retrieve, add, or delete suppressed email addresses efficiently.
- Get suppressions: Retrieve suppression records for domains you own or have been granted access to.
- Retrieve up to 1,000 suppressed addresses per request.
- Supports one sender domain per request.
- Add suppressions: Add one or more email addresses to the suppression list.
- Requests are processed asynchronously.
- Duplicate addresses are automatically ignored.
- Per request, you can:
- Add up to 1,000 email addresses per sender domain.
- Include a maximum of 10 sender domains.
- Delete suppressions: Remove email addresses from the suppression list.
- Requests are processed asynchronously.
- Per request, you can:
- Specify up to 10 sender domains.
- Provide up to 1,000 email addresses per domain for removal.
- Get suppression domains: Return a list of sender domains you can manage for suppressions, including domains you own or have received permissions for.
 Learn more
Regularly review your suppression list to maintain high deliverability and protect your sender reputation.