Email personalization
Email personalization allows you to tailor email content to each recipient by using attributes and placeholders. This helps you create more relevant and engaging messages while reaching many customers at once.
Placeholders
Use placeholders to personalize your emails with standard and custom attributes, such as names, account numbers, or other profile data. This makes each message feel tailored to the recipient, even when sending to a large audience. Standard and custom attributes are linked to People profiles. See People to learn more about attributes and how to set them up.
When adding a link, you can also define it as a special link:
- View in browser:
{$browserlink} - Unsubscribe:
{$unsubscribe}
The View in browser link expires after 5 days. This feature is not enabled by default for email traffic sent via API. To enable it, contact Support or your account manager.
Simple expressions
Simple expressions let you format and manipulate any personalization you add to an email message. The available options depend on the data type of the attribute you insert, ensuring consistent display.
Supported formatting options:
- String: Proper case, lower case, upper case
- Numeric: Round (down if less than X.5, up if greater than or equal to X.5), floor (always round down), format with two decimals
- Date/Time: US format (yyyy-MM-dd or yyyy-MM-dd hh:mm), EU format (dd/MM/yyyy or dd/MM/yyyy hh:mm), day of year, day of week, month of date
Example:
If you insert the firstName attribute, you can format it as:
- Proper case → John
- Lower case → john
- Upper case → JOHN
Display conditions
Display conditions let you define rules for showing or hiding content in your email. This ensures each recipient sees content tailored to their attributes or interests, even when the same message is sent to the entire audience. You can create up to 50 conditions per message.
How to create a display condition [#how-to-create-a-display-condition-display-condition]
To create a display condition:
- In the Email Editor, go to the Display conditions tab.
- Select Create condition.
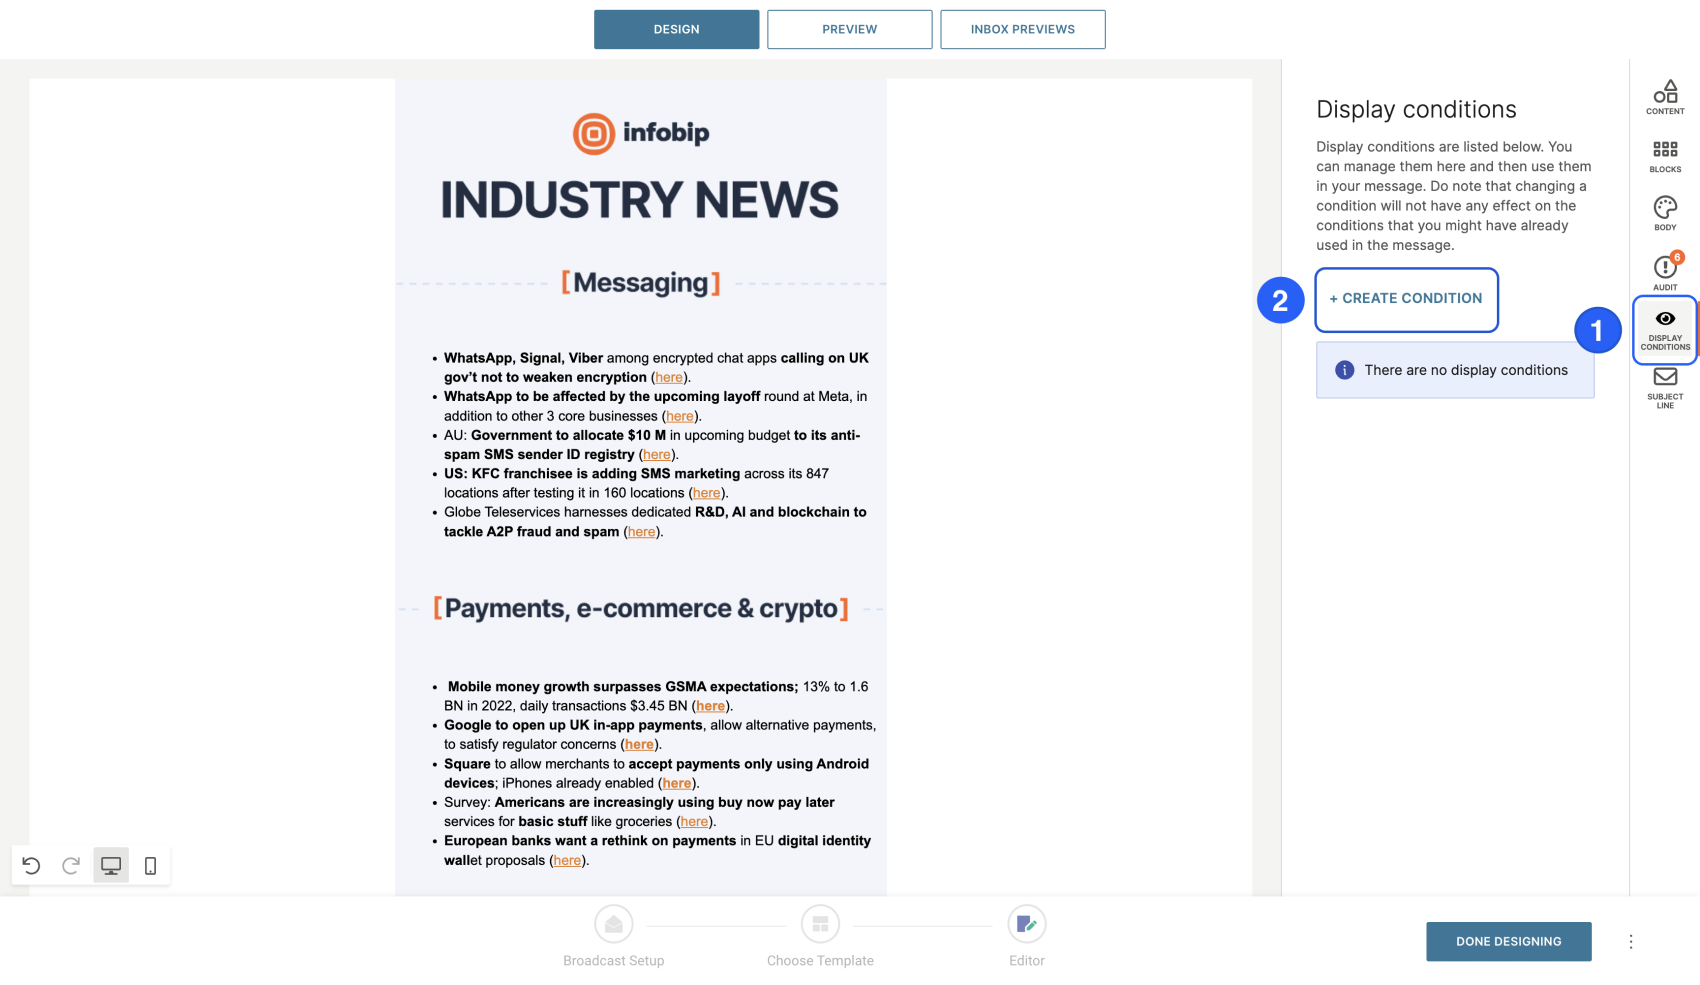
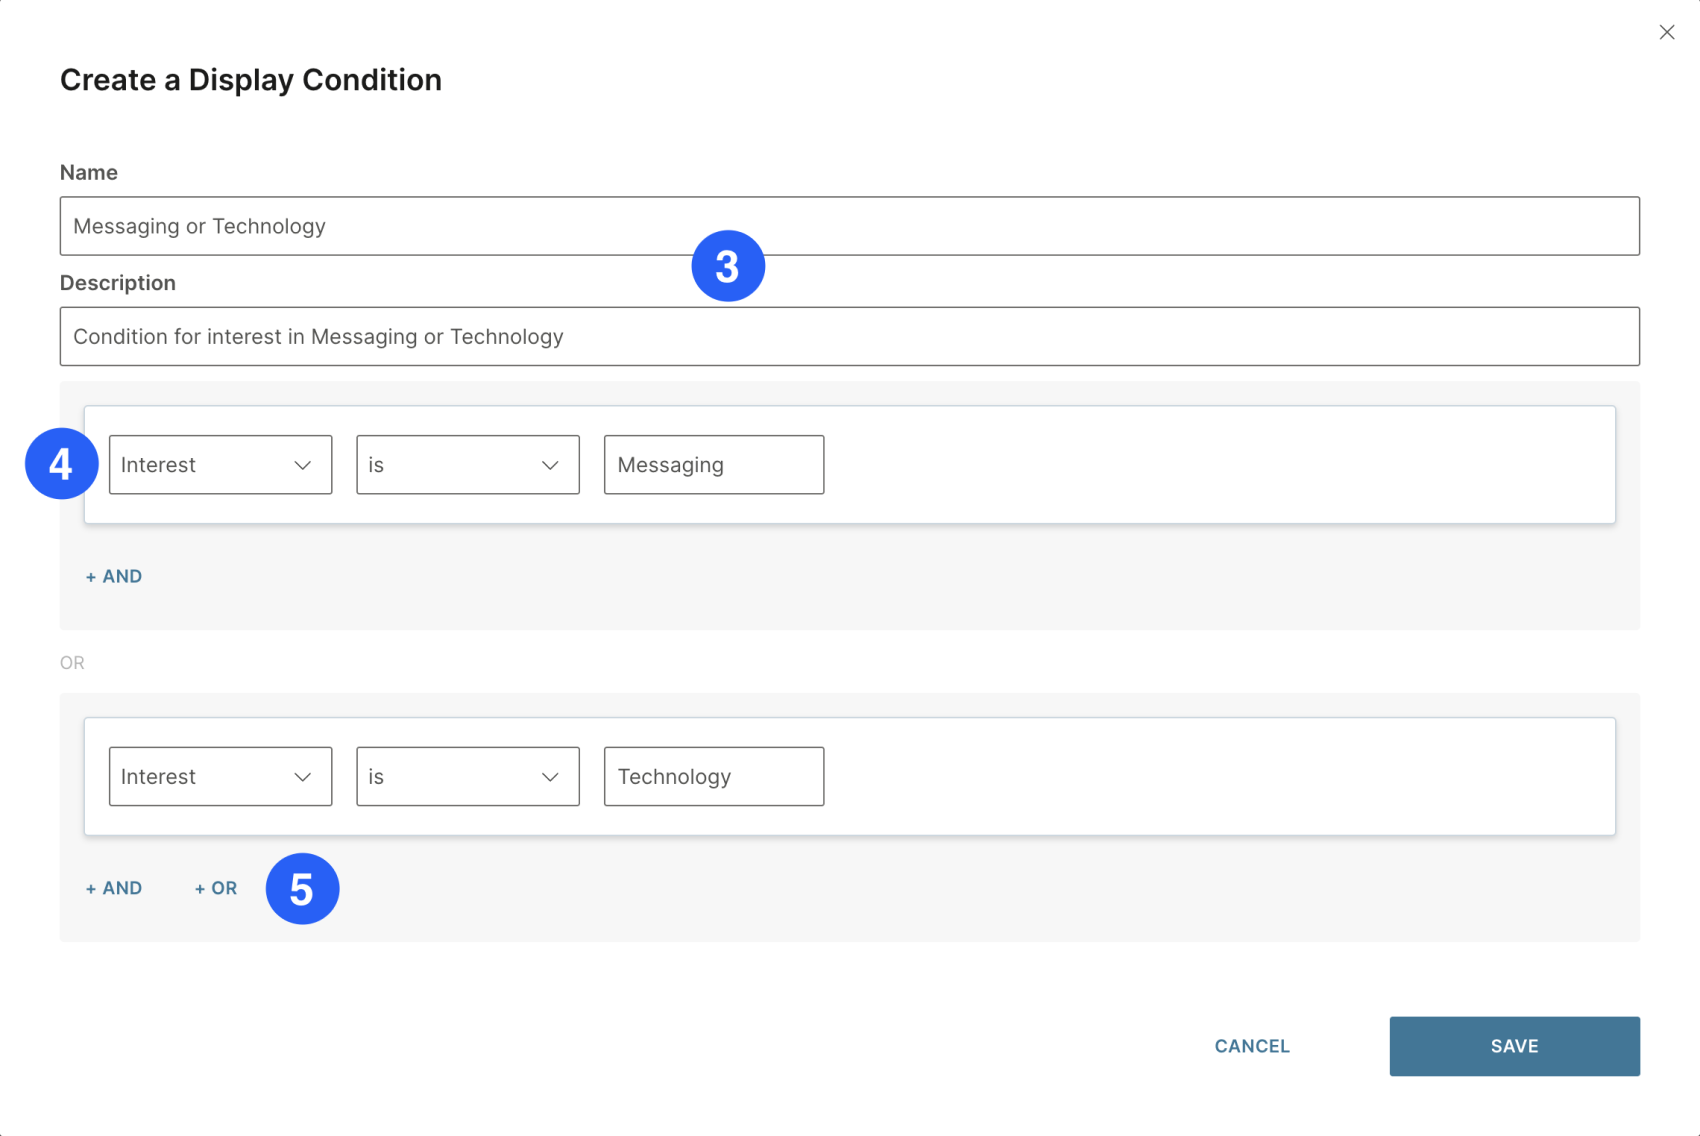
- Enter a Name and Description.
- Select an Attribute (for example, Interest = Messaging).
- To create more complex logic, use AND or OR operators (for example, Interest = Messaging OR Technology).
- Select Save.
Assigning a condition to content [#assigning-a-condition-to-content-display-condition]
To assign a display condition to your content:
- In your email design, select the row or content block.
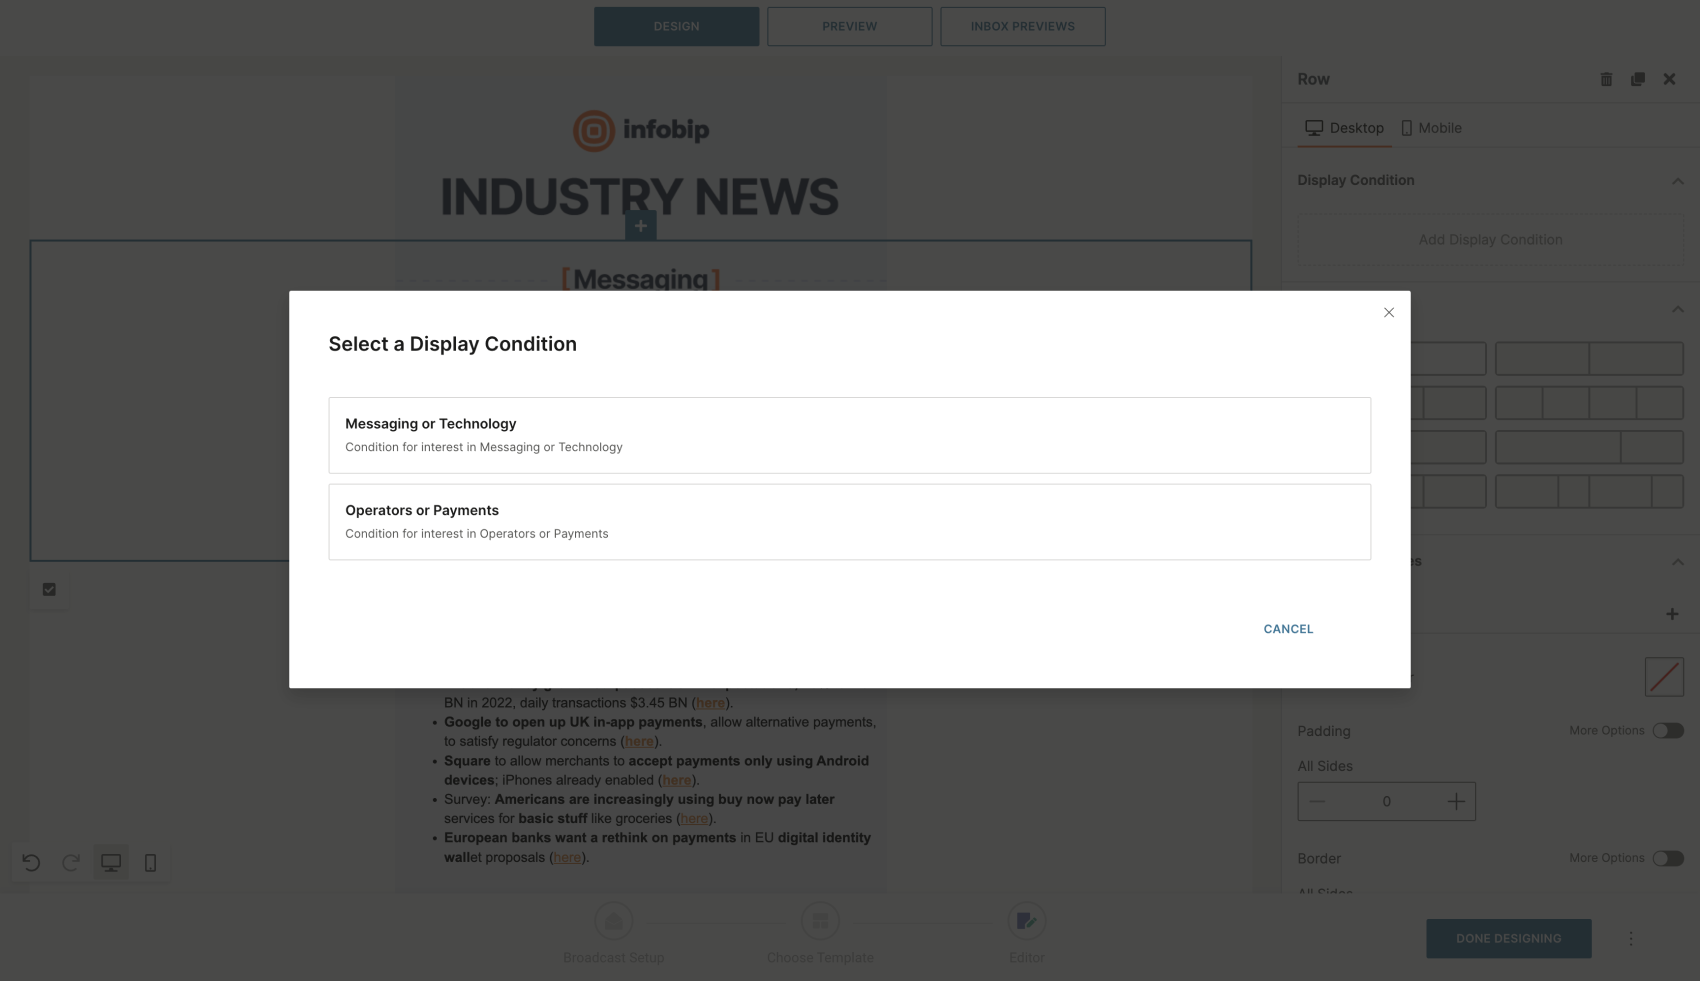
- In the property panel, select Add display condition.
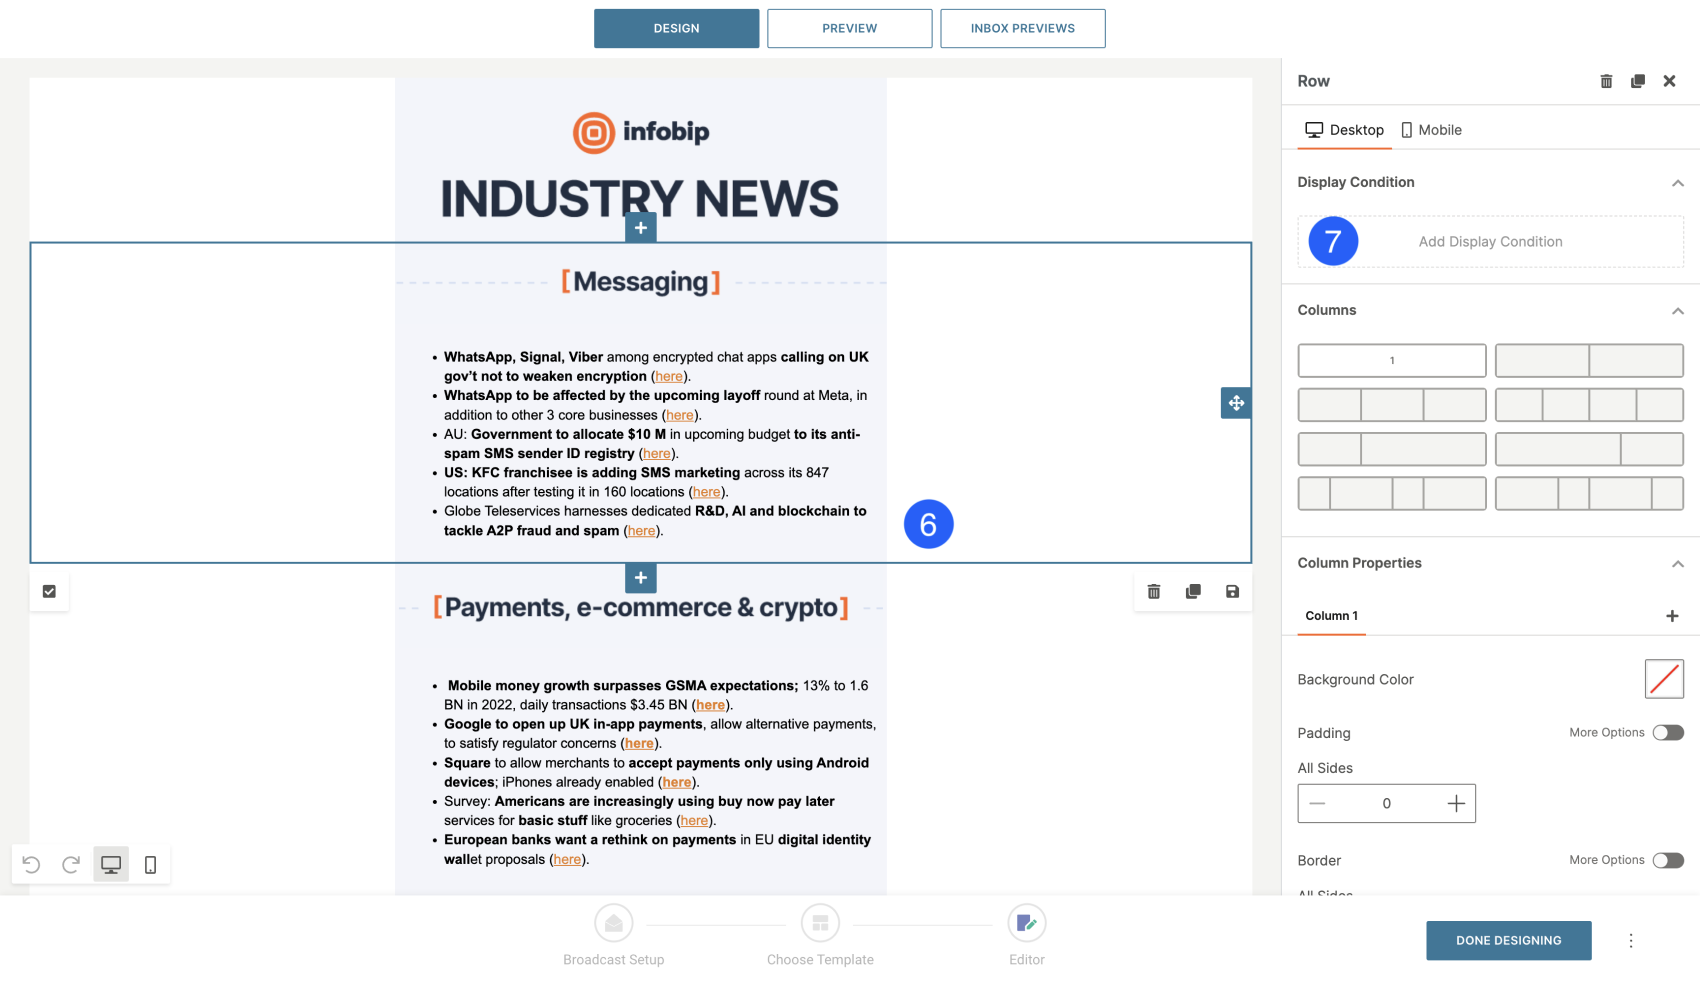
- Choose the condition you want to apply.
- Test your conditions in Preview by using the Test placeholders tab.
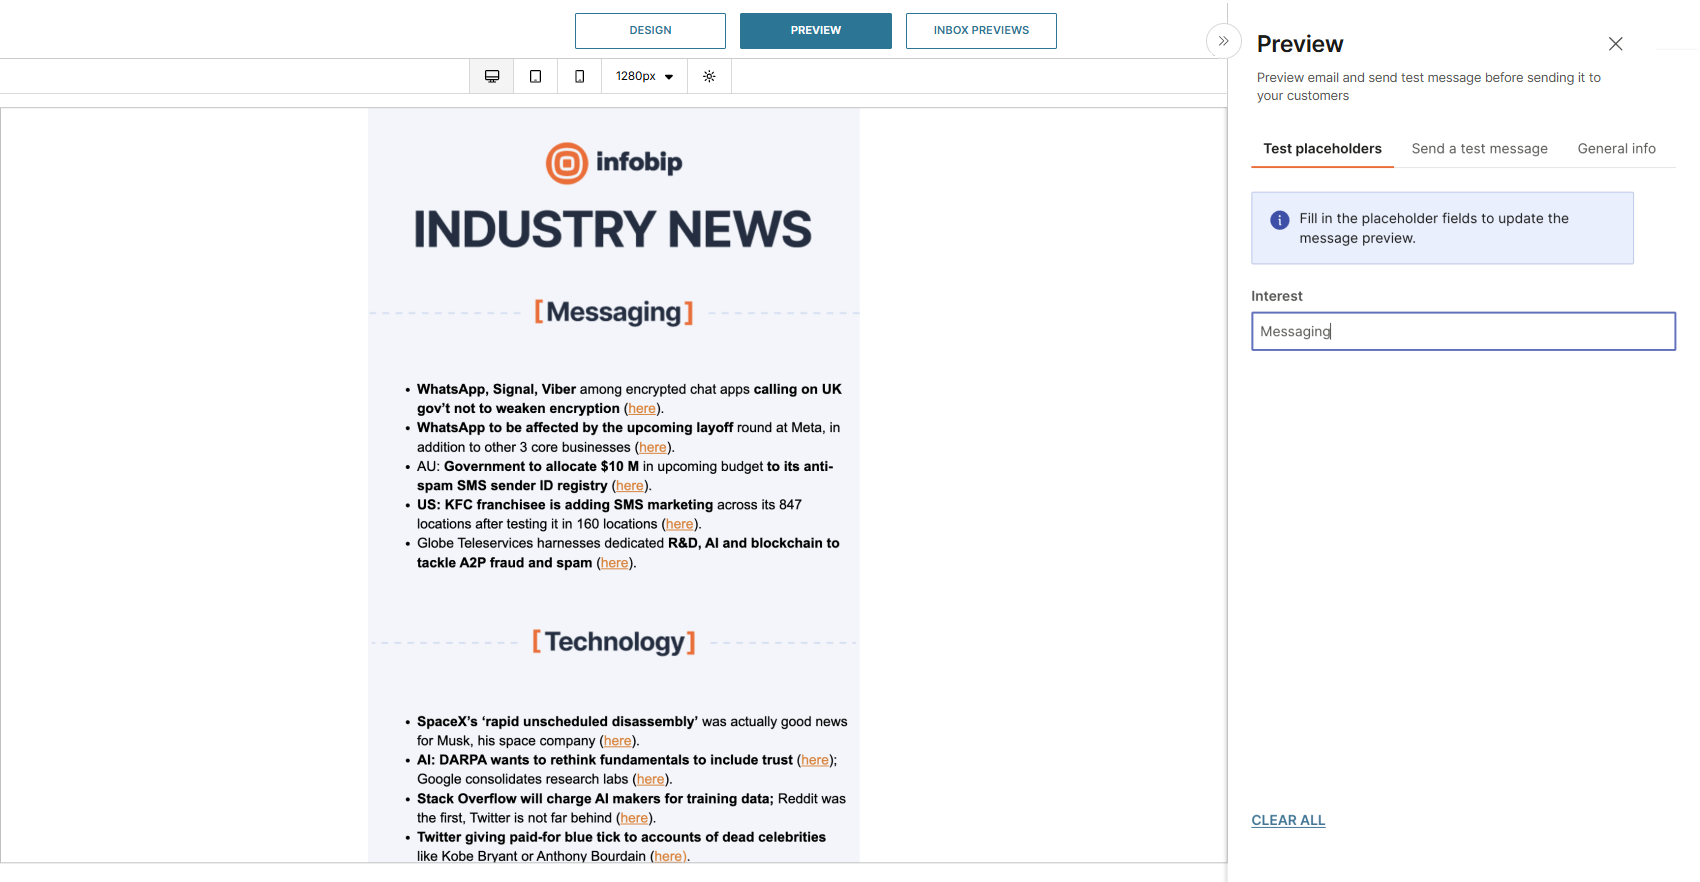
Example:
If your newsletter contains multiple topics, you can use display conditions to show only the sections that match the recipient's interests (for example, messaging or technology).
Repeat block
The repeat block feature lets you add personalized lists to your email messages, where items are dynamically loaded for each campaign or recipient. Use repeat blocks to create messages such as:
- Cart abandonment reminders
- Newsletters
- Low stock alerts
- Price drop notifications
- Policy expiration reminders
A repeat block works by looping over a list (array) of data and automatically repeating a section of your template for each entry in that list. Item properties are dynamically inserted into each repeated block.
How to create a repeat block [#how-to-create-a-repeat-block-repeat-block]
To create a repeat block:
- Create a Custom email message or open a template.
- Design the layout for the content you want to display.
- Select the block you want to repeat.
- Select the Placeholder icon.
- In the pop-up window, choose the list of items (from Catalogs or List attributes).
- To refine your list, select Filter to define which items should appear.
- Set the Maximum amount of items to display.
Best practice: Limit repeat blocks to 15 items per message for optimal performance and readability.
Personalization with Catalogs [#personalization-with-catalogs-repeat-block]
If Catalogs are your source of data, you can match items to each recipient to personalize your message:
- Choose the Catalog field you want to match to a People attribute. Only items that match the recipient's attribute are shown in the email.
- Add multiple match rules to tailor the list further. For example, show products from the Catalog that match the recipient's Size and also fall under a Category they are interested in.
- Use the Sort option to control the order in which items are displayed.
- Under the Available placeholders section, review the data you can dynamically insert into your message.
- Select Preview to test how the personalized list appears for each recipient.
Template language
The new template language introduces a more powerful, readable, and standardized syntax for dynamic email content. Use the template language within your HTML content and define placeholder values in the to parameter of your request.
Recommended syntax for new projects:
- Placeholders:
{$placeholder} - Expressions:
{{ ... }} - Logic tags:
{% ... %}
Tags [#tags-template-language]
Tags create logic and control the flow of templates. They are denoted with curly braces and percent signs:
{% tag %}
Conditions [#conditions-template-language]
Use the {% if %} tag to show content based on whether an expression evaluates to true.
Close every block with {% endif %}. You can extend logic with {% elseif %} and {% else %}.
Example:
| Input | Output |
|---|---|
{% if {$firstName} == "Alex" %} Hey Alex!{% elseif {$firstName} == "Anna" %}Hey Anna!{% else %}Hi Stranger!{% endif %} | Hey Anna! |
Operators [#operators-template-language]
You can use logical and comparison operators inside if statements.
Loops [#loops-template-language]
Use {% for %} to iterate through collections such as arrays or objects. Add limit:n to restrict the number of iterations. Close every block with {% endfor %}.
Iterating over a list of elements
Iterating over a list of elements
| Input | Output |
|---|---|
You left products in your cart: \{\{ product \}\}\{% endfor %\} | You left products in your cart: Shirt Jeans Shoes |
Iterating over a list of objects
| Input | Output |
|---|---|
You left products in your cart: \{% endfor %\} | You left products in your cart: Shirt, 10 EUR, 2 Jeans, 20 EUR, 1 Shoes, 50 EUR, 1 |
Calculate the item position in the list [#calculate-the-item-position-in-the-list-template-language]
You can calculate the size of your list and add rules depending on the position of the item in the list.
| Input | Output |
|---|---|
Your Policies for | Your Policies for |
Expressions [#expressions-template-language]
You can include expressions inside your email templates using the expression function. For details, see Expression Language.