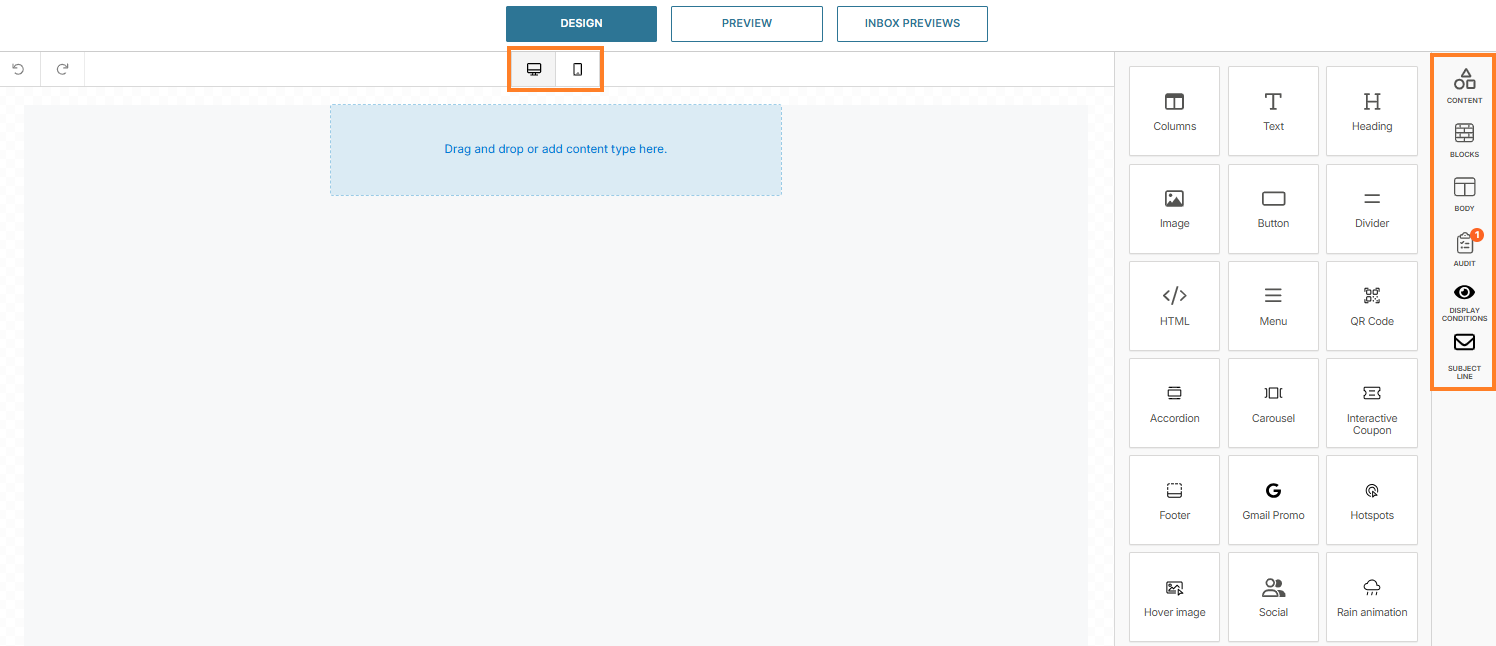
Create emails with the Email editor
The Email editor opens in design mode, where you can create and personalize your email layout. The workspace includes a blank editing area and a side panel with tabs for content, blocks, body, audit, subject line, and display conditions. Each tab provides tools to help you build and optimize your email:
- Content: Add elements such as text, headings, columns, dividers, images, videos, buttons, menus, social media links, and Gmail promotions.
- Blocks: Structure your layout with pre-built column blocks for headers, content, catalogs, footers, and more, or create your own.
- Body: Define default styles, such as text attributes, background and text colors, content width, and alignment.
- Audit: Get real-time checks for missing or invalid elements, such as links, alt text, or mandatory footers, and fix them before sending.
- Display conditions: Show different content to recipients based on attributes or rules you define.
- Subject line: Analyze your subject line against best practices, receive recommendations, and optimize in real time.
Design mode is responsive by default. You can switch between desktop and mobile views to make sure your email looks good on all devices.
For mobile optimization, you can adjust or hide certain elements, such as large images, that may not display well on smaller screens.
Create emails over Broadcast
Follow these steps to design and send your first email using the Infobip Email editor with Broadcast:
- In the Infobip web interface, go to Moments → Broadcasts.
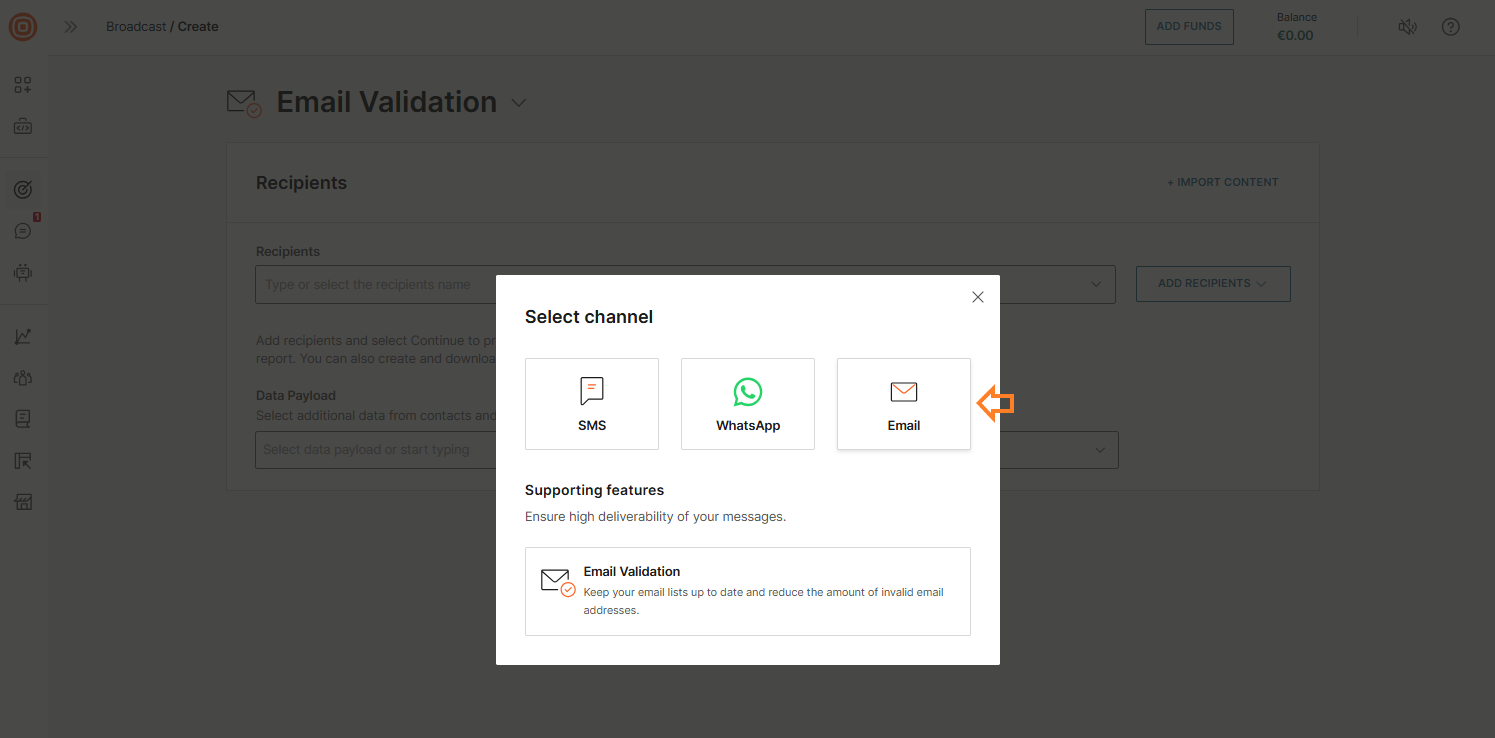
- Select Create Broadcast.

- From the channel list, select Email.
- On the form, select Create custom email to launch the Email editor.
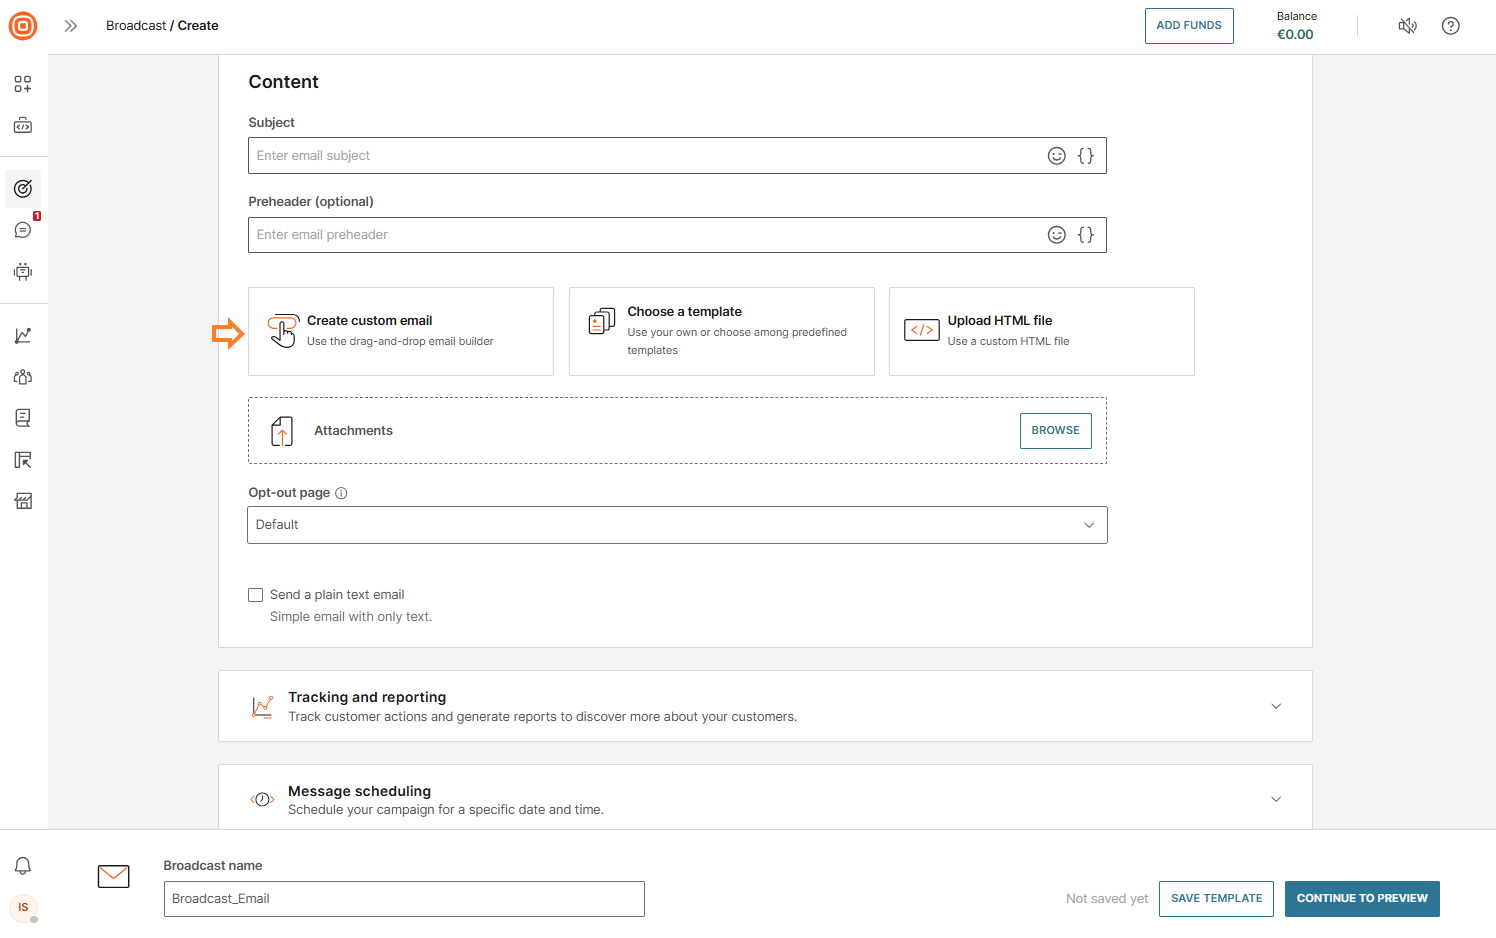
- An upload window will prompt you to select the HTML file saved on your device.
- After uploading, the editor shows your HTML with live previews for desktop and mobile. Any edits you make to the HTML are reflected in real time.

- In the Preview tab, you can:
- Test placeholders: Fill in placeholder fields to update the message preview.
- Send a test message: Send a test email to check that content and personalization render correctly.
- General info: Download the HTML version of your design or save it as a template for future campaigns.
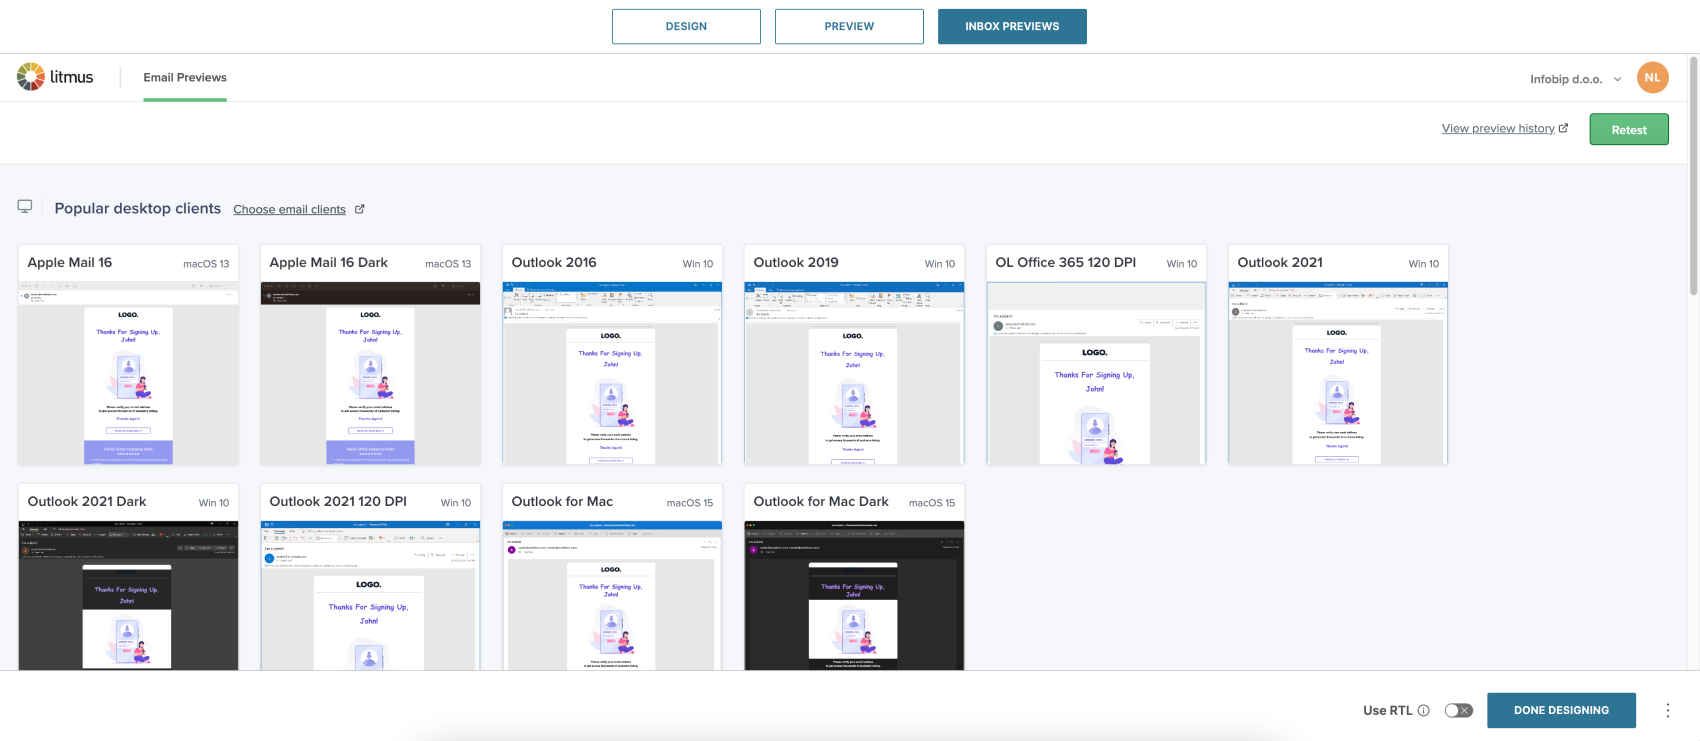
- Use the Inbox previews tab to preview your email in popular clients and ensure it displays correctly across inboxes.
- For detailed guidance on the Preview feature, see the learn more box below.
- When ready, select Done Designing and add the remaining details, then set up scheduling or automation.
- To save the created template, select the three-dot menu next to the Done Designing button, select Save as Content Email Template, enter a name, and save it for future use.
 Learn more
For detailed guidance on the Preview feature, see Inbox previews.