Purchase and manage dedicated IPs
Dedicated IP addresses give you full control over your email sending reputation and performance. Unlike shared IPs, which are influenced by the practices of multiple senders, dedicated IPs allow you to manage reputation, separate traffic by use case, and align sending behavior with best practices.
To enable this functionality for subaccounts, contact Support or your dedicated account manager.
Refer to the sections below to learn more.
IP purchasing and management over API
IP purchasing and management over API enables you to request dedicated IP addresses when needed and manage them programmatically. You can purchase dedicated IPs and configure settings such as pools and domain assignments.
For detailed API usage, including all endpoints and example payloads, check the Email IP management section in our API documentation.
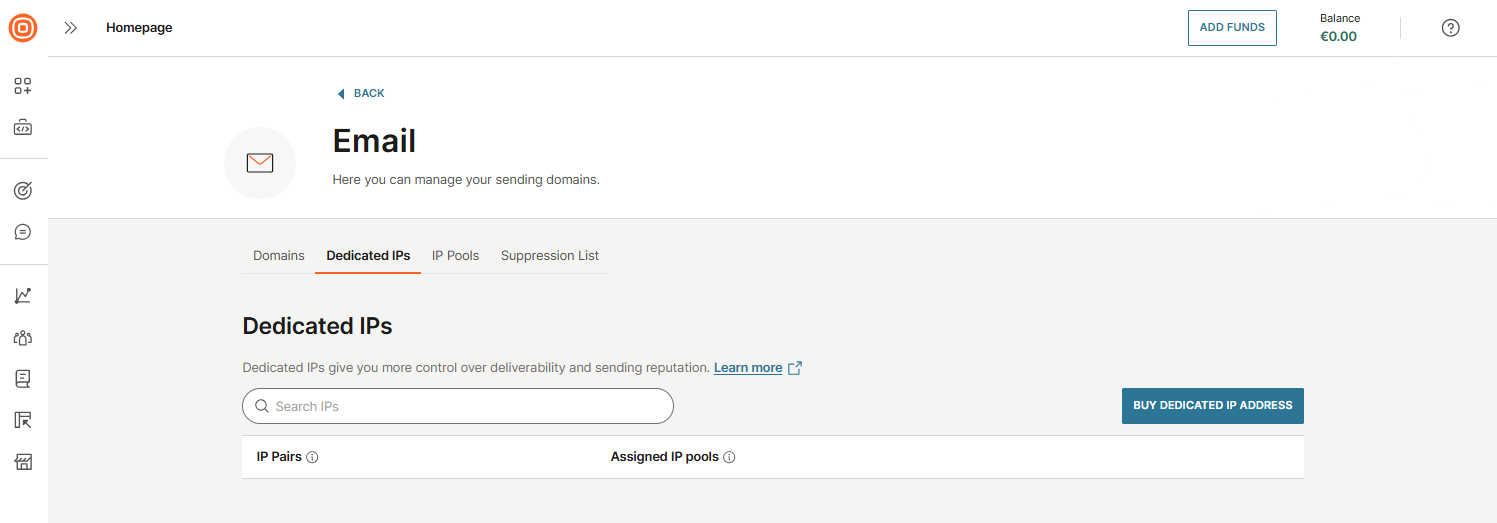
IP purchasing and management over web interface
You can purchase dedicated IP addresses, create IP pools, assign them to domains, and adjust priorities for sending. All IP-related tasks, purchasing, pool creation, and assignment, can be completed directly in the web interface.
Purchase dedicated IPs
To use IP management, you first need to purchase dedicated IP addresses. Shared IPs cannot be managed or assigned to pools.
In the US and EU regions, IPs are provisioned in pairs. Traffic is balanced across both IPs, ensuring that if one data center fails, the other can immediately continue sending. This also ensures both IPs are warmed up in parallel, avoiding delivery disruptions.
For all other regions, IPs are assigned as single addresses, since these regions are treated as single locations.
To buy a dedicated IP address, follow these steps:
- Go to Channels and Numbers → Channels → Email → Outbound Email.
- Select the Dedicated IPs tab → Buy dedicated IP address.
- When you select the button, a purchase summary of your dedicated IPs is displayed. Each purchase includes two IPs, one in each data center for disaster recovery. You can buy one pair at a time, with a maximum of three pairs per account.
- Review the purchase details and select Confirm purchase.
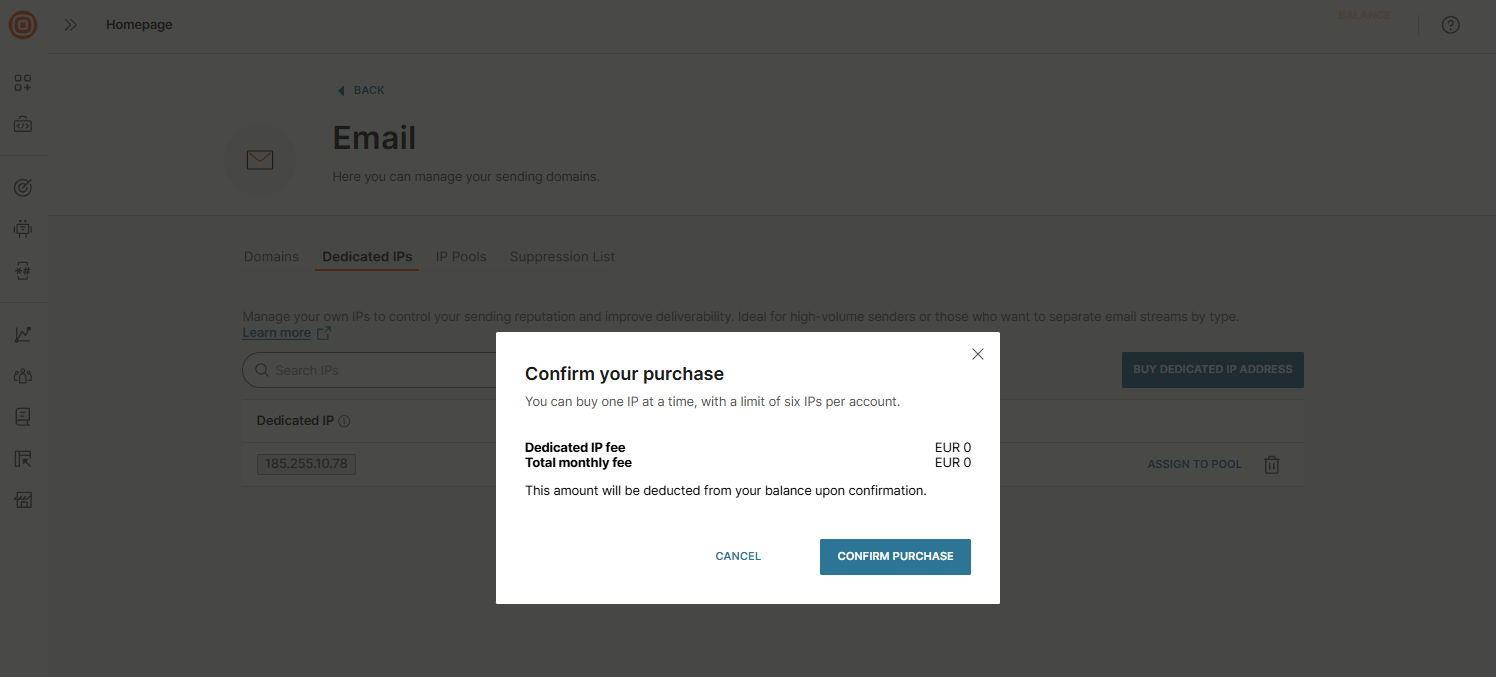
- Once confirmed, the dedicated IP pairs are provisioned and added to your account.
- Return to the Dedicated IPs page to view, directly assign to a pool, and manage the new IPs.
After an IP is purchased, you can go ahead and create IP pool(s) in which this IP will be used.
Create IP pools
Once your dedicated IPs are provisioned, you can group them into IP pools. Pools help separate traffic by use case.
For example:
- Transactional IP pool - Used only for critical, time-sensitive emails.
- Promotional IP pool - Used for marketing and bulk campaigns.
You can either assign different domains to different pools, or use the same domain for both transactional and promotional traffic while selecting the appropriate pool during sending.
For example:
@transactional.example.com→ Transactional IP pool@promotional.example.com→ Promotional IP pool@example.com→ Same domain, but two IP pools (transactional and promotional)
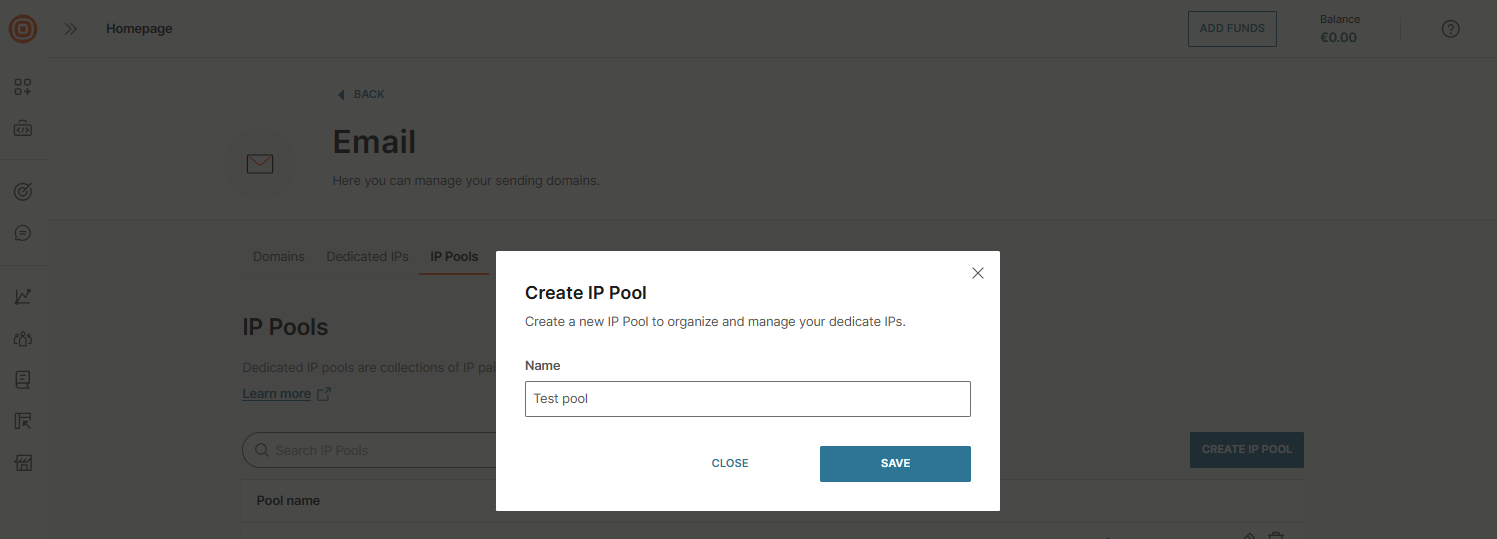
To create an IP pool:
- Go to Channels and Numbers → Channels → Email → Outbound Email.
- Select the IP pools tab → Create IP pool.
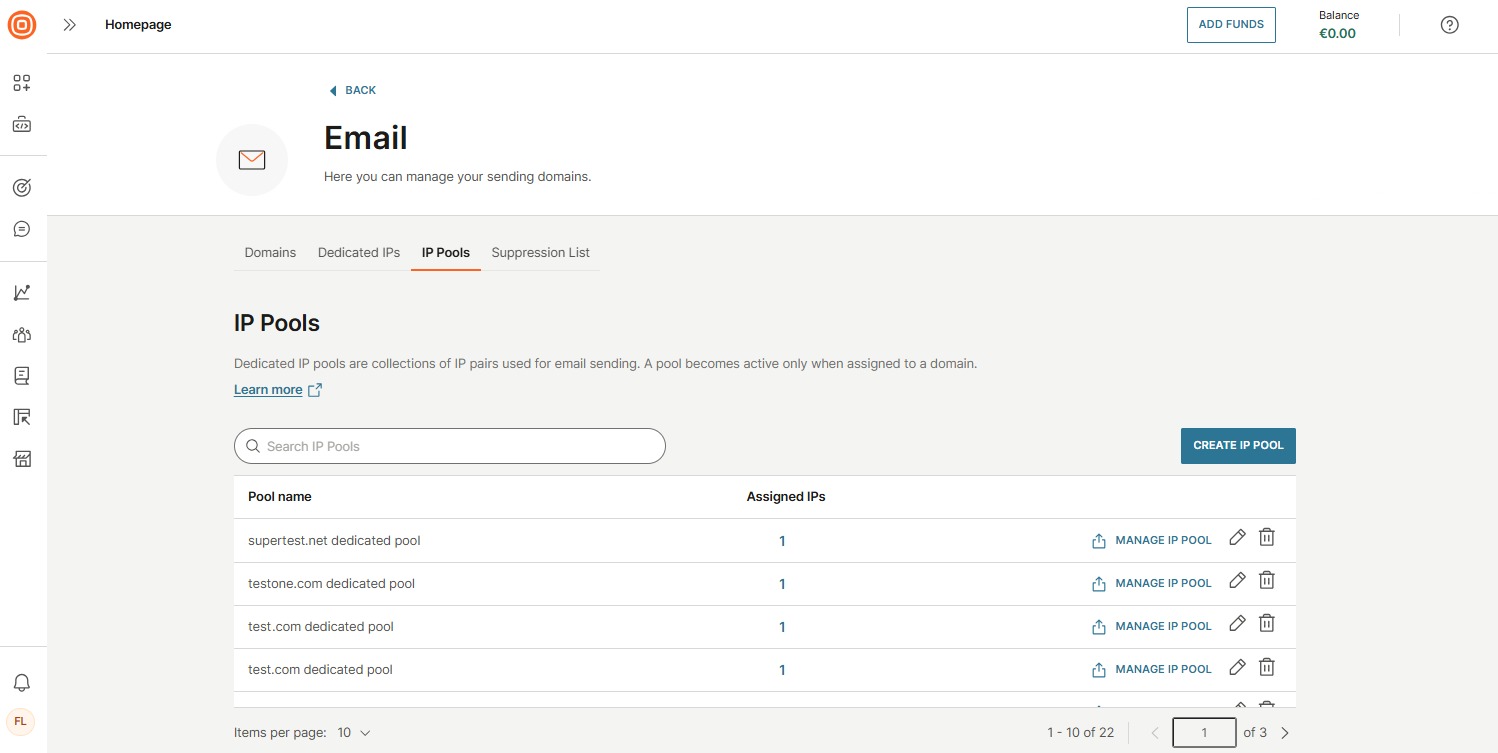
- In the pop-up window, enter a name for the pool.
- Select Save.
- After creating the IP pool, locate it in the list and review available pools to check which ones are not yet assigned to IPs.
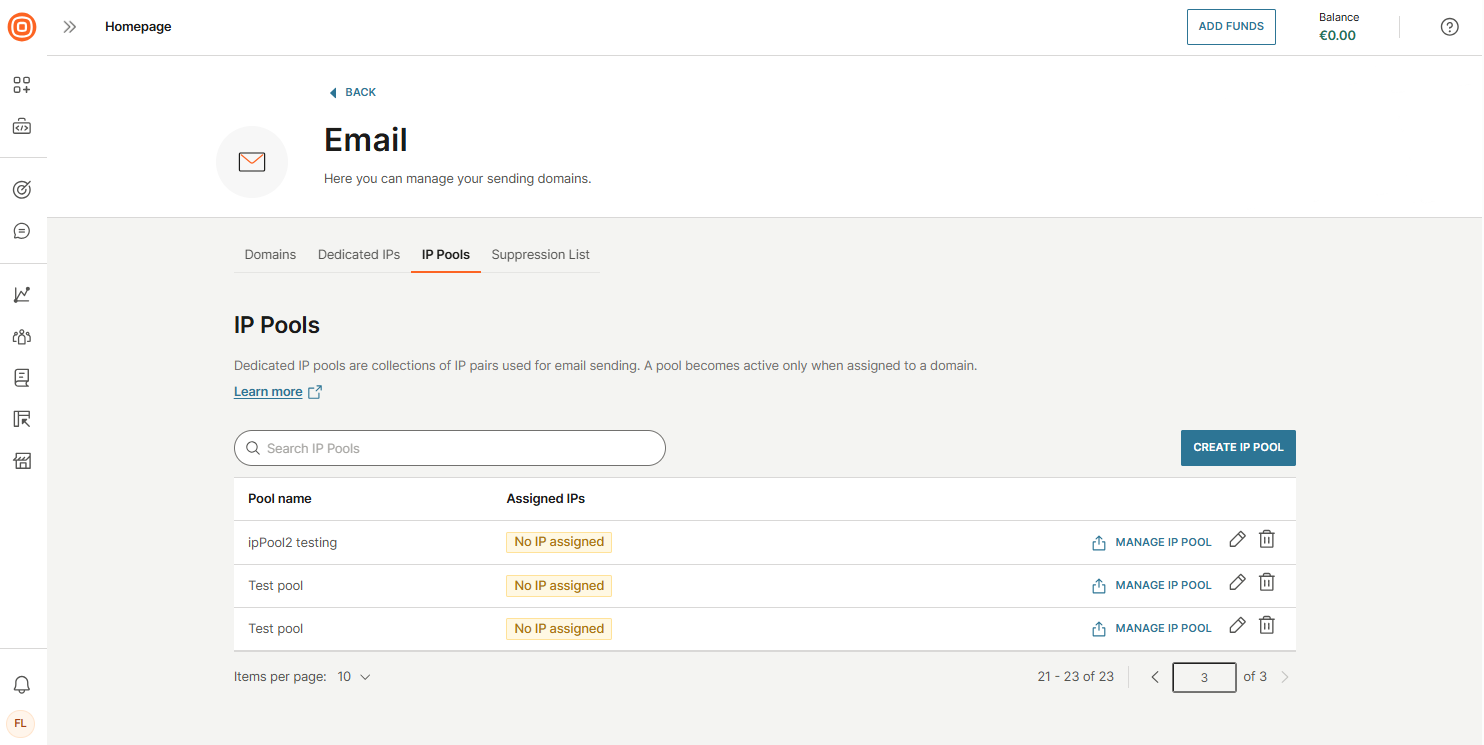
Manage, edit, and delete IP pools
After creating an IP pool, you can manage its configuration, update details, or remove it if no longer needed.
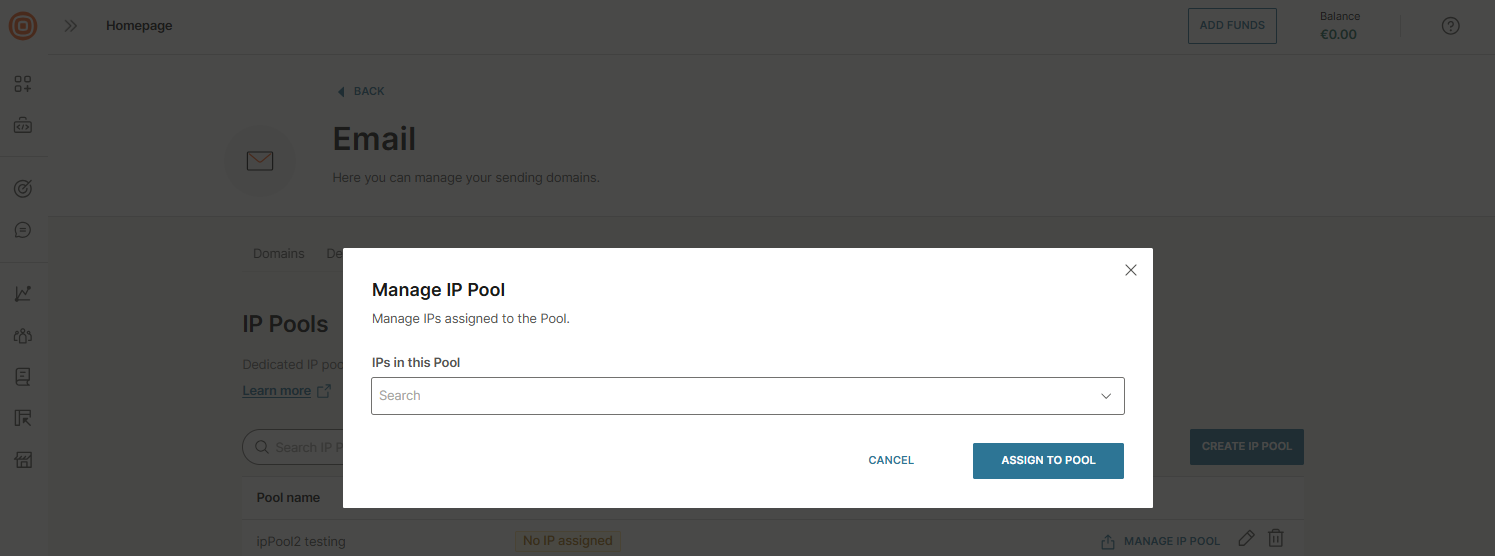
Manage IP pool
- Select Manage IP pool.
- In the pop-up menu, add or remove IPs as needed.
- Select Assign to pool to save your changes.
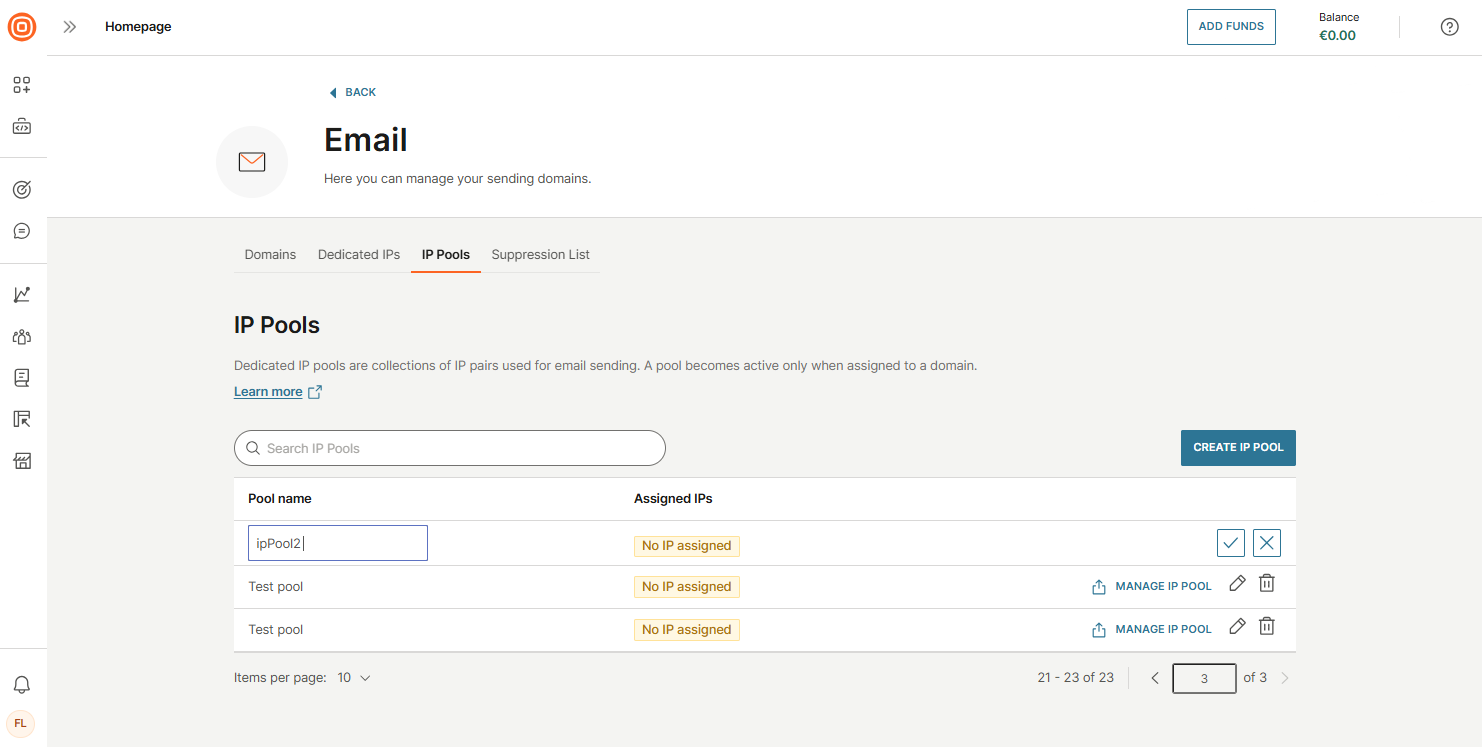
Edit pool name
- Select the pencil icon next to the pool name.
- Enter the new name.
- Confirm by selecting the checkmark.
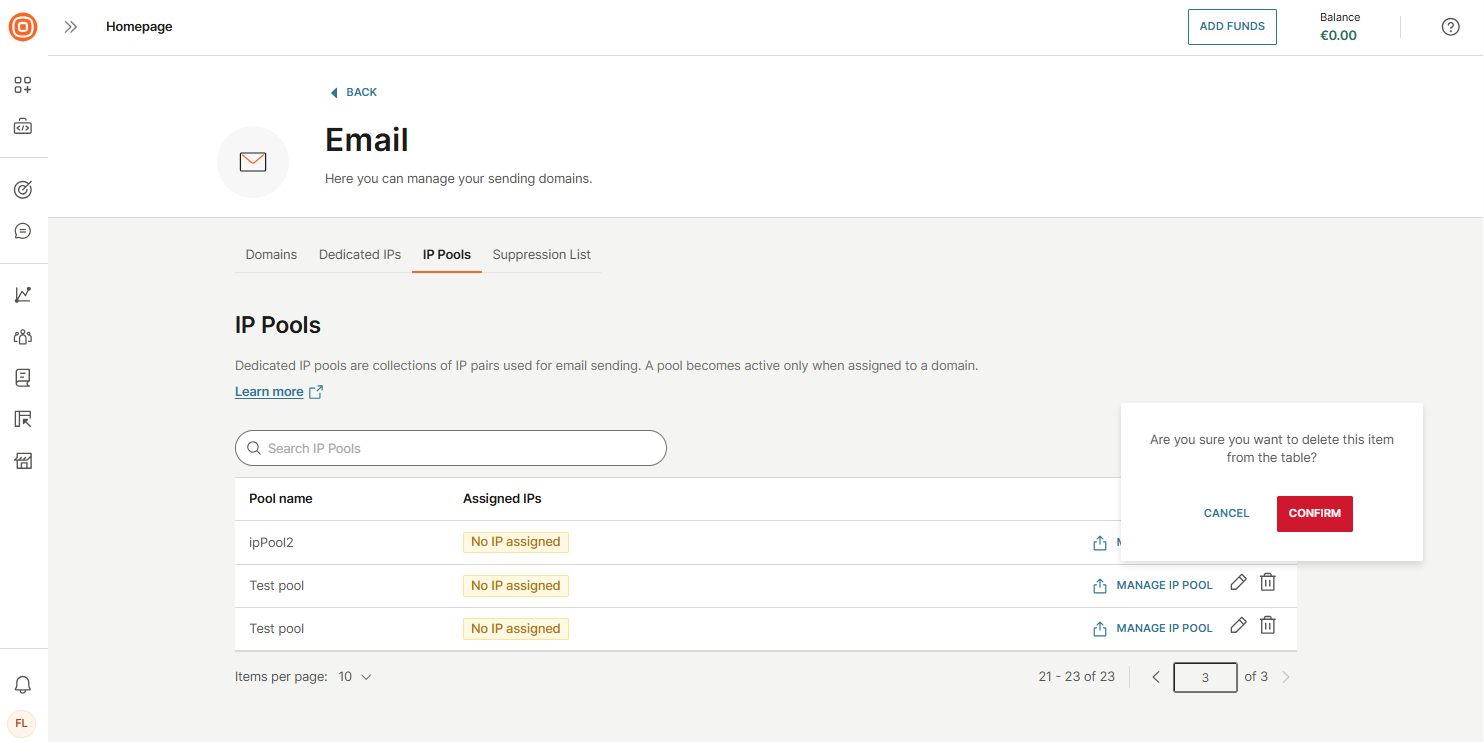
Delete a pool
- Select the bin icon next to the pool.
- Confirm the action to permanently remove the pool.
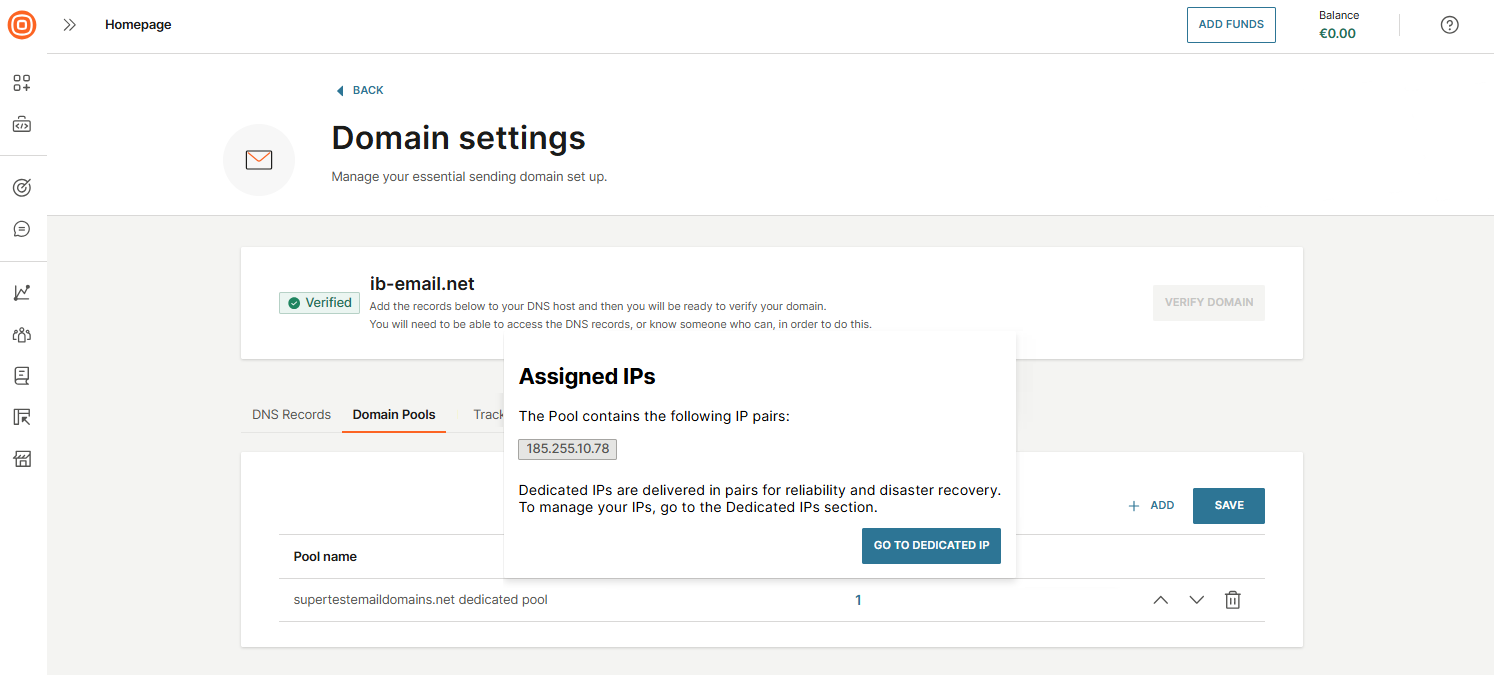
Assign IP pools to domains
After creating pools, associate them with your sending domains.
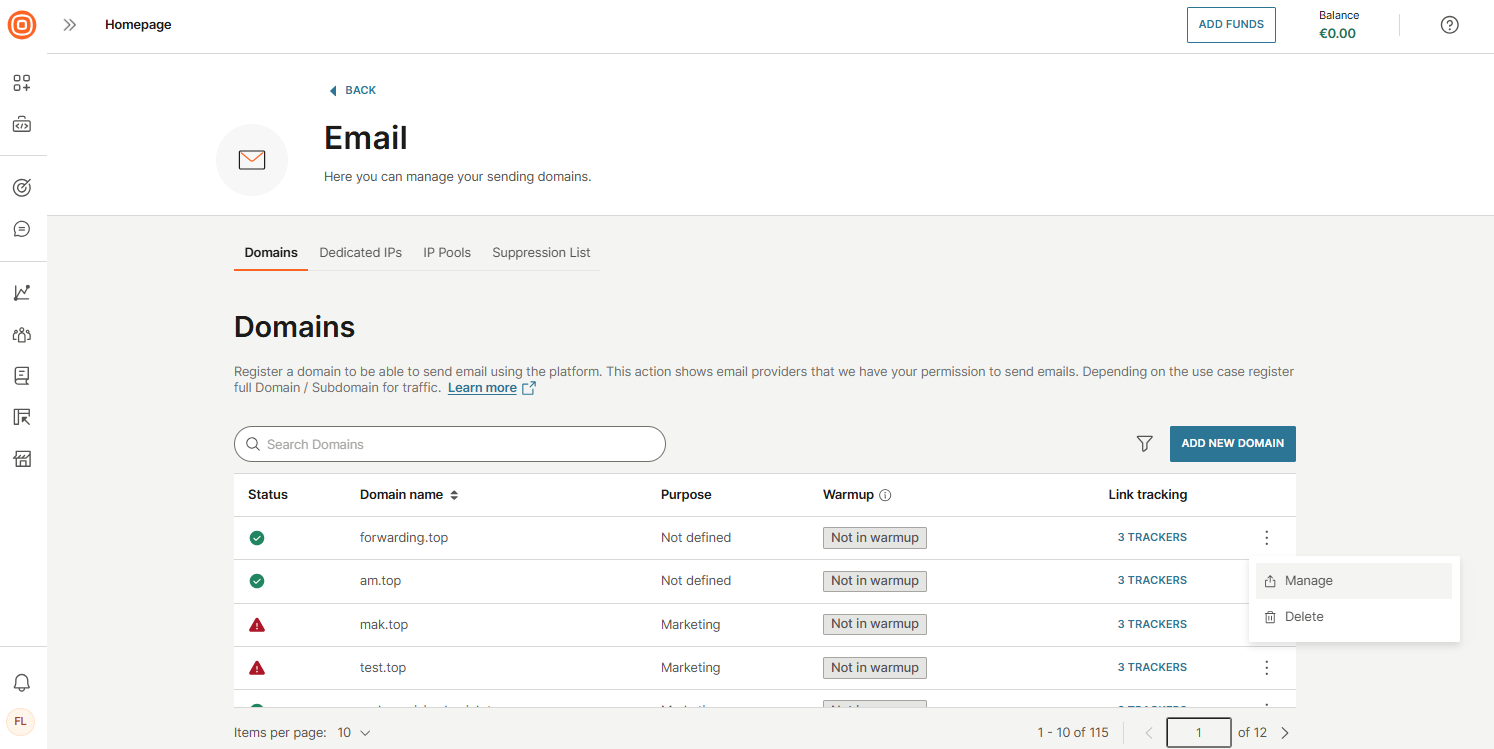
- Go to Channels and Numbers → Channels → Email → Outbound Email → Domains.
- Find the wanted domain, select the three-dot menu → Manage.
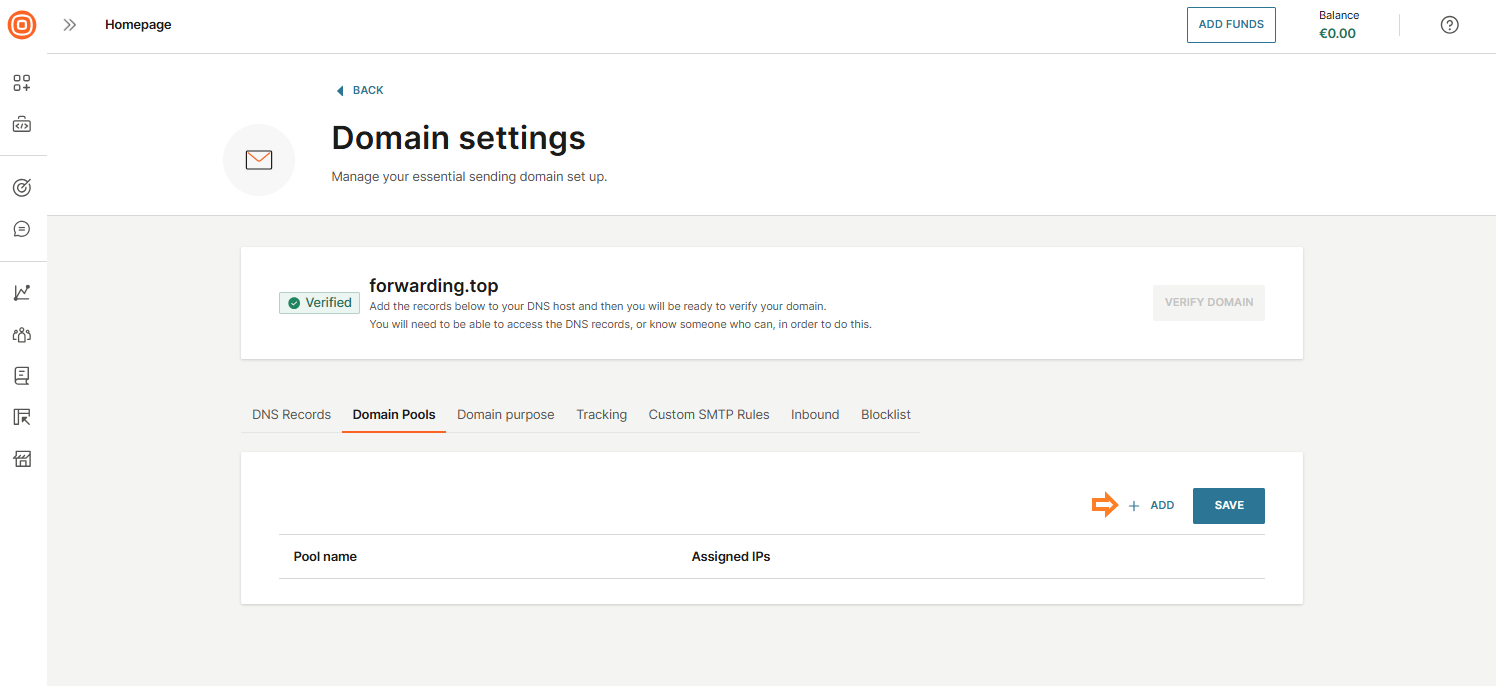
- Select the Domain pools tab to view currently assigned IP pools.
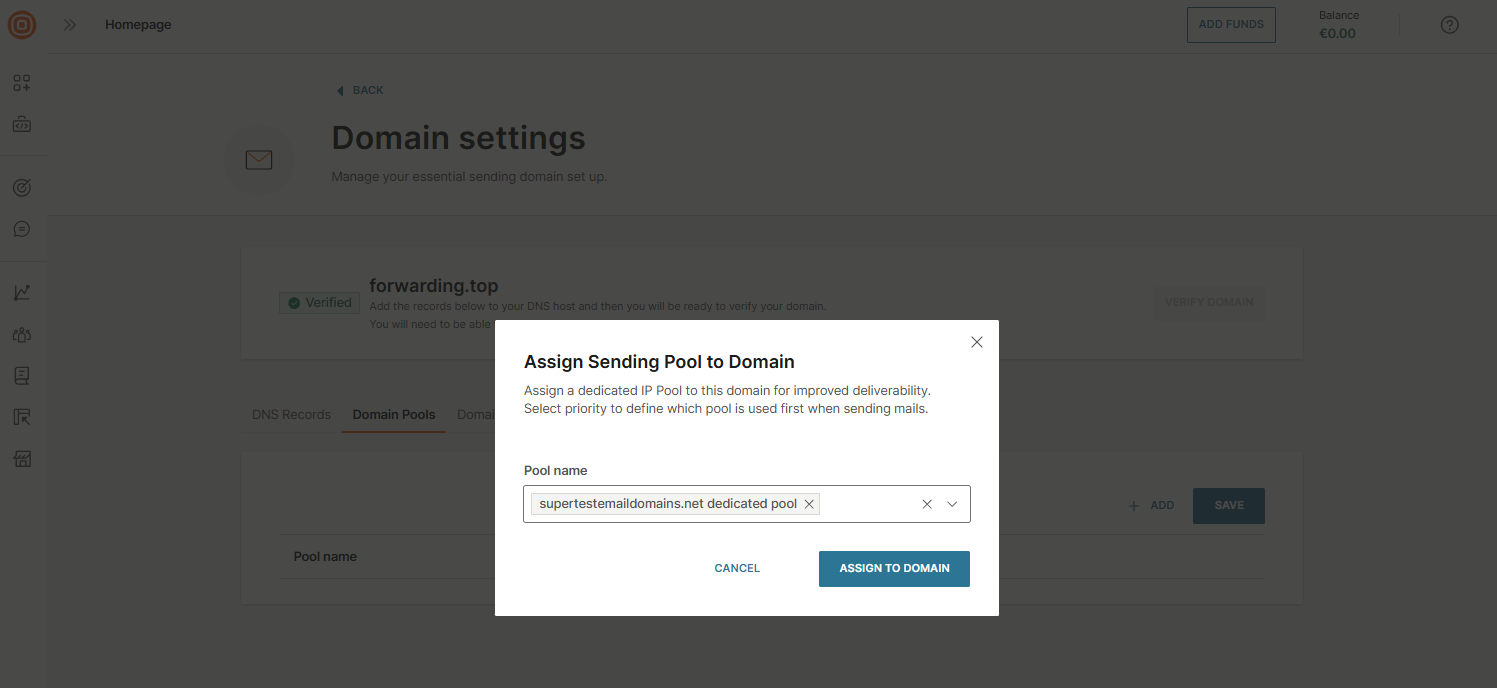
- Select the + Add button to assign a dedicated IP pool to this domain for improved deliverability.
- In the pop-up, select the IP pool(s) from the drop-down list.
- Select Assign to domain.
- You are redirected to the Domain pools page, where you can view all assigned IPs. Make sure to select Save, as the pool is only added to the domain once you confirm the action.
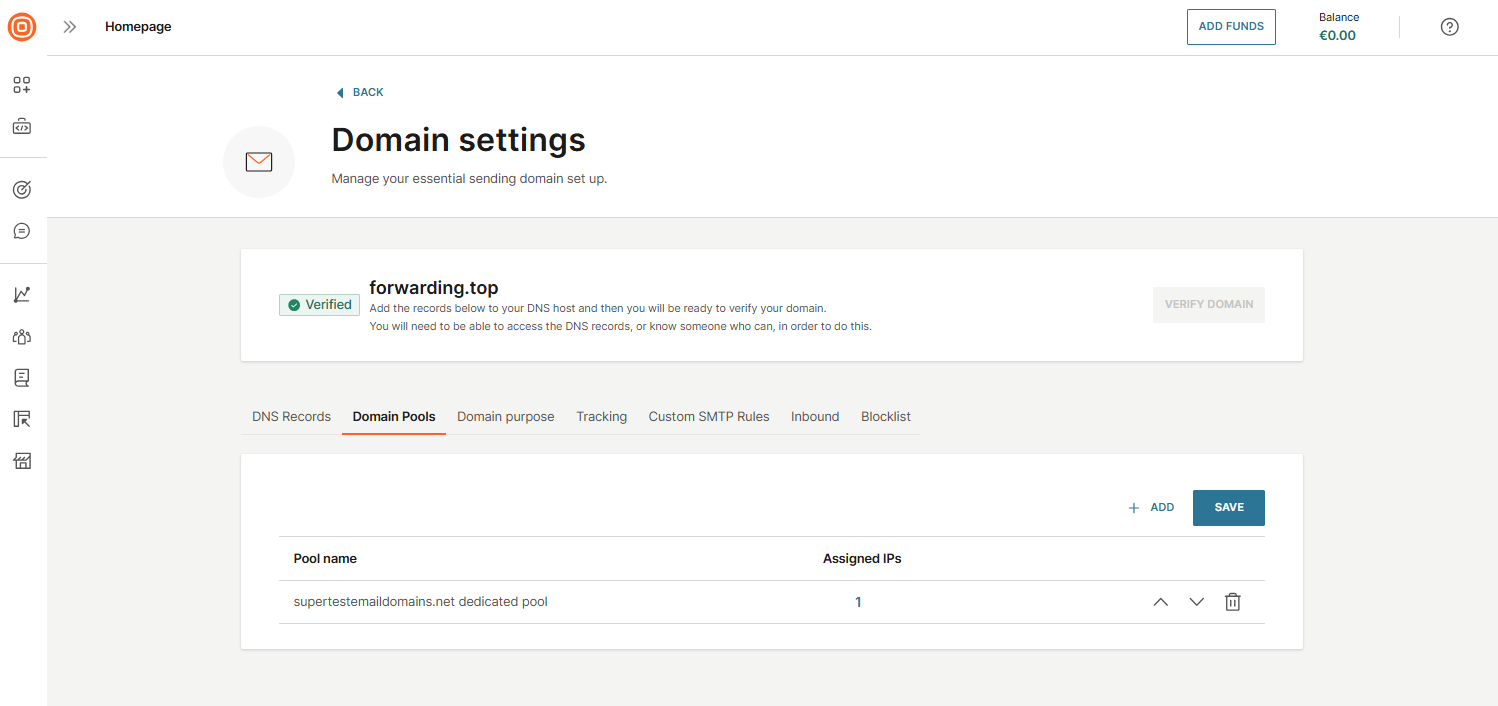
- The number of assigned IPs is shown as a clickable link, allowing you to check individual IPs. To remove a domain pool, select the bin icon.