


How to build an IVR system for contact centers
Get a step-by-step guide to everything IVR for contact centers: why you need it, how to build it, and best practices to follow.

At some point, you’ve probably come across an interactive voice response (IVR) system. Whether you’re trying to resolve a Wi-Fi issue, or if you’ve used voice responses to make changes to your bank account, a lot of call centers will use a guided IVR menu.
For call centers, IVR menus can offer automated, efficient, and personalized interactions for both inbound and outbound calls making interacting with customers more convenient and simpler.
This blog will give you a step-by-step guide on how to best implement IVR solutions in your contact center so you can always offer your customers convenience over frustration.
What is IVR for call centers?
Interactive Voice Response, or IVR for short, is a solution that call centers use to intelligently route inbound or outbound calls based on what the caller selects. Its purpose is simple; to automate and triage calls for call centers and help alleviate wait times and increase the ability for users to complete self-service tasks over Voice.
Inbound vs outbound IVR menus
There are two types of IVR menus, inbound and outbound. The main difference is self-explanatory, inbound IVR handles calls coming from users, and outbound reaches out to users.
Here’s a more detailed breakdown for call centers to use to track and better plan their IVR menu usages:
| Feature | Inbound IVR | Outbound IVR |
|---|---|---|
| Purpose | To manage and route incoming customer calls | To proactively reach customers with automated calls |
| When to use | When customers initiate contact | When the business initiates contact |
| Goals | Reduce wait times, route calls, self-service options | Deliver messages, collect responses, reminders, surveys |
| Personalization | Usually uses caller ID or account lookup | Can use customer-specific data to personalize messages |
| Typical features | Menu navigation, DTMF input, speech recognition, queue announcements | Menu navigation, DTMF input, speech recognition, queue announcements |
| Integration needed | CRM, routing engines, ACD systems | CRM, dialing systems, campaign managers |
| User experience | Customer-driven navigation | System-driven outreach |
| Best for | Support, information access, routing to agents | Alerts, collections, appointment reminders, marketing updates |
| KPIs | Containment rate, transfer rate, IVR abandonment | Answer rate, completion rate, opt-out rate |
The benefits: Why should call centers be using IVR menus?
Call centers use IVR menus to improve efficiency, reduce costs, and create smoother customer experiences. Here’s a closer look at the business benefits of IVR:
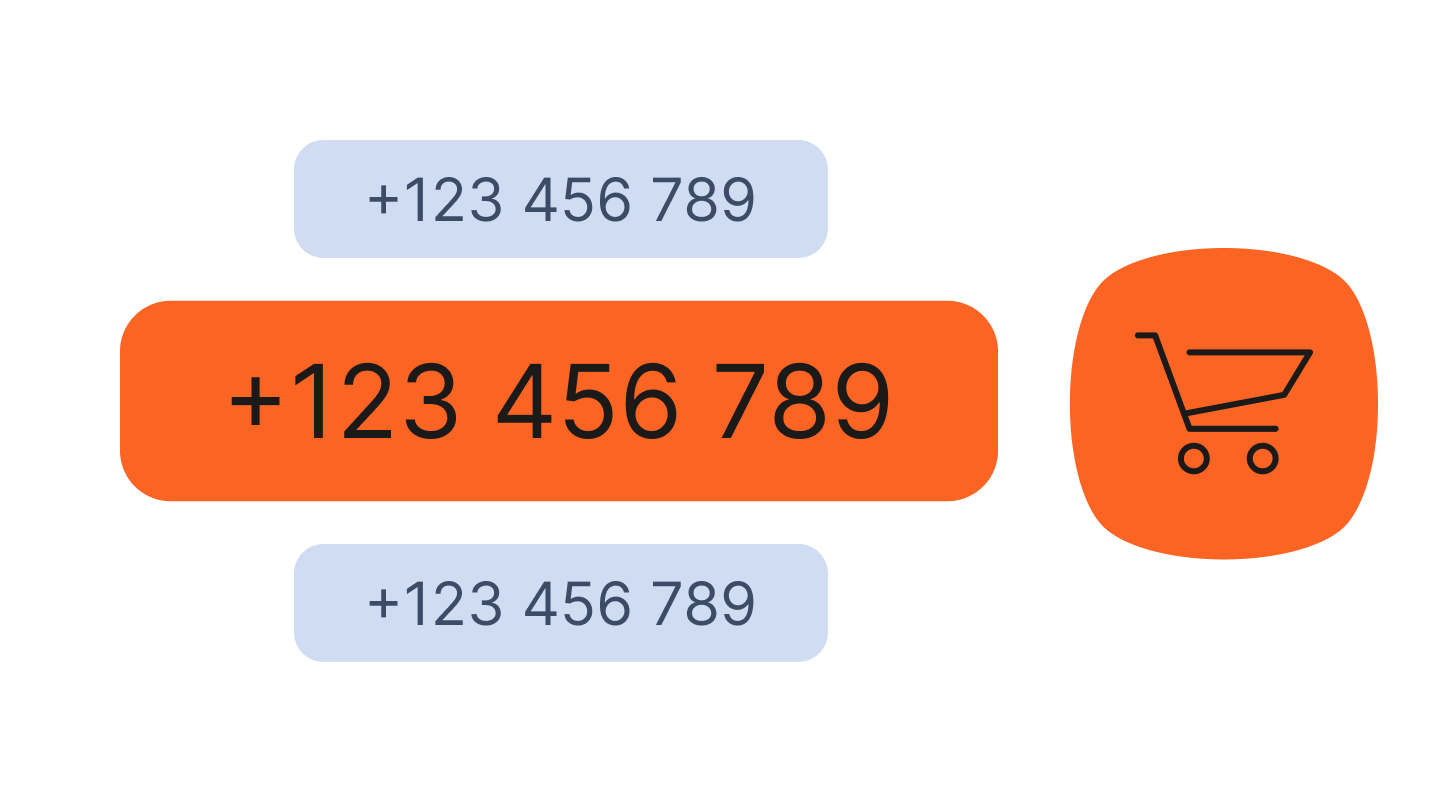
- Reduce call volume to agents: IVRs let customers complete simple tasks like checking balances, resetting passwords, or getting order status without speaking to an agent. This frees agents for more complex issues.
- Improve call routing: IVRs route customers to the right team based on choices or speech recognition. This reduces transfers, shortens handling time, and increases first-call resolution.
- Cut operational costs: Self-service interactions are far cheaper than agent-assisted calls. IVRs help scale support while keeping your workforce the same.
- Provide 24/7 service: Customers can access information or perform tasks anytime, even outside business hours.
- Reduce wait times: A good IVR design helps callers quickly get what they need, minimizing frustration and perceived wait time.
- Enable personalization: With CRM or database integration, IVRs can greet callers by name, reference account info, or tailor menu options.
- Support high-call-volume situations: During promotions, outages, emergencies, or seasonal spikes, IVRs help absorb the surge without overwhelming agents.
- Improve reporting and insights: IVRs track menu choices, drop-offs, containment, and usage patterns, giving call centers data to optimize operations.
- Increase consistency and compliance: IVRs deliver scripted, accurate information every time, reducing the risk of incorrect or non-compliant messaging.
IVR best practices for call centers
IVR menus are only as good as you design them to be. We’ve all experienced a terrible IVR loop, or menu that doesn’t give you the answers you need. Following these best practices will help your call center design and deploy the perfect IVR menus so you can reap the benefits.
1. Use a clear voice for the IVR menu
Customers don’t want to feel like they are talking to a robot, even though they might be. Use a human voice for your IVR, either with a voice-over actor, a text-to-speech tool, or AI. Steering away from robotic voices will help add credibility to your customer service and make customers feel like your brand is easily accessible.
2. Keep it short and sweet
Nothing will turn your customers off more than a lengthy IVR menu. They are looking for a fast resolution to their queries, which means your greeting messages should be very short, and your menu shouldn’t include too many options as it becomes hard to keep track of. The shorter and more efficient your menu is, the more satisfied your customers will be.
3. Provide access to a live agent
Although IVR is ideal for self-service issues, some customers just want to speak with a representative. Always offer the option to speak with an agent at the end of your IVR menu. This also helps customers who get caught in a loop or have already decided they are calling with the intent of speaking with a representative.
4. Offer multiple languages
If you offer services internationally, or even in regions with culturally diverse populations like the USA or UK, offering different languages on IVR menus can go a long way. This makes your services accessible to a wide range of people and will add to the overall satisfaction with your brand.
5. Use a high-quality speech recognition tool
It will quickly become frustrating for customers if your IVR cannot understand their voice responses. Make sure you account for potential background noise, phones, and call quality. This can all impact how well your customers’ responses are recognized. Ensure you also provide enough time for a response, but not too much time where they are waiting for the next step of the menu. brand.
6. Set up a fallback to DTMF
Ensure you’re prepared for any scenario. For one reason or another, a speech recognition tool might not be able to pick up on your customer’s voice. In the case they are making selections by speech, and it does not work, add a fallback to dual tone multi-frequency (DTMF). Setting up a fallback makes your IVR system more reliable and easier to use, helping avoid frustrating situations for customers.
7. Personalize your IVR system
Customers expect interactions to be personalized, and IVR is no exception. You can integrate your IVR solution into your back-end systems or use a customer data platform to ensure data and information can be used across your solutions. When a customer calls, you can recognize their phone number and use it to personalize the IVR menu presented by pulling information about the customer profile, orders made etc. making every IVR menu relevant to the respective customer.
How to build an IVR system with Infobip (no coding required)
Building an IVR system with Infobip is like stacking Lego blocks. Choose which blocks (elements) you want in your IVR menu and stack them up to create a strong structure that will guide customers – no coding required.
Our customer engagement platform is ideal for call centers that are looking for a drag-and-drop or low-code approach to integrating Voice to their communication stack.
Let’s walk through how to build an inbound IVR call flow. Keep in mind, you can use a similar call flow for different use cases and change the menu details or script to fit your needs. The platform is customizable and makes building an IVR system quick and easy.
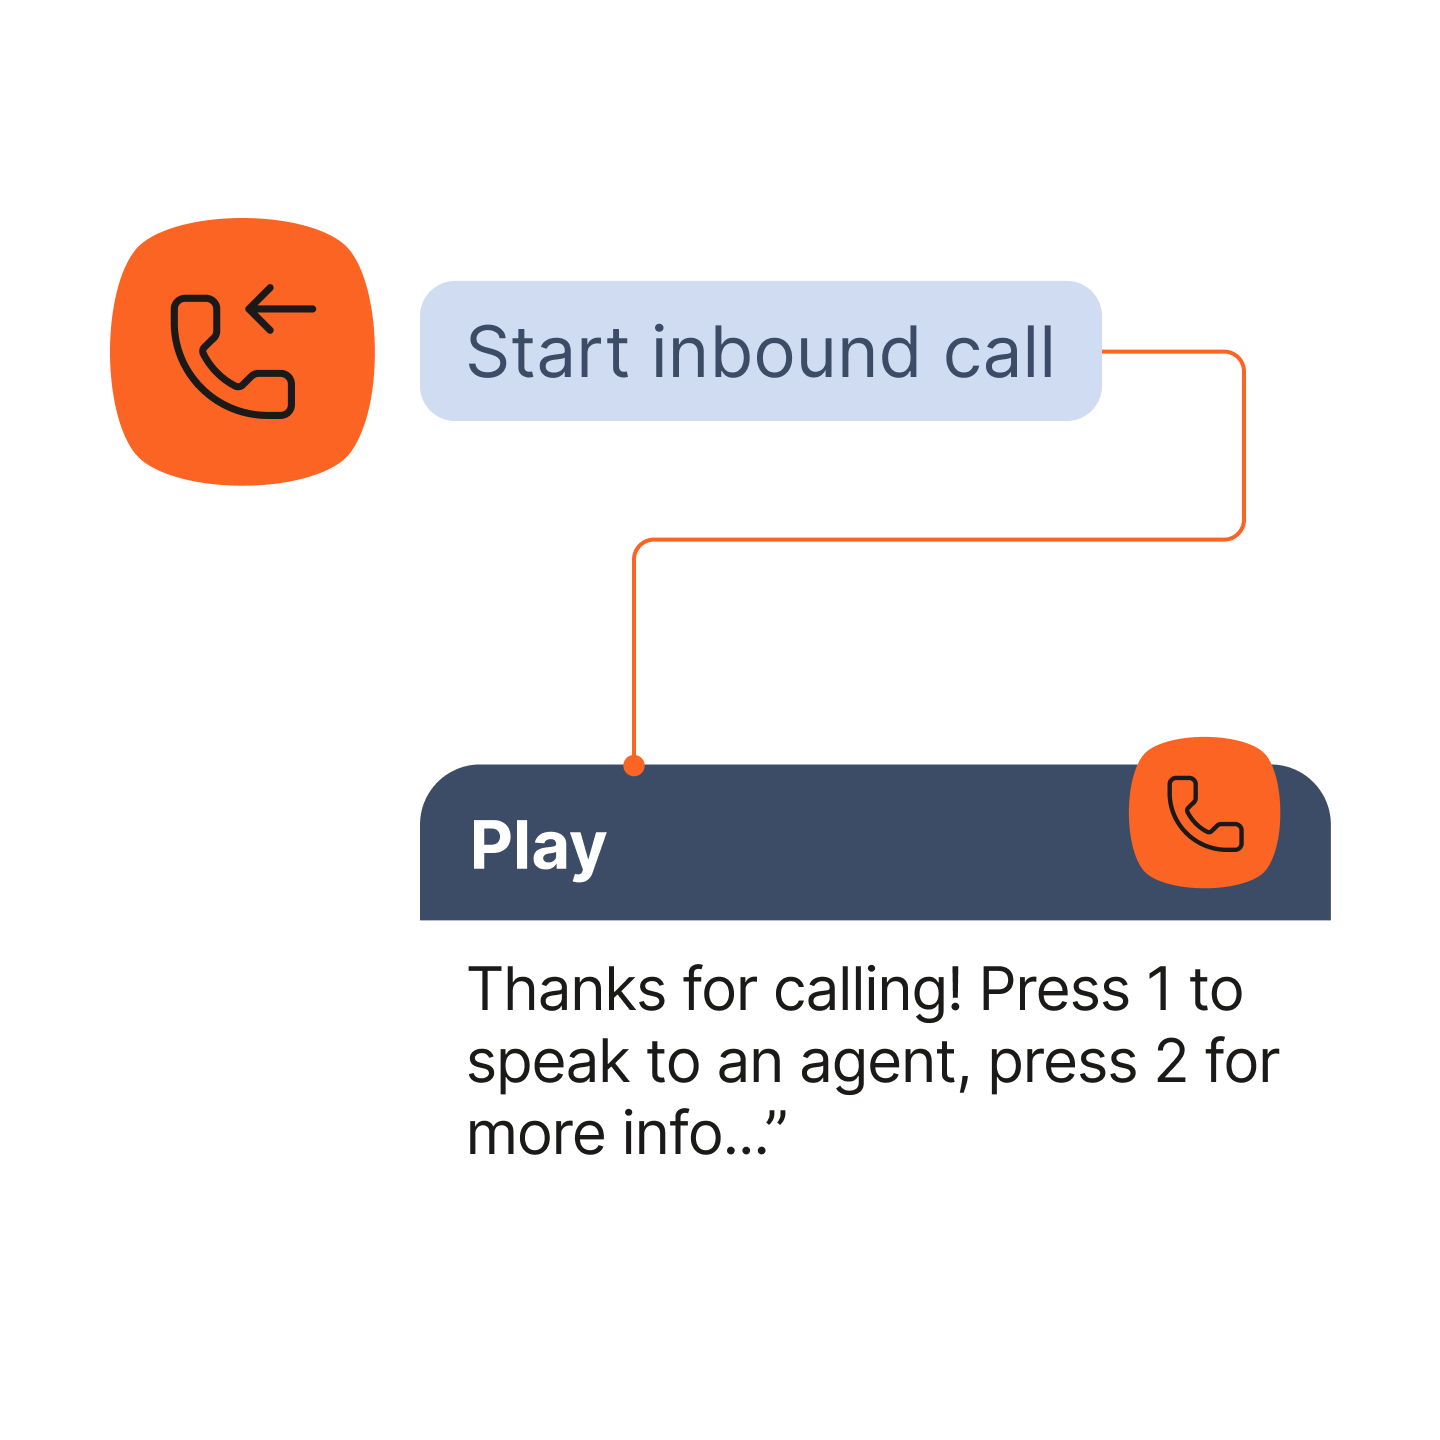
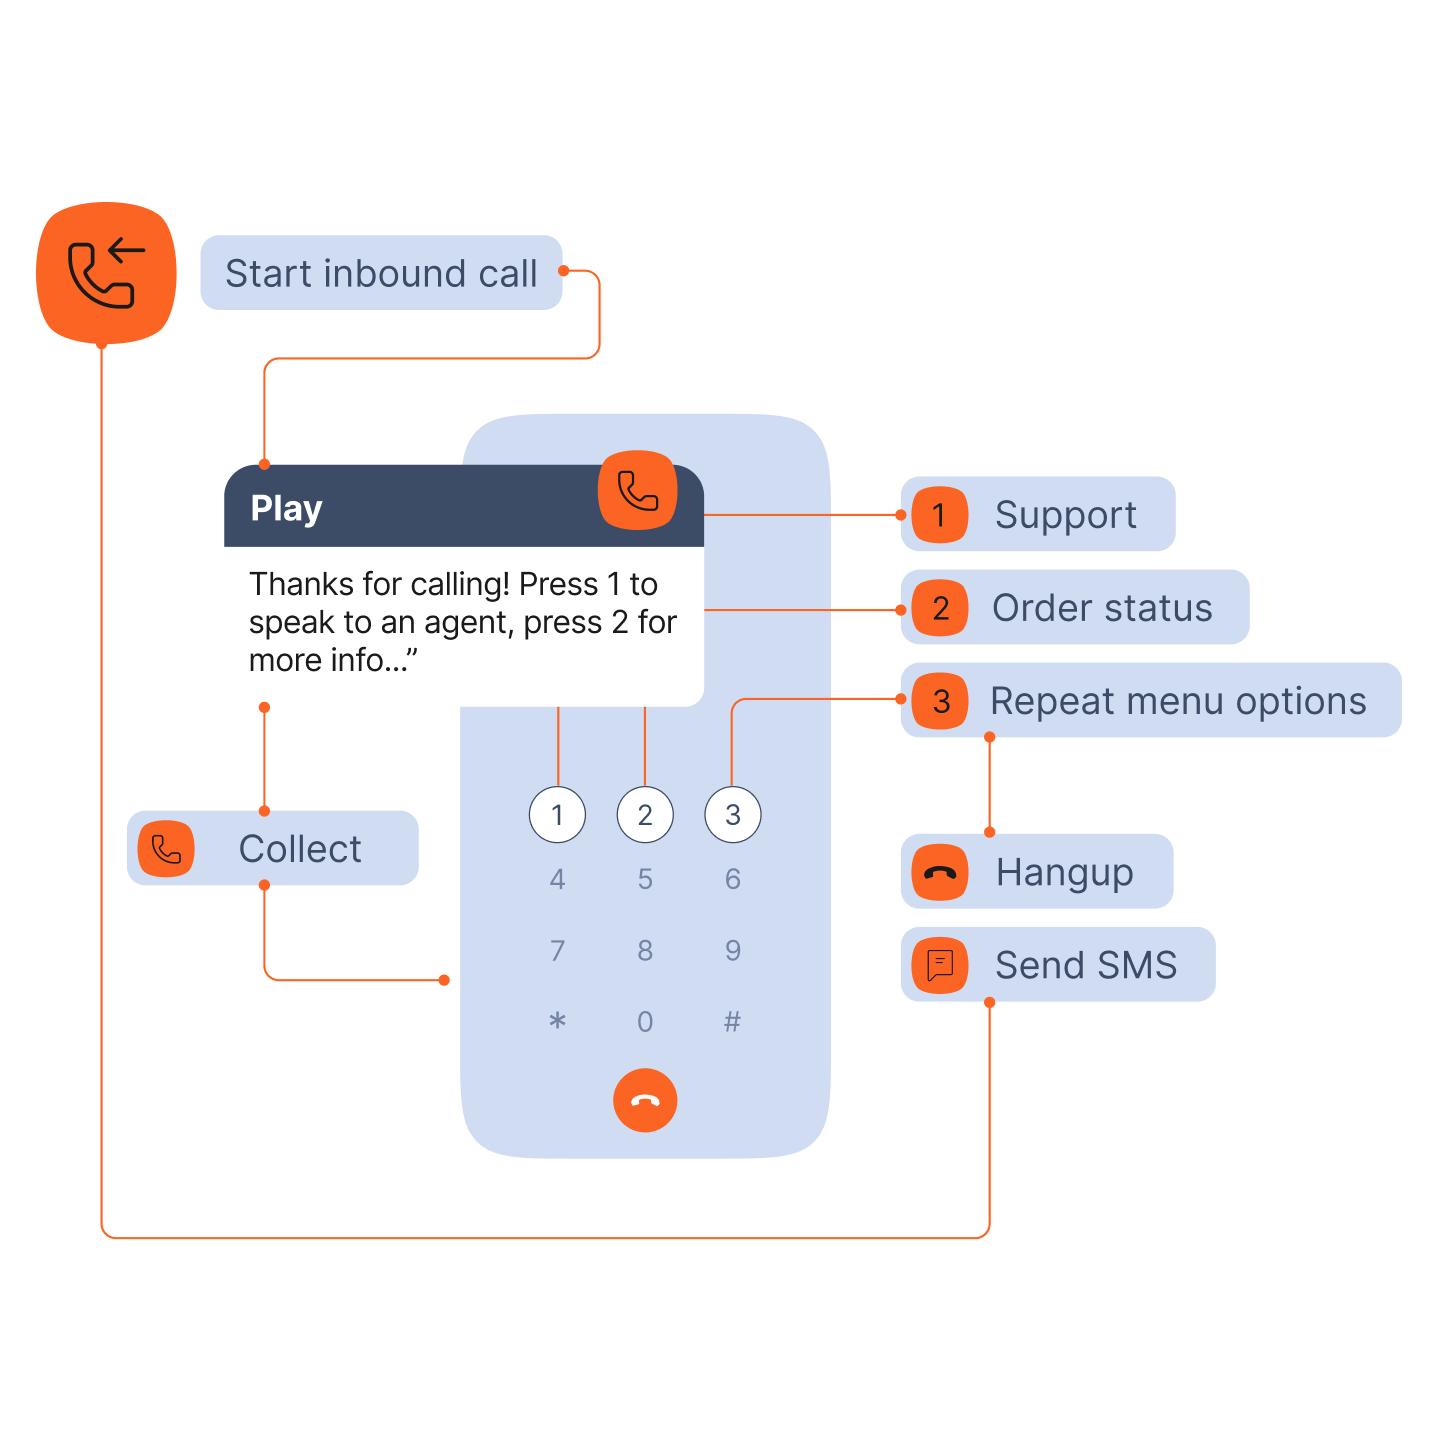
Step 1: Select a phone number
When you enter the platform, click Start from Scratch, then Start Inbound Call. This is where you’ll be asked to select a phone number. Remember, you can’t build an IVR system without a phone number from Infobip. You can purchase and set up a number in no time, ensuring you can continue building your IVR system without any delays.
Step 2: Set up your menu
You will start with a blank canvas to build your IVR flow. You’ve selected Start Inbound Call, now add the Play element. This will allow you to set up a message that your customers hear when they call you. You can use our Text-to-Speech tool, a pre-recorded audio file, or a recording of your previous IVR menu.
Here you can also choose the language and voice type you want, reproduction speed and duration of silence before the message is played.
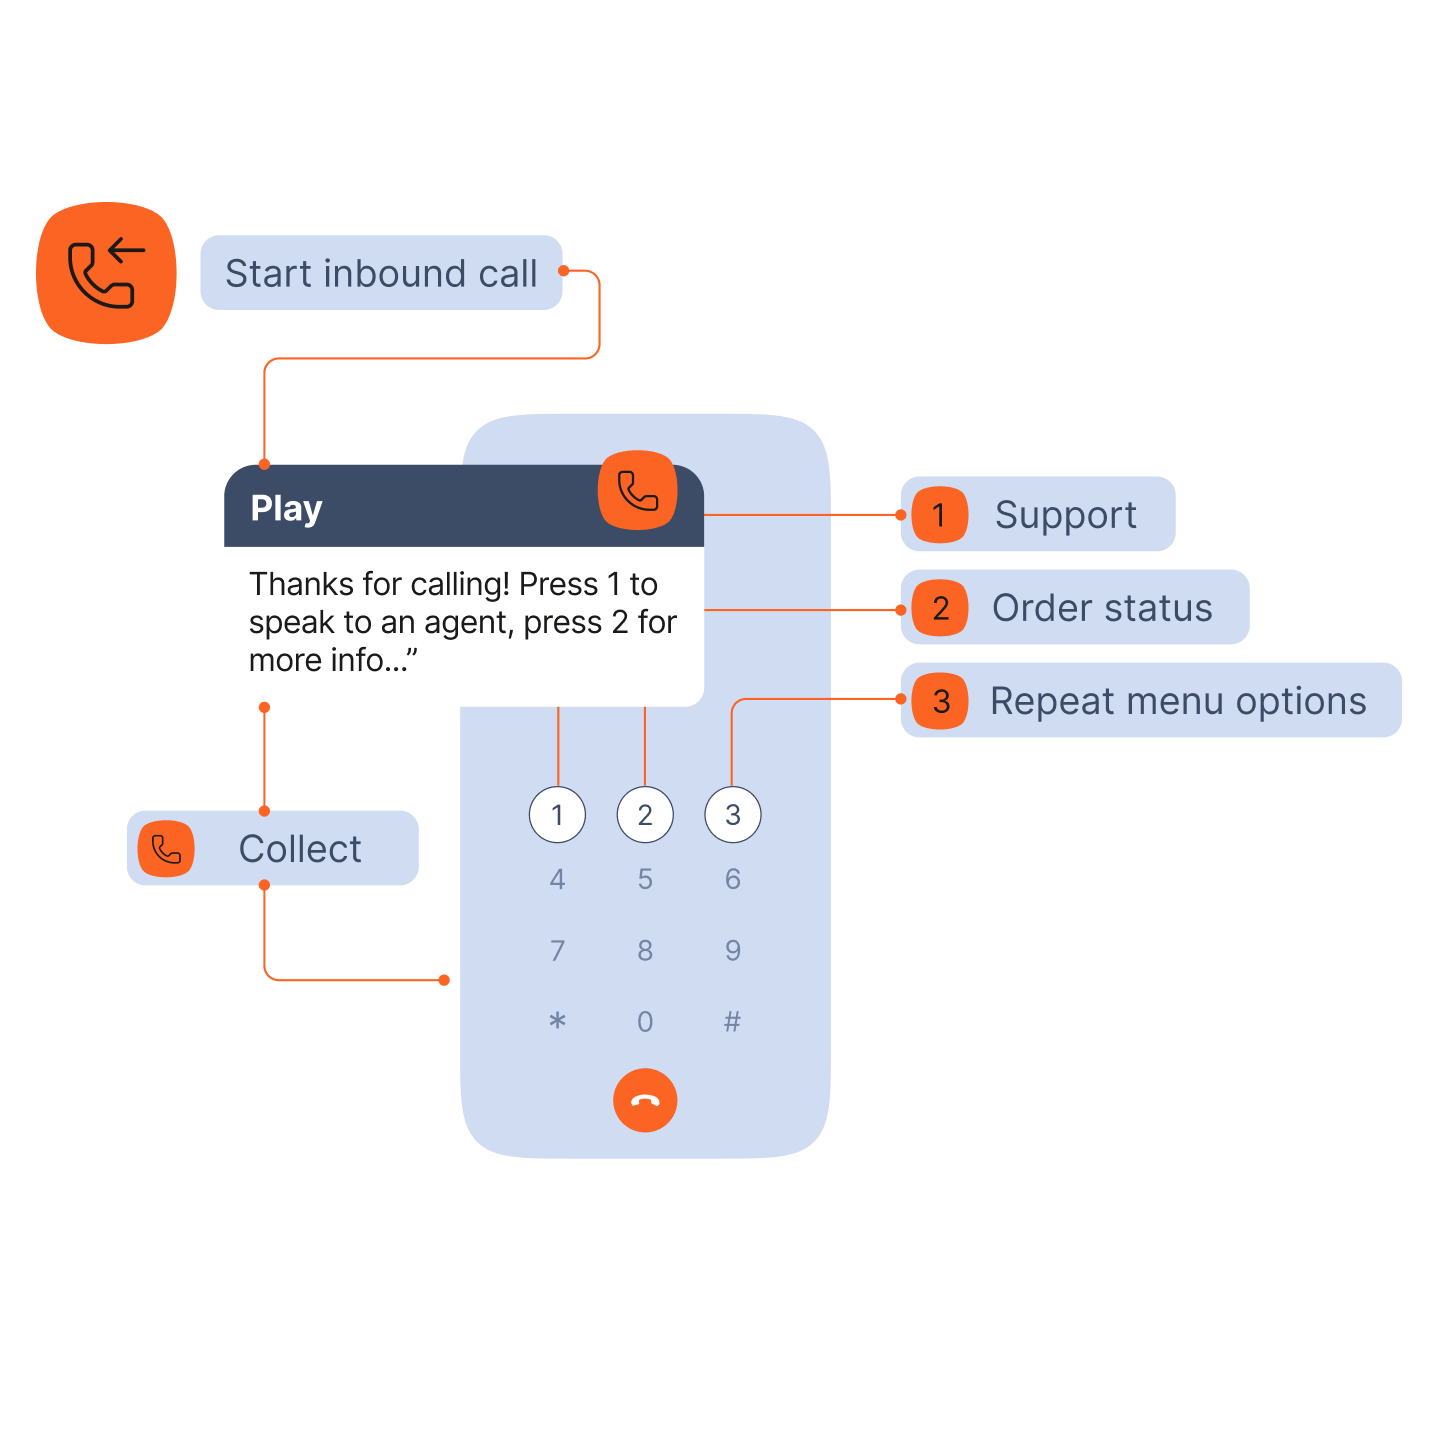
Step 3: Collect responses
After your customer hears your IVR menu, you’ll need to gather their response and guide them to their desired destination. Add the Collect element to gather their answers, and what each answer will lead to in the menu.
You can set up conditions for each answer. For example, press 1 for billing issues, press 2 for product quality concerns, and press 3 for service disruptions.
Step 4: Connect to SMS
If a customer hangs up in the middle of your menu, you can set up an SMS message to be delivered with a link for the customer to reconnect to your IVR menu. When they click on the link, they will be directed back to the original IVR menu recording.
Connect data from our Customer Data Platform (CDP) to personalize your IVR menus and elevate your Voice service. It makes creating IVR menus straightforward and allows you to integrate a Voice solution with as little heavy lifting as possible.
Building an IVR via API
On the other hand, if you want a bit more control over how to customize your IVR menu and you want to embed Voice solutions into your existing tech stack, our Voice API for IVR is for you. Voice API is a robust set of APIs that allows you to customize Voice message content and delivery as well as develop complex IVR menu scenarios.
You can get access to these add-on features with IVR over API:
- Text-to-speech
- Answering machine detection
- Speech recognition
Here’s a quick run-down on what you can do with Voice API:
Create IVR scenario
Make an IVR system using our Voice API. You can custom create any IVR scenario using the coding language you’re comfortable with. Our detailed Voice API documentation gives you deeper insight into what elements you can mix to make a multi-level plan that fits your business.
You can use a wide range of elements including:
- Call API
- Capture
- Collect
- Dial machine detection
Initiate an IVR call
You can use Launch API for outbound calls or configure a custom IVR for your Voice number. You can customize any aspect of your IVR system from destinations, ring duration, sending rate and speed, and validity period.
Modify and delete scenarios
Always having an ideal IVR system means you should be regularly updating and adjusting when you see if. Updating or deleting your pre-configured IVR scenario can be done using the DELETE method, so there’s no need to make a new IVR menu from scratch each time.