


A complete guide to Viber chatbots and how to build one in 2025
Join us for an introduction to Viber chatbots, including key features, what they can be used for, and most importantly – how to build one without needing to be a developer.
Viber is a messaging app that in 2025 is used by over 1 billion people globally and is the most popular app in several significant markets including Philippines, Bulgaria, and Greece. Brands that operate in the regions where it is popular have recognized the value of incorporating the app into their business communication – and this includes deploying chatbots on the channel.
Viber bots are a great way for businesses to reduce the cost of customer service, boost engagement and retention with bold marketing campaigns, and automate a lot of transactional messages. They allow brands to offer around-the-clock service without the overhead of human staff. In this blog we cover everything you need to know to design and build a Viber chatbot, with step-by-step instructions that anyone can follow.
The types of Viber chatbot that you can build
There are two main types of chatbot, each with its unique strengths and features:
- Rule-based Viber chatbots: These chatbots provide a pre-configured menu of options for users to select from. They are the quickest and easiest to set up but can be incredibly useful for answering day-to-day queries that customers would previously have called a contact center to answer. Anything from store opening hours, product availability, and account balances can be provided via a simple set of options.
- Intent-based Viber chatbots: These are more sophisticated chatbots that can be designed to provide a more conversational experience for people interacting with them. They take longer to build as they use natural language processing (NLP) and need to be ‘trained’ to understand multiple words and phrases and user intents. However, they can be incredibly flexible and a real asset to any business that wants to showcase its creativity and market leadership.
Matching chatbot type with use case
To help you choose the best type of chatbot for your use case we have expanded on the types of chatbot and what they can be used for. This should help you choose the right tool for the job and avoid over-engineering the solution.
Static informational bots
You might consider these automated responses rather than chatbots as they don’t support what we would consider two-way chat. However, they can be very useful in providing information or directing customers to another channel when there isn’t a person available to reply to a message. For example “Thank you for your message. Our store is closed right now, but you can explore our website to find and purchase the products that you are interested….”
Interactive Viber chatbots
These chatbots flex the strengths of rule-based chatbots to enable two-way communication with users using workflows that are simple to build, but also incredibly useful and flexible. The user chooses options via a guided set of menu options that can include buttons, and quick replies.
They can be used effectively for all sorts of use cases including providing answers and gathering information from the customer in a secure way, for example Gender, Number of dependents, Preferred check-in time and any data point that can be provided via a set of options or free text field.
Transactional Viber chatbots
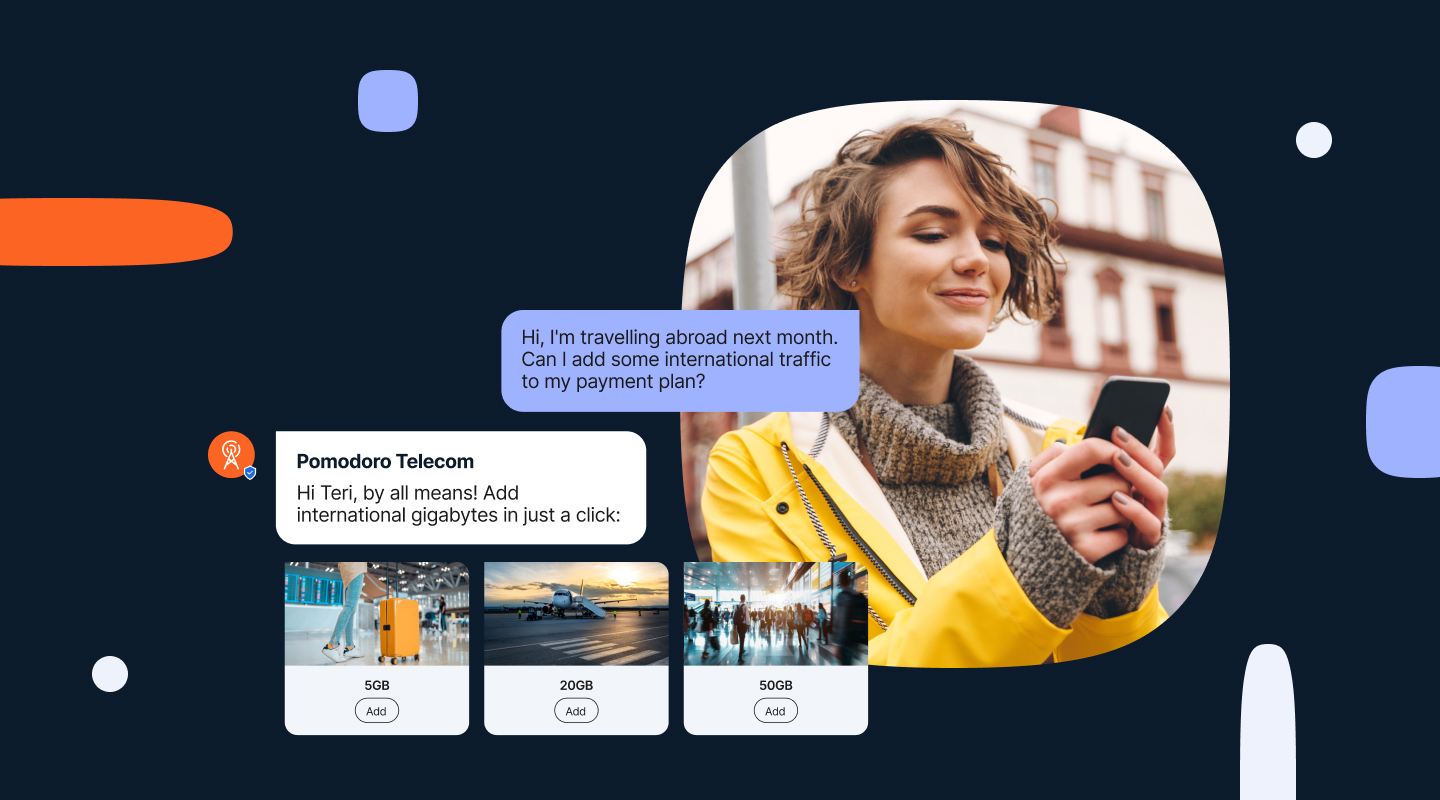
By integrating your Viber bot into your operational systems means that you can use it for a host of transactional use cases. Enable users to complete actions like booking appointments, placing orders, or making even making payments via integrations with payment systems like Google Pay, Apple Pay, and other local alternatives.
Conversational AI Viber chatbots
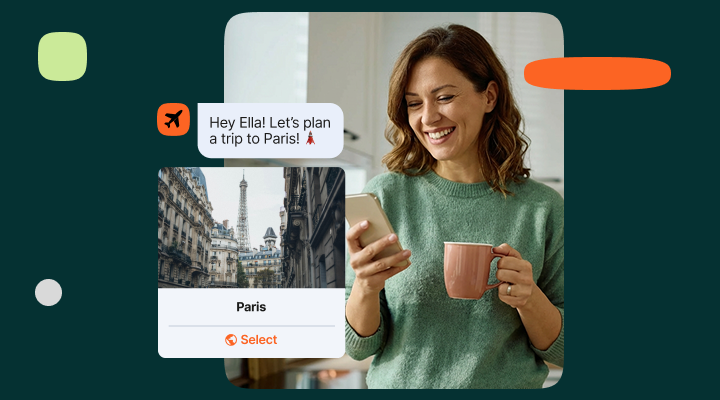
Use NLP and machine learning to enable natural conversations over the Viber channel. These chatbots can really chat by understanding intent and provide contextual responses. They are most suitable for advanced customer support or conversational marketing use cases.
How to build a Viber chatbot in 6 simple steps
If you would like to try building your own Viber chatbot you can register for a free account on our website and request a demo by clicking the following option:
You can then request access to our chatbot building platform where you can follow these simple steps to create a working Viber chatbot in under half an hour.
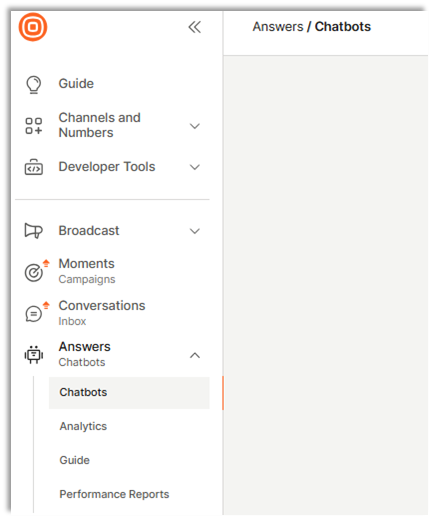
Step 1 – Getting started
Once you have logged into your new account, select the Chatbots option from the menu on the left.
Click Create Chatbot and then Start from Scratch.
Give your chatbot a name and select Viber from the dropdown menu (depending on your region, you may need to ask your Infobip account representative to add Viber to your account).
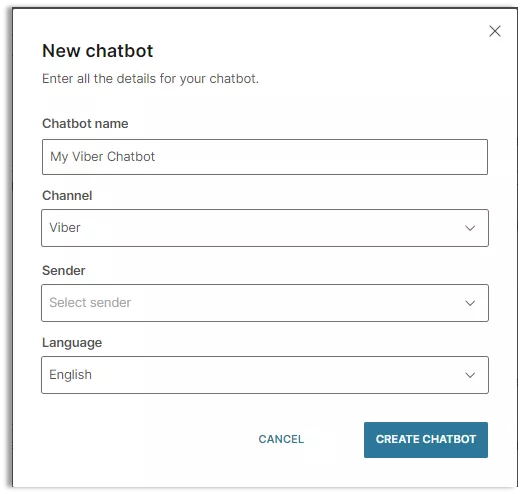
This will open the main chatbot builder canvas.
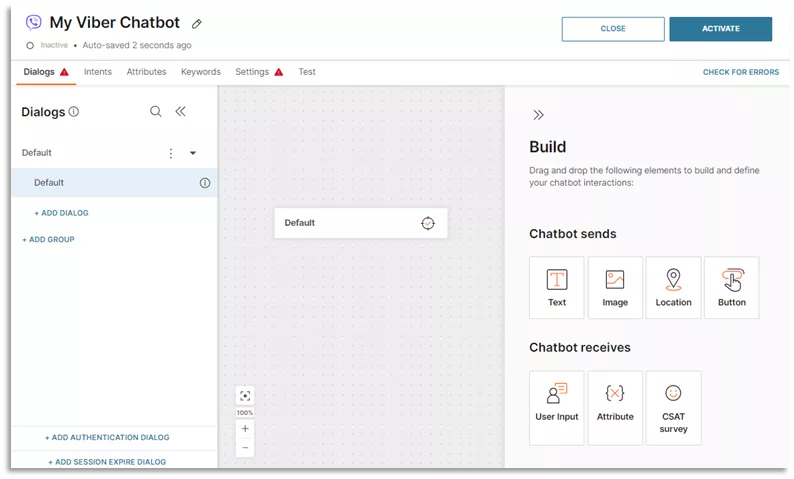
The Build section on the right of the screen has a set of tools that can be used by dragging and dropping them onto the workspace. You can use these to build up the structure and flow of your automated Viber chat.
The tools (called elements) are separated into three categories based on their function – but they all work in exactly the same way: Drag onto the workspace > Configure > Link to conversation flow.
You will get the hang of it really quickly once you start using them.
Step 2 – Add a welcome message
Every good conversation starts with a friendly greeting, right?
Drag and drop a Text element onto your workspace from the Chatbot sends menu.
You can then add some welcome text and maybe a question to kick off the engagement. Any answers that the person provides can be saved and used later in the chat, so they don’t have to keep repeating basic information like name, account number, or postcode.
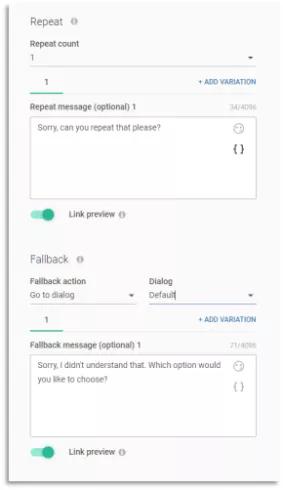
Everyone is different and uses language in a slightly different way so there will always be times when the chatbot can’t quite understand what the person has asked, or maybe they have foreign characters on their keyboard. This is when the Repeat and Fallback options can be used to provide a more seamless experience.
Step 3 – Display options for users to select
By providing a set of options for users to select from, the chatbot can answer increasingly complex queries with cascading sub-menus.
Our example will only have one set of options, but you can go as deep as you like by following the same process.
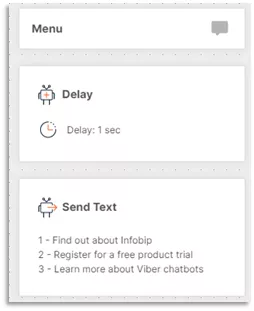
Add a Send Text dialogue that asks the person to make a selection from the list that we will configure in the next step.
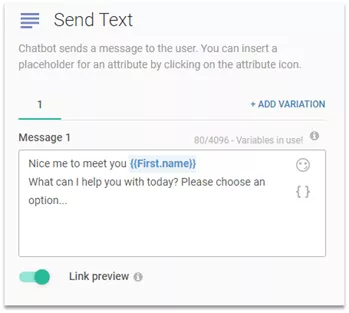
Next, you need to link the introductory text to the list of options by adding a Go To Dialog element and then a Text element to introduce the menu and specify the list of options it will contain.
It is a really good idea to use the Delay option to provide a bit of time for the person to read the text you are displaying and make a decision on what they would like to do. You’ll find it under Bot Actions.
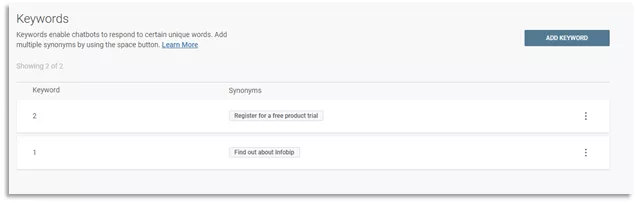
The next step is to add a User Input element (you can find it under the Bot Receives menu). This will process the response that the person replies with. You can add Synonyms to handle multiple forms of response and make the chat more flexible.
Step 4 – Link responses to actions
You will then need to create an Action for each of the options that the user might choose. This can be done by configuring a Go To Dialog for each option.
You can be extra creative when creating your actions by including rich media like image carousels and videos for added engagement possibilities.
- If your customer requests the address of their nearest store send them the geolocation using the Location attribute.
- If a user requests information about one of your products, why not send them a video.
To do this you just drag the relevant element onto the workspace and link or upload the media you are sharing.
Step 5 – Time to say goodbye
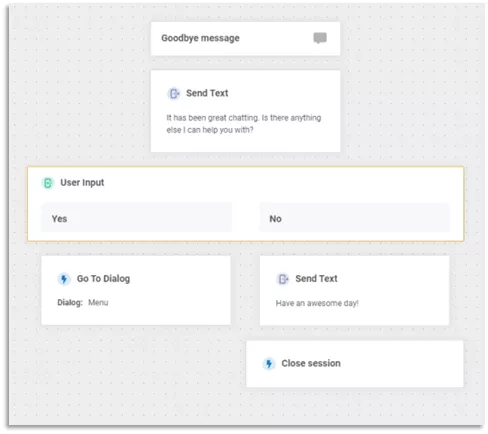
The final step in the build process is to configure a seamless exit path from the chat.
Once you have confirmed that the person has got what they came for you can sign off the chat or loop them back to the menu of options.
To close and reset the chatbot interaction add a final Close session attribute. This can also optionally delete any saved data – or it can be copied to your customer database to enrich future interactions with the person.
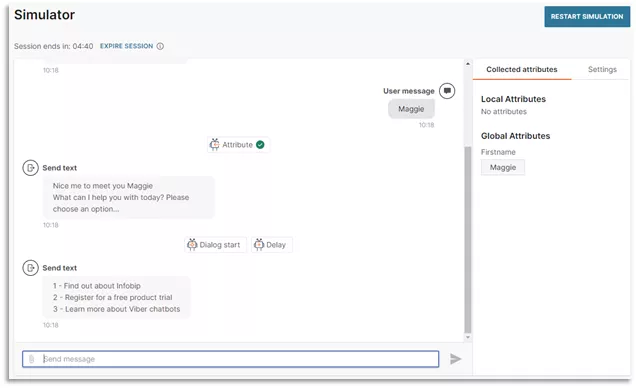
Step 6 – Testing
It is always a good idea to make use of the Simulation option to thoroughly test your chatbot before you deploy it. Ask colleagues or friends to try it out too as fresh eyes often find issues or inconsistencies that the creator didn’t see.
When it is time to deploy your chatbot, just click Activate and it will be live!
This is basic example of a rule-based chatbot. Using the same methodology, you can go on to create highly sophisticated Viber chatbots that use natural language processing to understand customer intent to facilitate more conversational chat interactions.
Check out the following video which shows how to incorporate elements of gamification into your Viber bot to boost engagement with your customers.
Viber chatbot integration options
For businesses to get the most value from the Viber channel it makes sense to integrate it into their existing communication stack so that it can work alongside other channels like SMS and email. With Infobip there are a number of integration options:
1. Add Viber chatbots to your cloud contact center
With a cloud contact center, you can ensure a connected and consistent experience
and provide the same level of service no matter how customers get in touch, including via your Viber chatbot. Backed with a customer data platform both agents and chatbots always have access to the customer history and context they need to resolve issues quickly.
2. Create a unified messaging platform
Our Messages API is the ideal solution for businesses that want to use Viber chatbots and Viber Business Messages, and other messaging channels with a single unified API. Since Viber Business Messages is based on the recipient’s phone number and Viber Bots is ID based, both audiences can be covered with a single integration.
3. Add Viber chatbots to your own communication stack
The Viber chatbot API enables businesses to integrate Viber Bots as a messaging channel into their own systems. With Infobip, they can continue to use the channel after the free message limit has been exceeded.
Viber chatbot pricing
We strongly recommend that you use the calculator on our Viber pricing page to work out precise costs for your region, volumes, and use cases.
The following are general guidelines and do not constitute a formal quote.
- There is no charge from Viber for building and deploying a chatbot, but there is a monthly maintenance fee of about €100 under the new commercial terms.
- Welcome Messages that you can automate when a person first initiates a chat with your app are.
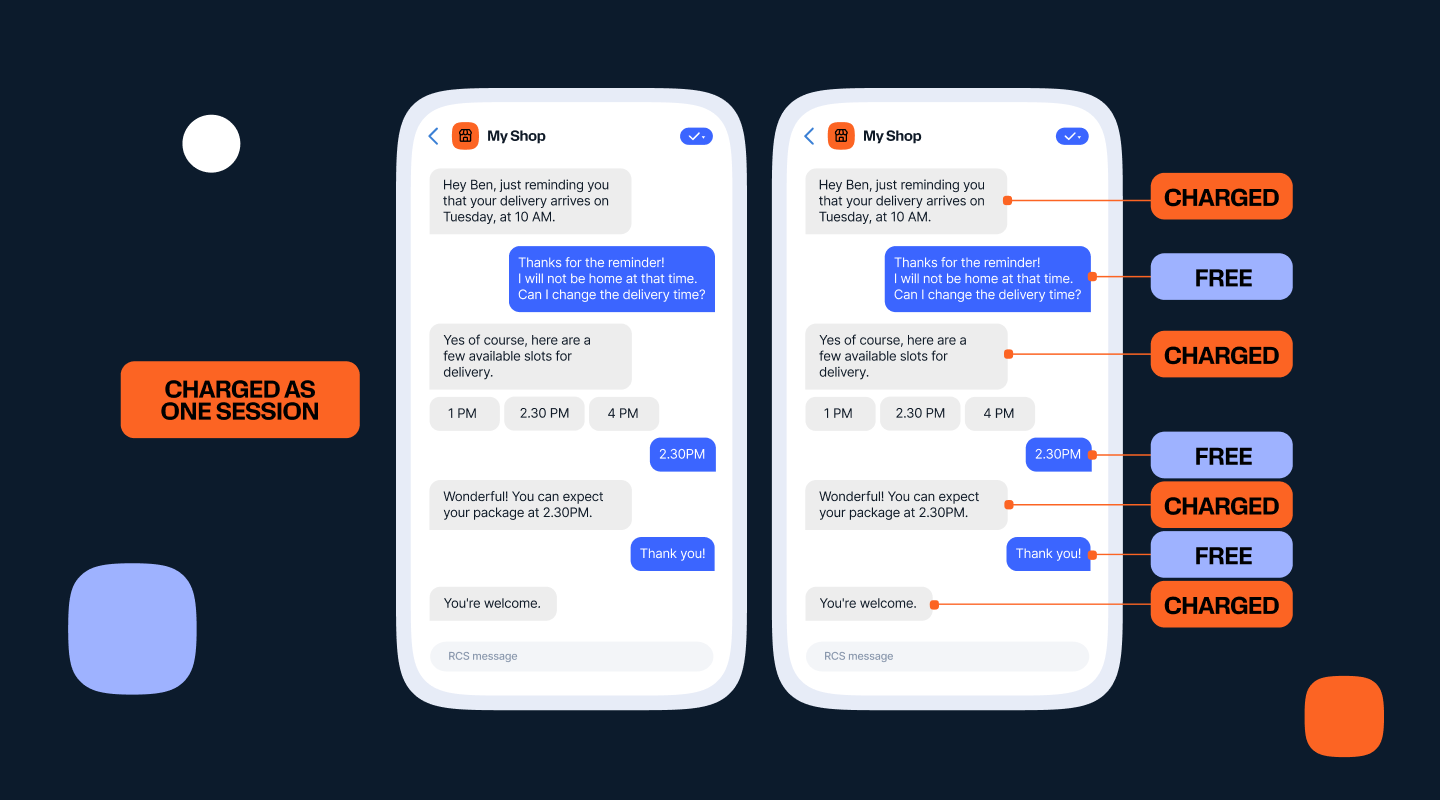
- After a person initiates a chat, subsequent session messages are free within a 24-hour window.
- Chats that are initiated by a chatbot are paid when sent outside an active session.
- Businesses get 10,000 free outbound messages per month, then pay per message based on the recipient’s country.