


WhatsApp Business account: What it is and how to create one
Everything you need to know to create a WhatsApp Business account and to choose between the WhatsApp Business App and WhatsApp Business Platform.

Our recently published messaging app penetration research showed clearly that WhatsApp is the dominant messaging app globally. In Q1 2025 the app surpassed the 3 billion active users a month mark.
In addition to the popularity of the app for P2P interactions, WhatsApp has always led the industry when it comes to creating tools for businesses to use the app for talking to customers. From WhatsApp Flows to Payments and most recently, WhatsApp Business Calling which enables customers to jump on a voice call with a business representative direct from a chat.
And its not just enterprise businesses that can benefit – there are tools perfect for startups, one person operations, and everything in between.
If you’re a business looking to start using WhatsApp for your customer communication, there are two routes you can take: the WhatsApp Business App and the WhatsApp Business Platform.
It all starts with a WhatsApp Business account. In this blog we look at how to create one, how to get started using it, and what to do when you start to outgrow the basic app and need to explore the enterprise features that WhatsApp offers.
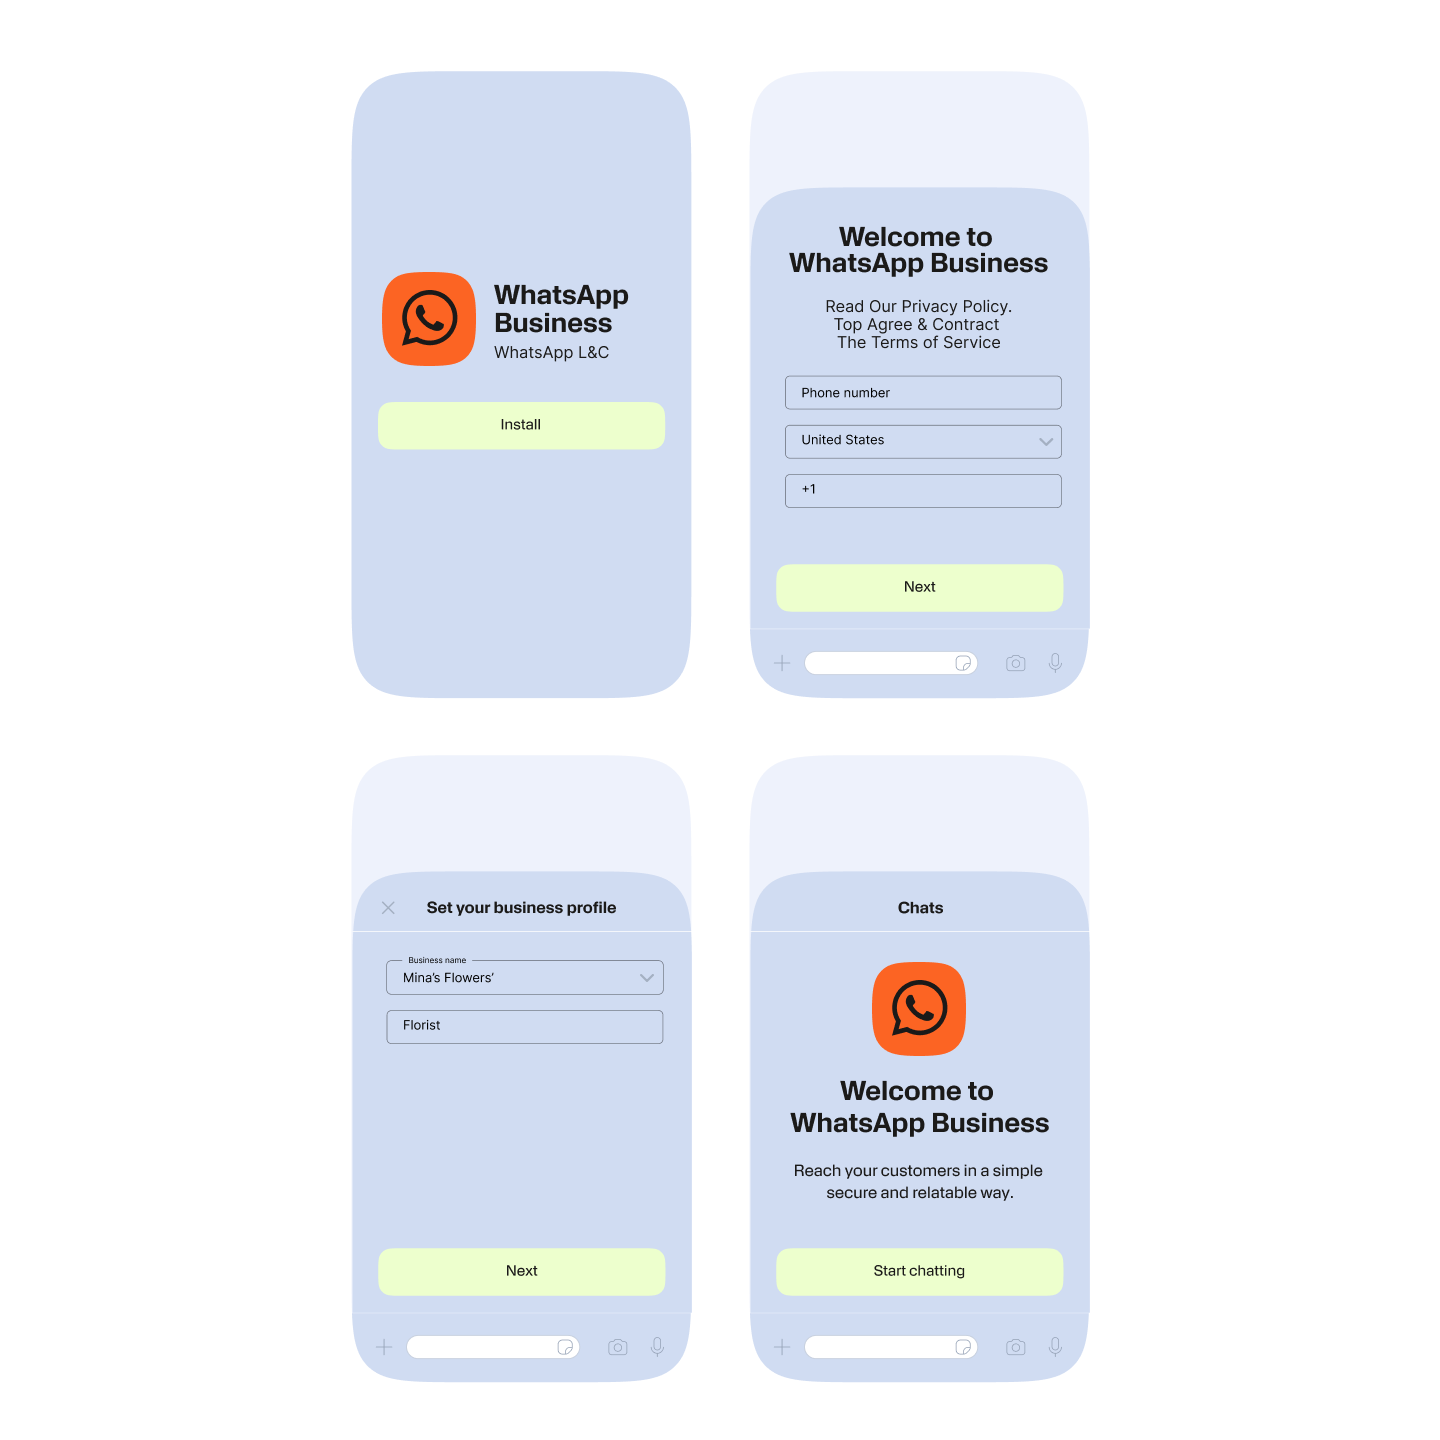
How to create a WhatsApp Business account on the mobile app
Step 1: Download the app
- Go to the Google Play Store (Android) or Apple App Store (iOS).
- Search for WhatsApp Business.
- Choose Install or Get
Step 2: Launch the app
- Open the WhatsApp Business app once installed.
Step 3: Agree to terms
- Read and accept the Terms of Service and Privacy Policy.
Step 4: Register your business number
- Enter your business phone number (this can be different from your personal WhatsApp number used on the same device).
- Tap Next.
- Verify the number via SMS or phone call.
Step 5: Set up your business profile
- Enter your business name.
- Select your business category (e.g. Restaurant, Consultancy, etc.).
- It is optional, but we definitely recommend adding a profile photo. This could be your logo or a picture of your premises.
Step 6: Add relevant business details
Go to Settings > Business Tools to enter the details about your business that customers would find useful:
- Add your business address.
- Set your business opening hours.
- Add a website and email.
- Create a short description of your business.
Step 7: Set up messaging tools
Under Business Tools, you can configure a number of options that make it easier to manage chats and provide a better experience for customers interacting with your account. For example:
- Add a greeting message that is automatically sent to new customers.
- Set an away message for when you are closed or unavailable.
- Set up quick replies to answer FAQs.
- Create message labels to organize your customer chats, for example ‘New customer’ or ‘Payment queries’.
You are now set up to interact with customers using WhatsApp, but before you do you need to make sure that you are familiar with WhatsApp’s opt-in rules and other best practices to ensure that you stick to Meta’s guidelines and provide the best experience for your customers.
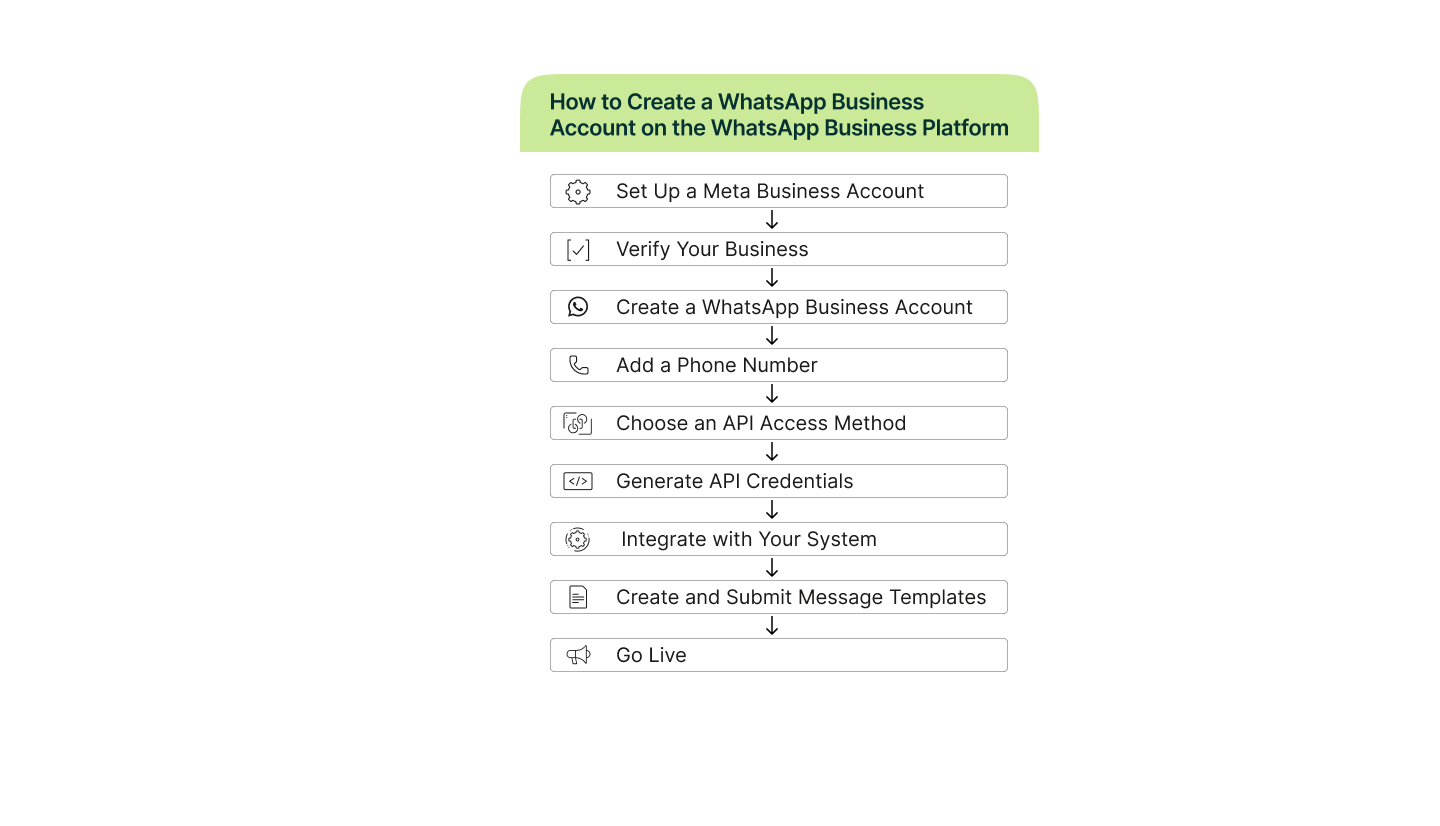
How to create a WhatsApp Business Account on the Business Platform (API)
Creating a WhatsApp Business Account on the WhatsApp Business Platform (API) involves a few more technical steps compared to the mobile app. Here’s a step-by-step guide to help your team get started:
Step 1: Set up a Meta Business account
- Go to Meta Business Manager.
- Log in with your Facebook account.
- Create a Business Manager account if you don’t already have one.
- Add your business details (name, address, website, etc.).
Step 2: Verify your business
- In Business Manager, go to Business Settings > Security Center.
- Start the Business Verification process.
- Upload required documents (e.g. registration certificate, utility bill).
- Wait for Meta to approve your verification.
Step 3: Create a WhatsApp Business account
- In Business Manager, go to Business Settings > Accounts > WhatsApp Accounts.
- Click Add to create a new WhatsApp Business Account.
- Link it to your verified business.
Step 4: Add a phone number
- Choose a phone number to use with the API (must be able to receive SMS or voice calls).
- Verify the number via code sent by SMS or voice call.
- This number will be used for sending and receiving messages via the API.
Step 5: Choose an API access method
- Cloud API which is hosted by Meta
Step 6: Generate API credentials
- Go to WhatsApp Business Platform on Meta for Developers.
- Select your app and WhatsApp Business account.
- Generate a permanent access token and phone number ID.
Step 7: Integration
You can now use the API to send and receive WhatsApp messages from your own tech stack, including:
Step 8: Create and submit message templates
- Go to WhatsApp Manager in Business Manager.
- Create message templates for notifications, reminders, etc.
- Submit them for Meta approval.
Once you have completed the setup steps and your templates have been approved, you are ready to start sending messages to customers and prospects who have opted in to receive them.
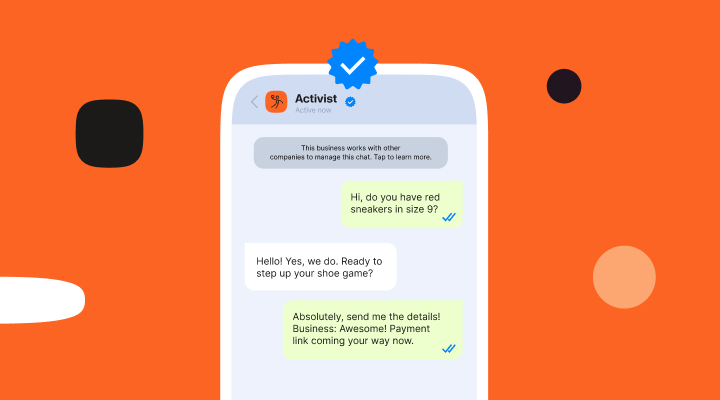
How to get your WhatsApp Business account ‘green tick’ verified
In the WhatsApp Business ecosystem, there are two types of business accounts – Standard Business Accounts and Official Business Accounts. Only the official accounts get the green tick.
See our blog for more information – How to get the blue tick verification on WhatsApp.
In summary, for a standard account no formal approval is needed – only a verified phone number and business profile.
- Customers see your business name only if they’ve saved your number. If they don’t, they see your phone number in the chat header.
- No blue tick badge.
- All messaging features supported (templates, automations, etc.).
To get the blue tick and be recognized as an Official Business Account, you will require most of the following (Meta doesn’t publish exact criteria, but
- High brand recognition i.e. be a well-known company or public figure.
- Have a verified Meta Business Manager account.
- Consistent and compliant usage of the WhatsApp Business Platform.
- Strong online presence – you have a website, active social media, and have received press coverage).
- Use of the WhatsApp Cloud API or approved BSP (Business Solution Provider).
If you fulfill most of these requirements, you can apply via your BSP or through Meta’s support channels.
Why you should consider getting green tick verified
You don’t get access to any additional features; however, the green tick is all about trust and brand visibility.
- Your business name is always visible, even if the user hasn’t saved your number.
- It adds credibility and trust – especially important in the financial services, healthcare, and e-commerce sectors.
- It is likely to improve message open rates and engagement with messages.
Migrating from the WhatsApp Business App to the Business Platform
Some scaling businesses that started using the app might find that they start hankering for some of the features and integrations only available with the Business Platform. Or maybe there are multiple people in the company that want to use WhatsApp for their own use cases.
Luckily there is a clear migration path from the WhatsApp Business App to the WhatsApp Business Platform (API). Here we break it down into steps to simplify the process.
Step 1: Gap analysis
This step is all about evaluating whether the Business Platform has the features and flexibility to help you meet your business objectives. For example:
- How many messages do you send now and how many do you want to be sending
- How many users do you need now and in the future
- How important are integrations and automation to your business goals
- Do you want to start deploying chatbots on the WhatsApp channel?
If your analysis indicates that it would be beneficial to migrate to the full Business Platform, then you can start the process.
Step 2: Prepare your Meta Business Account
- Go to Meta Business Manager.
- Create or access your Business Manager account.
- Complete business verification (upload legal documents, verify domain if needed).
At this point you should consider taking a backup of your existing customer chats if you may require them for reference later on. You won’t be able to import them into Business Platform, but they may contain information that you will need later.
Step 3: Choose a phone number
You have two options here:
- Use the same number from the WhatsApp Business App – note that this requires you to delete the app account first).
- Use a new number dedicated to the API.
Important: You cannot use the same number on both the app and the API simultaneously. If you want to migrate the number, you must delete the app account first.
To delete the WhatsApp Business App Account (only if you are reusing the number):
- Open the WhatsApp Business App.
- Go to Settings > Account > Delete My Account.
- Follow the prompts to remove the account linked to the number.
Step 4: Set up the WhatsApp Business Platform
- Choose Meta’s Cloud API.
- Register your phone number via Meta’s WhatsApp Manager.
- Verify the number via SMS or voice call.
Step 5: Generate API credentials
- Create an app in Meta for Developers and link it to your WhatsApp Business Account.
- Generate > Access token> Phone number ID > Business ID
Step 6: Integrations
Use the API to integrate WhatsApp into your tech stack – CRM, helpdesk, or AI platform.
Step 7: Create and submit message templates
- Use WhatsApp Manager to create templates for notifications, reminders, etc. and submit them for Meta approval.
Step 8: Final preparations
You are now ready to start sending and receiving messages via the API, but before you do there are a few more things to consider.
- Notify customers about the change in communication format.
- Train your team on the new system and workflows.
- Test thoroughly before launching at scale.
Getting the most out of your WhatsApp Business account
1. Nail your opt-in strategy
Learn everything you need to know about WhatsApp opt-ins, why they are important, and how to successfully collect messaging consent from customers.
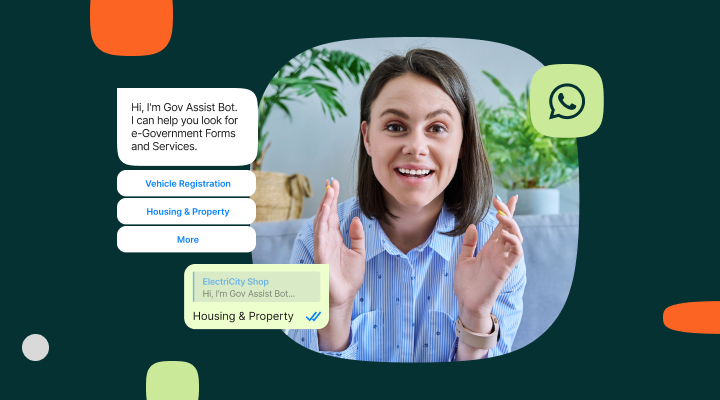
2. How to use buttons effectively in chat
Using interactive buttons in WhatsApp messages to customers makes it much easier for them to reply and has been shown to improve response rates significantly.
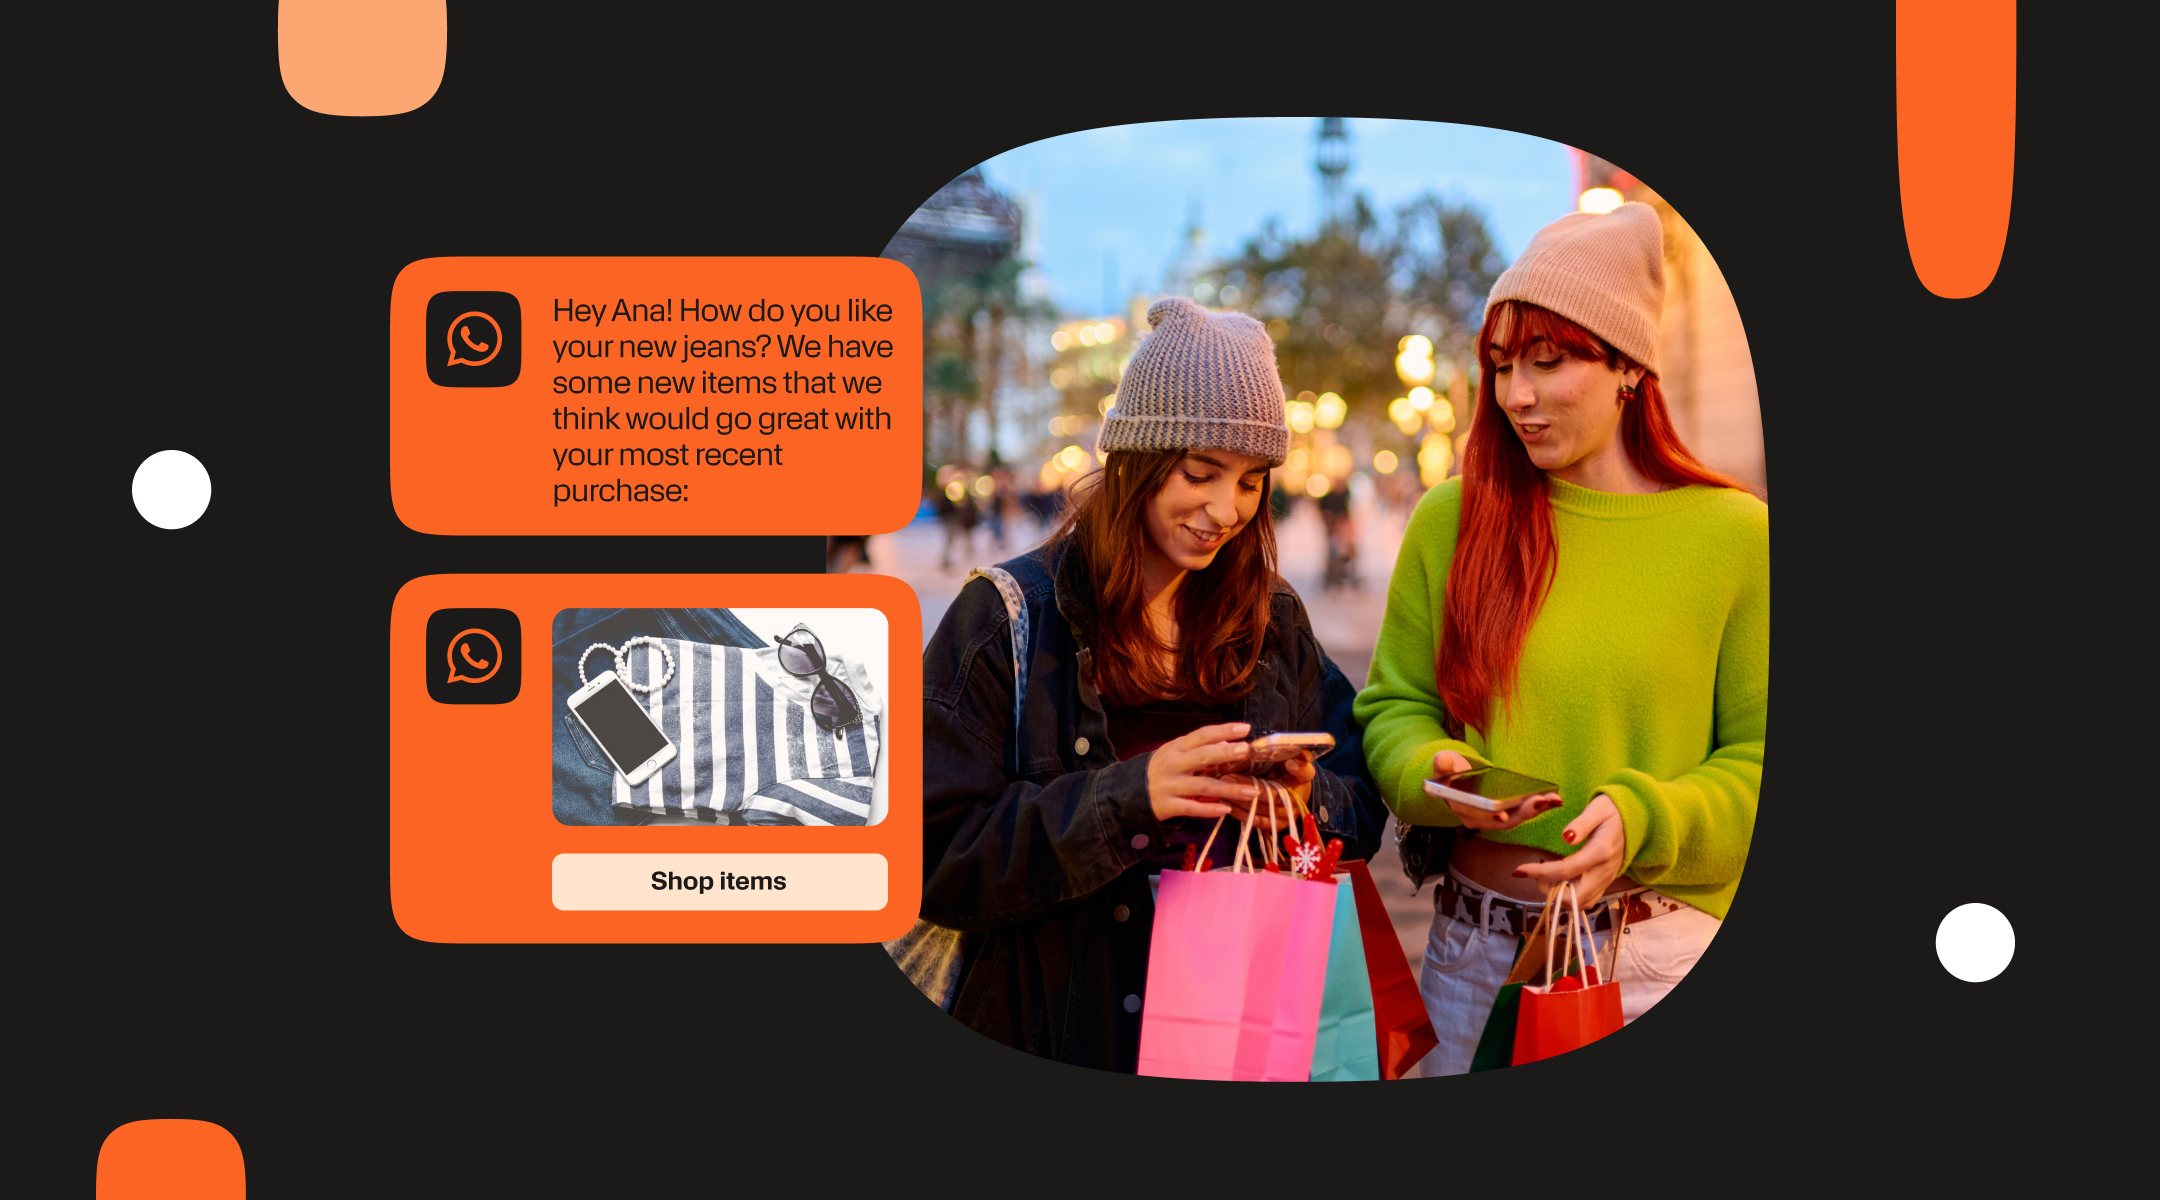
3. Improve the post‑purchase experience with WhatsApp Utility Messages
Discover how to increase your customer lifetime value and loyalty by providing a conversational post-purchase experience with WhatsApp Utility Messages.
4. Learn how to use WhatsApp to send verification codes
The native end-to-end encryption of WhatsApp chats makes the channel well suited to sending verification codes and One-time passwords (OTPS).
Trusted provider